You can create a million-dollar look with super-inexpensive original art and framed prints at Goodwill!
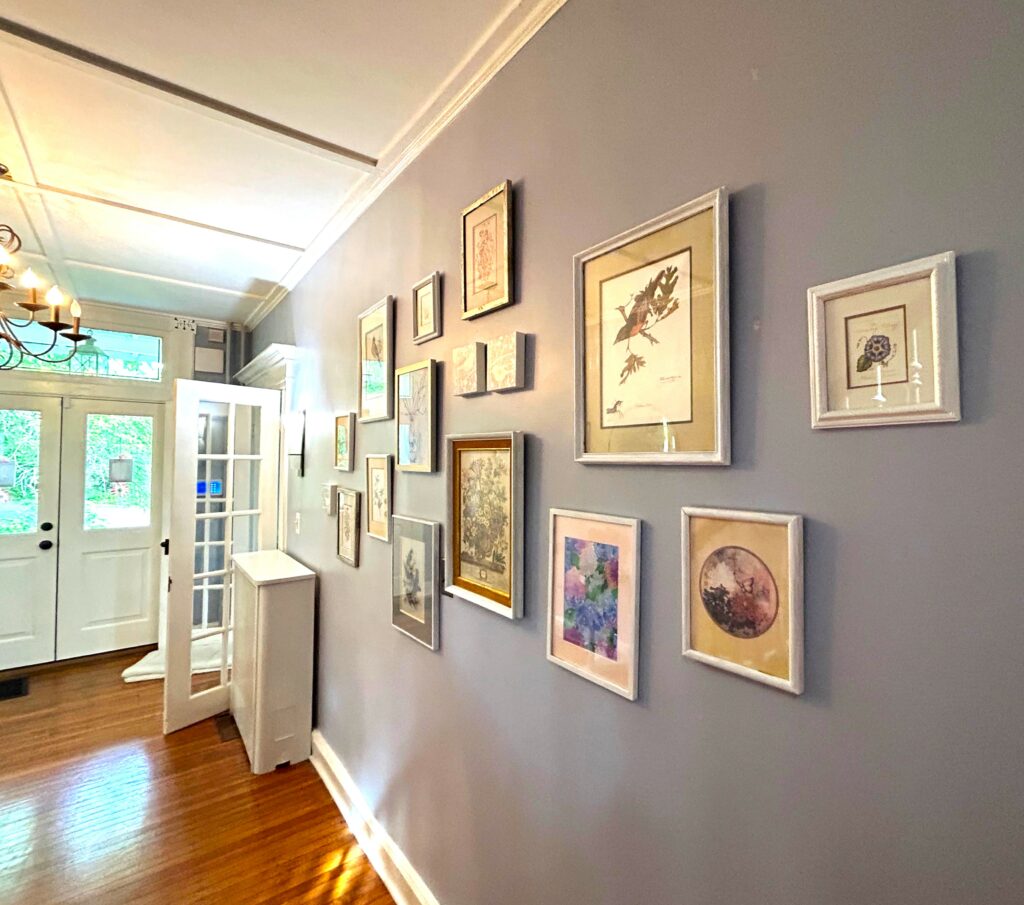
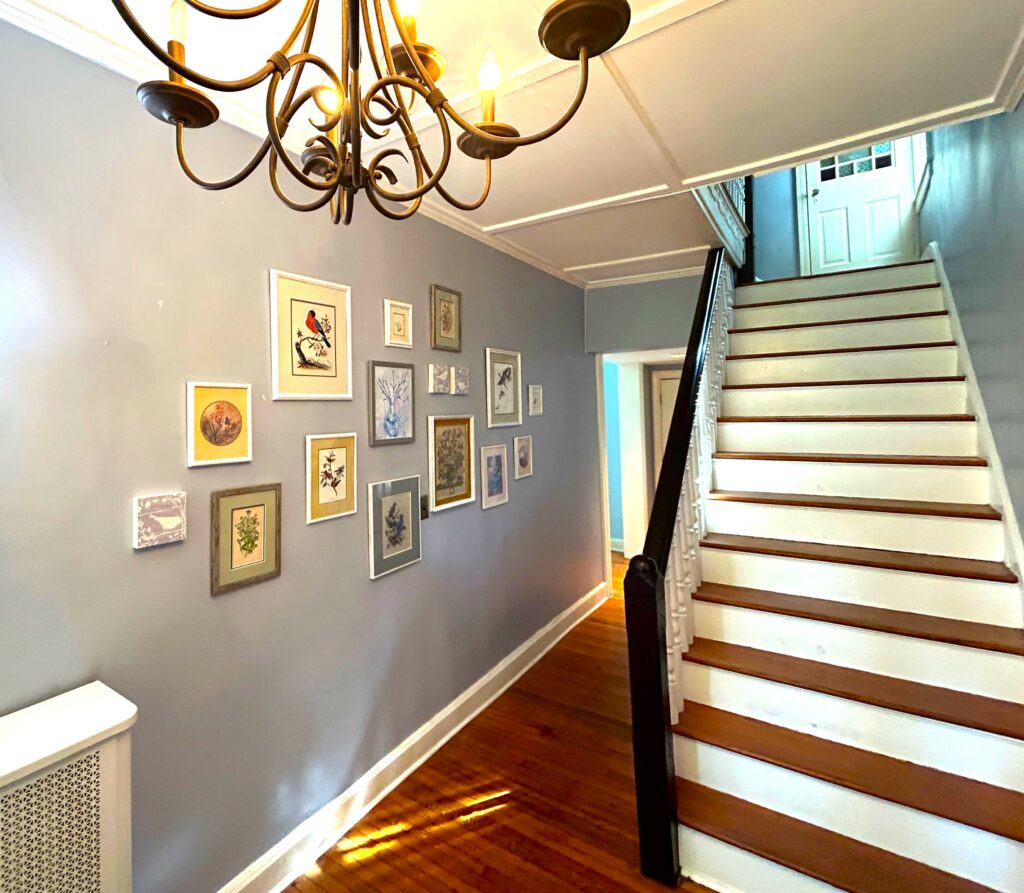
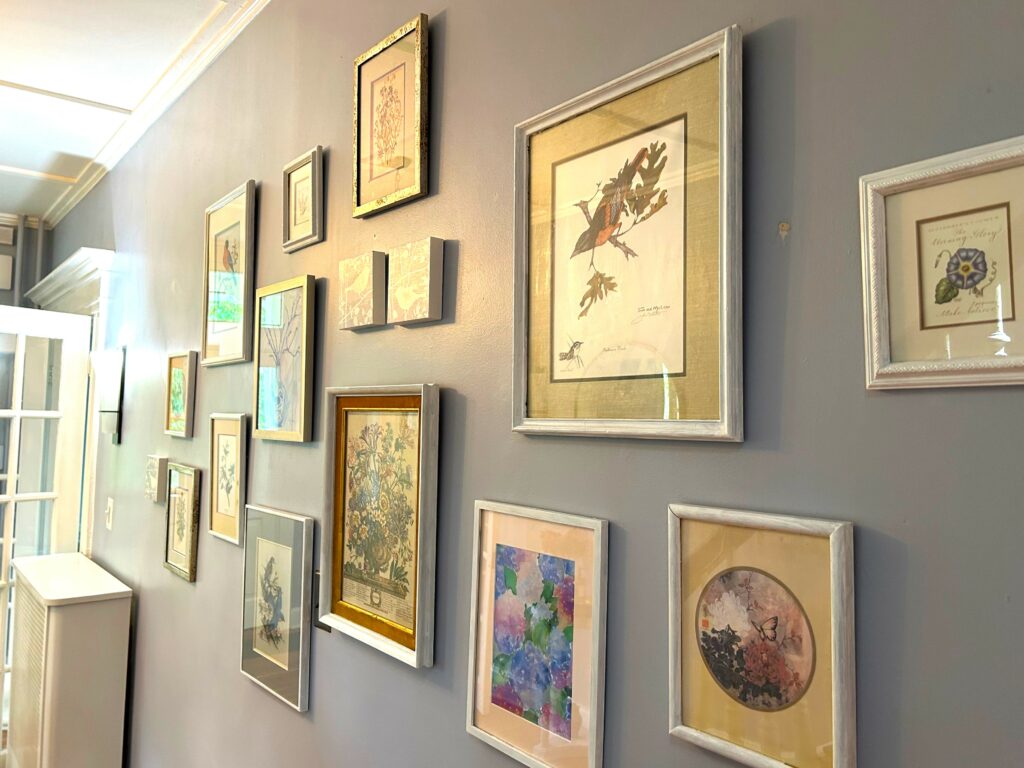
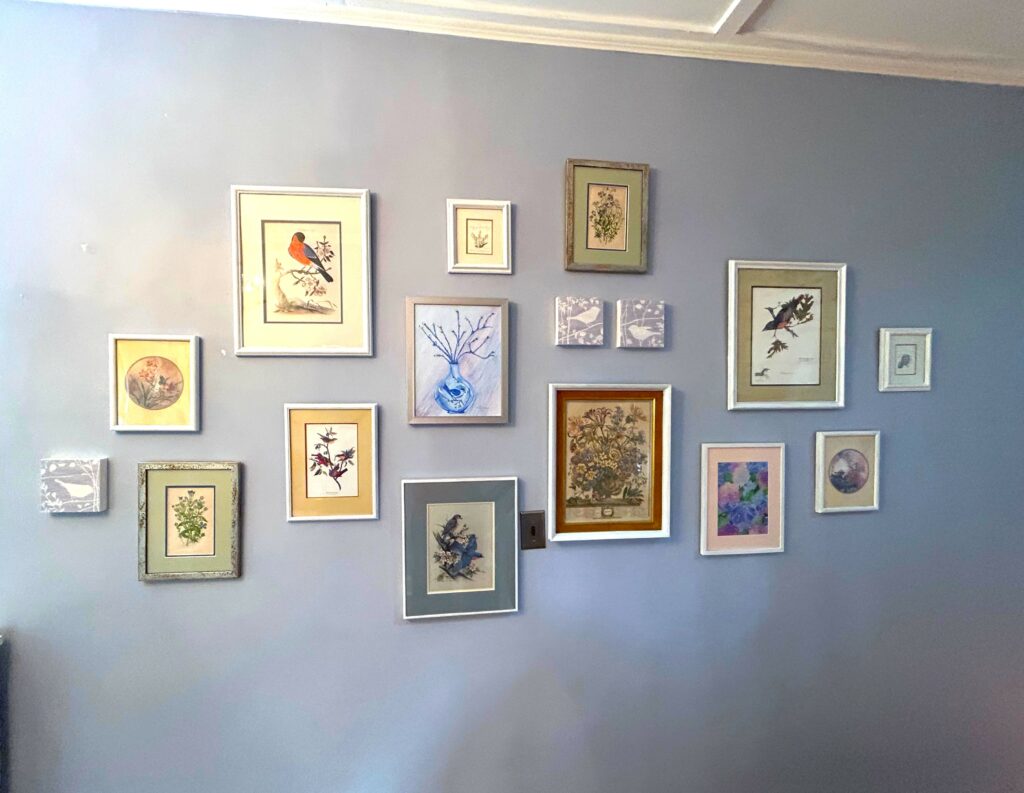
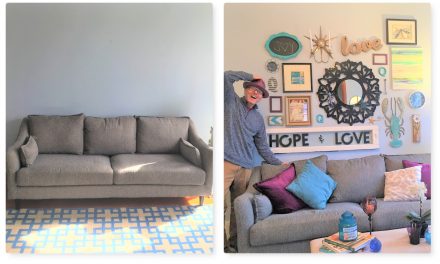
A front foyer went from blank to blooming with a collection of thrifted pieces featuring birds and botanicals that were connected by their subjects and, thanks to upcycling, with their now-matching white frames.
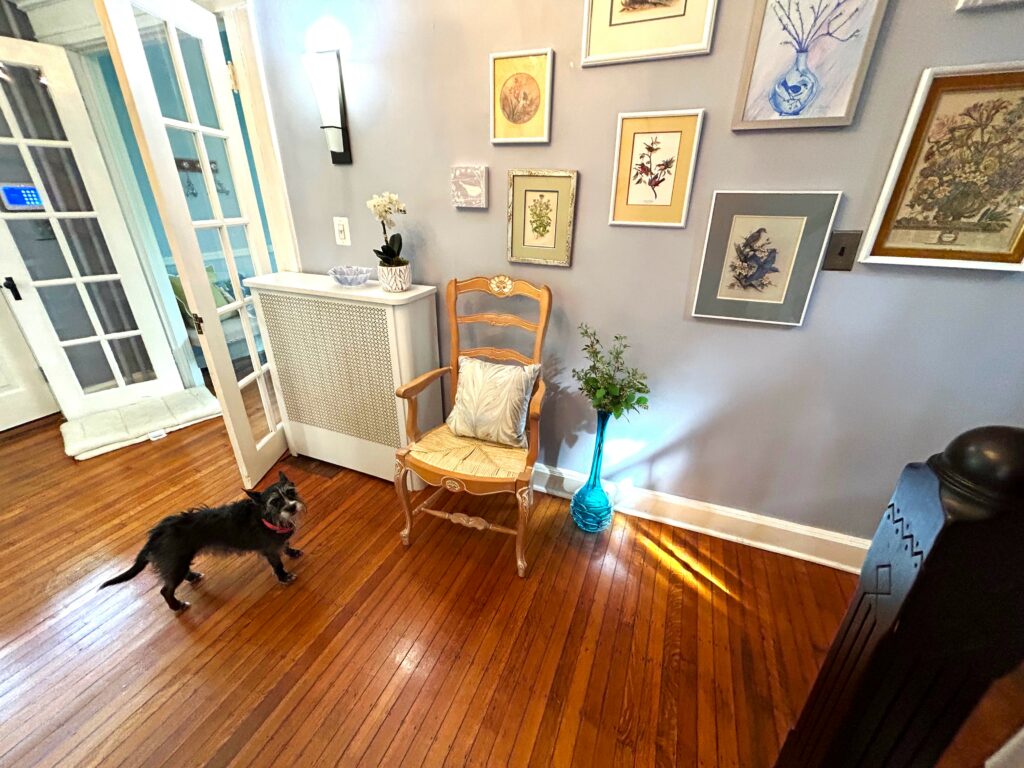
This week’s DIY project transformed this front space into a friendly and inviting entryway, and all items—from the artwork to the chair to the silk orchids—are thrift store finds.
Follow these simple steps, and you, too, will say, “Bravo!” when you enjoy the lovely final result and when you see all the money left over in your piggy bank because you smartly shopped at Goodwill.
Items needed:
· Framed prints featuring birds, botanicals, blooms
· Original paintings from local artists
· White semi-gloss paint
· Foam brushes, small craft paintbrushes
· Painter’s tape
· Newspaper or drop-cloth
· Hammer
· Nails or picture hooks/hangers
· Ladder
· A helpful assistant (like my cute dog Tiptoe!)
1. Find your good & build your art collection at Goodwill
There are always great items at amazing prices at Goodwill, so as you consider transforming a wall or two in your home or apartment, start by shopping at Goodwill. Each Goodwill store has a section of donated artwork that is often eye-catching in design and well-framed.
Picture framing can be very expensive, so if you find a print, photo, or piece of art you like at Goodwill but the frame’s color doesn’t match your décor, be sure to take it home with you anyway. Following the simple steps here, you can easily paint the frame to reflect your taste and design aesthetic.
Thrifting Tips
While shopping at Goodwill, I love to buy original paintings or pieces of art that are hand-made/painted/created. Several of the pieces featured in this blog are by unknown artists, but their energy and creativity are now part of the final look and feel. Also, you can easily switch out prints from one frame to another that might fit your style a little better. As always, don’t limit yourself to an item’s current appearance because you can easily and inexpensively make changes to it.
2. Create a collection
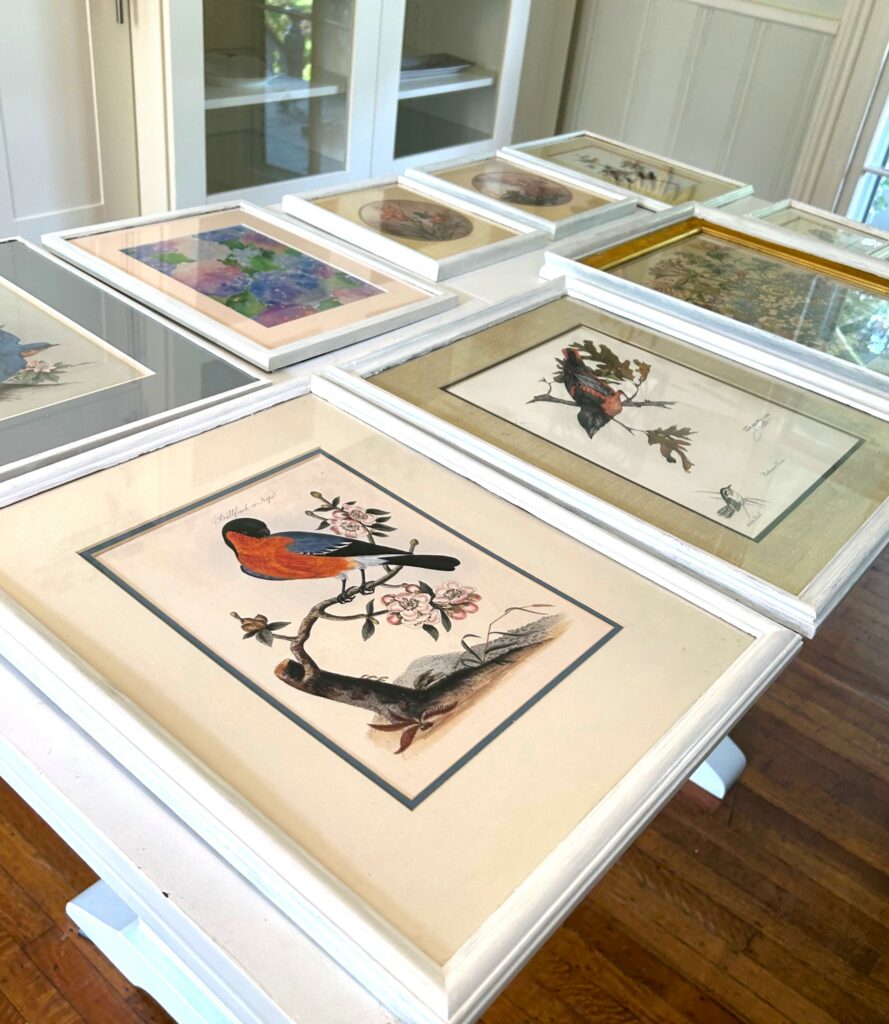
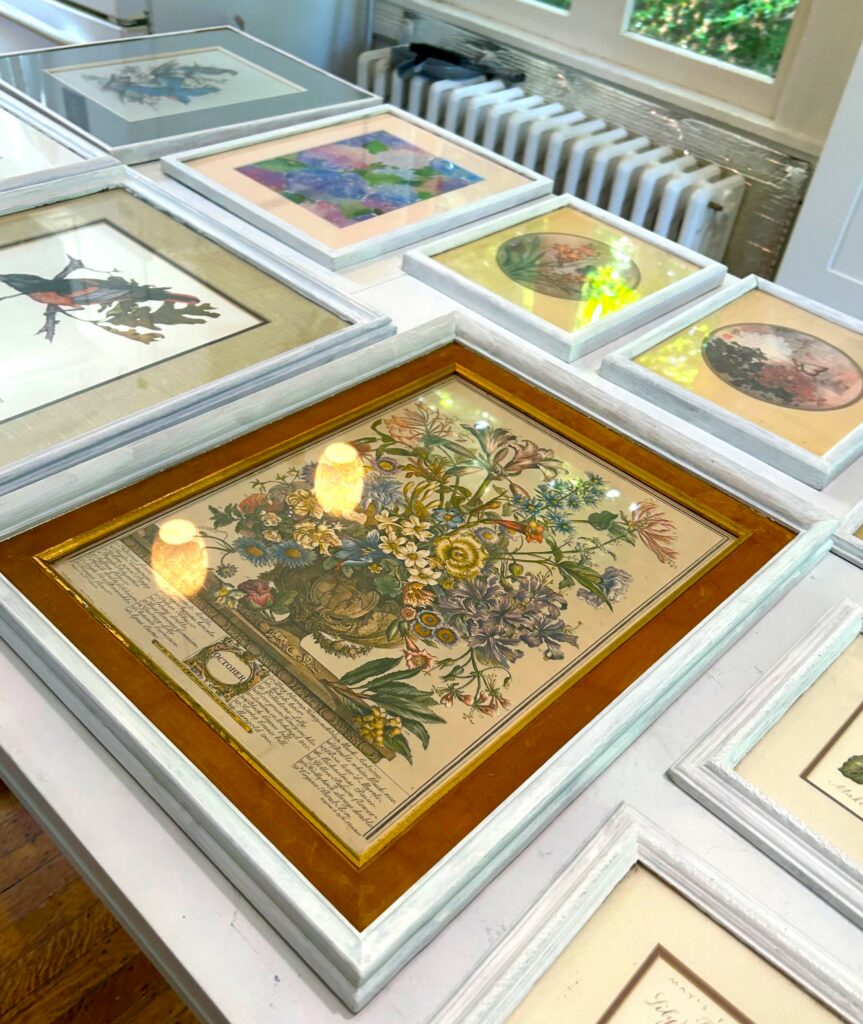
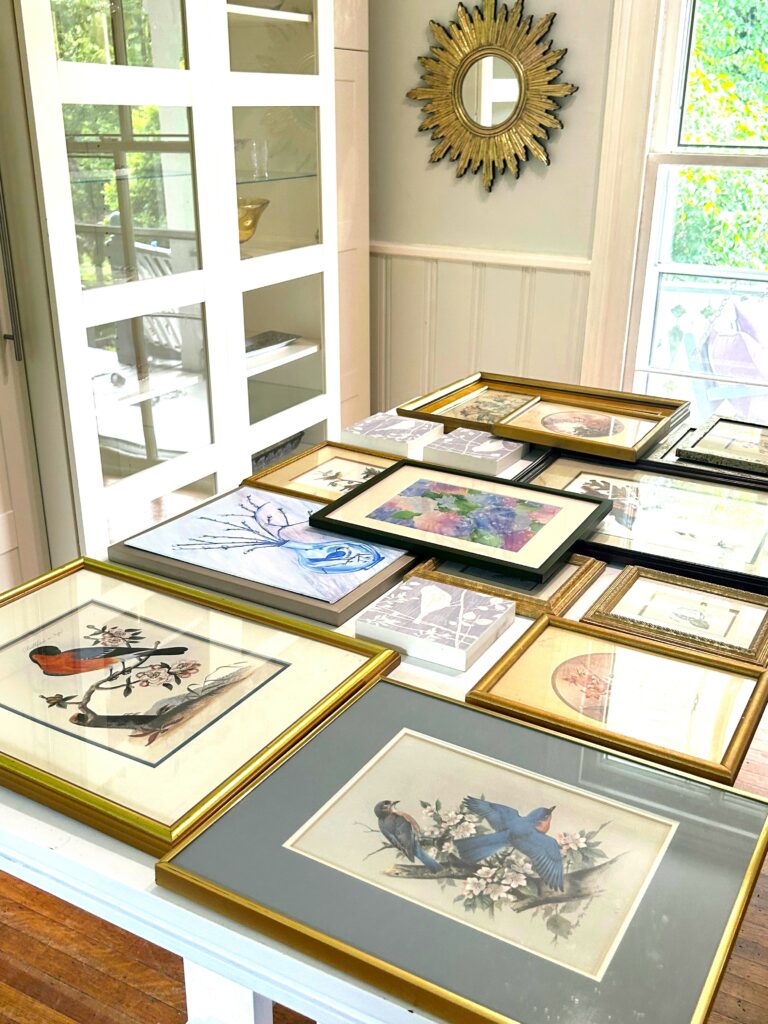
This beautiful collection of framed bird and botanical prints, as well as the original painted pieces, were gathered over time and during a number of excursions to Goodwill.
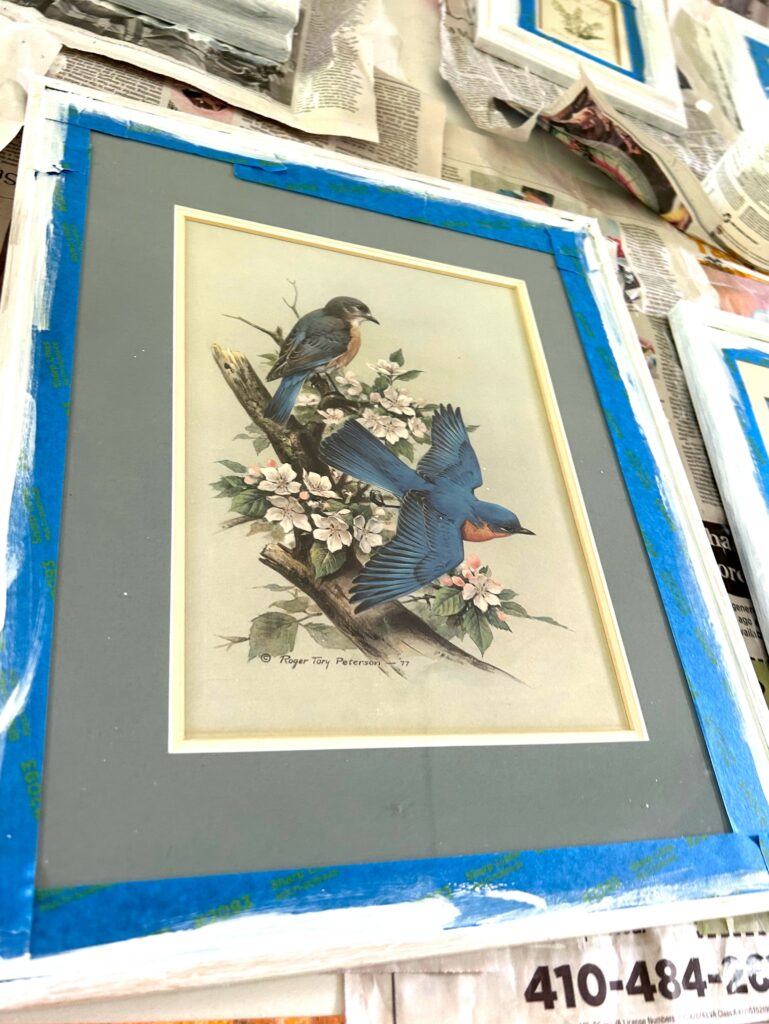
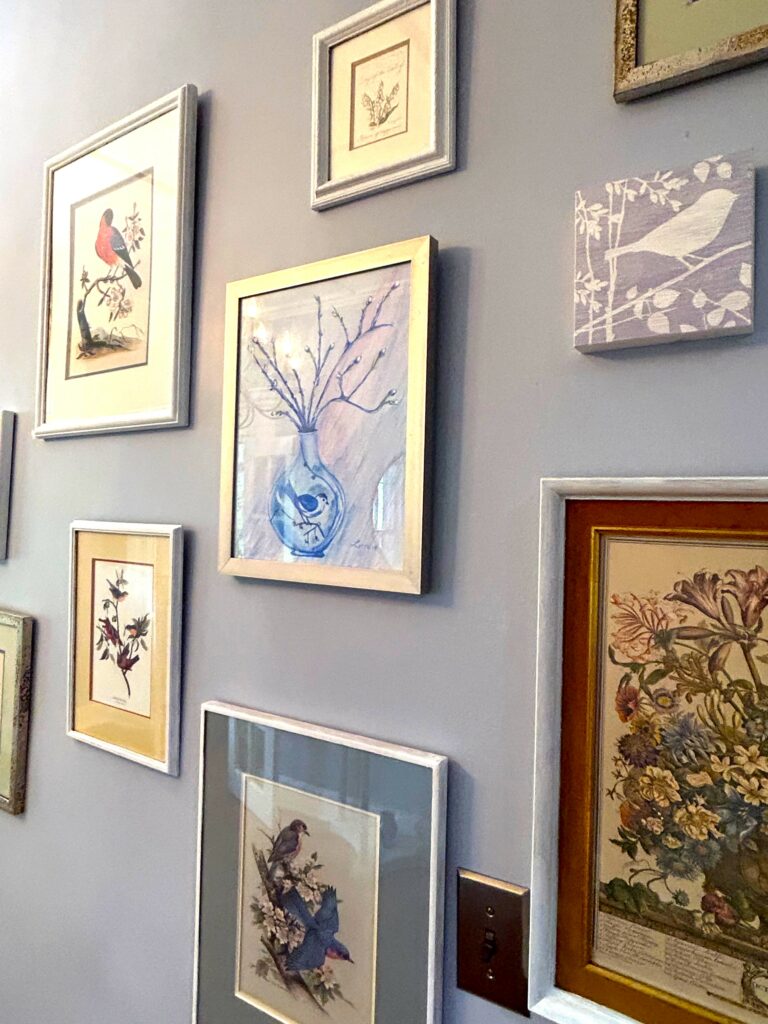
Birds, flowers, plants, and other items found in nature are universal and always very appealing. Thankfully, they are often easy to find in artwork waiting for you at Goodwill. The first piece purchased featured bluebirds because they looked so cheerful—and I love blue!
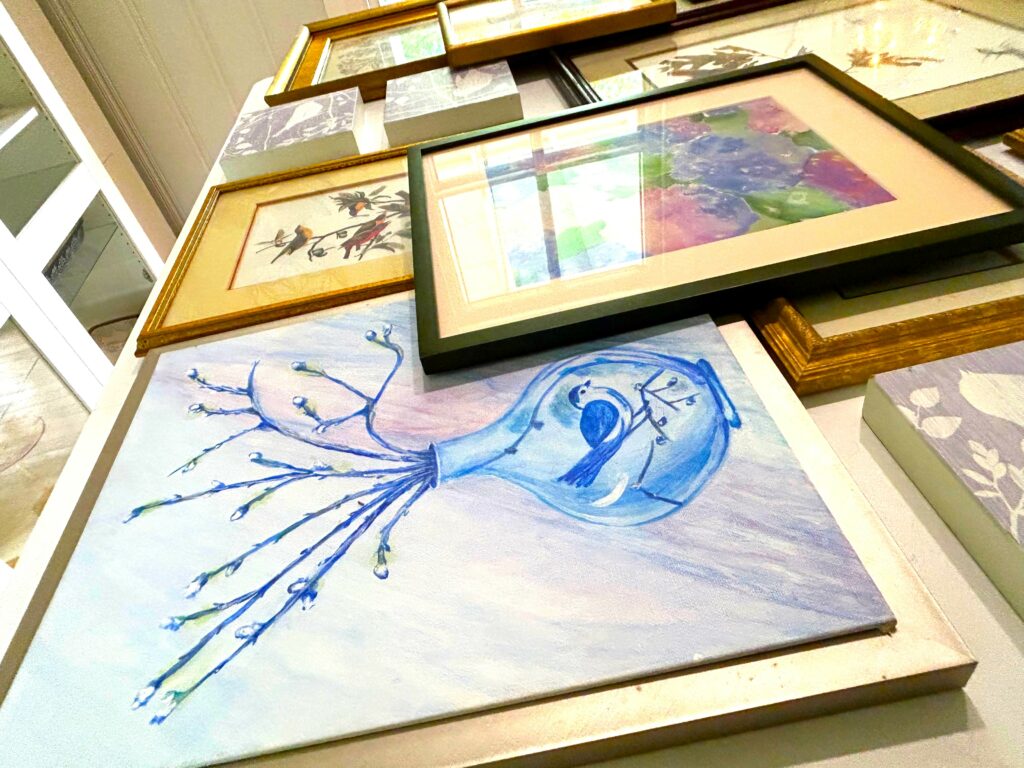
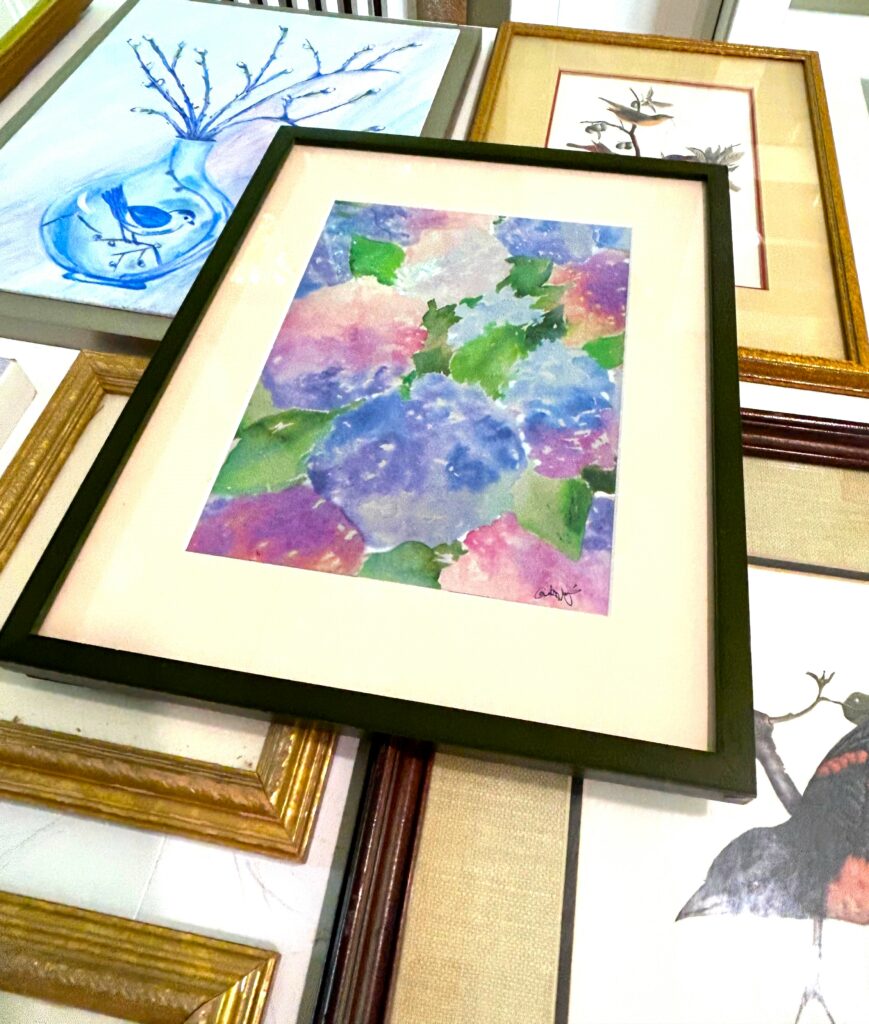
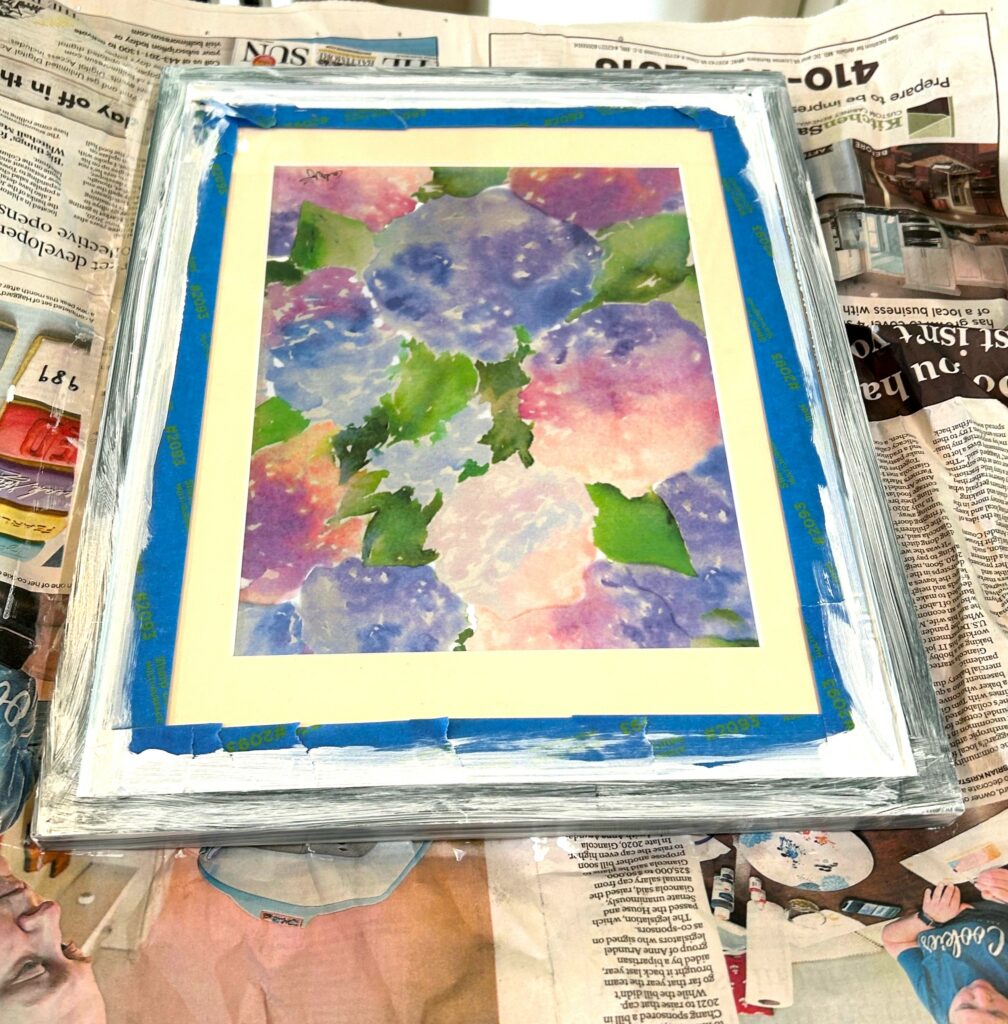
Soon after, an original watercolor of purple, blue, and pink hydrangeas went home with me because of the colors and composition. From then on, each time I came across a bird image or floral print, they, too, were purchased.
Design ideas:
Create your own unique collection by picking up images and designs which resonate with you. Certainly, you can follow my lead by selecting birds and botanical prints and paintings. I promise you, doing so will be a winner!
However, consider your surroundings to help you decide which way to go, design-wise. If you live in an urban setting, select photos, drawings, and artwork of skylines, buildings, and architecture.
Decorating a place by the beach? Of course, fish, boats, nautical images, palm trees, and the like will make your collection feel cohesive and connected.
Like to travel? You are very likely to find artwork and prints featuring notable buildings from other places (like the Eiffel Tower, Big Ben, or the Pyramids), which you could combine with framed postcards and maps.
3. Color helps to connect your collection
The foyer featured here has walls that are a classic gray-blue tone with crisp white baseboards, trim, and ceilings. To make the collection match each other and the setting, bright white paint (which I already had on hand, so no cost!) was used for the frames. Also, the white tone would help to keep the space bright and light looking and feeling, too.
Look around your space to see what color works best, given what you already have there. A bunch of black frames would look classic sporting colorful artwork or a collection of black-and-white photos. Kids’ rooms have the best and brightest colors, so if you are creating a collection of art there (possibly pieces created by your child), then picking a bold, cheery color always works well.
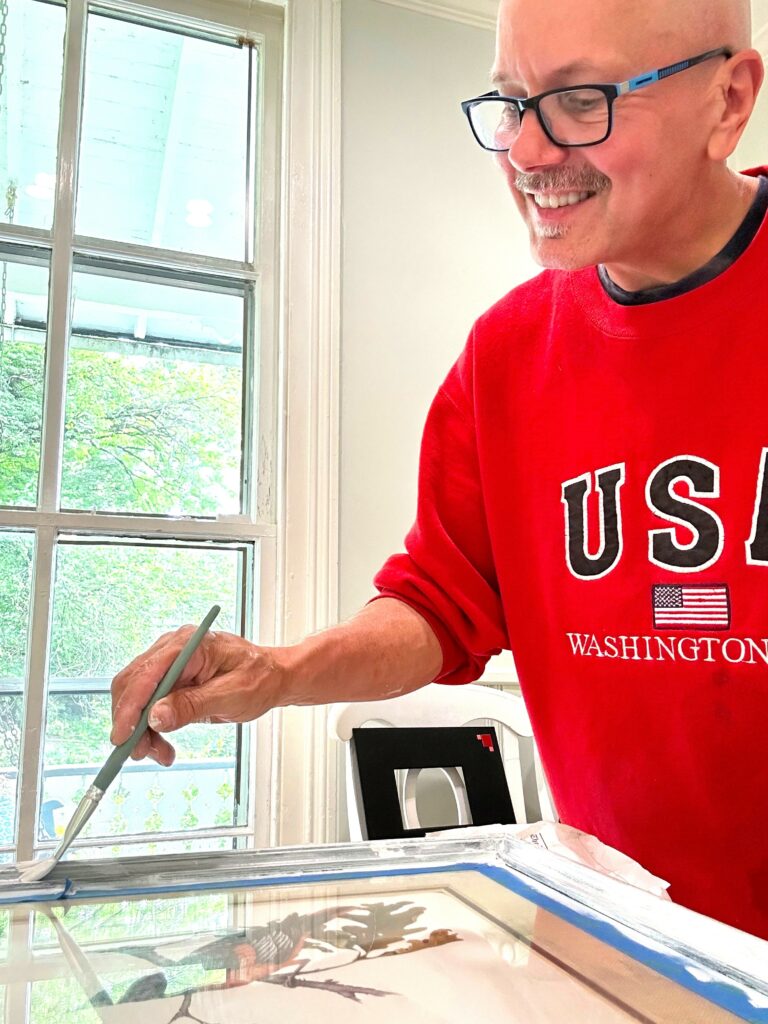
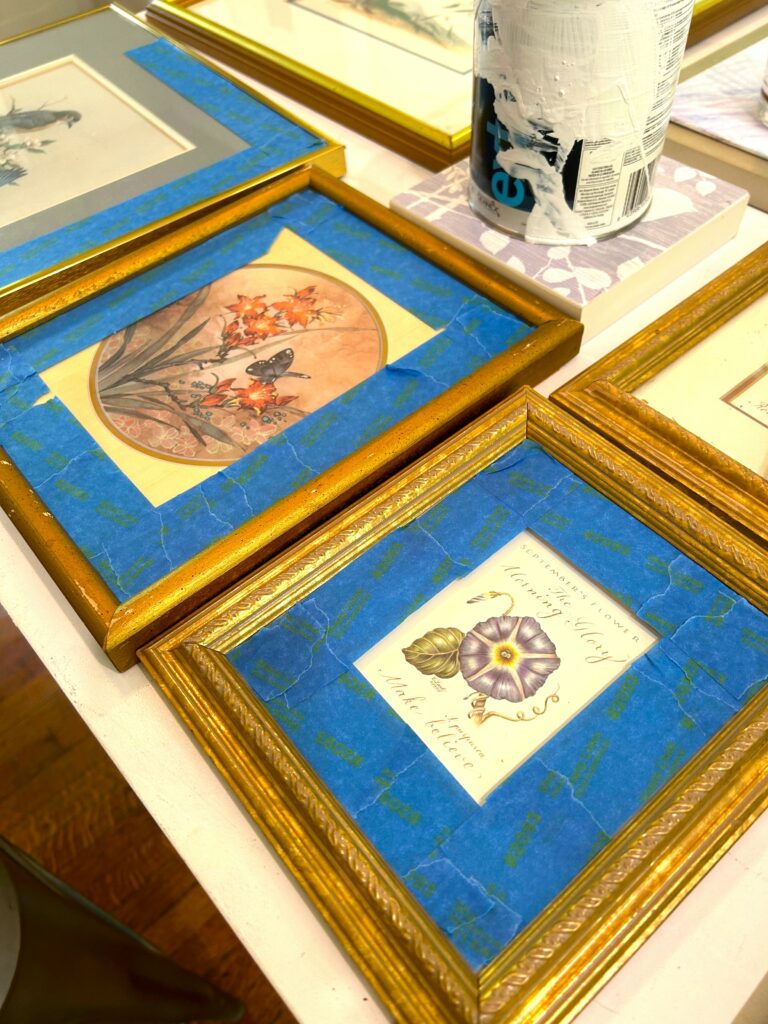
4. Prep your pieces
Before you start to transform your pieces’ frames, be sure to clean them well to remove any dust, dirt, or fingerprints. Use painter’s tape on the frame’s glass to protect it. Place your collection on a drop cloth or on newspapers to protect your work surface. You are now ready for the fun part!
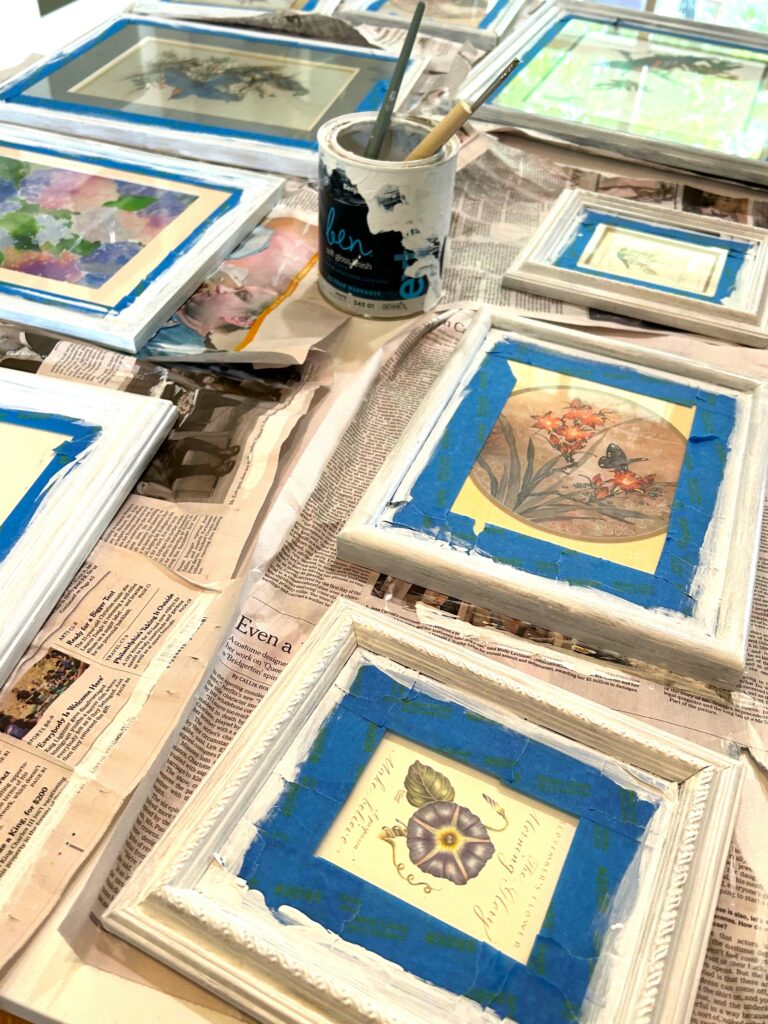
5. Spray or brush on paint?
For this DIY project, several coats of paint were applied on using foam brushes and smaller craft paint brushes to get in various nooks and crannies. Some of the pieces took three coats—and some patience—to get the final look desired. I chose to brush on the paint for this project, rather than spray painting, because I had the white paint already, AND I was doing the project inside. Therefore, the brush option was a no-brainer.

However, spray painting is easy, inexpensive, and quick. If you have a well-ventilated space or outdoor place with which to work, then consider spray painting. In addition to protecting your pieces with painter’s tape, you will want to cover the frame’s glass with scrap paper or newspaper and then secure them with the painter’s tape, too. Place your pieces outside, then add several very light layers. You may need to prop them up after a coat or two to ensure you get each frame’s side edges covered solidly and completely.
Whether you spray it or brush it on, once the paint dries well, carefully remove the painter’s tape to unveil your art pieces’ new, matching, and eye-catching look!
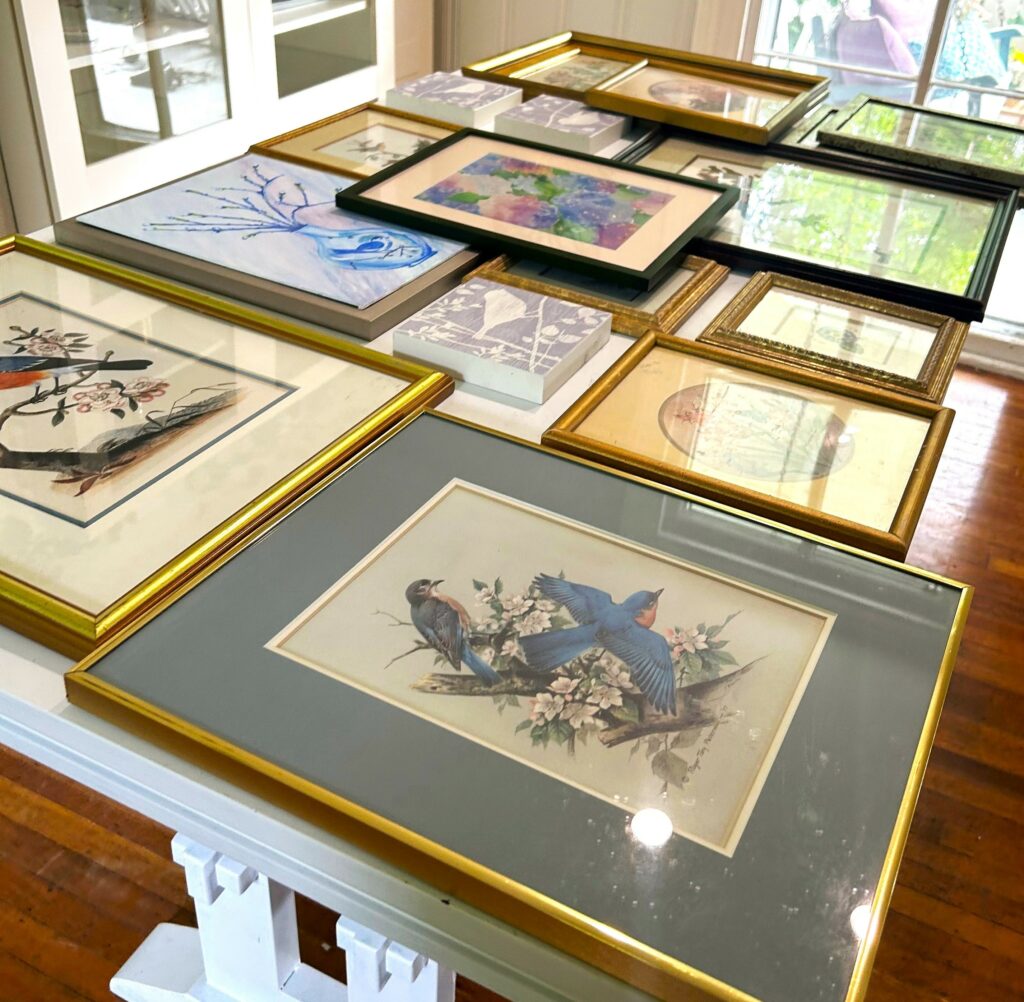
6. Lay it down before hanging it up
To ensure your final look is balanced, well-thought-out, and feels right, find a place where you are able to lay your pieces down before you hang them up. I used my kitchen table as a place to model how the final look might be; I moved pictures around until I had the layout I loved.
I didn’t want the bigger pictures right next to each other, so placed them down first with smaller images around them. Also, I wanted to ensure various colors, like the blues and purples, were spread out throughout the overall collection. Also, I included three images in silver frames (which looked very elegant with the white frames), so wanted to place them in spots so they blended into the collection.

This pre-planning step will ensure your final look is wonderful AND will keep you from adding unnecessary nail holes to your walls!
Expert Tip:
If you don’t have a big kitchen or dining room table, you could set your art collection on the floor, too, to allow you to see how things will look and to move them around easily. For additional advice and inspiration, check out my “Gallery Wall” blog here.
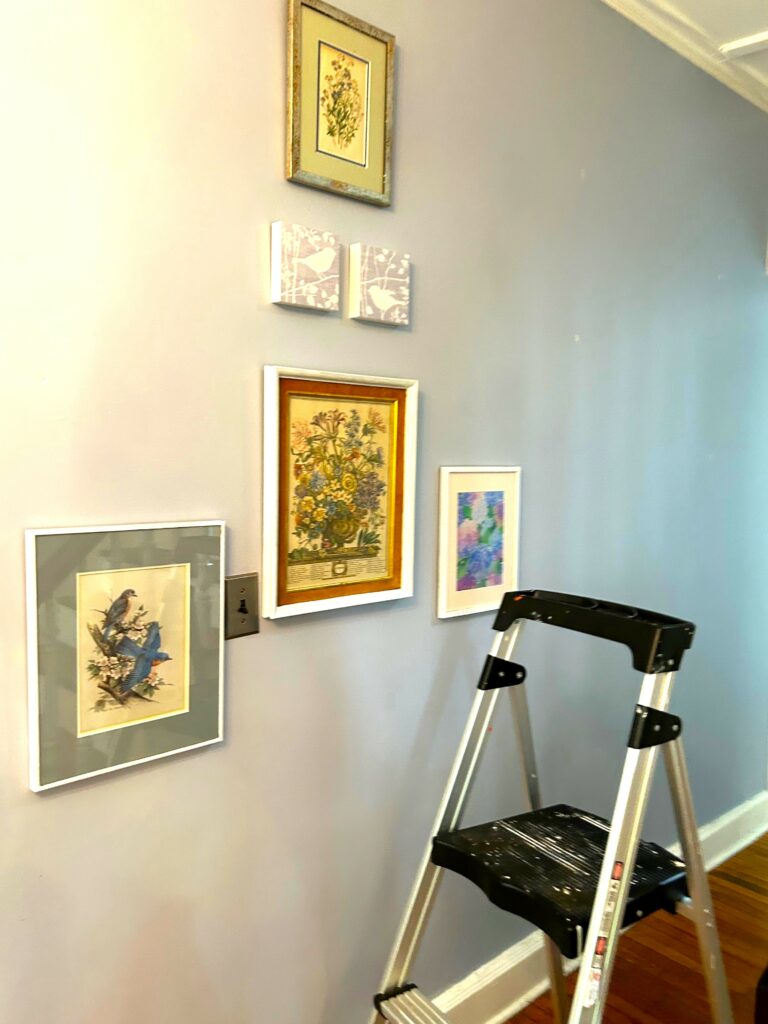
7. Hang up the happy
- Start at the center of your wall and use a nail or picture hanger to hold up your first, larger piece. Then work outward and upward from there, picking up one piece at a time from your “model” design on your table or floor.
- Enlist a helper, if possible, to hold your ladder or hand you your hammer.
- Given that your wall might be larger than your table and the layout there, consider the spaces between each framed piece and work to be consistent with it so it feels balanced and so your eye easily flows goes from image to image.
8. Add the accessories
Finish off your bird and botanical framed collection by adding items to further define the space and add additional visual interest, depth, and warmth. If you have space, add a chair or bench so there is a place for folks to sit to put on or remove their shoes. A small table is great to add as somewhere to easily drop off your keys and mail.
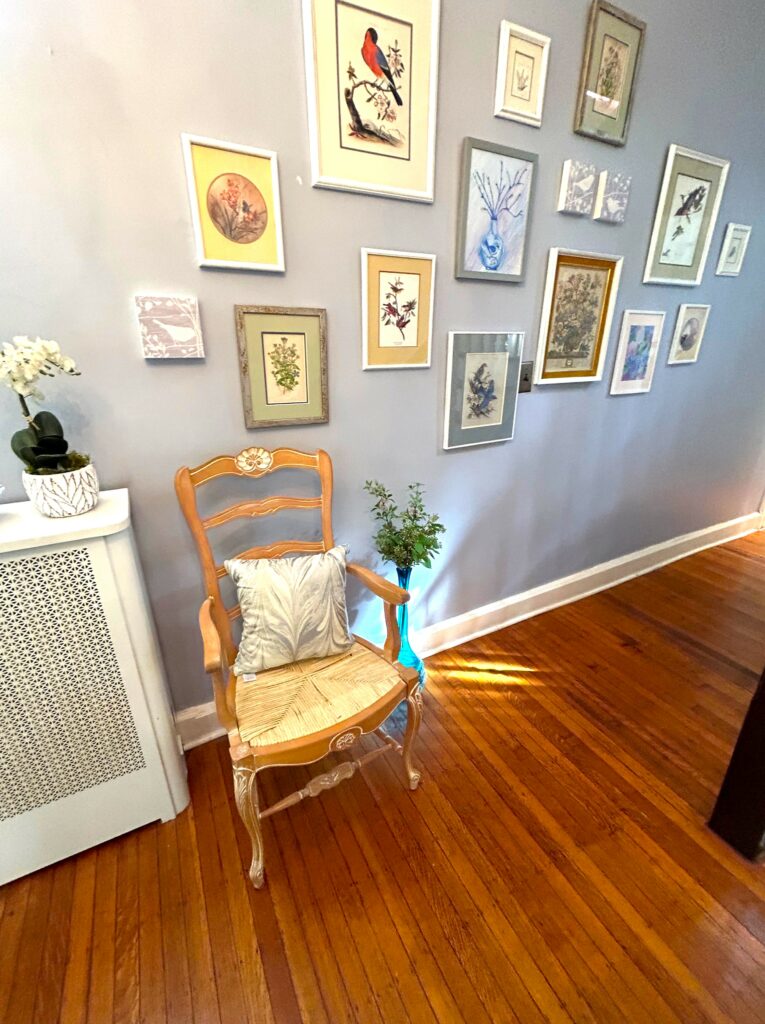
The French country chair, with its silvery, artsy throw pillow as well as the tall teal vase, white orchid plant, and hand-painted dish also were all picked up at Goodwill during various thrifting adventures there. These disparate pieces now all come together to create a charming and delightful vignette that compliments the birds and botanicals beautifully!
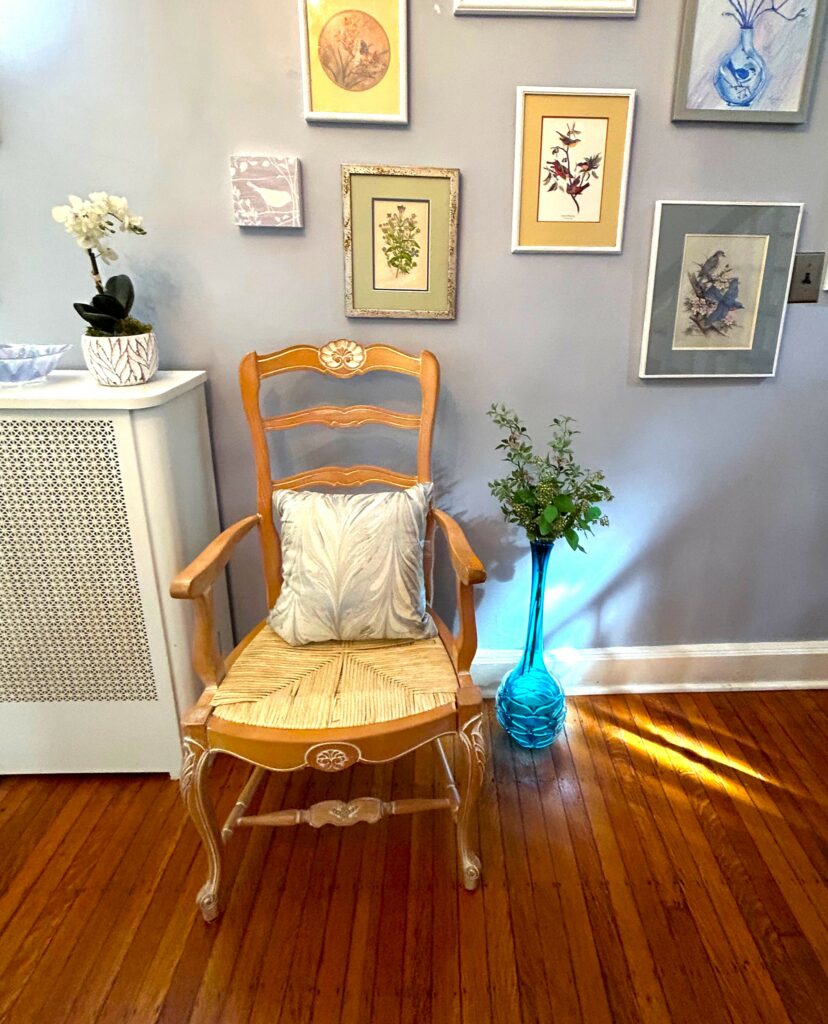
This foyer/entry space feels so happy and harmonious now, just like you will when you follow these steps and create one for your space, too!
Similar Reads:
- DIY: Frames Become Stained Glass Windows
- DIY 5-Step Spring Gallery Wall
- How to Create an Art Gallery Wall

Tim Kime
Artist, Motivational Speaker, Life Coach

