Give your Halloween night visitors a thrill by transforming a snack bowl into a scary candy dish!
Age Level:
Teens and adults
Items Needed:
- Large ceramic snack bowl
- Black spray paint
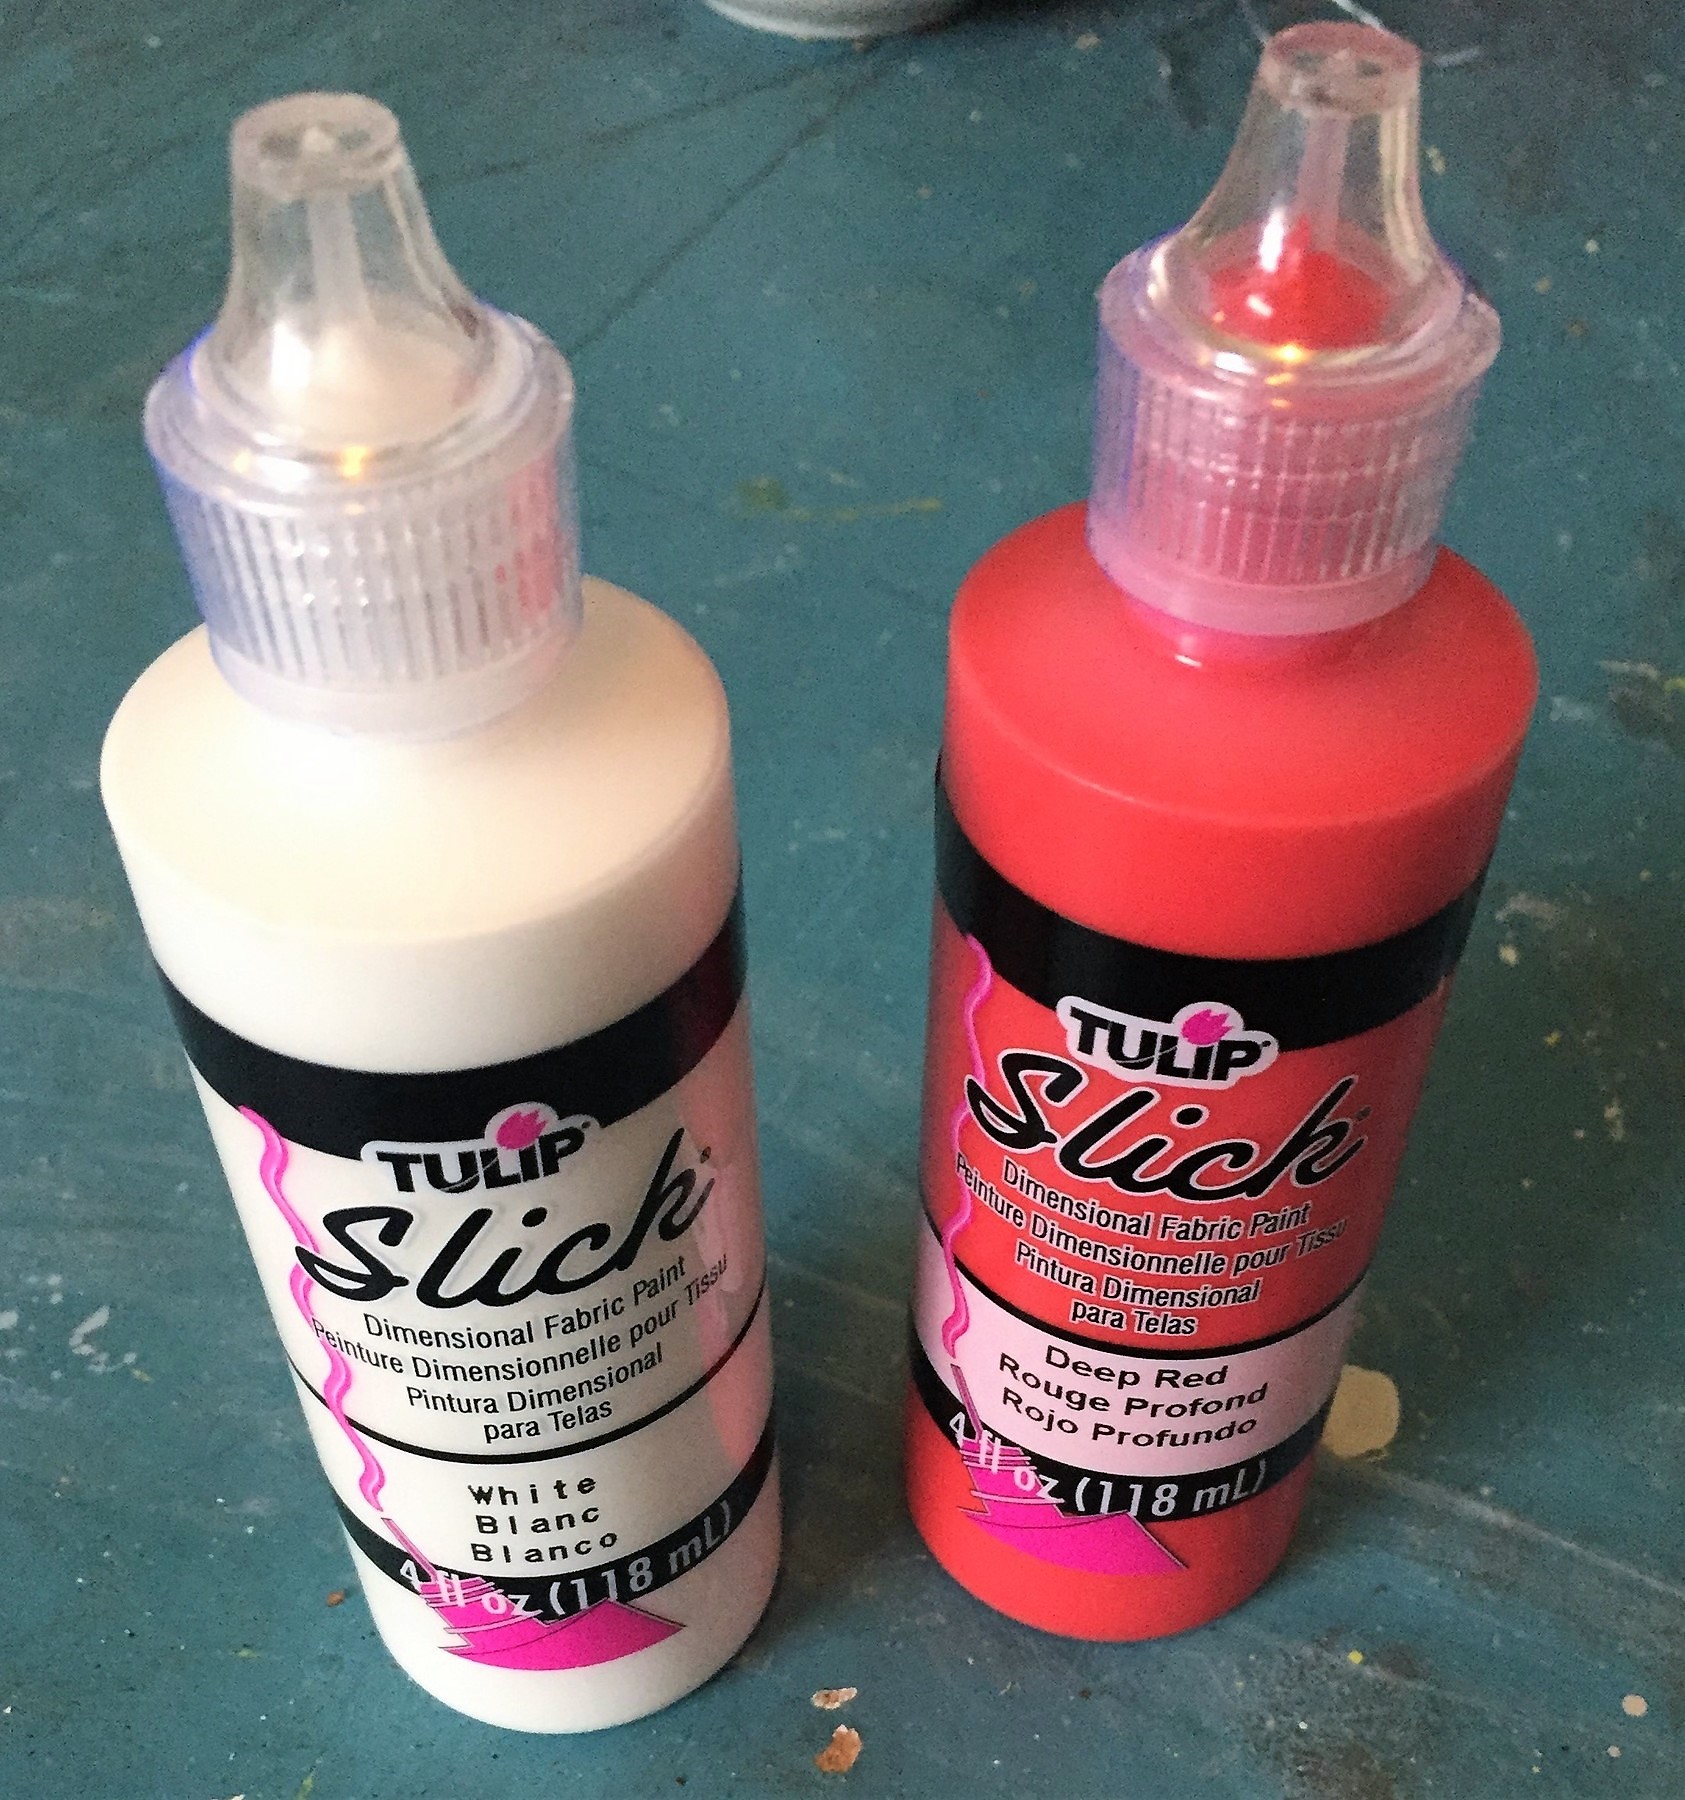
- Red puffy paint
- Fake eyeball decorations (2)
- Glue gun & glue sticks
Time Requirement:
1 hour (not including paint drying time)
Cost: Approximately $10-$12
- $4 for snack bowl
- $5 for spray paint (lots left over!)
- $3 for puffy paint (lots left over!)
- $1 for fake eyeballs
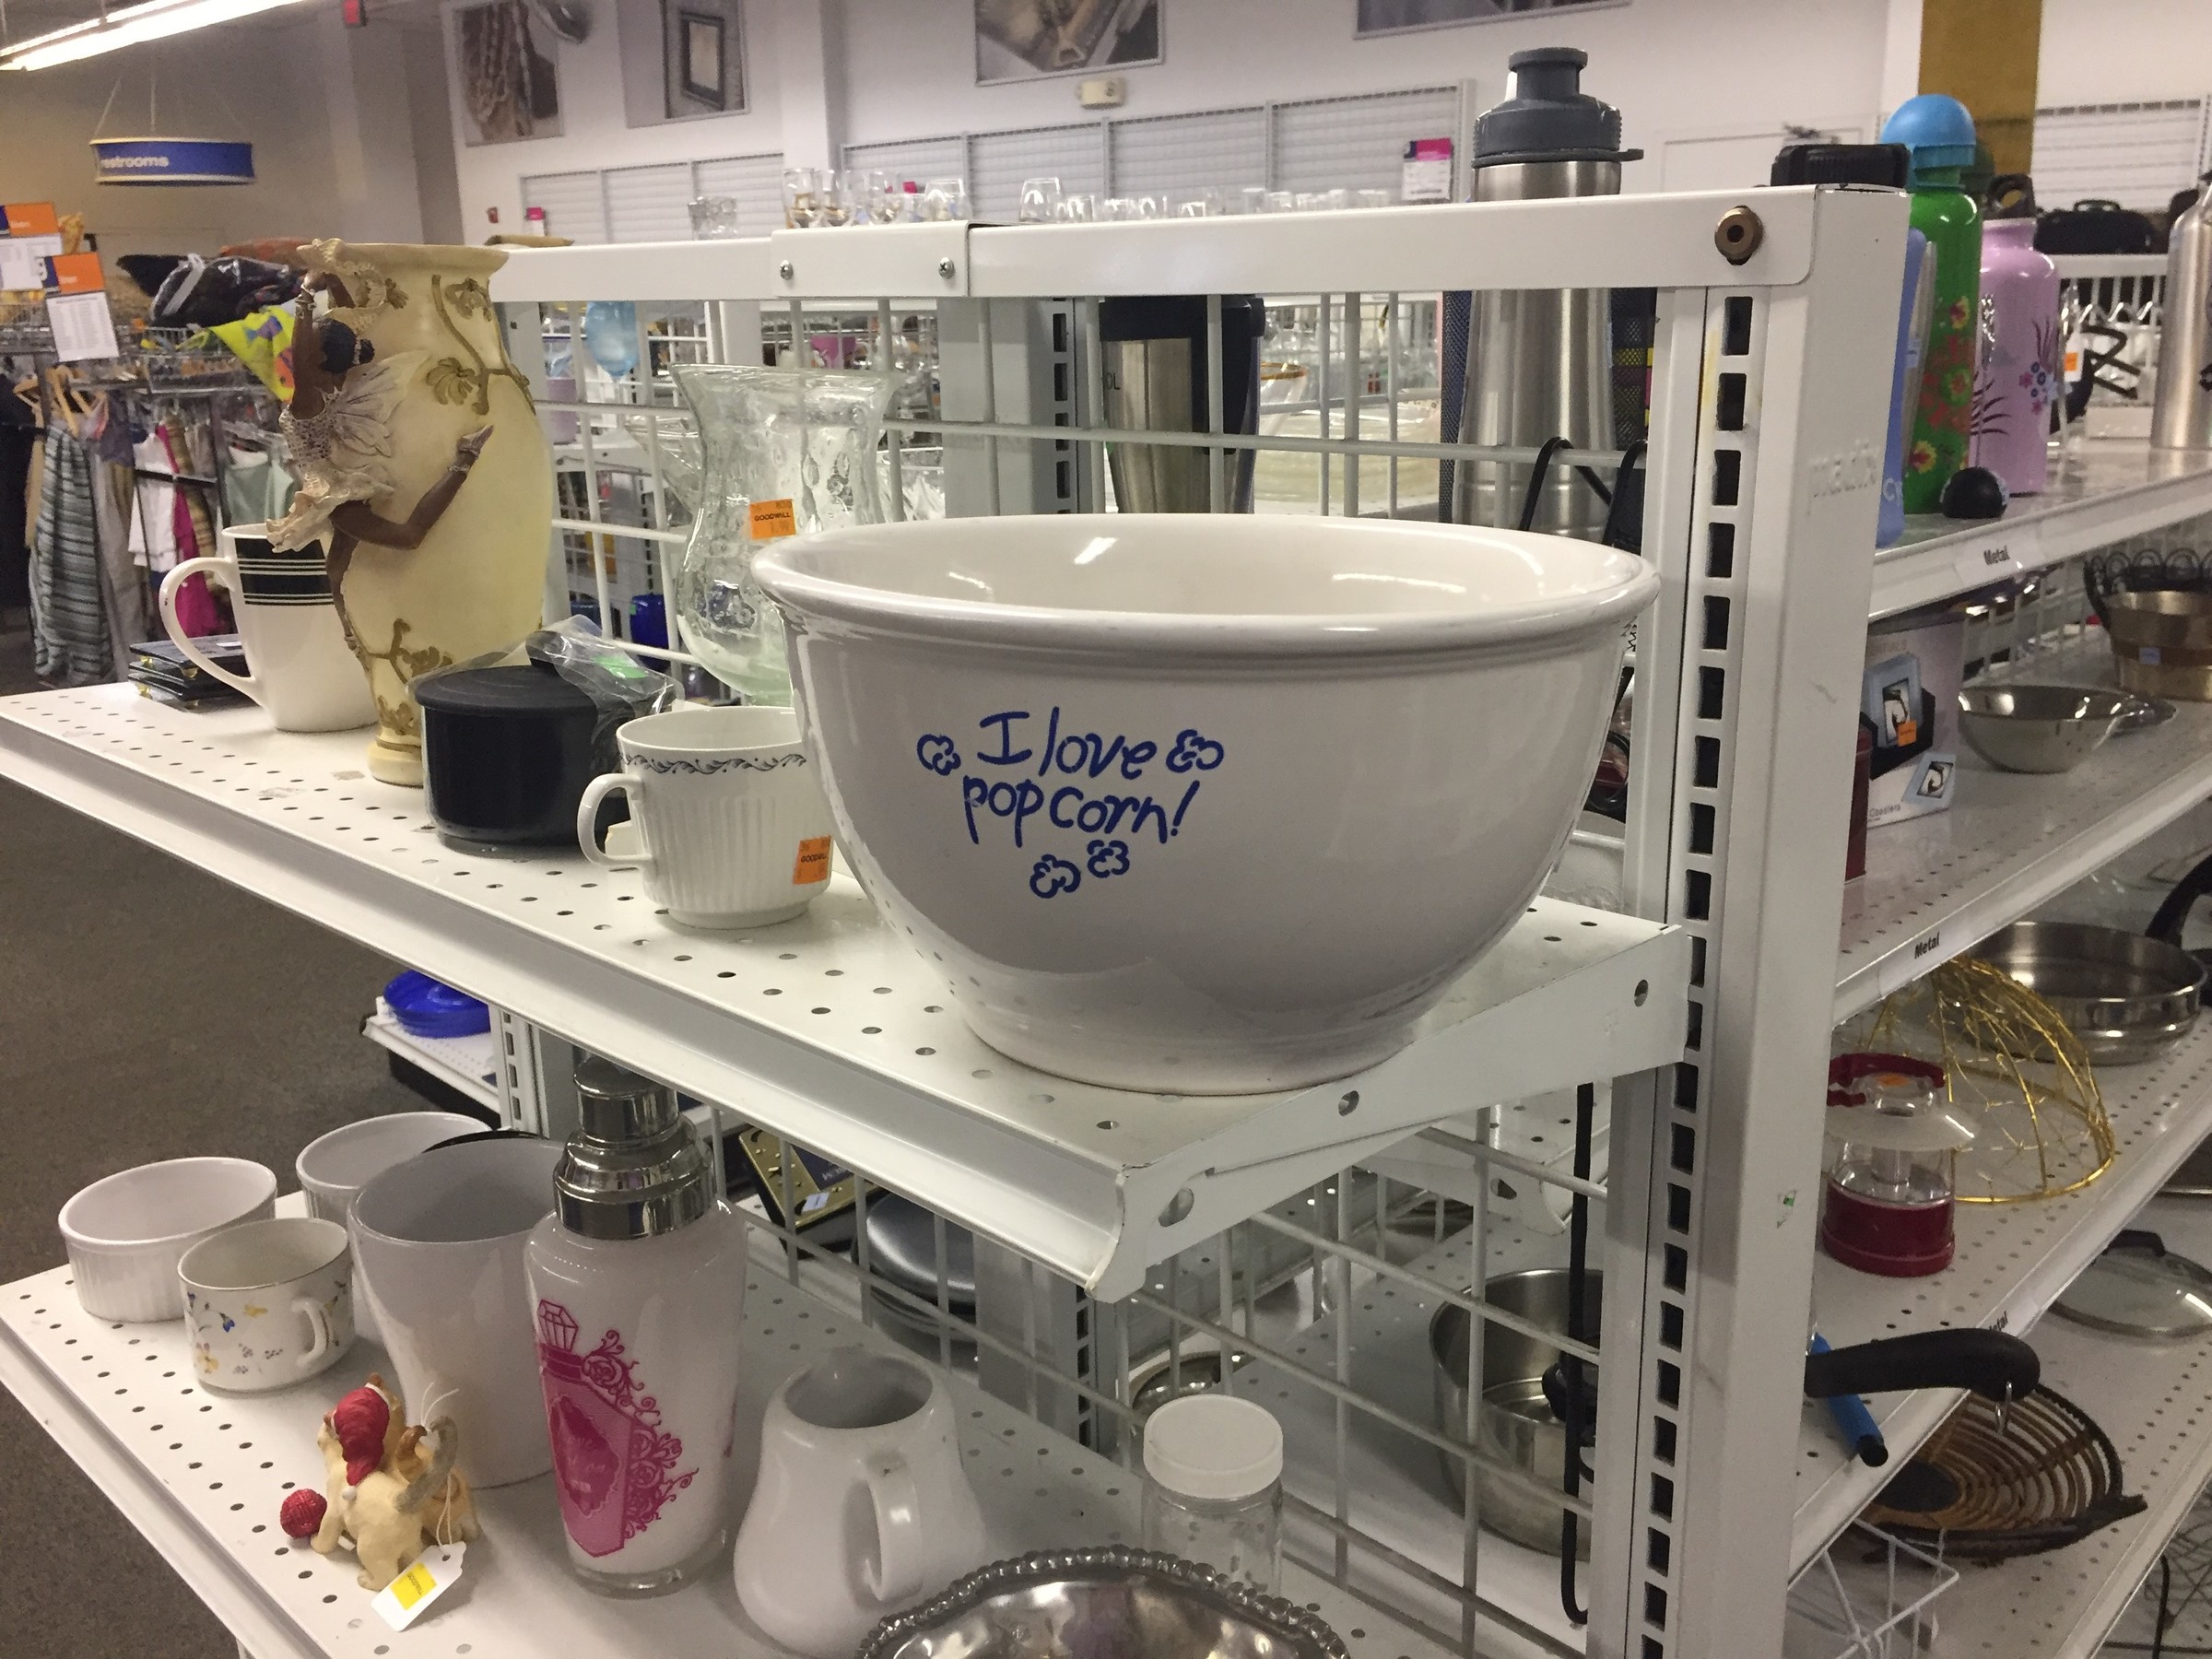
Step 1: Go “bowl-ing” at Goodwill
At your favorite Goodwill Retail Store, check out the Housewares section where kitchen items hang out. Look for a good-sized snack or serving bowl that will be able to hold lots of candy. While a ceramic bowl (previously used for popcorn due to the lettering/design on it) was selected due to its weight and heft, you might consider a large plastic or wooden bowl, too, based on the various available options.
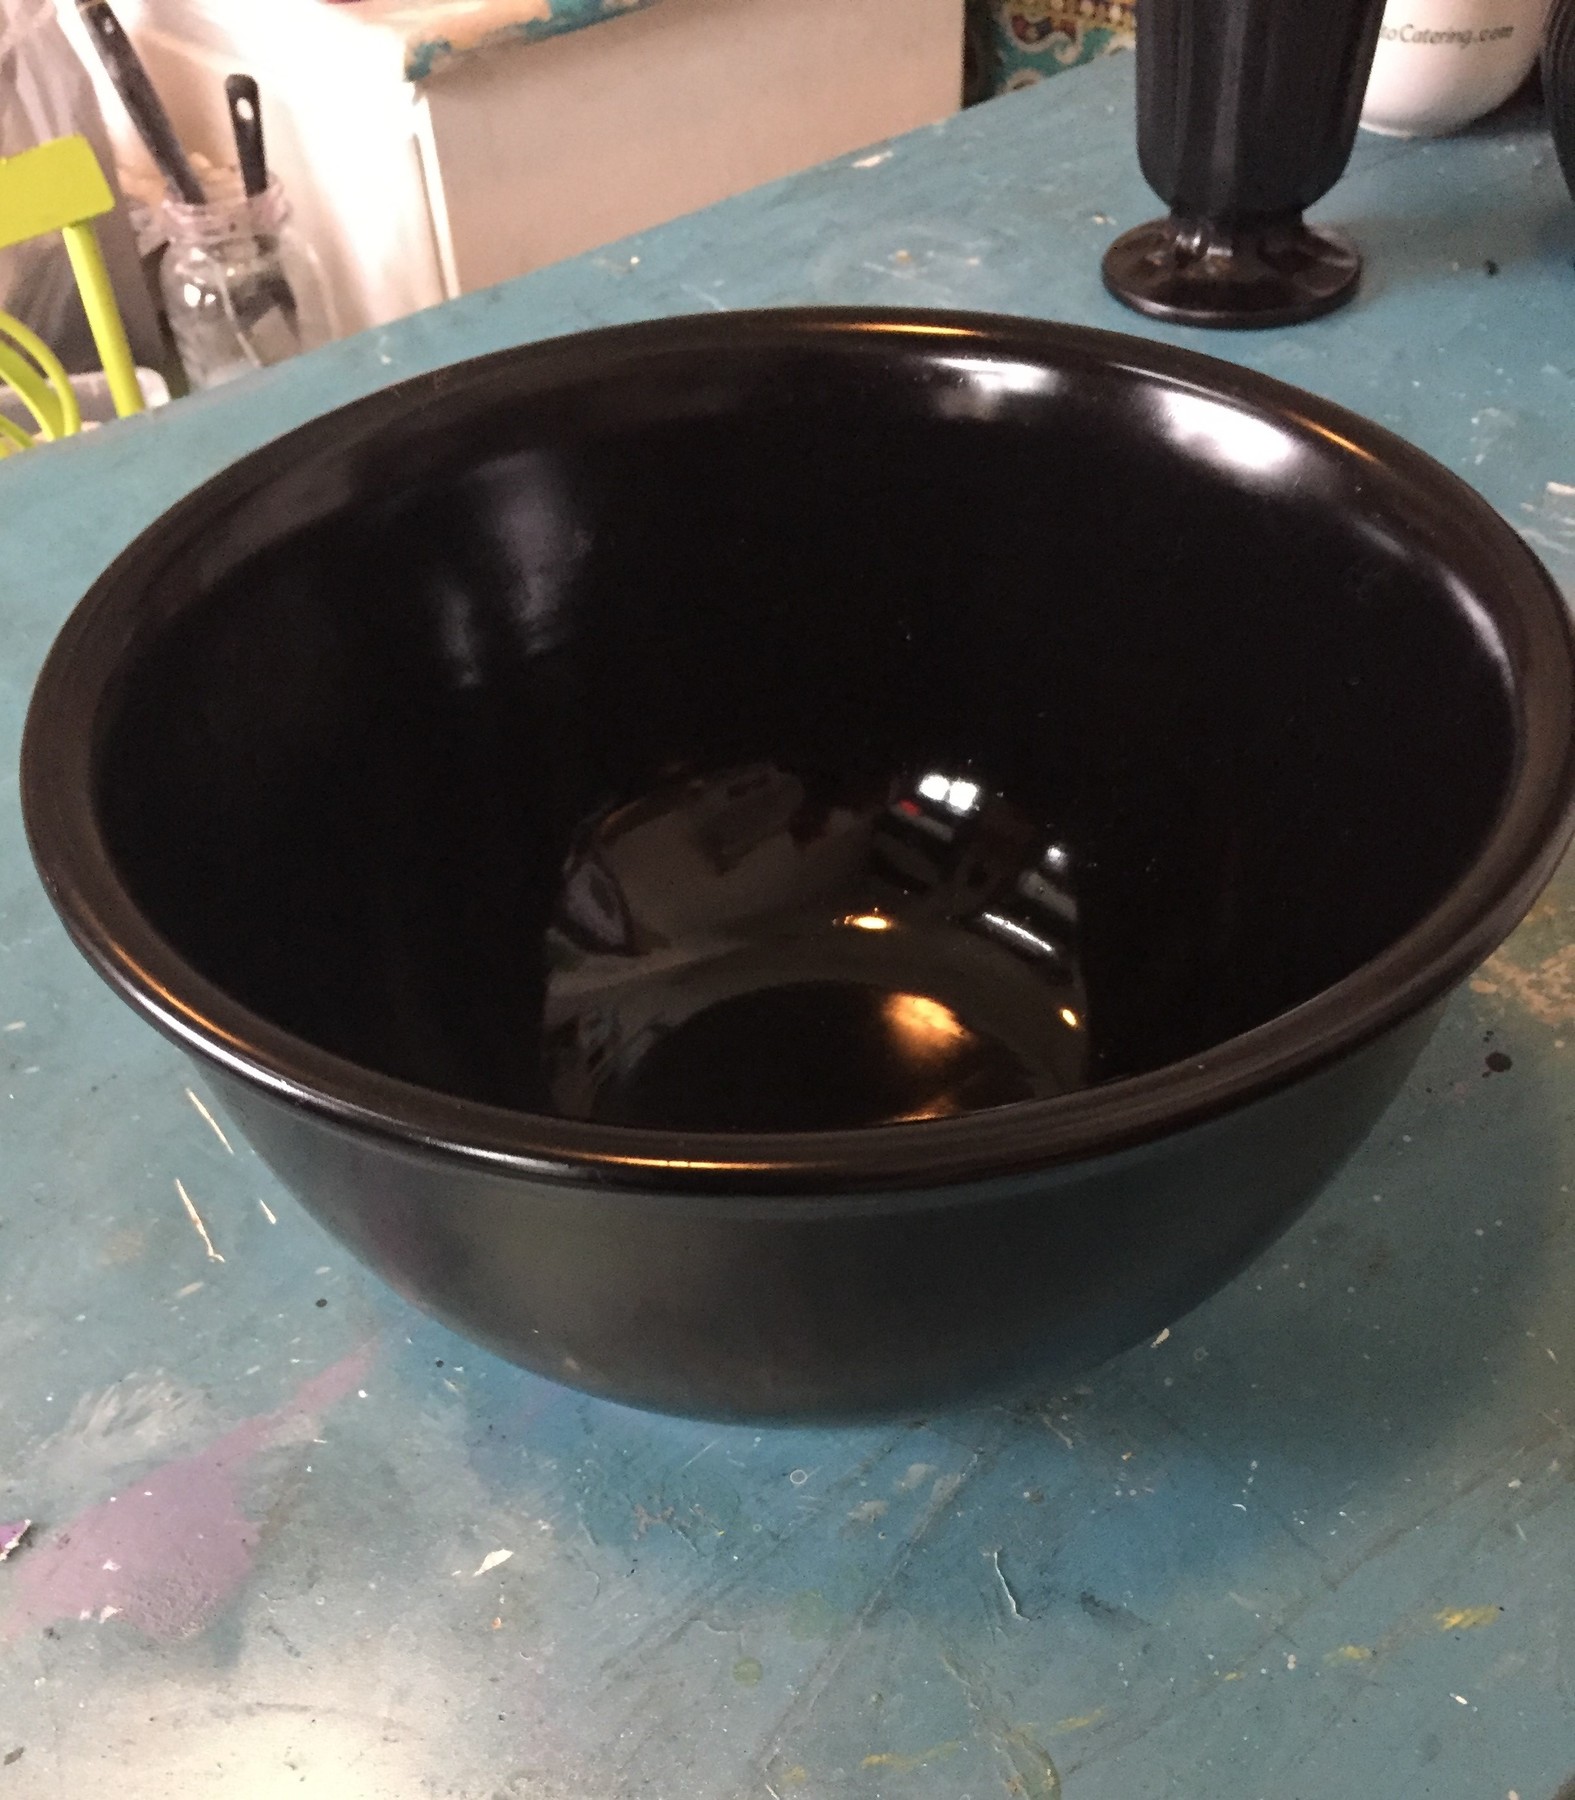
Step 2: Spray on the spookiness
After you remove any stickers, wipe down the bowl with a damp rag. Please upside down on a tarp, outside if possible or in a well-ventilated space. With a glossy black can of spray paint, gently apply a light coat. Allow time for it to dry, then add another coat ensuring solid coverage. When dry, flip over the bowl and spray the top edge and interior, again, spraying on a light coat. Let this dry then repeat. Ideally, let your bowl dry overnight or at least several hours before moving forward with the next step.
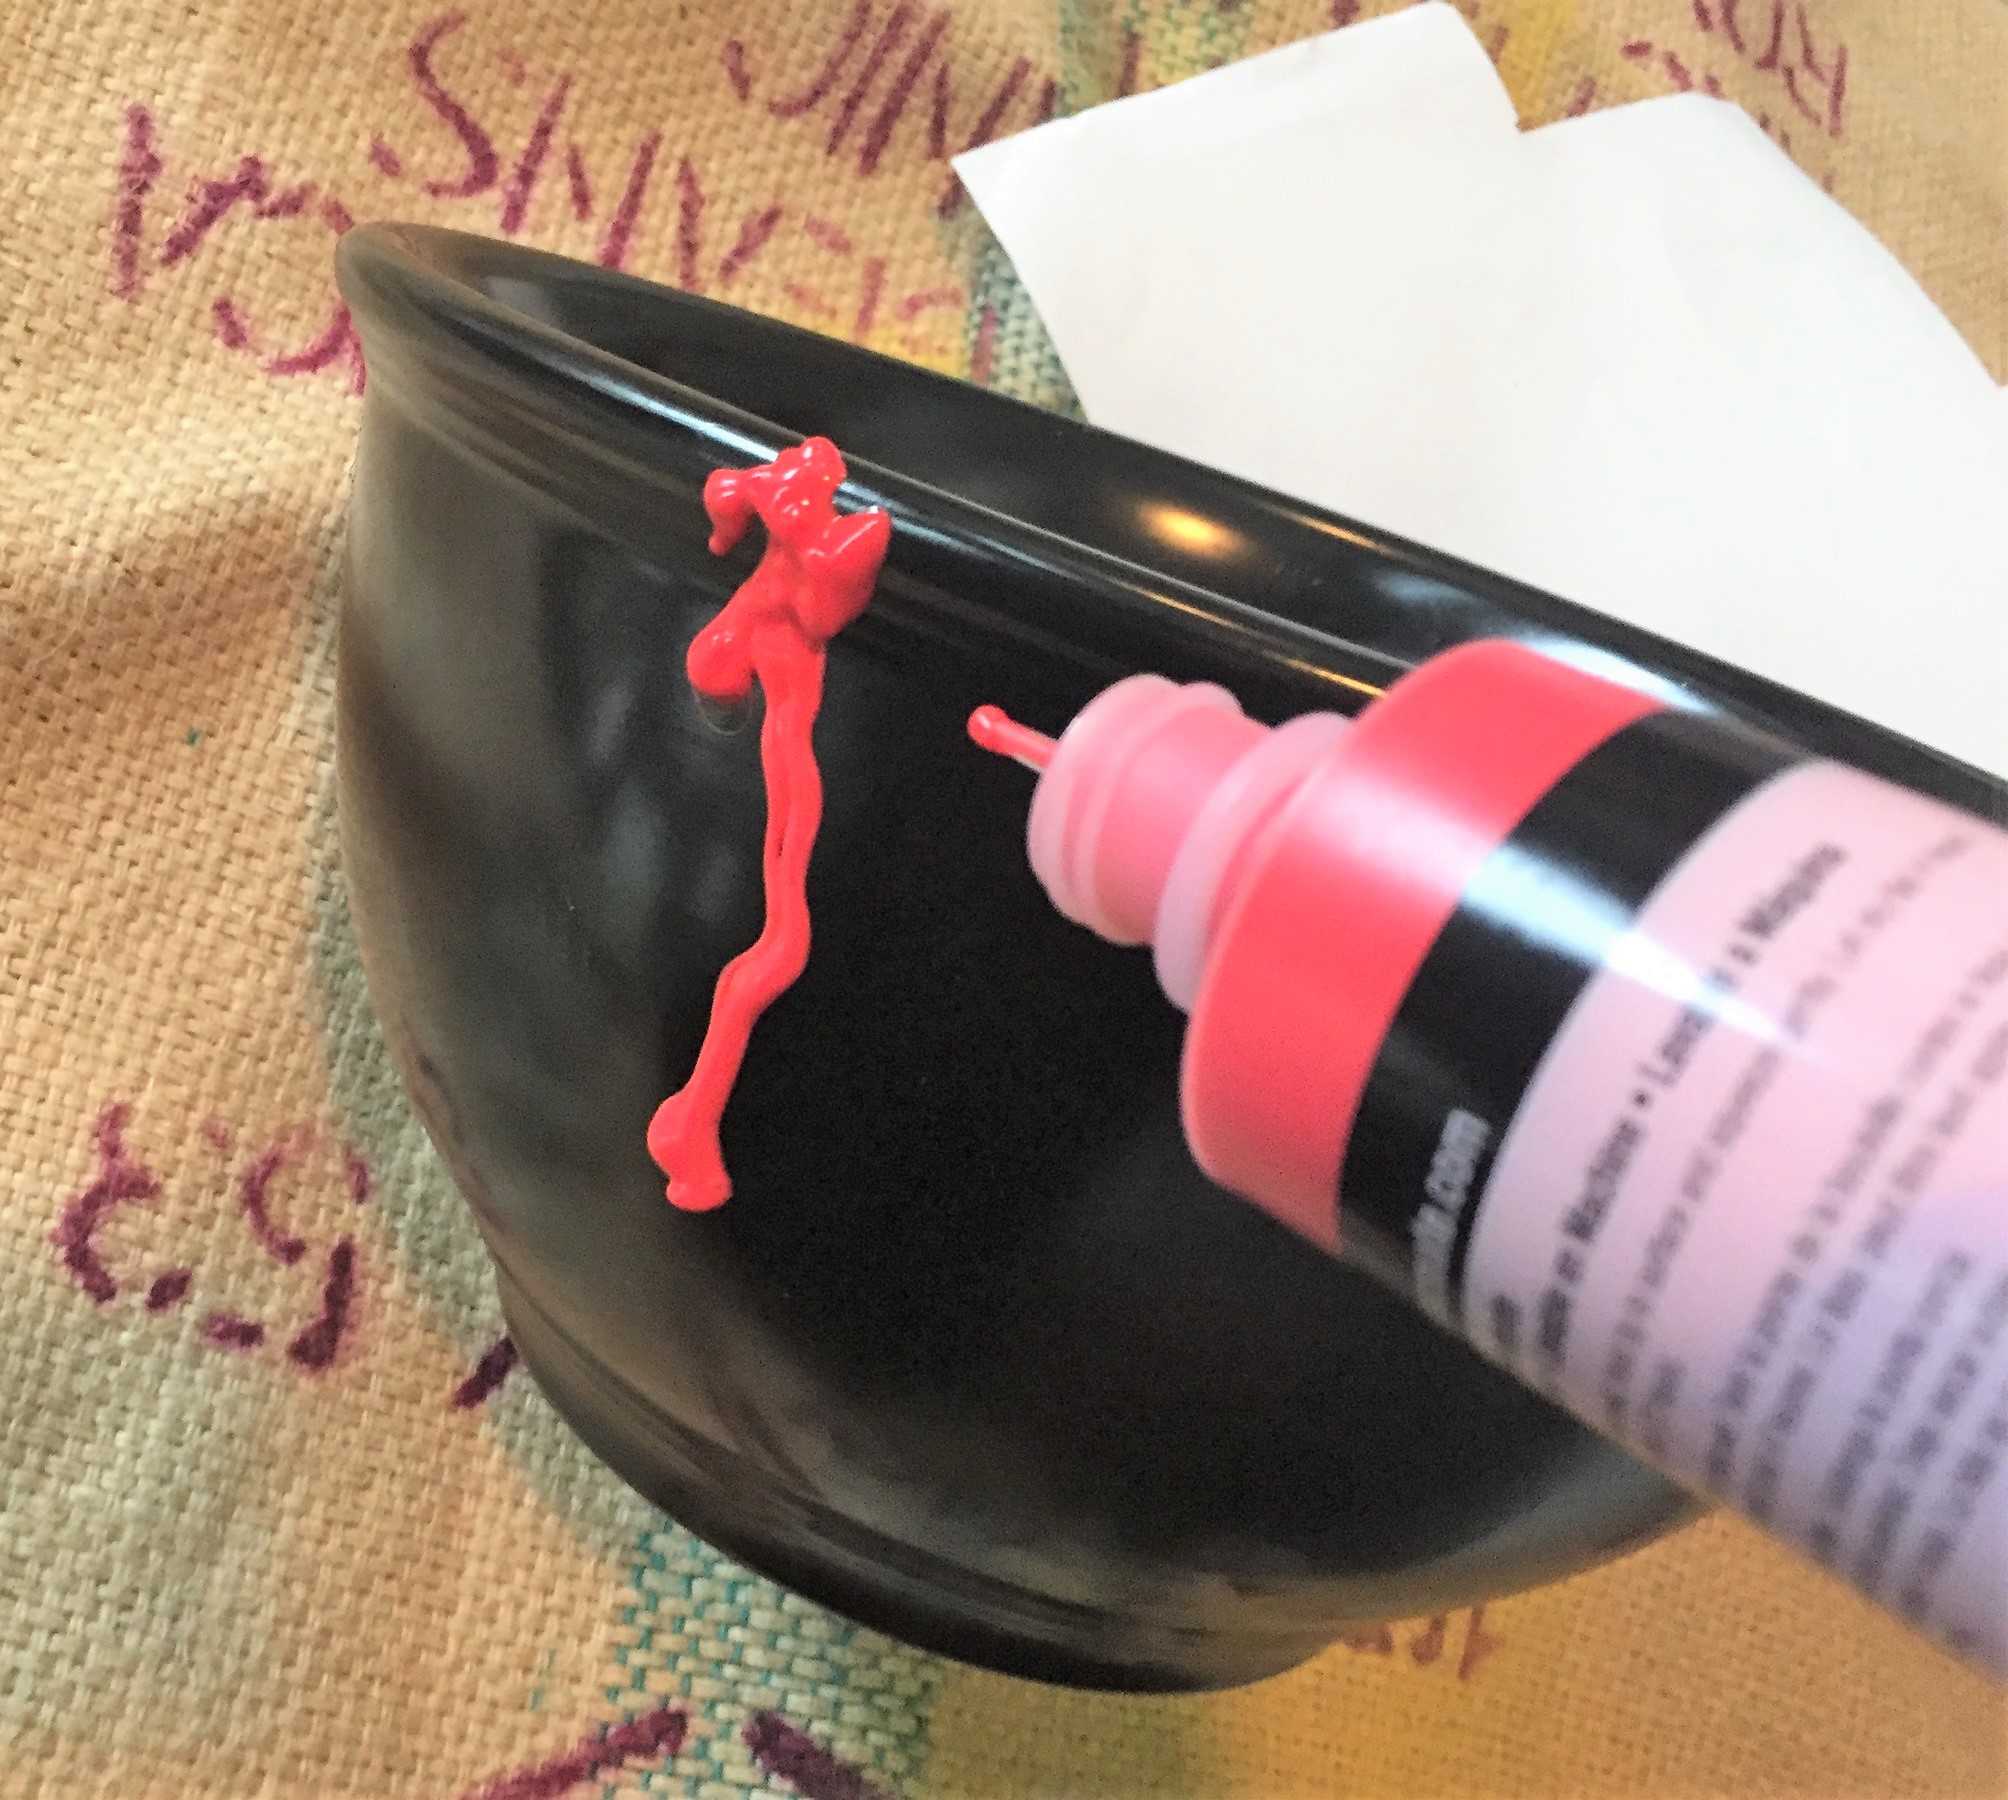
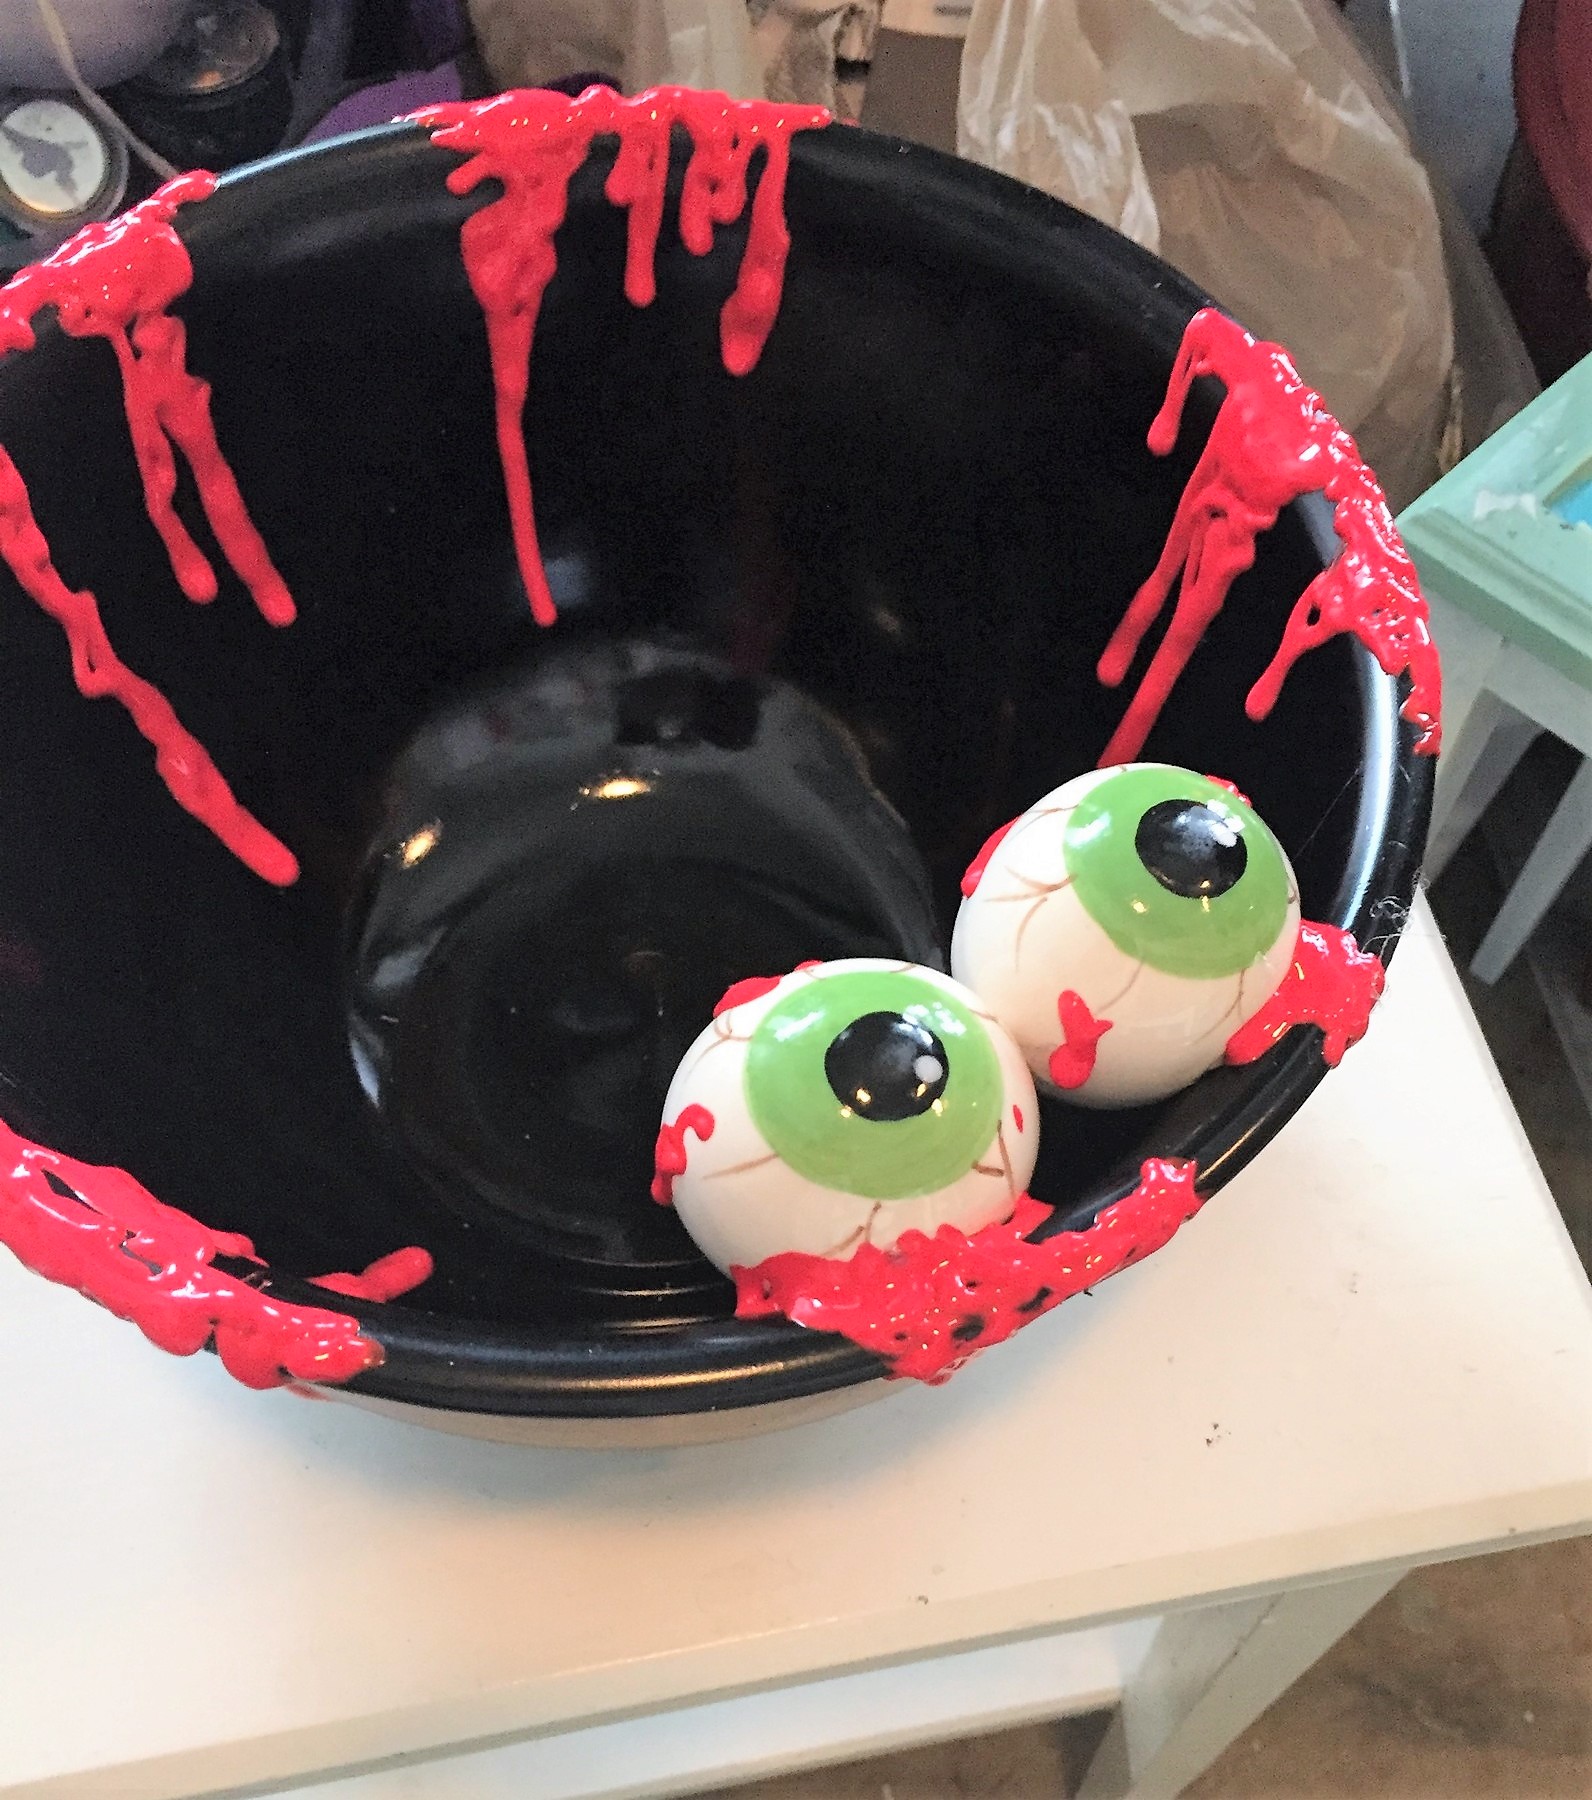
Step 3: Have a bloody good time
To give your bowl a gory look, apply the red puffy paint along the top edge in various places. (Purchase this paint at most arts and crafts stores.) Add “drips” by adding lines of the puffy paint on the outside from the top edge toward the bottom in various lengths to mimic dripping. Be careful as you move the bowl around when applying the paint to avoid smudging and smearing it. This puffy paint gives dimension and thickness for the “blood.” While it might look a little scary, have fun during this step!
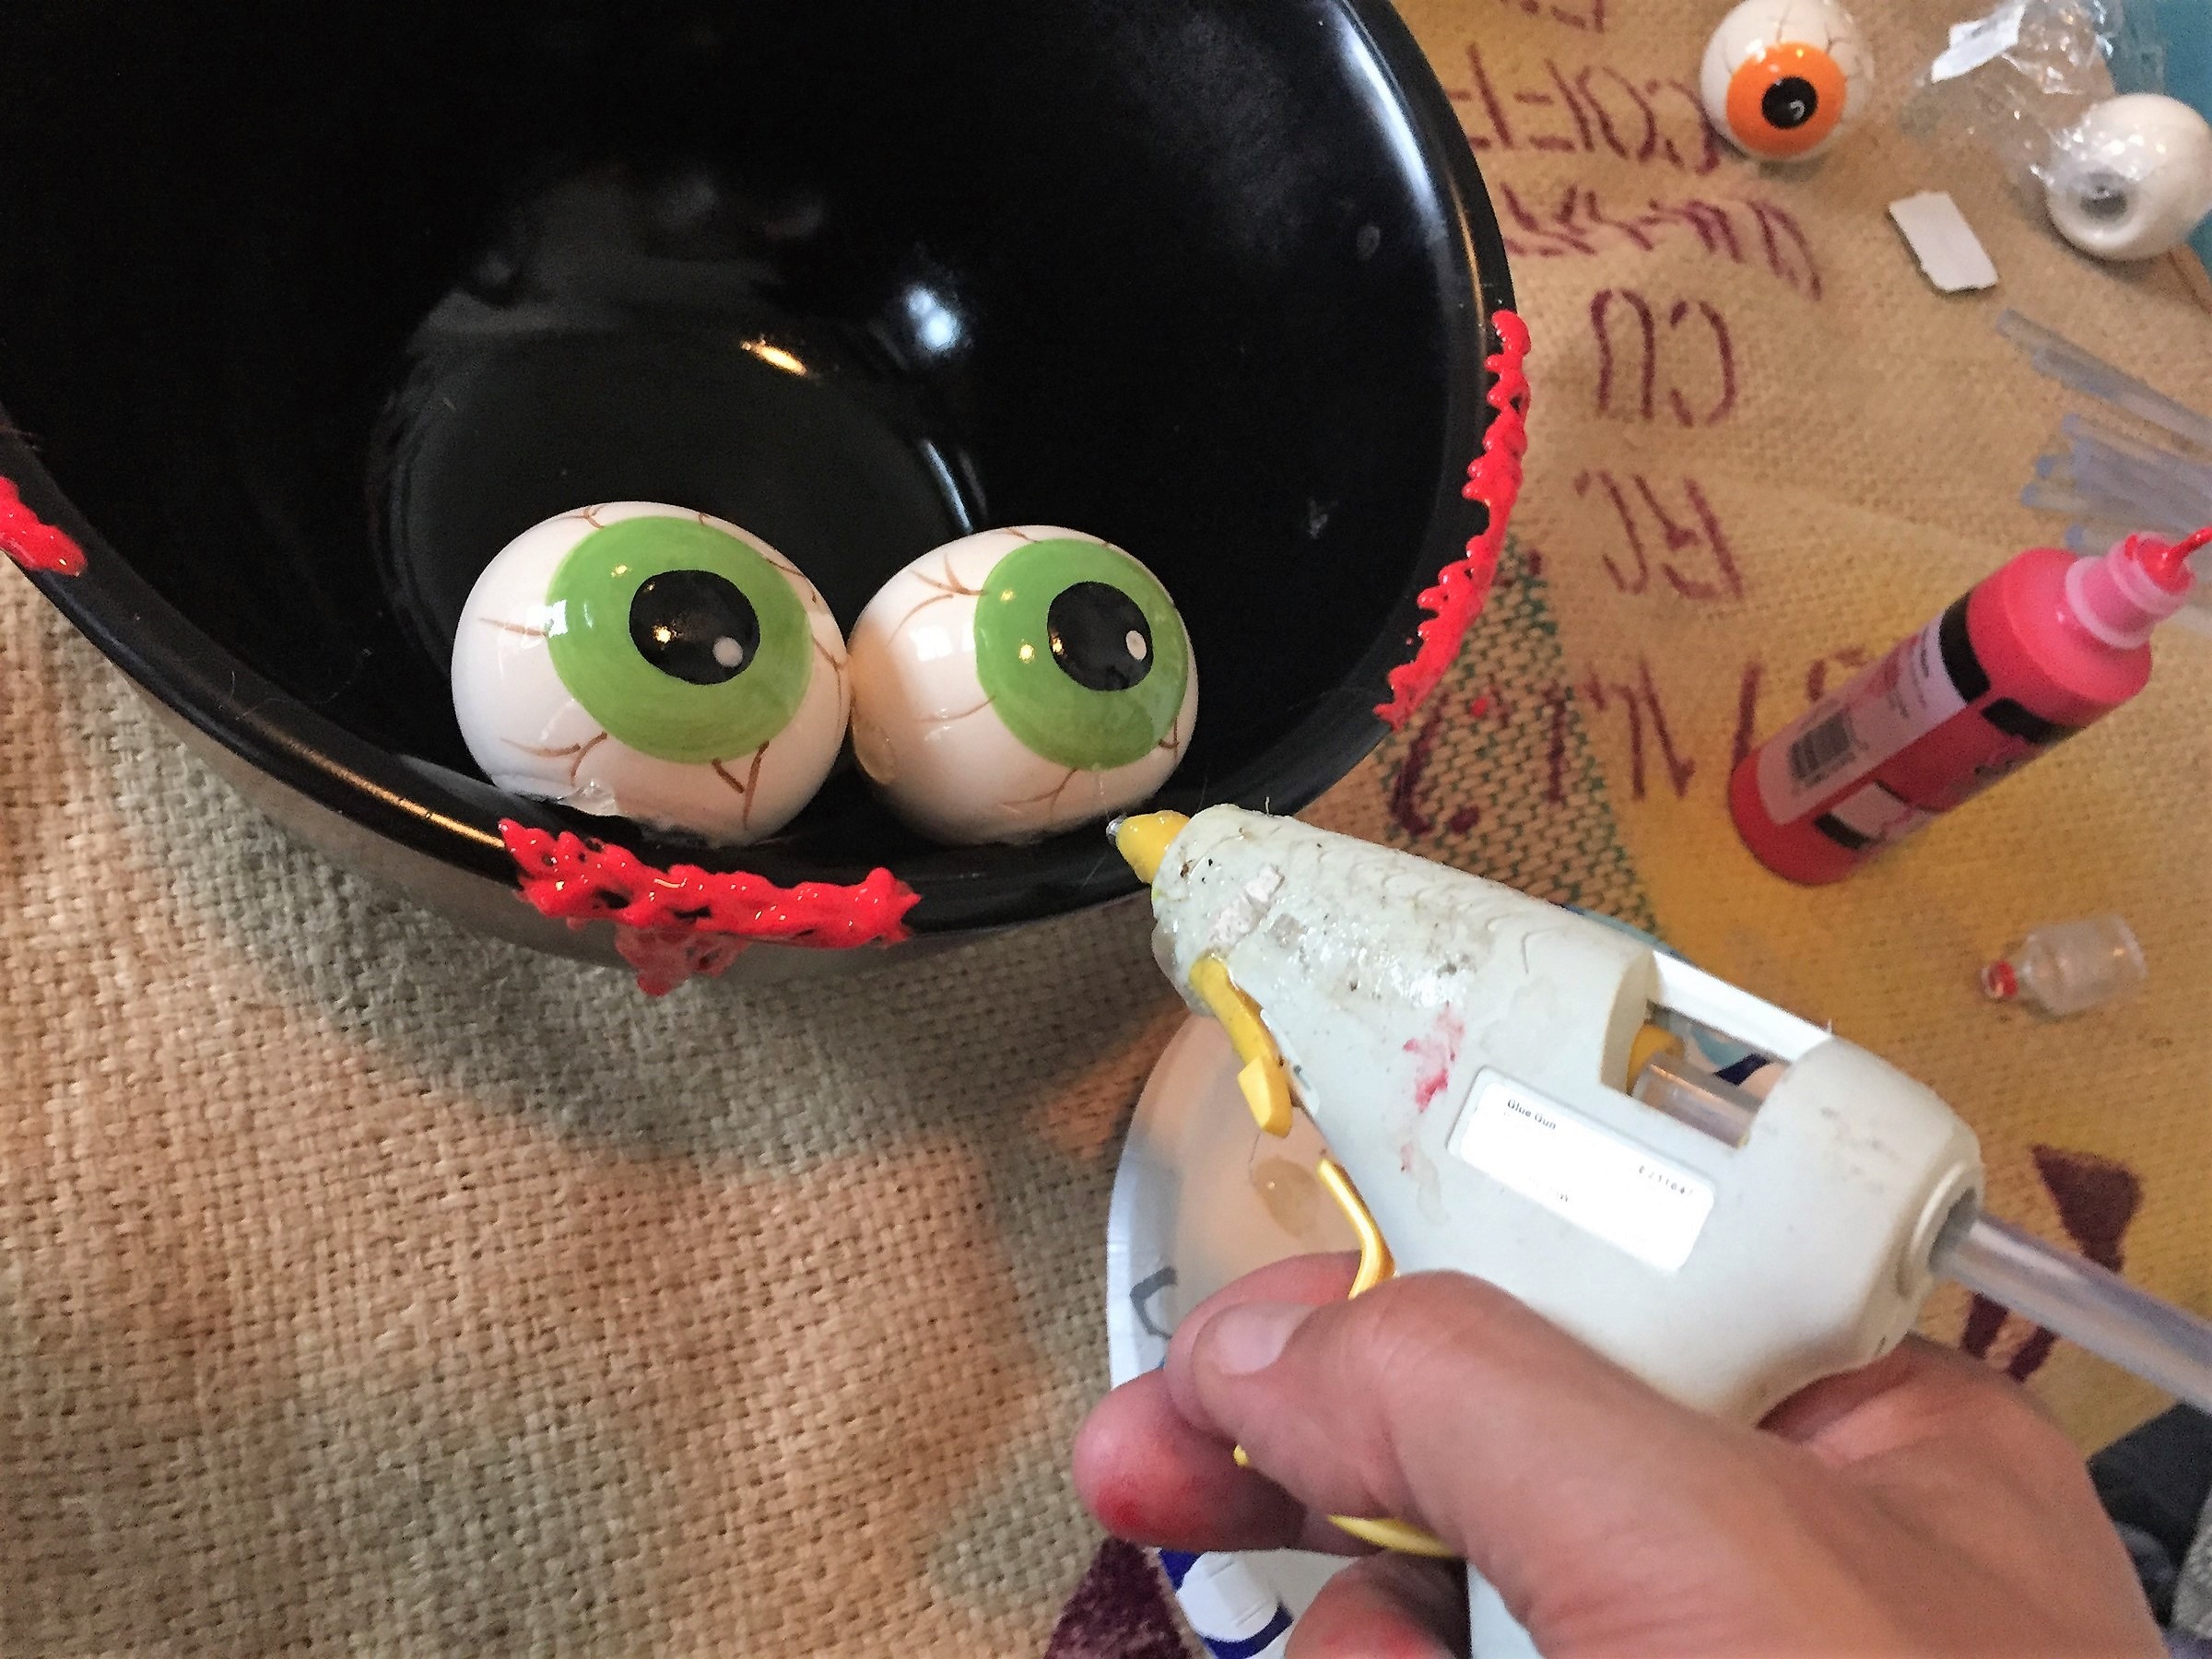
Step 4: The eyes have it
With your glue gun, attached the fake eyeballs (picked up at a dollar/discount store) along the top inside edge so trick-or-treaters are able to see them when grabbing candy from the bowl. Add glue between the eyeballs, too, so they are attached to one another and offer additional support. By attaching them on the inside, it looks like a creature is peering out.
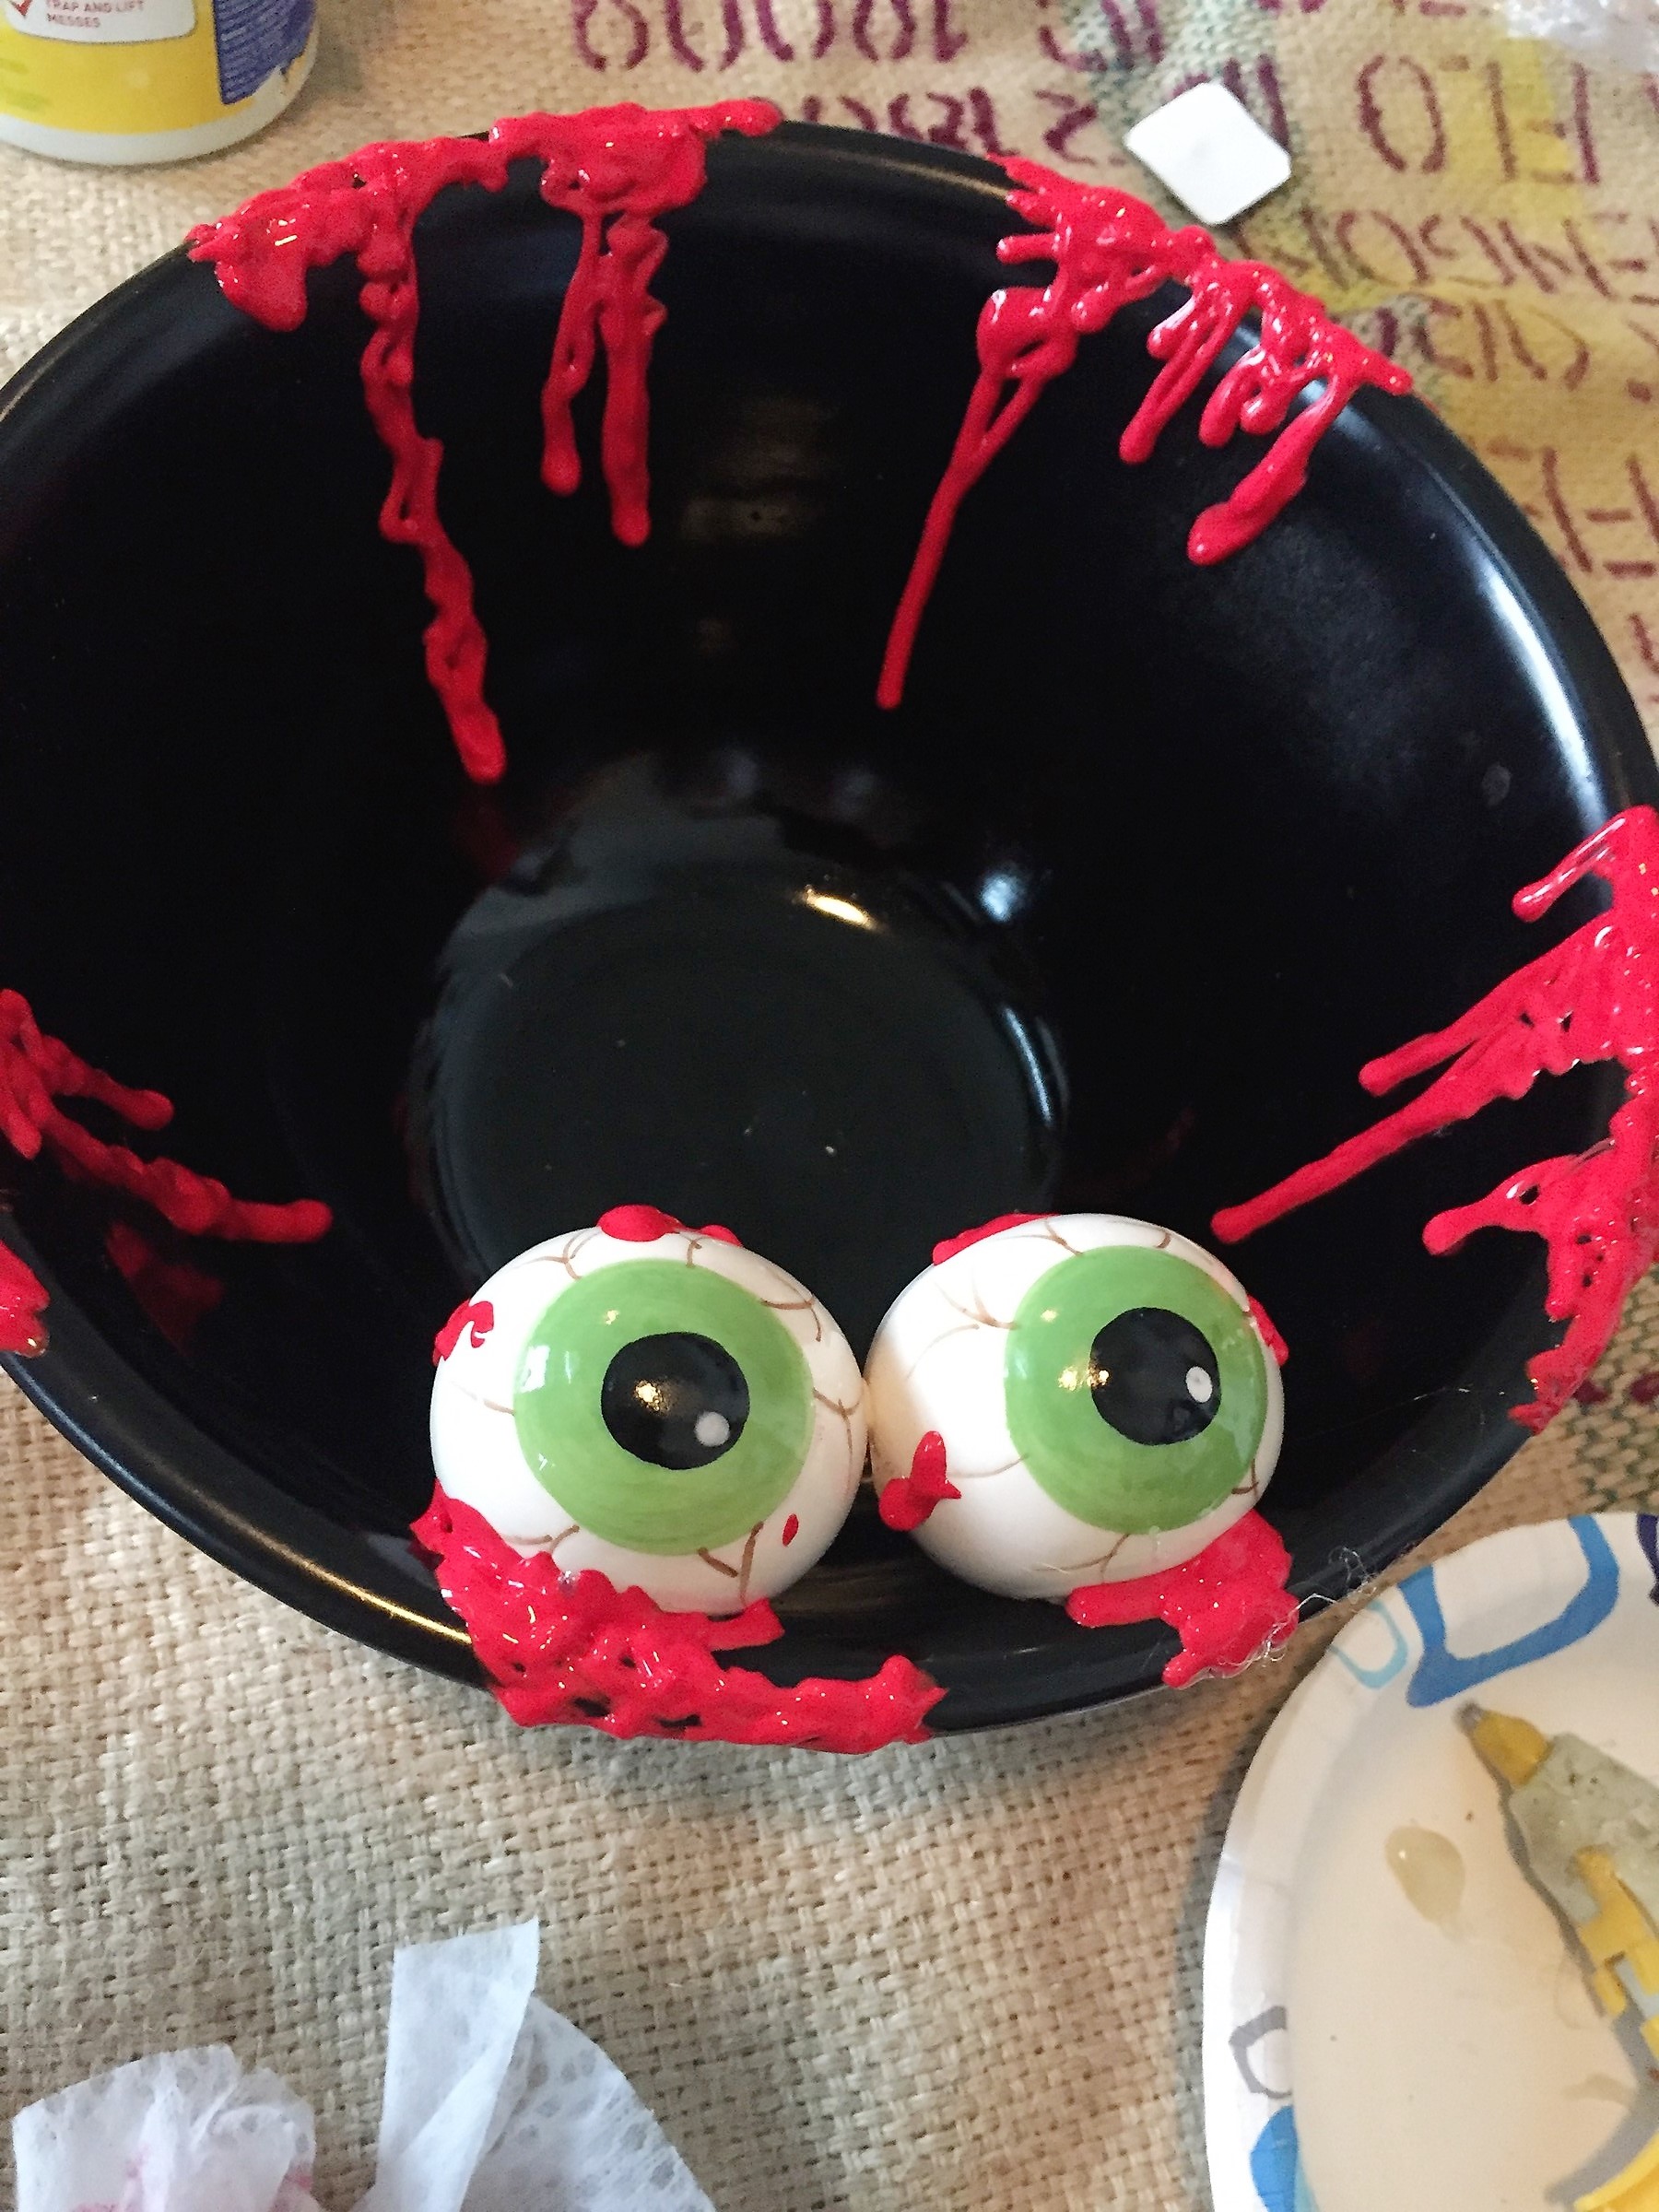
Step 5: Pour on more “blood”
Once your fake eyeballs are secured tightly, add more of the red puffy paint along the edges where they are attached to the bowl. Add small streaks of the puffy paint, too, right on the eyeballs to give them a bloodshot look and to make them even creepier looking! Let your transformed, scary candy bowl dry overnight.
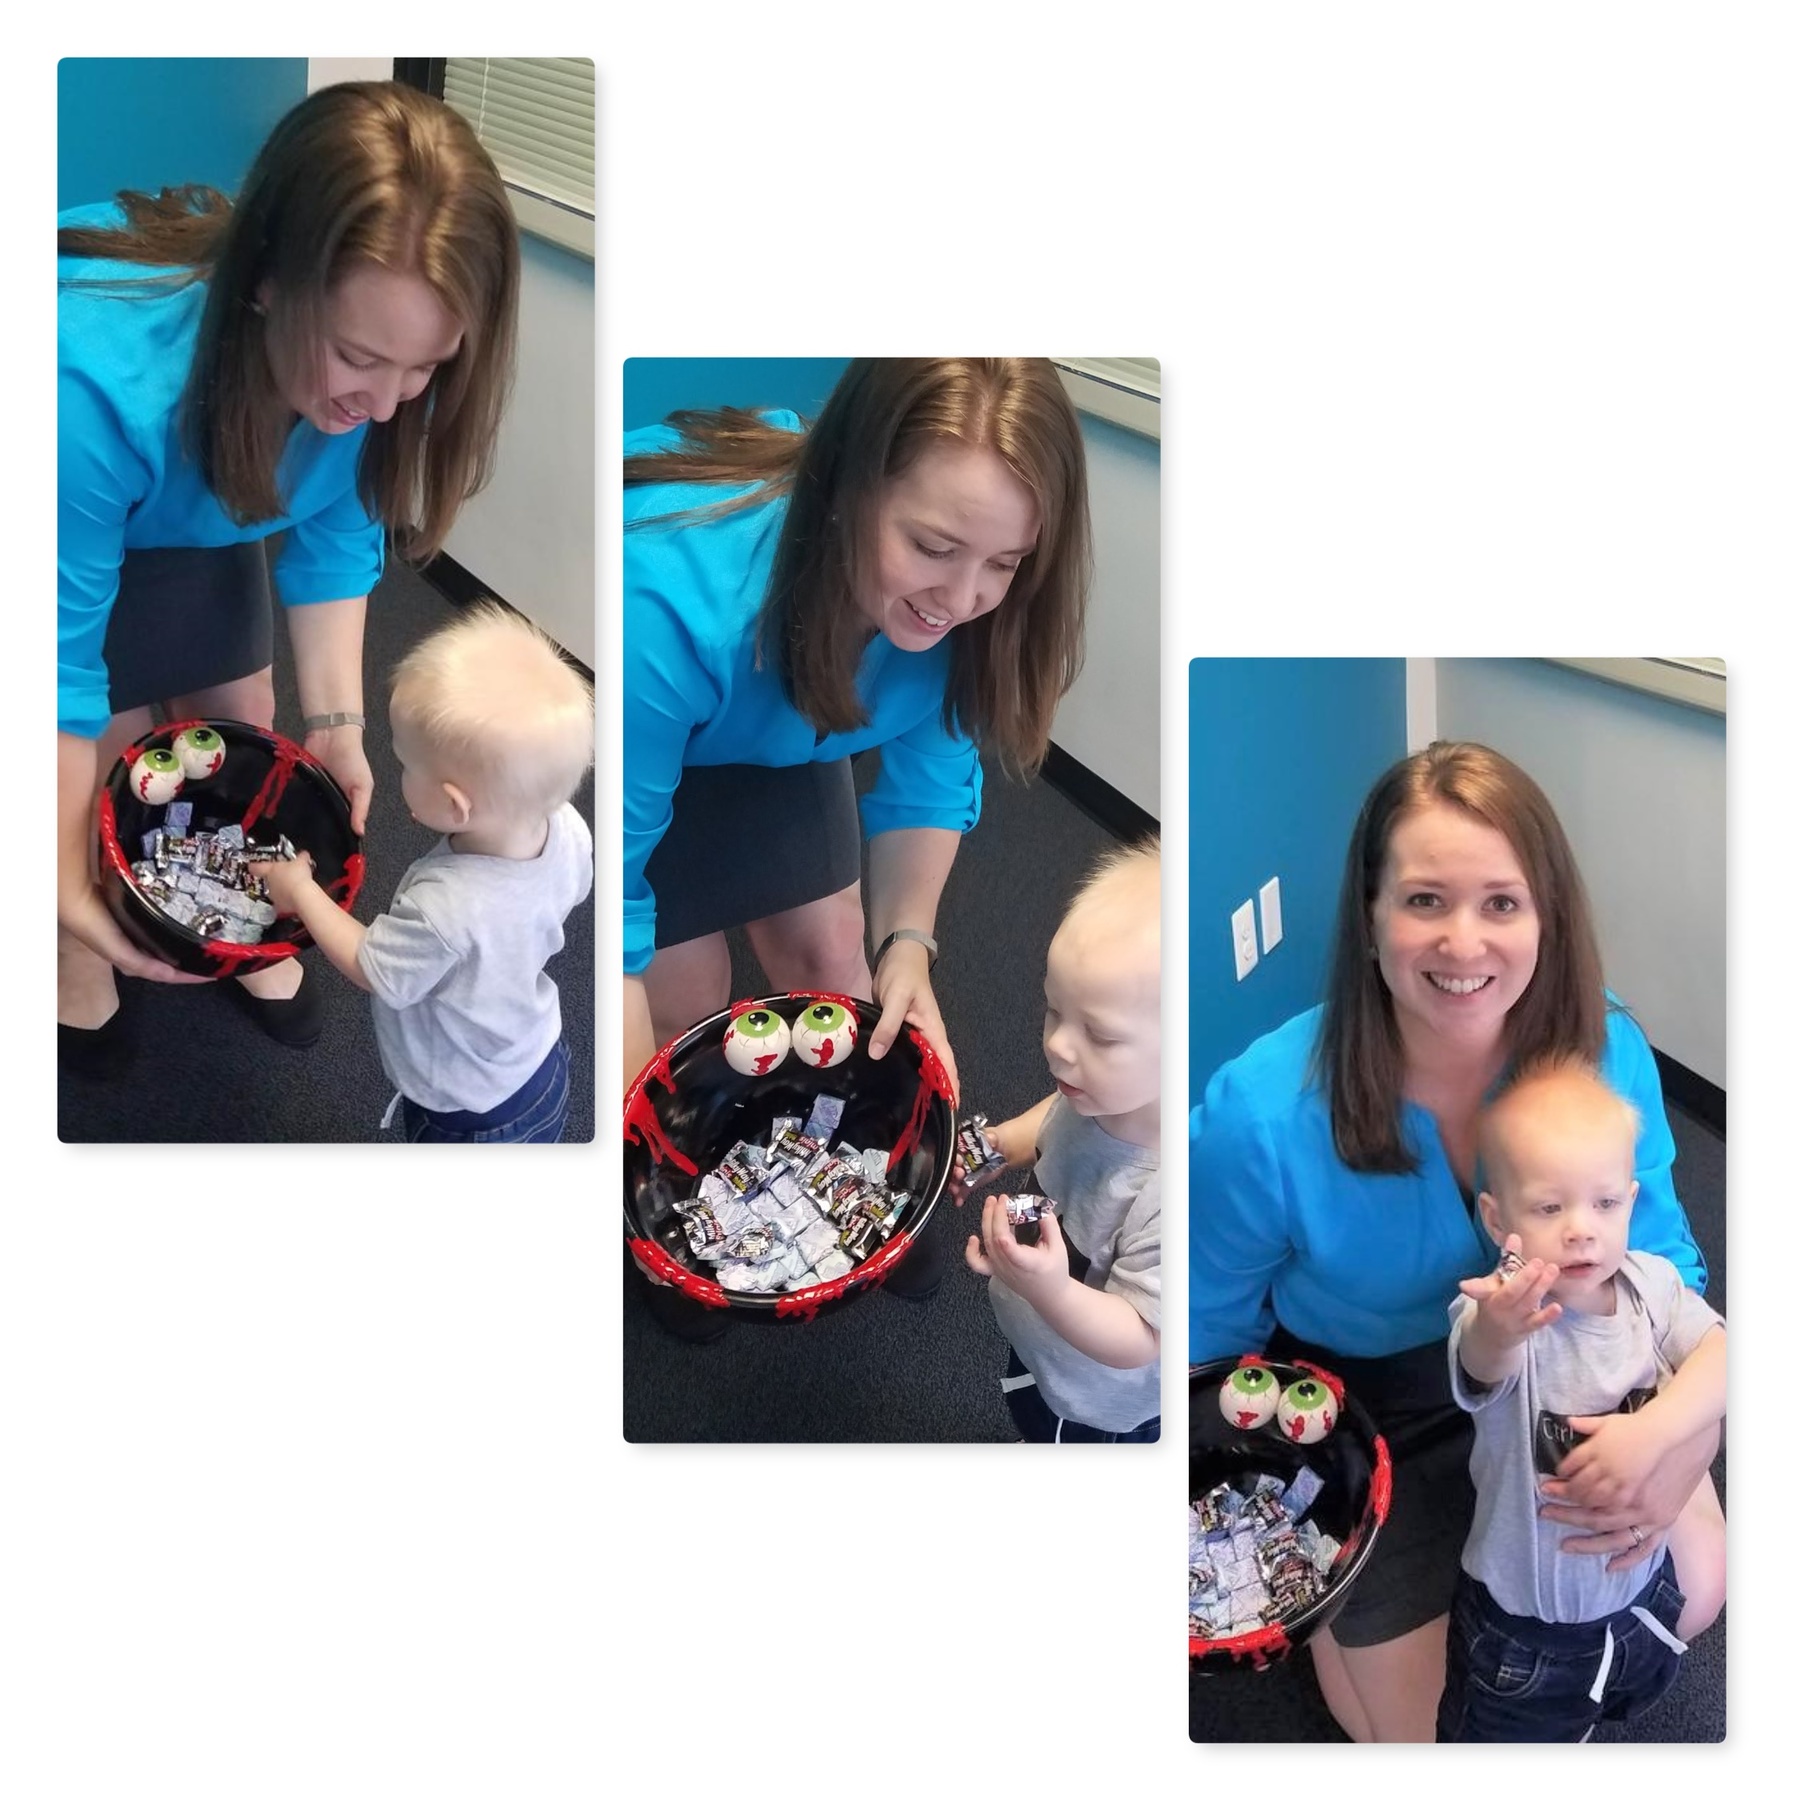
Step 6: Add candy then watch for looks of horror (or happiness!)
Now that your bloody eyeballs bowl has dried, it is ready to serve its new purpose as a frighteningly fun candy container. Fill with your favorite Halloween treats; place on the party table or have it handy when the doorbell rings. Either way, it will be sure to scare up some ghoulish fun!
Tim Kime is an artist, life coach, connector. He is President of Kime Leadership Associates offering executive coaching, meeting facilitating and motivational speaking. He is also Chief Creative Force of Transformation Junkies which upcycles furniture and other household items into functional works of art. He combined his two passions—unleashing the potential in people and transforming items with the launch of the Art of Possibilities Workshops. These workshops are part upcycling, part dreaming, part goal setting.

