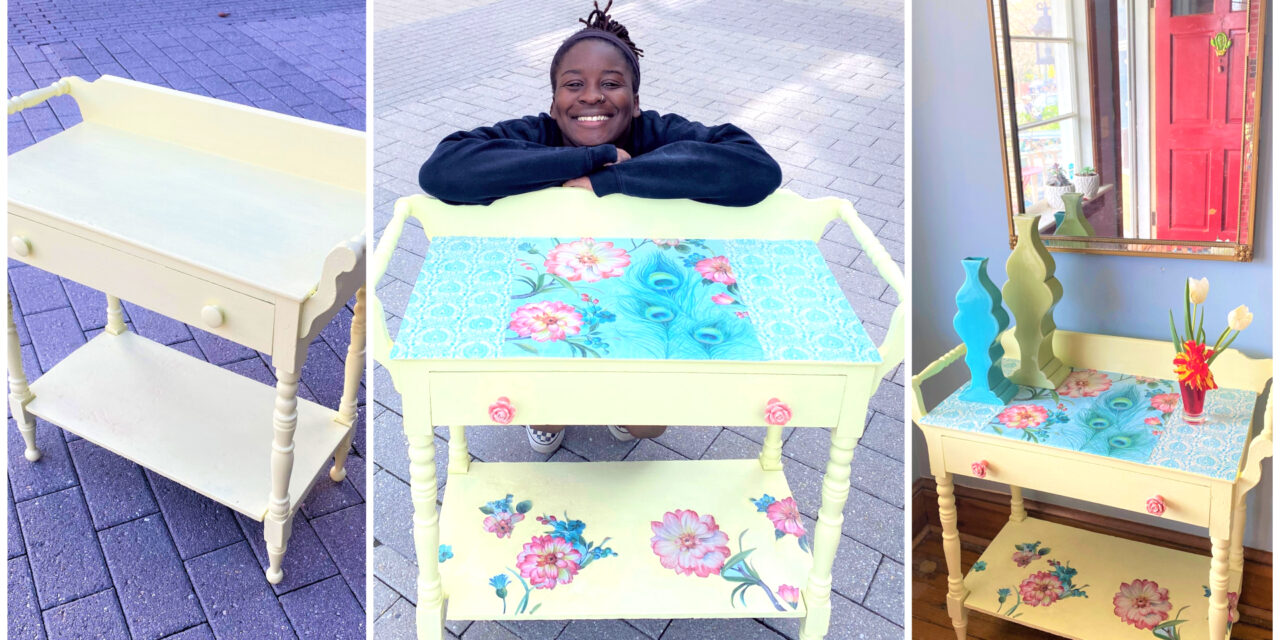
It’s a Wrap: A Reused Gift Bag Gives the Charm Treatment to a Table
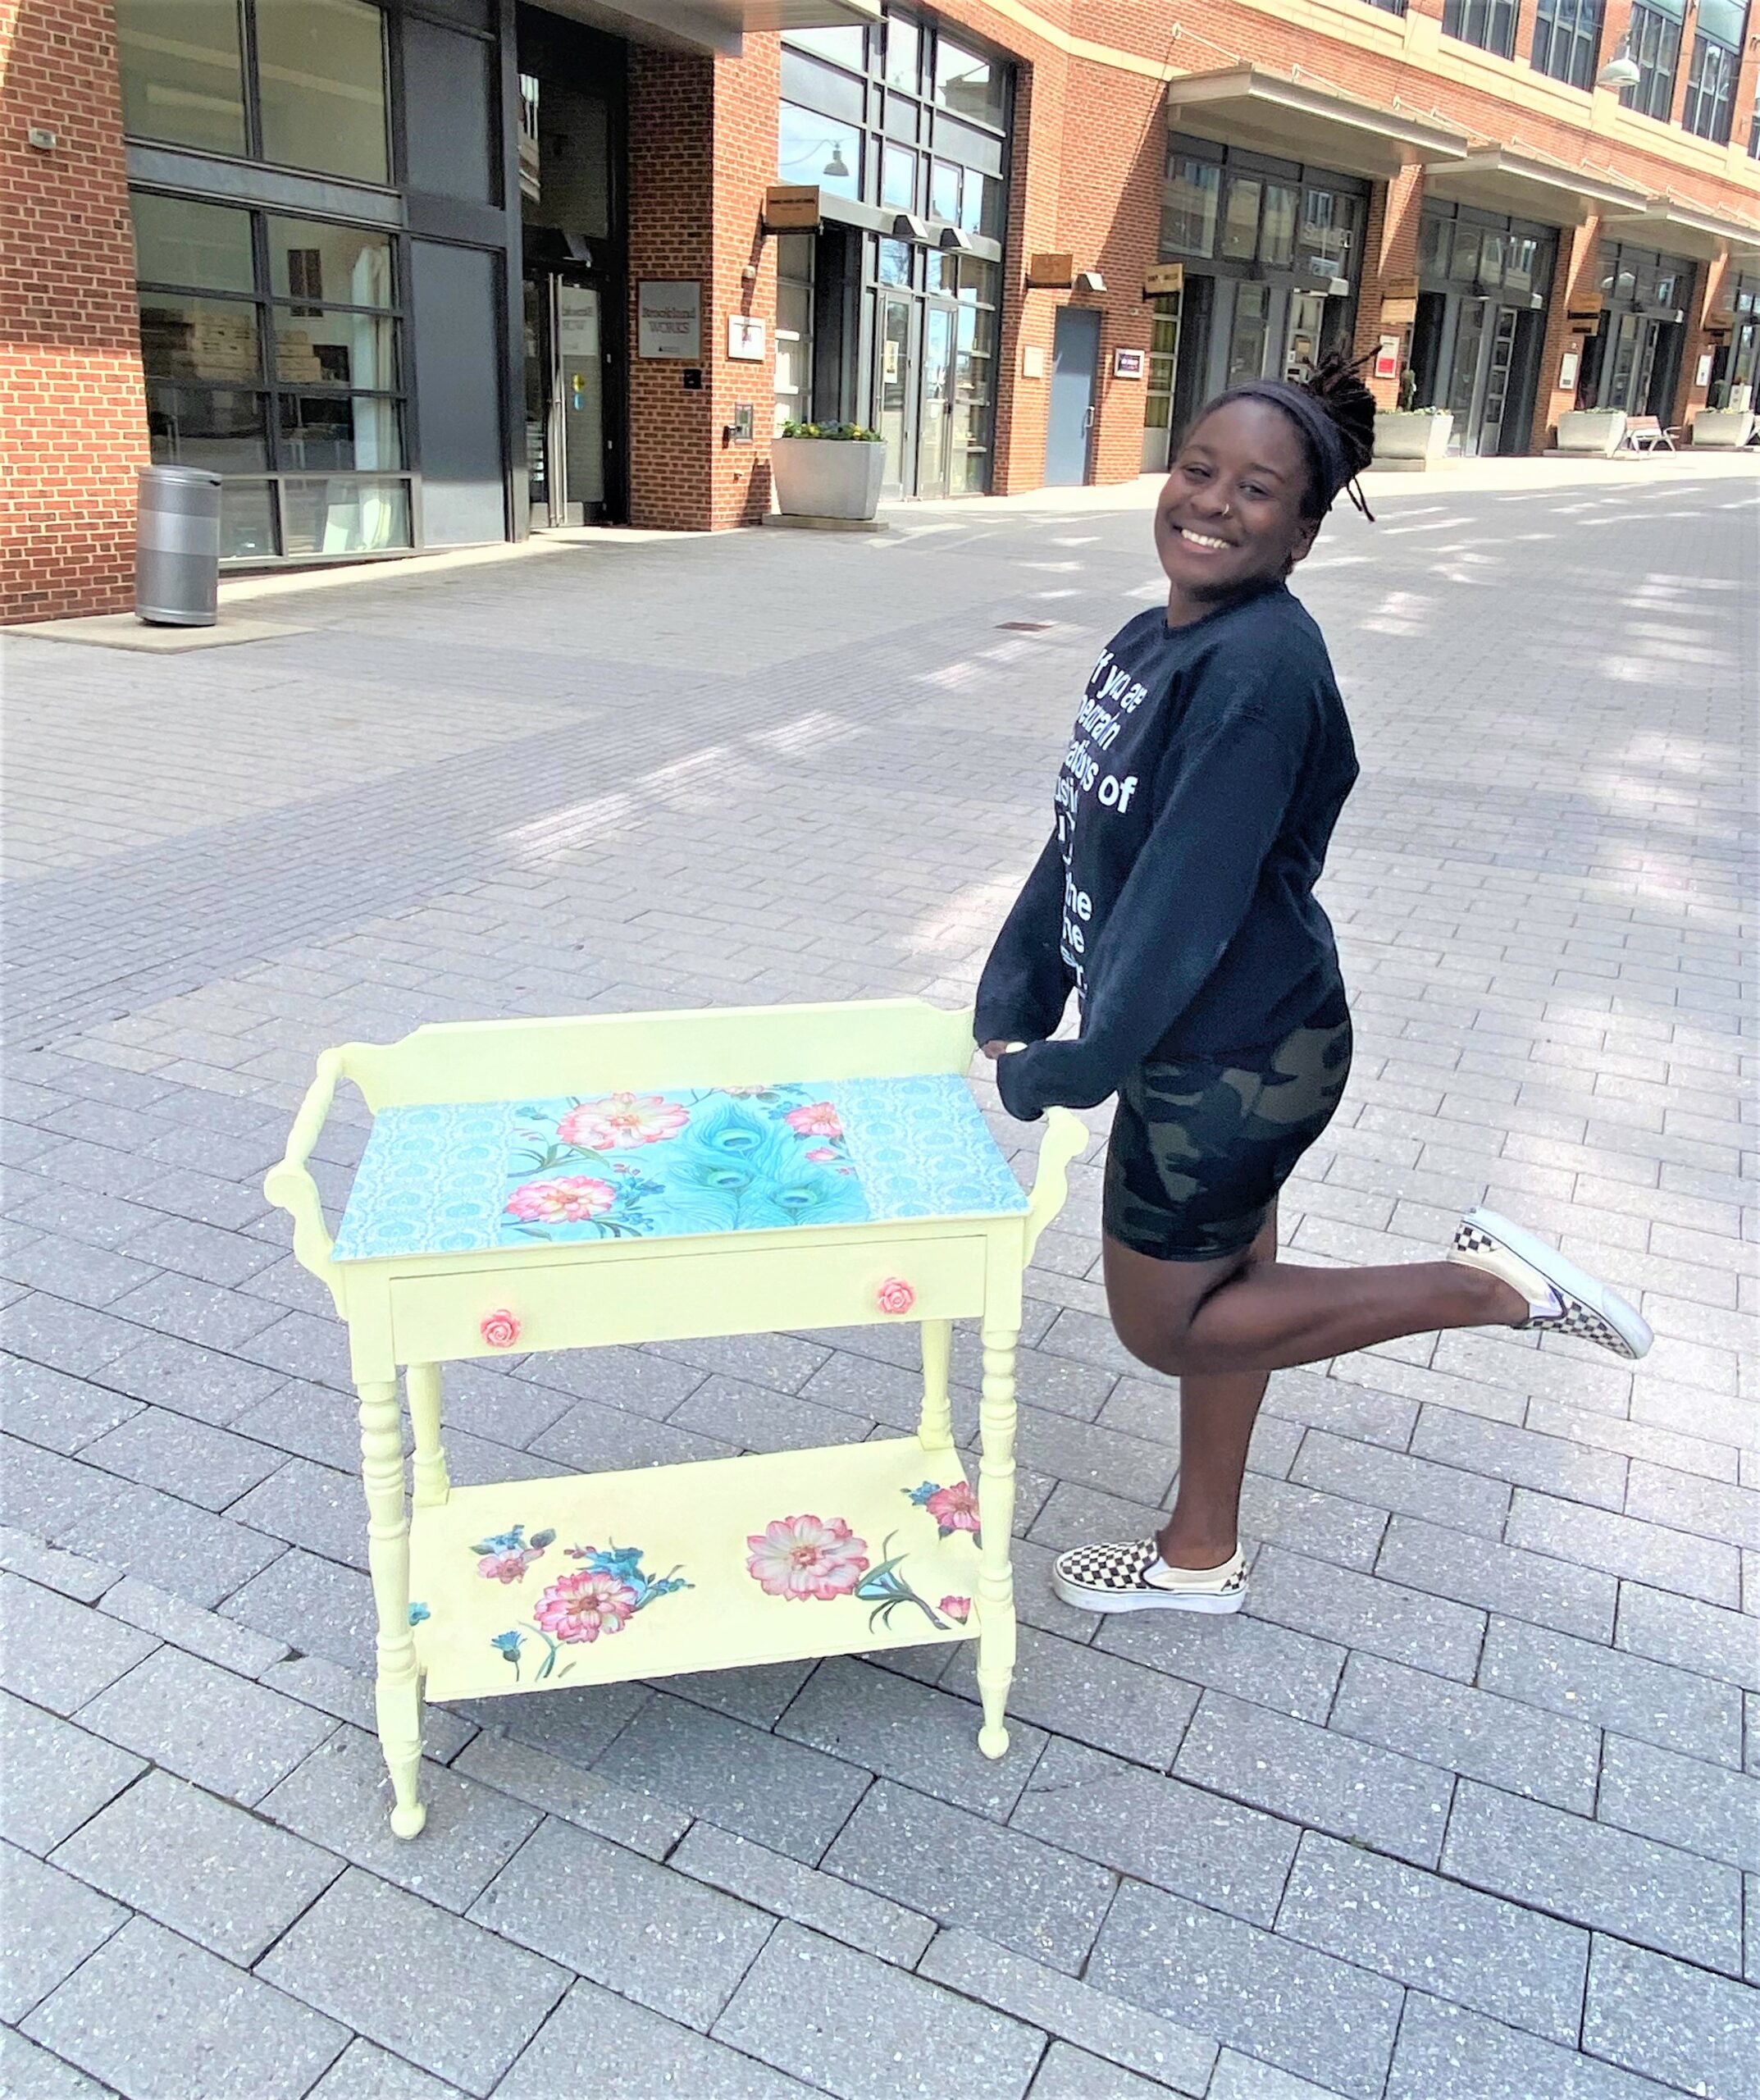
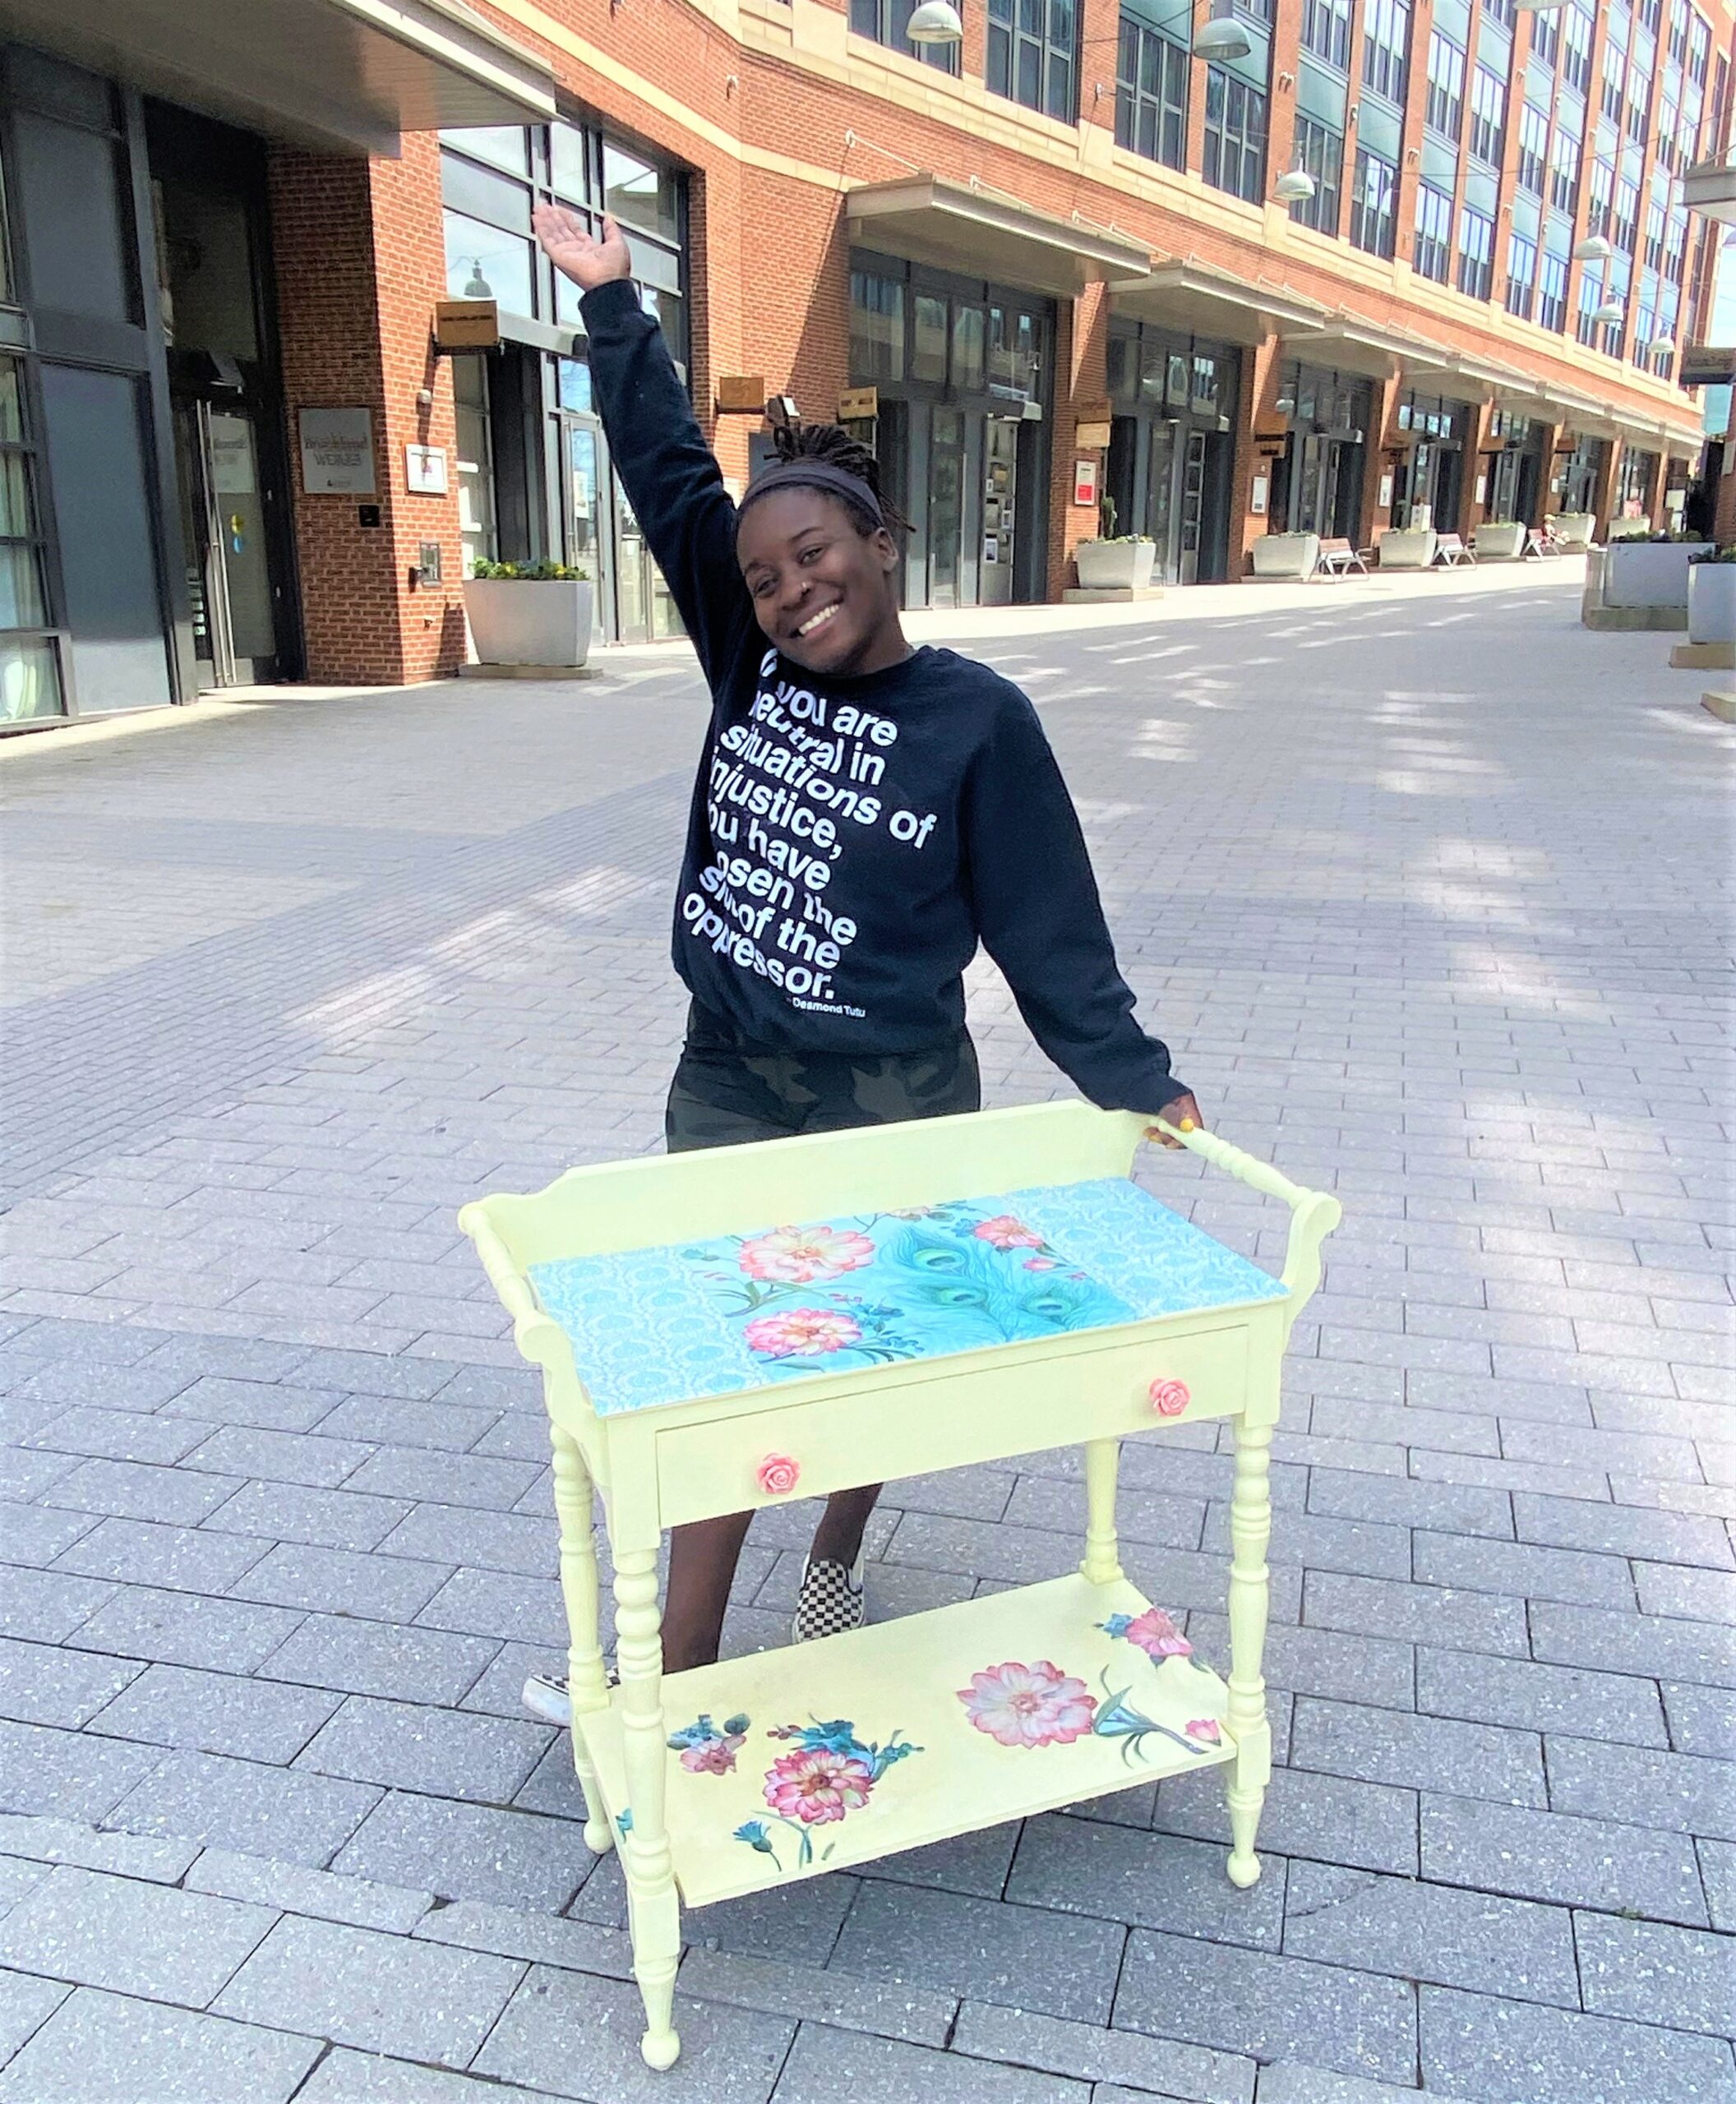
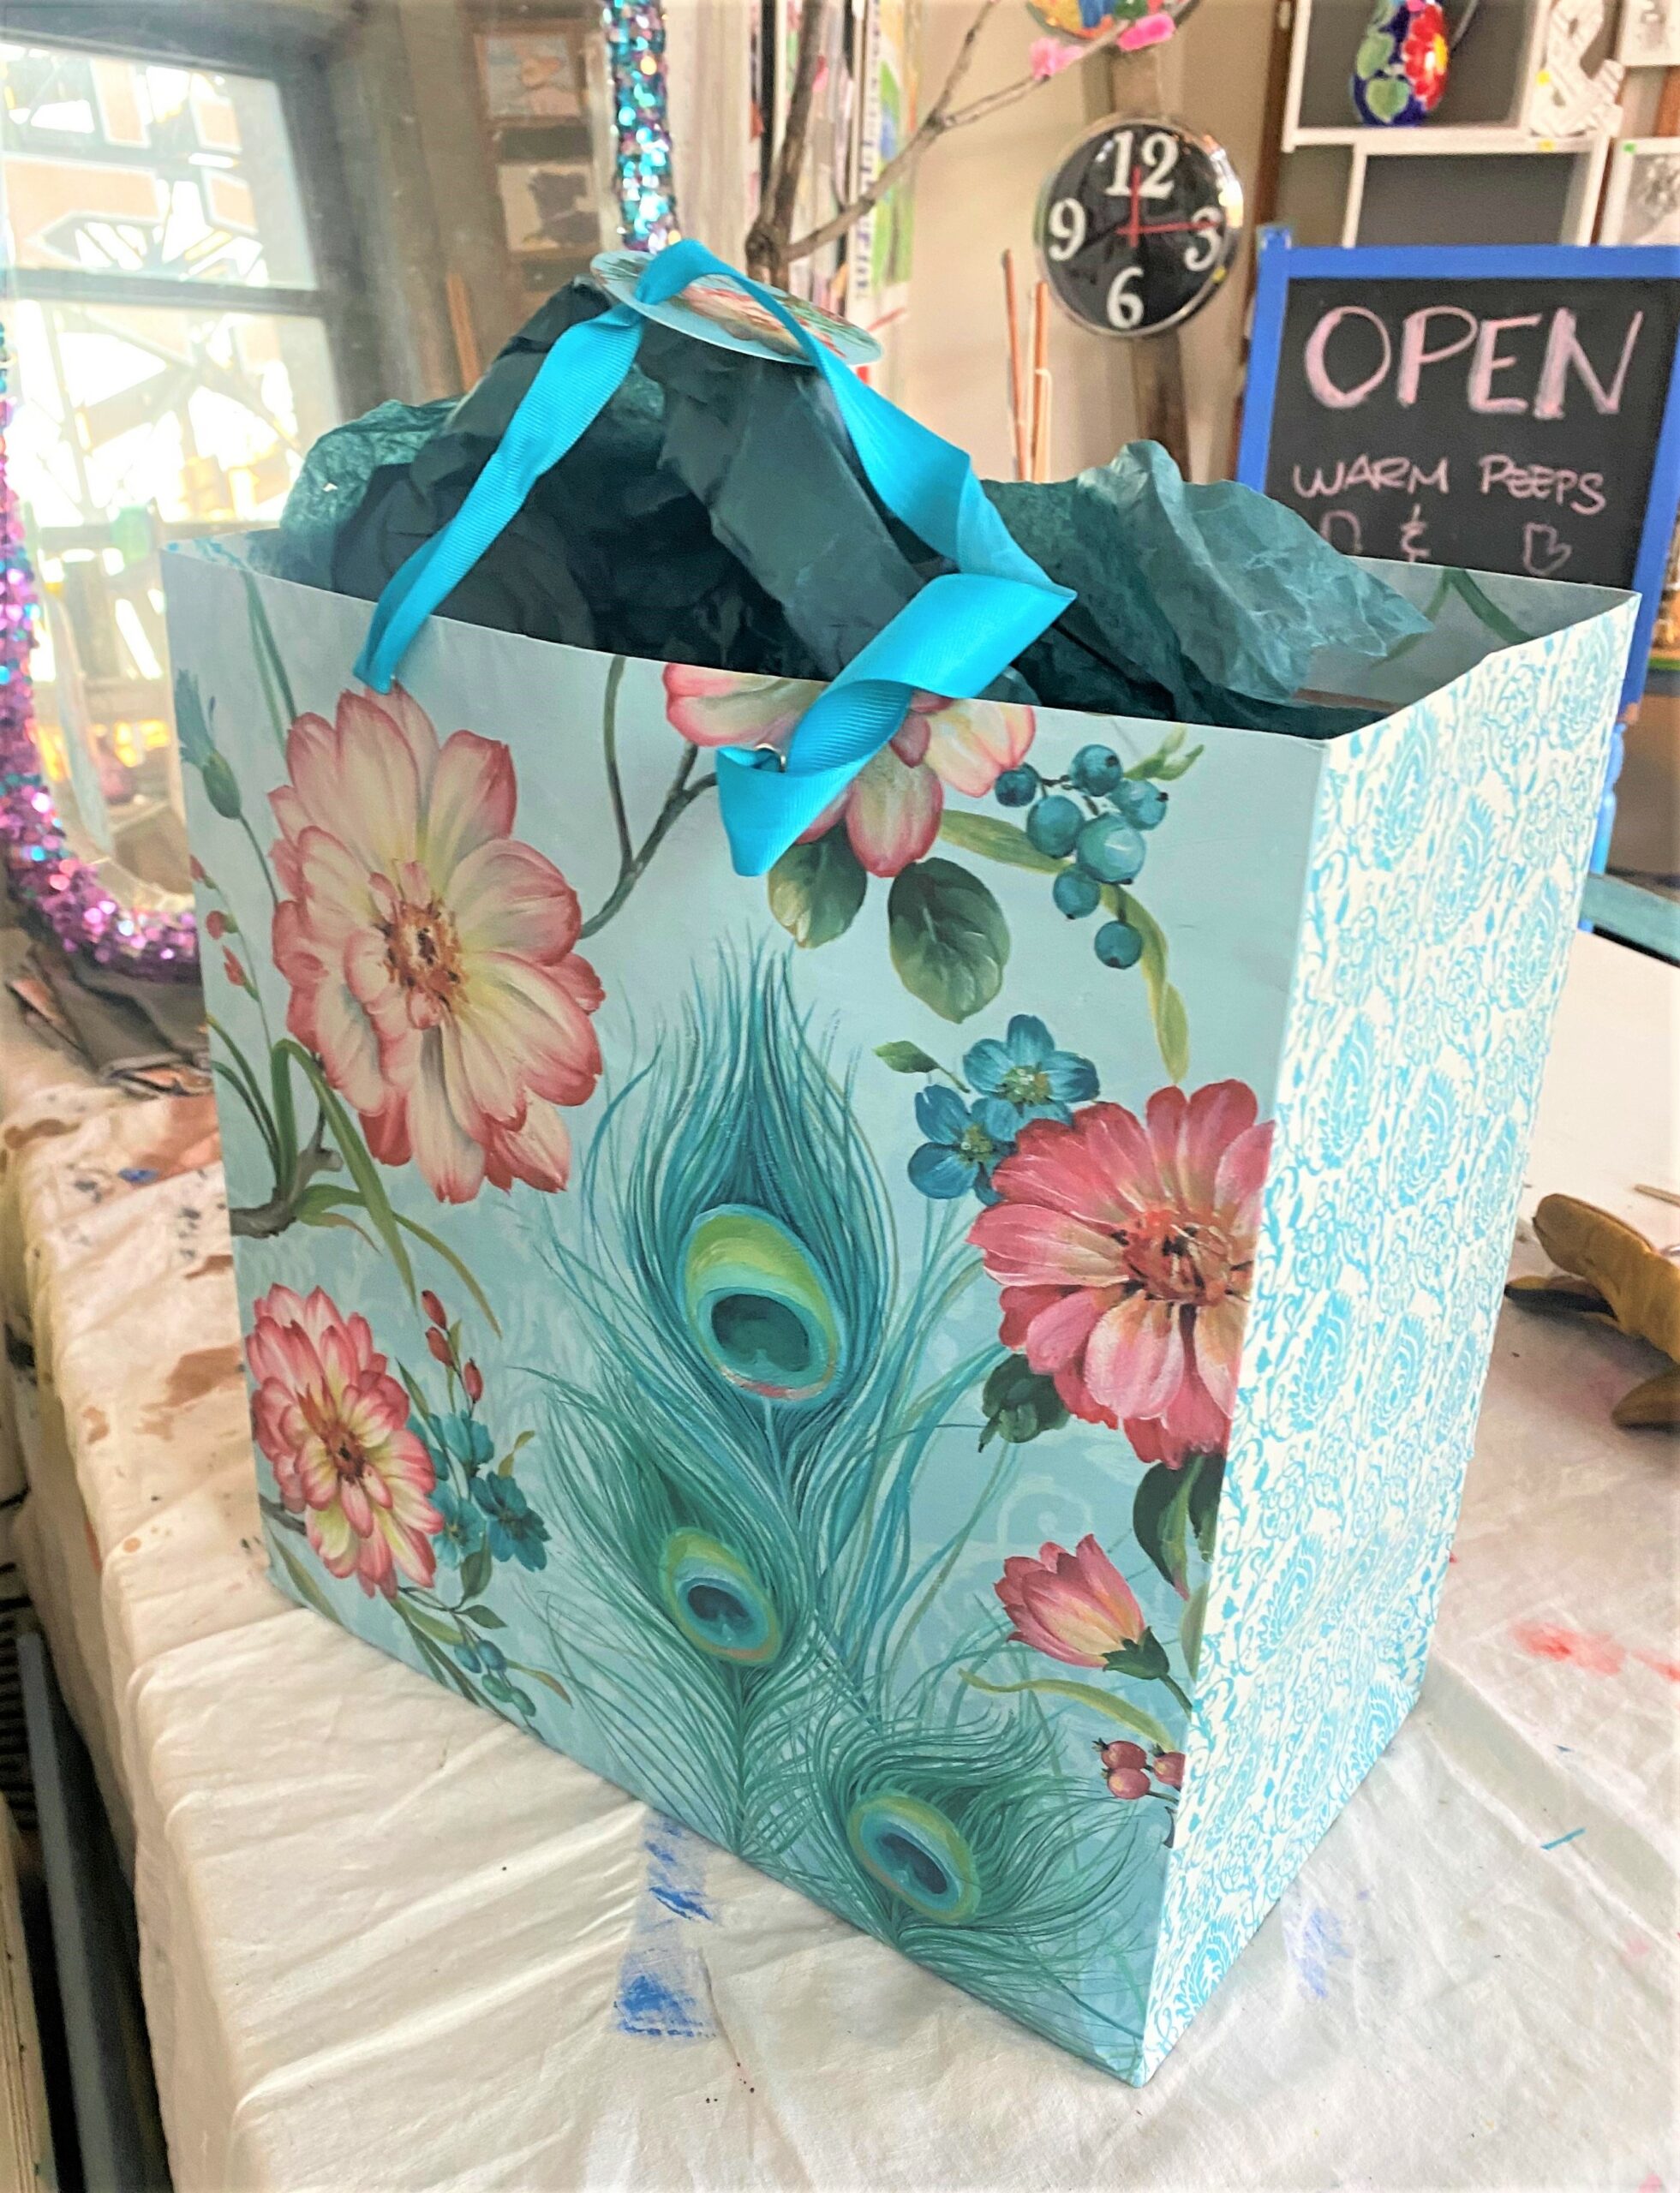
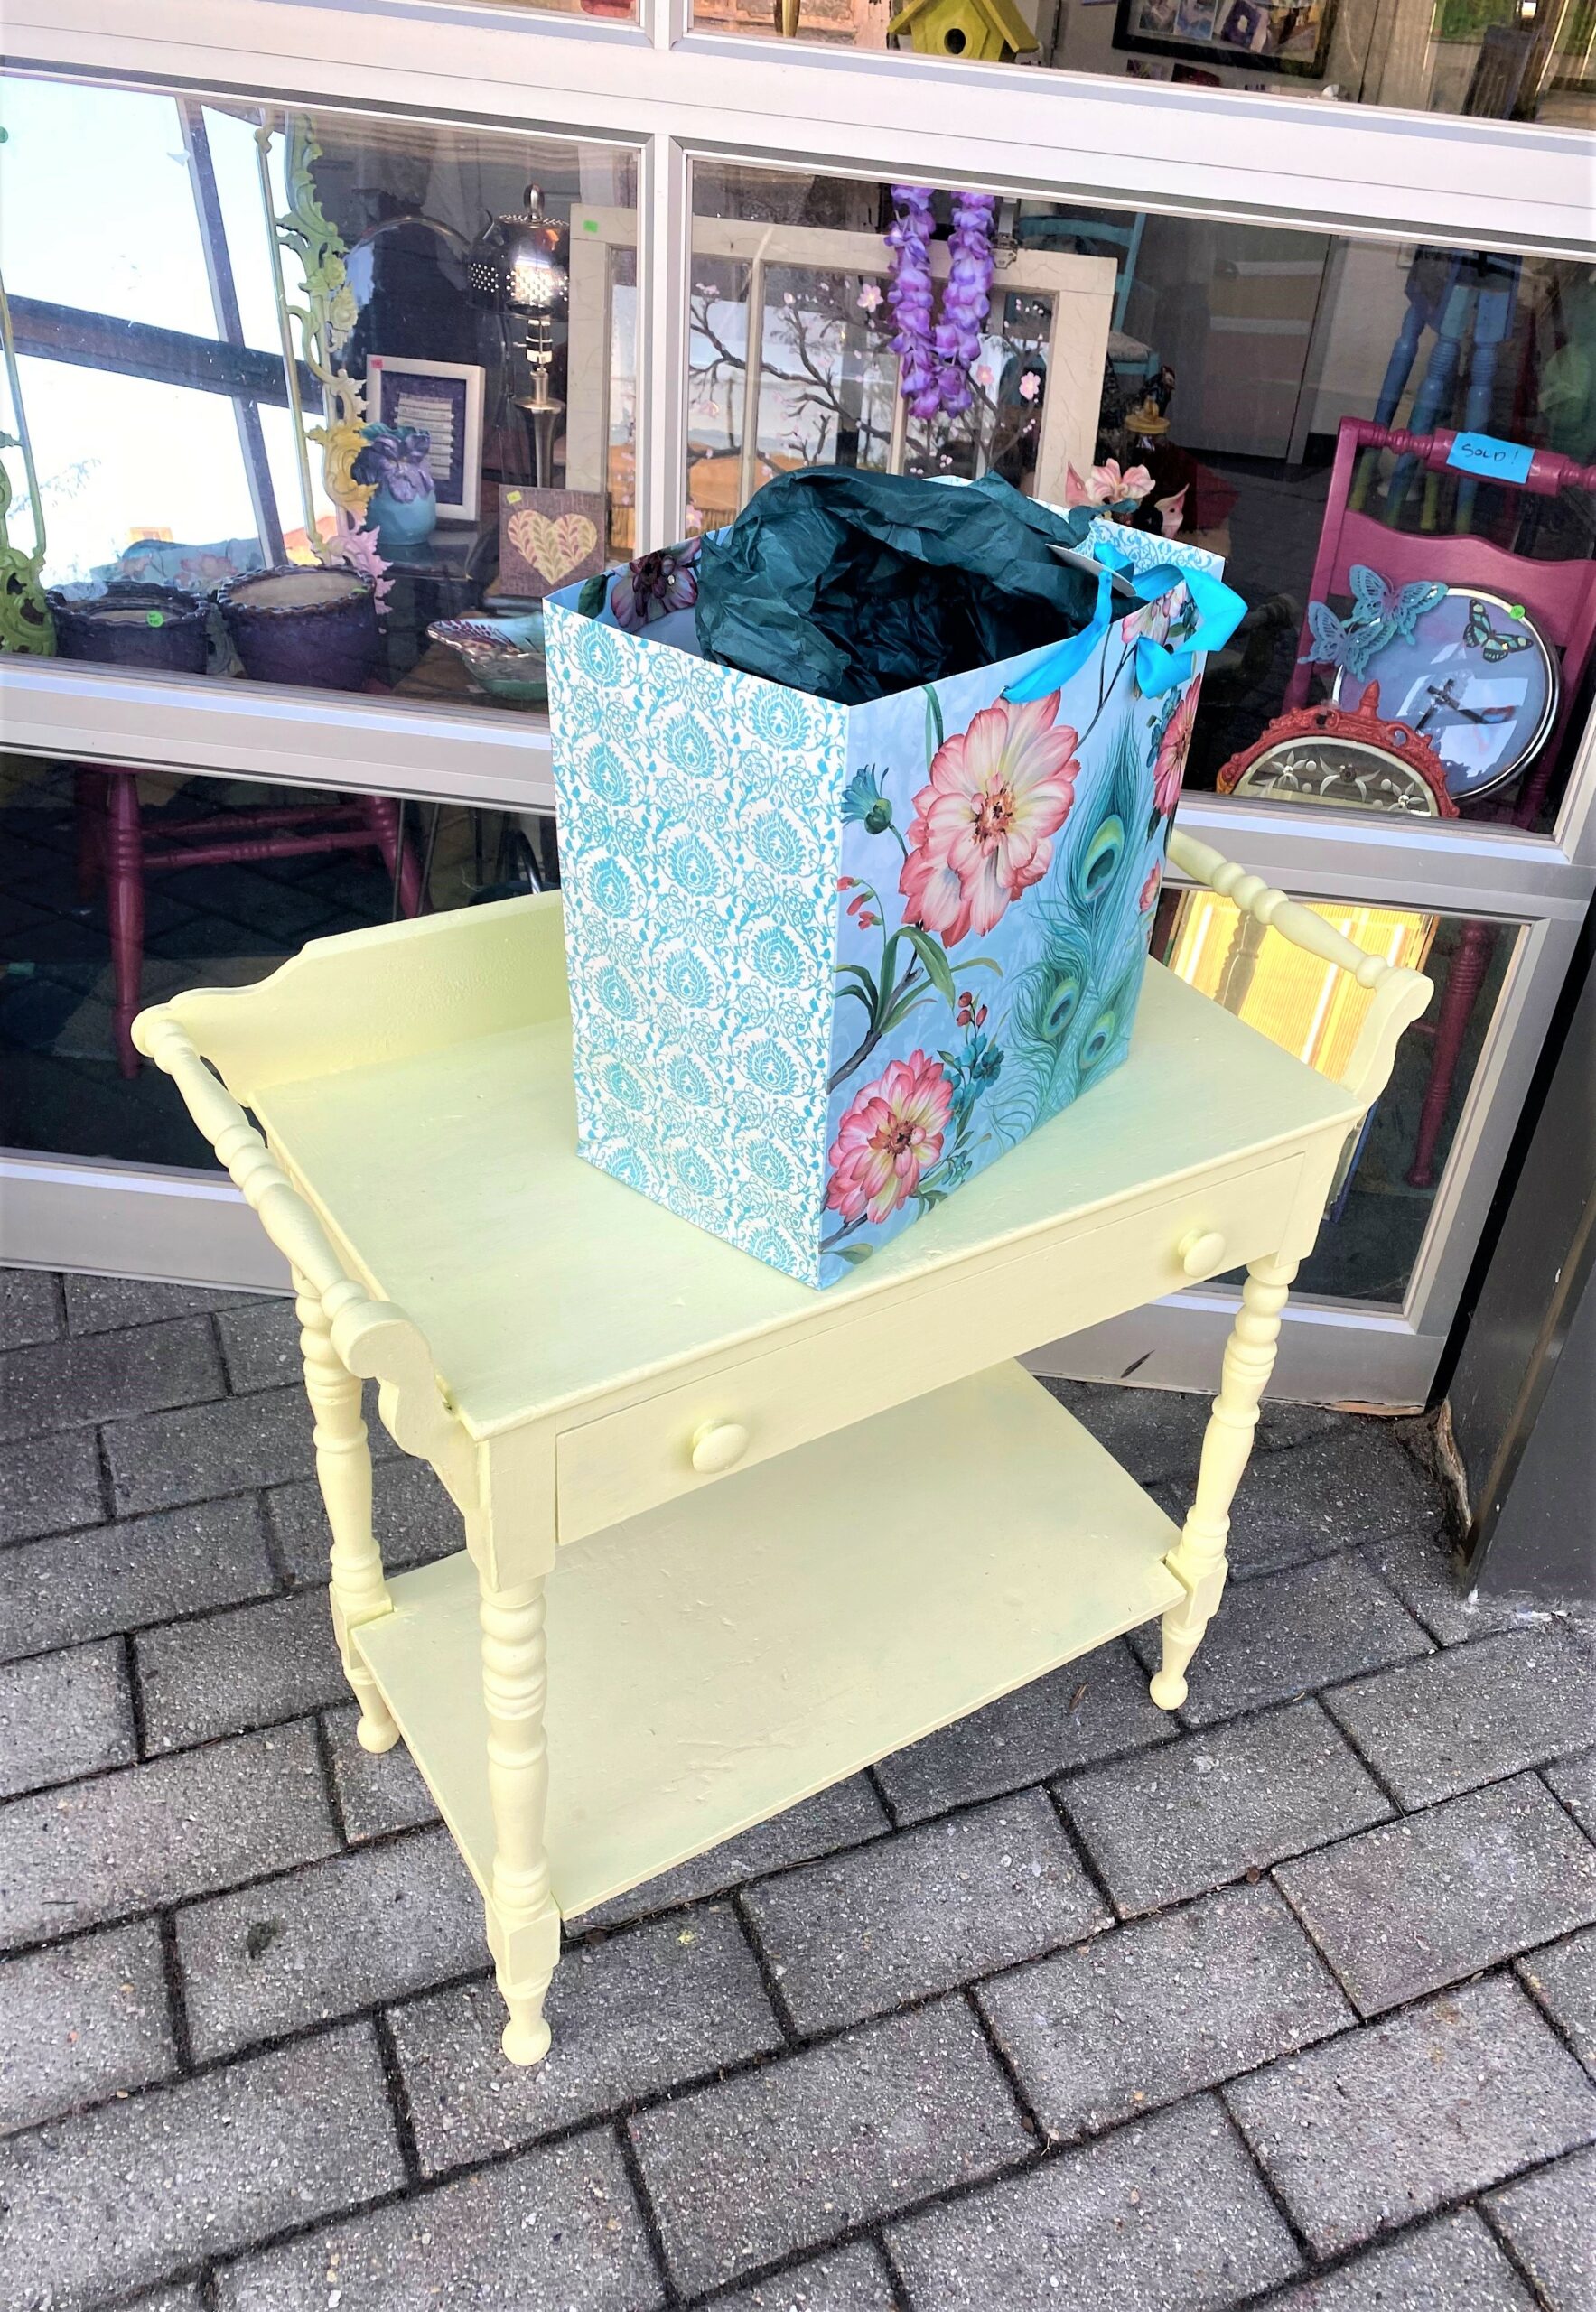
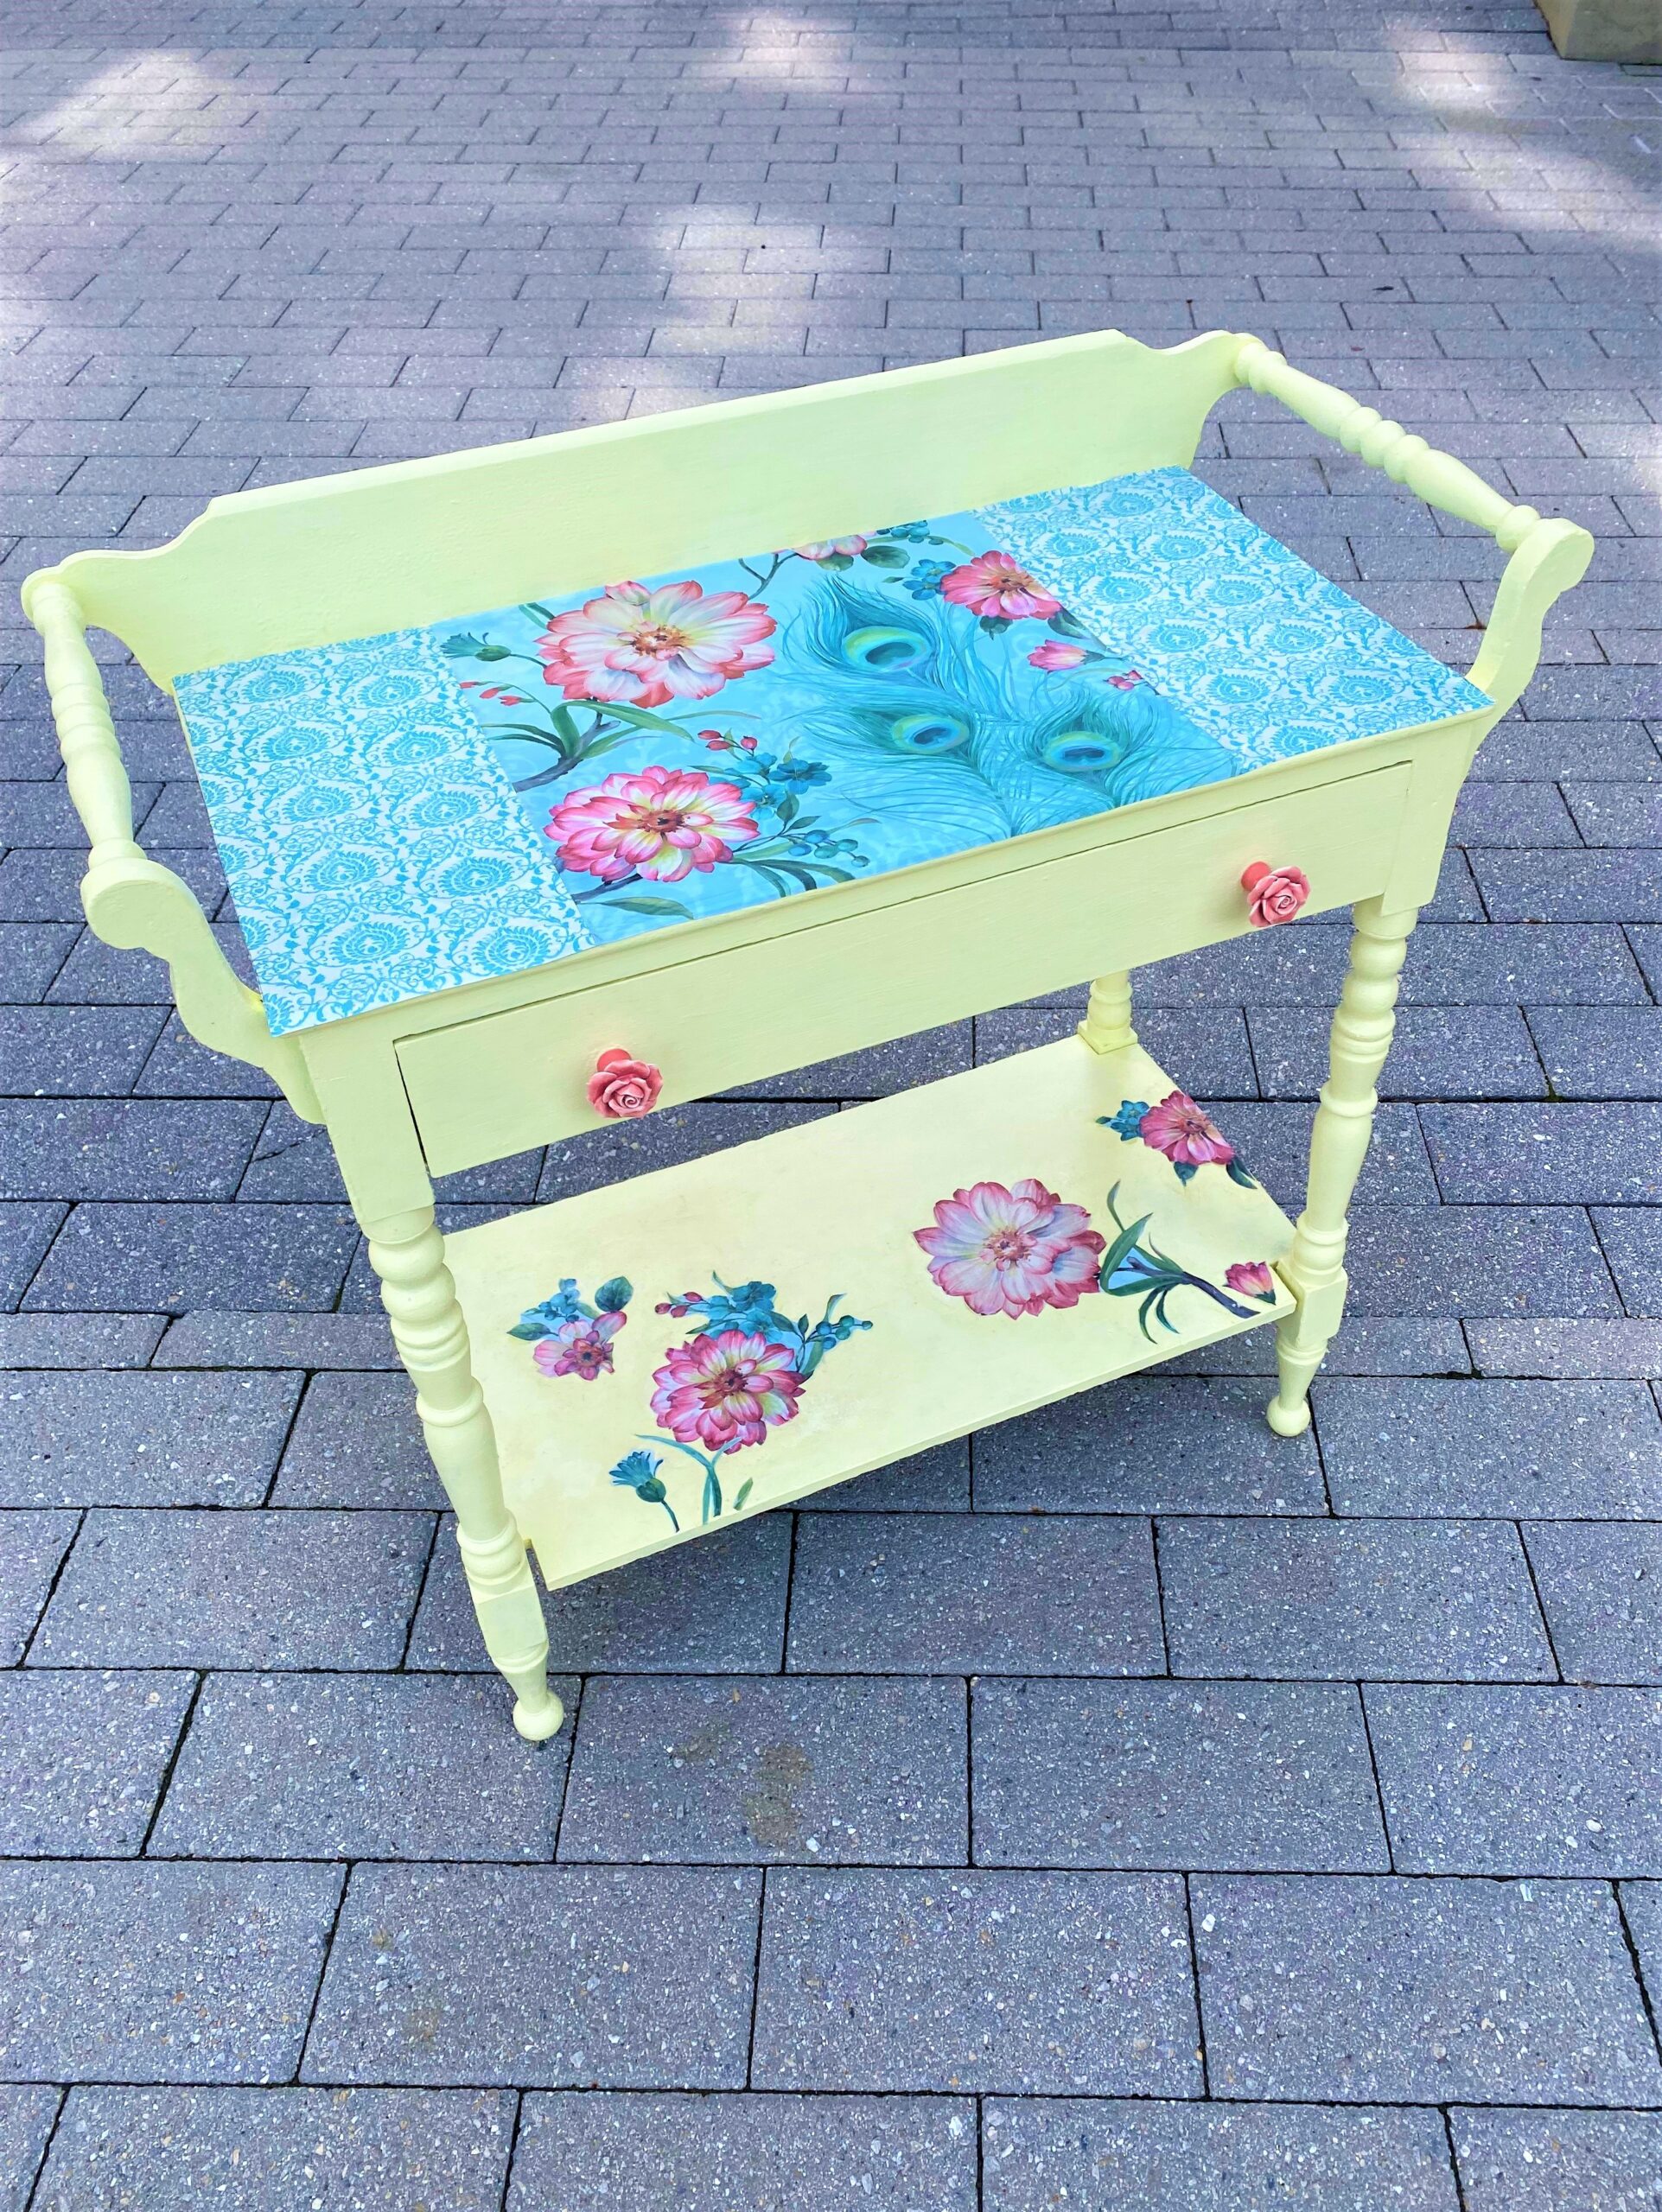
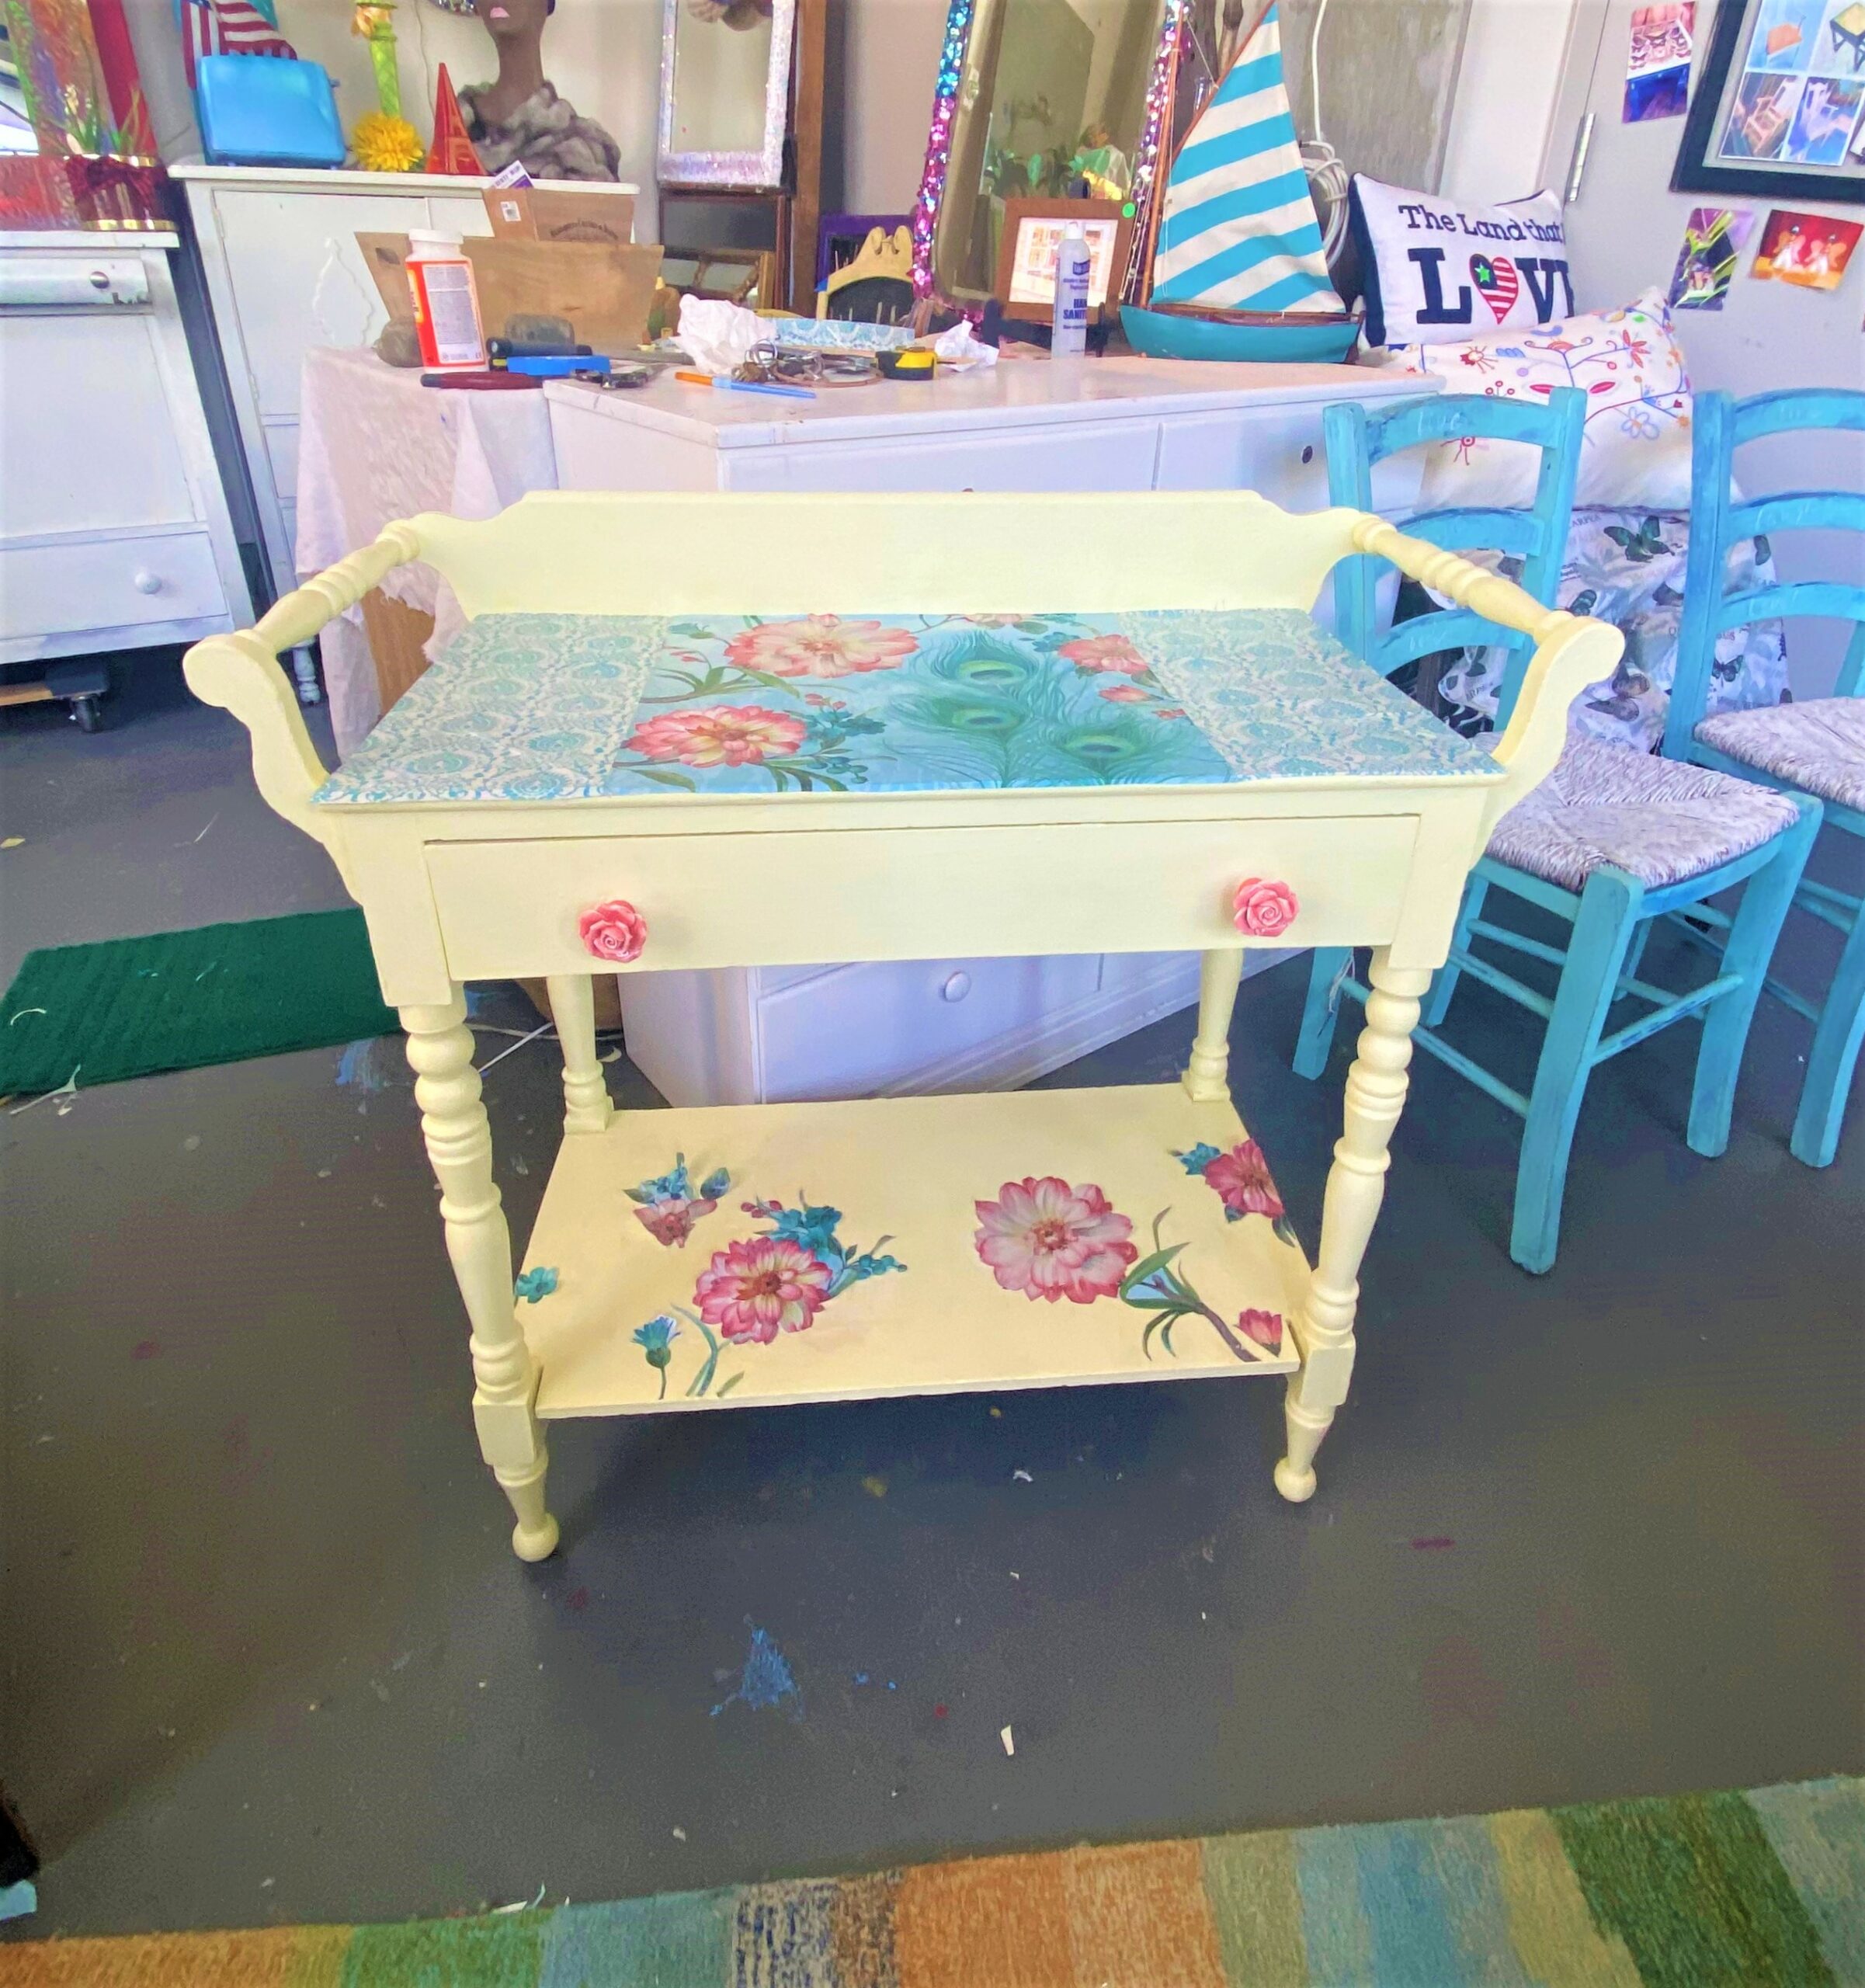
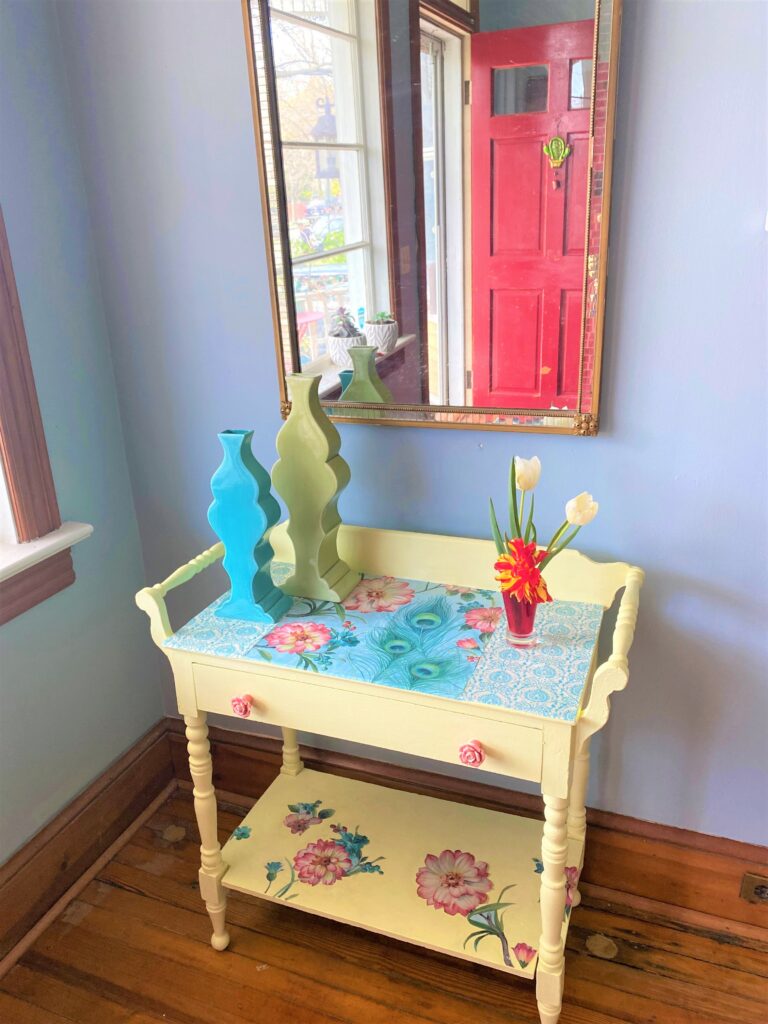
“Oh, La, La!” That’s what you’ll say when you repurpose a gift bag to give a side table a charming look. A paper gift bag with flowers, peacock feathers, and pretty graphics was used to take a thrift store side table from meek to marvelous.
Thanks to my dear friend Dianne who gave me the bag (full of gifts and love) which was the perfect material to use for this heart-warming upcycle. And my appreciation to Makeda, an artist and studio neighbor, for being my effervescent model. Consider supporting their small businesses, Netique (netique.com) and Sio Ceramics (sioceramics.com); they both have beautiful products and give excellent customer service!

Supplies Needed:
1. Wooden side-table
2. Light yellow paint
3. Paintbrushes
4. Gift bag
5. Mod Podge
6. Scissors
7. Tape measurer or yardstick
8. Pencil or pen
9. Painter’s tape
10. Flower-shaped knobs
11. Sanding blocks
12. Polyurethane, semi-gloss finish
Step 1: Use April showers to shop at Goodwill
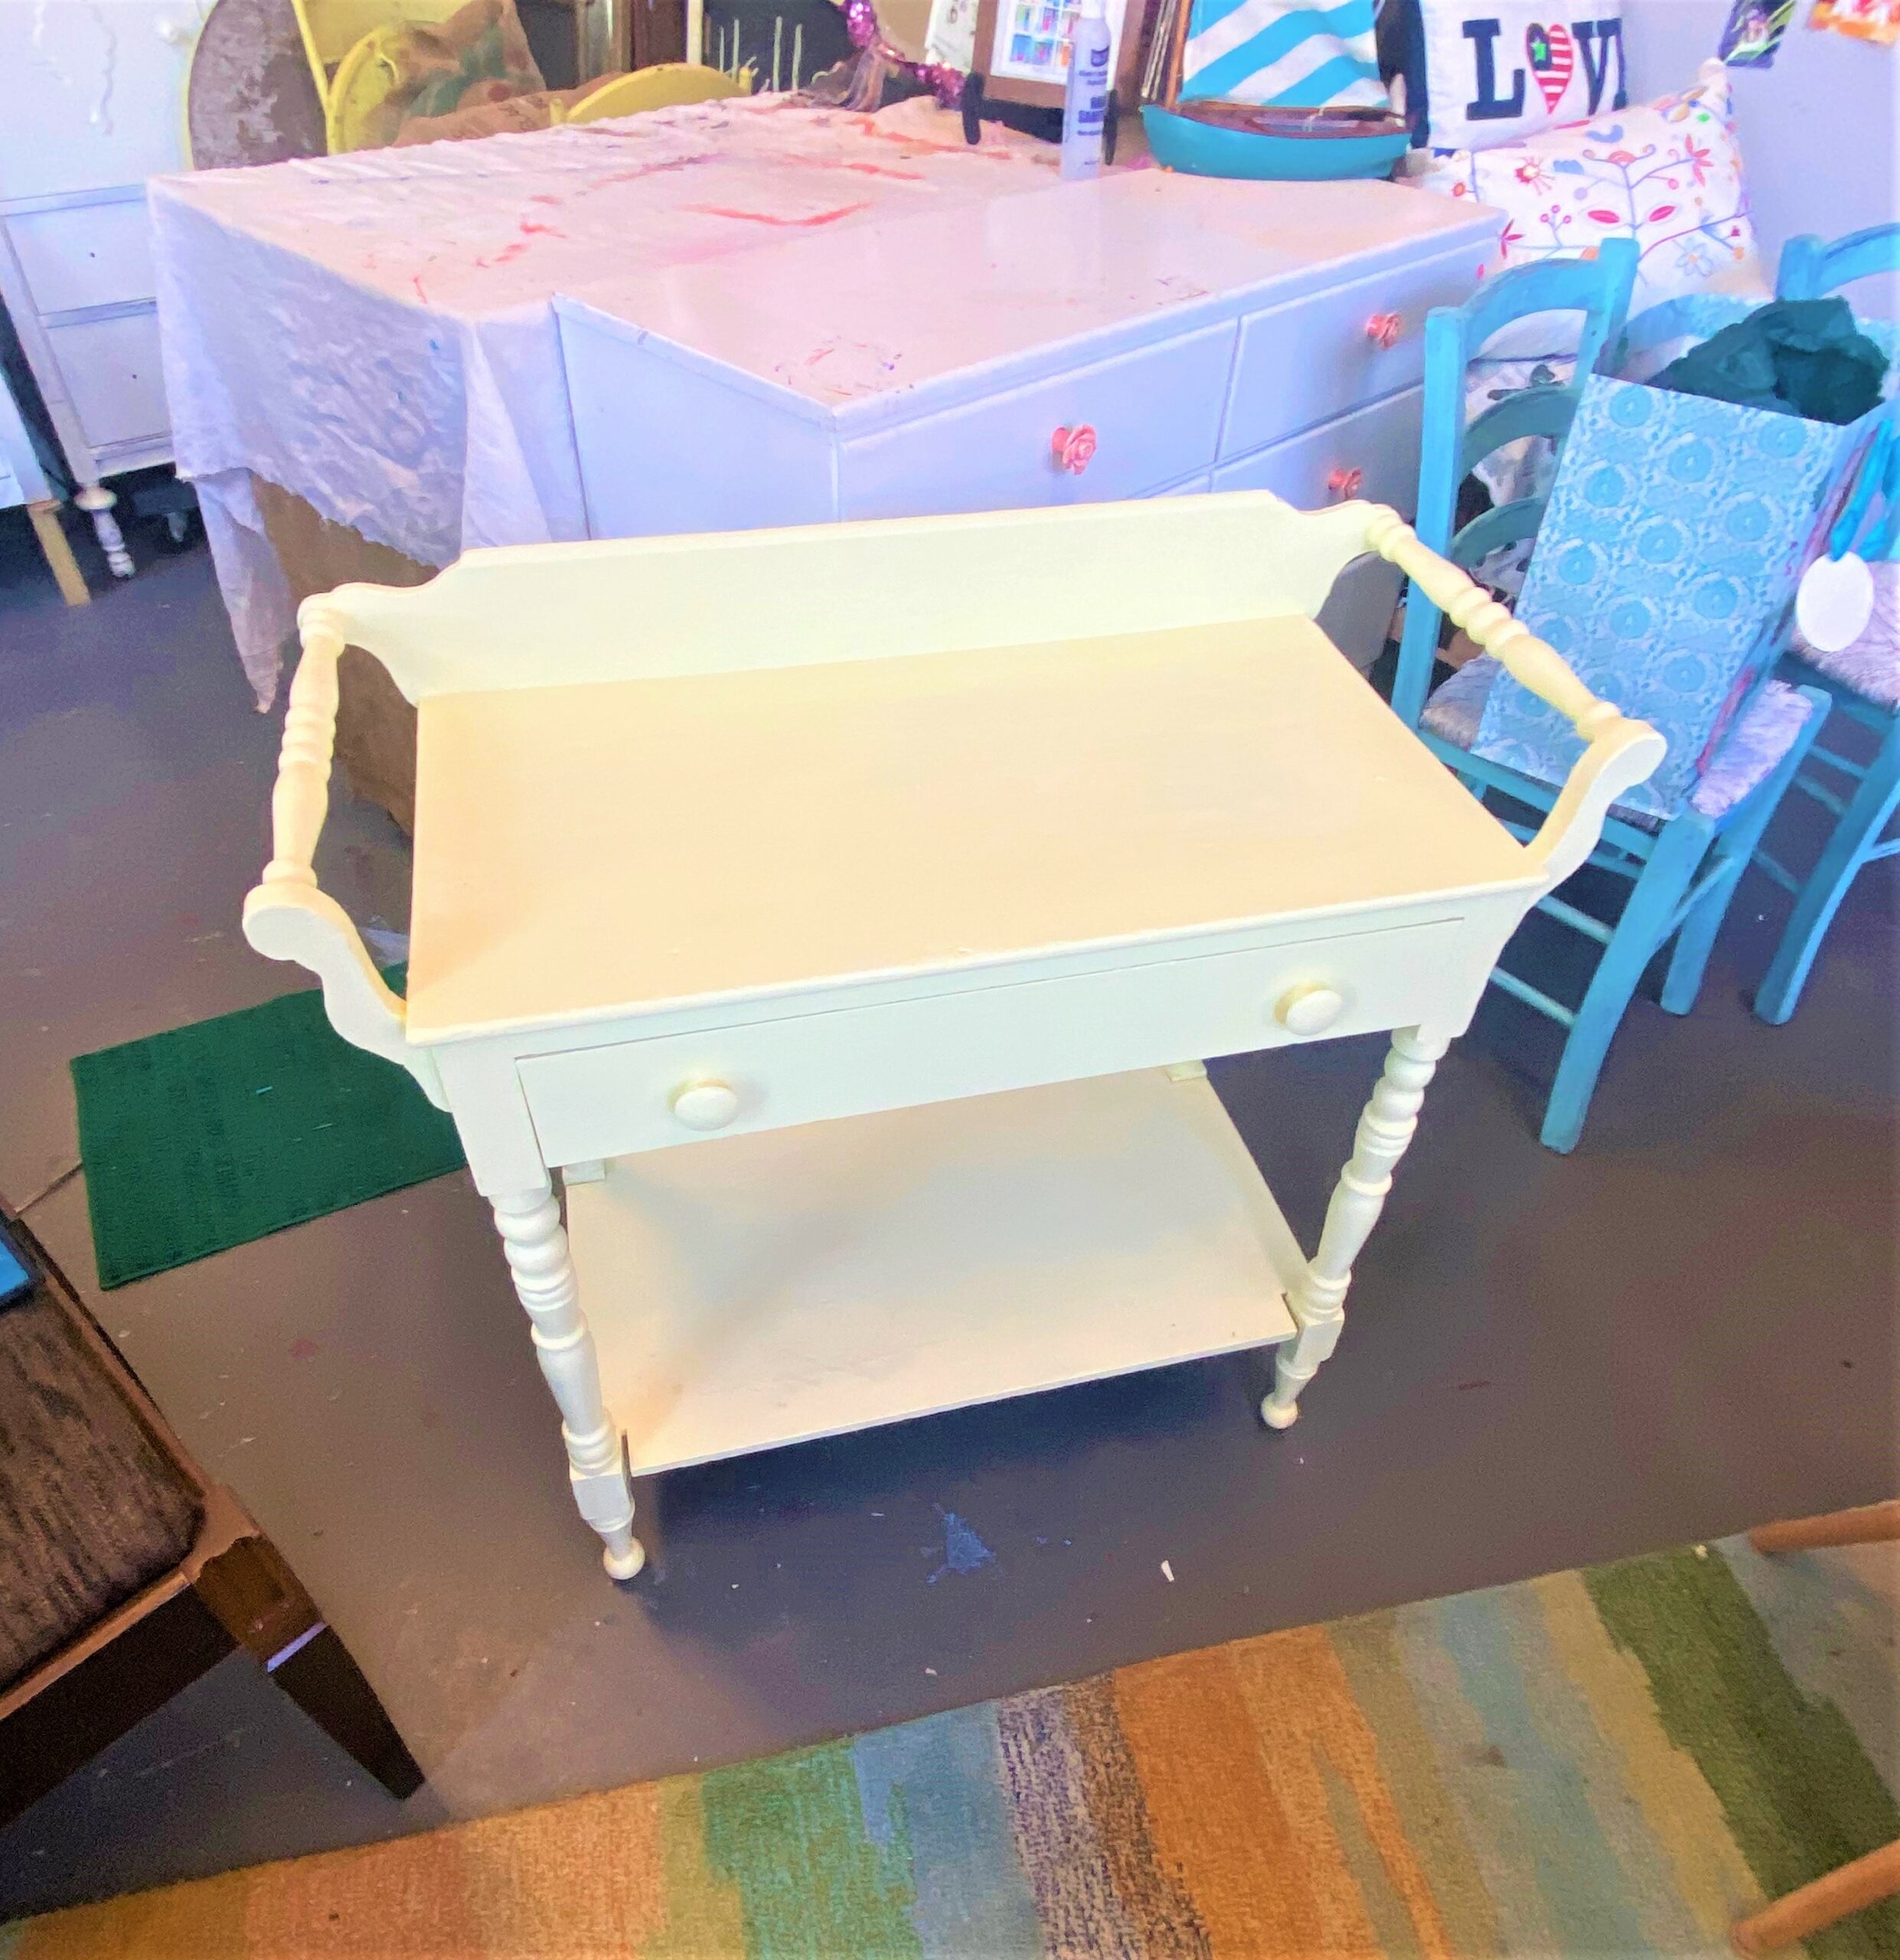
You know the saying, “April showers bring May flowers,” so no need to get down when it rains this month—or any time of year. Take advantage of the need to be indoors by shopping at your local Goodwill store. Check out their furniture section to see what catches your eye and is deserving of a happy makeover.
One glance at the side table highlighted here was all it took to inspire me to take it home. The carved legs and side handles with the curvy back panel were design elements that made it super cute while the wide drawer and open shelf gave it lots of practical functionality too.
What have you seen at Goodwill that you just had to have?
Step 2: Prep for painting
- Once at your workspace, give it a solid sanding. Don’t worry about removing all of the existing paint, just enough to rough it up a bit and make it paint-friendly.
- With a damp cloth, wipe it down to remove all dust and debris and create a clean slate on which to be creative.
Step 3: Brush on brightness
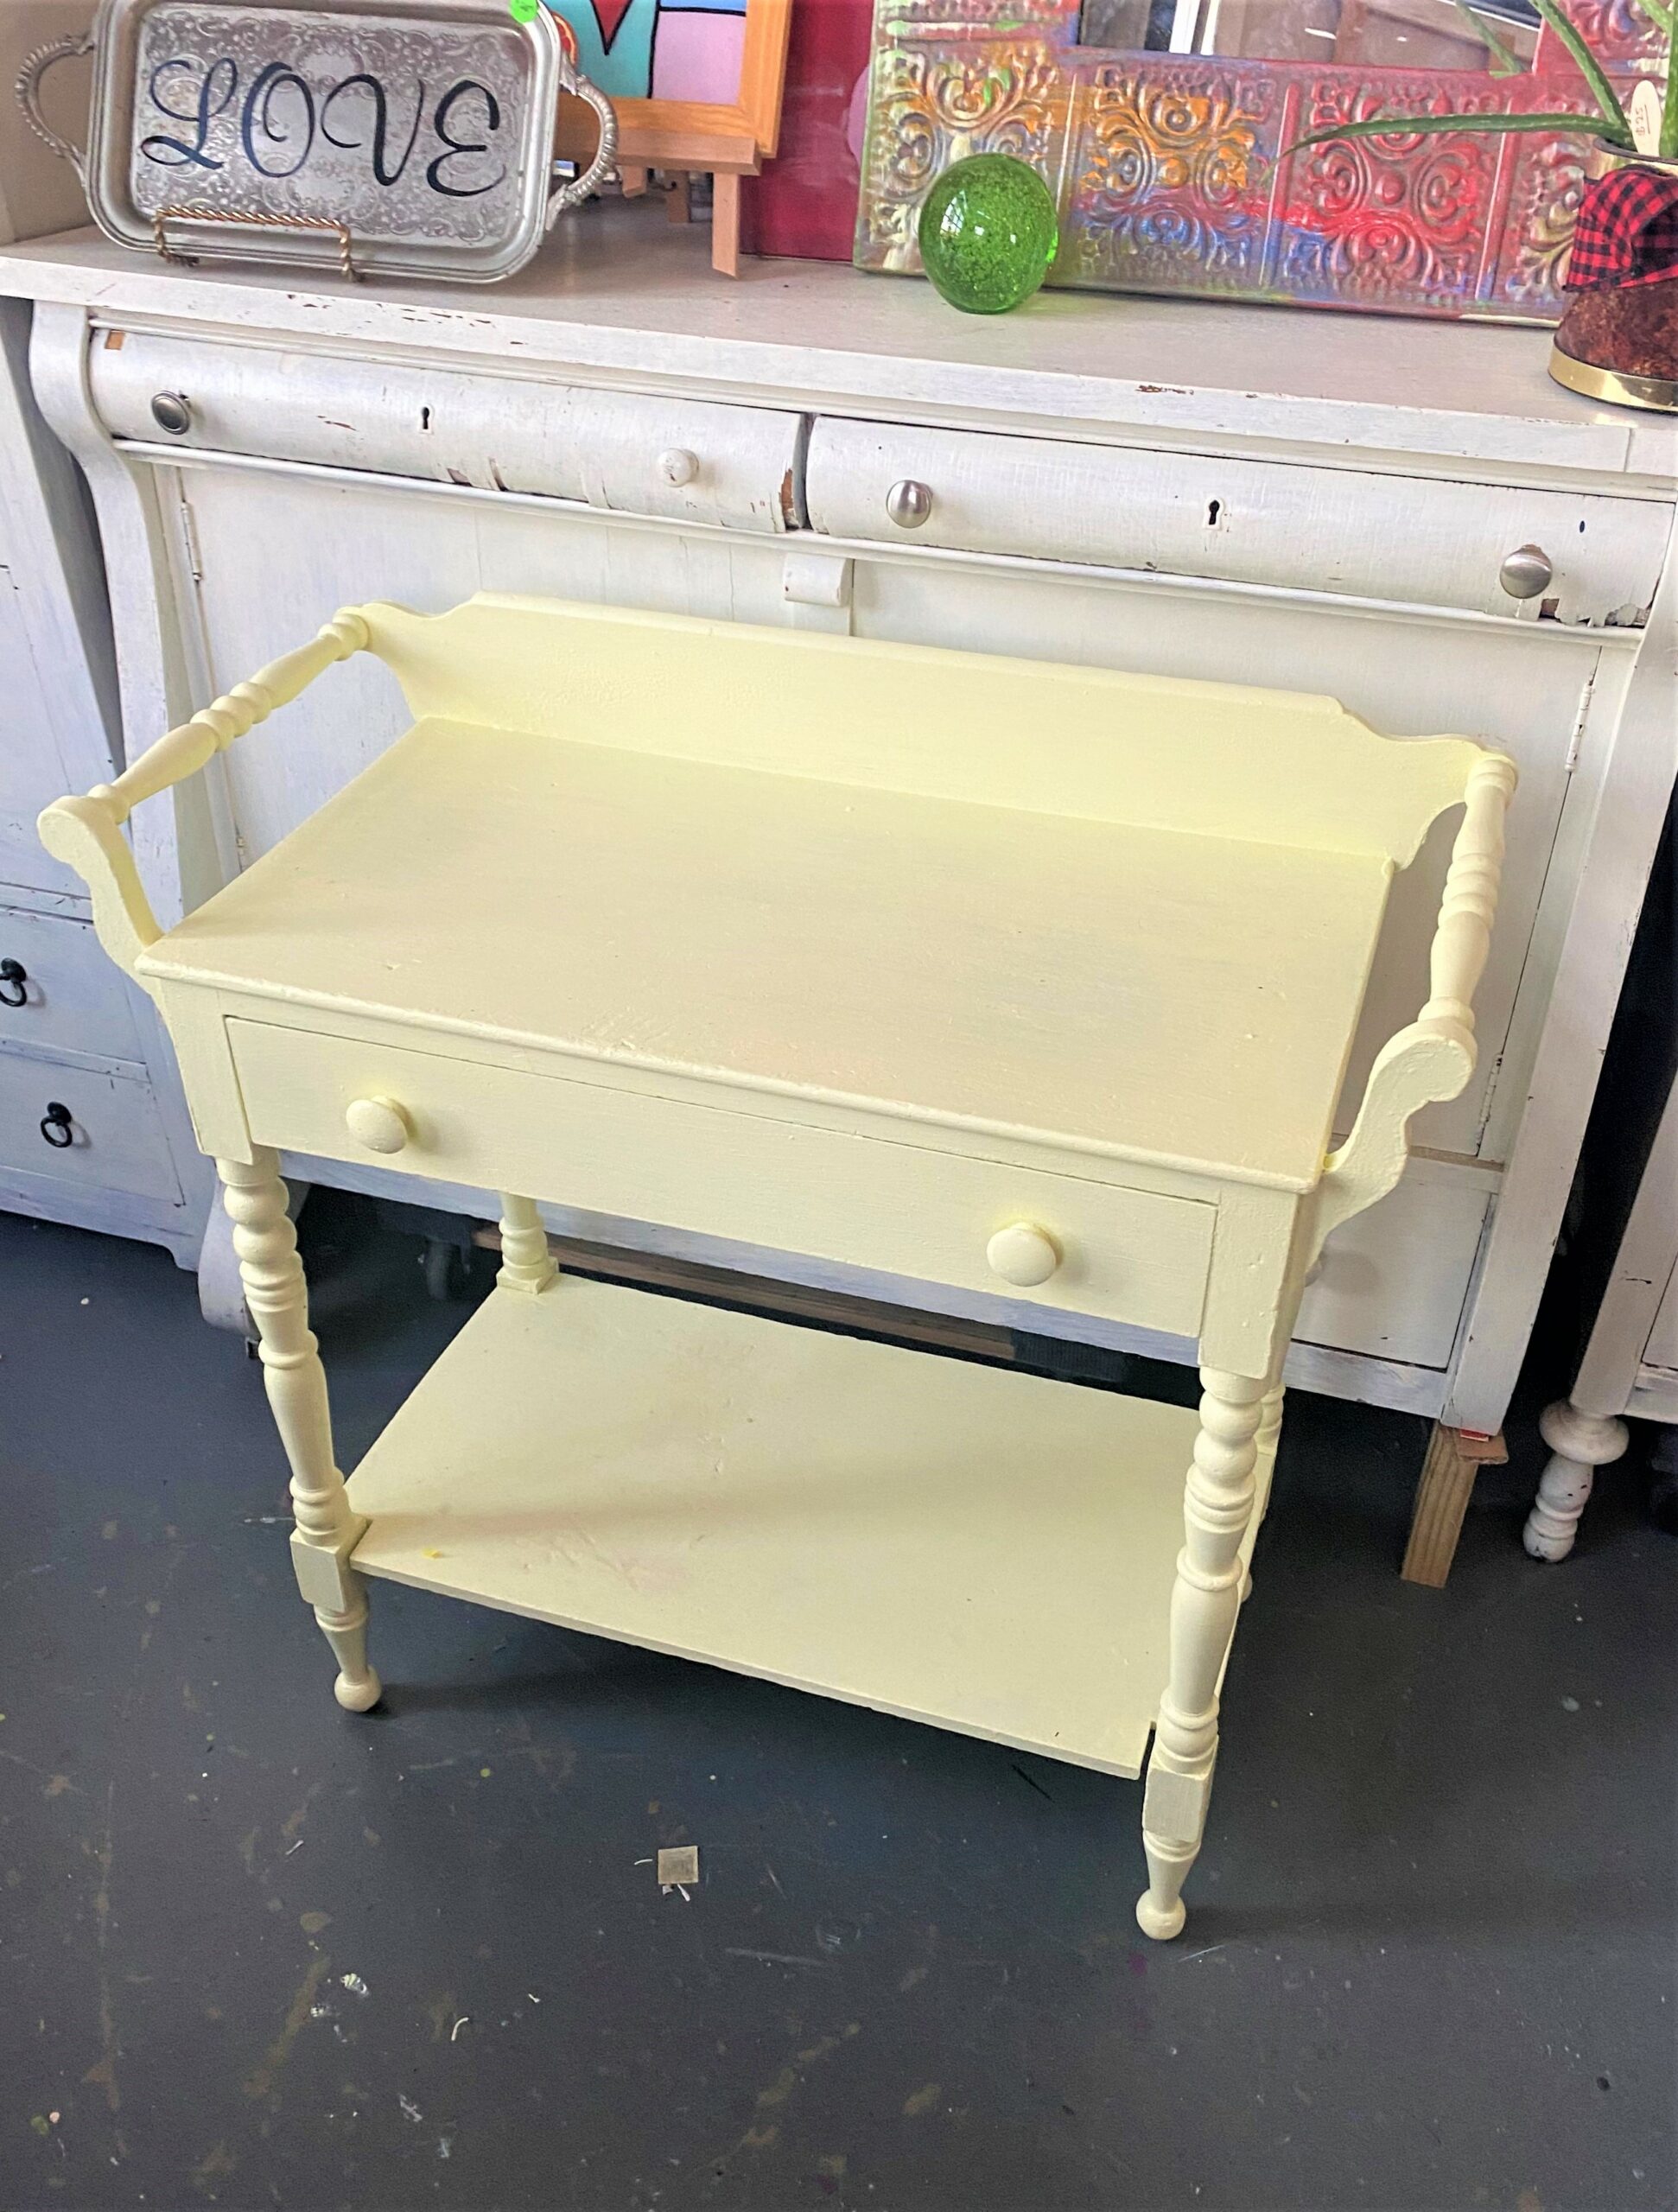
While I don’t have a before picture (drats!), the side table had been painted both black and green before I came along. Over time, the green had worn away in places, so it looked a little tired and a little depressing! A very light-yellow paint was used to brighten up the piece and helped to call attention to its nice details.
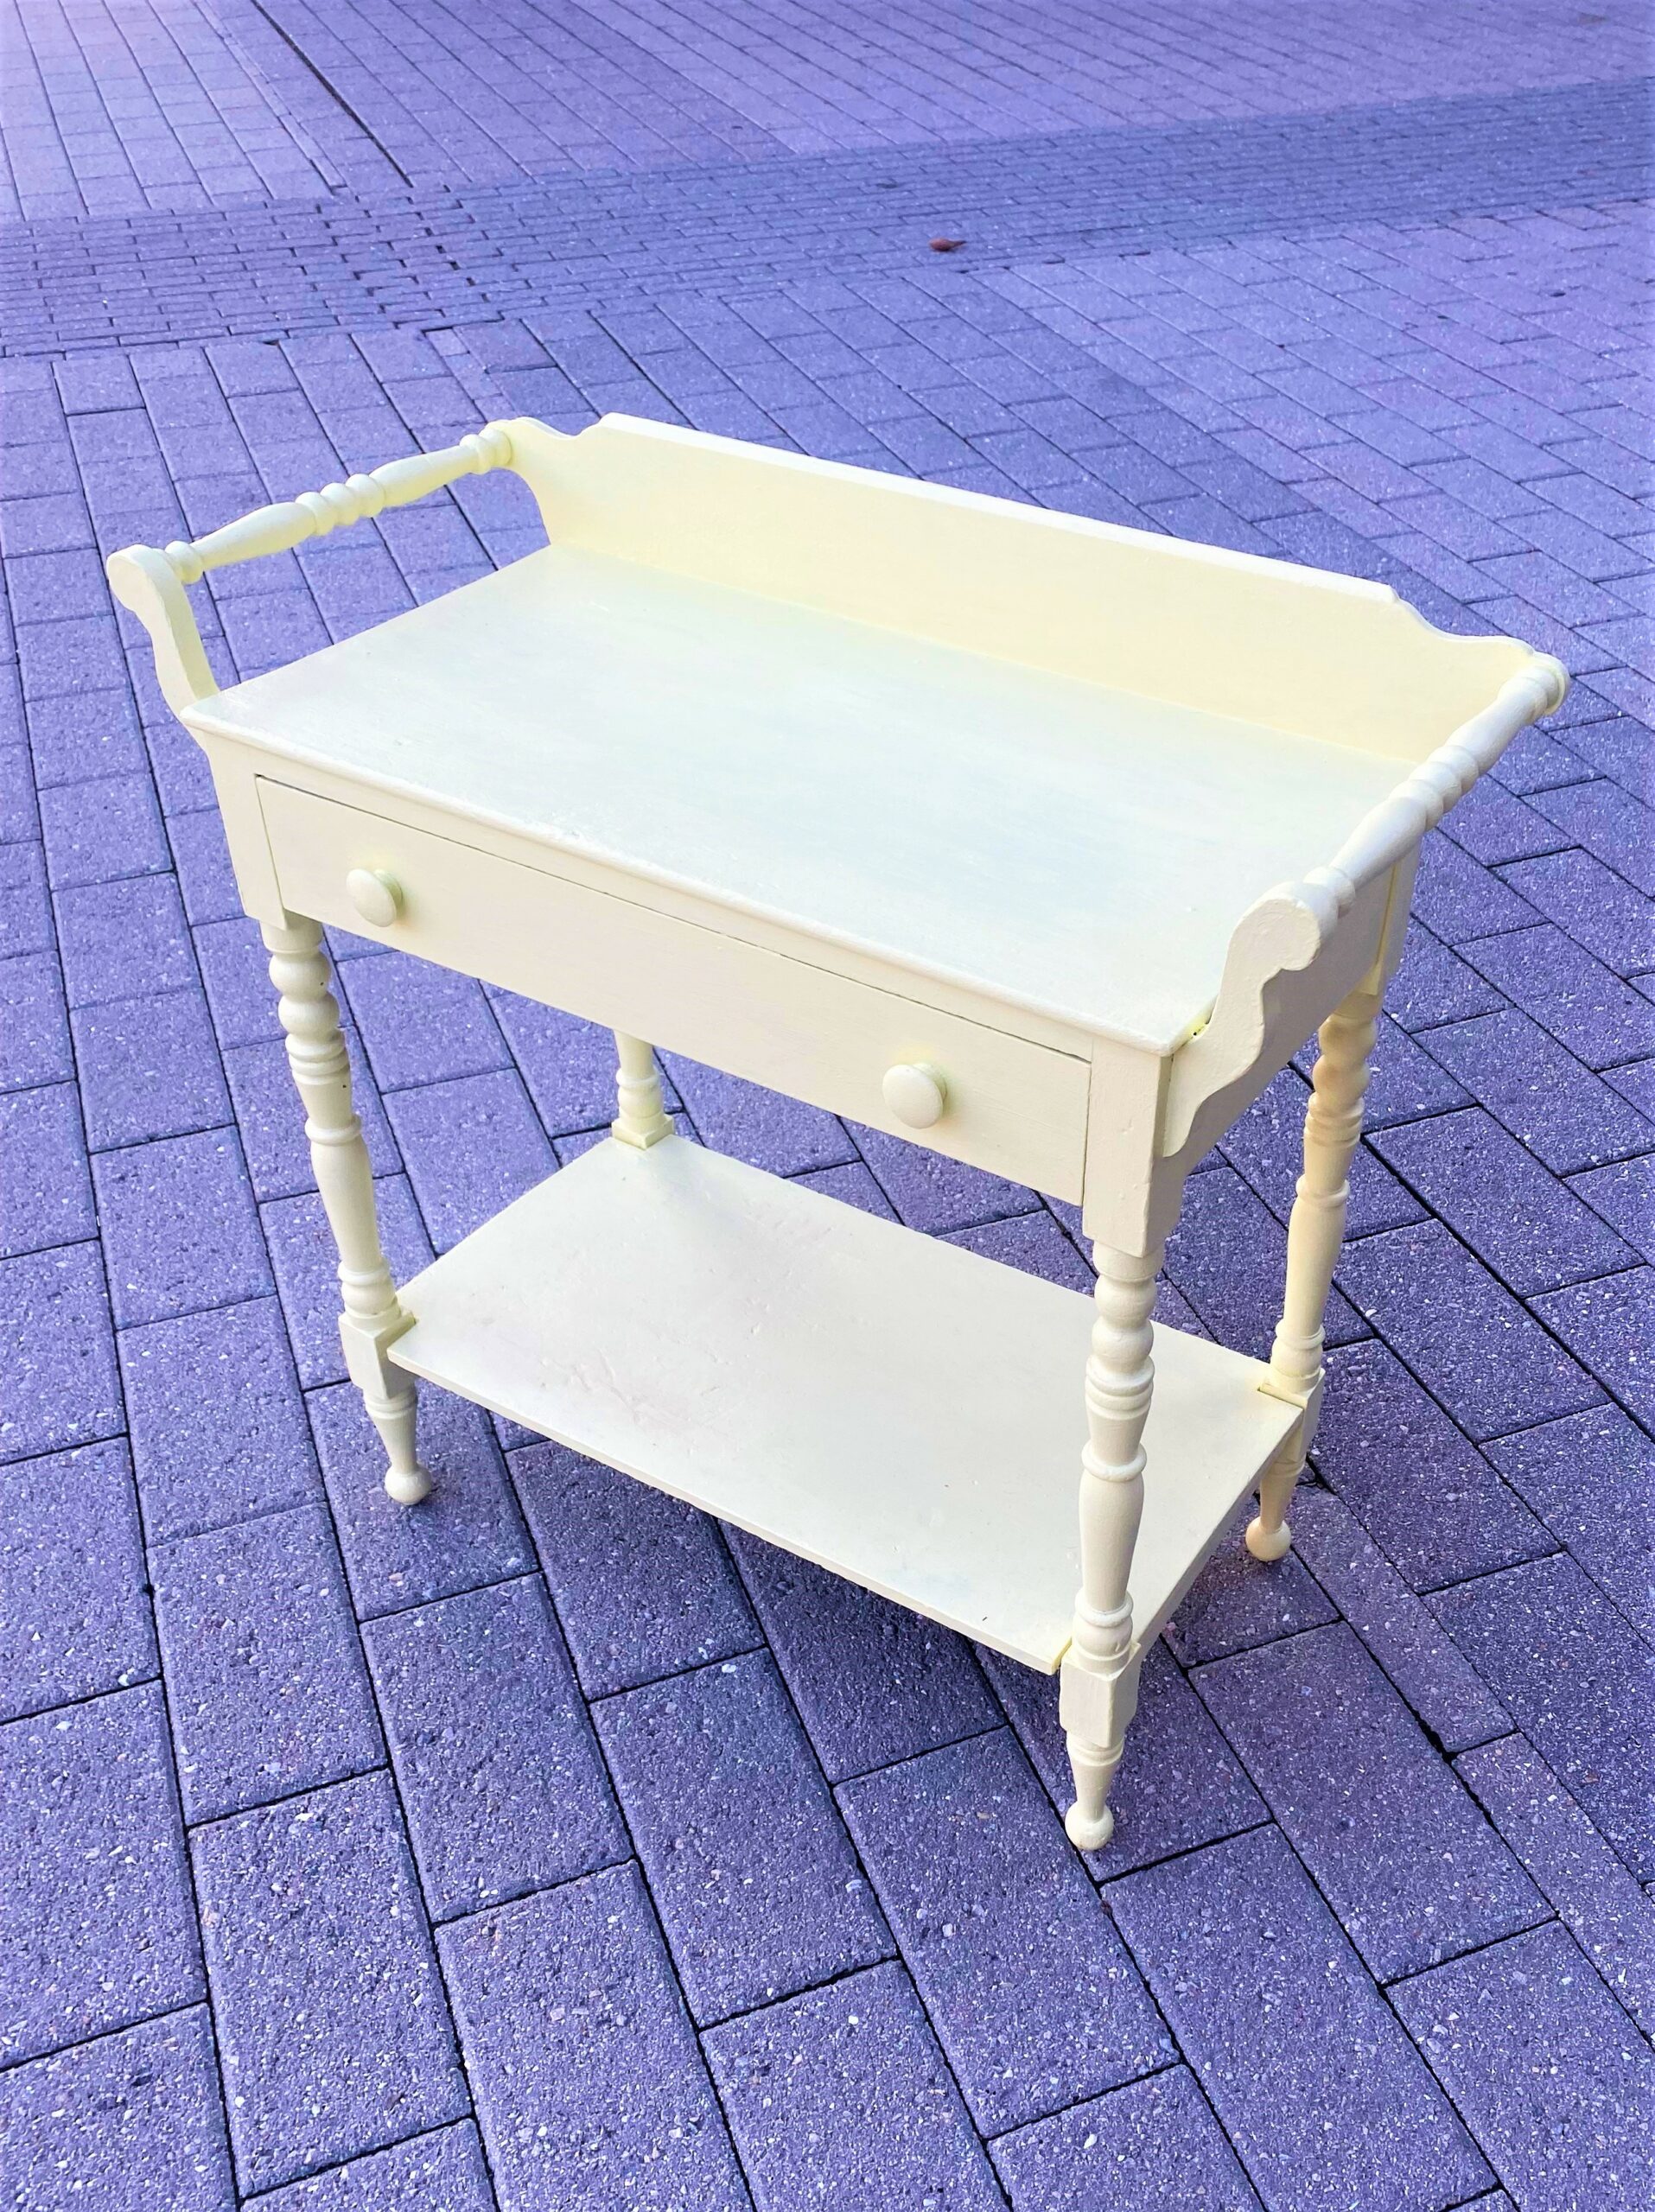
- Place your table on a drop cloth and give it a light coat of paint.
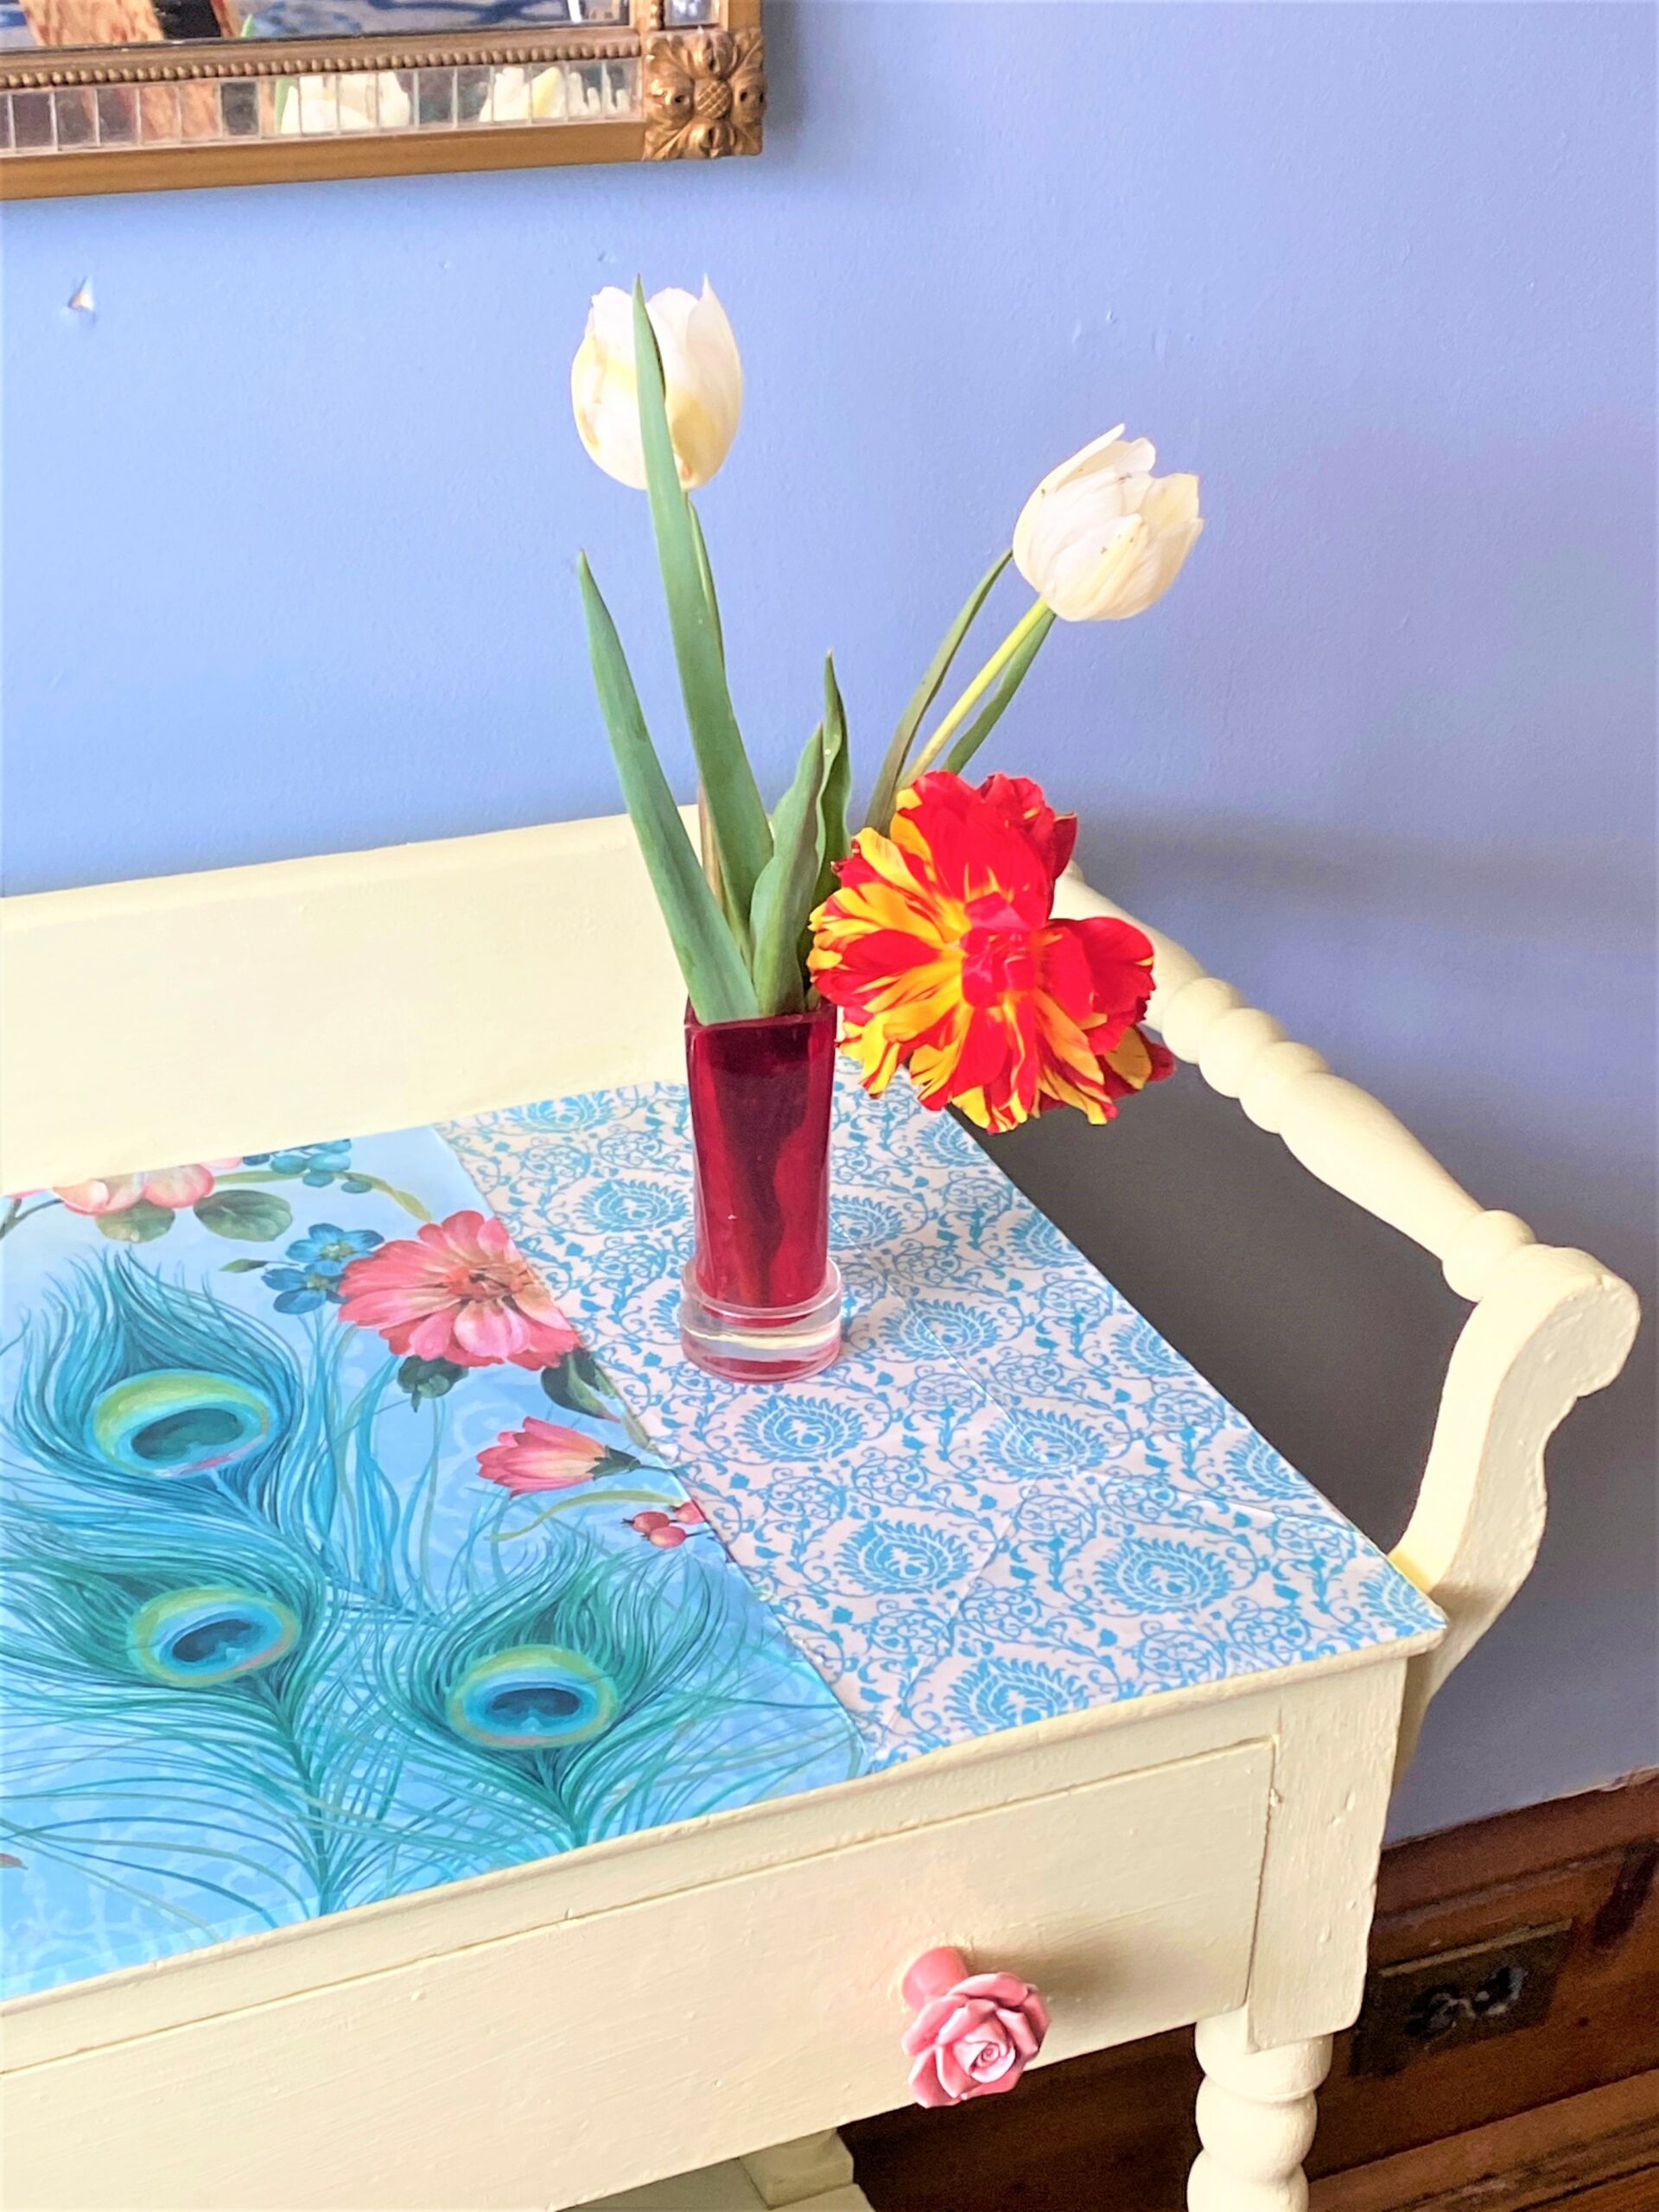
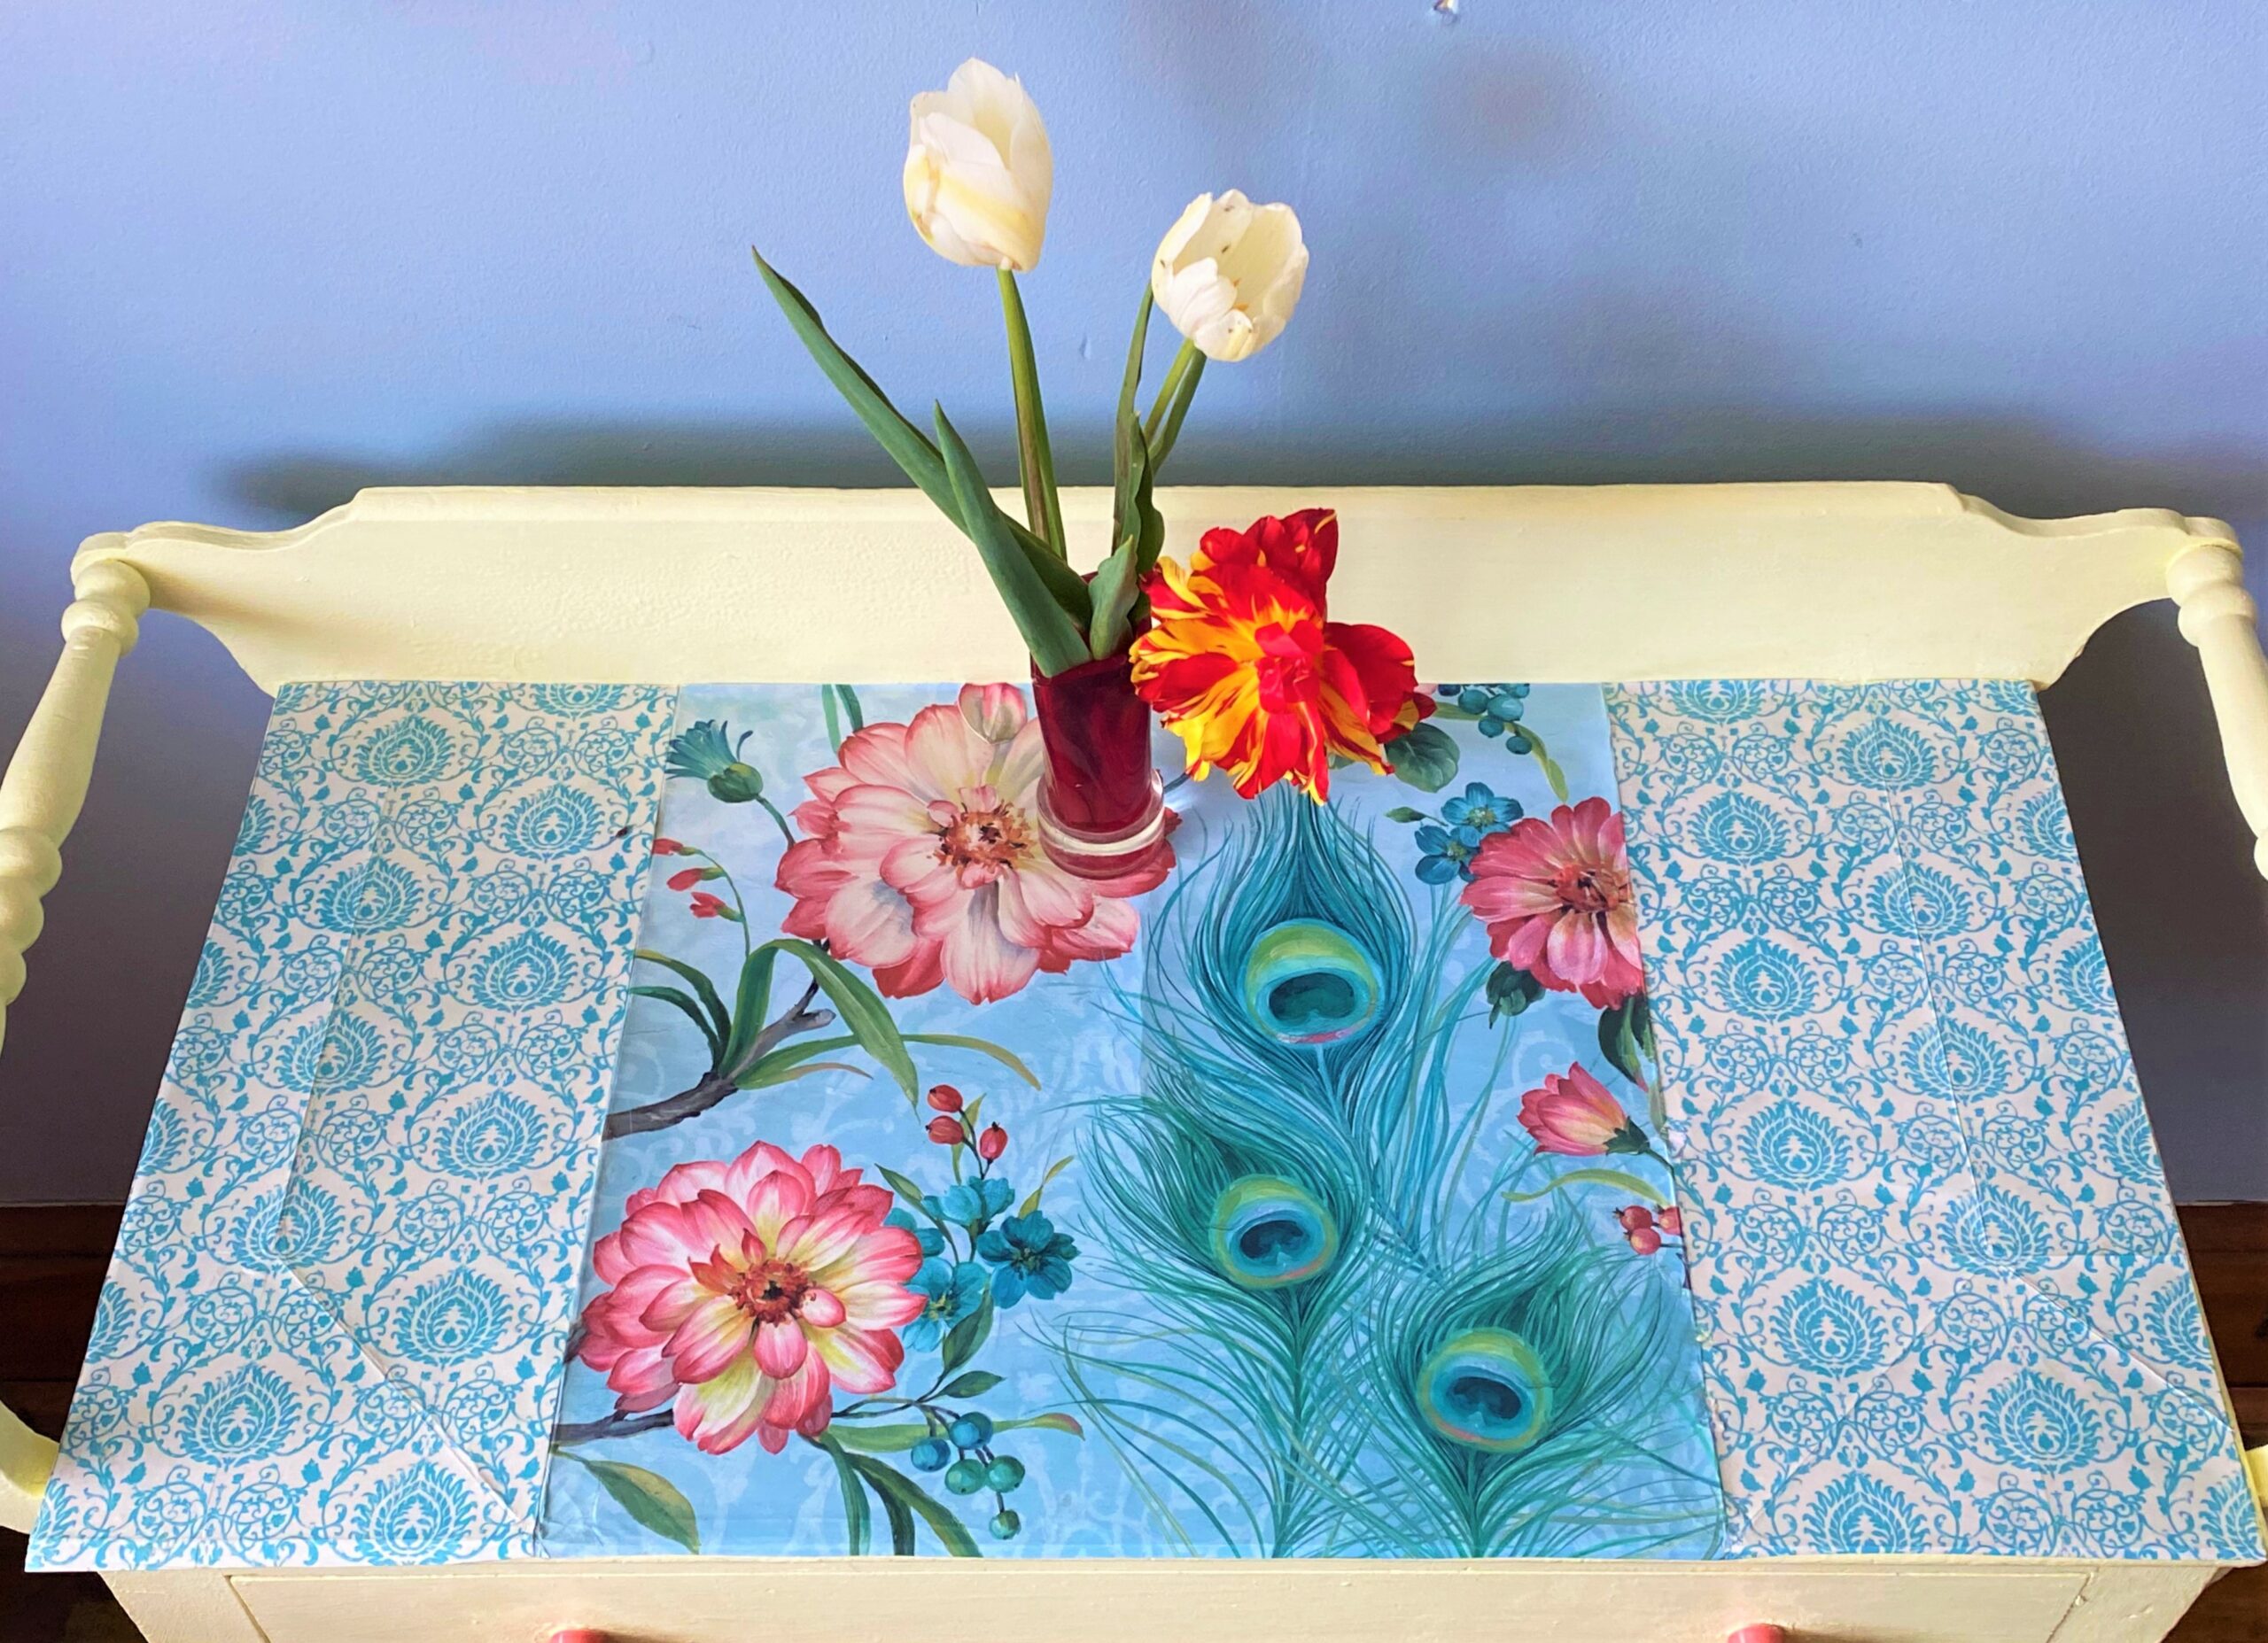
- Let it dry then place it on its side to get each and every surface. Based on your piece, you may need to give it three or four solid but light coats. It looked really friendly and happy after getting this paint transformation but then the good thing happened! I took the gift bag to my studio and its colors matched nicely and it was large enough to cover the top with some left over! How lucky is that?!
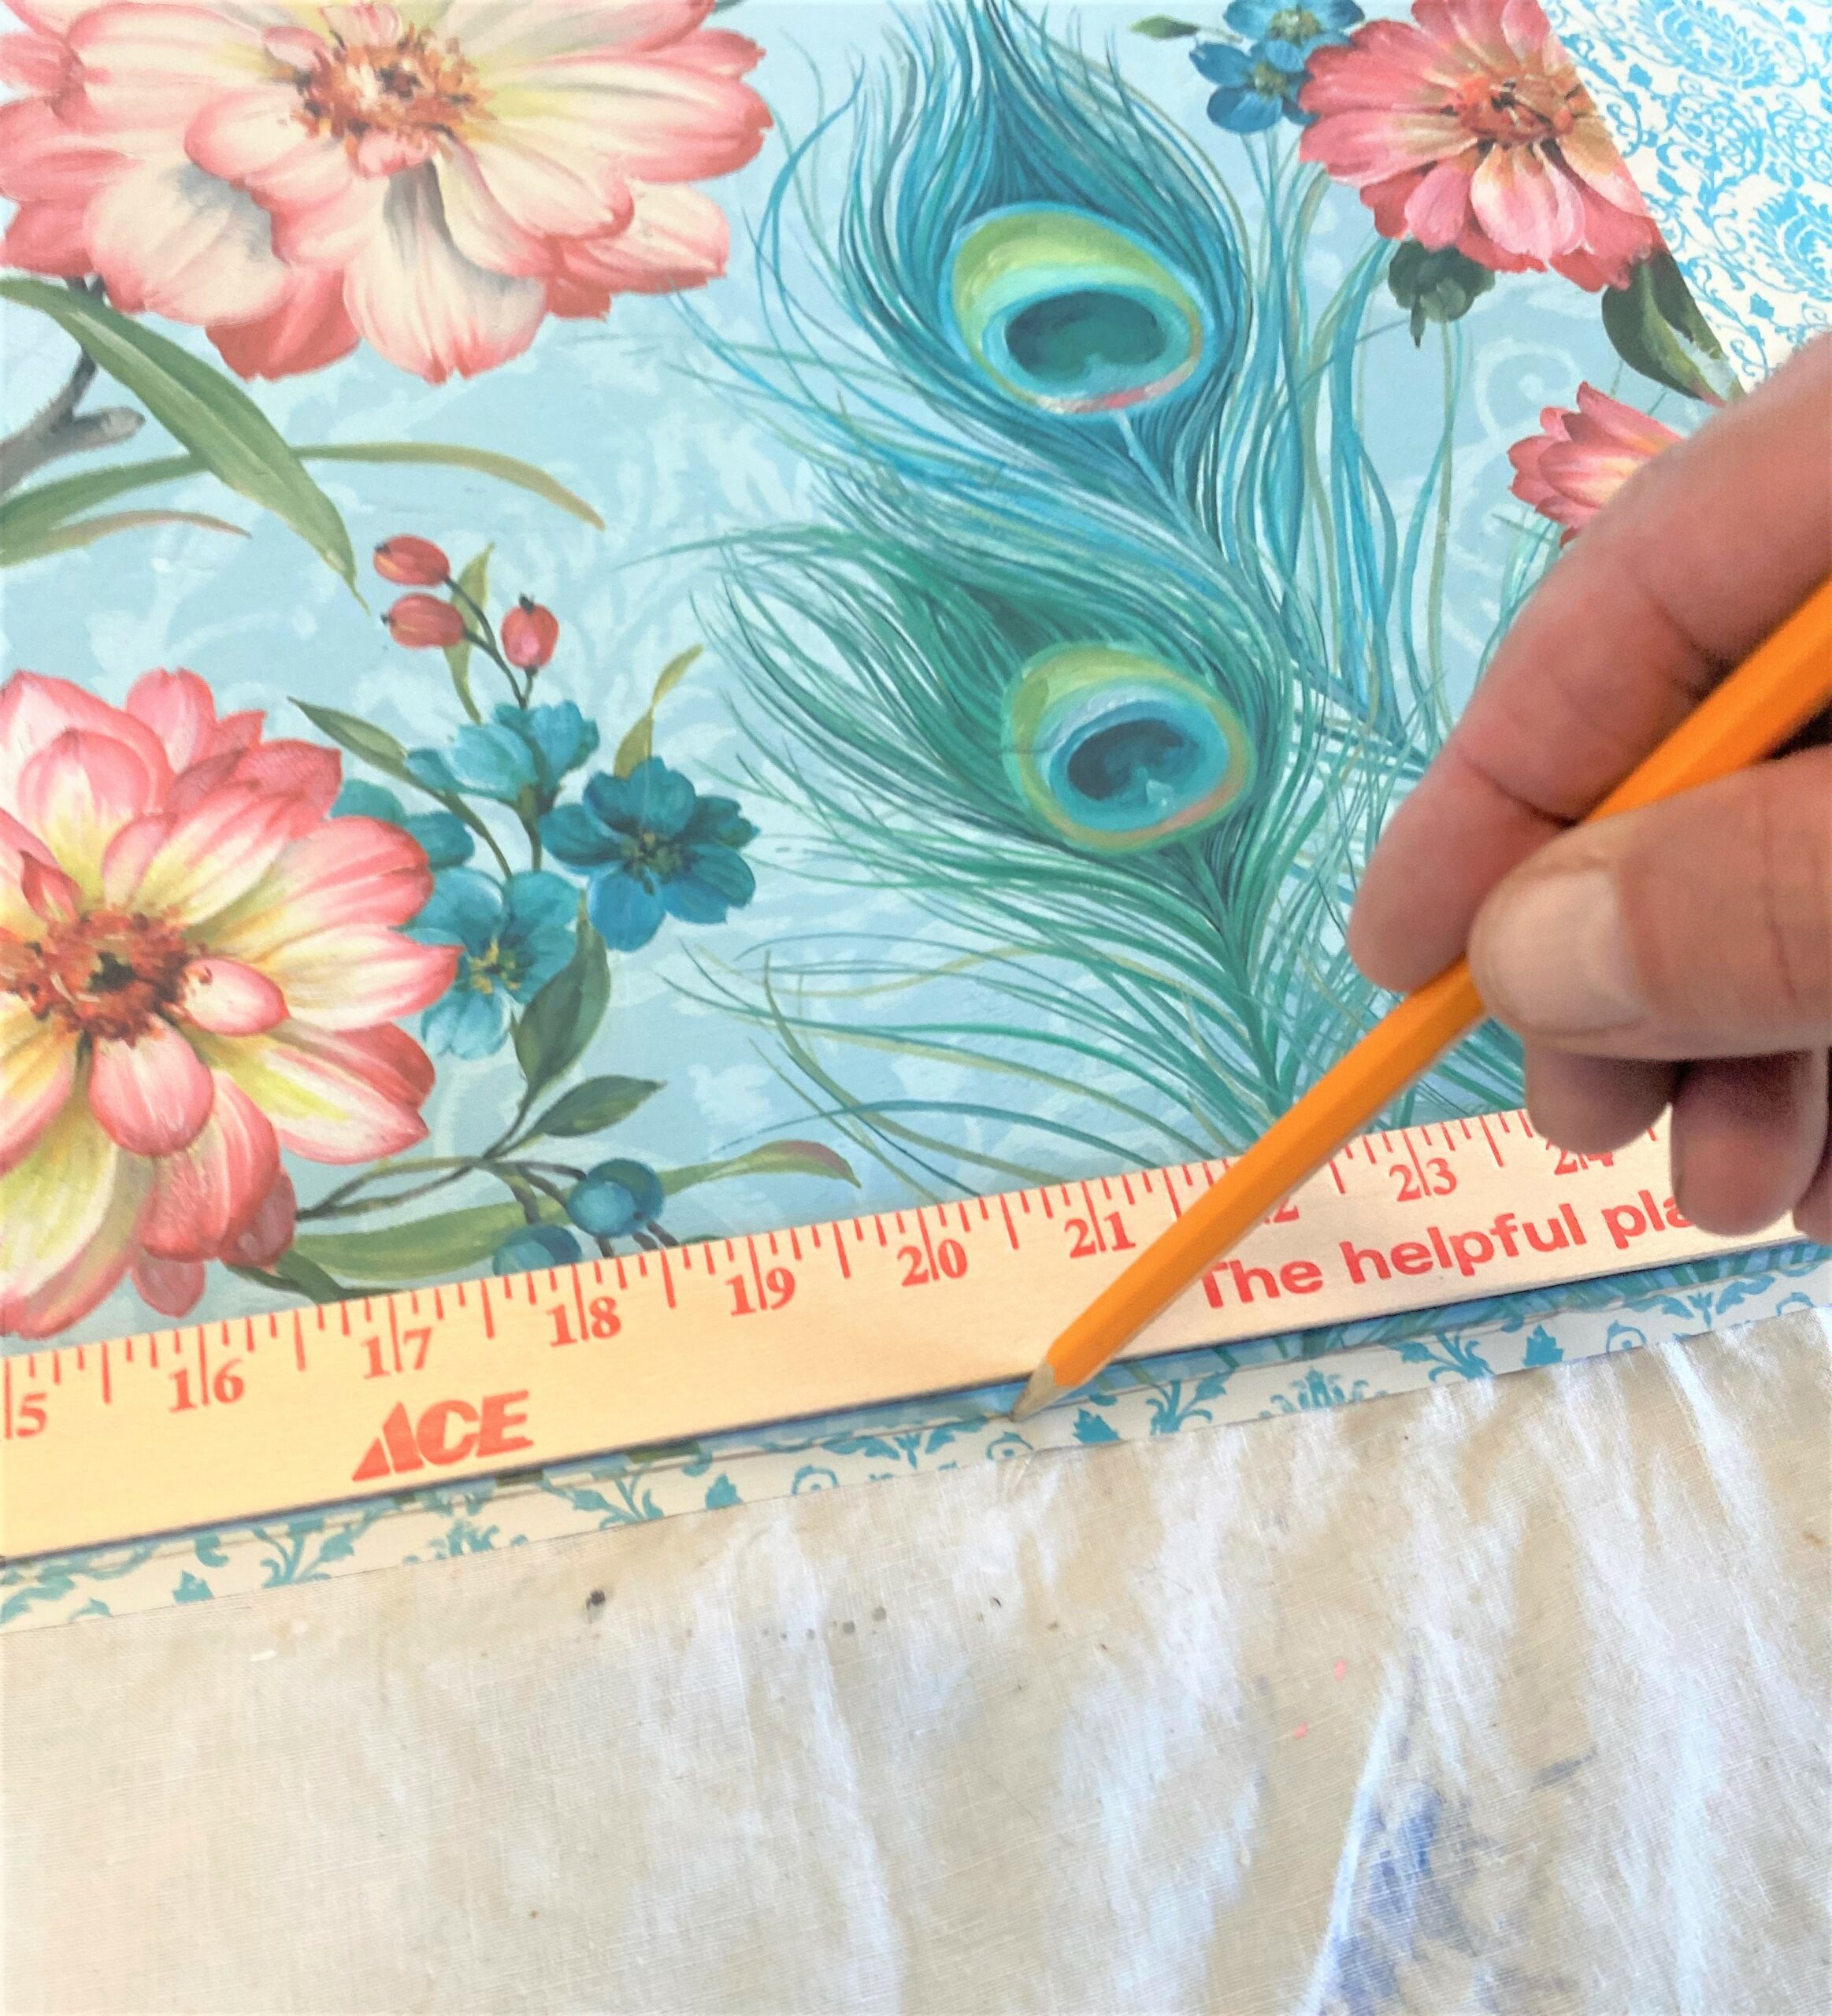
Step 5: Measure twice, cut your gift bag once
- Carefully deconstruct your gift bag by finding its seams and pulling it apart from there.
- Your bag is likely one piece of heavy paper that is folded up so simply—and carefully—unfold it. After doing so, I could see the design I had to work with and how it could be used to make the side-table even more charming.
- Measure your table’s top with your tape measurer (or yardstick or ruler) to see how much surface needs to be covered. Thankfully, the bag was large enough to allow the whole top to be covered. I wanted the flower-covered panel to be in the center, so I measured from there and worked my way to the edge.
- Using a pencil, I marked where I wanted to cut then used scissors to trim away the access.
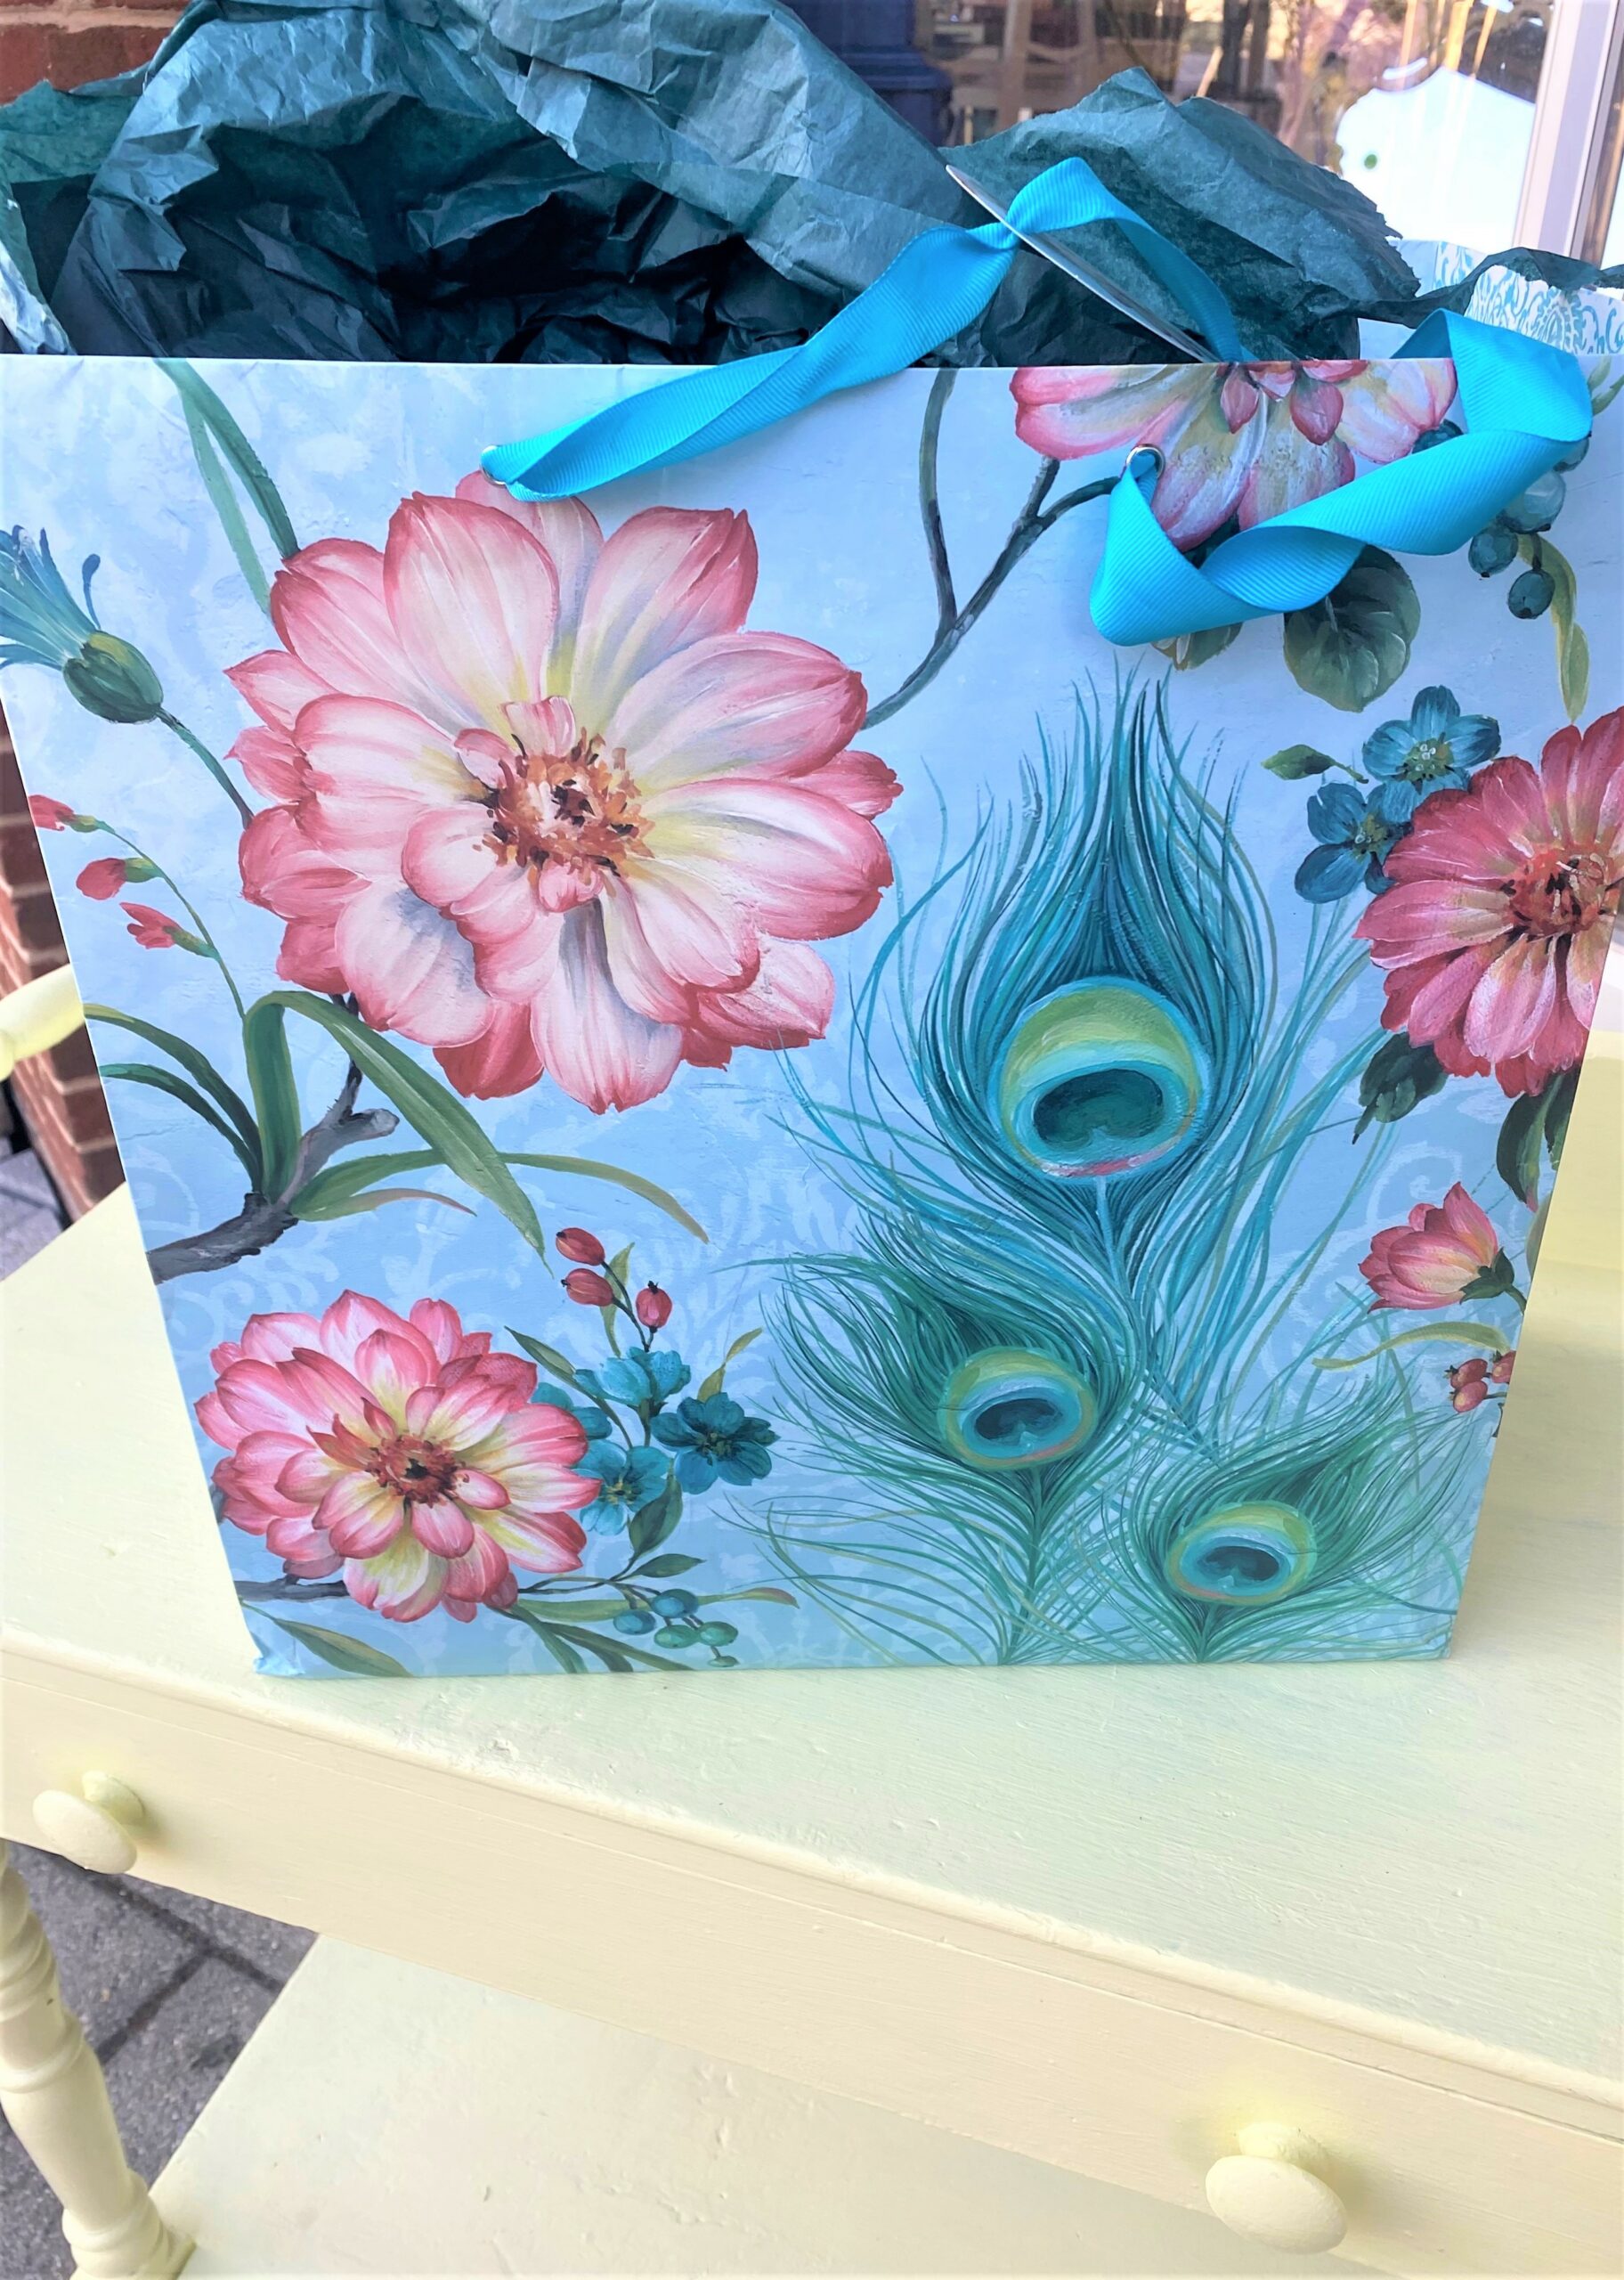
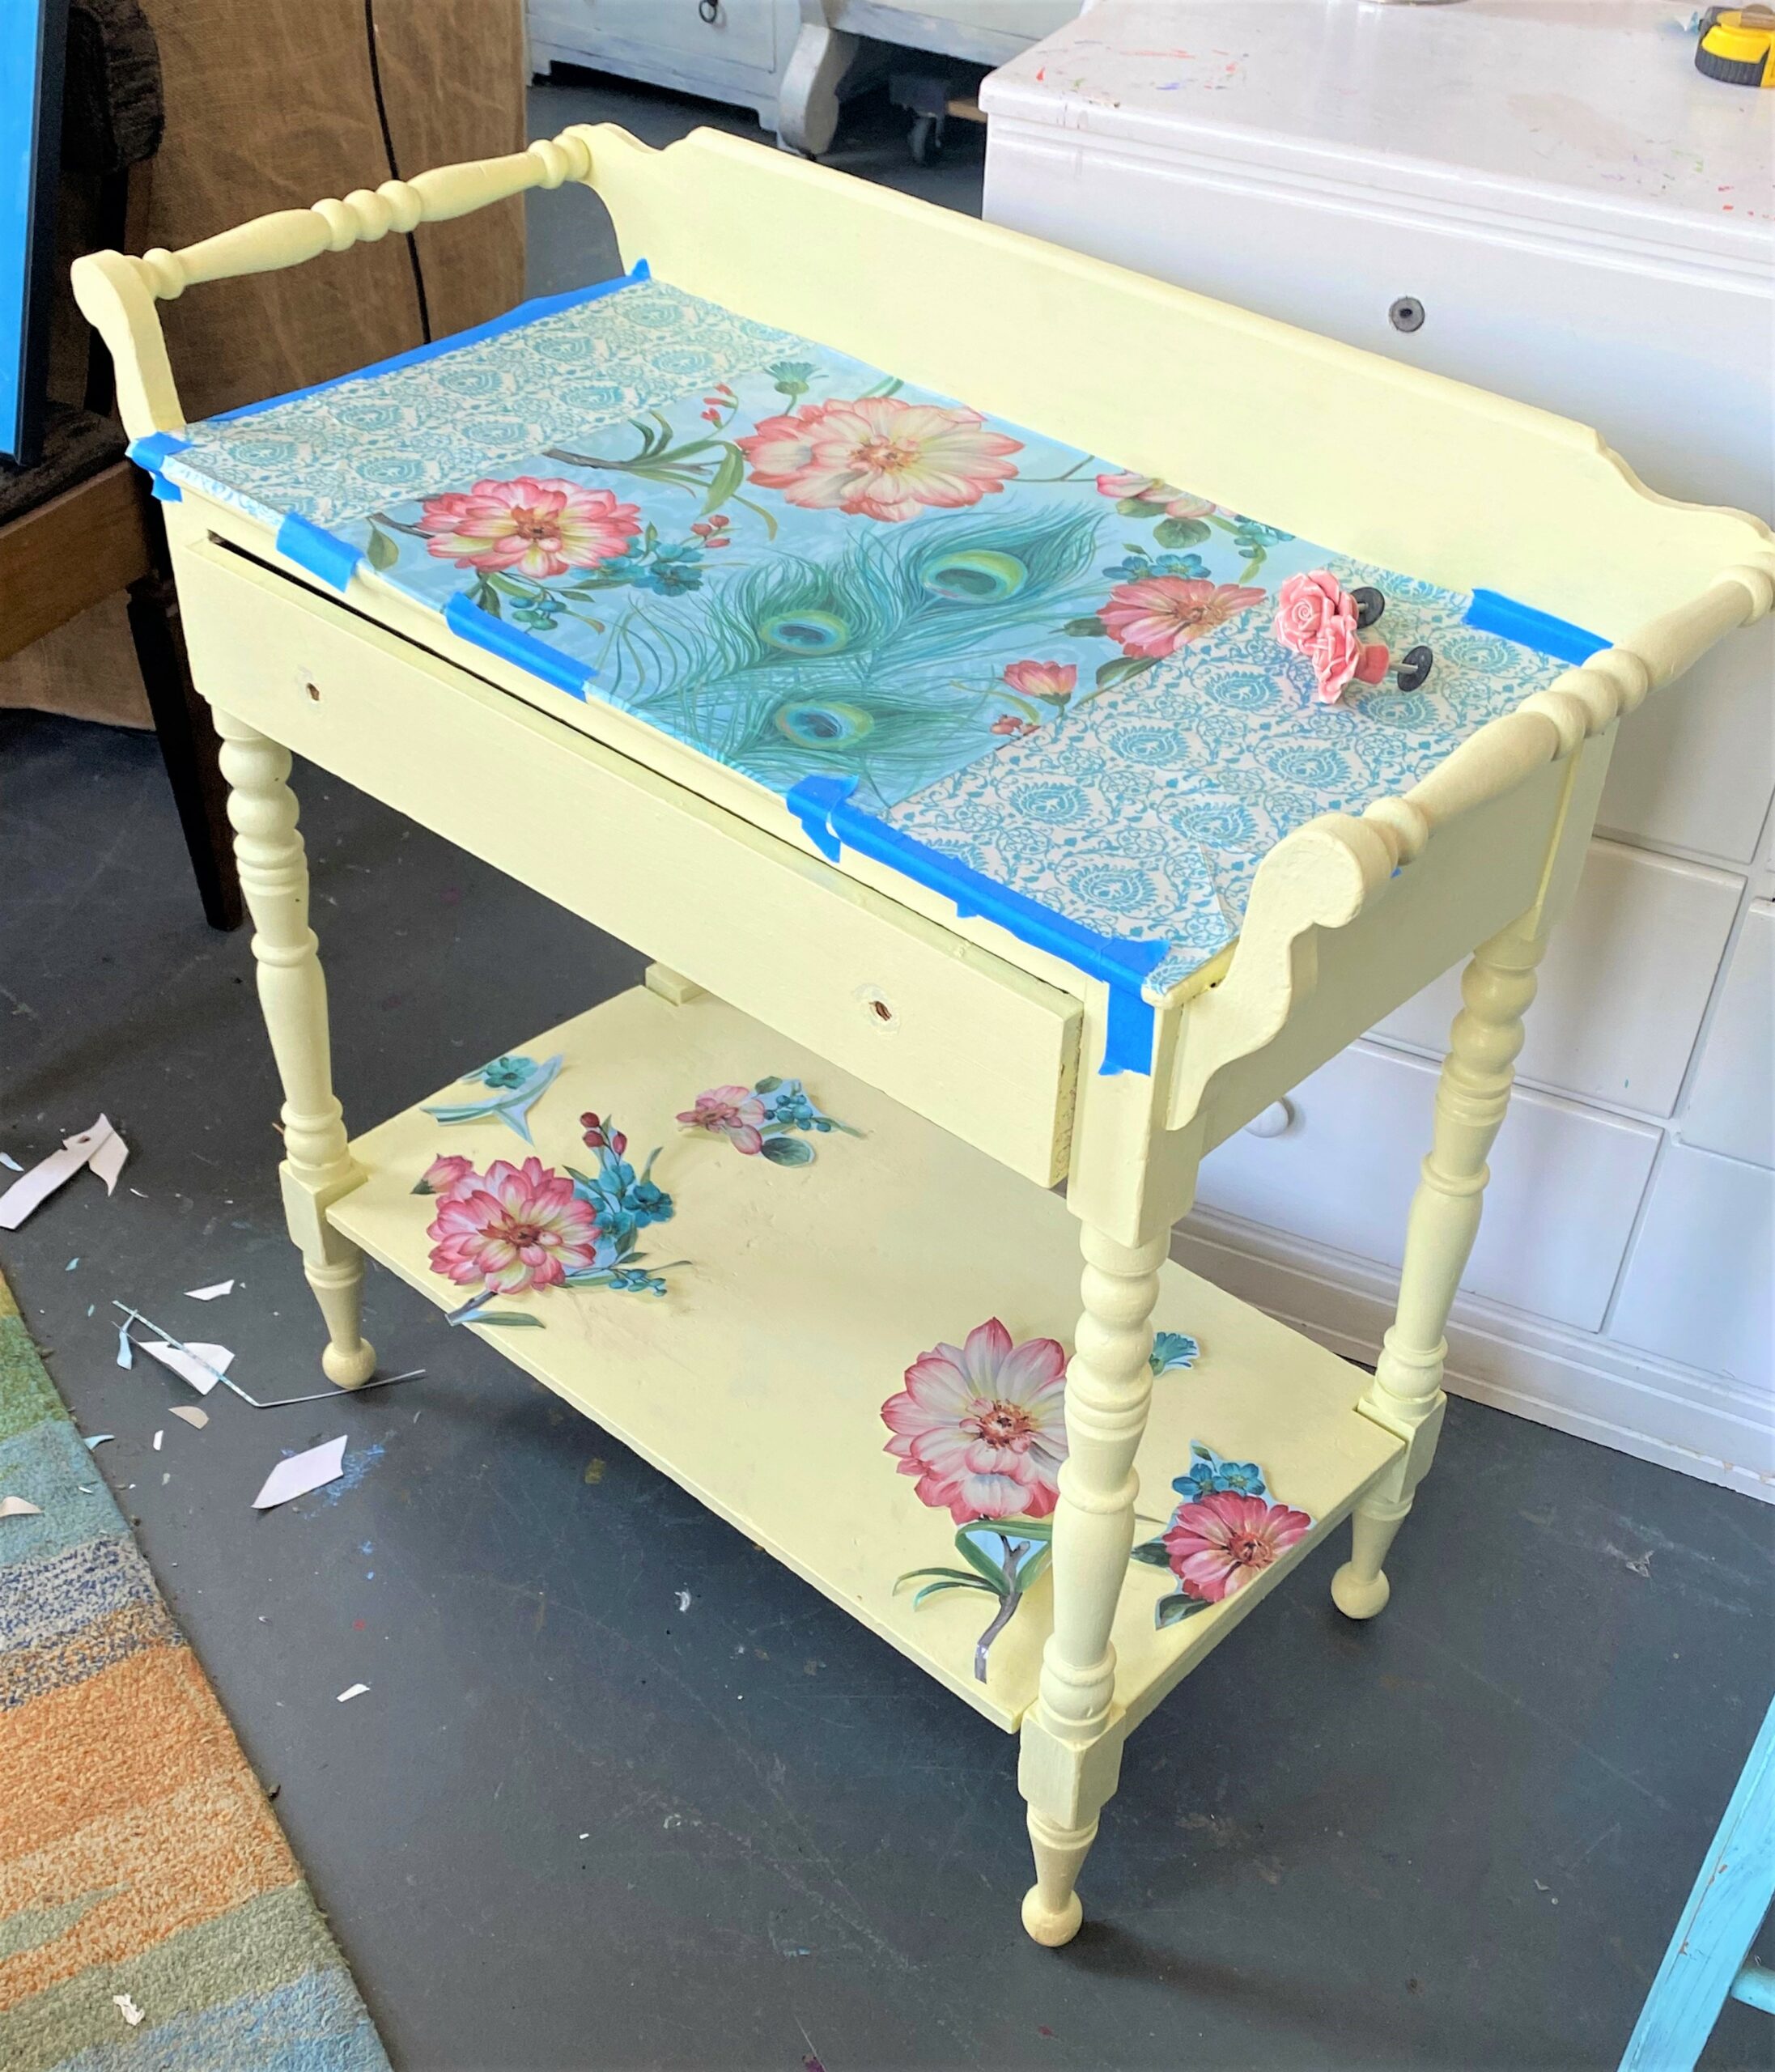
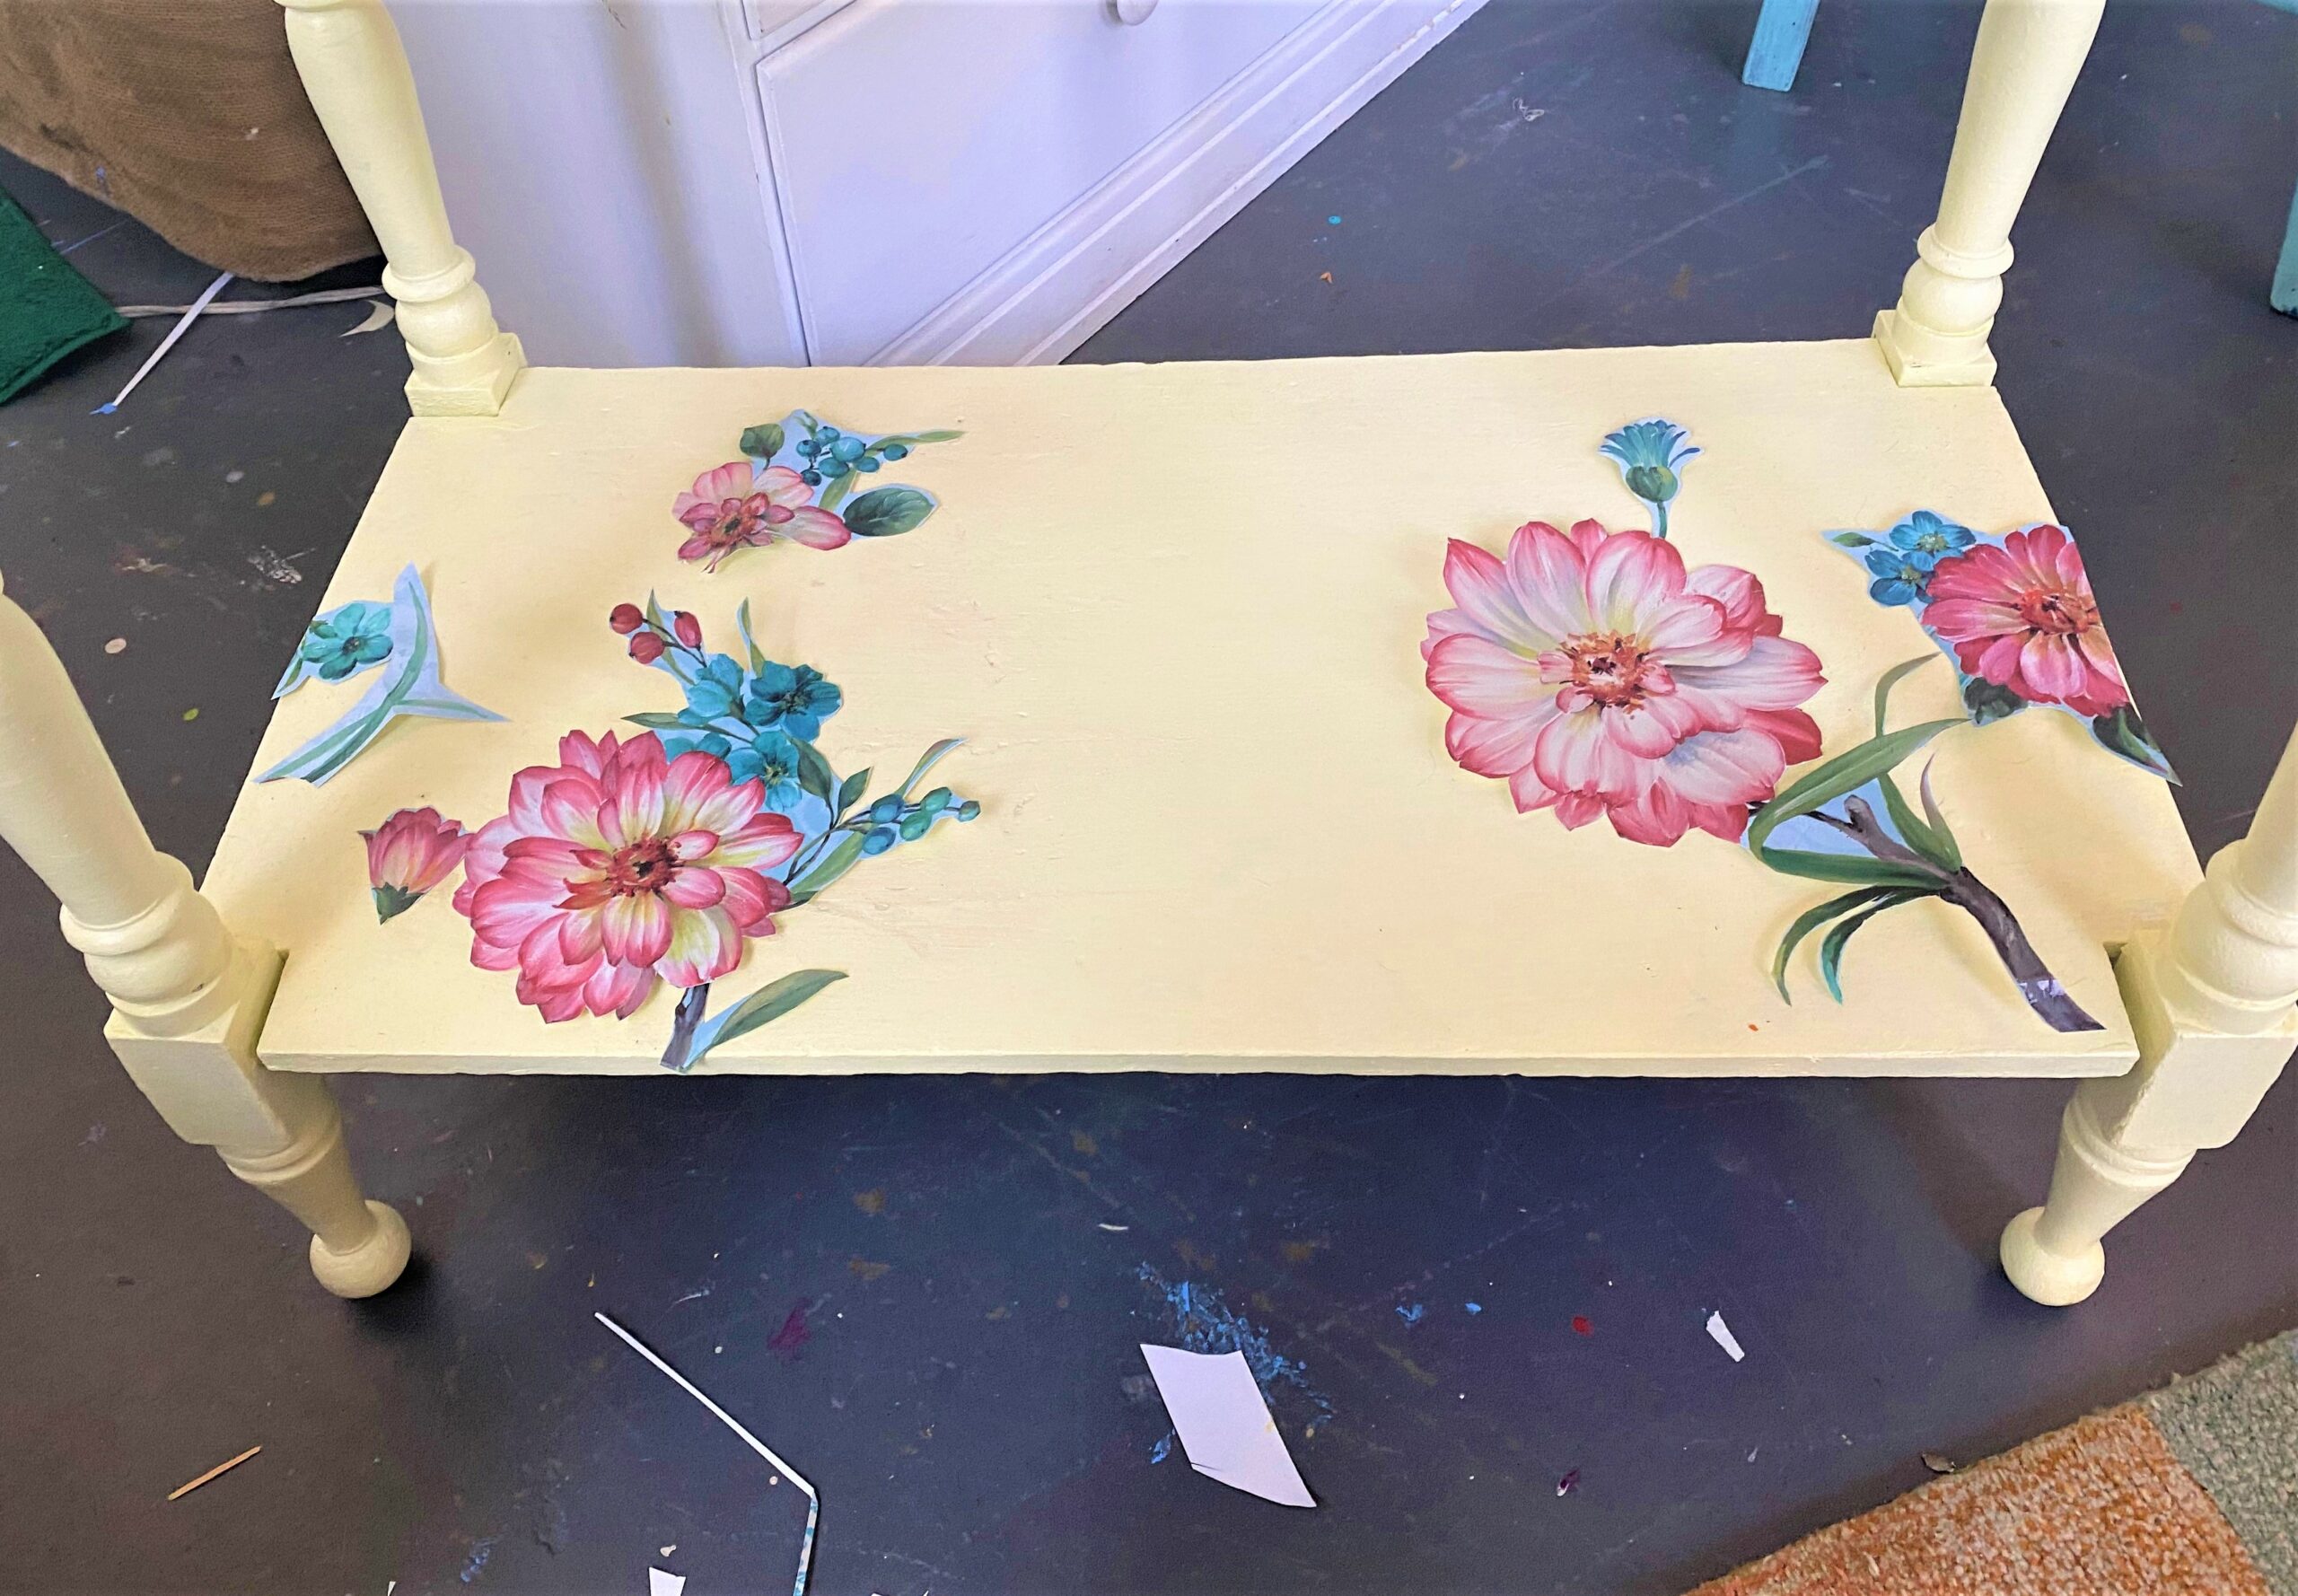
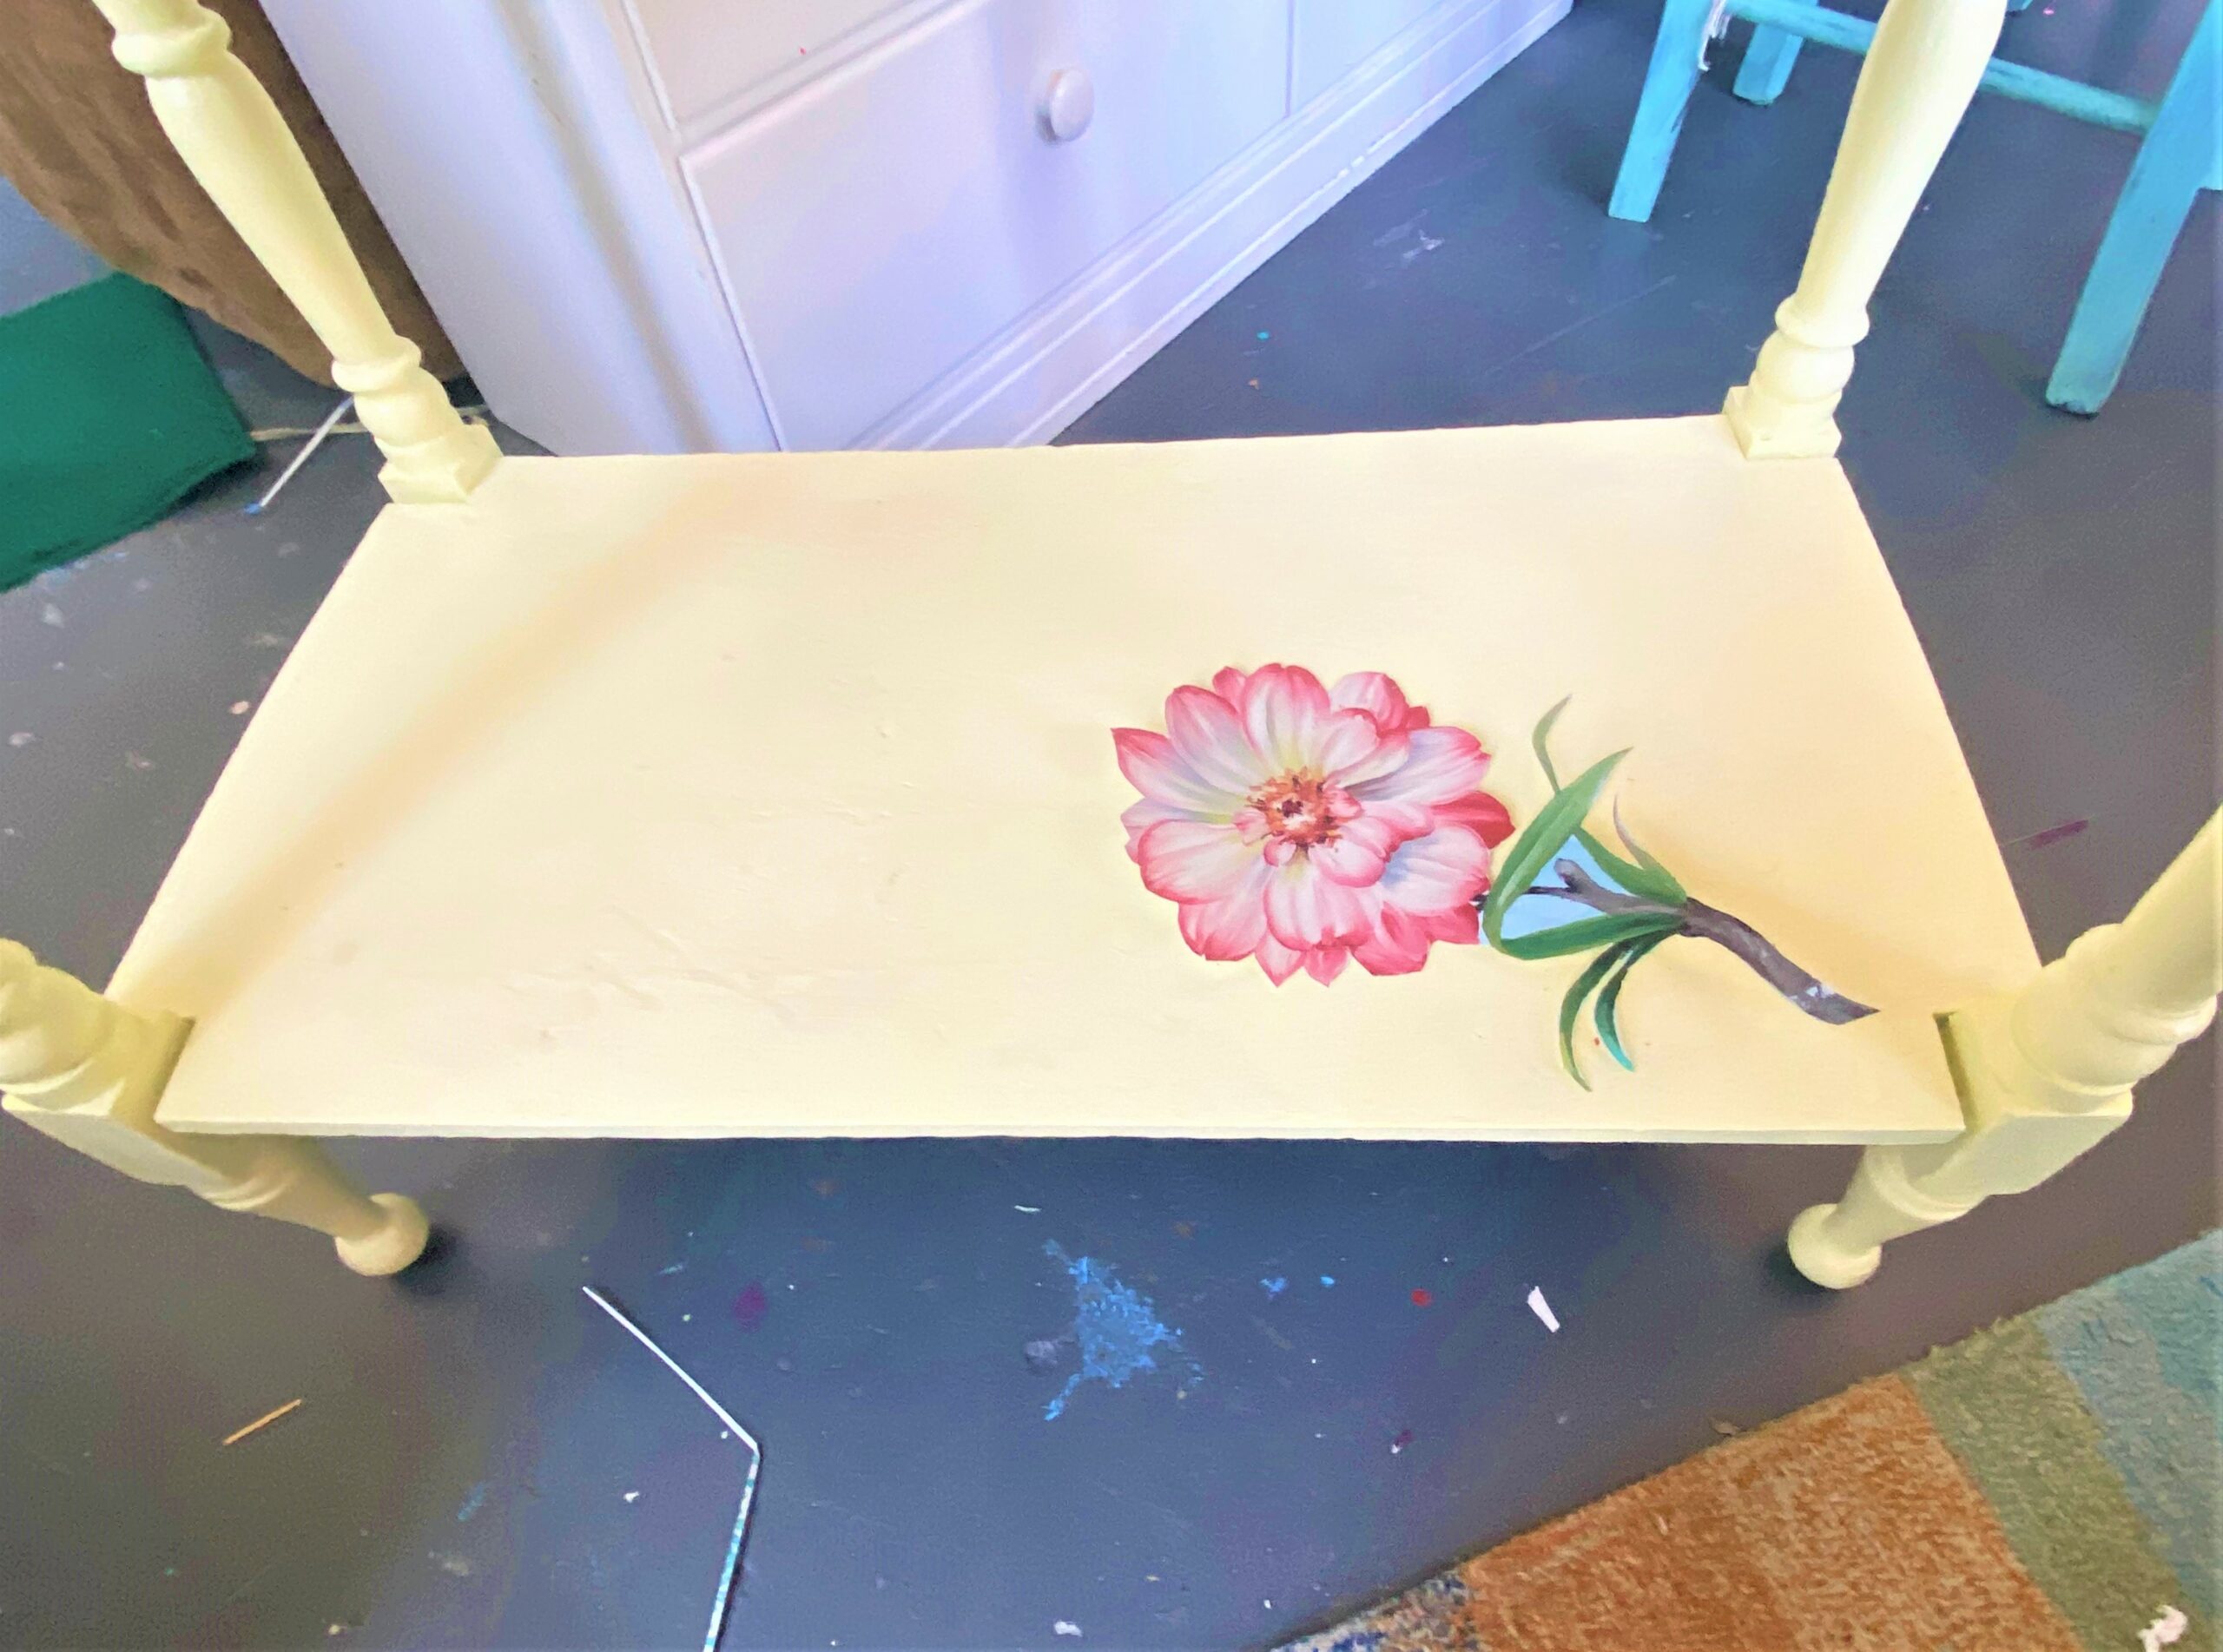
If you get lucky, you might have some images or designs on your gift bag’s leftover parts that can be used elsewhere on your table. With a small set of scissors, I carefully cut out the extra flowers, buds, and leaves, with the plan of placing them on the bottom shelf to add some visual interest there and to connect it to the top surface.


Step 6: “Decoupage” does delight
“Decoupage” is the process of gluing paper to surfaces and has been used for hundreds of years to make furniture and other items look even more beautiful. Mod Podge is the ideal glue to use for this step; a glossy finish was used because I had it on hand; a matte finish would have worked just fine, too.
- Brush on a layer of Mod Podge on your table’s top then carefully position your paper piece in place.
- Start with the center and use your fingers to push the paper so it is securely on top and air pockets are pushed out.
- After the Mod Podge dries, you will want to add more of it to any edges or parts that need more to adhere to it tightly.
- For the shelf transformation, brush on some Mod Podge on the backside of your cut-out flowers.
- Position in place and, again, use your fingers to push the paper onto the surface.
- Use your brush to remove excess Mod Podge.
- If your cut-outs curl (which mine did), allow time to dry then add more of the glue/Mod Podge to ensure each petal and leave is securely and flatly in place.
Step 7: Nice knobs get noticed
Okay, I love how the universe works!
This piece had two nice, wooden knobs that had been painted many times over the years. I painted them light yellow which looked very nice. Then I discovered I had several flower-shaped knobs in a matching pinkish-red color that were leftover from another piece. This pair of blooming knobs were perfect and added that special touch.
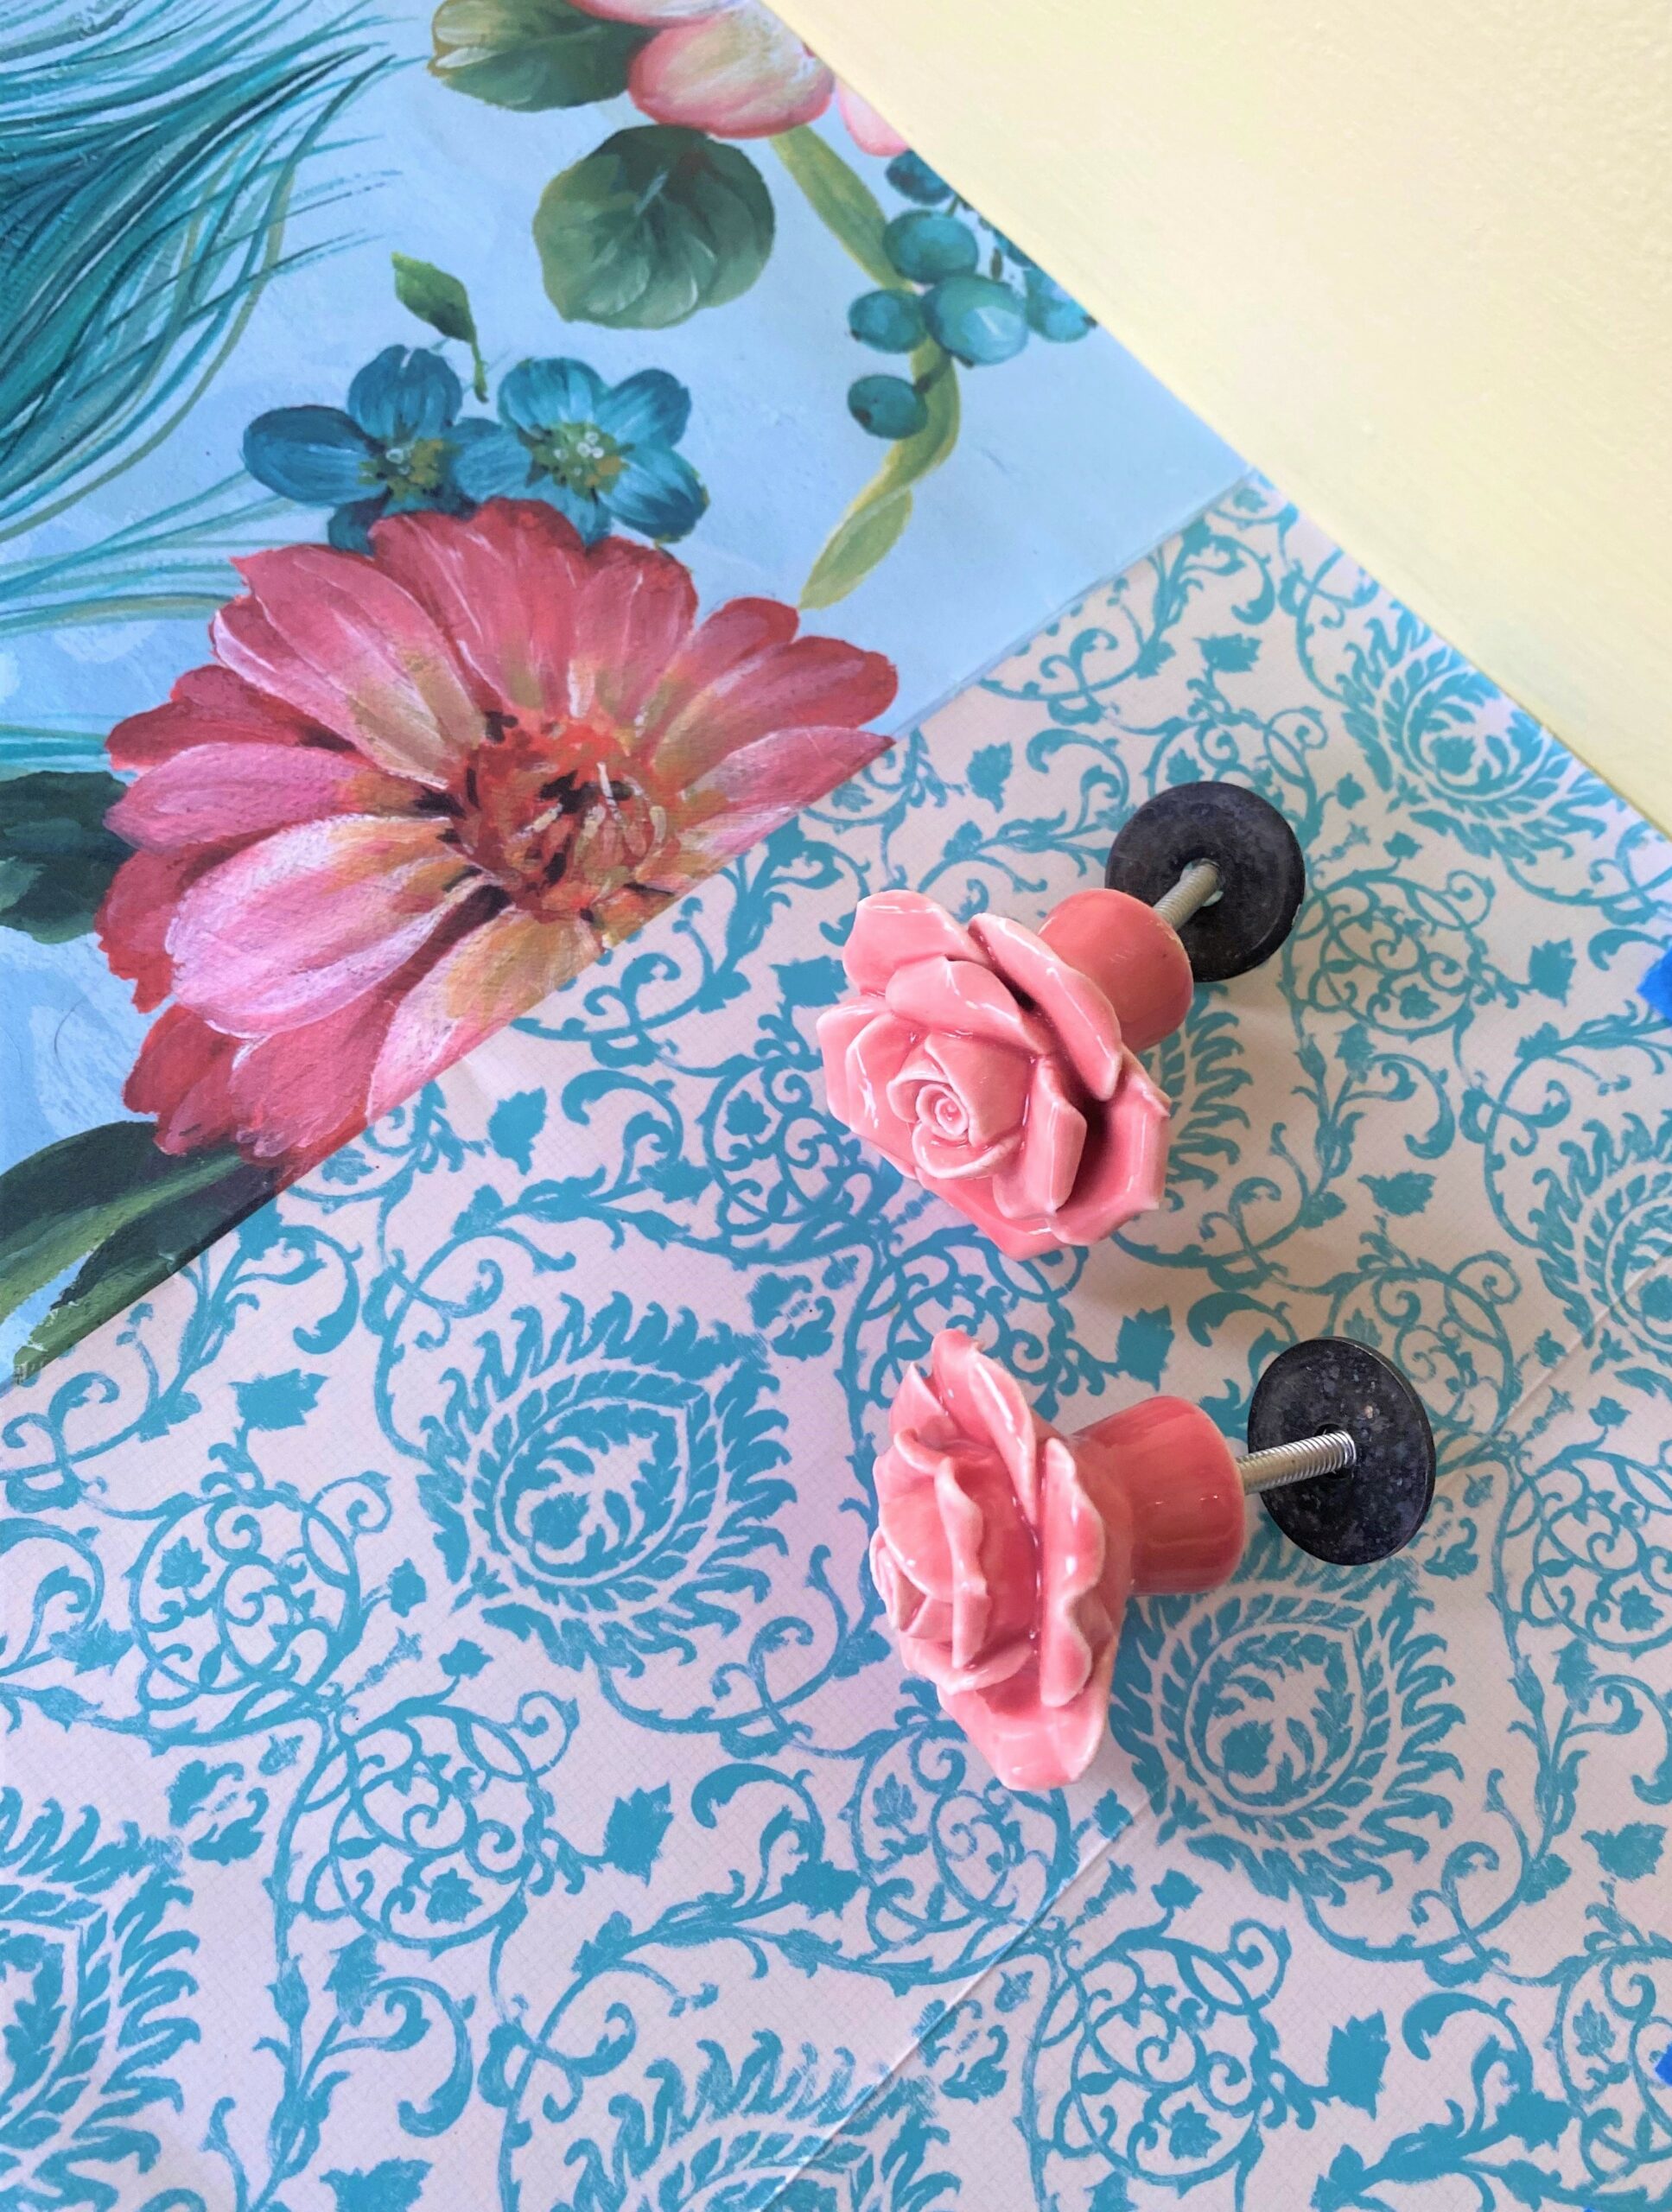
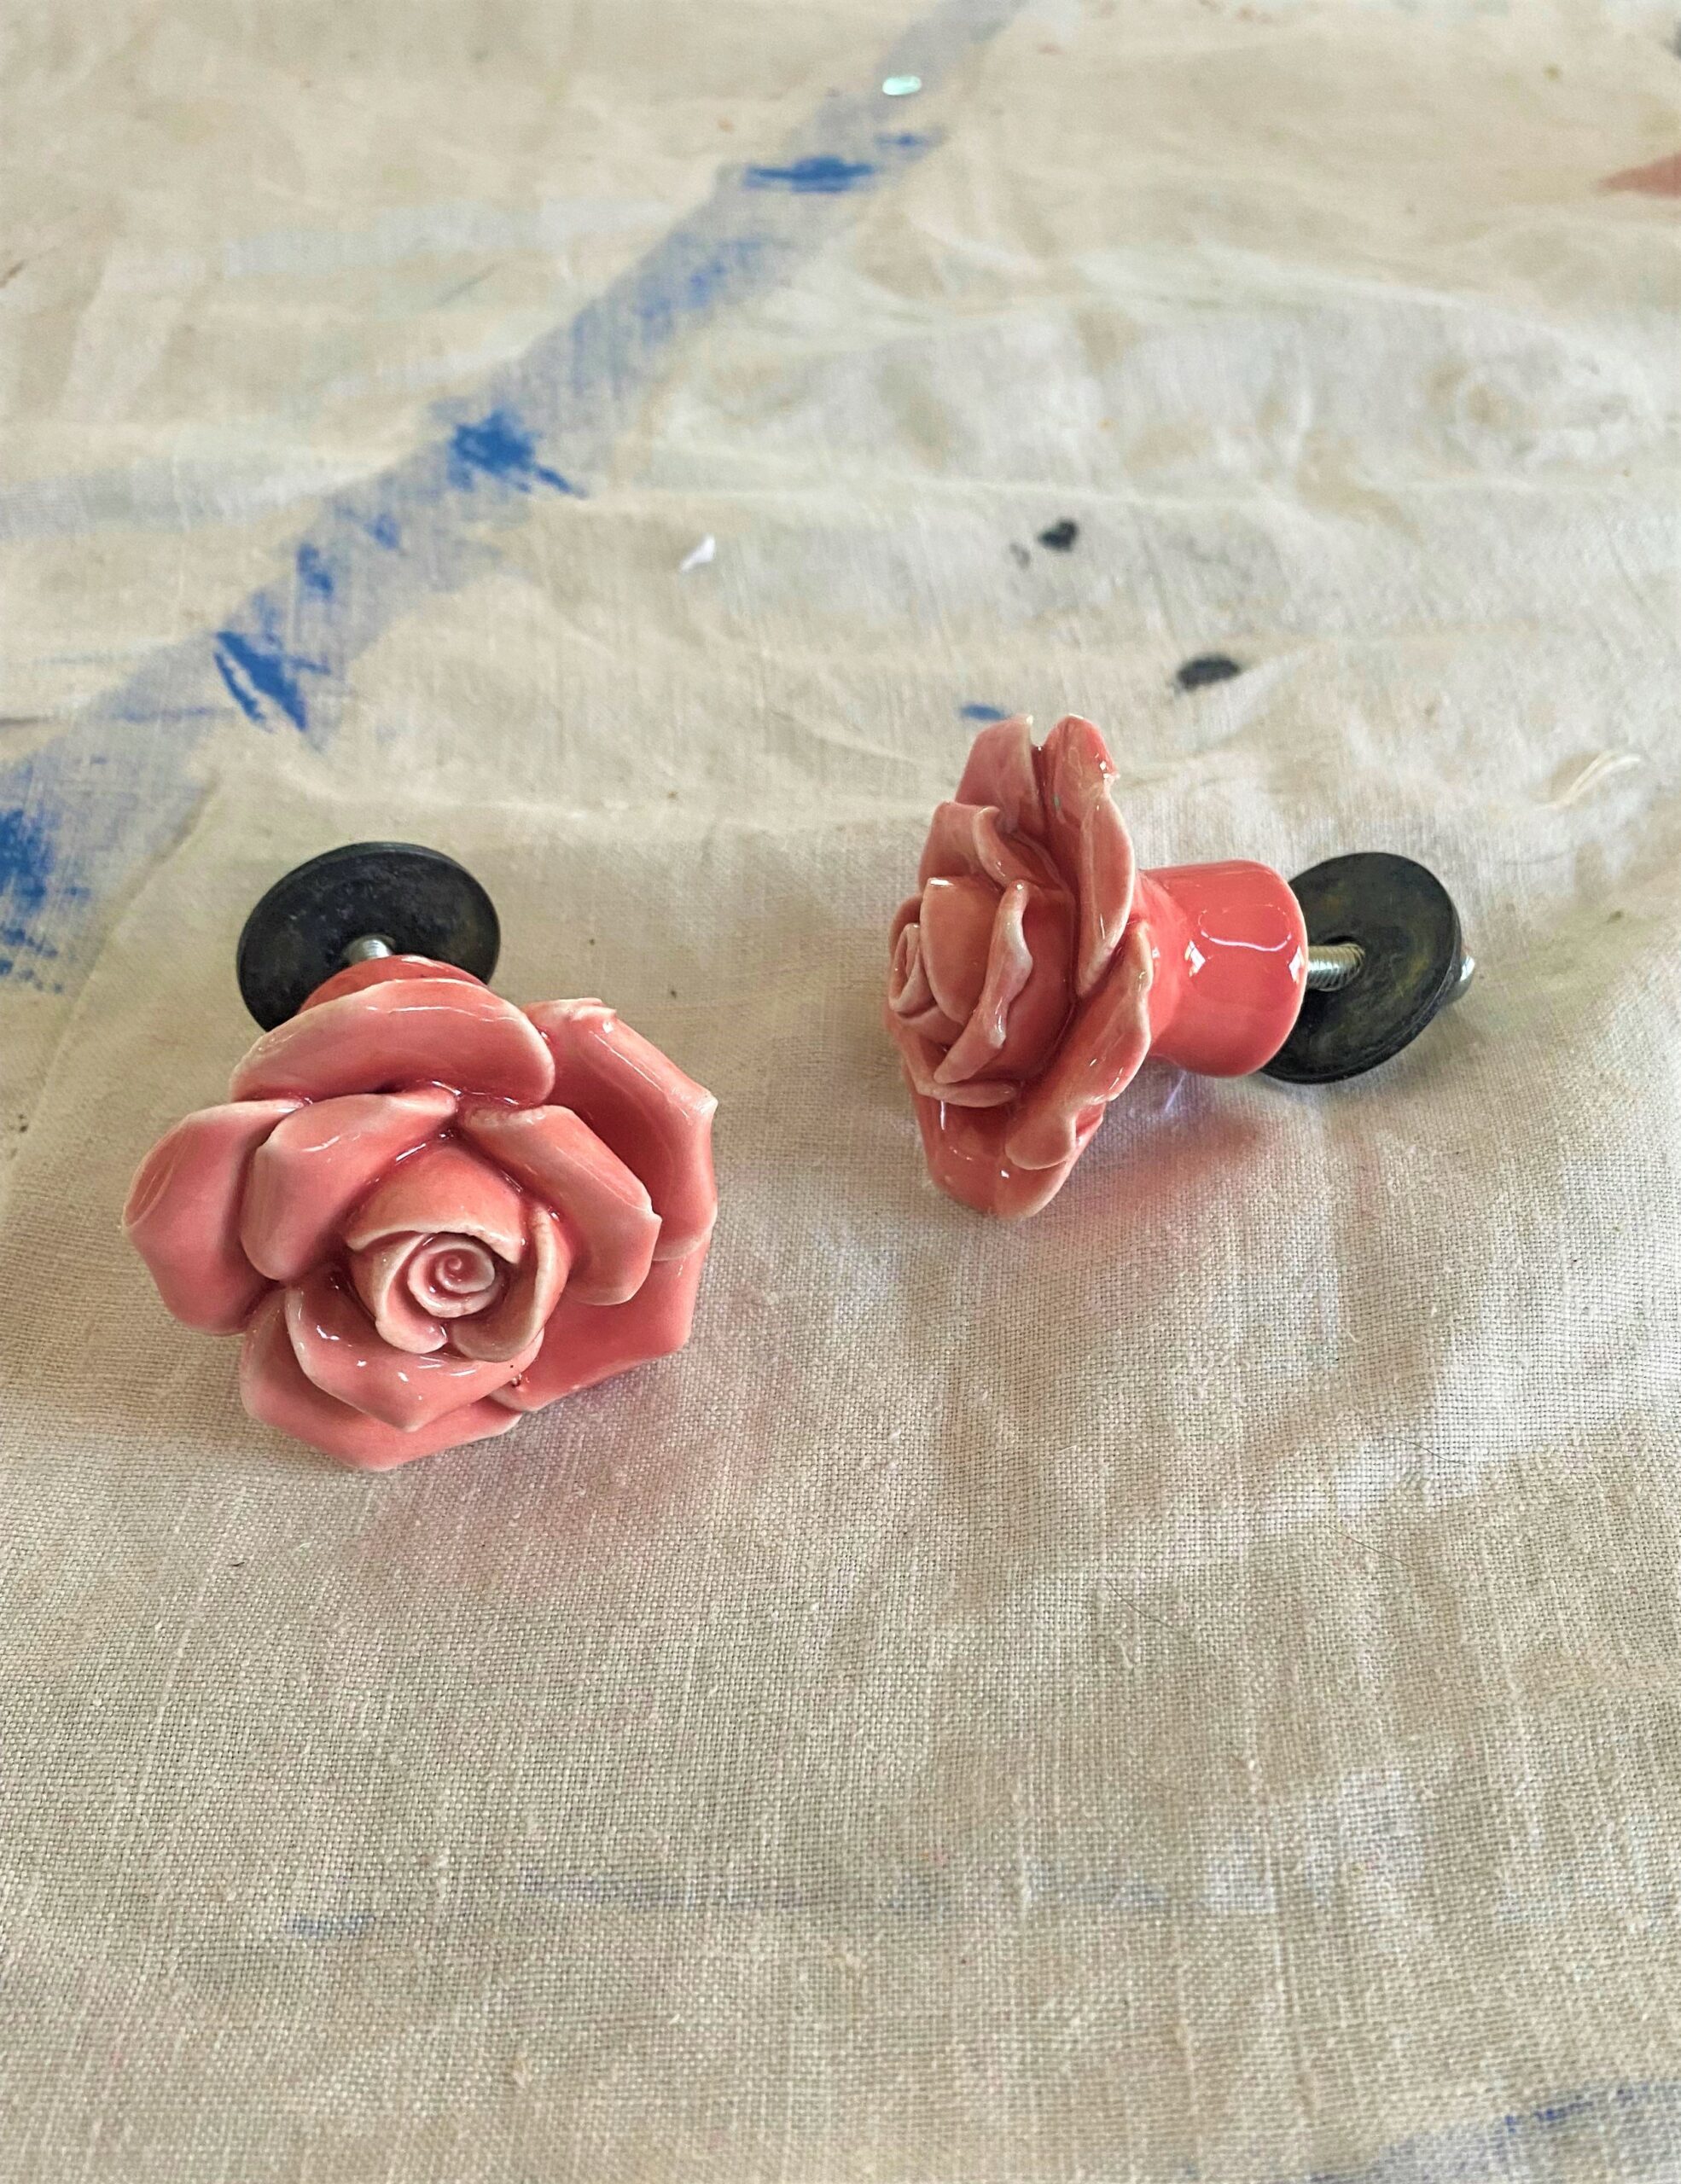
If you don’t have such knobs on hand, you can pick up a pair at your local hardware store or order them online. For a few extra dollars, this accent can be the icing on your table’s cake, too!
Step 8: Poly protects the pretty
You will want to keep your creative, upcycling efforts safe and protected. Therefore, brush on a couple of layers of polyurethane all over the painted and decoupaged surfaces. Poly will help to keep things safe and allow for easy clean-up and dust removal.
Step 10: Place to please
Your charming side table will have so many uses in your place!

Foyer:
Put it by your front door to collect keys and mail. Add a basket to the shelf to hold hats and gloves. Hang an umbrella on the side rail.
Bathroom:
You can always use extra storage in your bathroom so put clean towels on the shelf. Place a small tray on the top and add toiletries. Fill the drawer with soaps and supplies.
Kitchen:
Position a round container on top and place utensils in it. Arrange cookbooks on the shelf and hold them up with fun bookends. In the drawer, add placemats and napkins.
Where will you place your gift bag covered side table? No matter where it goes, it will add charm to your place for certain! And if you have a good friend like I have in Dianne, you too will say, “Merci beaucoup!”

Tim Kime
Artist, Motivational Speaker, Life Coach
