Flowers + Flamingo = Fabulous Fixture
And the campy, spunky fun continues this week with another garden flamingo transformed into a decorative item for the inside of your home. Last week, we took a pair and upcycled them into a stunning chandelier (if I do say so myself!).
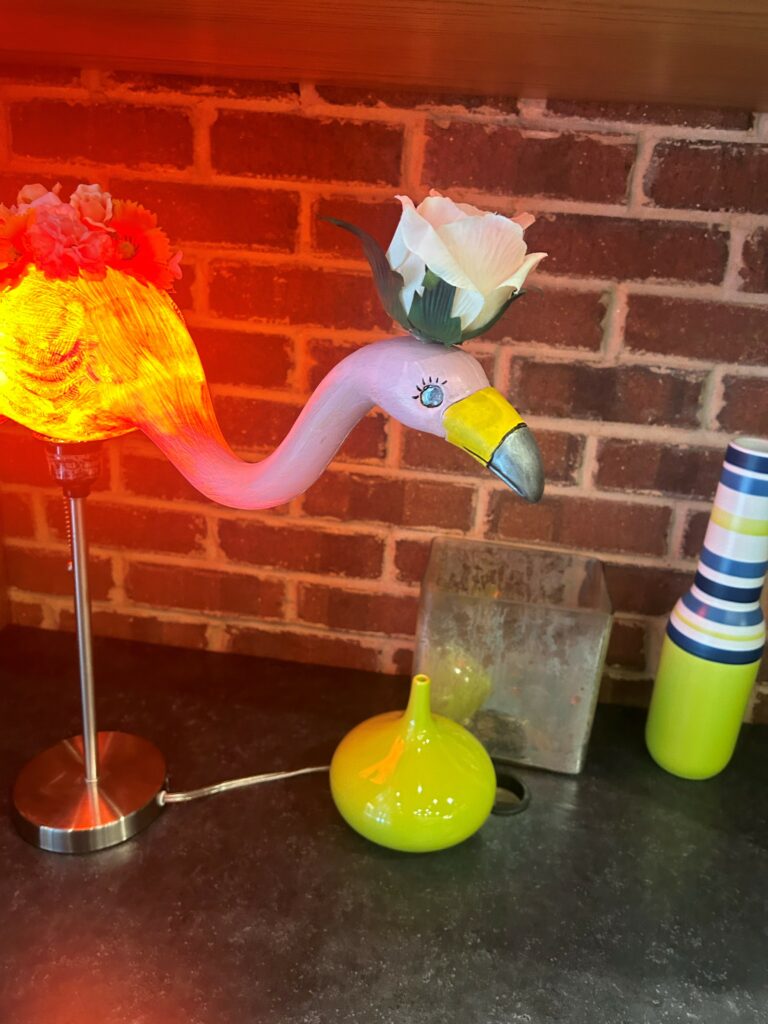
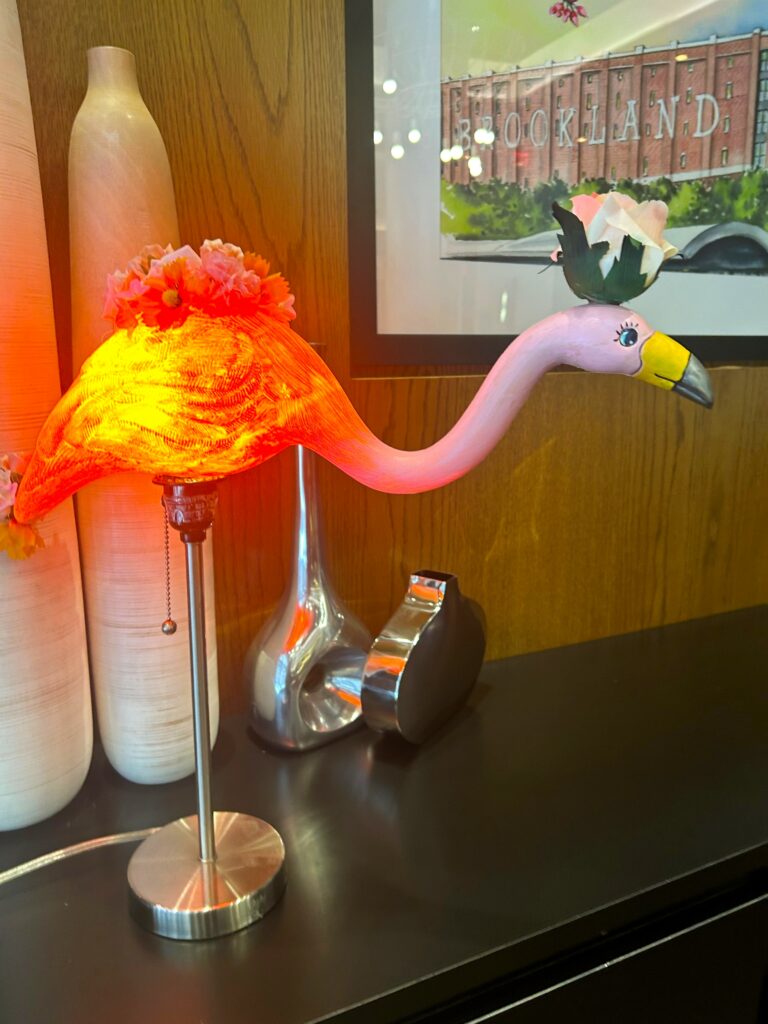
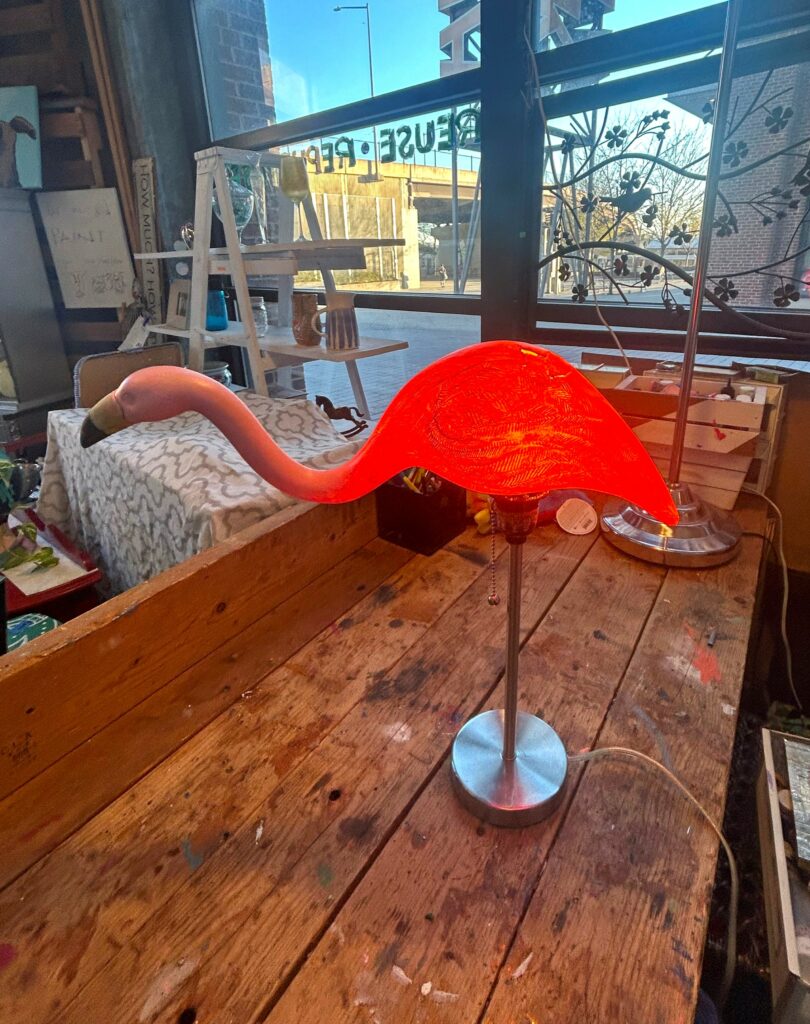
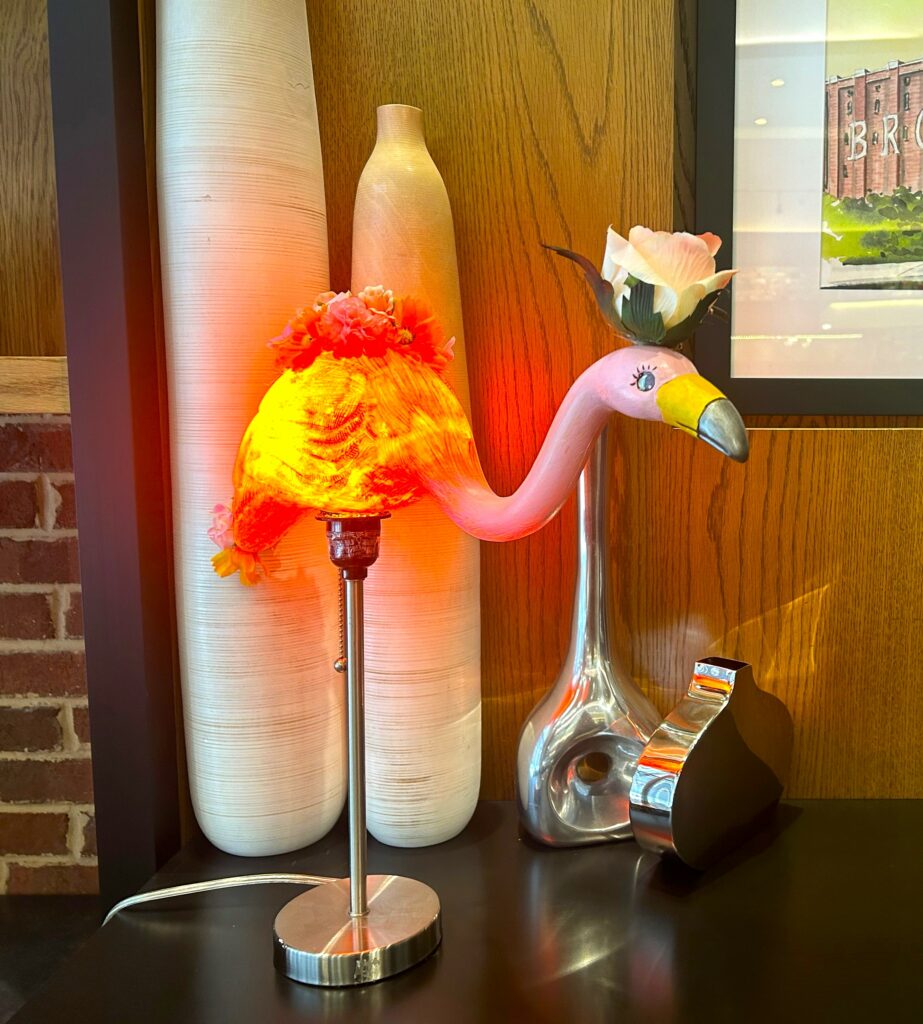
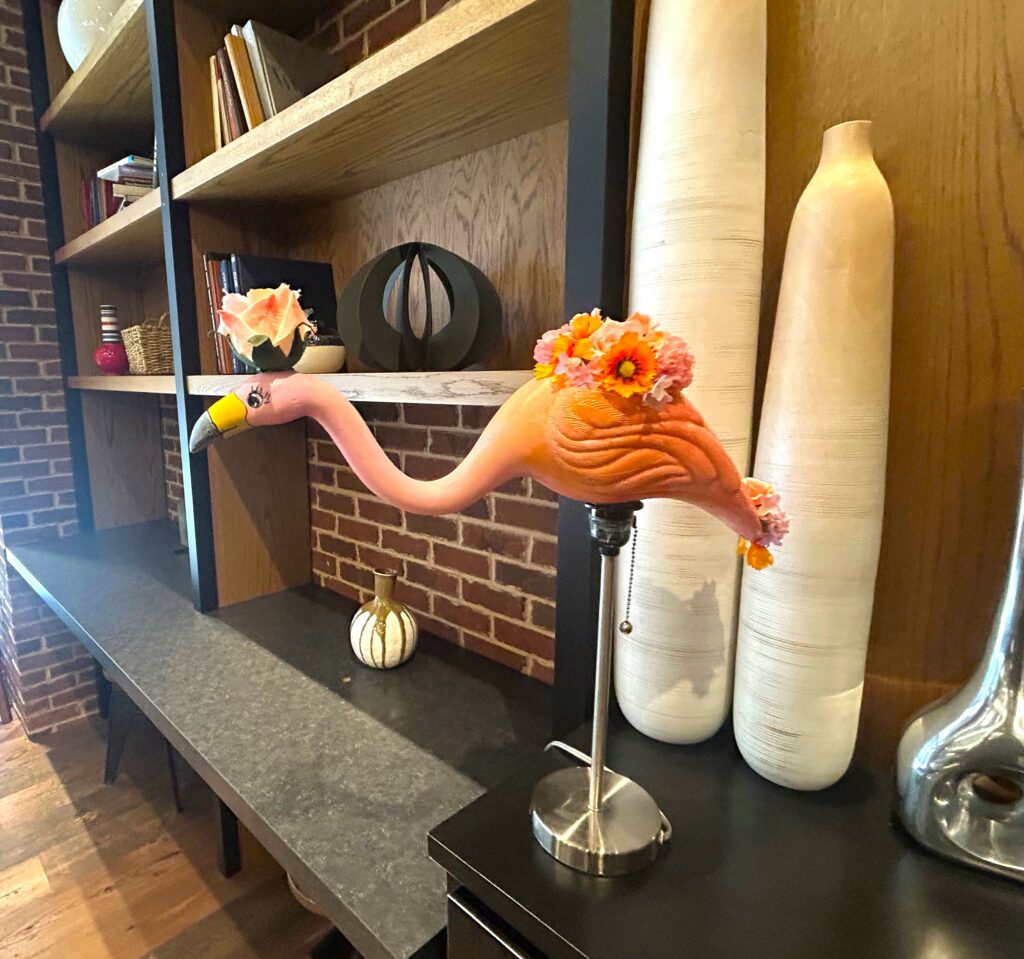
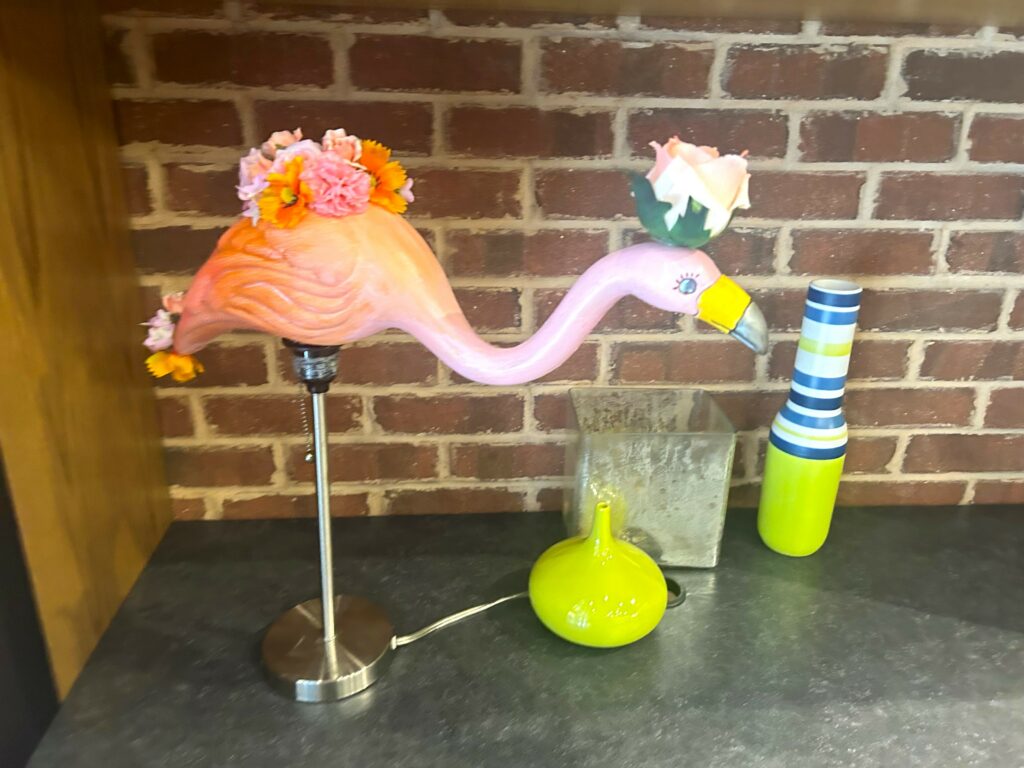
This time, a totally unique, crowd-pleaser light is created by pairing a garden flamingo and a small lamp base. Sprinkle some silk flowers on top, and you’ll have a piece that’ll make you proudly sing, “This little light of mine, I’m gonna let it shine!”
`1. Fetch a flamingo & find your good at Goodwill
One of the reasons why many of us (and likely you, too) enjoy shopping at Goodwill on a regular basis is because there are always interesting and unexpected items in every aisle and on every shelf. Spring is in the air so there are likely lots of things at Goodwill you will want to pick up for your outdoor space to make it reflect your style and taste without breaking the bank.
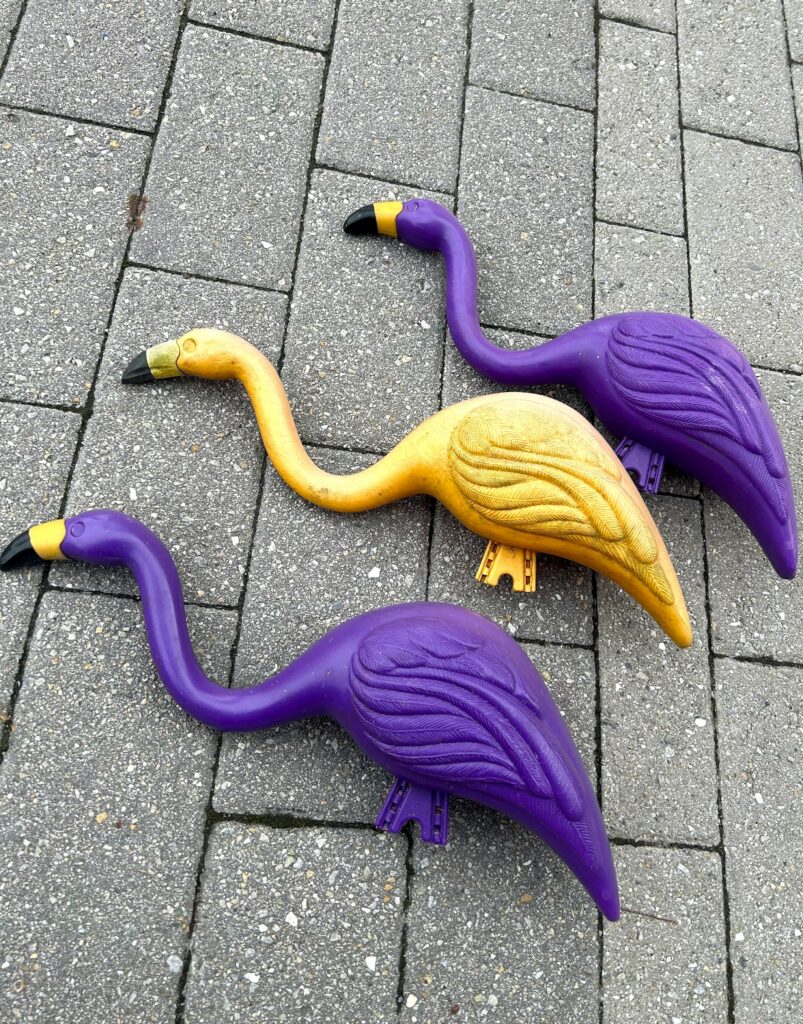
A small flock of garden flamingos was waiting for me there on one excursion, and I decided to use them for some fun indoor upcycling projects. They are whimsical and colorful, and their plastic construction is good for outdoors and even better when used inside for DIY projects.
2. Look out for a lamp base
A small and simple lamp base was picked up among the vast array of those for sale at Goodwill.
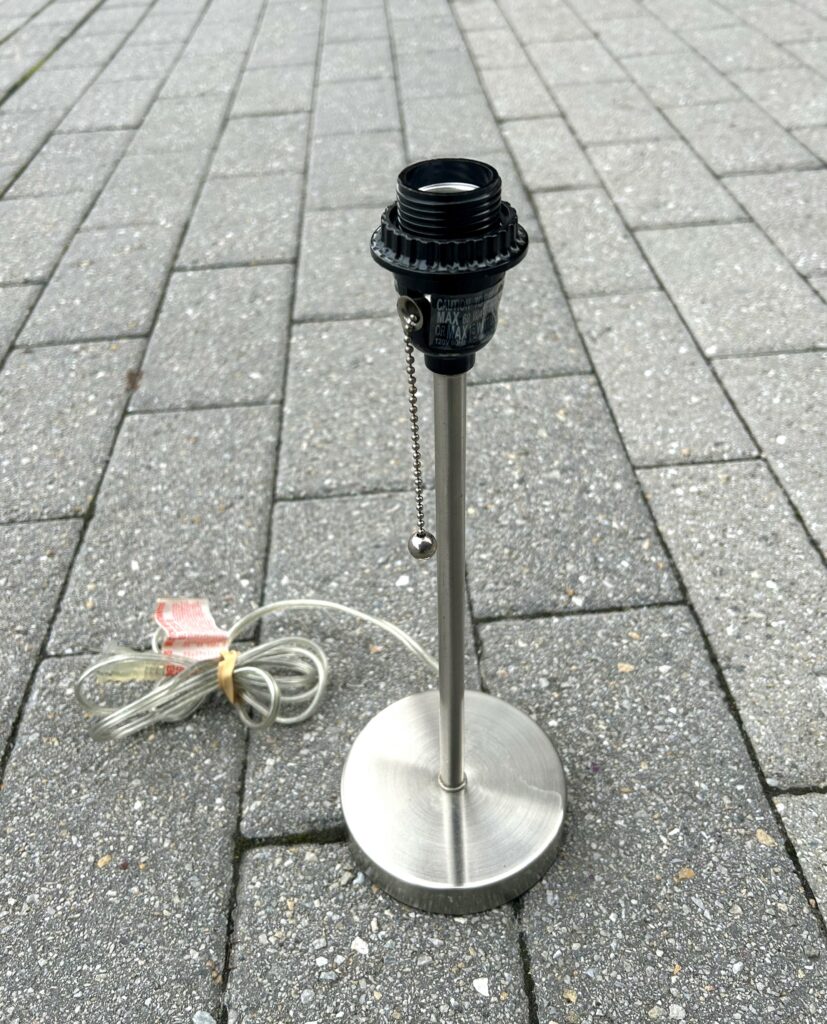
Given its size, it seemed perfect to pair with a garden flamingo—and it was, as you are able to see. Also, the small pull chain to turn it on and off was a delightful bonus, too.
3. Create an opening for your base
As fate would have it—and another lucky asset—there was a removable plastic circle that would help to hold a regular/traditional lamp shade in place.
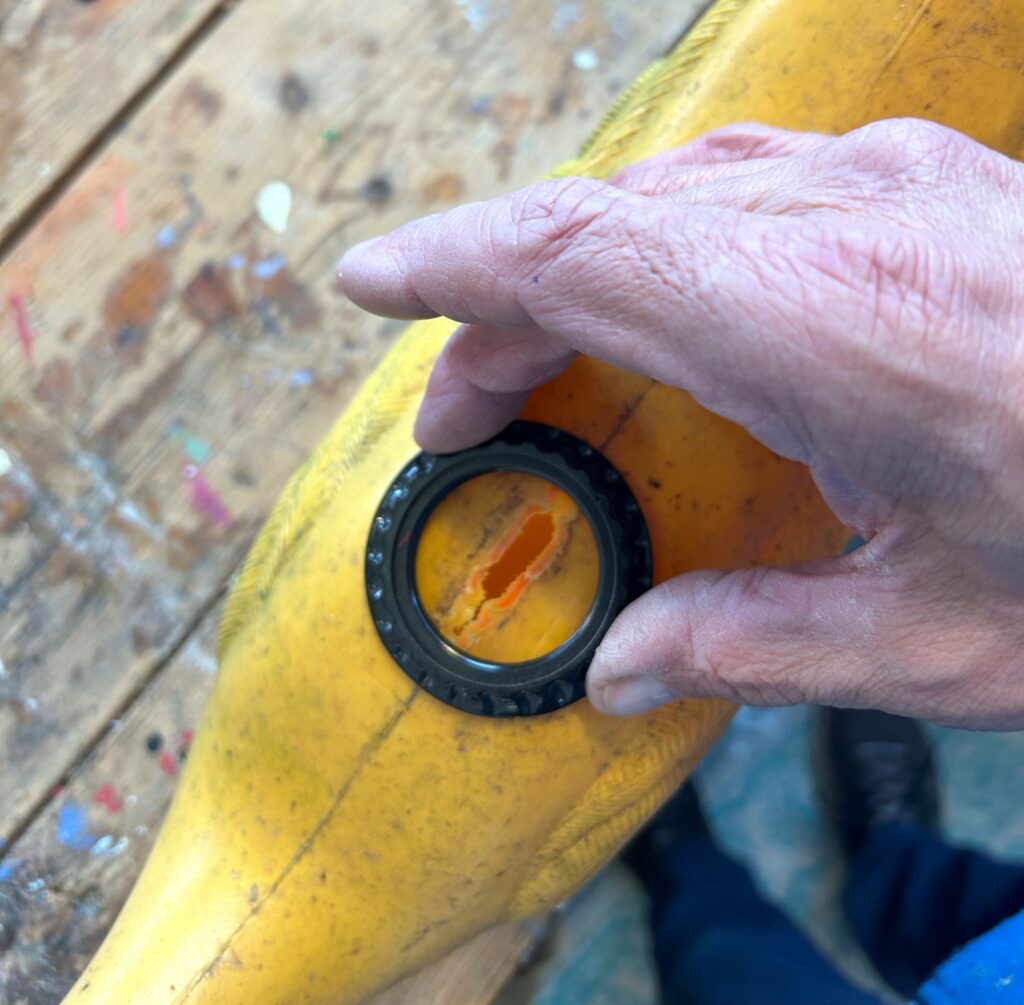
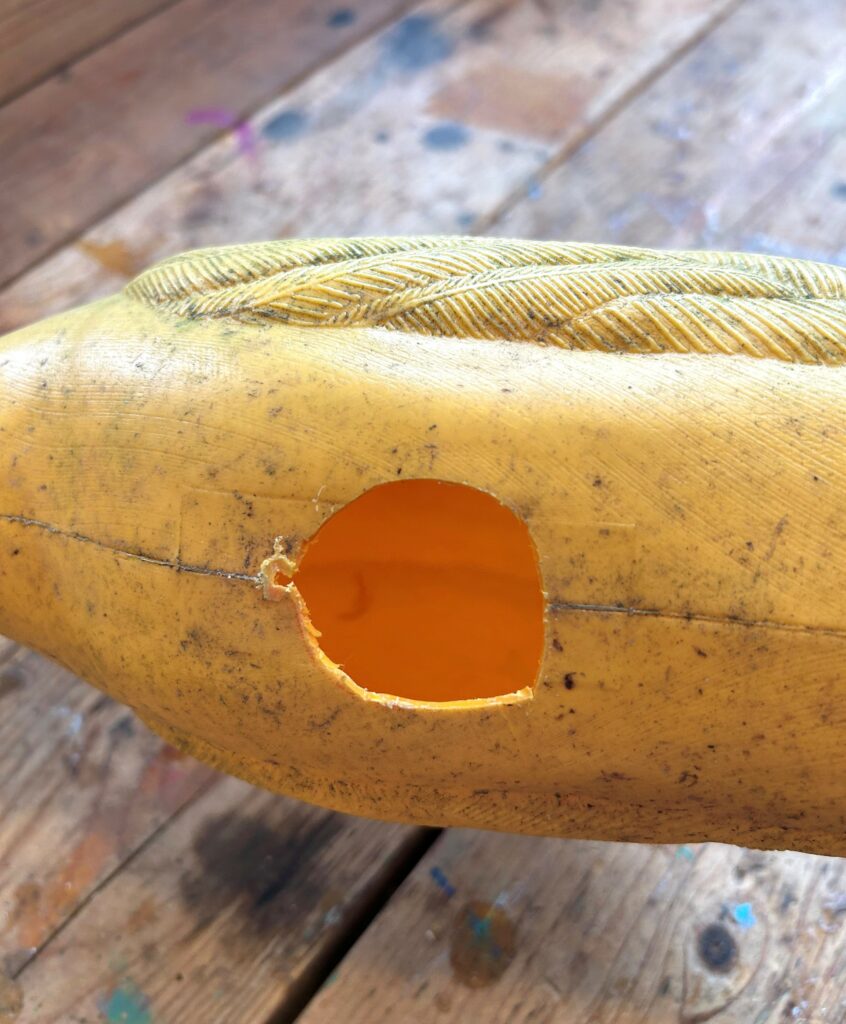
This circle part was unscrewed easily then its inside was traced on the bottom of the flamingo. A sharp, small craft knife was used carefully to remove the traced part, leaving a circular-shaped hole behind.
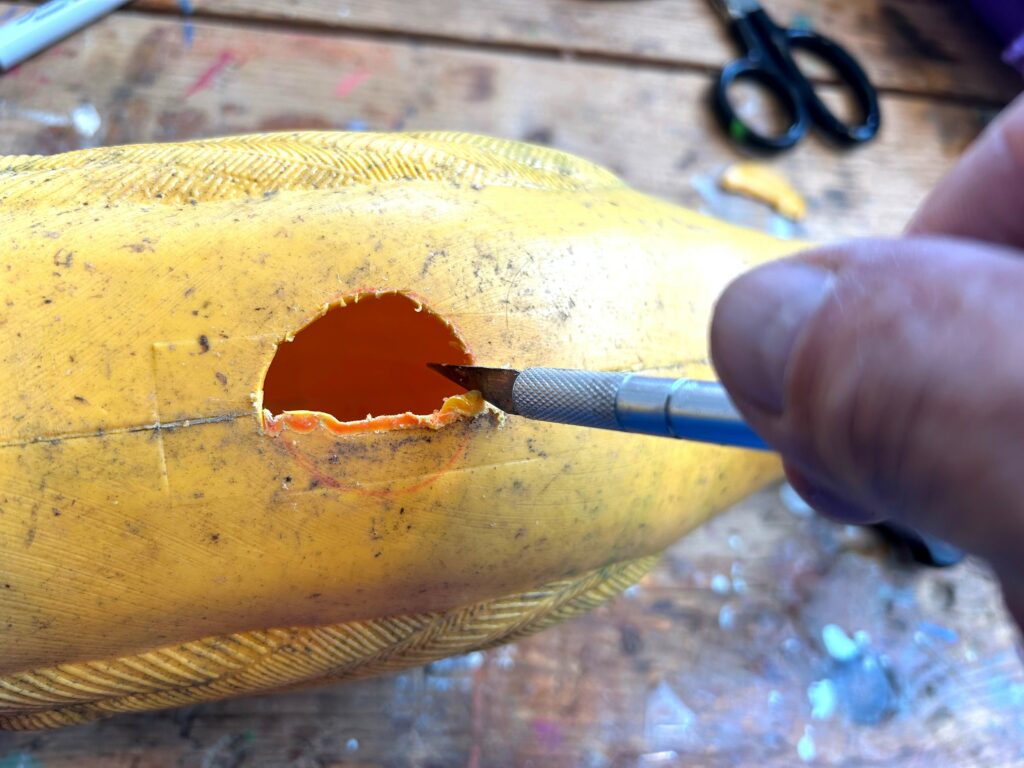
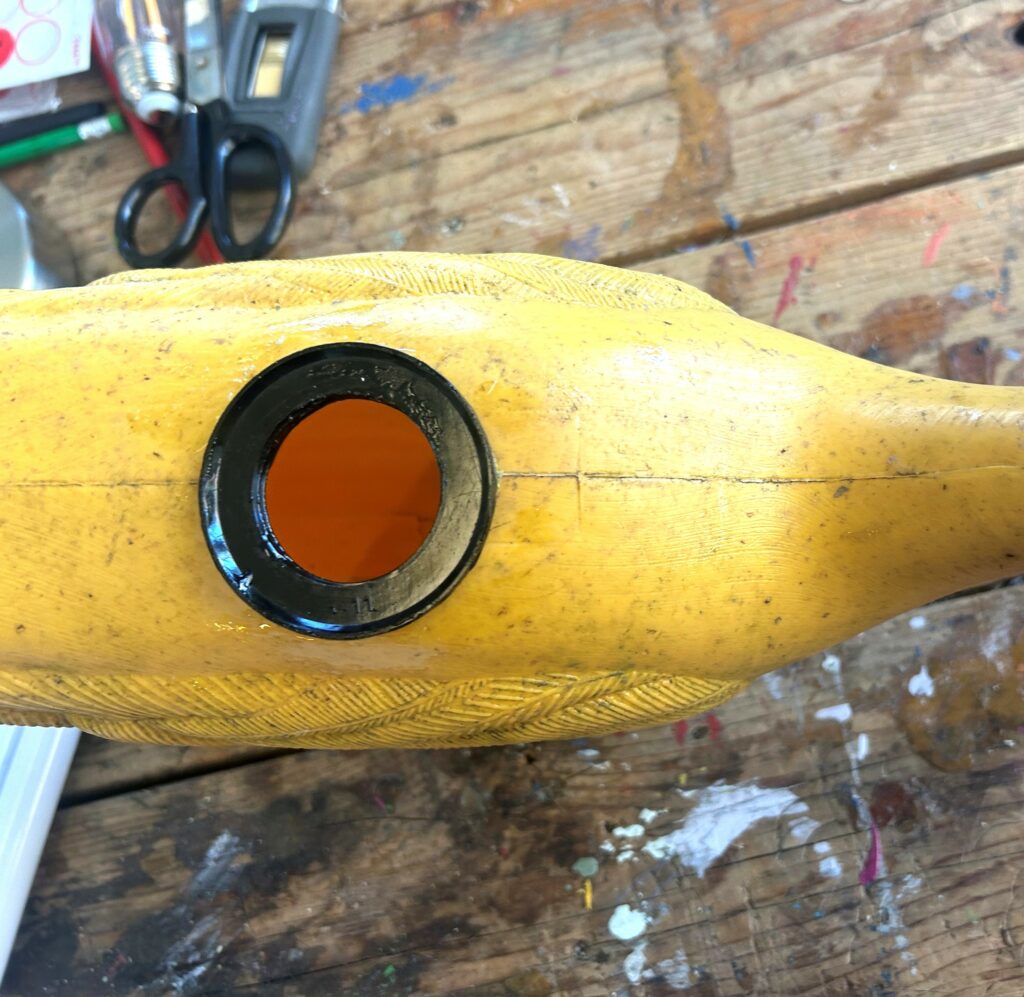
Using quick-drying epoxy glue, the circle part was glued in place, giving the flamingo a place to perch on top of the lamp base. As you tackle this step, take your time and be super careful not to cut or poke your fingers with the knife.
Another helpful option is to use an electric or battery-powered drill and a large bit to make the hole.
4. Select a slim bulb for simple assembly
In its previous life, this little lamp base would have had a lamp shade rest on top. When the bulb needed to be replaced, you would have reached it from above the shade or below by grabbing and unscrewing it. In other words, you would have had room to get your hand in and out of the shade to remove it.
However, given that that flamingo has a solid surface other than the hole you created, a different option is needed. The solution? An LED bulb which is cool to the touch and straight up and down in shape, came to the rescue. Thankfully, most hardware stores carry such bulbs, as did my favorite one, Annie’s Ace Hardware, in Brookland, near my studio and home.
5. Screw to secure
The skinny, straight bulb was inserted, and the flaming with its glued circle lamp part was placed on top and screwed in place, giving it a happy place to perch. Be careful with this step, too, so you don’t break the bulb, and ensure the flamingo with its circular lamp part is intact.
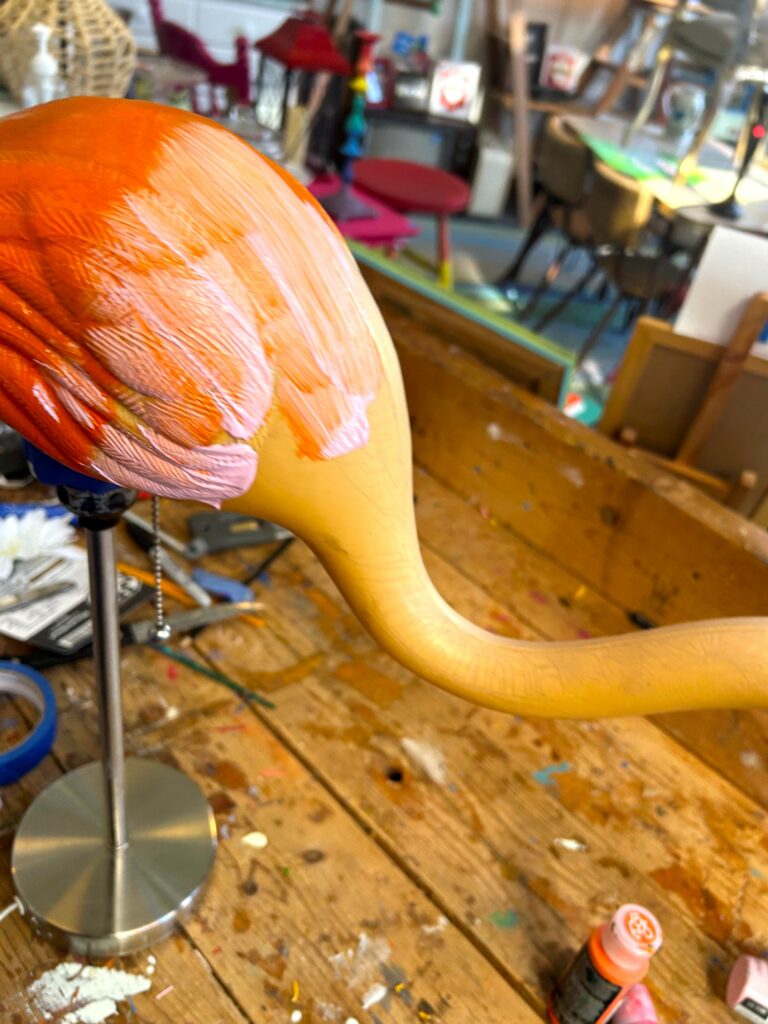
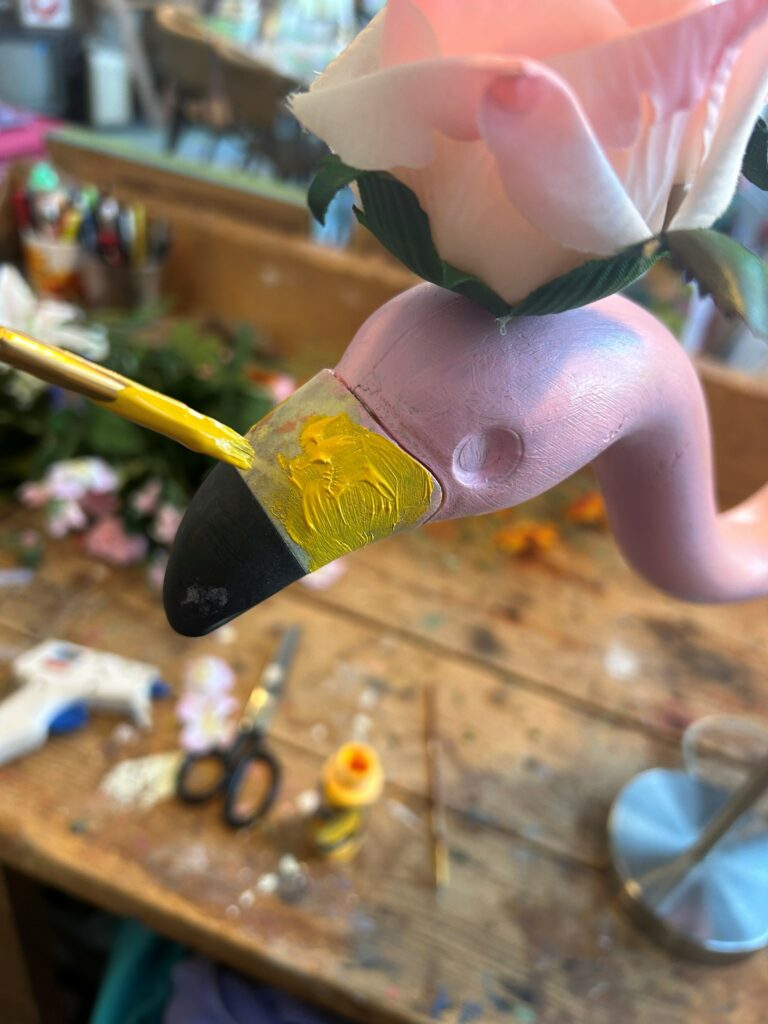
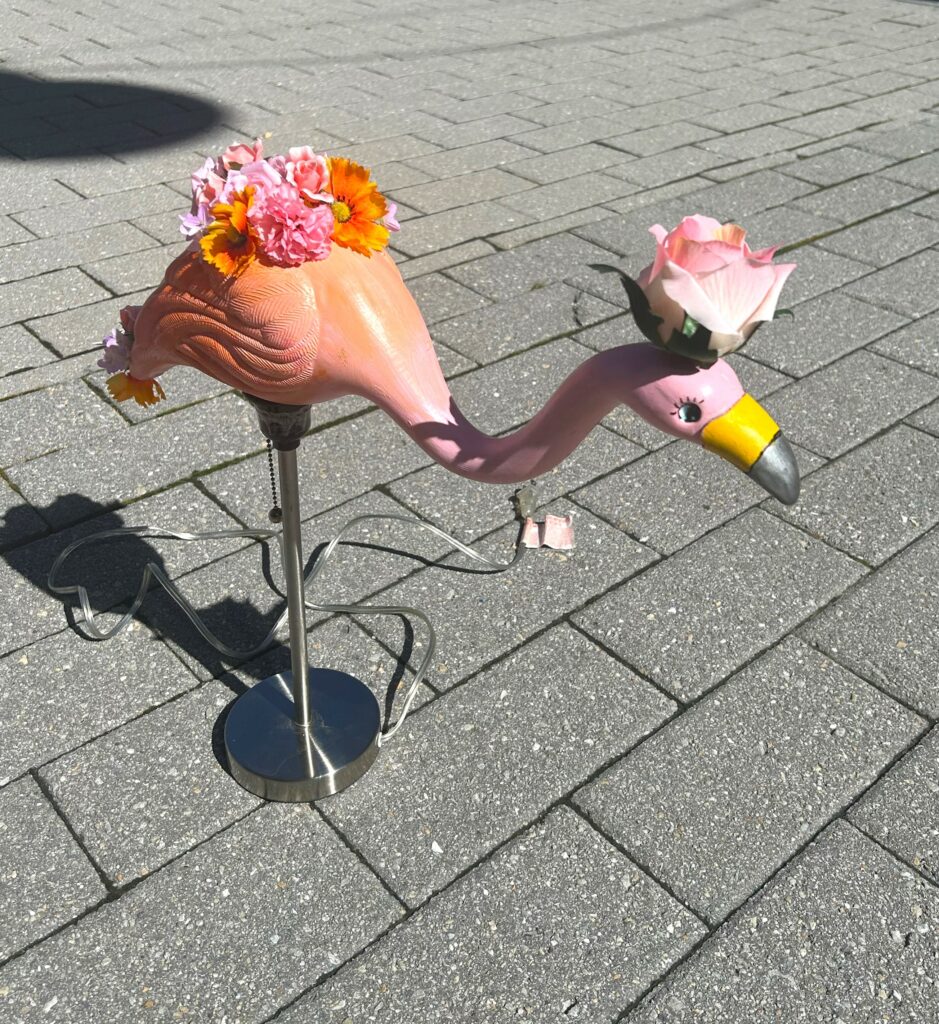
6. Paint on some pop & pizzaz
Give your garden-flamingo-turned-light some color by brushing on several layers of craft paint. While you can paint your flamingo any color you like or select one to match your home’s décor, I liked the idea of a bright pink one since we associate that hue most with these feathered friends. If you have several shades of pink, consider applying them and blending them as you go for a flowing, organic look and feel. Again, be gentle so that your flamingo and its glued base part stay together.
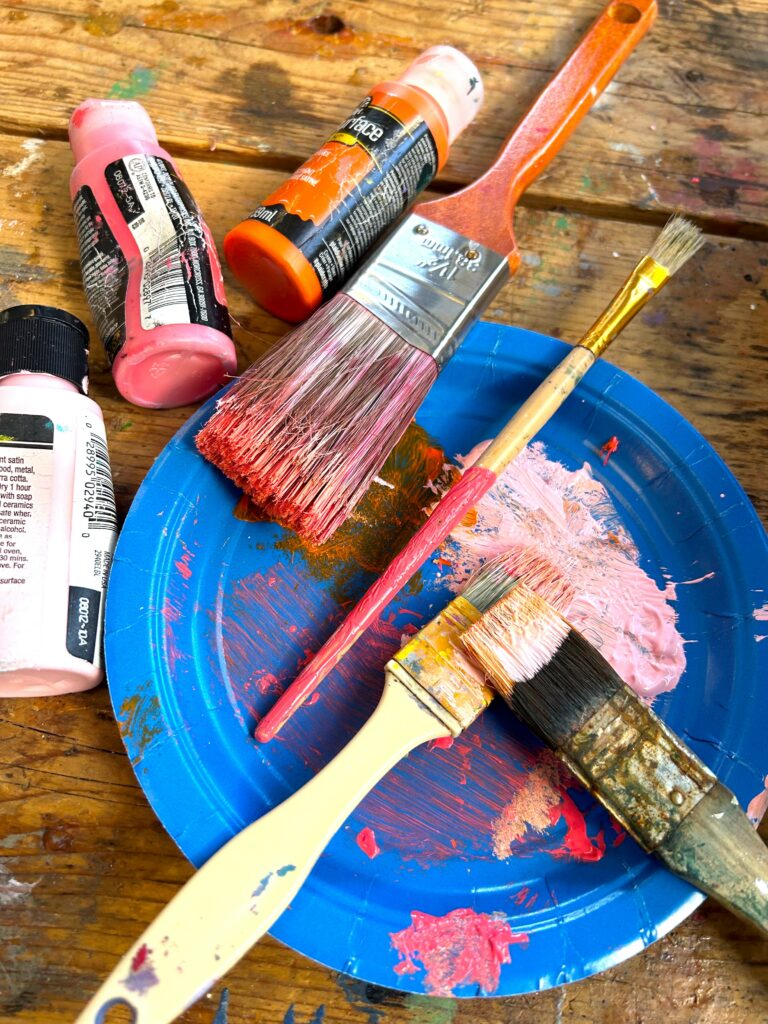
Yellow, silver, white, and teal paint were selected for its handsome beak and friendly eyes.
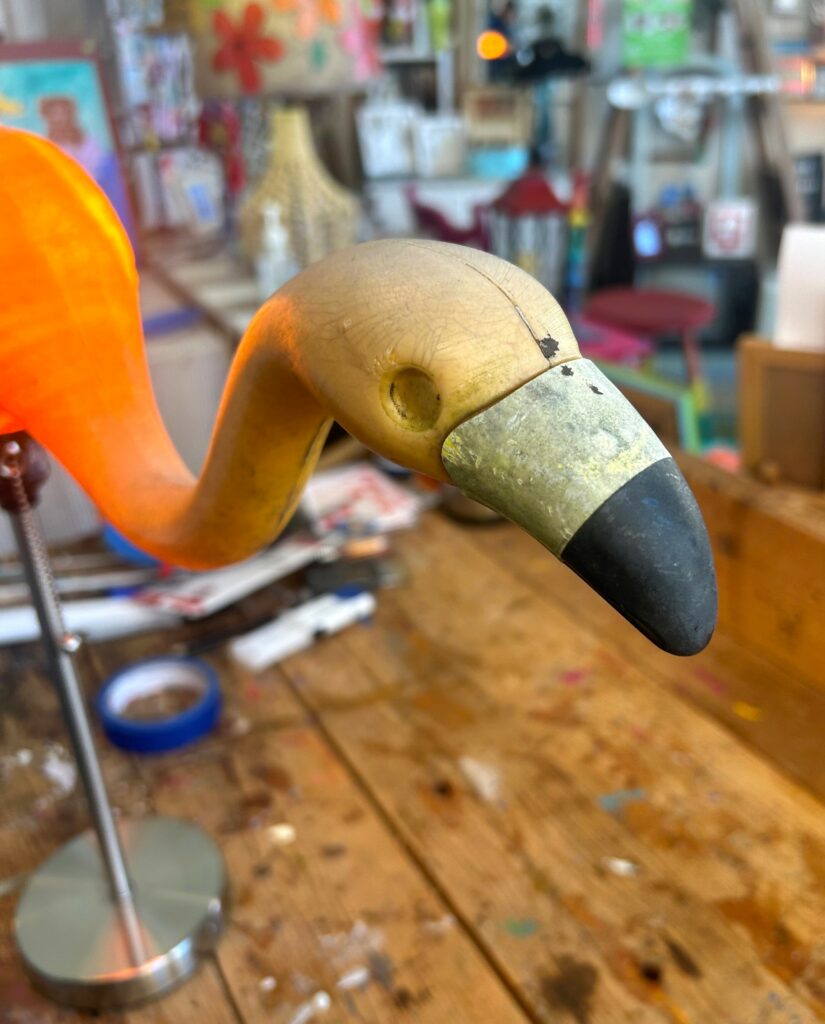
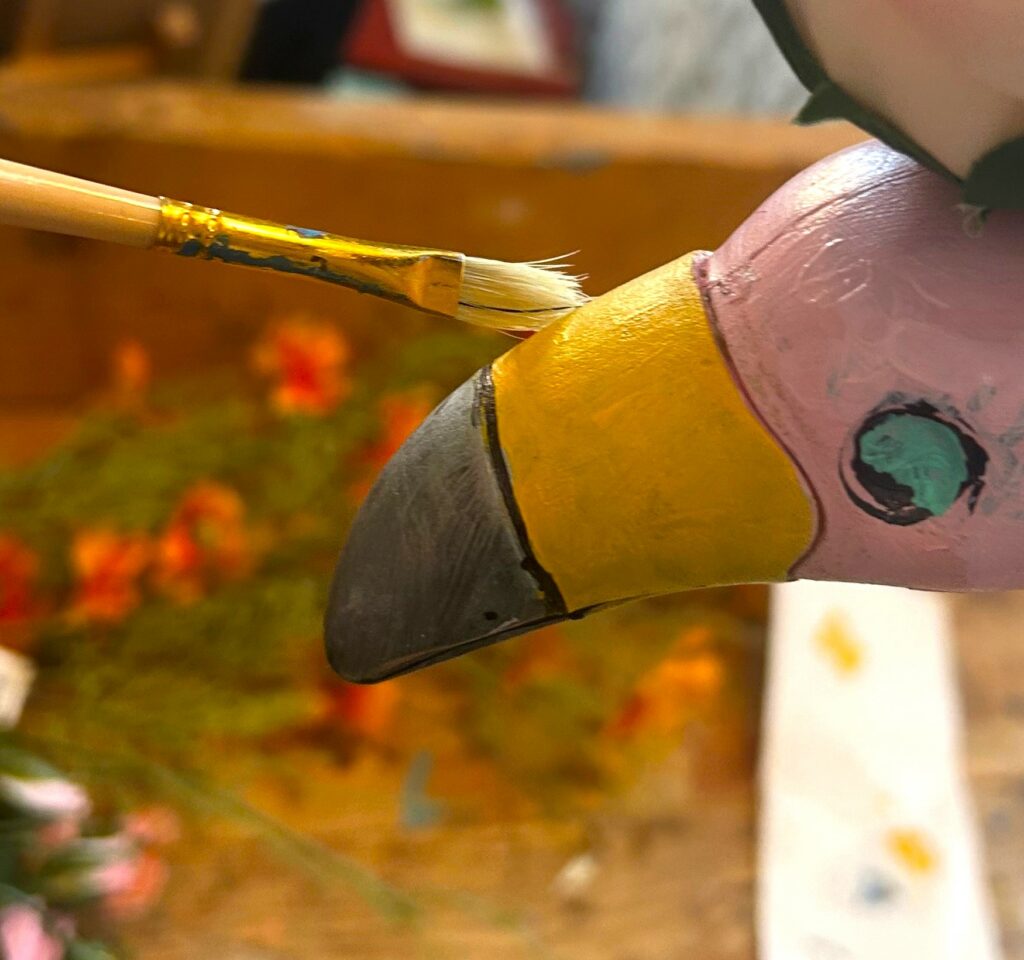
Use a very small, detailed paintbrush for this step. Once dry, consider using a Sharpie or other black marker to add pupils and eyelashes. Now, this bird has some personality!
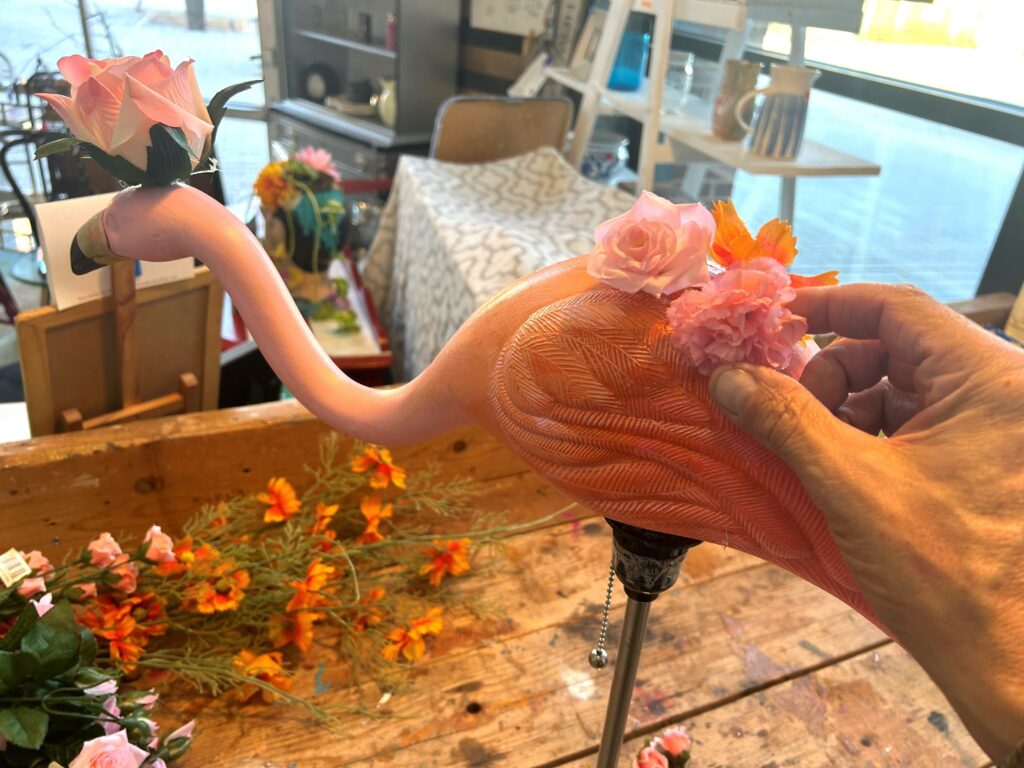
7. Give it a flowering hat & blooming accessories
While you could have stopped at the previous step, and your flamingo light would have been just fine, we always want to take things to the next level of fun, flair, and fabulosity (is that a word?)!

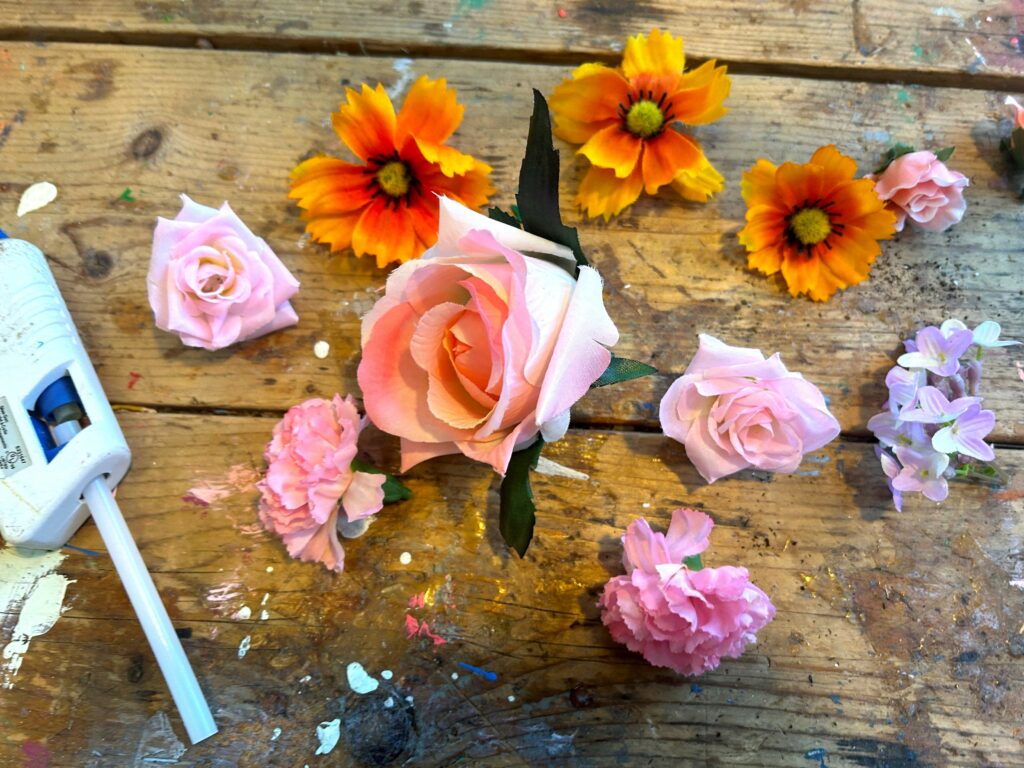
Silk flowers in a variety of pinks, as well as some orange ones, were selected to match the bird’s new colors.
You often see silk flower arrangements at Goodwill, so consider picking up one or two while there, too, to reuse this way.
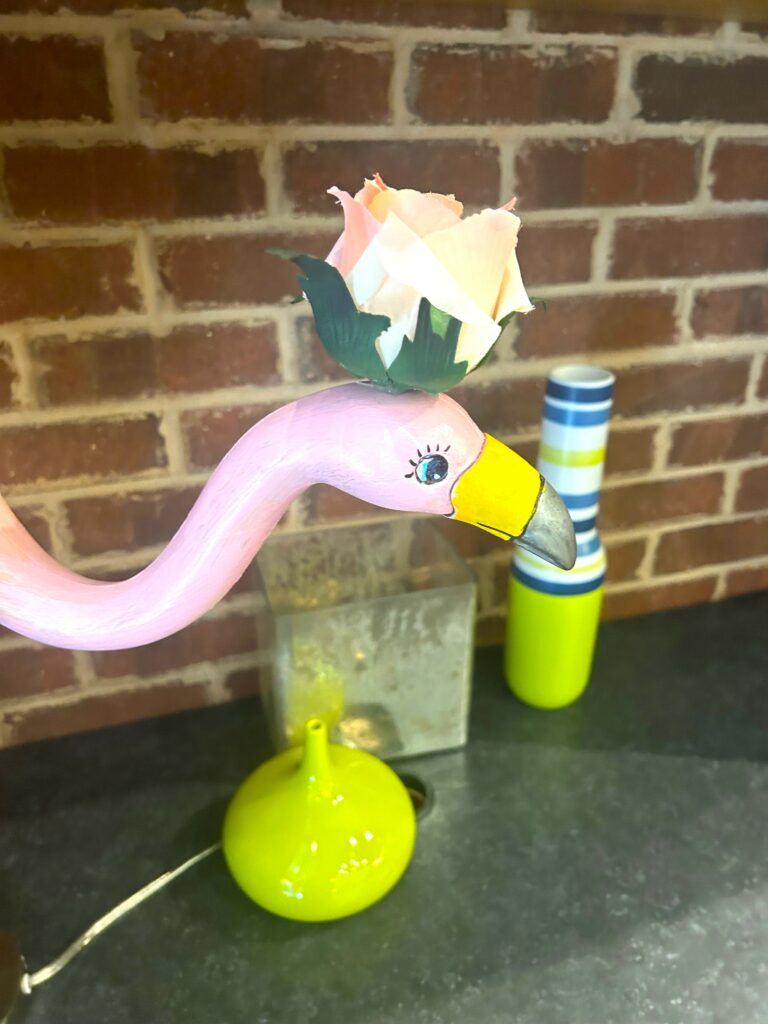
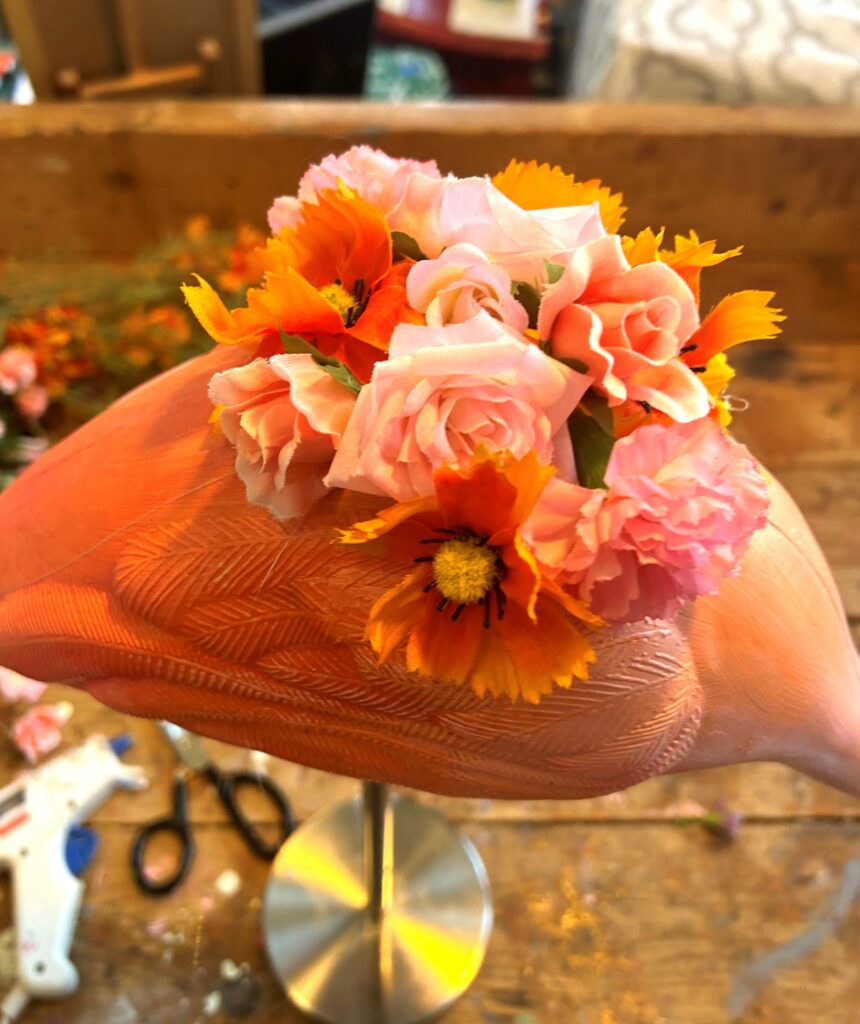
A large pink rose was added as a hat on top of the bird’s happy head using a hot glue gun. An array of other flowers was added on the critter’s back and several more were enlisted as colorful tail feathers.
A sassy and superb step, don’t you think?
8. Perch it in your place
This totally funky and charming little light will look great with any décor style. It is not meant to blend in at all, so show it off in your favorite room so it brings a smile to your face it time you see it—whether it is turned on or not.
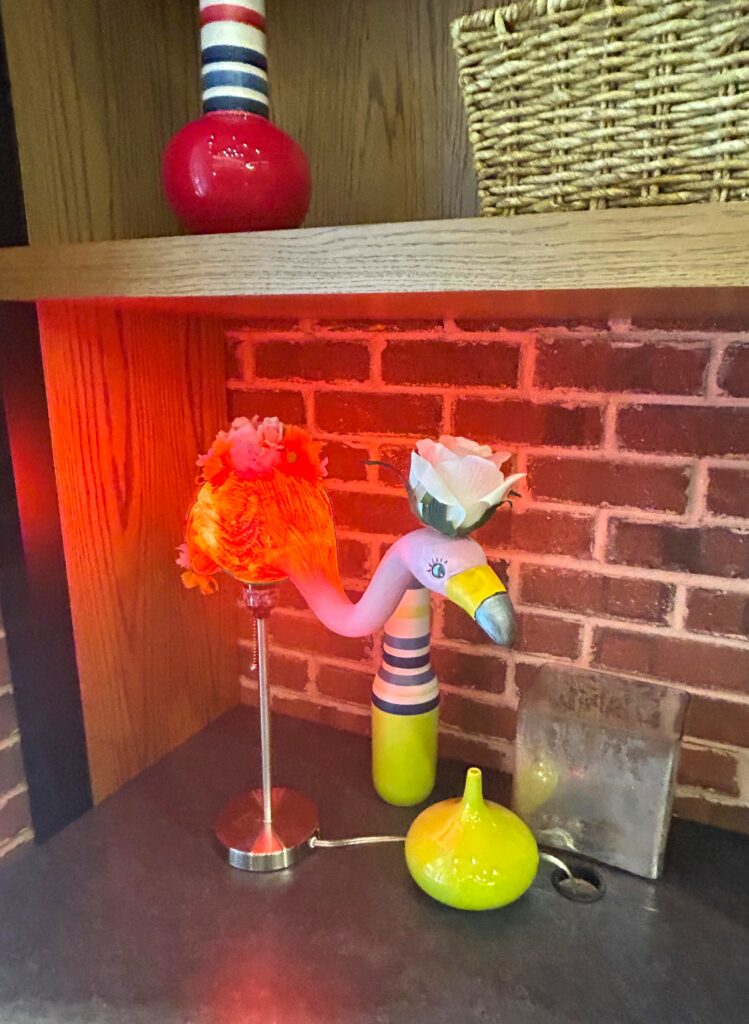
Hopefully, this project turns on your creativity and makes your DIY dreams take flight!
Similar Reads:
- DIY: How to Transform a Garden Flamingo into a Statement Piece
- Make a Roar with Rainbow-Ringed Lamp Shades
- Quick & Inexpensive DIY: My Thrifted Lamp Makeover
- How to Make a Colander Lamp

Tim Kime
Artist, Motivational Speaker, Life Coach


