A Family that DIYs Together, Stays Together: Colander Lamps
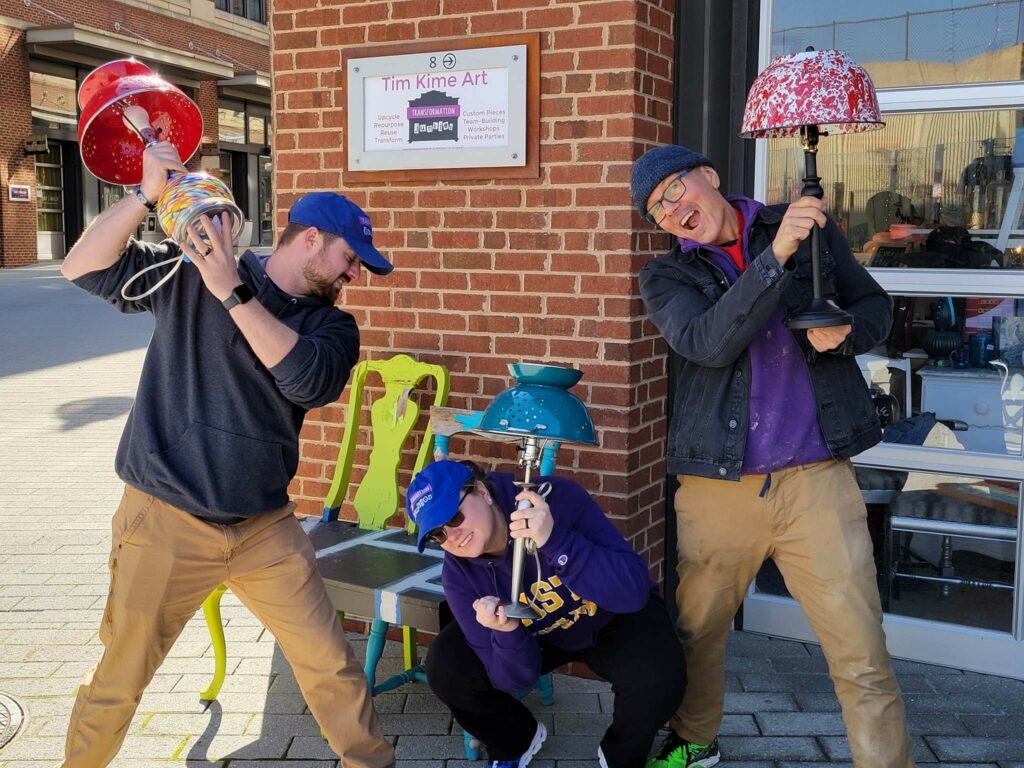
Upcycling items is so much fun, so why not double or triple your fun by doing it with others? During a recent visit by my niece and her husband, they took time from seeing the famous Washington, DC sights to visiting the best one, not on the map—-my studio space! Together, Saige, Jake, and I paired thrift store colanders and lamp bases to create totally unique and charming lights perfect for your country kitchen, family room, or bedroom.
DIY projects can help to spark one’s out-of-the-box thinking while giving a meaningful memory, too. Both the colander lamp and time spent with family will be remembered for years to come!
Items needed:

· Large-sized colander or metal kitchen bowl
· Medium-sized table lamp bases
· Drill
· Wrench or pliers
· Lamp finial
1. Shopping at Goodwill will help you see the light
When my visiting niece Saige said, “Let’s check out Goodwill,” I knew it would be an excursion that would be well worth the time away from visiting The White House, Lincoln Memorial, and other traditional Washington, DC tourist attractions. Given the limited time together, we were looking for an upcycling project that would be easy and exciting.
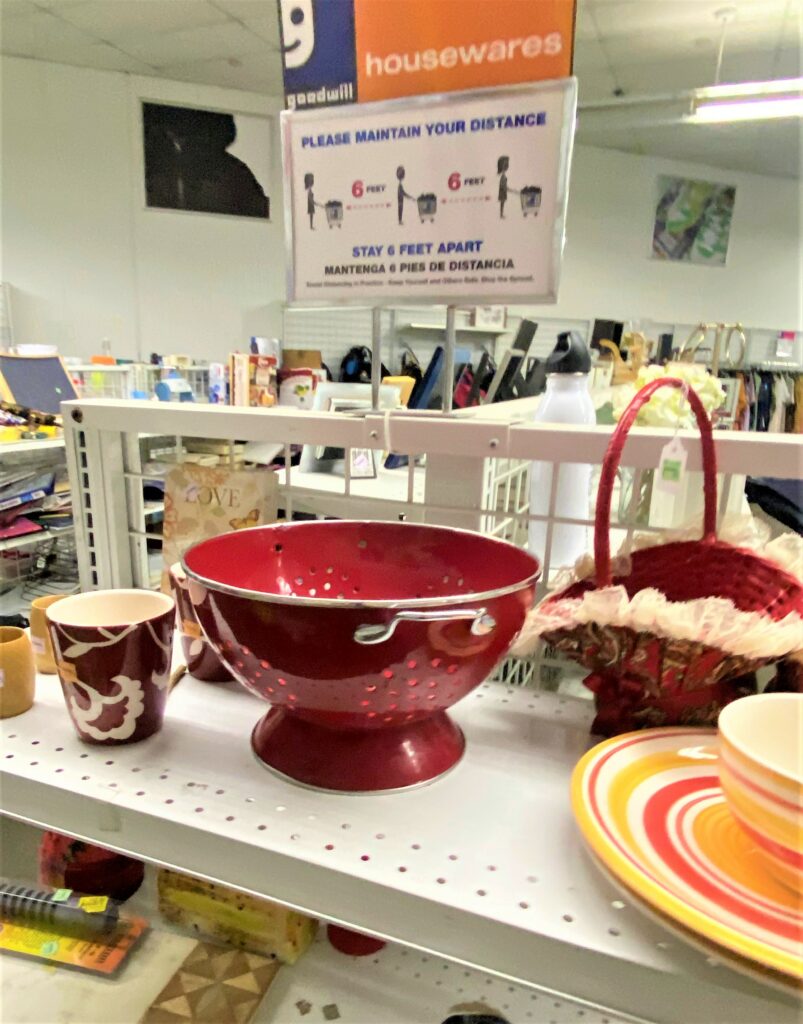
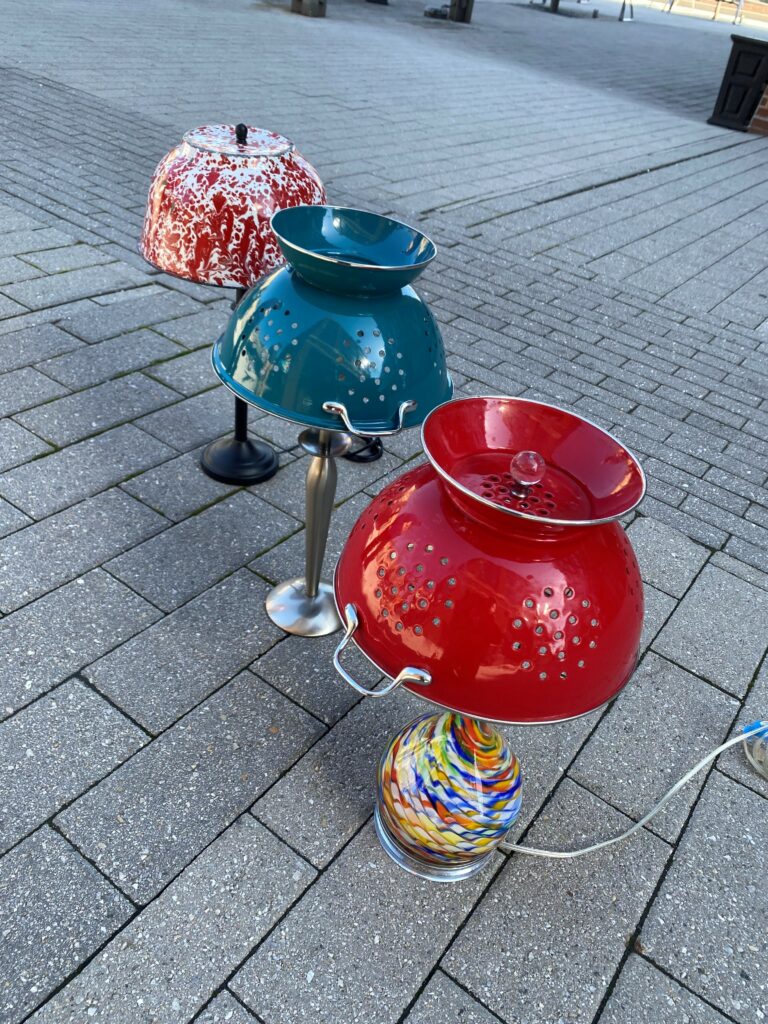
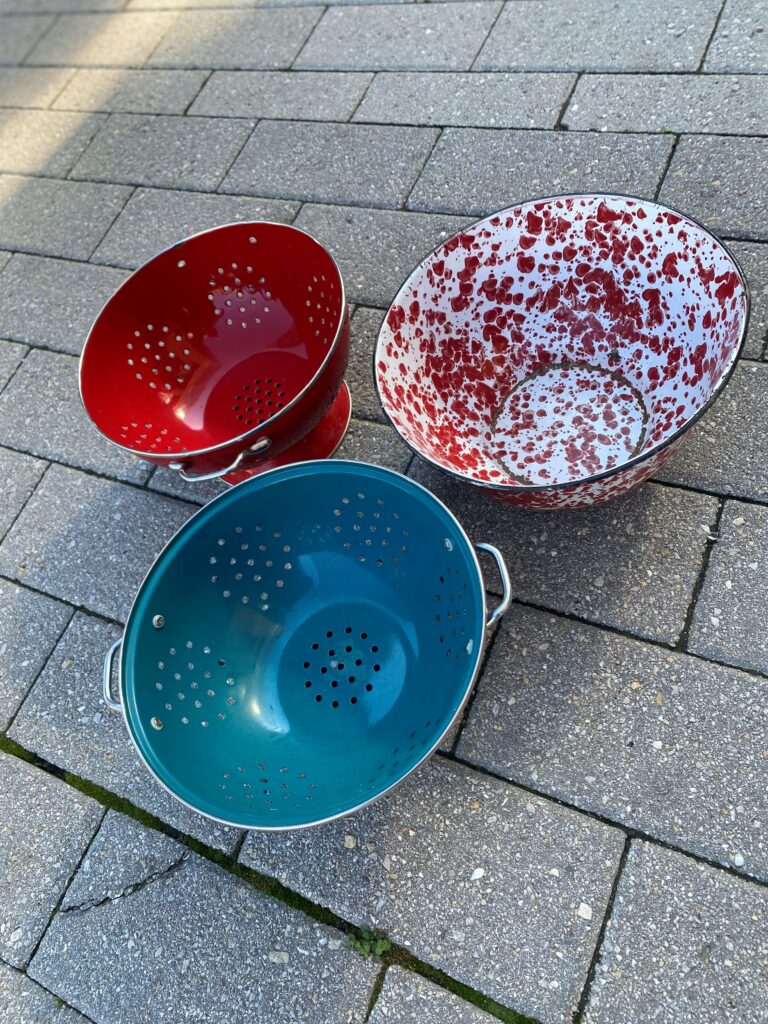
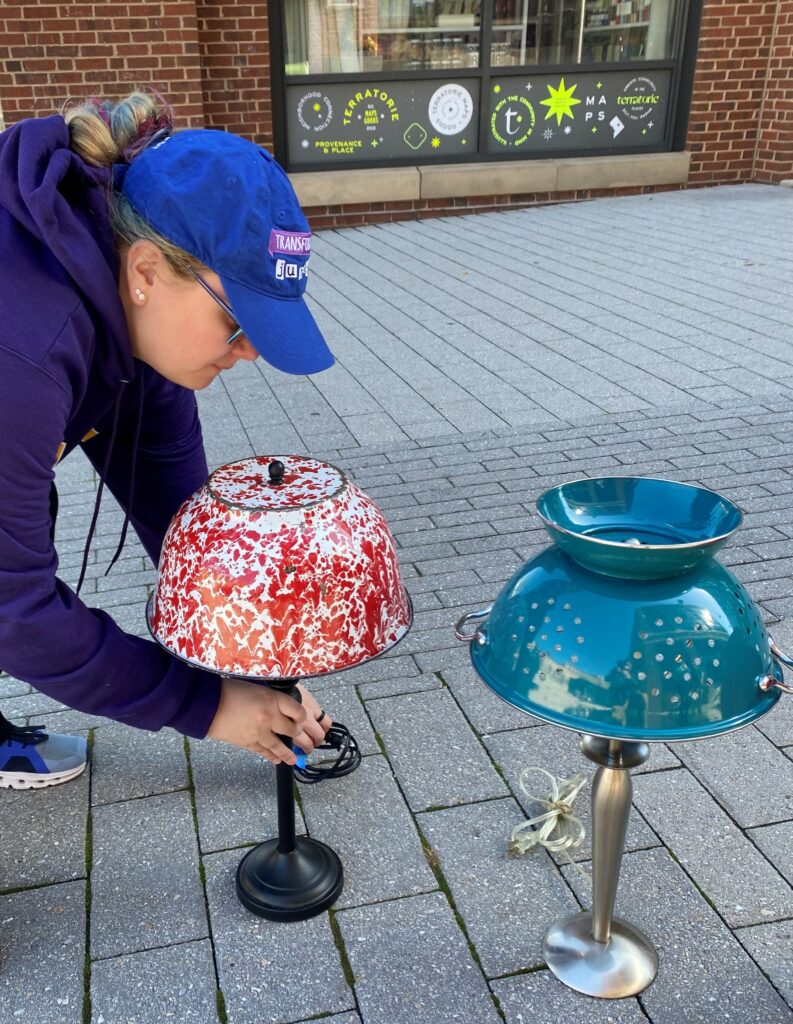
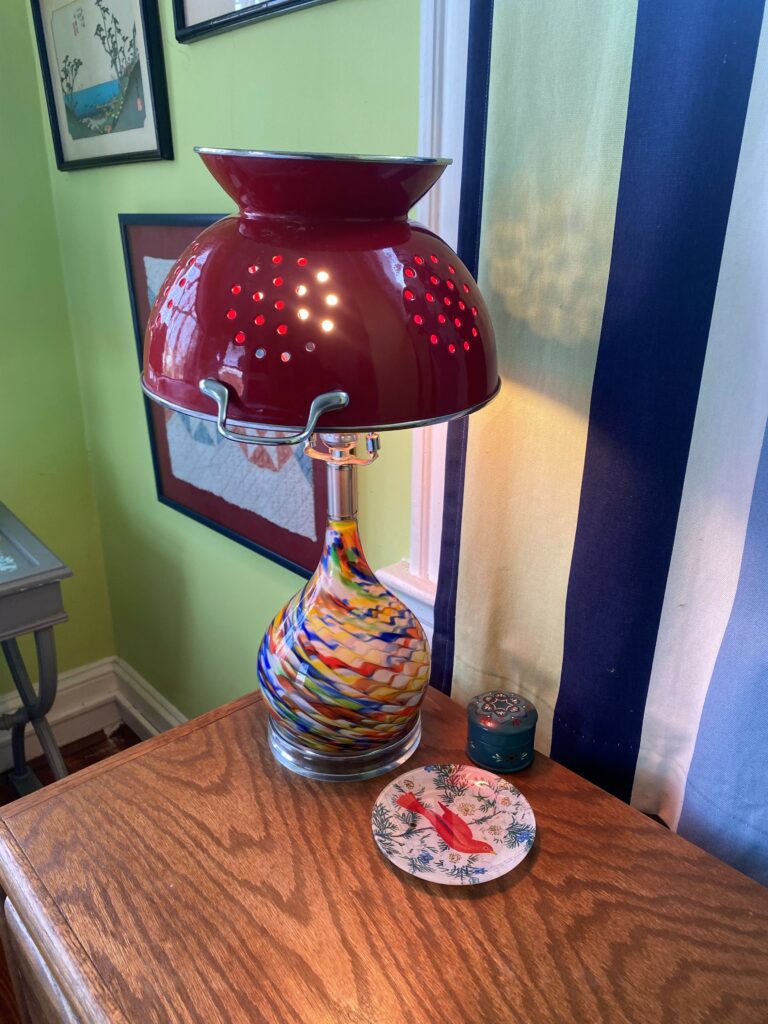
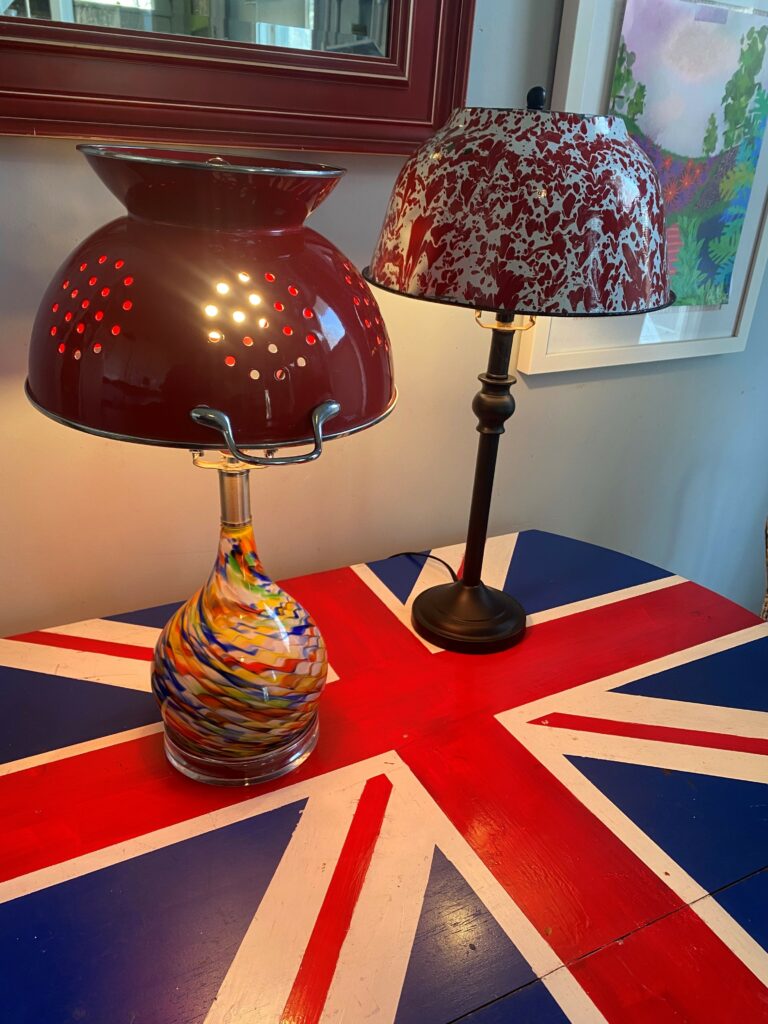
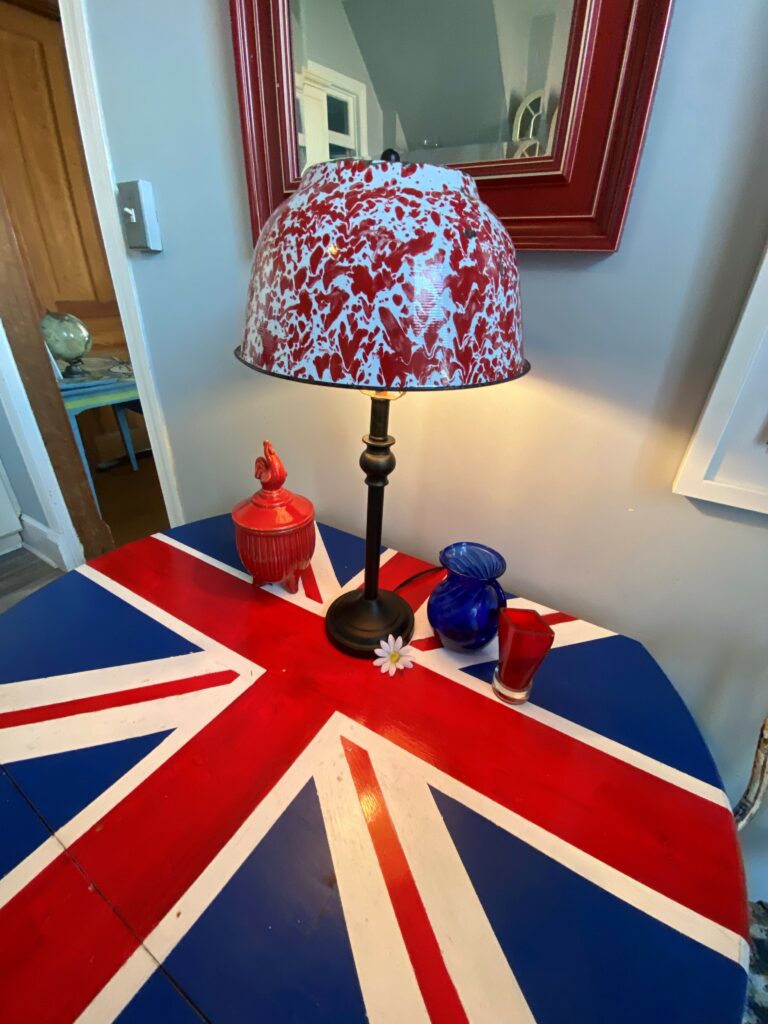
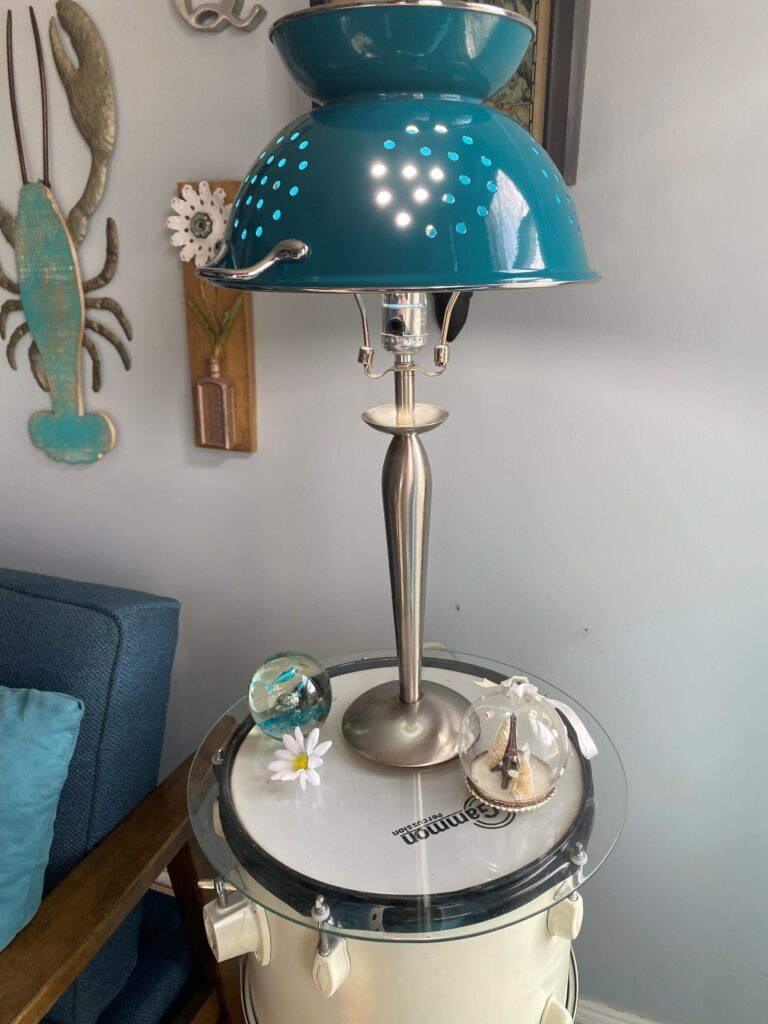
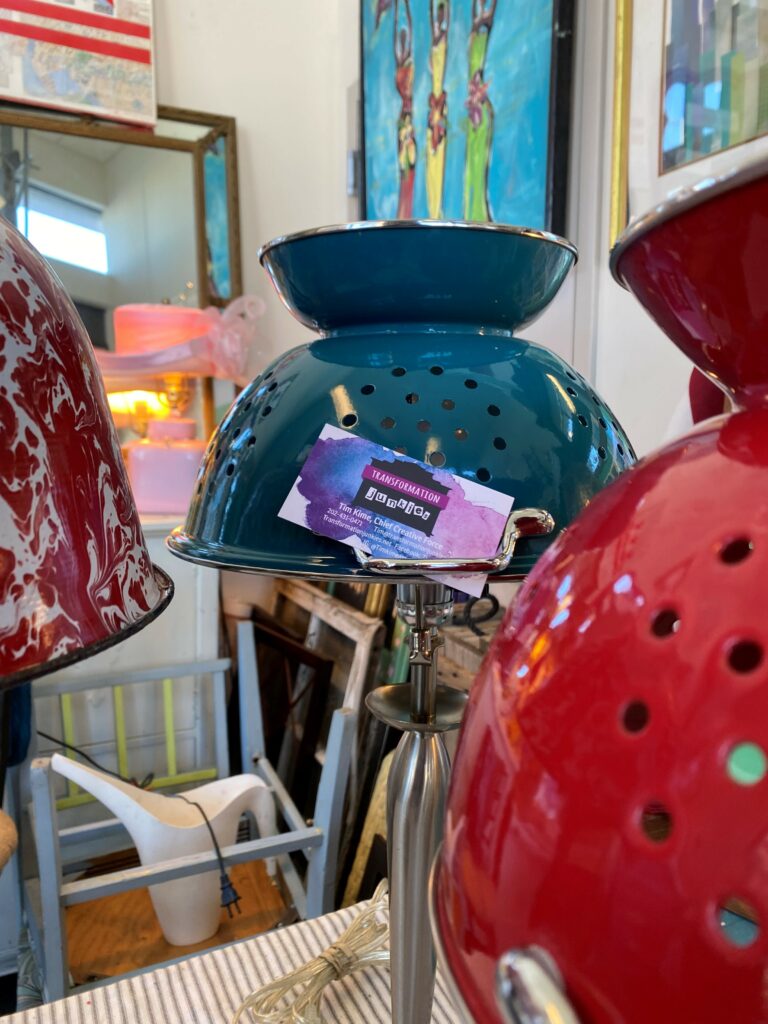
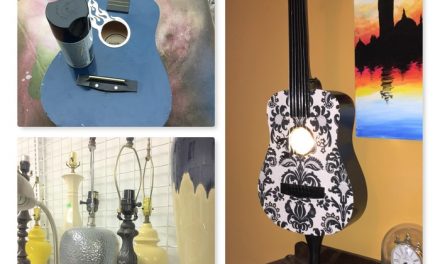
Look in the Housewares section for metal kitchen items to flip into lampshades. Two large colanders and a deep metal bowls were ideal when you looked at them in an upside-down manner. The colanders came in bright colors—one a deep red and the other a vibrant teal—which was the icing on our DIY cake. A deep metal bowl, about the same size, was also discovered during our adventure, and it, too, came in a welcoming color palette—a pairing of burgundy and white.
Also, while you venture to Goodwill, look for lamp bases to partner with the kitchen piece. Goodwill always has many options available for a bargain-hunters dream price. How to decide which base to get? Your colander’s look can help you decide.
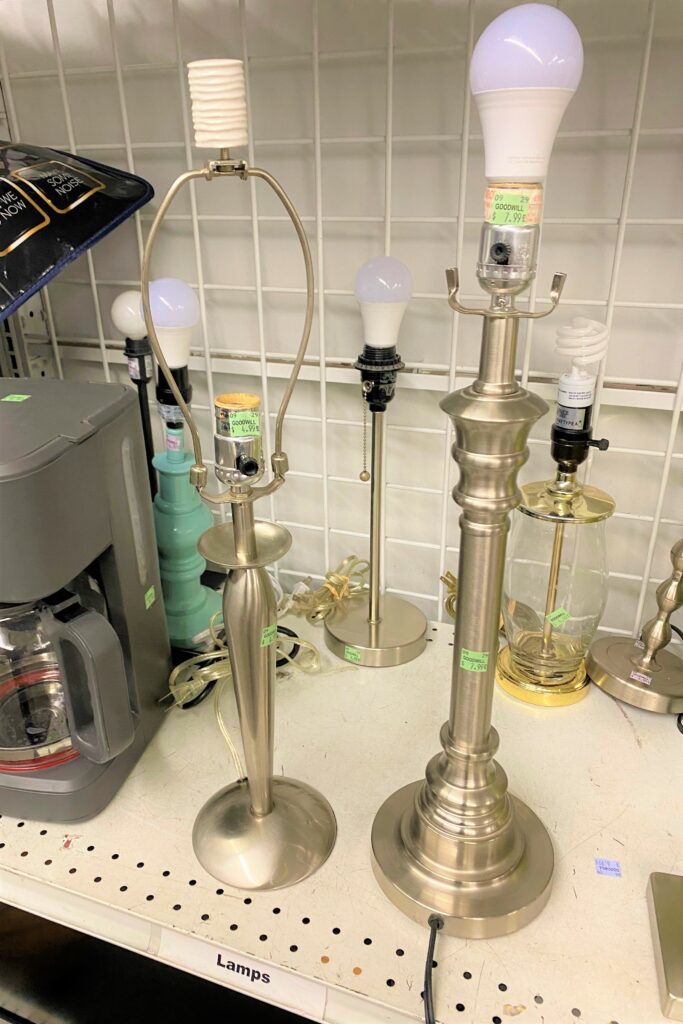
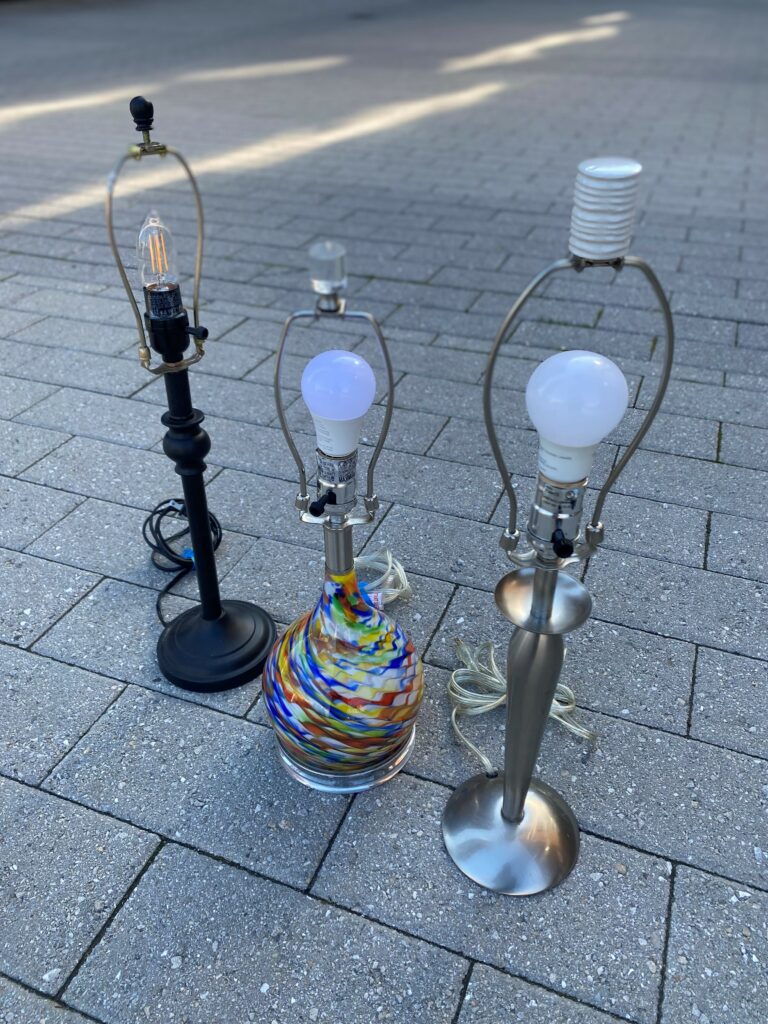
A silver lamp base was selected because the colander had silver parts on them. The dark brown, slim base was selected because of the brown edging in the metal bucket. The colorful glass-based lamp was selected for its vibrancy and various tones. Also, it is strongly recommended to pick a lamp base with a harp attached to it—that’s that part that holds the shade to the lamp. By selecting one with it, you have all you need to transform it this way.
Design idea:
If you don’t find a lamp base on the “right” color, consider spray painting it to match. Also, you can transform a silver colander into a truly one-of-a-kind one by painting it a funky color as well.
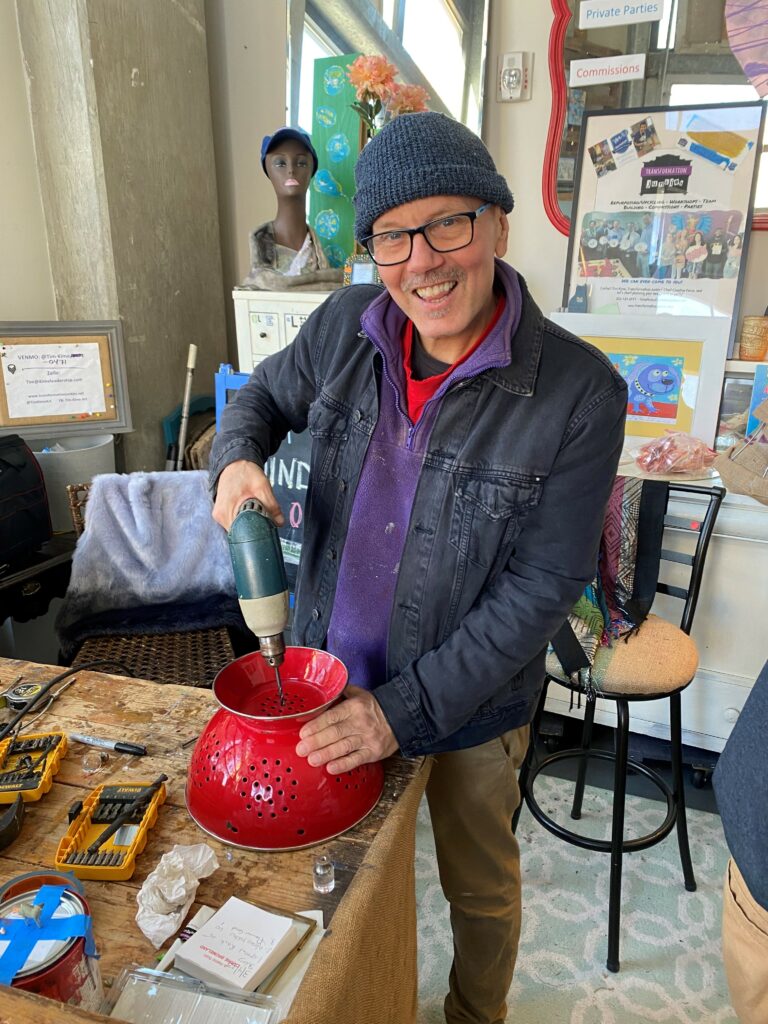
2. Disassemble, then bend a bit
If your lamp has a shade that is in good shape, then remove it and set it aside to reuse it for another DIY project. Are the holes in your colander’s bottom large enough to allow it to fit on top of the lamp harp’s top screw?
One featured here fits on perfectly with no effort at all. The other colander, as well as the metal bucket, needed a drill to widen a hole/create a hole for the harp screw to slip through. Easy enough!

Depending upon how deep your colander is, you might consider removing the lamp harp and bending it a bit to allow it, as a shade, to sit lower on the lamp.
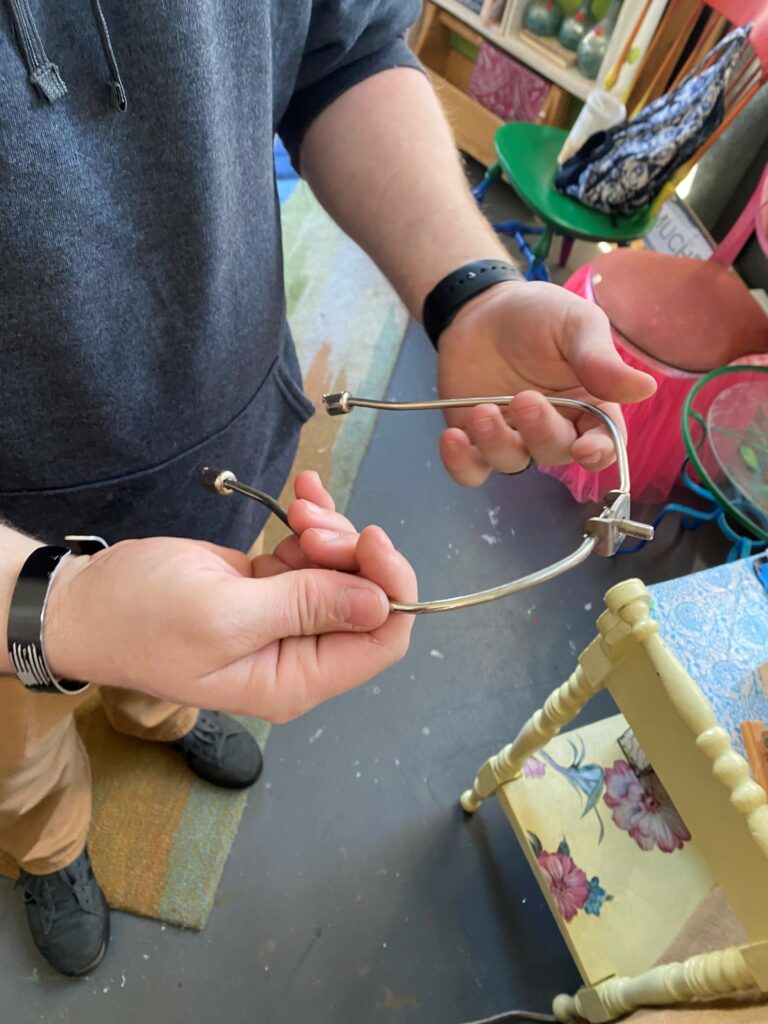
Thankfully, my niece’s hubby Jake was strong enough to bend it to the right size and used a wrench to shape it. Glad to have him to help out and add his personality to the fun!
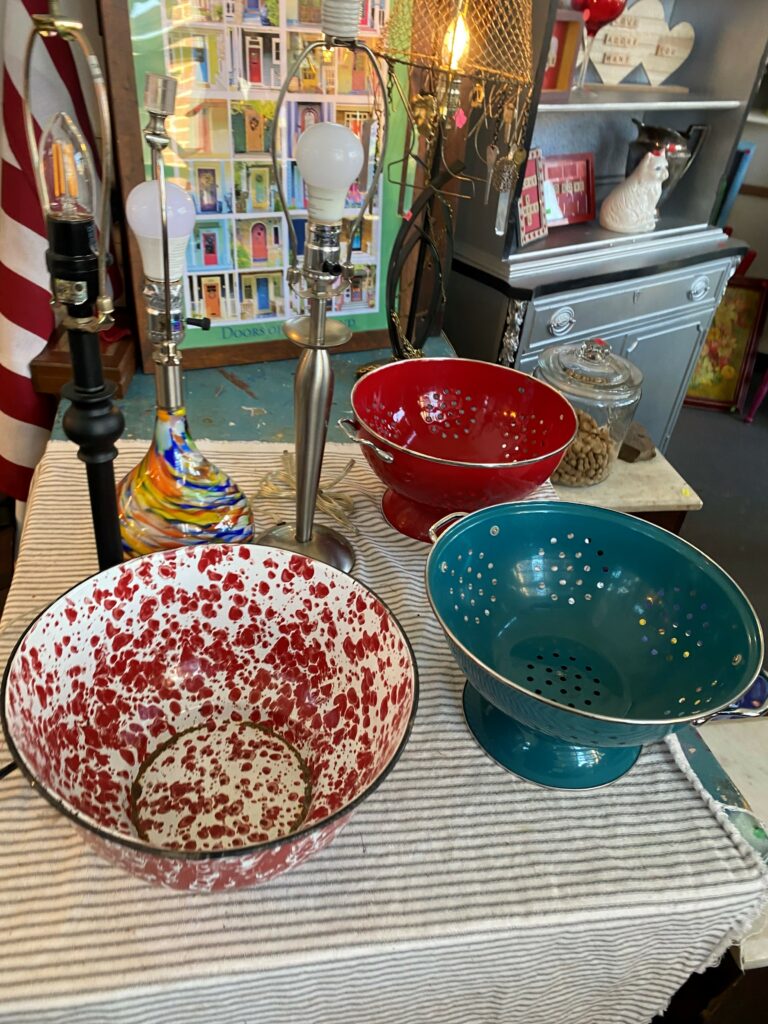
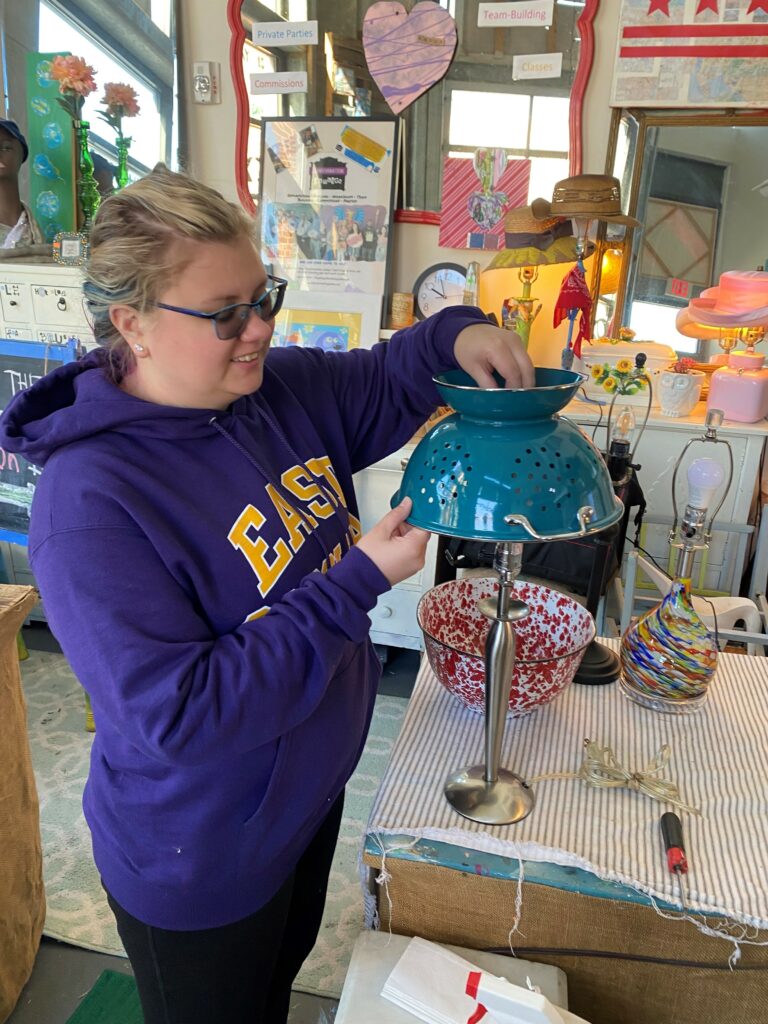
3. Add your colander “shade” and a matching finial
Flip your colander upside down, thread the lamp harp’s screw through it, and secure it in place with a finial that compliments the overall look. Ta-Da! You now have a totally whimsical, charming lamp!

4. Set & stage it
Place your upcycled DIY lamp in your kitchen to compliment the cooking/chef look of the lamp. Set it on a side table in your living room and turn it on at night for some unique shimmer and shine. Give it a home on a nightstand to ensure pleasant dreams. Wherever you put it, stage it with decorative items also picked up from Goodwill for just a penny or two.
Thanks to Saige and Jake for sharing their creative talents with me and all of our Finding Your Good readers/followers. It was so much fun to DIY together. When’s your next trip to DC, and what’s our next upcycling project?
Similar Reads:
- DIY: Create Cool & Quirky Lamps Using Graters & Colanders
- DIY: Let Your Light & Support Shine with Pride-Painted Lamps

Tim Kime
Artist, Motivational Speaker, Life Coach

