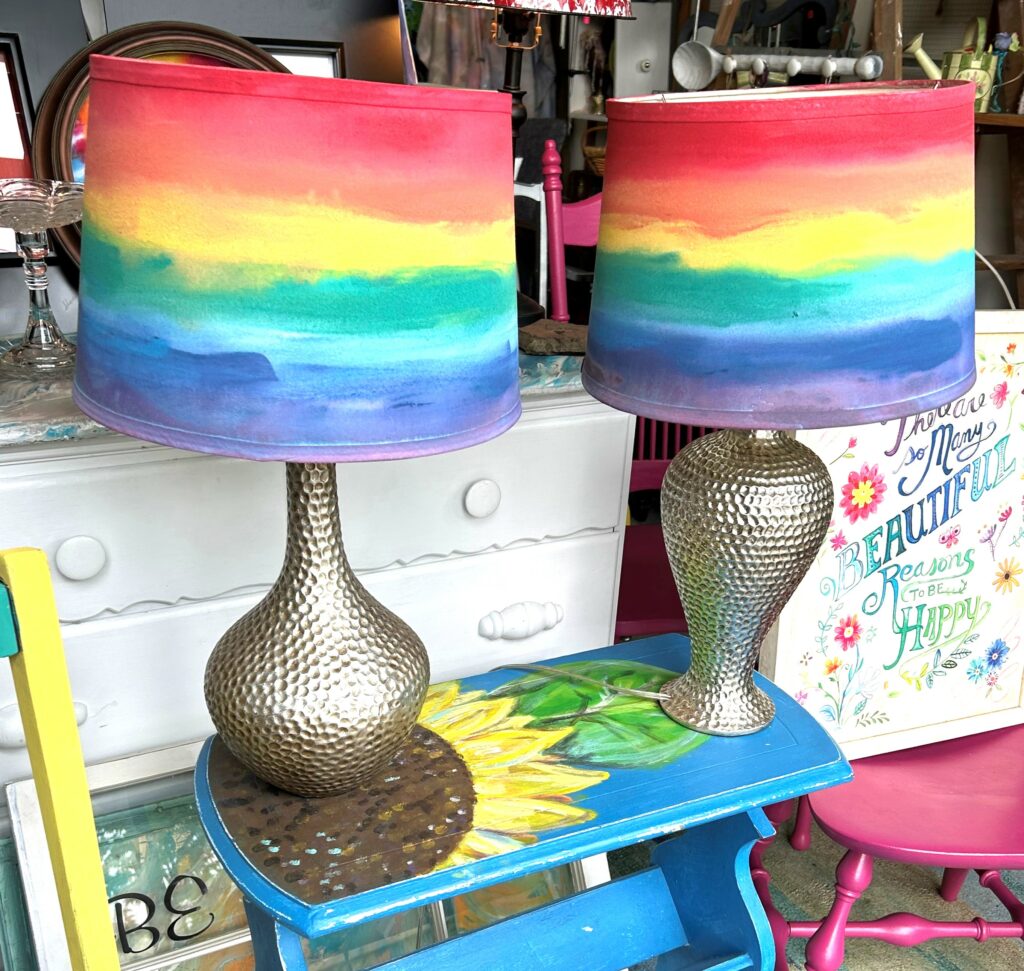
Here’s another way to show your Pride and/or being an ally: Rainbow-ringed lamp shades! We’ve all heard the saying, “The world is your oyster.” Take those sentiments to the next level with the mantra of, “The world is my canvas!”
A pair of regular lamps are transformed into royalty with painted rainbow rings. Given the bold and bright statement they make, you might be surprised at how easy and inexpensive this week’s DIY blog truly is.
Items needed:
· Pair of lamps with white cloth shades
· Water-based paints in rainbow colors—red, orange, yellow, green, blue, violet
· Paint brushes
· Water
1. Show your pride & DIY talents, starting at Goodwill
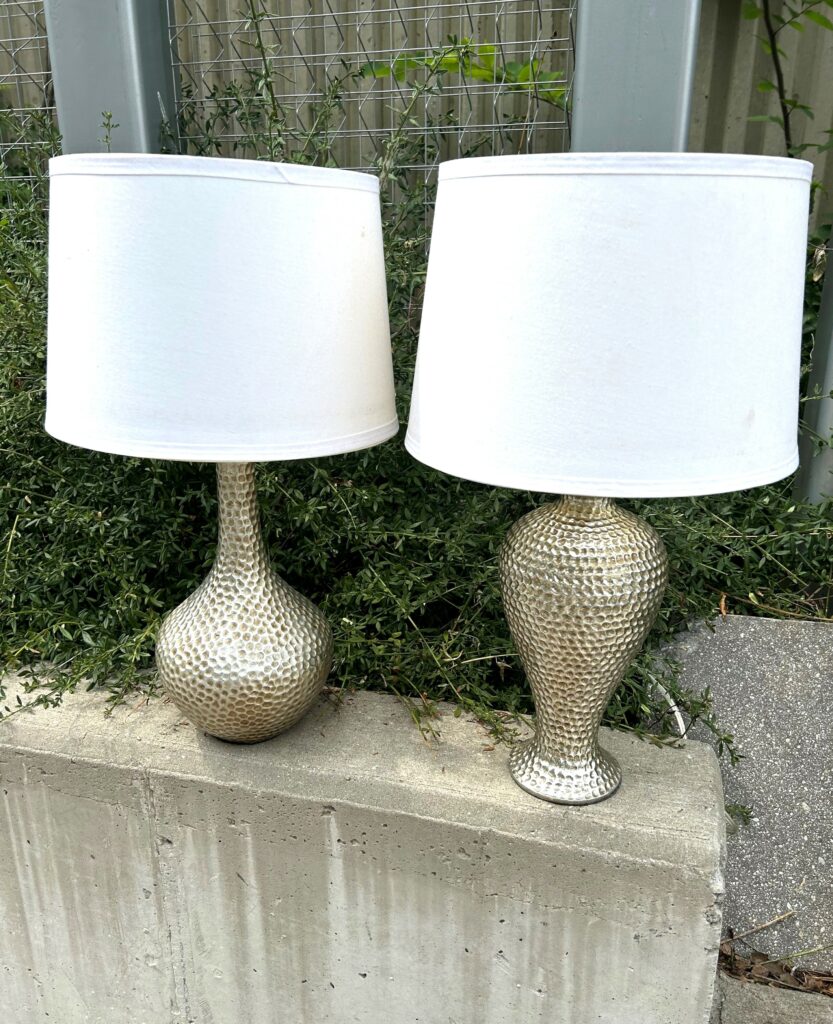
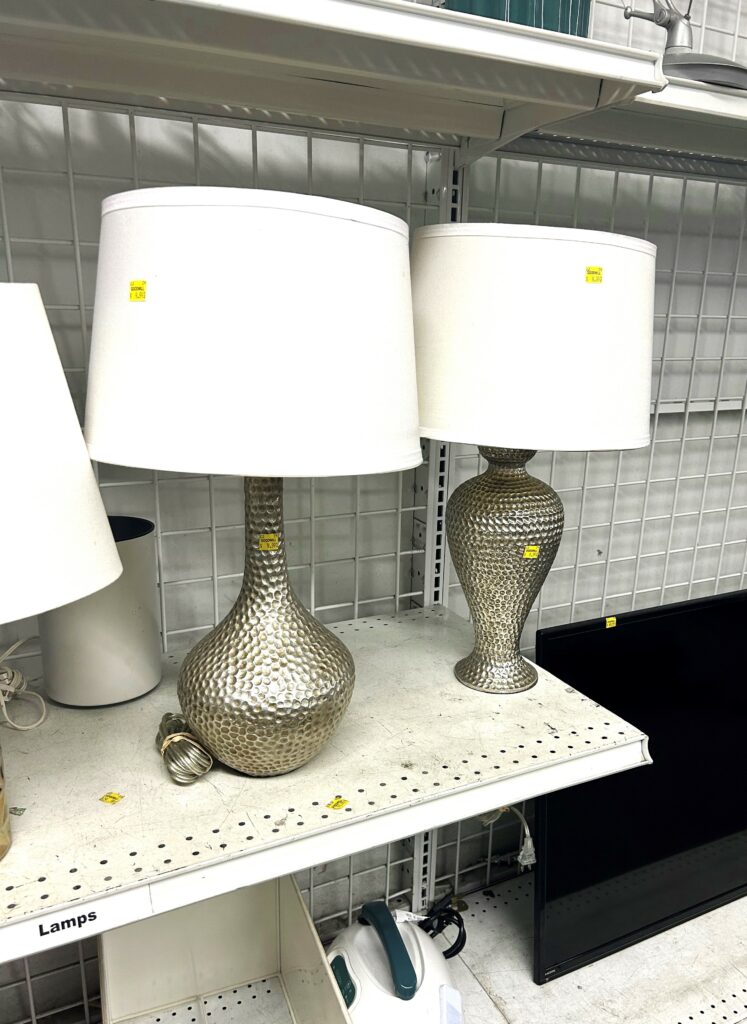
Every day can feel like a celebration when you shop at Goodwill for dynamite deals on delightful décor. One thing I always buy when I see them are eye-catching, stylish lamps. This pair was super handsome with its silver toned, hammered bases which reflect light from every angle.
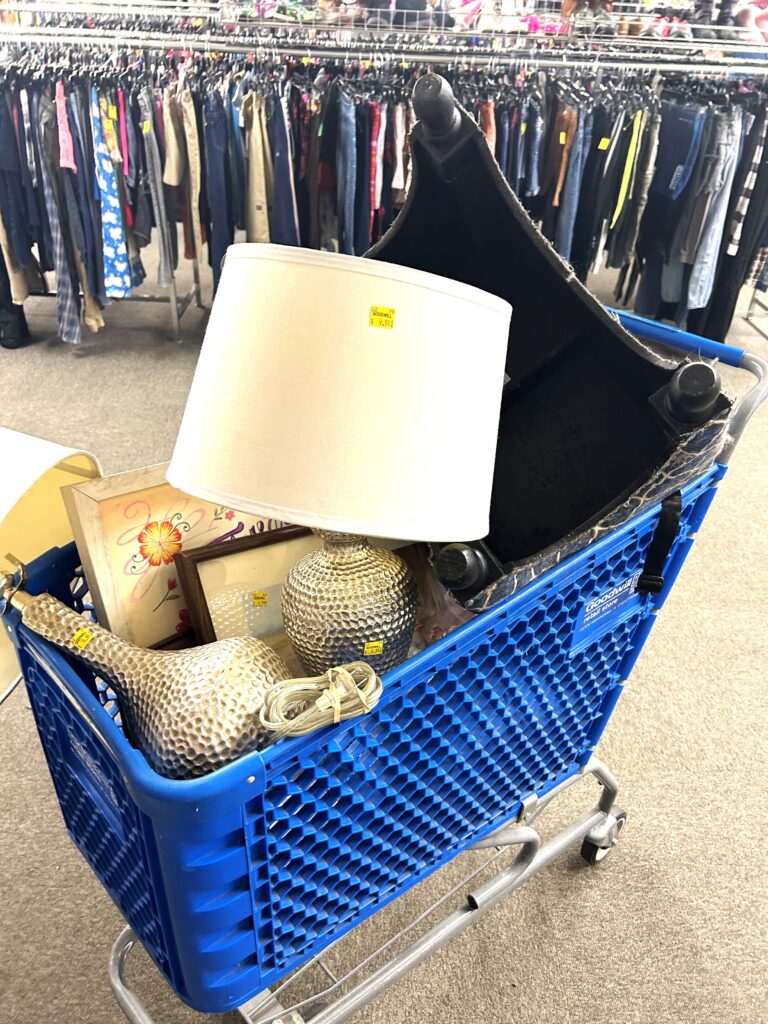
Also, I like that while they were a set, that were slightly different in shape to add an additional level of visual interest. Also, each came with a white, fabric covered shade to top off its good looks.
Goodwill always has a great collection of lovely lights and lamps in its Electronics Section. The prices are always remarkably low, too, for single and pairs of lamps to go by for your bedside, to stand proudly next to your couch or to make their home on a dining room buffet.
The pair featured here were the total package: good looks with shades. Sometimes at Goodwill, there are nice lamp bases without any shades. And if you get lucky (like me!), you will get the whole kit and caboodle!
Thrifting Tips
If you find a lamp base you love at Goodwill, but it doesn’t have a shade, no worries. You are likely able to find one there, too. If possible, purchase a base that also has a “harp” on it.
This is the part that goes from the base and around the bulb/fixture; your shade will go on it and will be secured with a finial.
A new harp bought at a hardware store can cost as much as an entire lamp, shade, bulb and all at Goodwill. Another reason to love finding your good there!
2. Remove to get ready
- Unscrew the finial which secures the lamp to its harp and place it and the base aside.
- Put down a drop cloth or an old towel on your workstation.
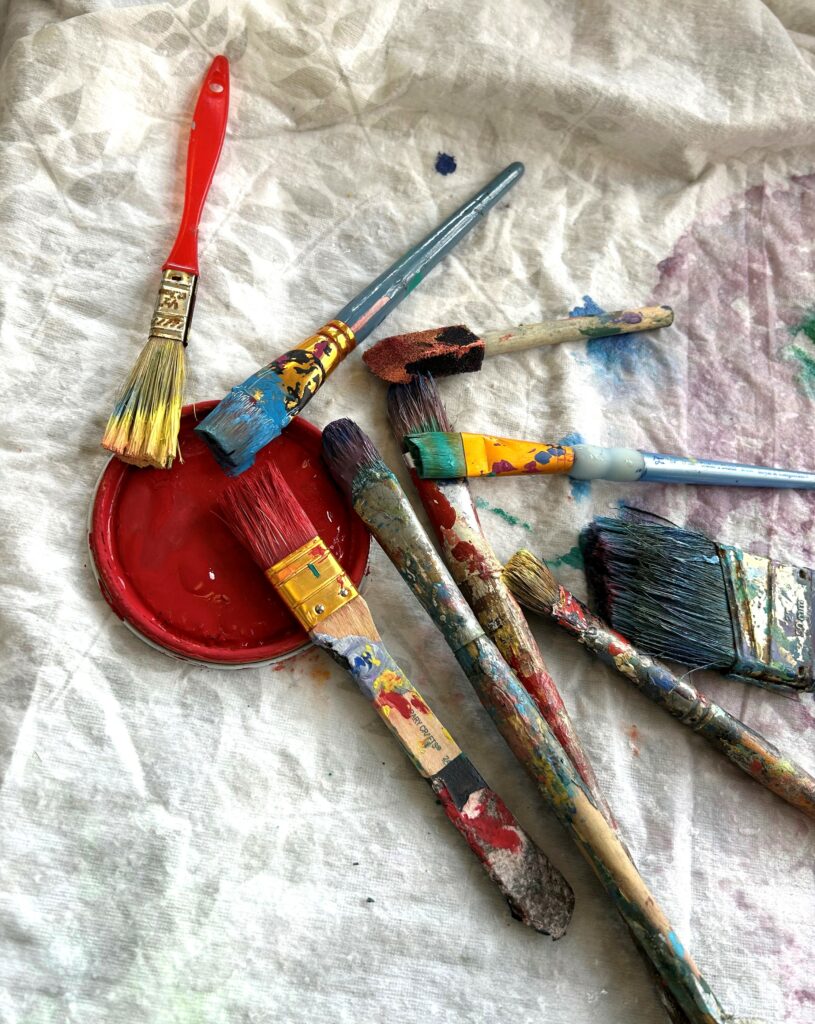
- Bring out your collection of rainbow-colored paints and position your brushes nearby.
- Fill a jar or glass with water.
- You are now ready to get rocking and rolling!
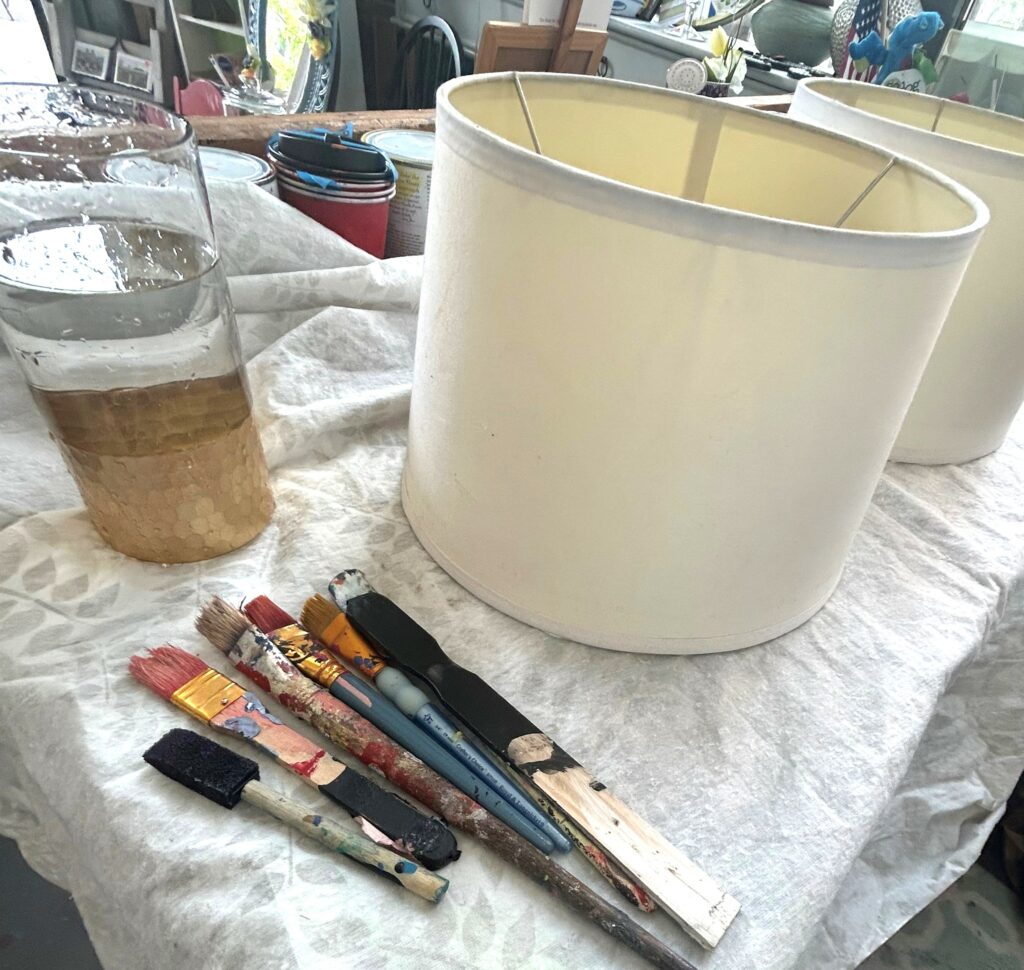
3. Add water to make things flow
- Dip a regular-sized trim paint brush (as opposed to a small detailed, craft paint brush) and apply a light layer of water all over the outside of your lamp shade.
- You want to brush it quickly, adding more water as you go, so the entire outer surface is moistened but not dripping.
- Now you know why you were encouraged to use an old towel because this can be a slightly wet project.
Expert Tip:
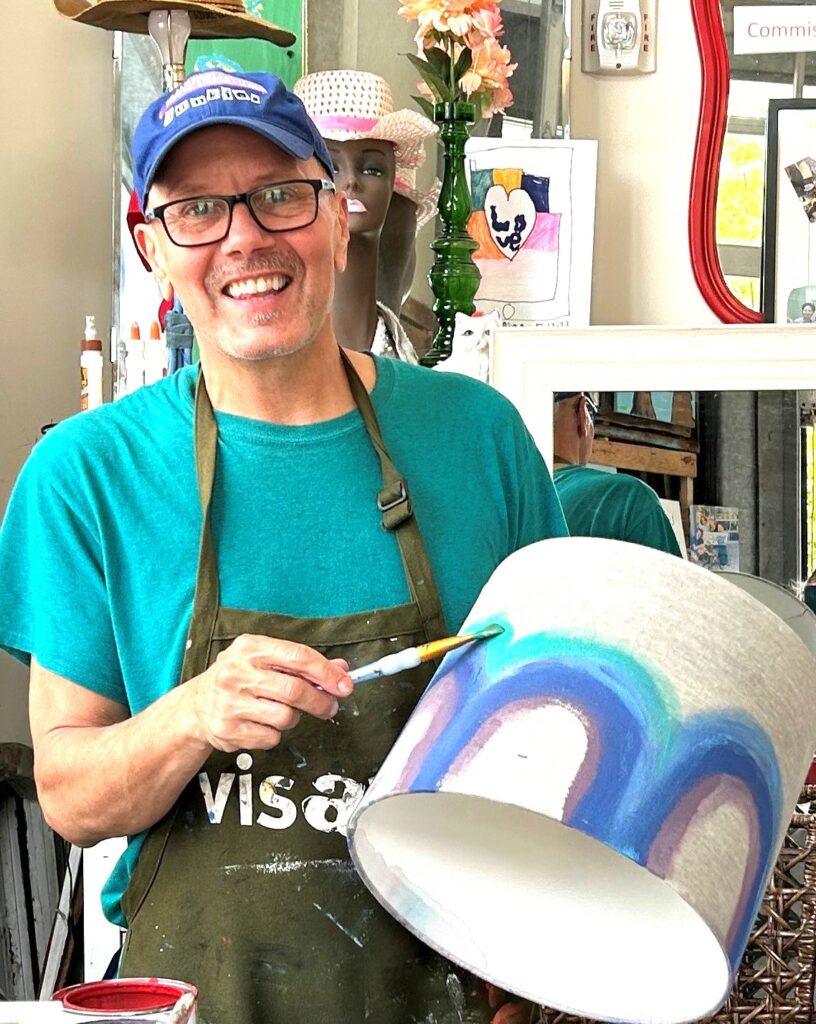
If you have a pair of shades you are going to upcycle this way, complete one first, following all these steps, then repeat them for the second one. For some projects done in pairs, you can go from one item to the other; you are encouraged to tackle one shade at a time for best results.
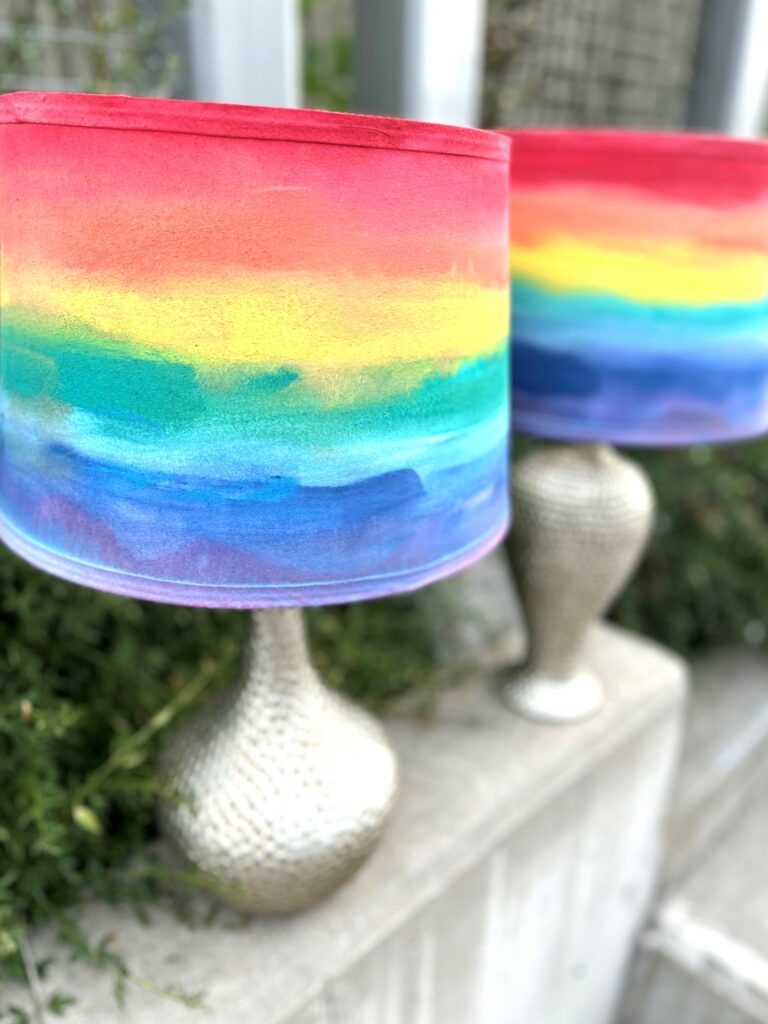
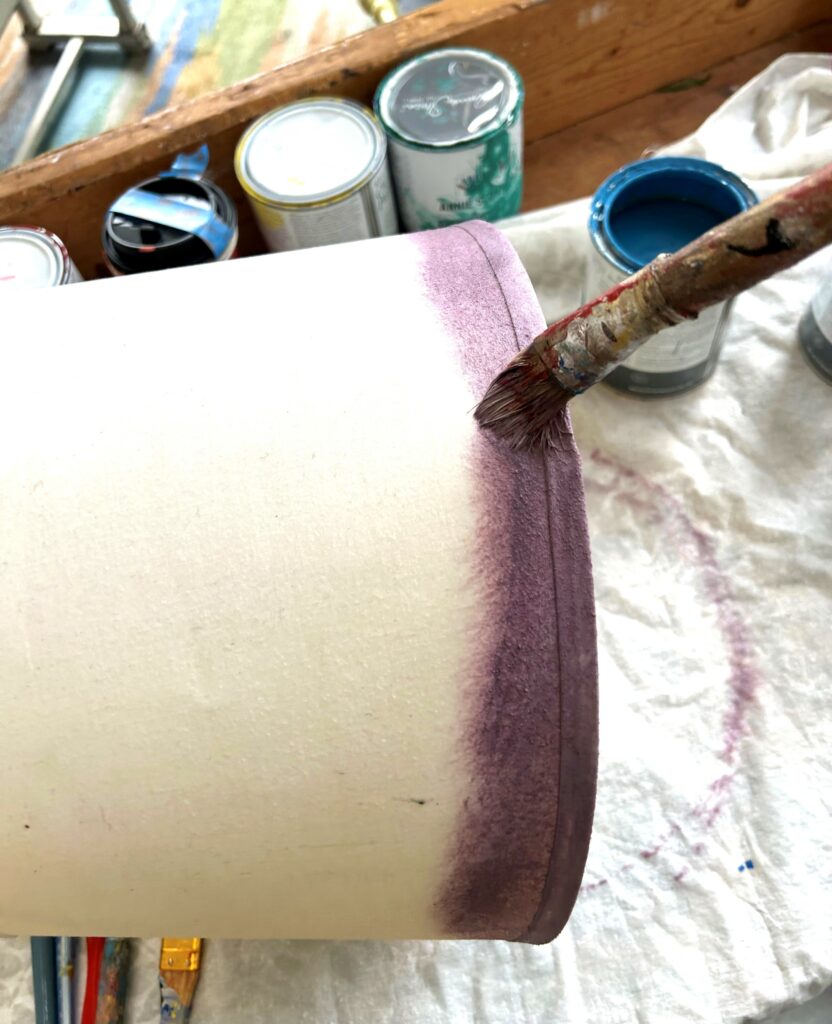
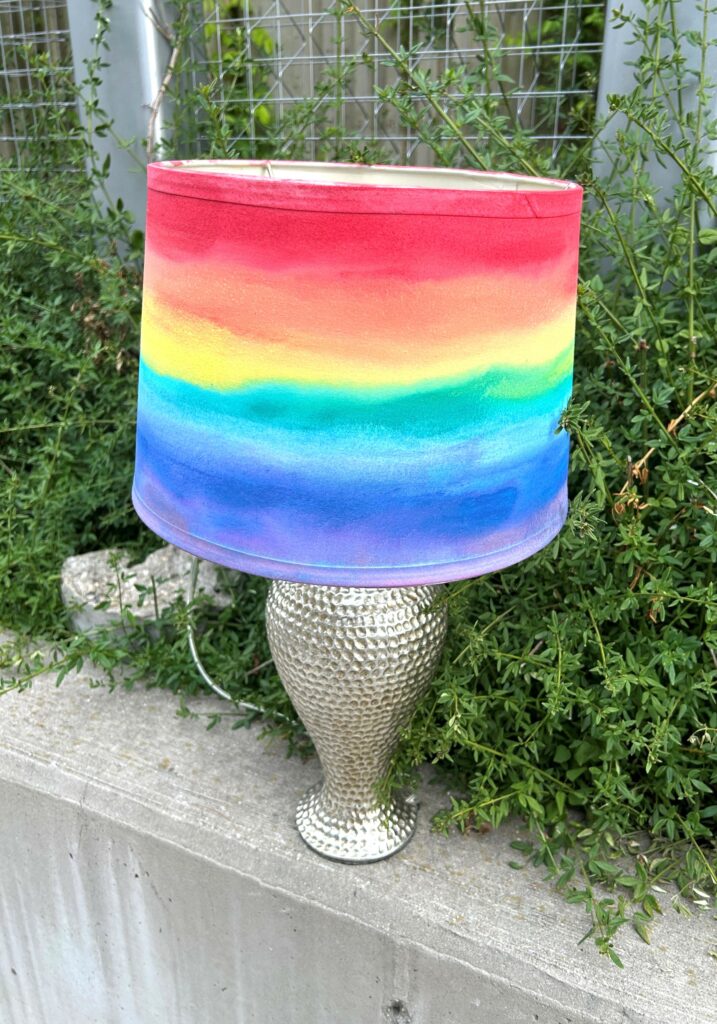
4. Paint on your pride
Place your shade on its side and add a stripe of purple paint along its bottom edge (the bottom edge when your lamp shade is turned right side up and placed on top of the base).
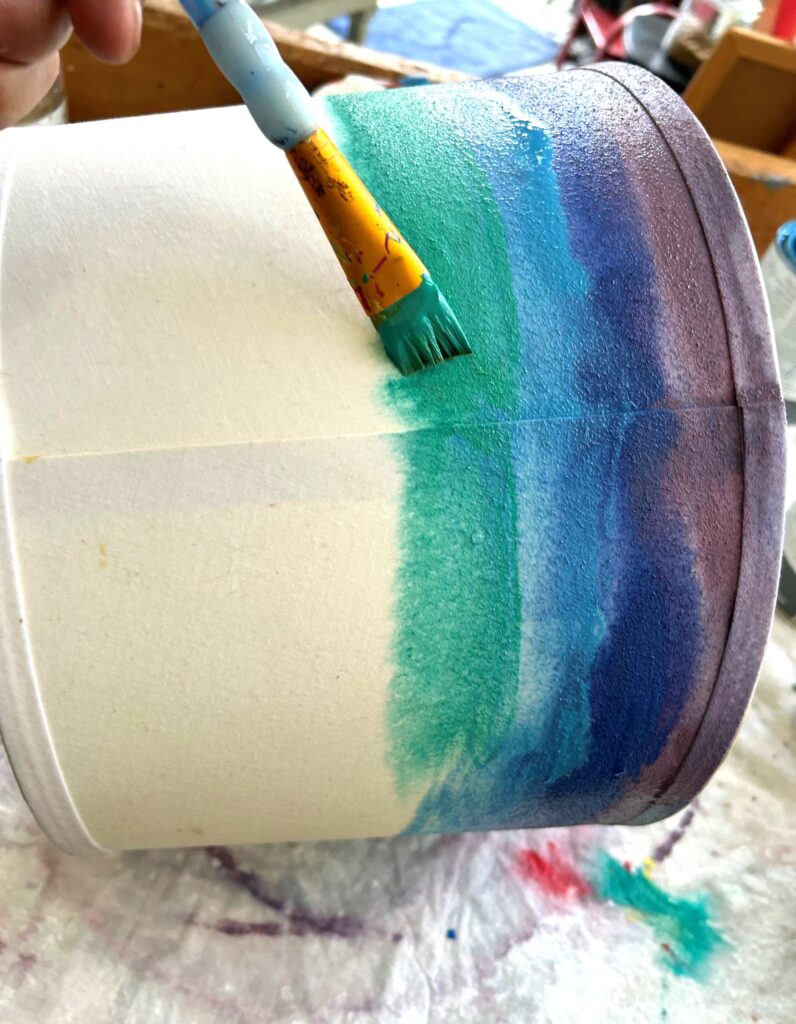
You are not aiming for perfection and are not brushing on a heavy, thick layer. You want the purple stripe to be obvious and given that it is a rainbow, to also be organic and flowing. The water layer brushed on first will help to spread out the paint, too.
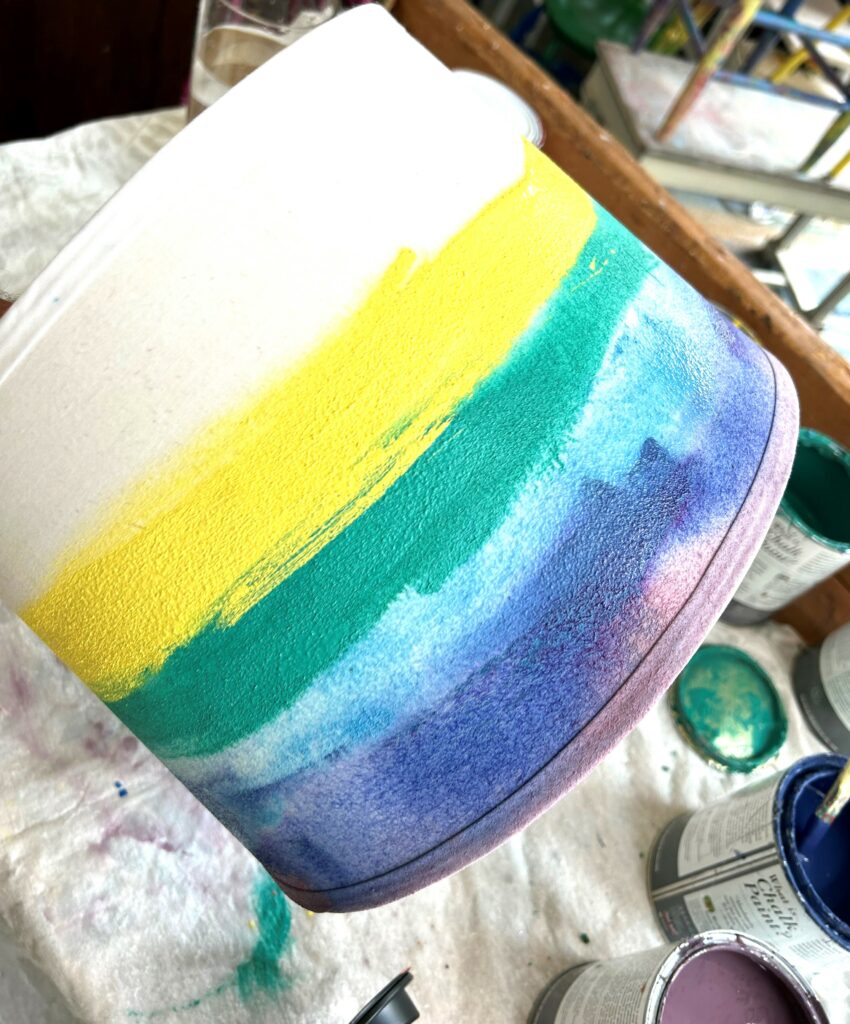
Move next to your blue paint and brush on a ring of blue being sure to slightly overlap the purple stripe.
Continue this process with each of the rainbow colors (red, orange, yellow, green, blue, indigo, violet), painting on a ring of the color.
As much as possible, keep your lamp shade and your painted surface horizontal as you go; if you turn your shade upright, the water will make the paint and colors drip and flow in a way that will look messy (trust me, I found out the hard way!).
5. Give it a rest—or a night to dry
After you have brushed on a ring of each rainbow color and have gone back to touch up any parts of the shade not covered with a color/paint, then position your painted shade on its side with the seam facing down. Place it on something to allow minimum contact with the painted shade; a silver bowl and wide-mouth vase were perfect to assist because they had big openings and very small points of contact. You are placing the seam-side down because this is the back of the lamp shade and, in case there is extra water, you want it to drip in a place on the shade you won’t see.
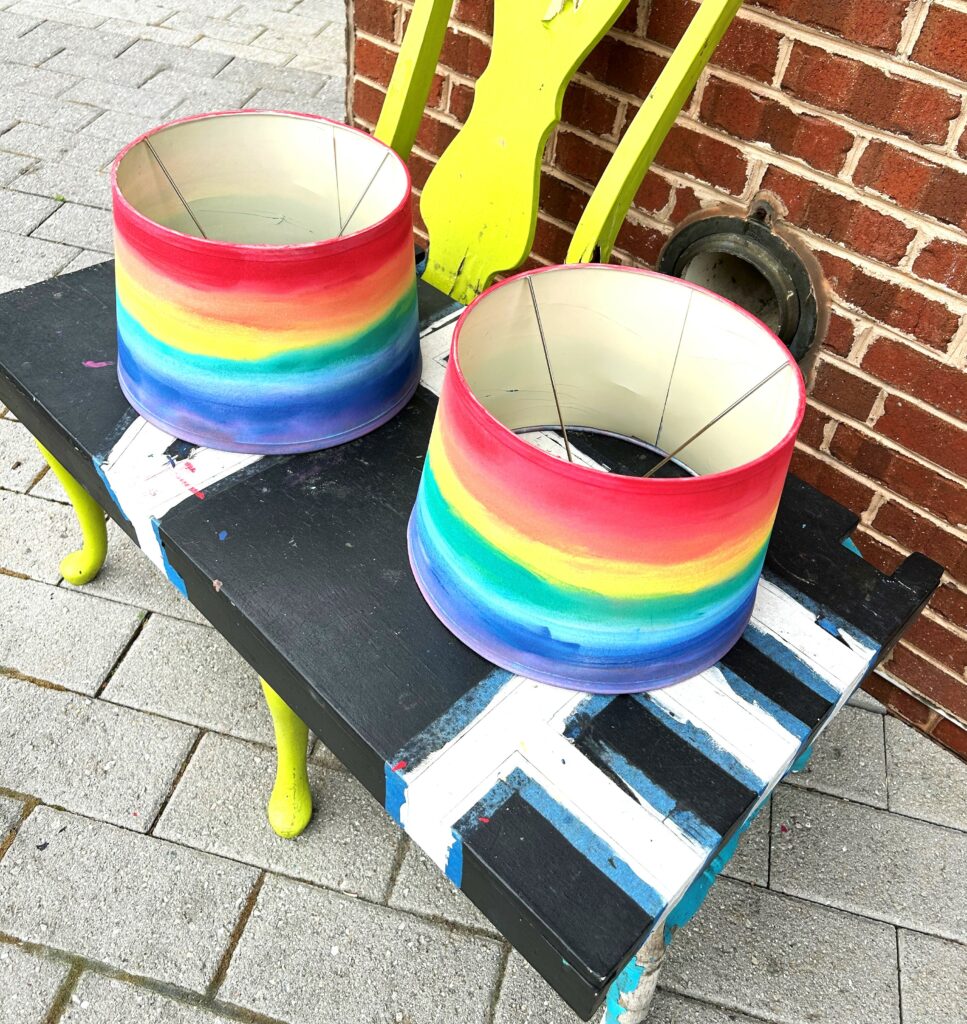
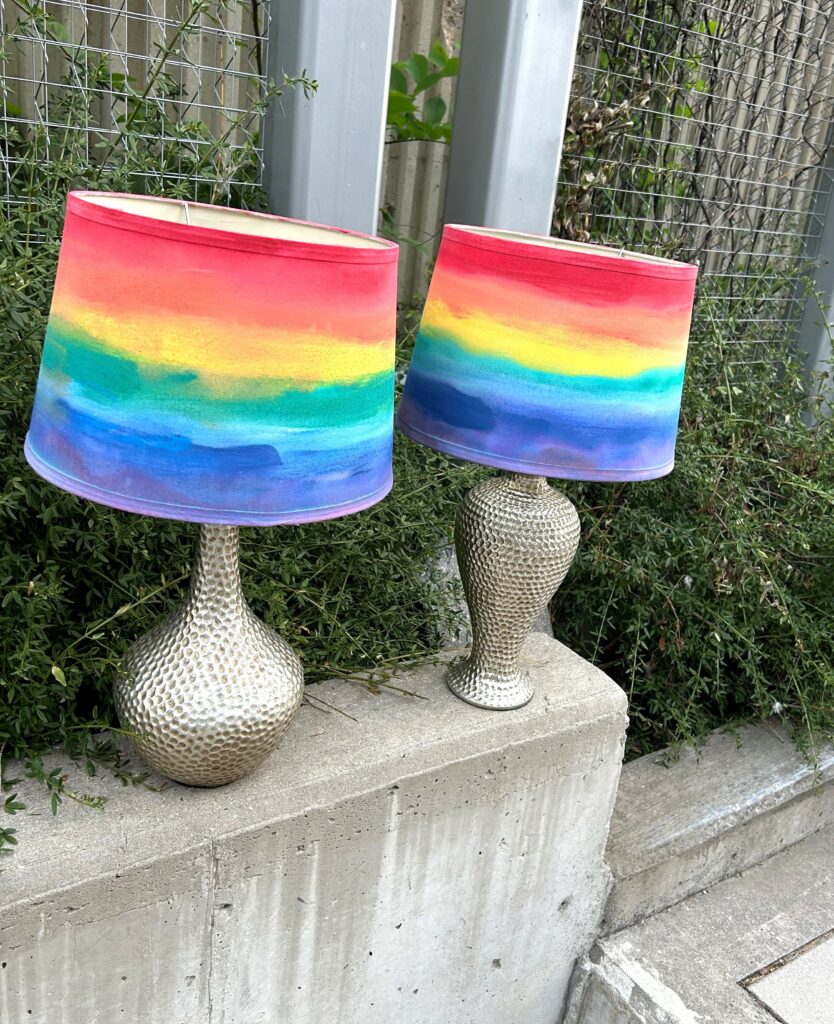
6. Raise up your rainbow shade & raise up your DIY pride, too
After your shades have dried completely overnight, return them to their proud positions on top of your lamp bases. Add bulbs and secure the finials on top to keep them in place.
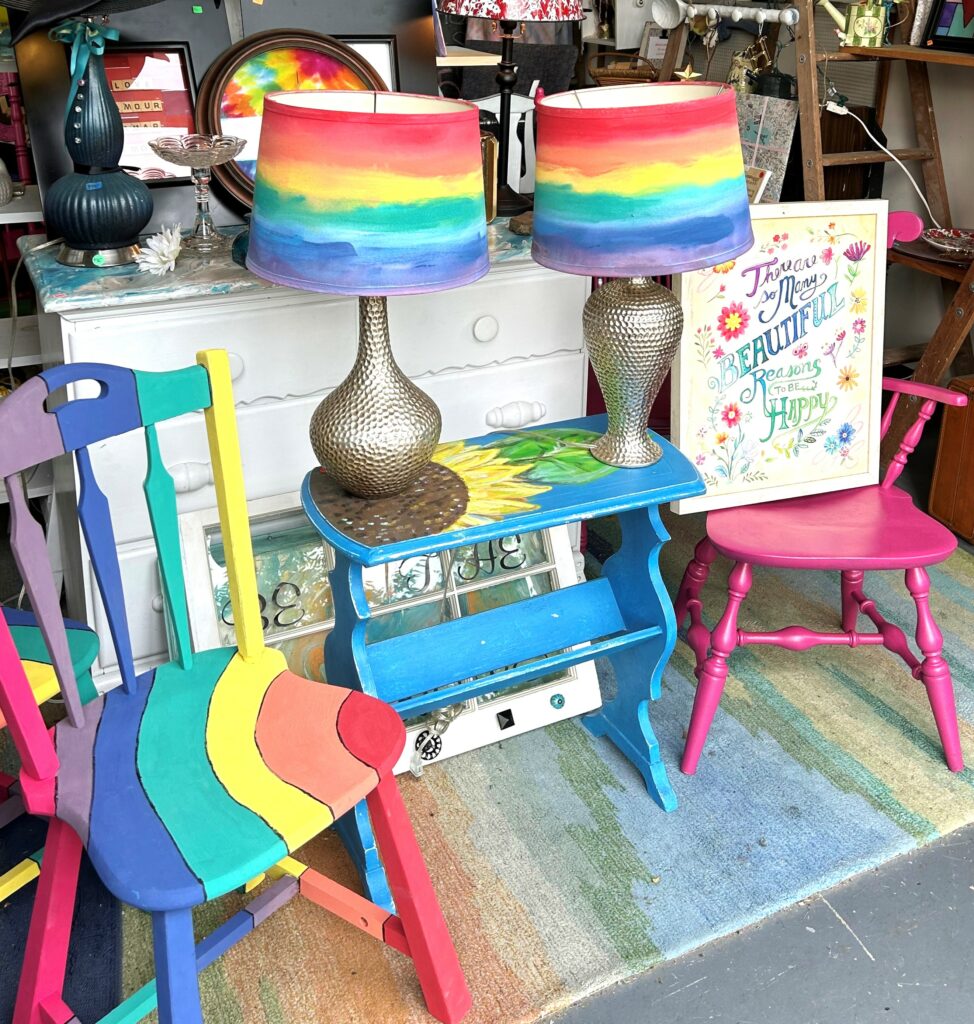
Put your rainbow-ringed twosome on either side of your sofa to add some instant color and energy.
They would look cool on your nightstands next to your bed. Place one on your foyer table to use as a night light to warmly greet you when you come home after dark.
Put one in a dark corner of your family room to give it light and a pop of color.
These super cheerful, happy lamps, now all decked out, will make you smile with pride for your talents to transform!
Similar Reads:
- DIY: Let Your Light & Support Shine with Pride-Painted Lamps
- DIY: Show Your Pride with Painted Pieces
- DIY Project: Reflect Your Pride by Upcycling a Mirror or Two

Tim Kime
Artist, Motivational Speaker, Life Coach
