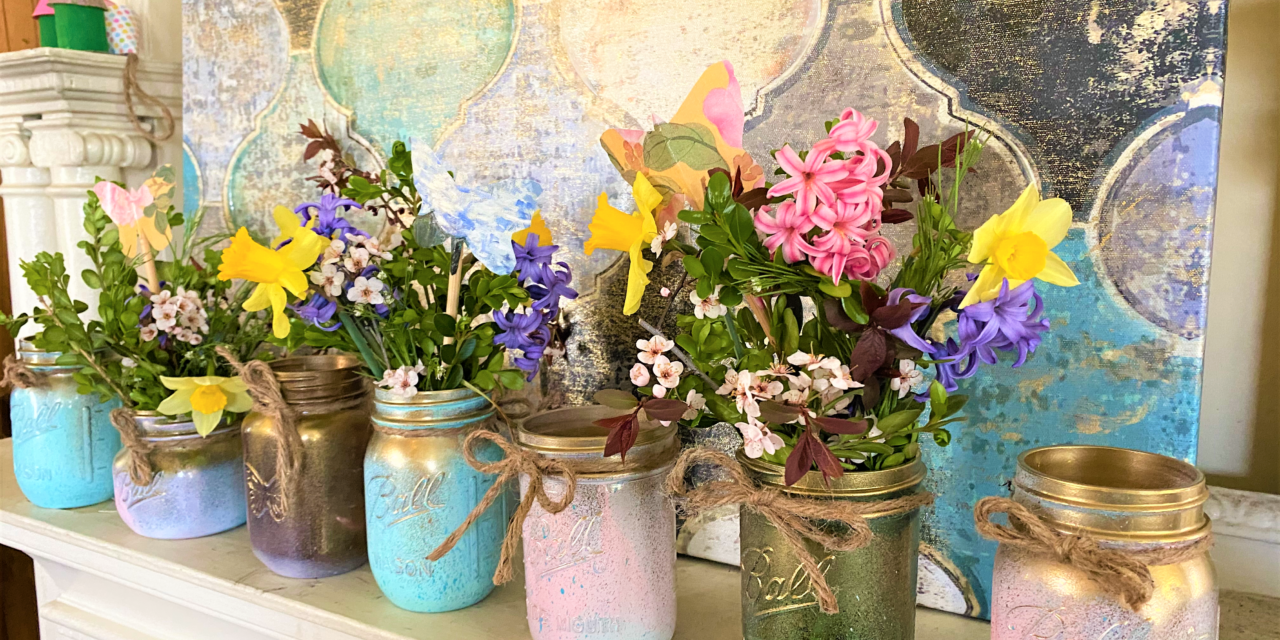
Another easy, creative and pretty project that is perfect for Spring—upcycle mason jars into marvelous vases. This project has cute country charm and is low on costs, especially when you pick up items at Goodwill and use what you already have on-hand.
Full of freshly cut spring flowers, these make a great gift to give someone for Easter, Passover or Mother’s Day. Any soon-to-be graduate would love one too! And now that more and more people are being vaccinated, can’t you imagine how friendly and inviting these will make your guests feel at your wedding, bridal shower or other family gathering?
This project is good for the environment. Resources are not only being reused and repurposed, mason jar vases celebrate Mother Nature’s artistic talents—her blooms—too!
Supplies:
· Mason jars
· Spray paints in pinks and blues—or your favorite colors
· Gold spray paint
· Twine
· Chopsticks
· Recycled/reused paper from calendars, cards, magazines
· Scissors
· Glue gun
· Fresh flowers and greens
1. Find Your Good at Goodwill & pick up mason jars
While you are exploring Goodwill for treasures, stop by the Glasswares section to grab any and all mason jars for this happy project.
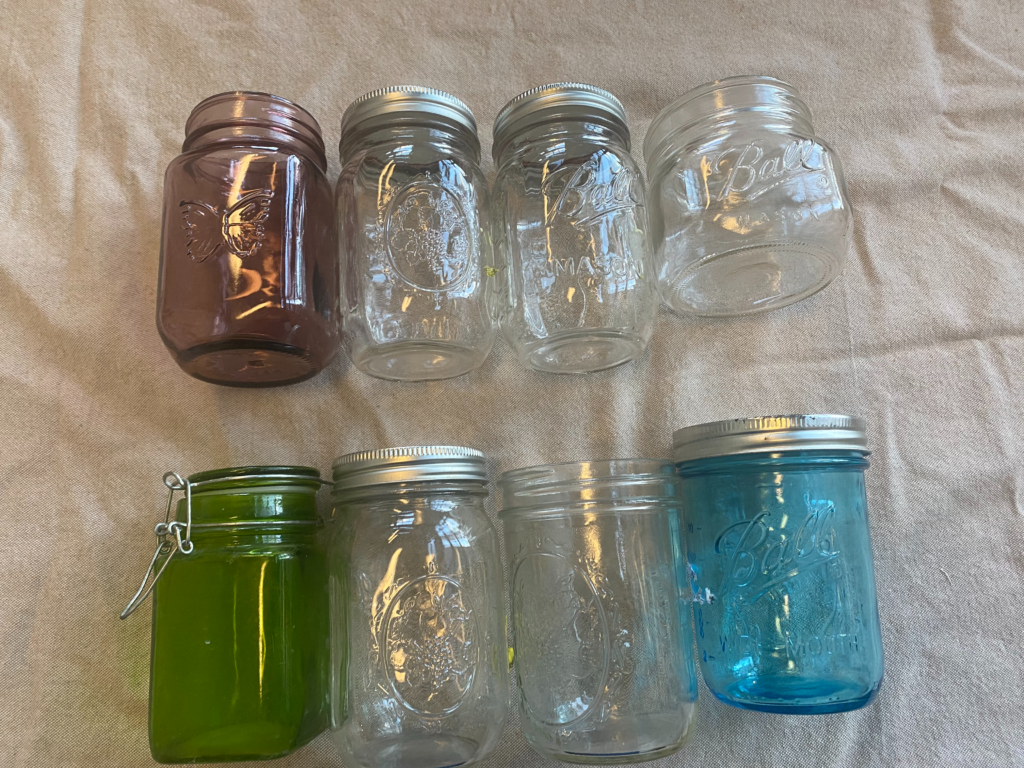
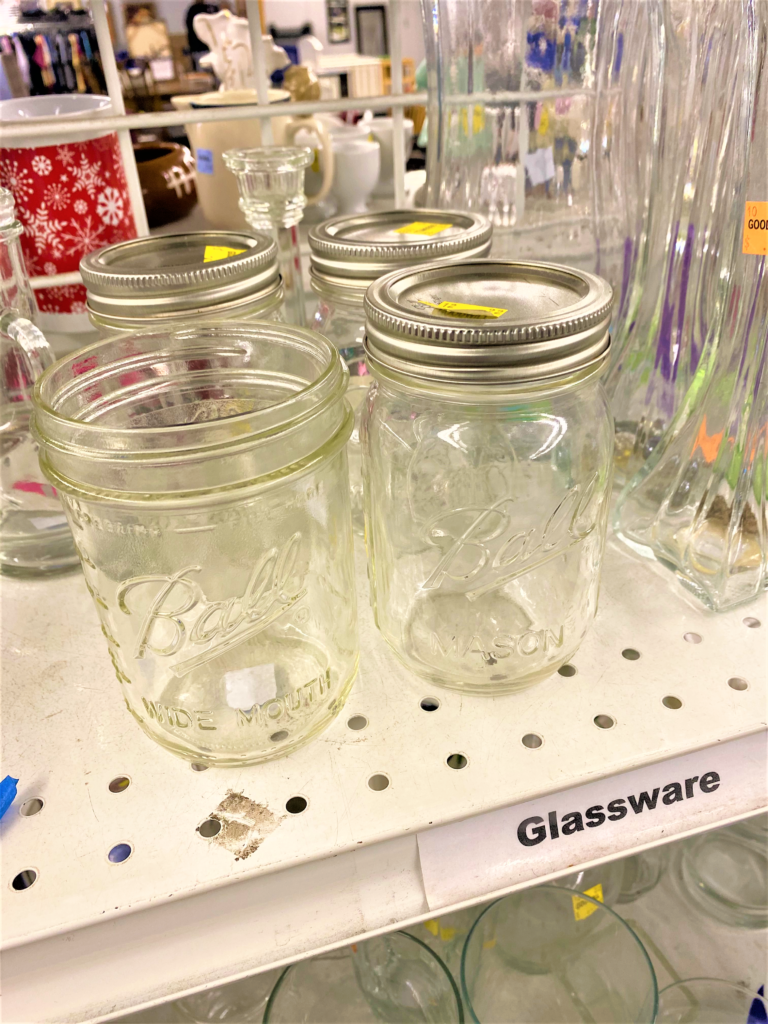
For just $.99 each, you can leave the store with a load of ‘em for very little. For some reason, mason jars seem very down home and timeless to me. I picture our grandmothers filling them with jams and other preserves.
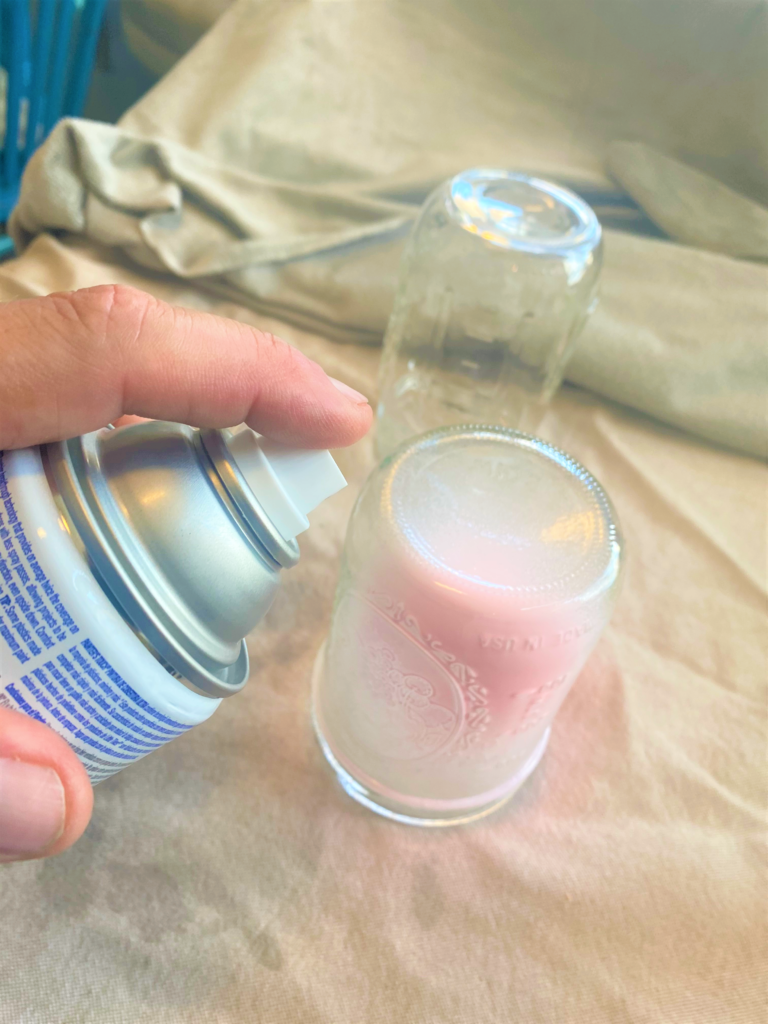
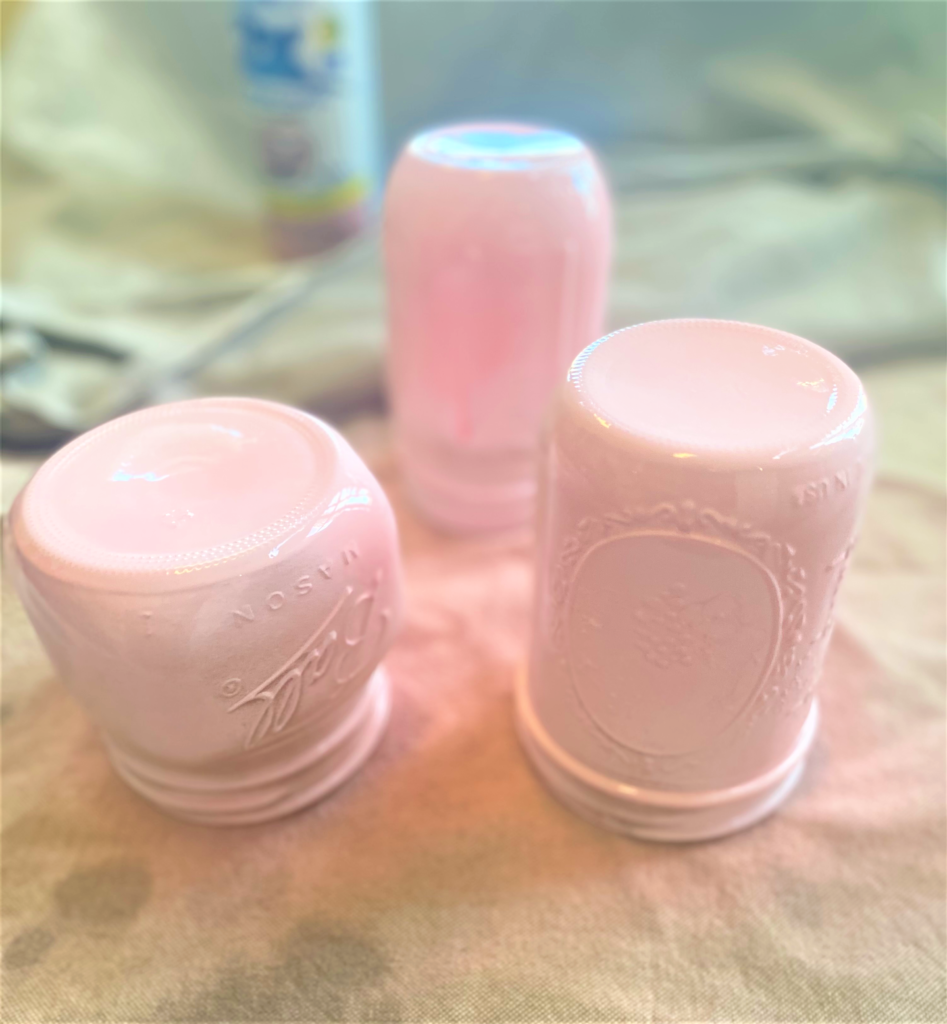
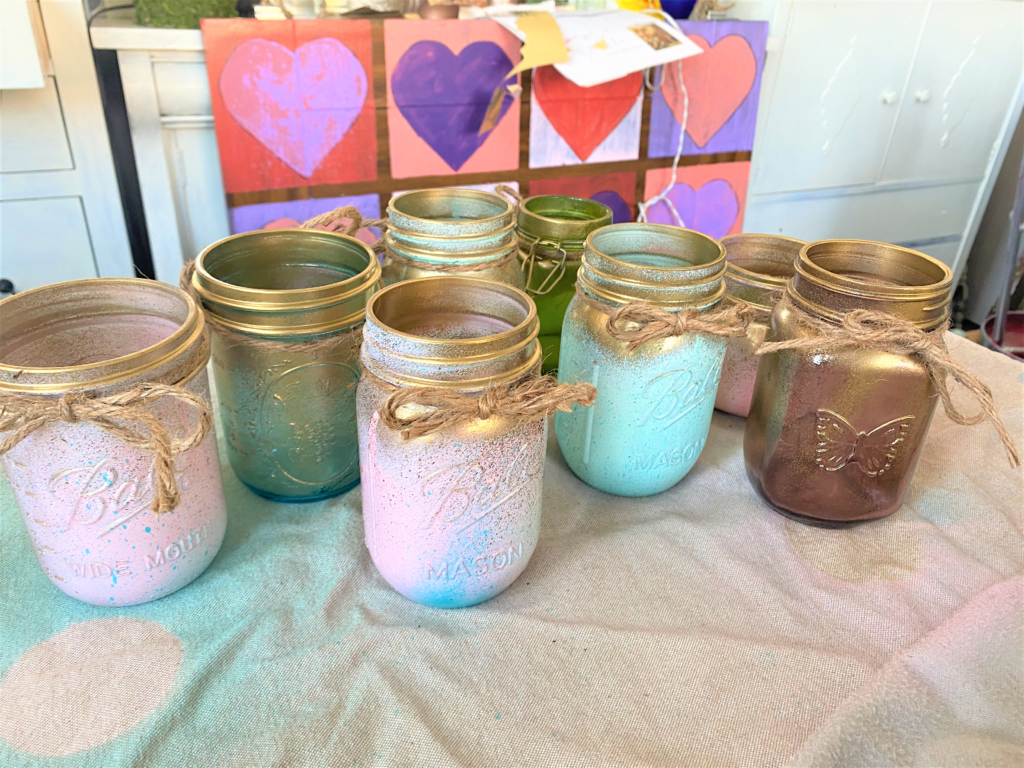
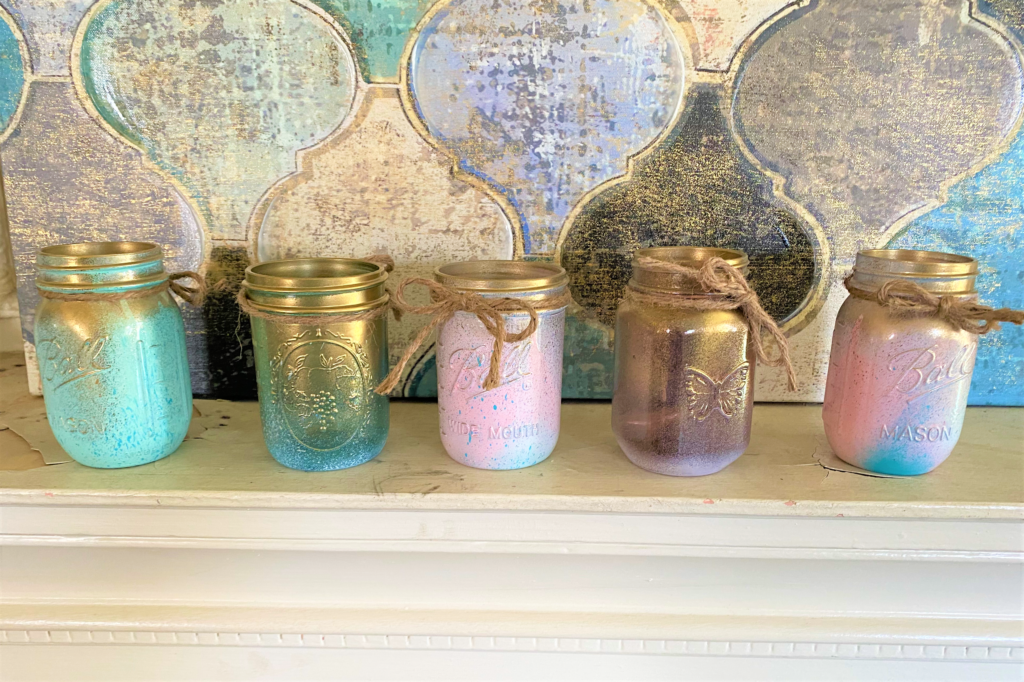
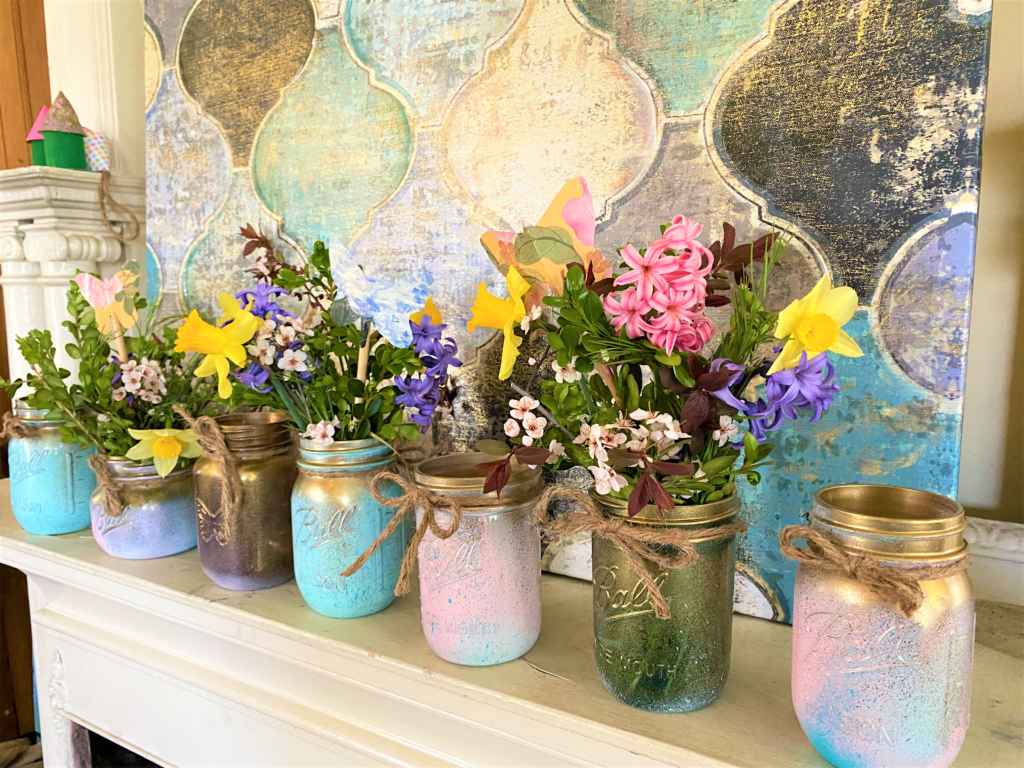
2. Spray on color & elegance
A color pallet of light pinks and blues was selected because it reminded me of Easter eggs, cherry blossoms and sunny skies. For this project, I used what I had on-hand, which meant another way to keep this project super inexpensive.
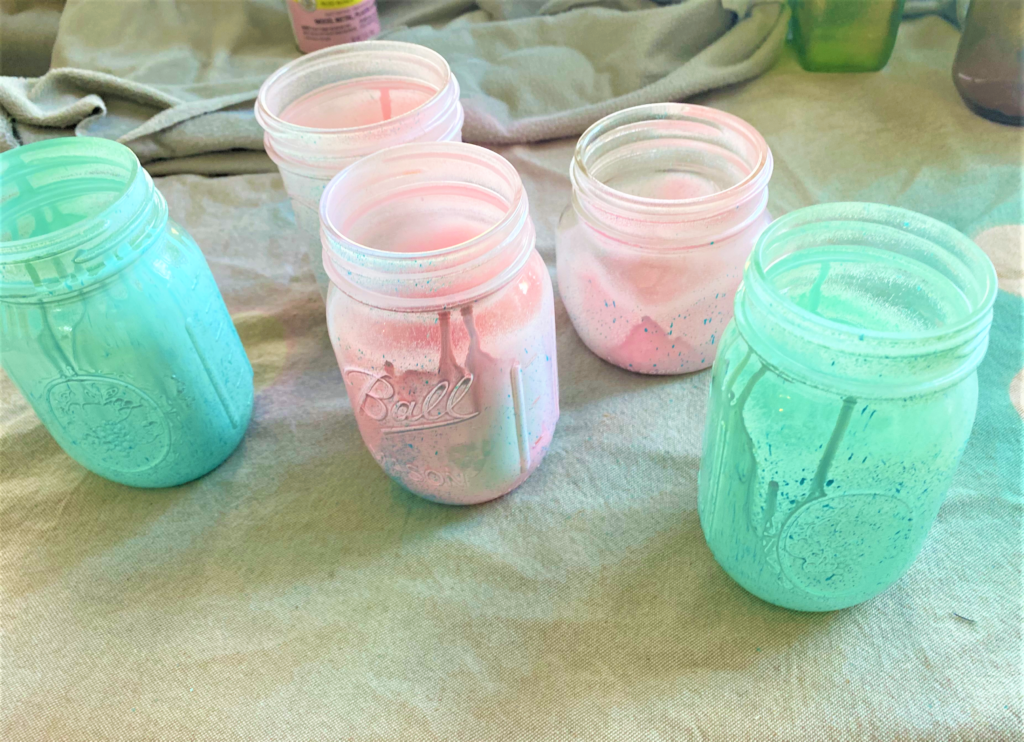
What spray paint might you have on your shelf? A light green, creamy yellow or warm salmon tone would look peachy-keen, too.
- Discard/recycle any lids and turn your empty jars upside down on your drop cloth or tarp.
- Quickly spray on one color and don’t worry about perfect coverage.
- With a second color, lightly “spritz” on that color, again, not as a solid coat but with an eye for light layering.
- With your finger on the spray part nozzle, lightly touch and tap as you go. Any imperfections or drips in your painting are welcome now as they will add depth and dimension.
- Let your jars dry for a bit and then turn them right side up.
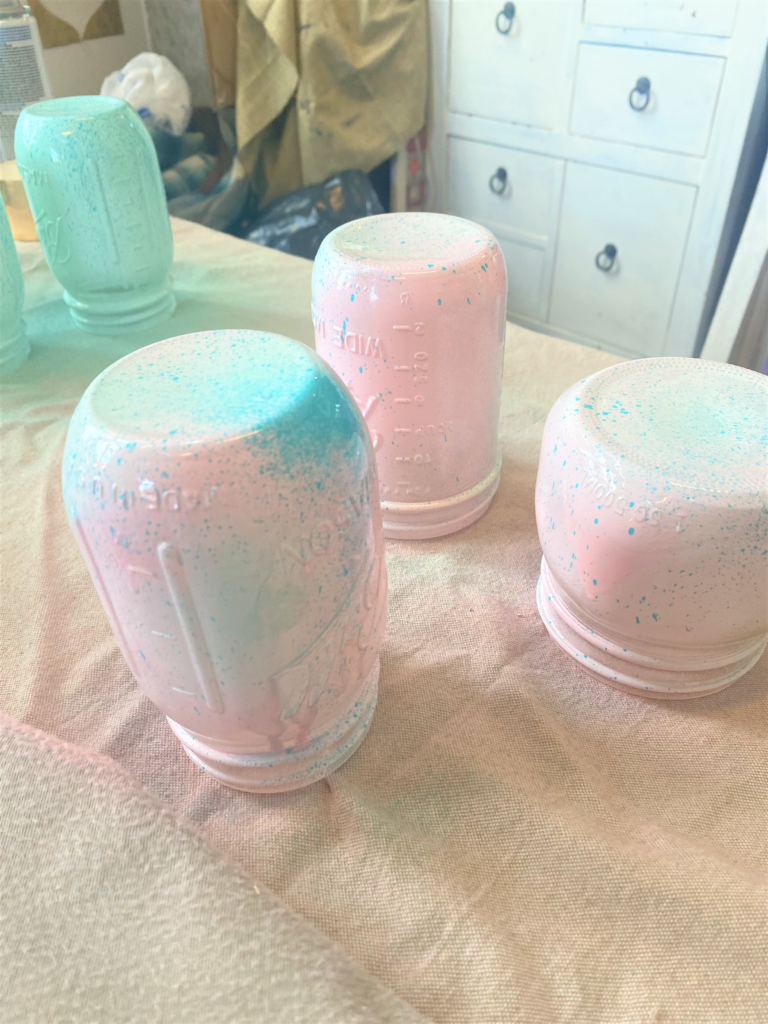
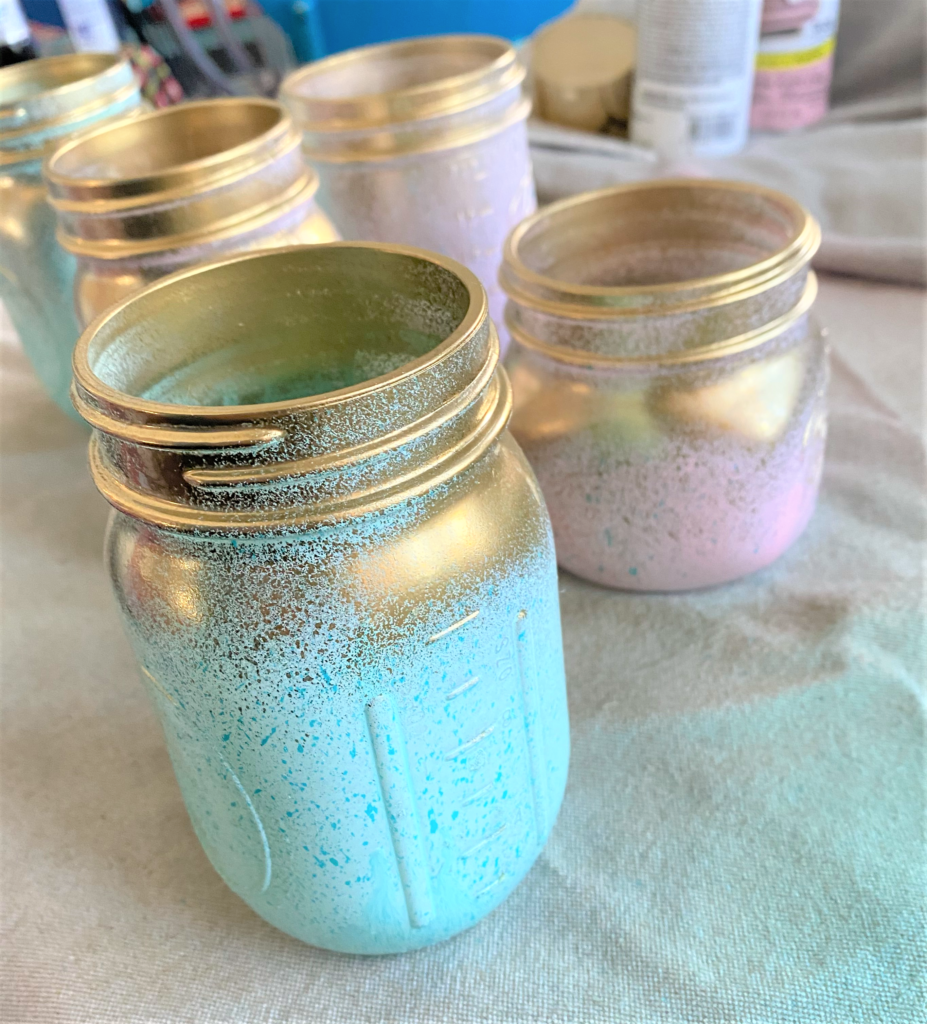
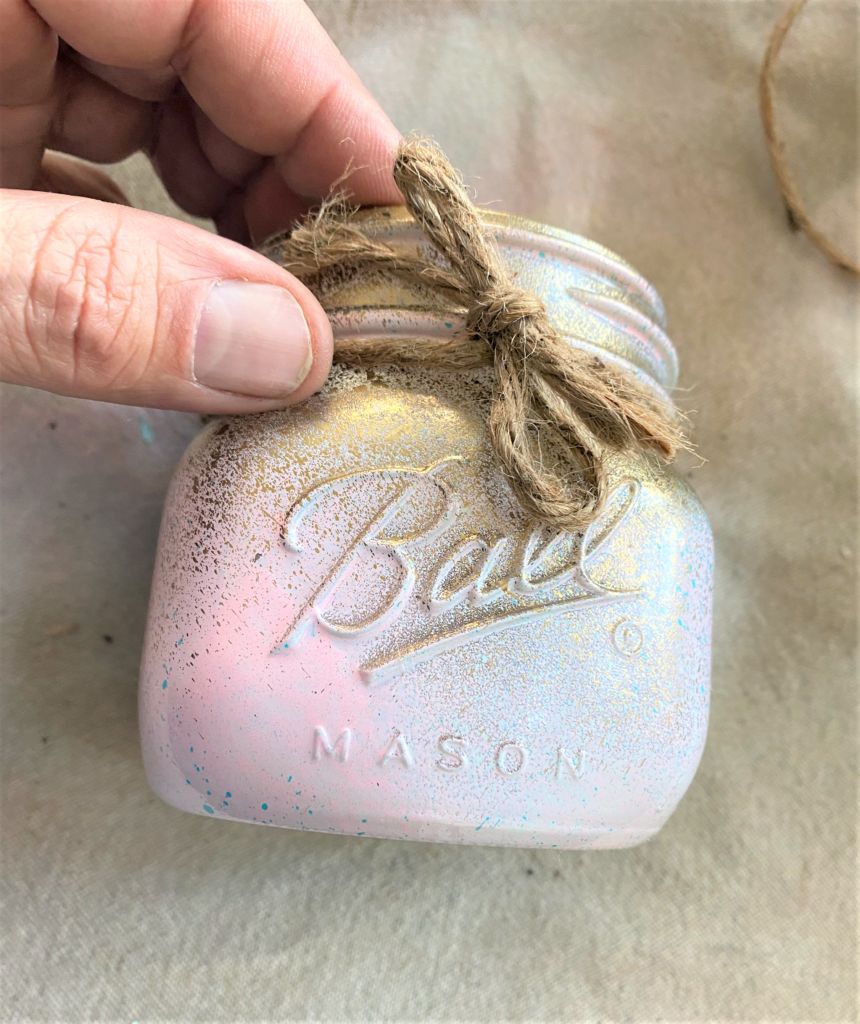
Now is time to go for the gold!
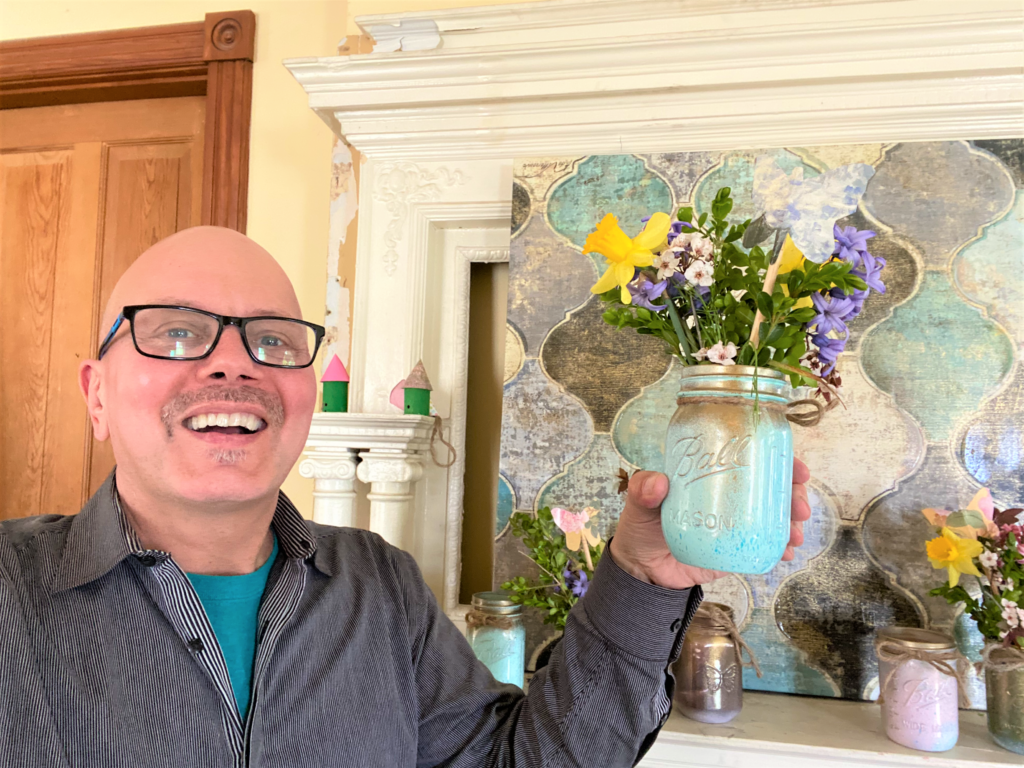
- To provide shimmer and elegance, lightly spritz on gold spray paint to the top portion of your mason jar.
- Again, don’t go for a solid coat but just a lighter layer so the previous tones show through.
- Several of the mason jars that I found were made of blue, purple and green glass, so I put a very light layer on the bottom and a light layer of gold on top so you could see the original shade shining through the paint layers.
- Again, let dry well before moving.
Design Tip: If you are creating these mason jar vases as centerpieces for a special event, you could easily pick up paints in tones to match the overall look and feel of it. Making some for a friend’s milestone birthday? Choose colors that are the guest of honor’s favorite ones.
3. Tie on twine
- To tie into the rustic charm of the jars, cut pieces of twine to wrap around the top of the jar then tie with a bow.
- Again, keeping with the “use what you have” theme, what else might you use? Ribbons, colorful fabric cut into strips, pieces of lace, parts of an old necklace are all interesting and unique options.
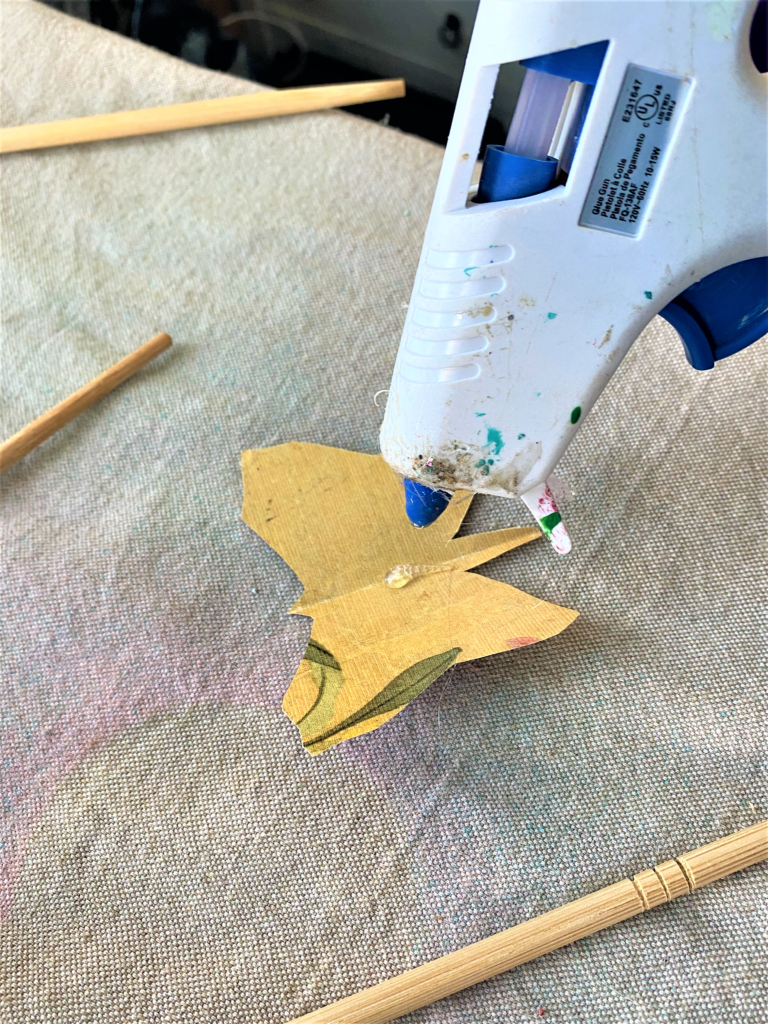
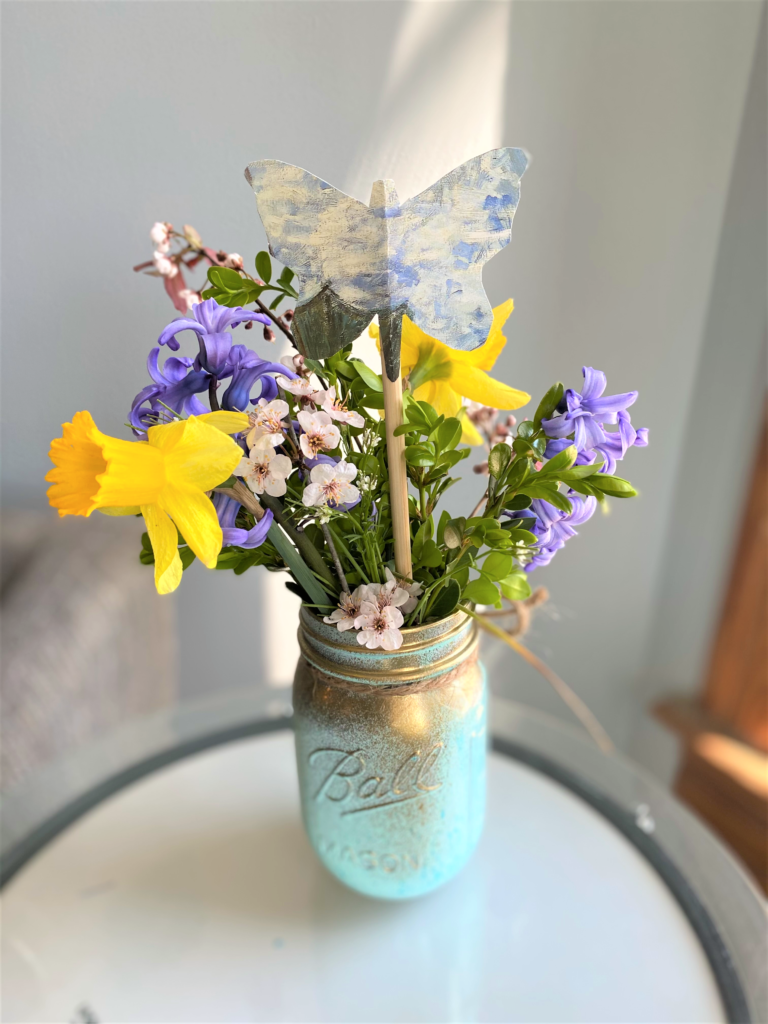
4. Chopsticks + paper butterflies = love
I wanted to add another layer of Spring to the overall final look of each vase, so I traced and cut out butterflies from parts of old calendars.
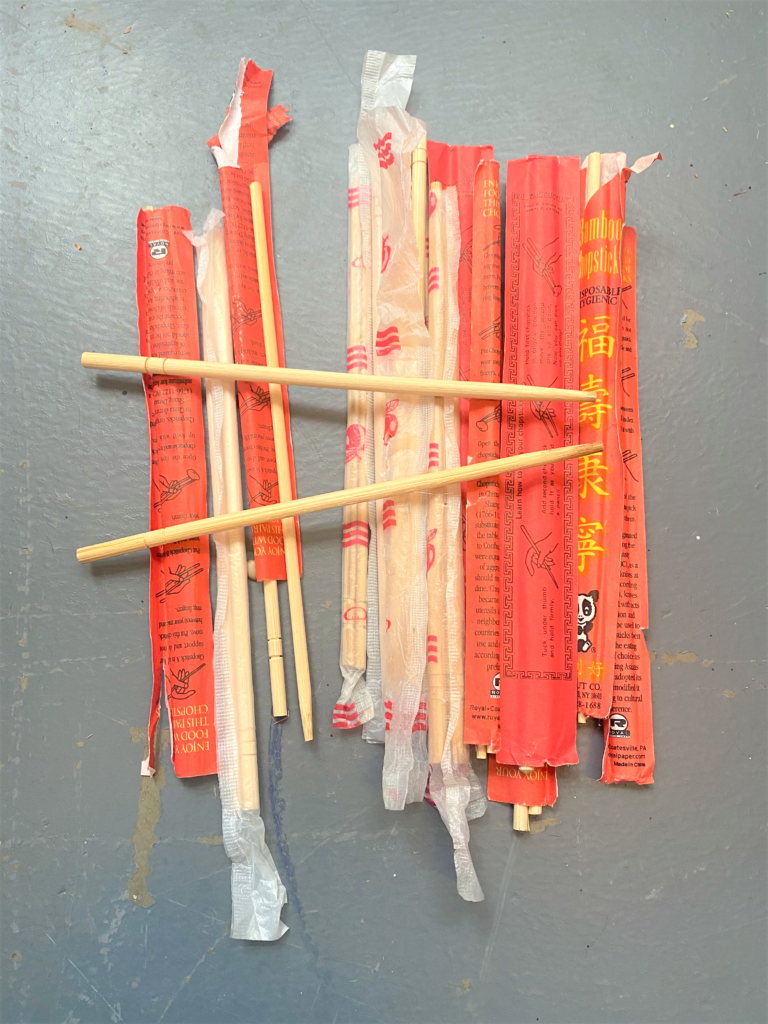
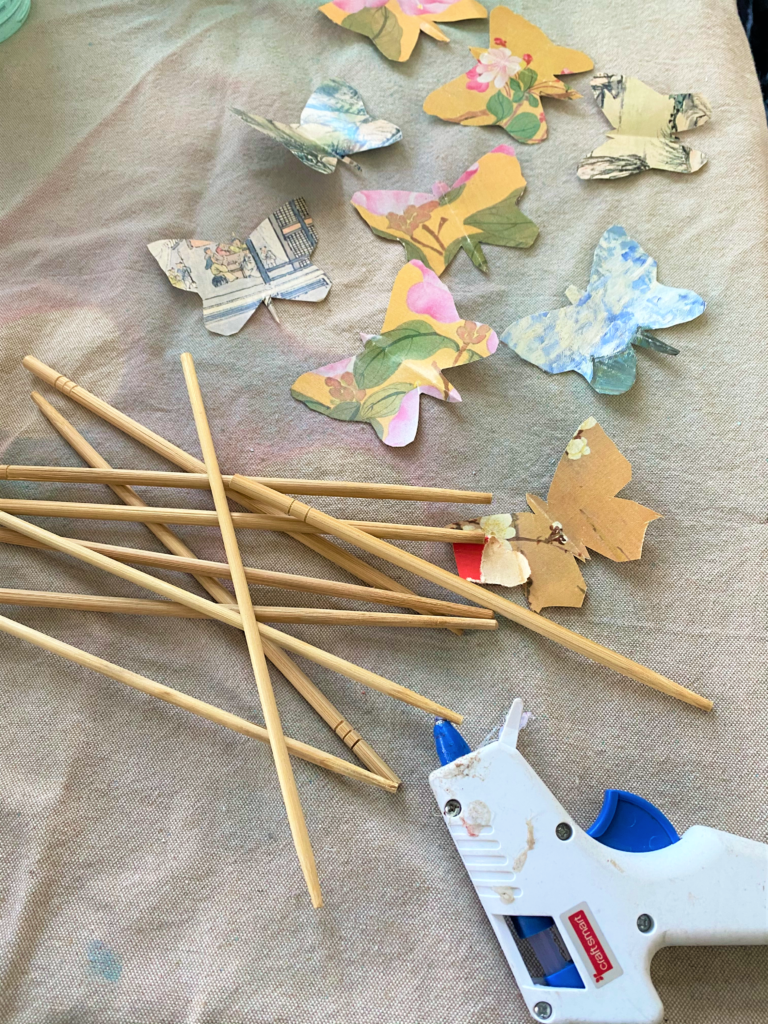
Old, unused chopsticks were used to display the butterflies which were attached to the end with my glue gun. Adding it at the end was truly the icing on the cake!
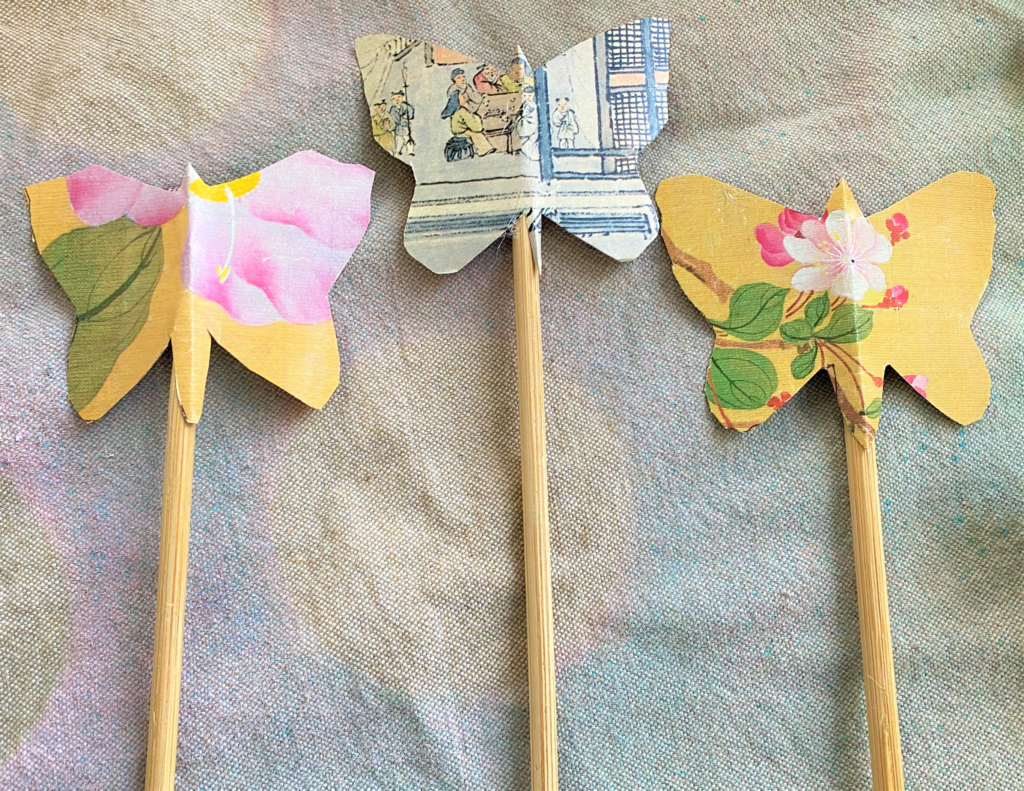
Design Idea: In place of butterflies, you could cut out the first initial of the gift recipient’s name and secure it to the end of the chopstick. For example, cut out a “C” to add to the bouquet when you give it to your friend Carolyn as a token of appreciation for all she does!
Thankfully, I am very fortunate to have a great yard with gardens that are starting to bloom right and left these days, especially given the recent warm and balmy weather.

I clipped greens from a bush which I put in first to help keep the flowers standing upright. Hyacinths and daffodils were added next. Branches from a flowering tree finished the Spring look.
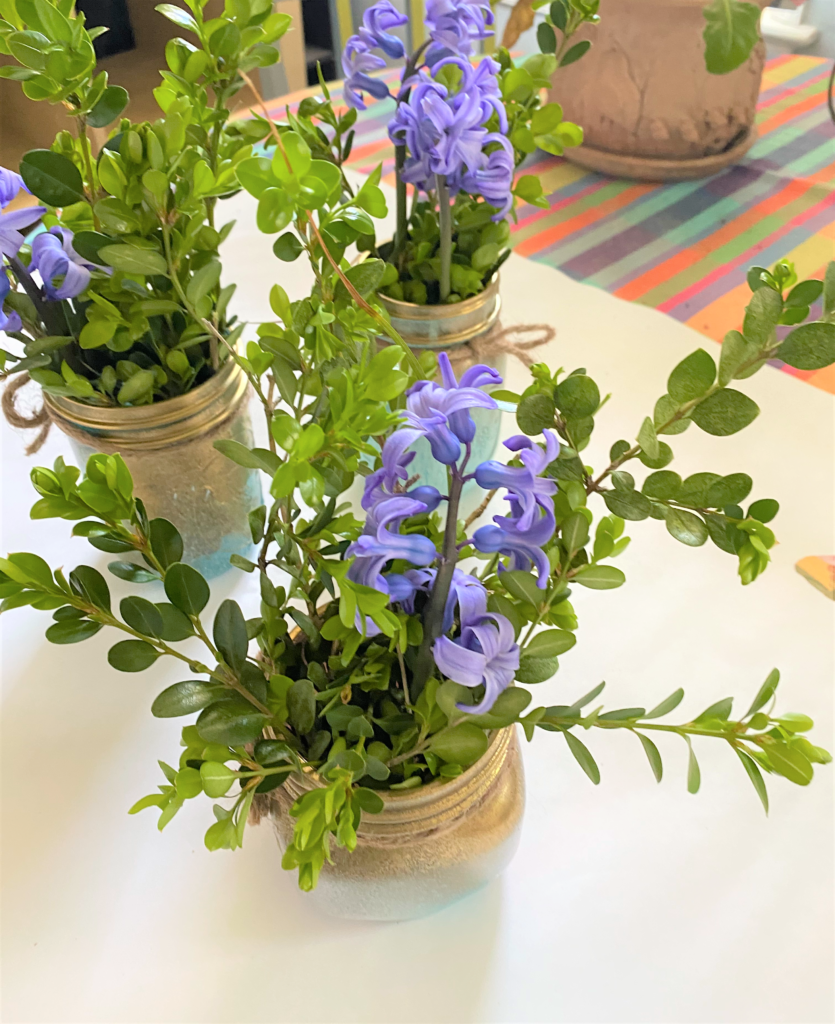
If you don’t have an outdoor space to pick from, any grocery store will have many options of cheerful flowers to buy for this project. After all flowers were arranged, the paper butterfly cutout on the chopstick was added, making it the perfect final touch!
6. Share & celebrate
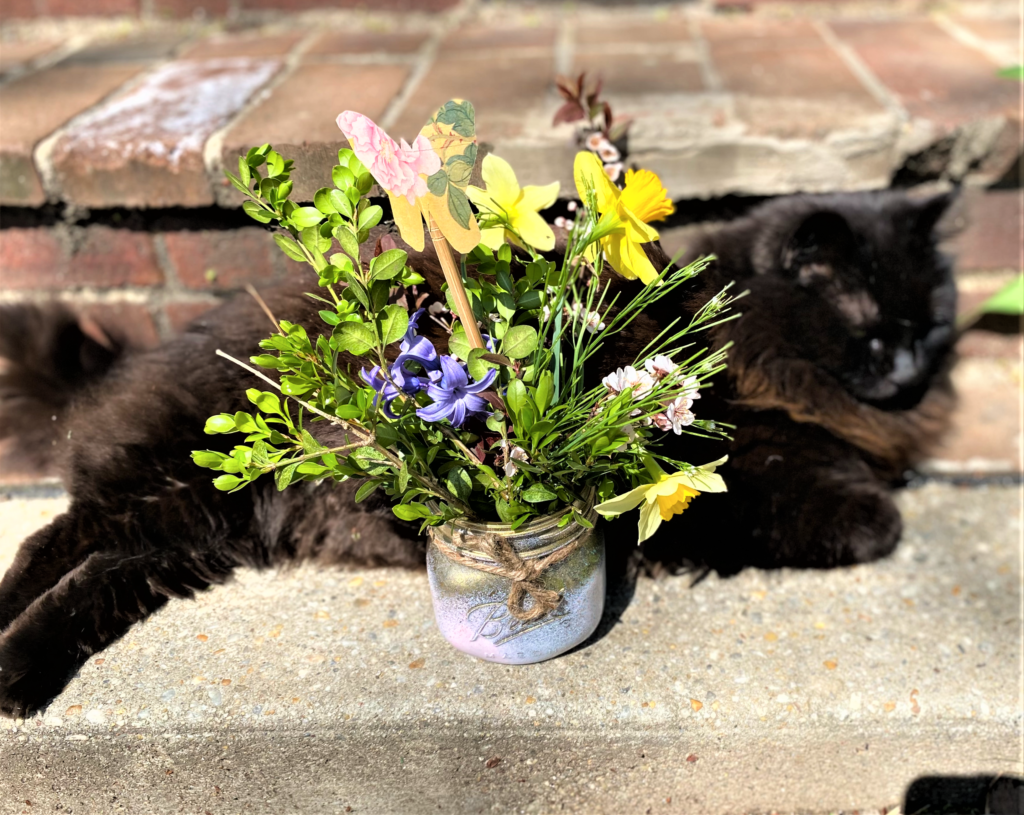
Give one of these mason jars bouquets as a surprise to your neighbor or present it to a family member to show you care.

Create a bunch to send home with guests who come by for a safe and socially-distanced holiday brunch.
And be sure to make one for yourself, too, so that you may enjoy the simple beauty of Mother Nature’s talents.

Tim Kime
Artist, Motivational Speaker, Life Coach