Celebrate Earth Day/Week with Stepping Stones for Your Piece of the World!
Here’s a DIY recipe to celebrate Mother Earth! Using cake pans, fold in cement and sprinkle with accessories to add bling to your garden with these one-of-a-kind stepping stones. These make cherished Mother’s Day, Father’s Day and graduation gifts!
Age level: Older teens and adults
Items needed:
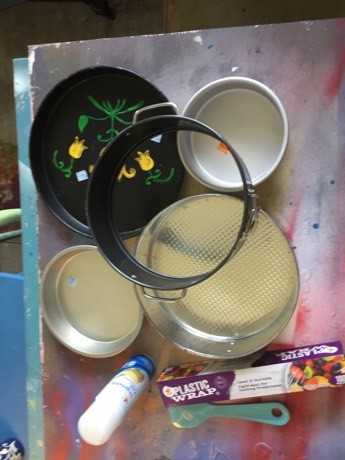
1. Cake pans and tins
2. Pre-mixed cement
3. Embellishment items like jewelry, old plates, tools/bolts/keys/hinges
4. Contact paper
5. Spatula
6. Pan spray
7. Scrap paper
8. Scissors
Time requirement: One hour (not including cement drying time)
Cost: $15
- $1 to $3 per cake pan
- $24 for pre-mixed cement (which made 3 stepping stones)
- $2 to $10 per jewelry item, plate
First Step: Head to Goodwill’s kitchen items aisle and find all kinds of good!
A staple at your Goodwill store is pans, in all shapes and sizes.
Go hunting for pie tins and cake pans for this earth-friendly DIY project. Look for metal ones that will be the frame work and/or base for your stepping stones.
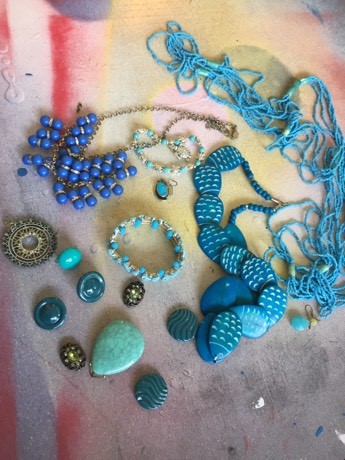
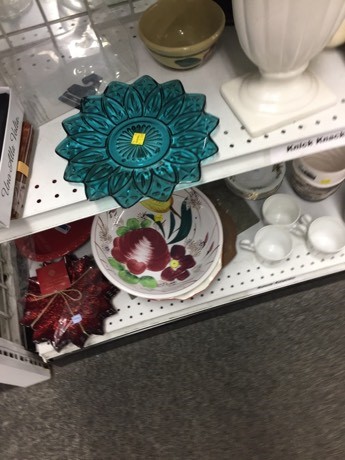
While shopping there, also be on the lookout for a colorful clear glass plates, funky jewelry and other items to embellish these pieces.
Also, look for marbles, glass gems/blobs and color dishes (to be broken) to cover your stones.
3 Approaches to Making a Stepping Stone
A. Layout items first
1. Trace, cut paper patterns
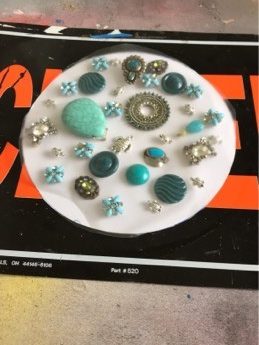
For a more complicated design, start by tracing your pie pan bottom (which will become the top of the stepping stone) on scrap paper and on contact paper. Place the scrap paper circle on a piece of heavy cardboard, then lay out your design with the pieces facing up and in position as how you want them to look when on the top of the stone.
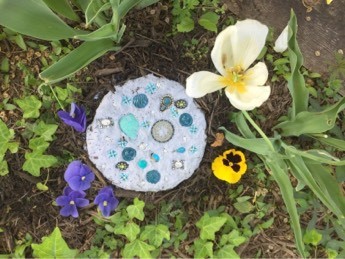
For one of my stones, I used necklace pieces, beads and earrings that had blue tones so they looked great together—and all purchased at Goodwill!
After you position your pieces as you would like them to look, take the contact paper circle, remove its paper backing and place directly on top of your items.
Gently press each piece so that is sticks to the contact paper. The contact paper will help to hold your design in place.
2. Prep your pan
To ensure your items and the cement don’t stick, lightly spray your pain with cooking spray.
3. Flip your design
With one hand under the piece of cardboard and the other hand on top of the contact paper over your pieces, carefully lift up your design so it is sandwiched between your hands, the contact paper, scrap paper circle and cardboard surface—then flip it over.
Place the contact paper on the bottom of the pie pan and lay it down so it fits inside nicely.
Think of it as though you are making a pineapple upside down cake!
The contact paper with the items stuck to it are at the bottom now, but will become the top when done.
Discard the cardboard and scrap paper circle. Your design should have stayed together well, though you may need to move things around in case they shifted during the flipping and moving.
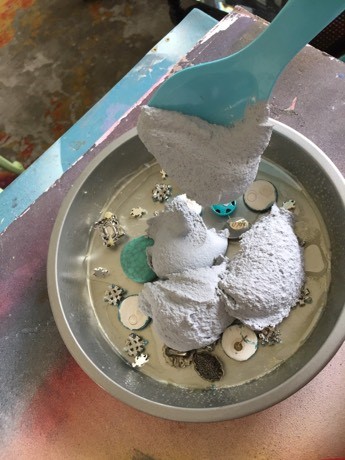
4. Scoop in your cement
With a spatula, add dabs of cement gently on top of the items. Place a layer of dabs so that the entire surface is covered. Gravity will work in your favor as the cement will flow down and over your items. As though you were smoothing out cake batter, ensure the cement goes to the edge of the pan.
Keep smoothing it so that the top surface is as flat as possible. Set aside and let dry overnight.
Expert tip: To provide extra support to your stepping stone, consider cutting a piece of chicken wire in the shape of your pan. After a layer of cement, add the chicken wire piece then add put more cement on top to ensure it is covered completely. You could also use wire screen, too, to provide added reinforcement.
B. Add items on top
1. Prep your pan first
Like Step 2 above, spray your cake pan/pie tin with non-stick cooking spray.
2. Scoop in cement now
Add a layer of cement and smooth it out along the bottom of the pan. Once a solid layer is added, then place the piece of chicken wire and add more cement on top. Continue to add cement to fill up the pie pan, then smooth out like you are frosting a cake.
3. Place items on top
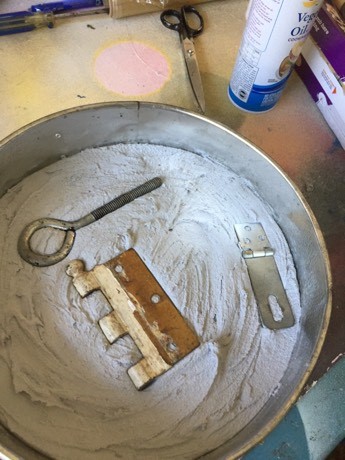
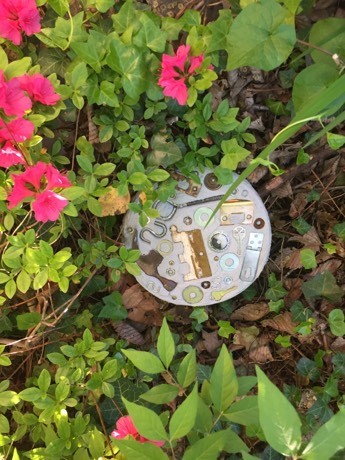
Gently place your items on top and carefully push them into the cement. Hinges, bolts, an old hammer head and other house hold items were used for the stepping stone created with this process. Each piece was added and pushed in to ensure it was secure in the cement. After all your items are placed in the cement, set aside to dry overnight.
C. Keep in the pan
For this last option, you will keep your finished stepping stone in the pan, so no need to prep it with spray and not need to add chicken wire as the pan will provide additional support.

1. Scoop in cement
Add a layer of cement and smooth it out along the bottom of the pan. Continue to add cement to fill up the pie pan, then smooth out, again as though you are frosting a cake.
2. Place items on top
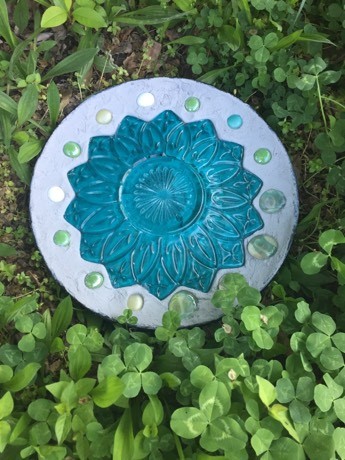
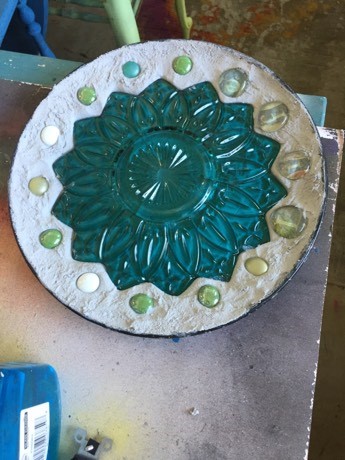
Gently place your items on top and carefully push them into the cement. For this process, a clear glass teal plate with a flowery look was placed into the cement top side down so the plate’s curve went into the cement. Around the plate, glass “blobs” where added pushing each gently into the cement to ensure they were secure. Place aside, too, to dry overnight.
The Big Reveal!
If you followed the first two processes above to create your unique stepping stone, then carefully flip it over to remove it from the pan. Hopefully, the pan spray worked its magic and prevented the cement from sticking to it.
If you followed the first option, then your design should now be on top and ready to greet the world!
If you followed the second option, your stepping stone will be upside down as you removed the pan, so carefully flip it back over so your embellishment items are now visible from above!
The third option doesn’t require any flipping at all nor the removal of the pan!
Add to your outdoor space
Given how eye-catching, cool and creative these pieces are, you will want to find a prominent place in your garden or yard where they may be seen by family, friends and other visitors. While they are functional as stepping stones, they are also works of art to add visual interest and intrigue to your outdoor space, all in celebration of Earth Day/Week and Mother Nature!


Tim Kime
