DIY Project: Tie-Dyed T-Shirts Give Clocks a Timely, Terrific Transformation
Take fabric from a tie-dyed t-shirt to transform a clock into a terrific, trendy time piece! Tie-dyed fabric is always fun and looks groovy on kids of all ages, so why not give a boring clock a bold and bright new look, too? Pair parts of a thrift store t-shirt with clocks found at Goodwill, too, for a totally terrific transformation.
You will say, “Peace and love” when you see how easy it is to piece and glue the parts to upcycle a clock or two.
Items needed:
· Battery-powered wall clocks
· Tie-dyed t-shirts
· Glue: glue sticks or school glue
· Foam brush
· Scissors
· Marker
· Painter’s tape
It’s always the right time to find your good at Goodwill!
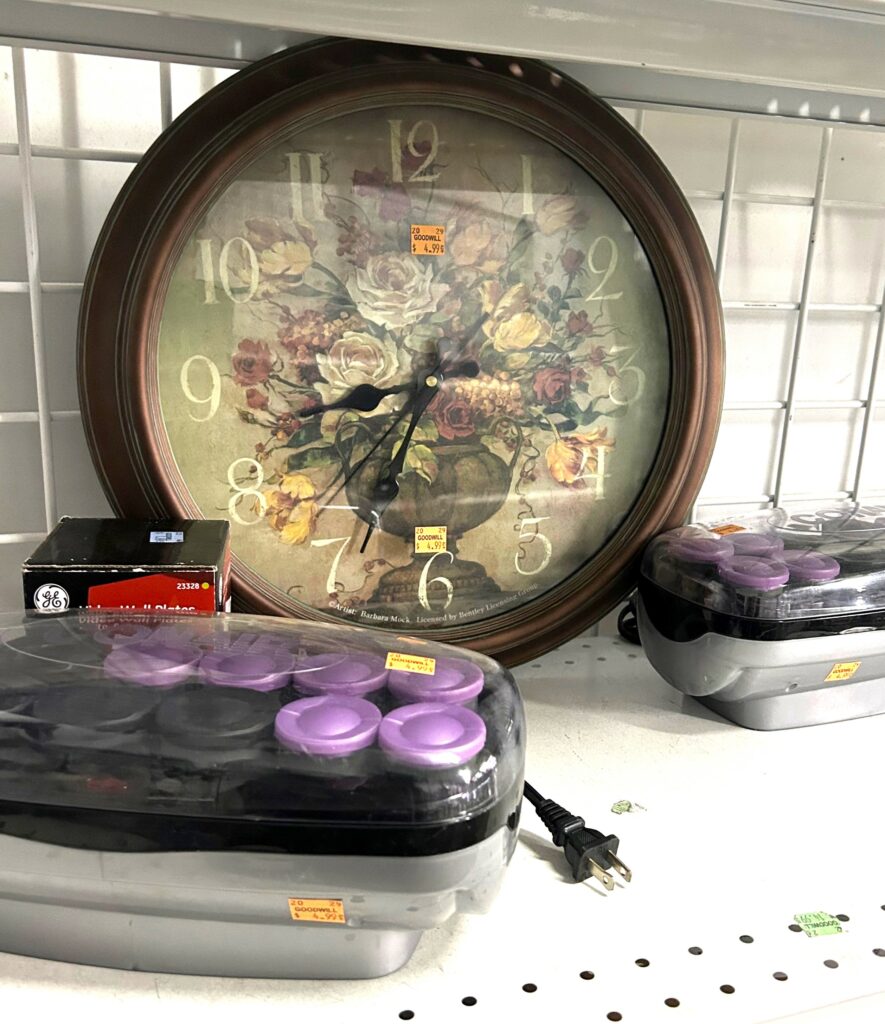
Part of the adventure that shopping at Goodwill for items to decorate your home or office is you never know what treasures—or good—you will find there. Thankfully, most Goodwill stores have a collection of clocks for sale as well as racks of t-shirts. Why not combine the two for a totally cool transformation?
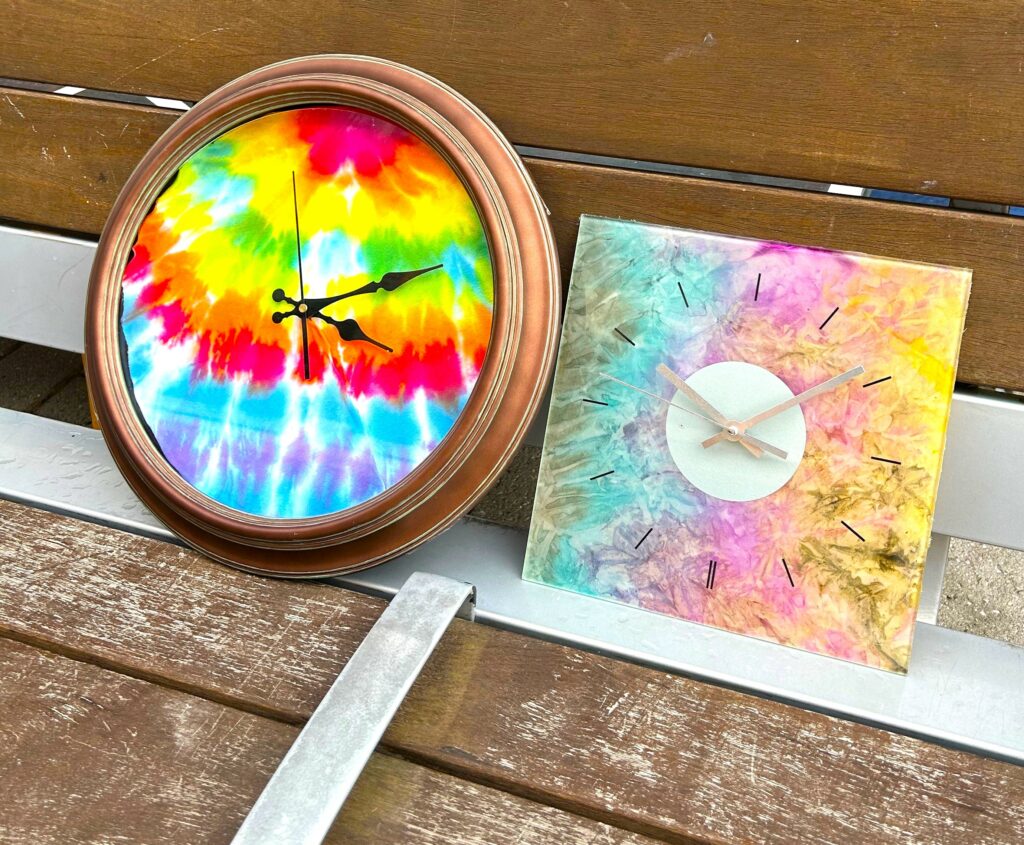
Two clocks caught my attention because of their shape, size and design. Their current look was fine, but both could go from okay to out of this world with a little creativity—and some cutting and gluing! Everyone and every room can always use a wall clock, especially one upcycled to make it a work of art, too.

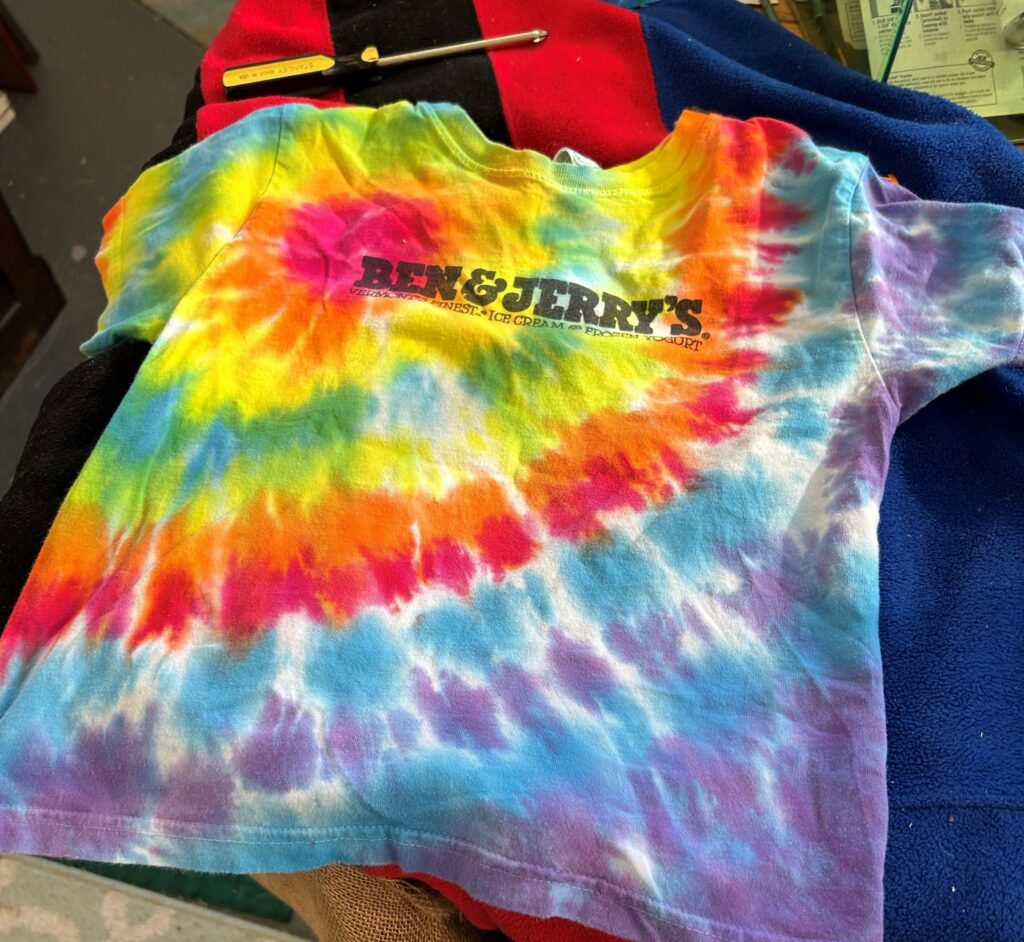
While getting out of the heat by walking through my favorite (and cool) store on South Dakota Avenue, a kid’s colorful tie-dyed t-shirt caught my attention, so I put two and two together.
How about using this happy fabric to transform a dated-looking clock? And here is the result of that “ah-ha” idea.

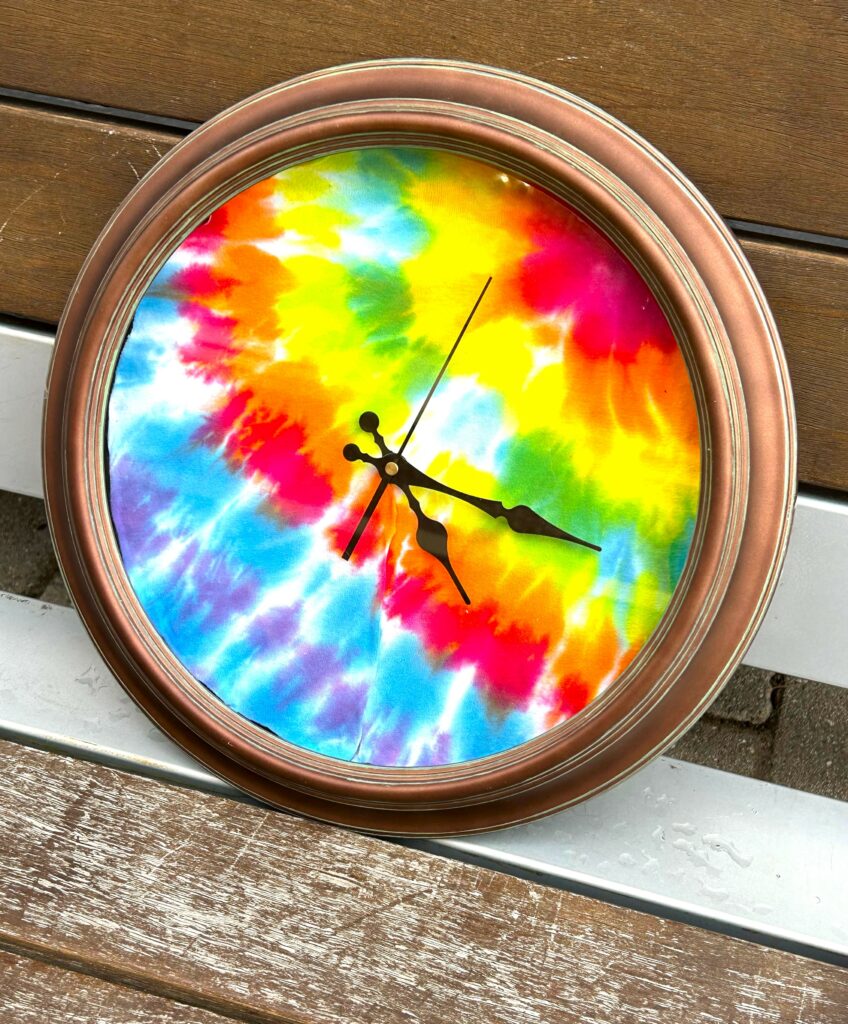
Round Clock Upcycle: Here’s How
1. Take it apart and keep track of all pieces & parts
Based on the design of your clock, you might need to use a screwdriver to disassemble it to get to the clock face.
Be careful as you remove various screws and pieces; this clock had a glass cover, so it was important to be very gentle with it.
Place your pieces aside; consider using a mug or small bowl to hold the screws.
Put the glass part on a towel on a flat surface away from where you are working.
2. Cut your fabric
Place your t-shirt on your worksurface and smooth it out as much as possible; you also might consider ironing it to ensure it is flat and wrinkle-free.
If you are using the front of the shirt, place that face-down and carefully cut the back of the shirt to open it up.
You may also want to cut the sleeves to give you as much material to use.
3. Trace & trim
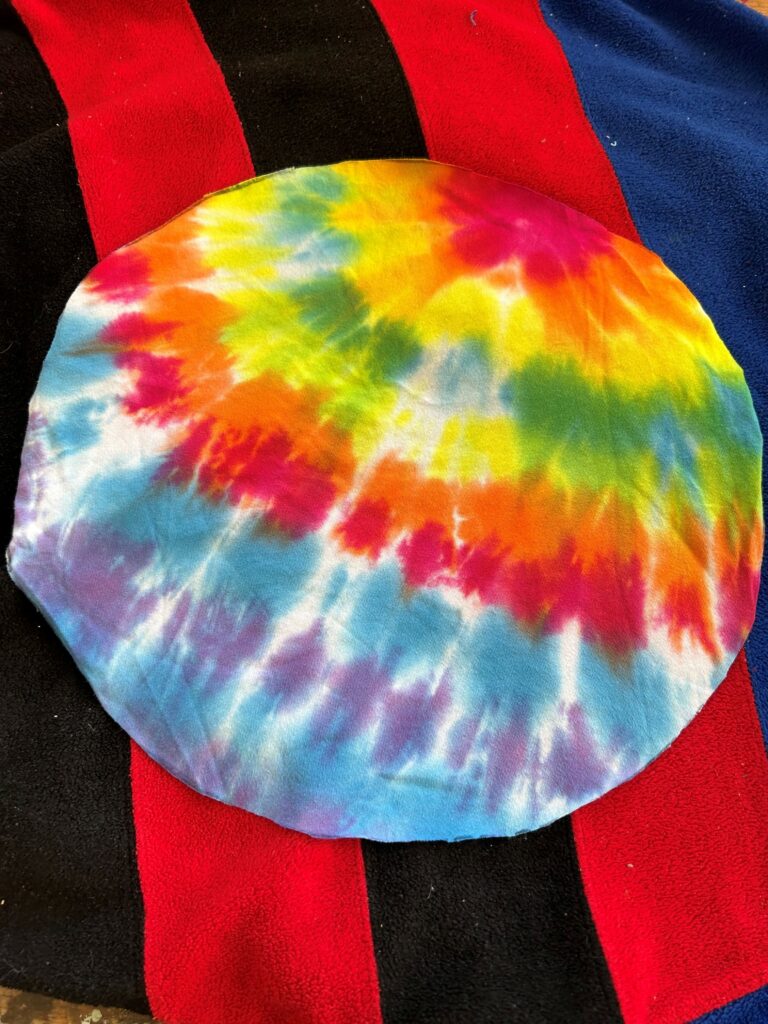
The clock face and its glass cover are usually the same size, so carefully place the glass piece on top of your cut-open t-shirt. With a marker, trace around the glass. Remove the glass piece and trim away the excess fabric with your scissors. Cut any rough edges so your piece of fabric is a smooth, sharp circle.
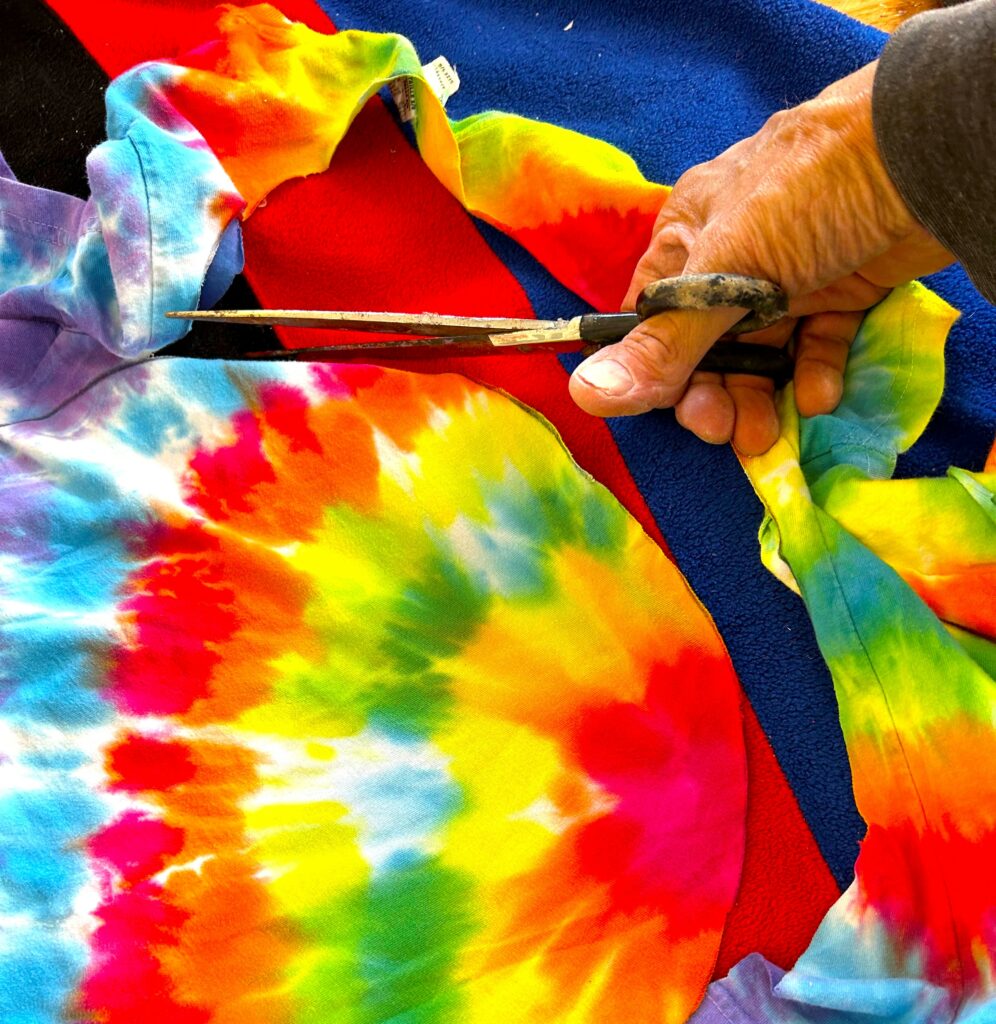
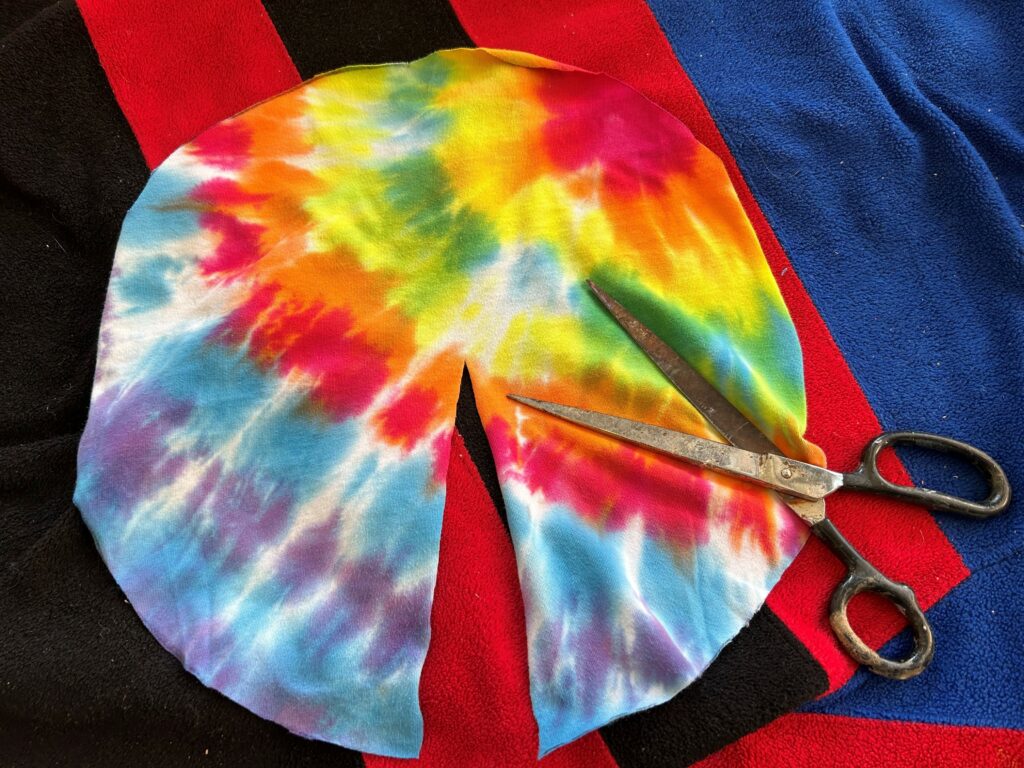
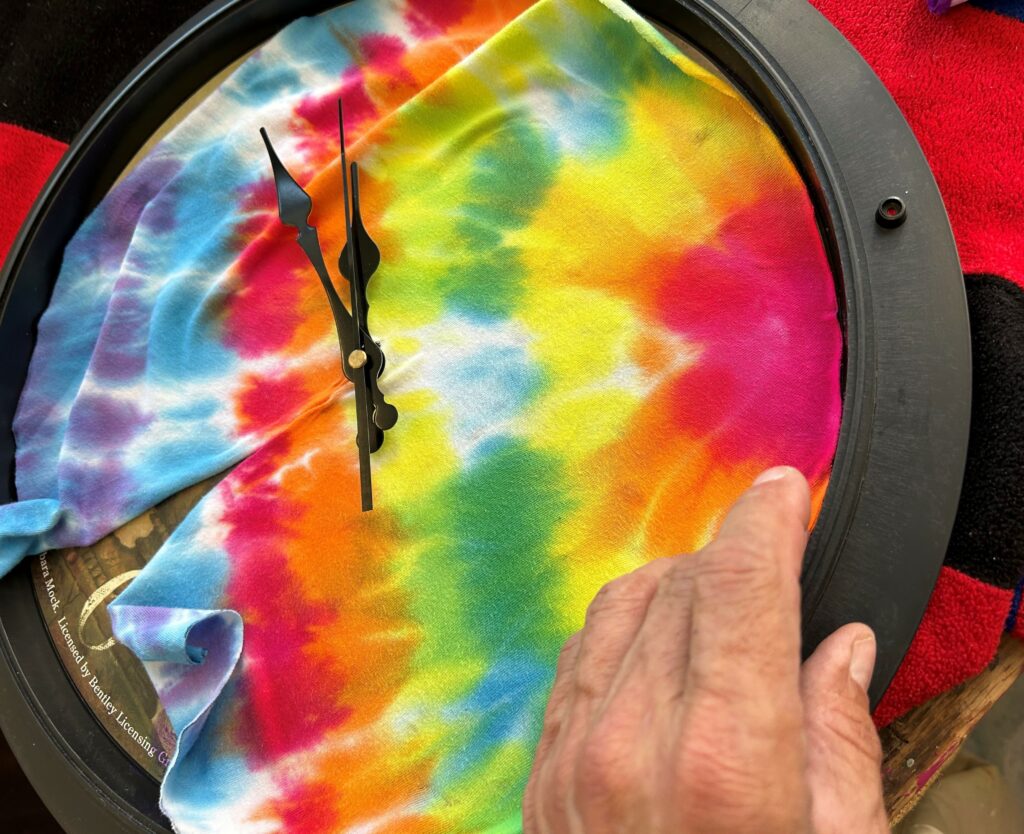
In order to fit the circle piece of fabric around the clock’s hands, cut a line from the center to an edge.
4. Position in place, give it some glue
- Place your fabric circle around the clock’s hands, through the half-way center cut, then work to lay the fabric flatly on the face.
- The two edges of the cut part should meet together nicely for a small seam that is not really noticeable and doesn’t take away from the final look. Fold over part of the fabric and apply glue.
- A glue stick was used for this clock; however, school or fabric glue also could have been brushed on with the same impact: holding the fabric in place.
- Fold the fabric back on the glue and smooth out the fabric with your fingers to help it hold tightly.
- Repeat this step with the other half.
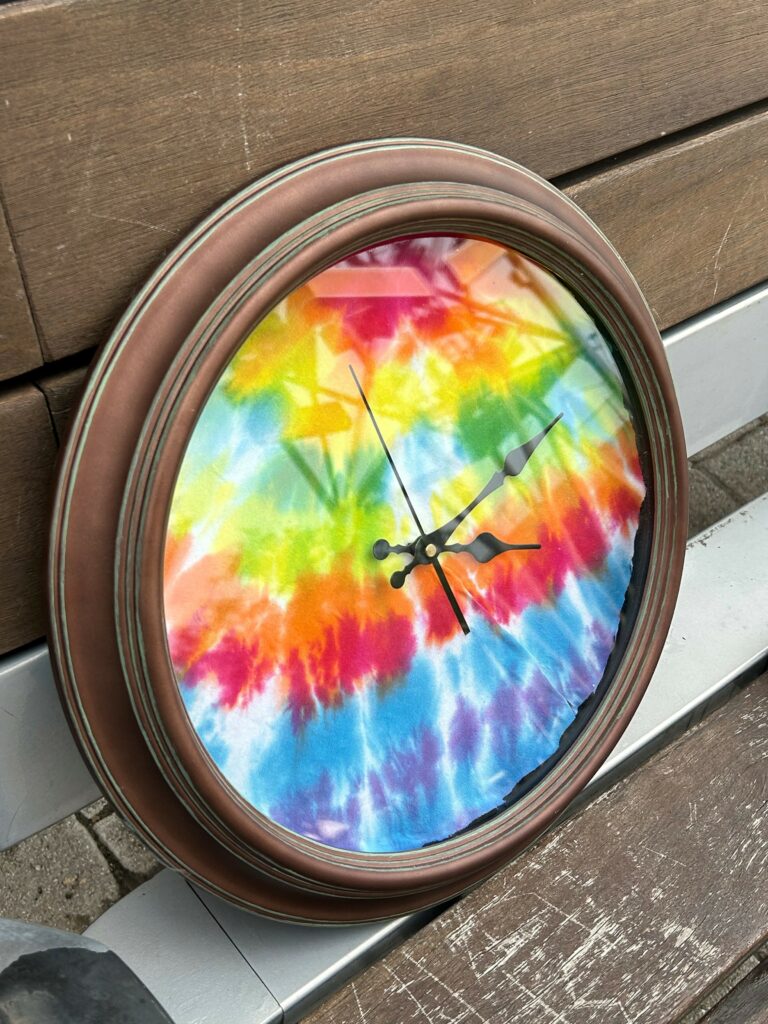
5. Reassemble & rejoice
After the tie-dyed fabric has dried well to the clock face, ideally overnight, then reassemble your clock. Again, use extra caution when handling the glass part.
When it’s all back together, set the time, hang it and give yourself a big thumbs up!
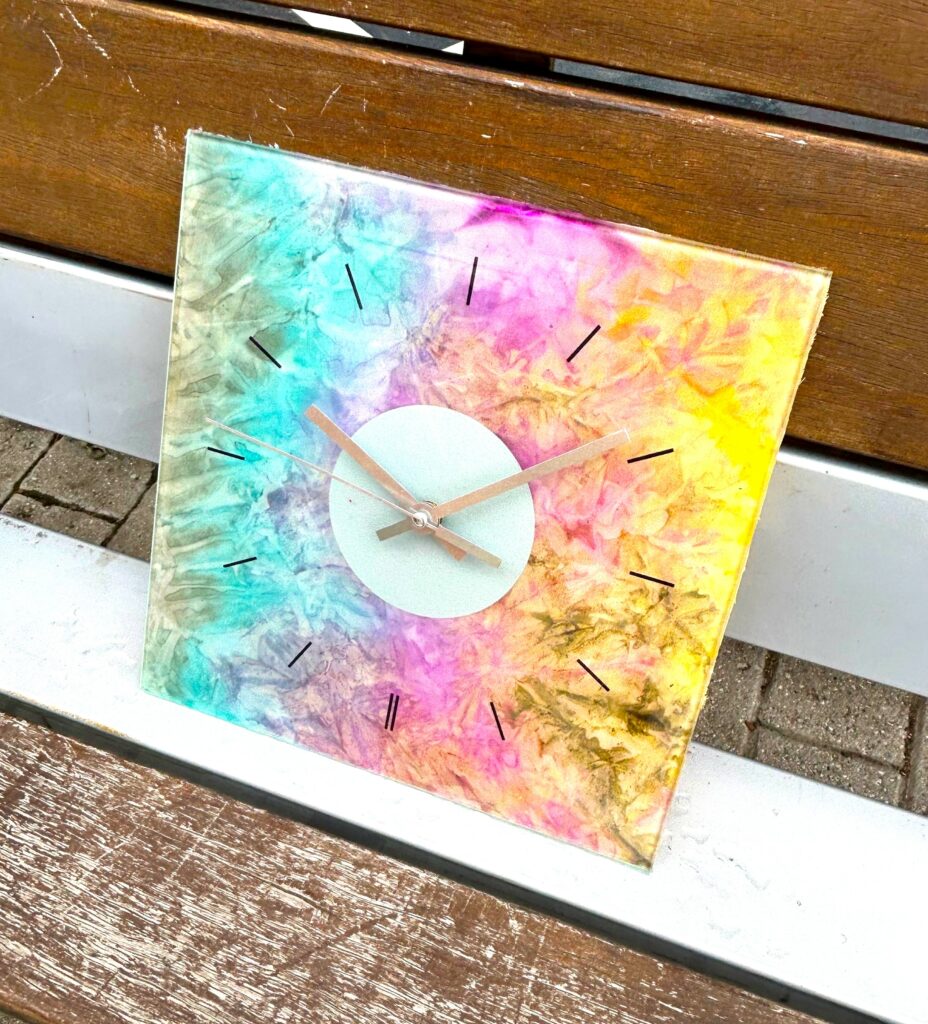
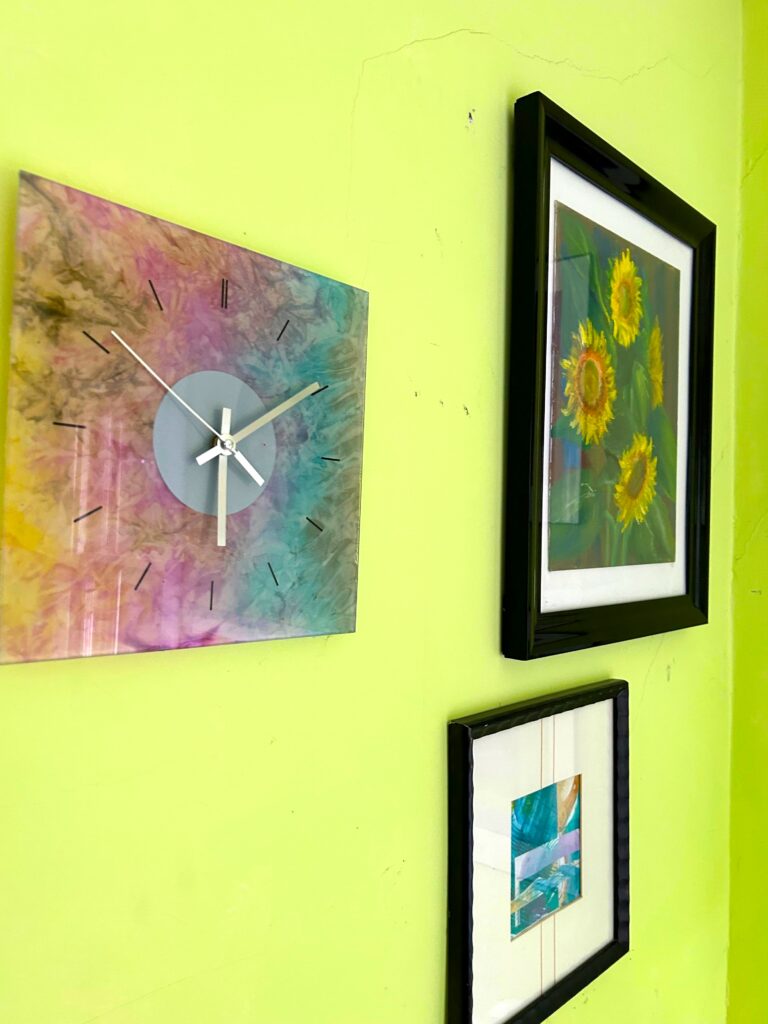
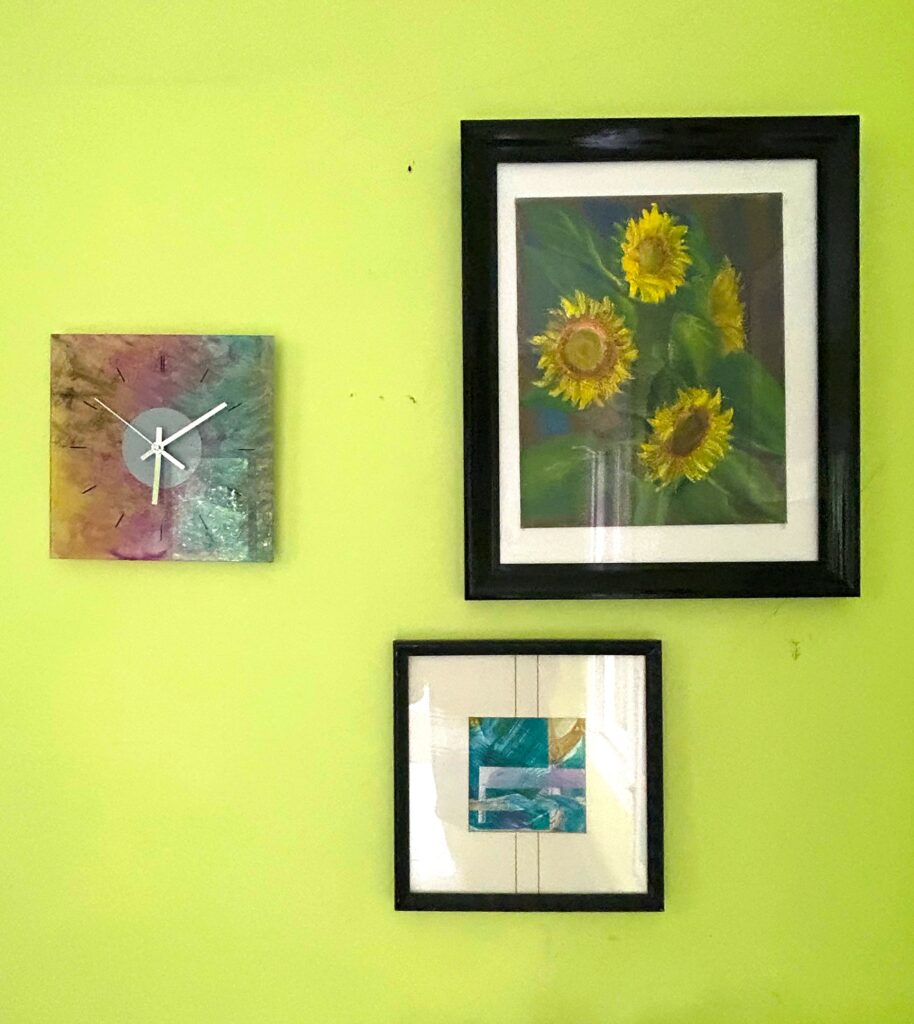
Square Clock Upcycle: Here’s How:
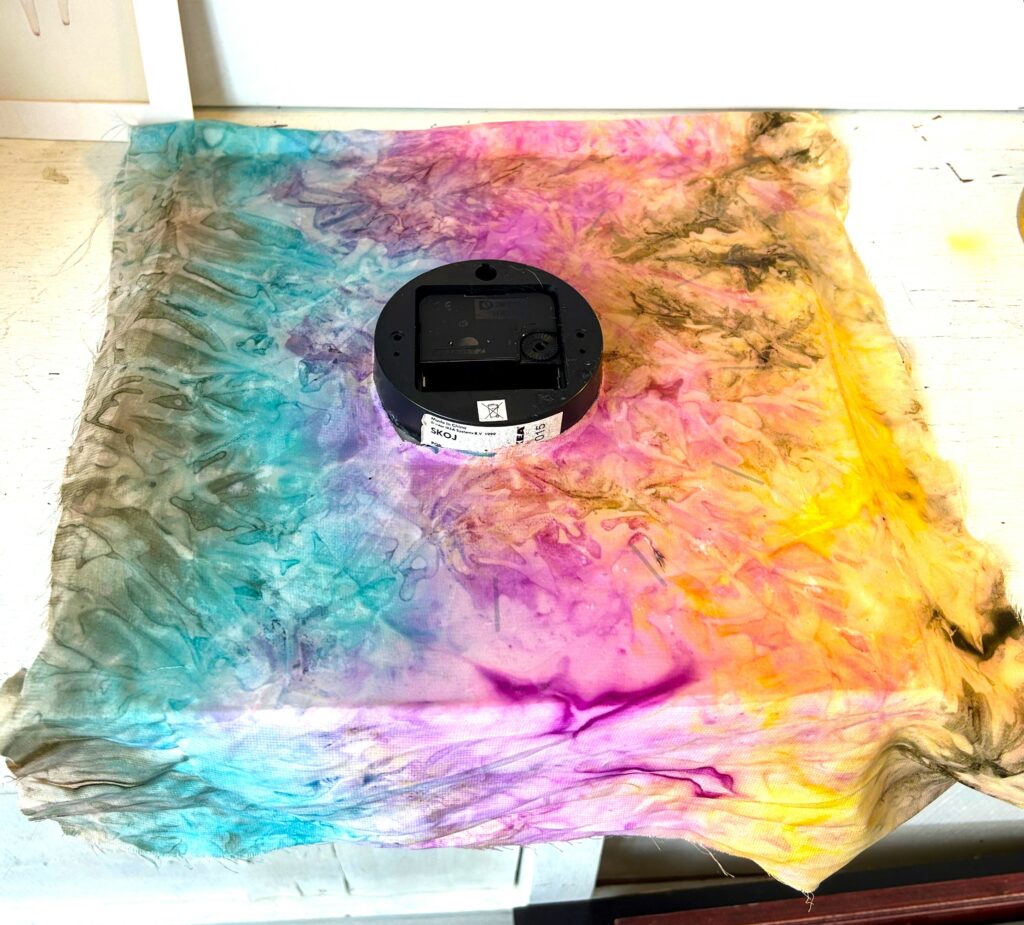
1. Place it on its face and the fabric on its back
- The square clock had a glass front, slightly frosted and with its timing mechanism on the back.
- When hung up and displayed, it would not be flat against the wall by design, but rather have a floating sort of look.
- This meant its transformation would take place on the back of its face, not the front like the first clock.
- If you have a clock with this style, then carefully place it face down on your work surface being mindful of its hands.
- Place your colorful fabric on top and cut away most of fabric, allowing an inch or so to remain.
2. Cut out a center hole
Use your marker to trace a circle on top of the clock’s mechanic’s box. Enlist your scissors to cut away the inner circle so you have a piece of square fabric with a round hole cut out right in its center.
3. Apply your glue
School glue was used for this clock to ensure the fabric was tightly adhered to the entire front glass piece and without any gaps or bubbles.
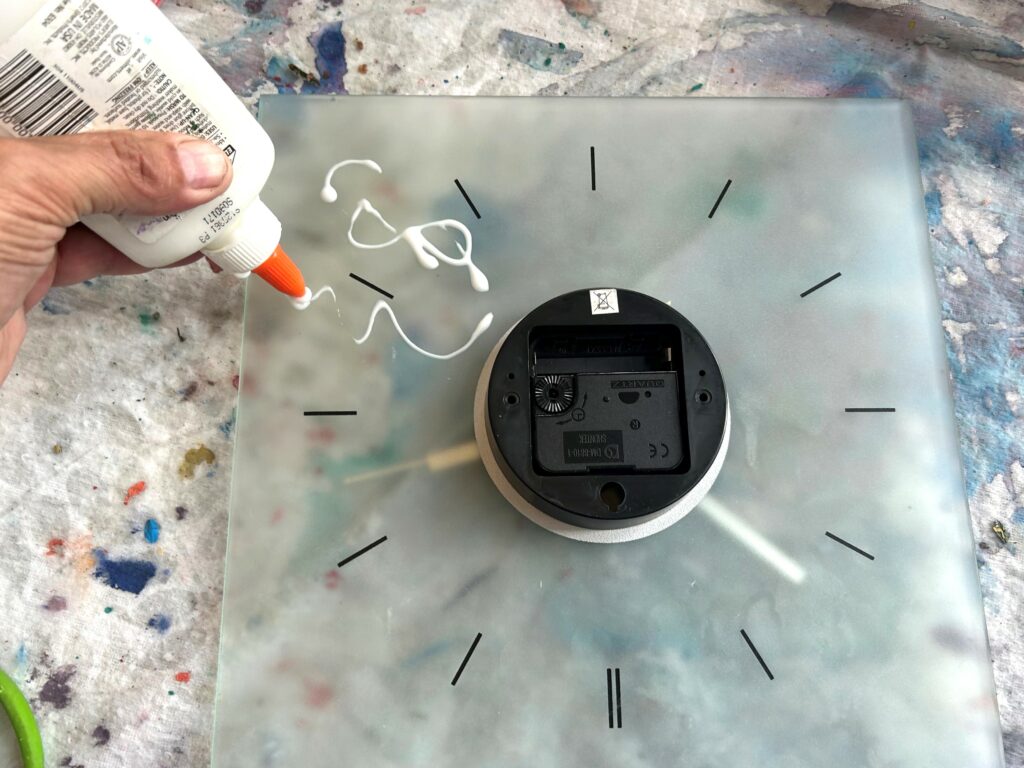
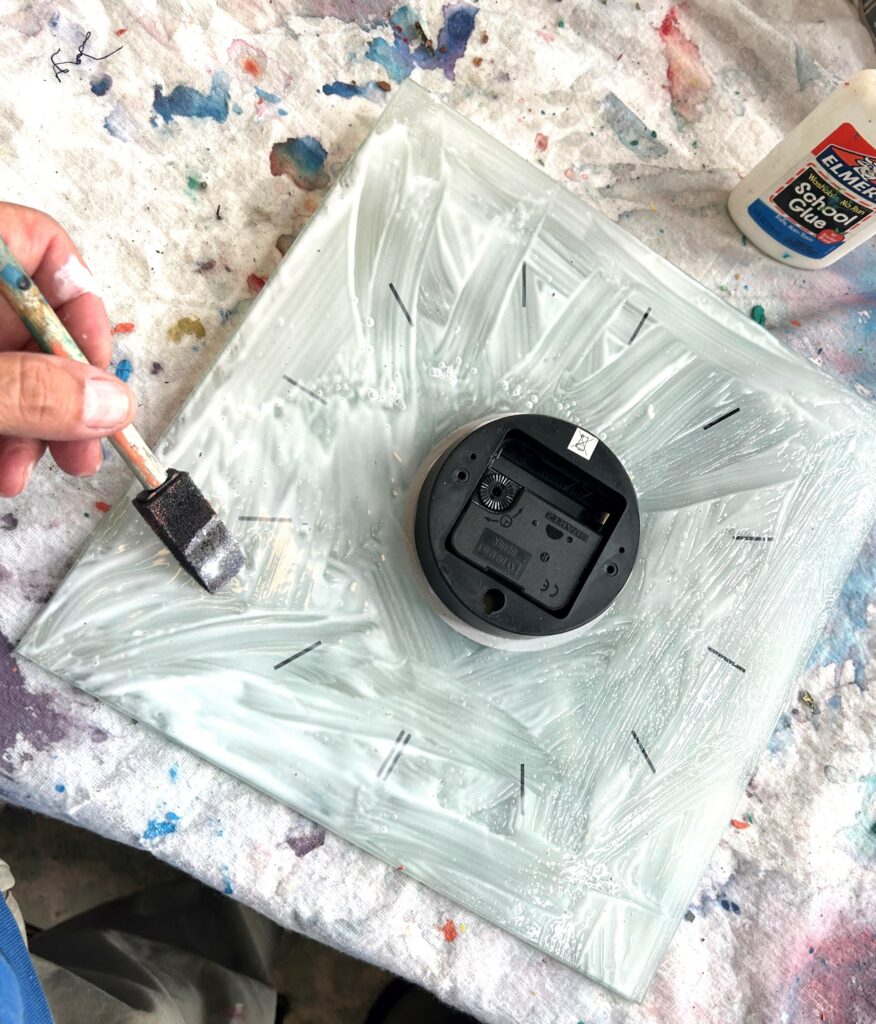
- Use a foam or craft brush to ensure a nice solid and complete coat on the clock’s glass surface.
- Carefully place your fabric piece on top; it should lay flatly on the surface with the hole allowing the mechanism to poke through completely.
- Use your fingers to smooth out the fabric and ensure all of it has glue and it touches the glass surface. Allow it to dry.
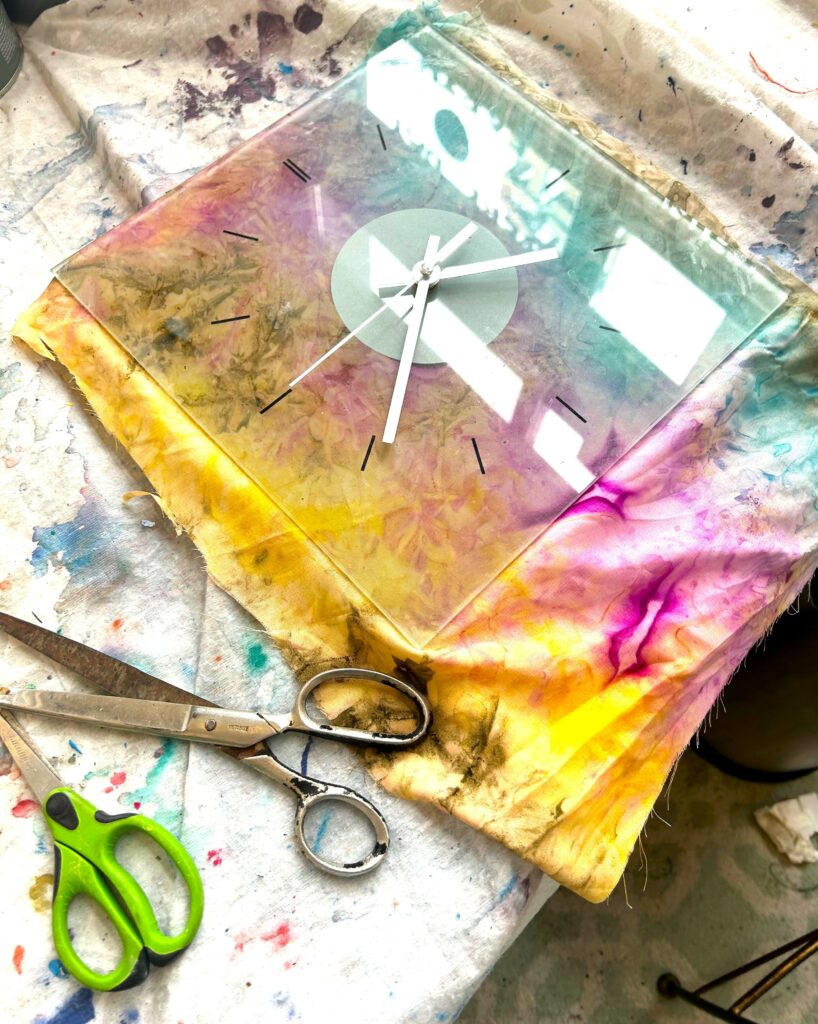
4. Trim the edges for a crisp cut
Flip your clock over so the front is facing you. Use your scissors to carefully cut and crispy trim the access fabric; you want the fabric to stop at the glass edge.
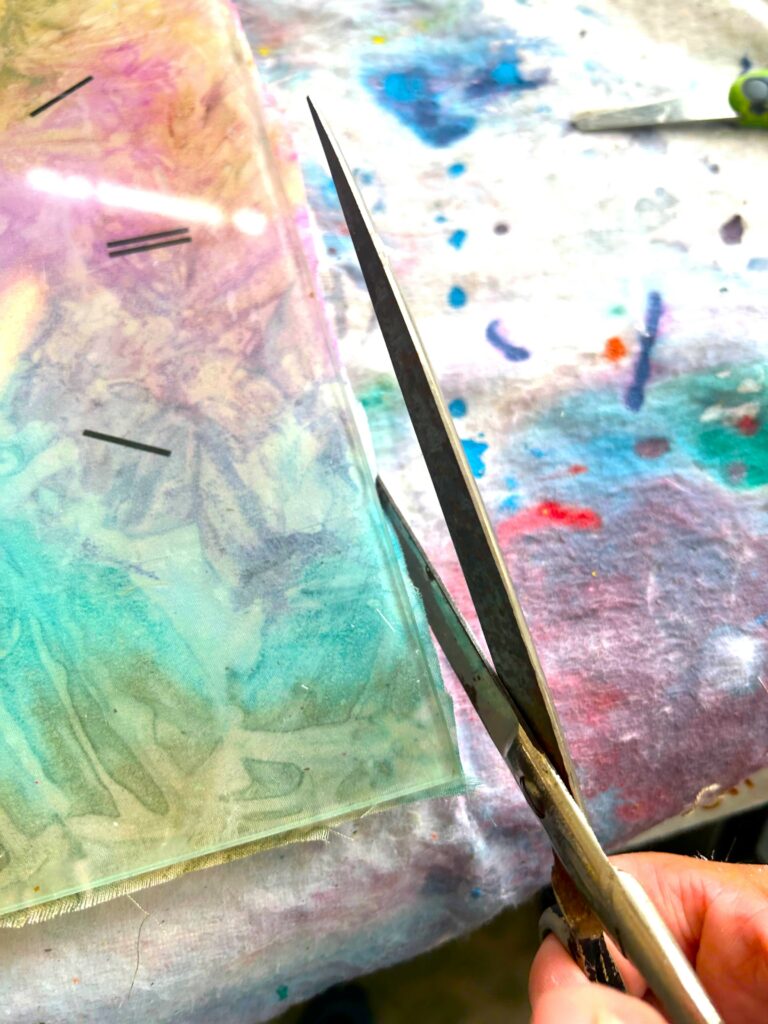
To assist with a straight line and to hold things in place, consider positioning a strip of painter’s tape on the edge before trimming.
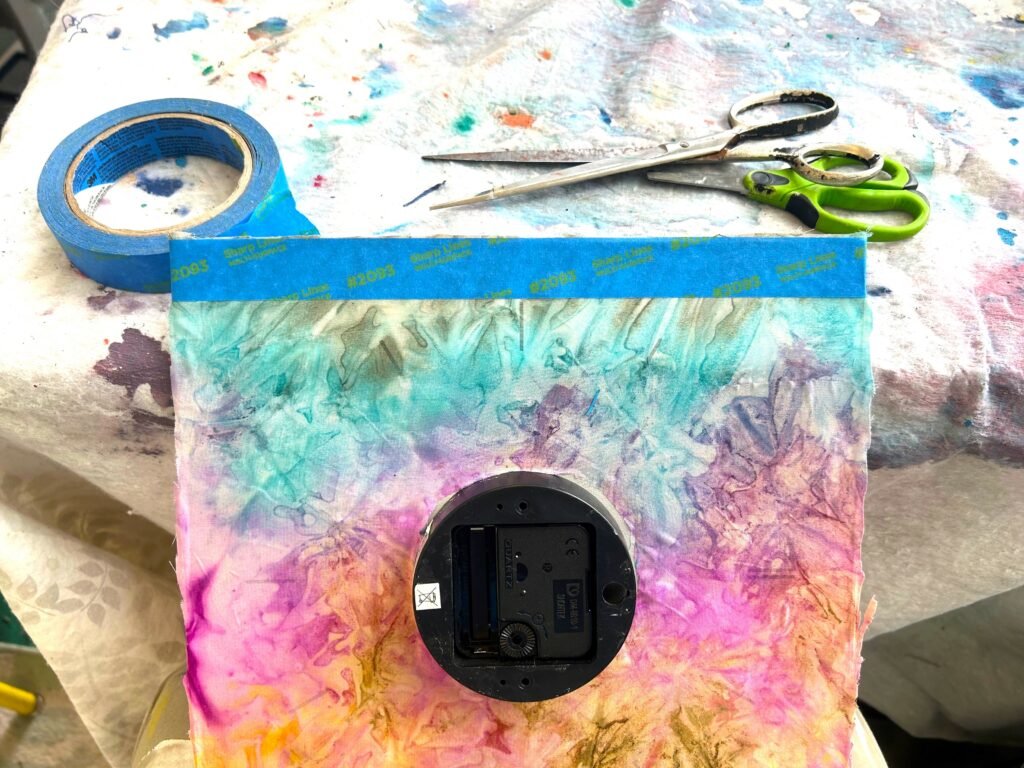
This will help you to cut away only the access fabric which is hanging over the edge.
Expert Tip:
You may consider placing your clock back down on its face, after cutting the fabric, then applying more glue along the cut edge. This will help to ensure the fabric doesn’t fray and will ensure a tight fit along each edge.
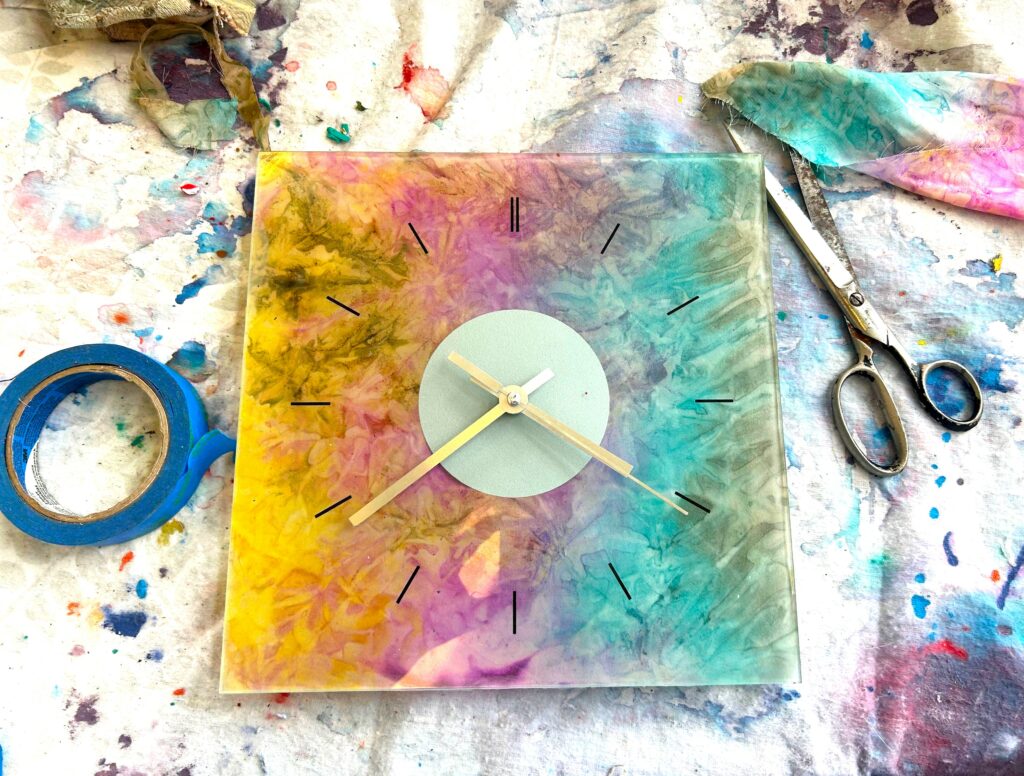
5. Hang it up & be happy
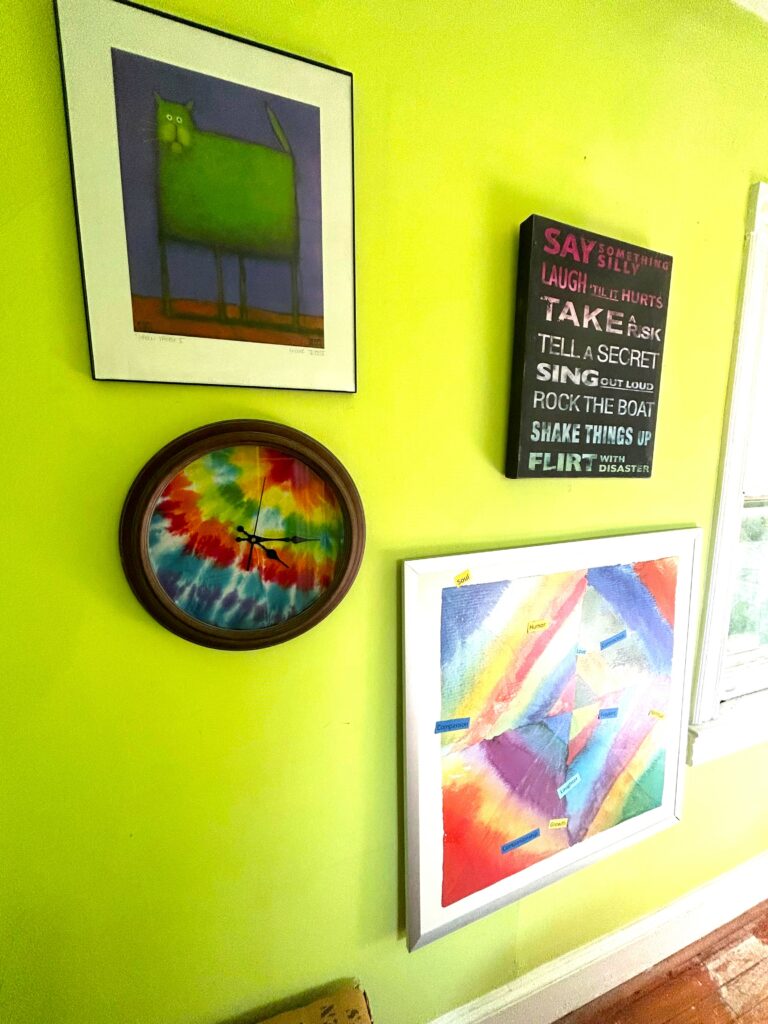
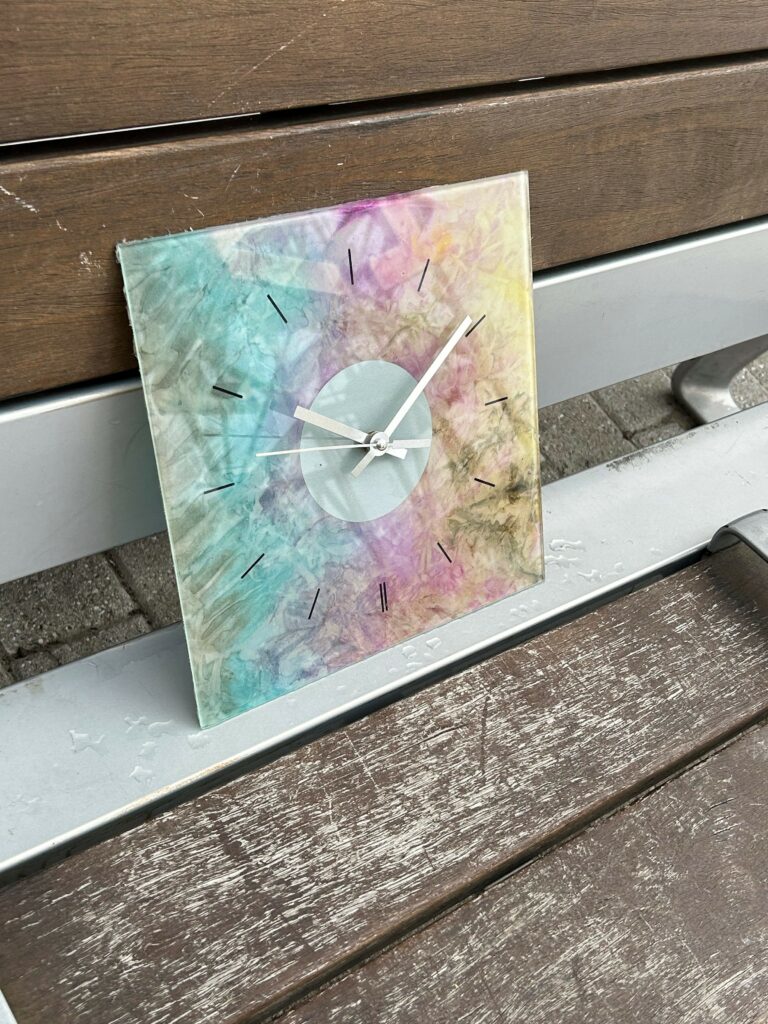
After giving additional time for your colorful clock to dry, now is the time to hang it up! Find a place that needs a little bit of color and coolness then put it there and watch your smile get bigger as well as the smiles on the faces of all who see it.
You have a unique clock (or two) that you will love, love, love, I know, know, know it!
Similar Reads:
- DIY: Let Your Light & Support Shine with Pride-Painted Lamps
- DIY: Show Your Pride with Painted Pieces
- DIY Project: Reflect Your Pride by Upcycling a Mirror or Two
- DIY: One Clock, Four Ways to Upcycle It

Tim Kime
Artist, Motivational Speaker, Life Coach


