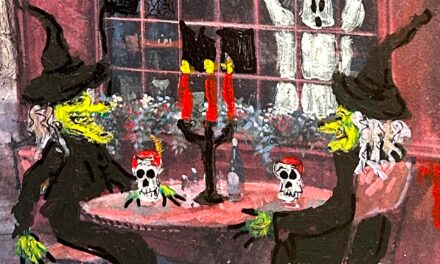
Upcycle a Thrifted Hall Tree from “Morticia” to Masterpiece
There is something about very ornate and dark wood Victorian-era pieces that says Adams Family to me. With some vision and paint, you, too, can upcycle a hall tree or other thrift store find from monster-friendly to Monet-inspired. Bring a piece from the shadows into the spotlight with a bright and inviting color pallet.
Items needed:
· Wooden hall tree
· White, semi-gloss paint
· Other paints in blues, purples, silver, gray
· Paintbrush
· Small, detailed paintbrush
· Painter’s tape
· Drop cloth
1. Even Gomez Adams would find his good at Goodwill
No matter where you come from or your background, or your financial status, Goodwill will have good waiting for you in the form of unique, one-of-a-kind items for your home and office for low prices.
Morticia’s husband, Gomez, won’t shake in his shoes while shopping at Goodwill, unless it is with excitement for all the cool items and scarily low prices. (Okay, this blog is going to be fun with all the Adams Family references and puns!) You don’t have to wait to get Wednesday’s approval or wait until Wednesday to stop in your favorite Goodwill store to find your good there.
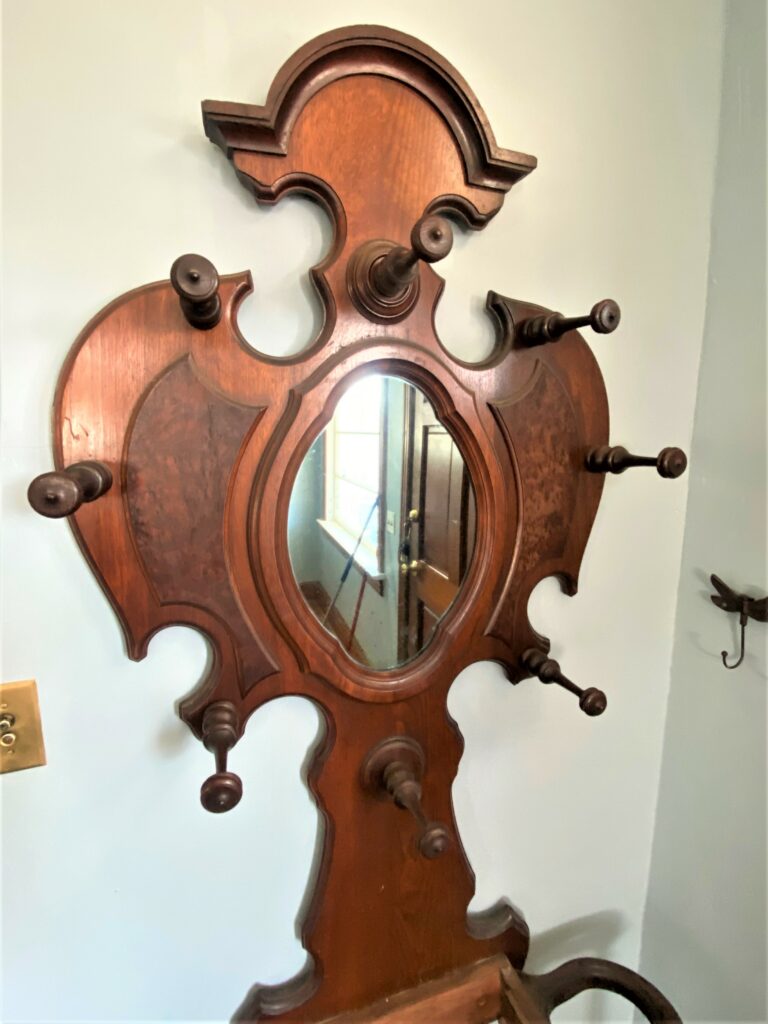
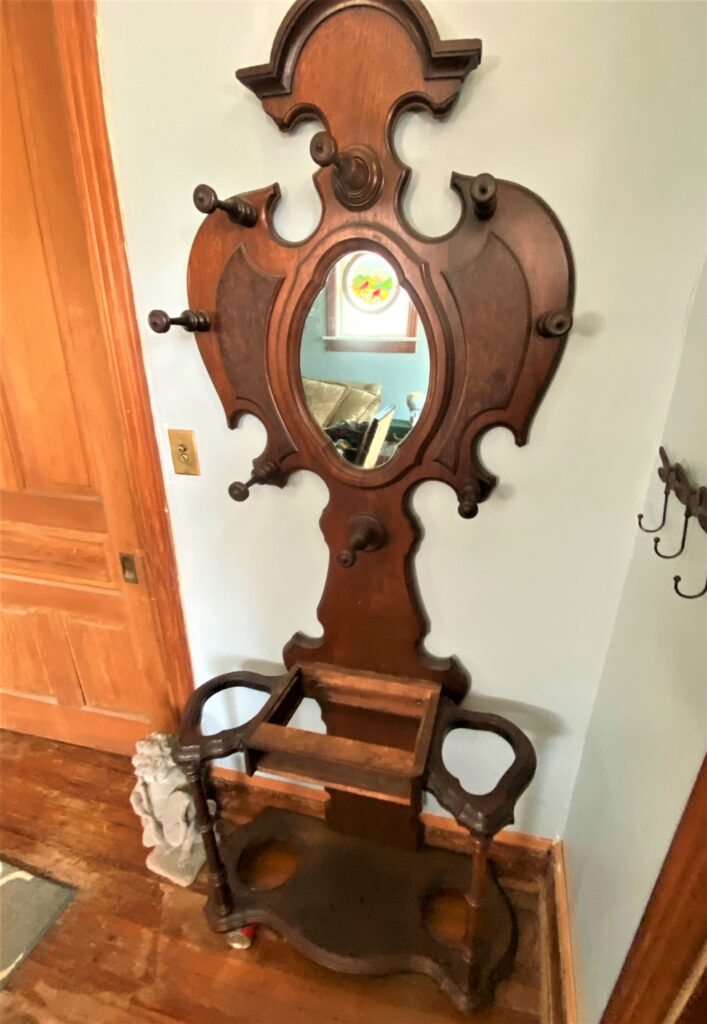
This hall tree was so beautiful and a little creepy at the same time, so it was a must-have as soon as I saw it. It was in excellent shape and had decorative details of days gone past.
Also, folks shopping may have seen it before me and thought it, too, had seen better days. Thankfully, I was able to take it home for this week’s DIY blog upcycle.
2. Prep with primer
- This project started with tightening of screws and protecting the mirror with painter’s tape.
- A drop cloth was spread out on the floor, and gallon paint cans were placed on top of it so the hall tree, when laid on its back, would be slightly raised up for better painting access.
- A layer of white primer was carefully applied over all parts, each nook, cranny, and carved curve, to provide a brighter and more neutral canvas on which to create.
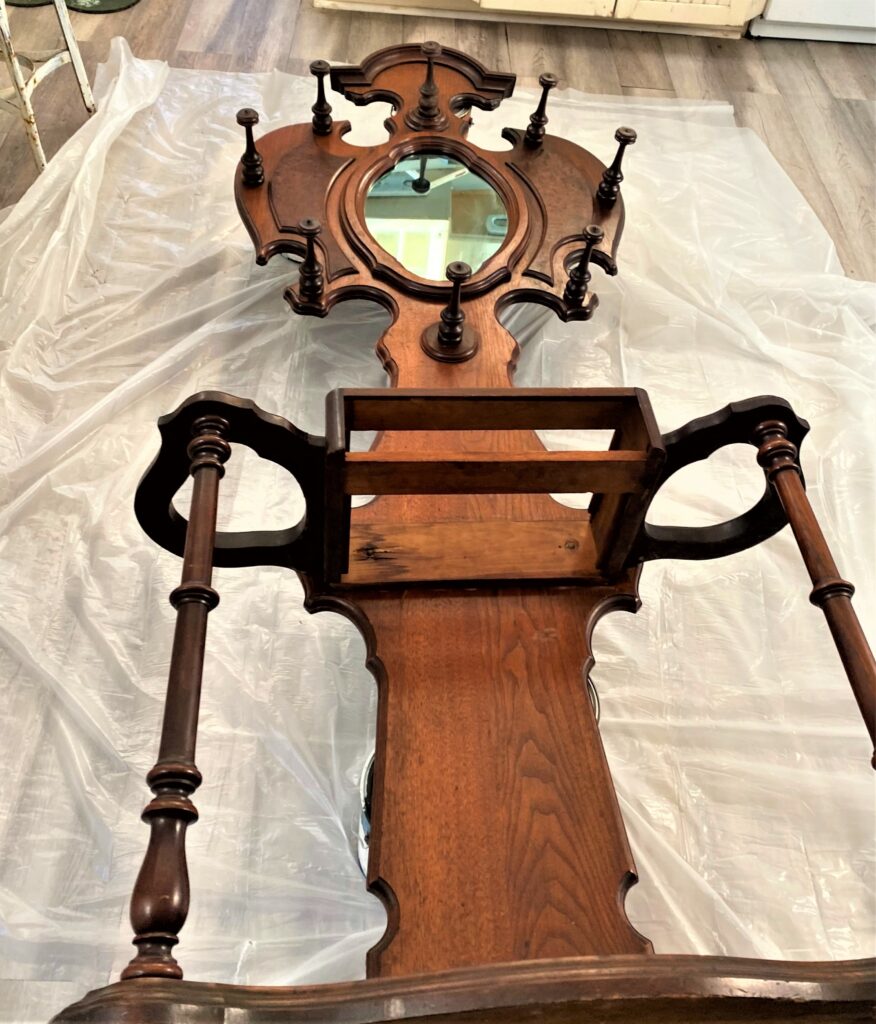
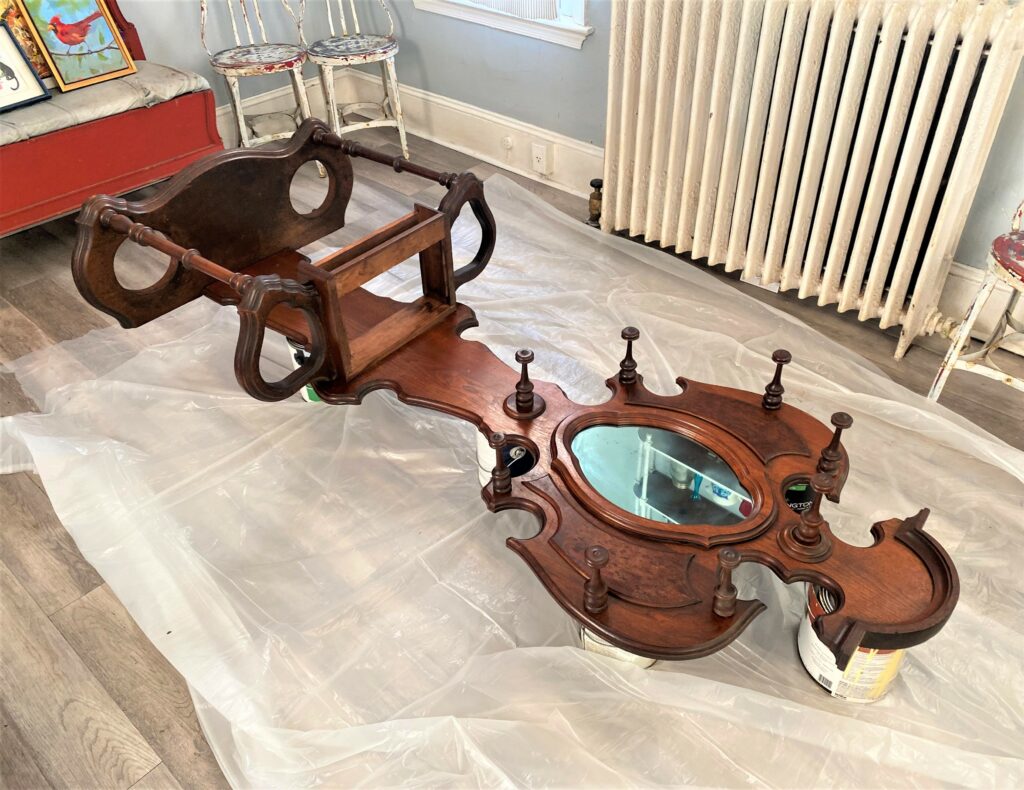
Based on the project piece that you are upcycling, you will want to move your piece around, placing it on its sides and back to ensure solid coverage.
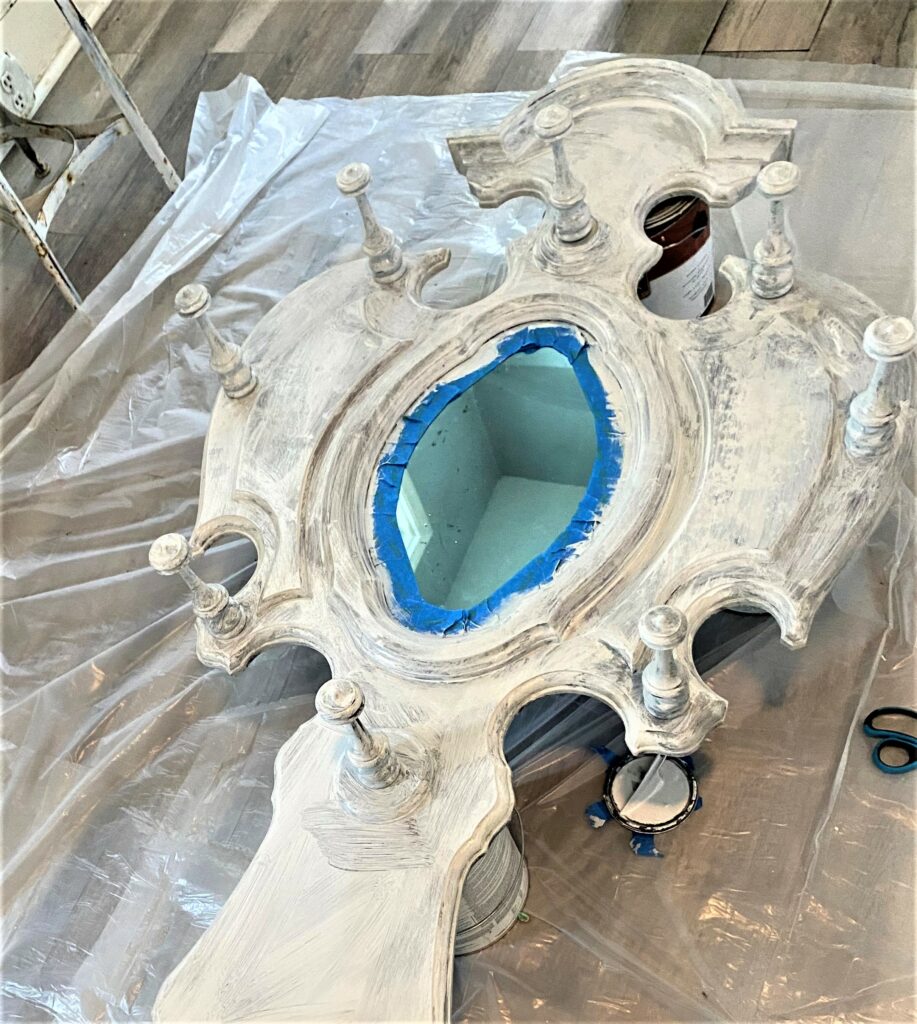
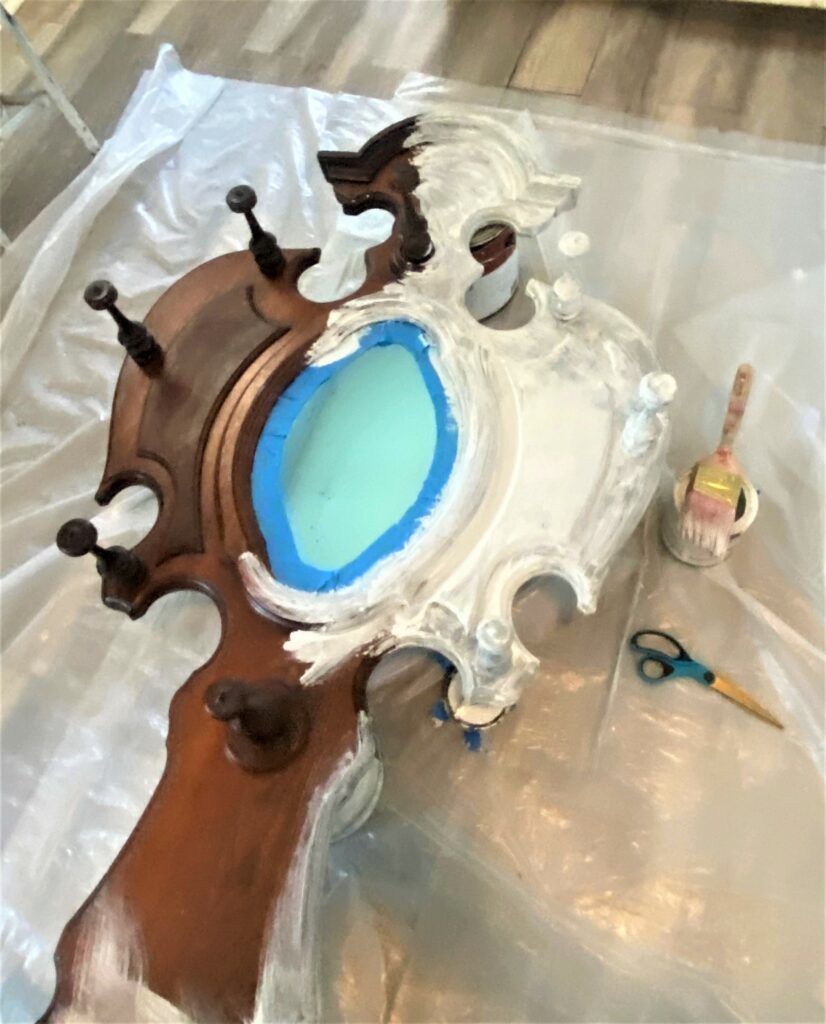
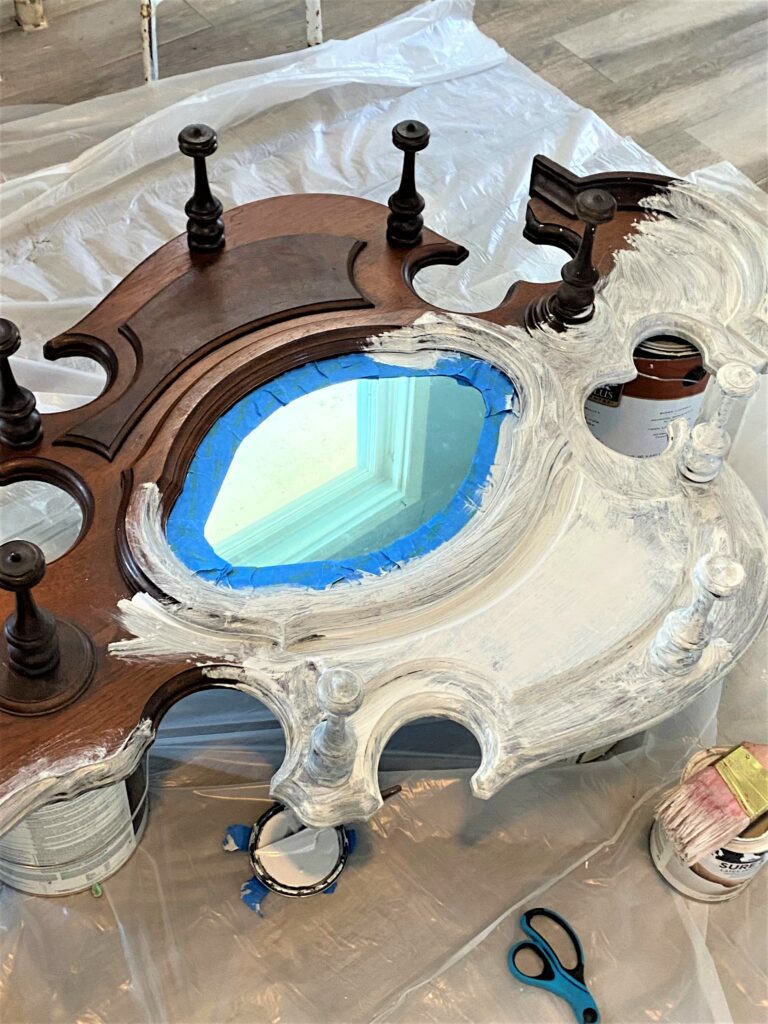
Given the hall tree’s size and potential fragility, it was left in the horizontal position while I worked my way around it, often lying down on the floor next to it so I could see all sides and edges.
3. Pour & comb on the color
This project was an experiment for me in trying a paint pouring technique inspired by friend and artist Dee (check her out on Facebook at Deni Flow Art or Instagram at deni_flow_art), who creates stunningly beautiful pieces this way.
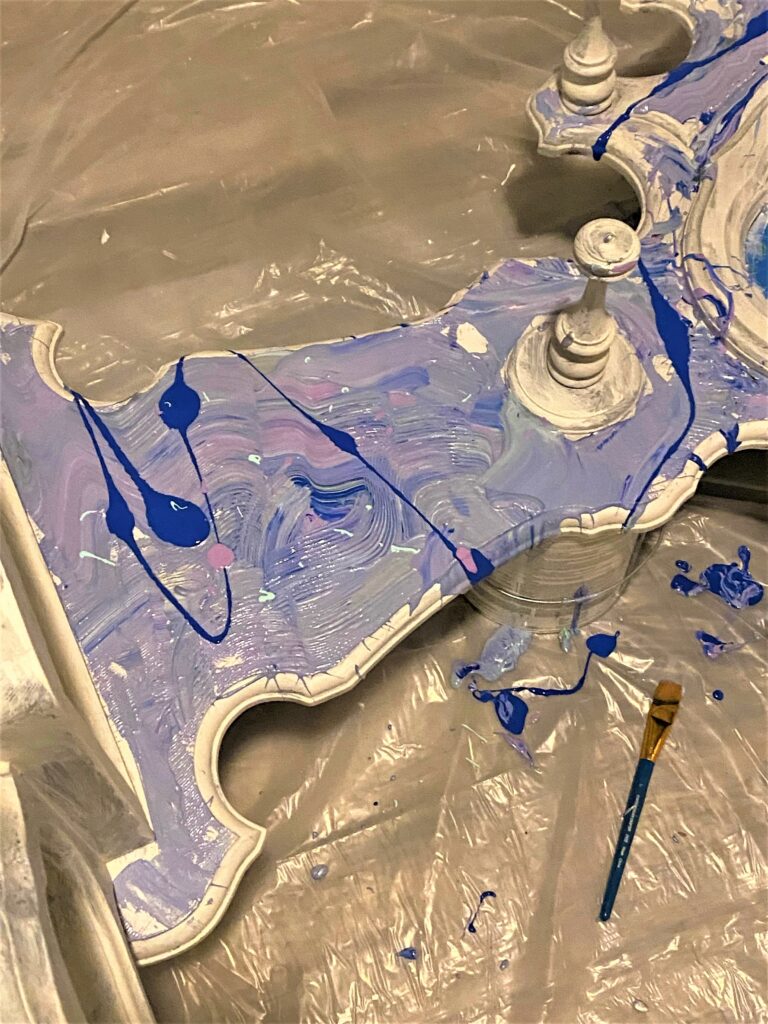
Blues, purple, and teal, and silver-tone paints were poured on a dustpan used as a tool to apply the paint by then pouring it over the piece.
As I went through the process, I used a comb and my fingers to move the paint around the piece, allowing it to flow and run over the edges (onto the drop cloth, of course). The combing process is really fun as you make waves and curves of the colors. The result is a flowing, organic look and an impressionist feel.
This step is super messy and will use lots of paint, so ensure you use a plastic drop cloth to protect your floors/work surface. Let your piece dry well overnight.
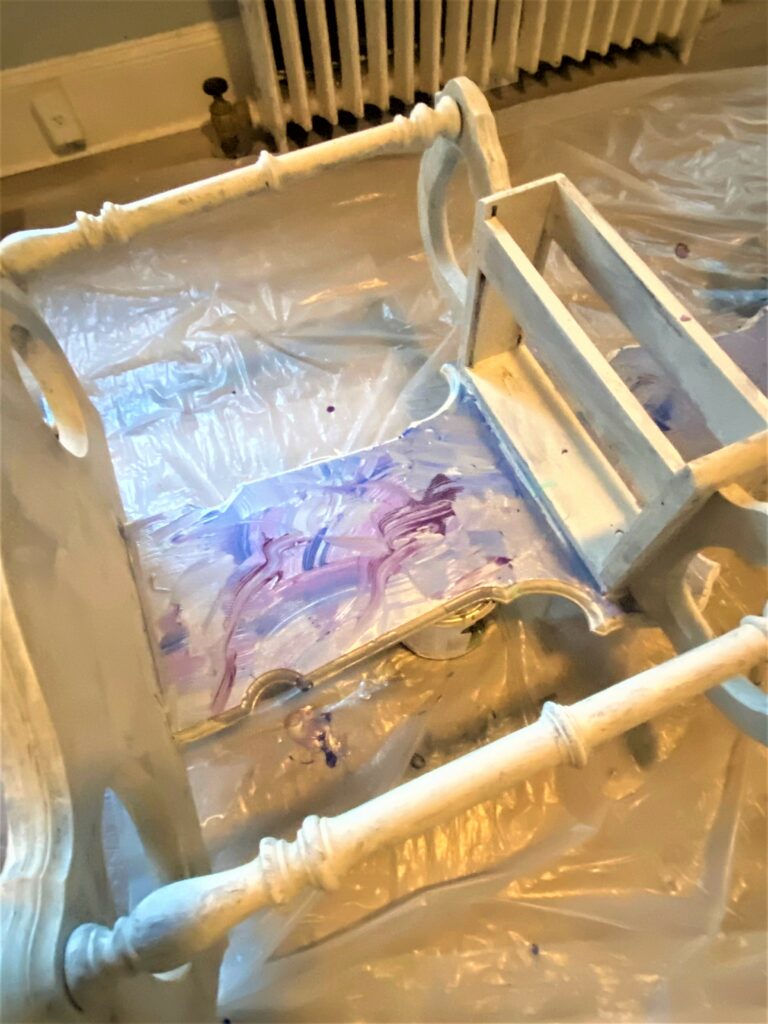
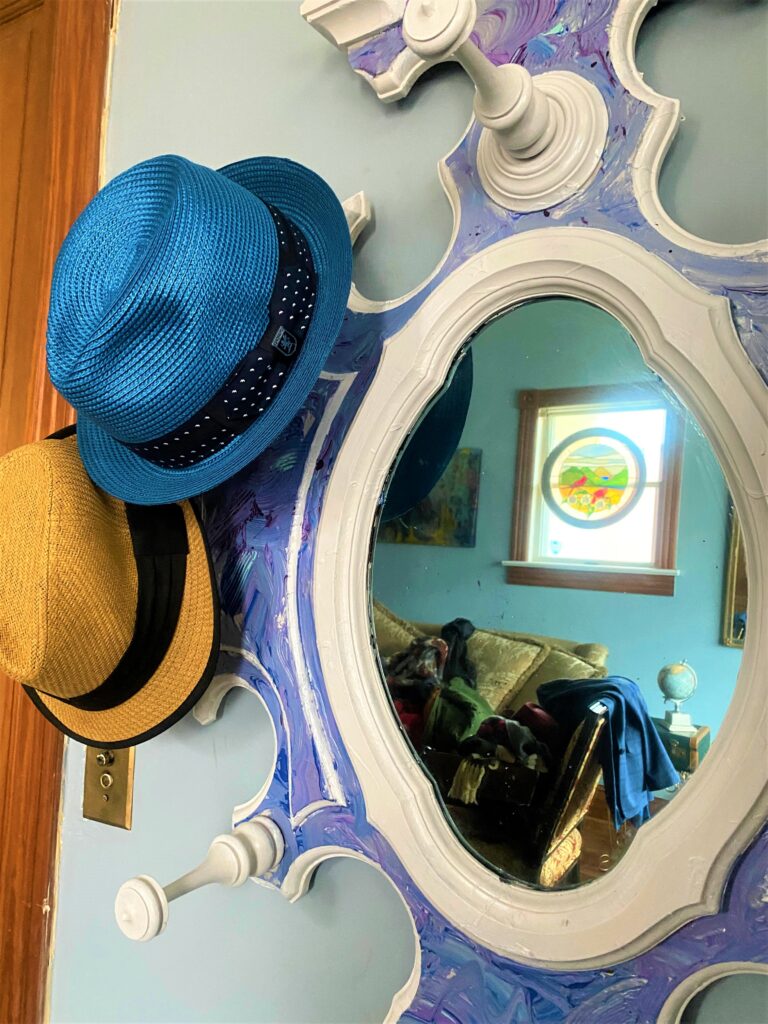
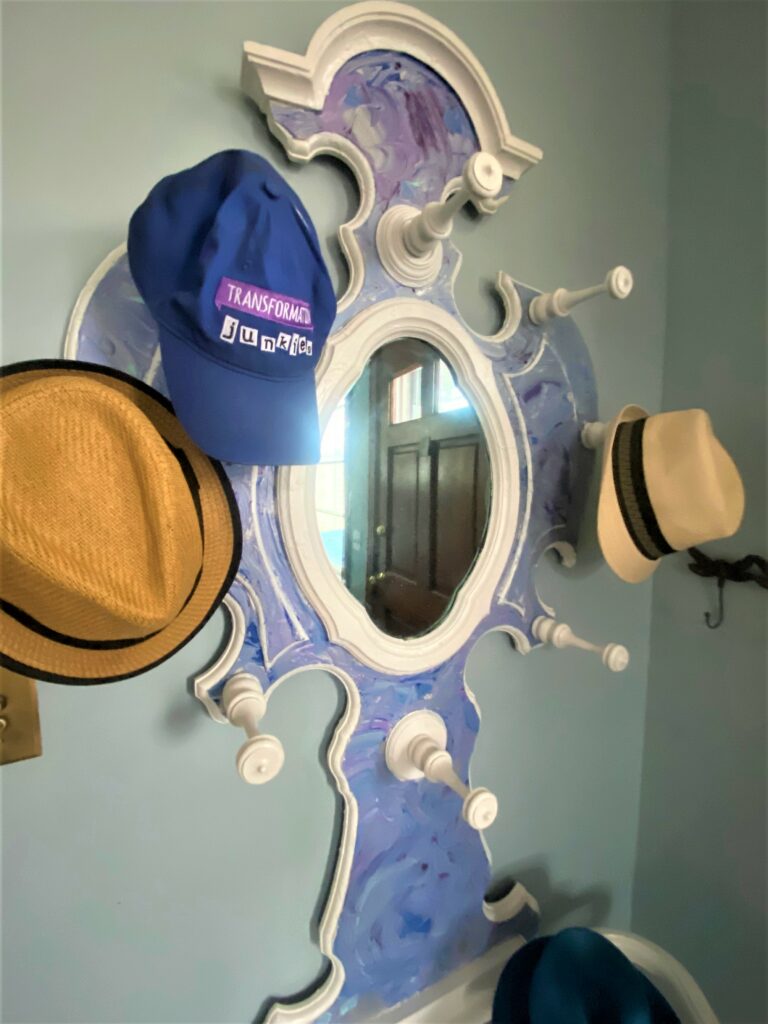
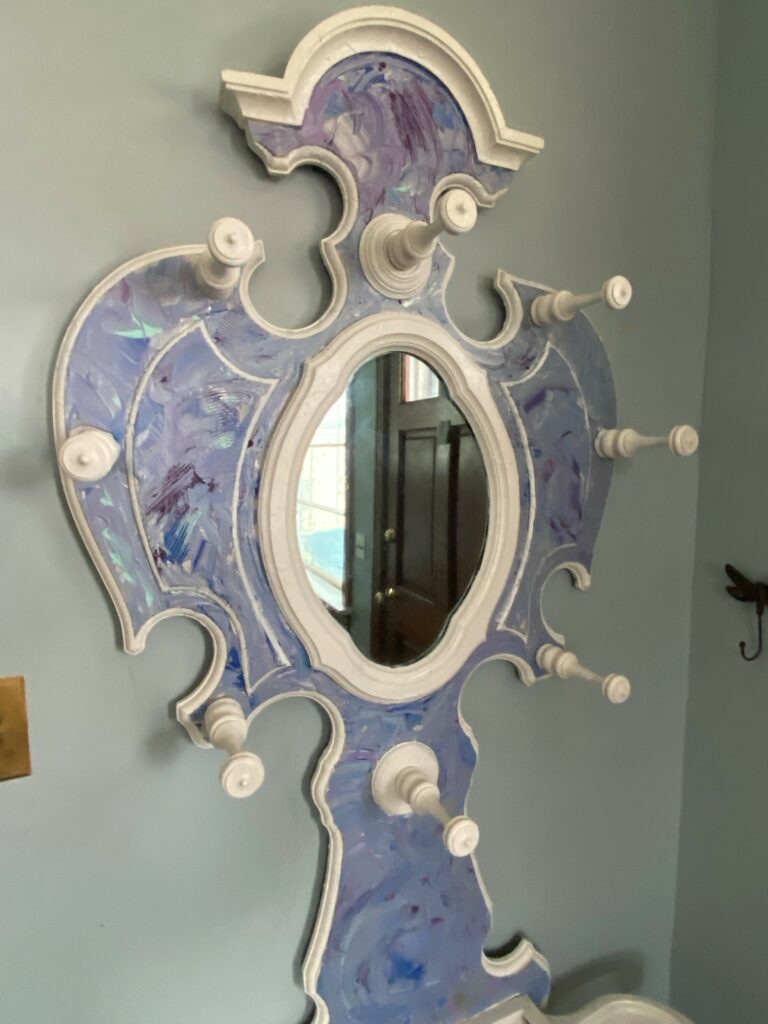
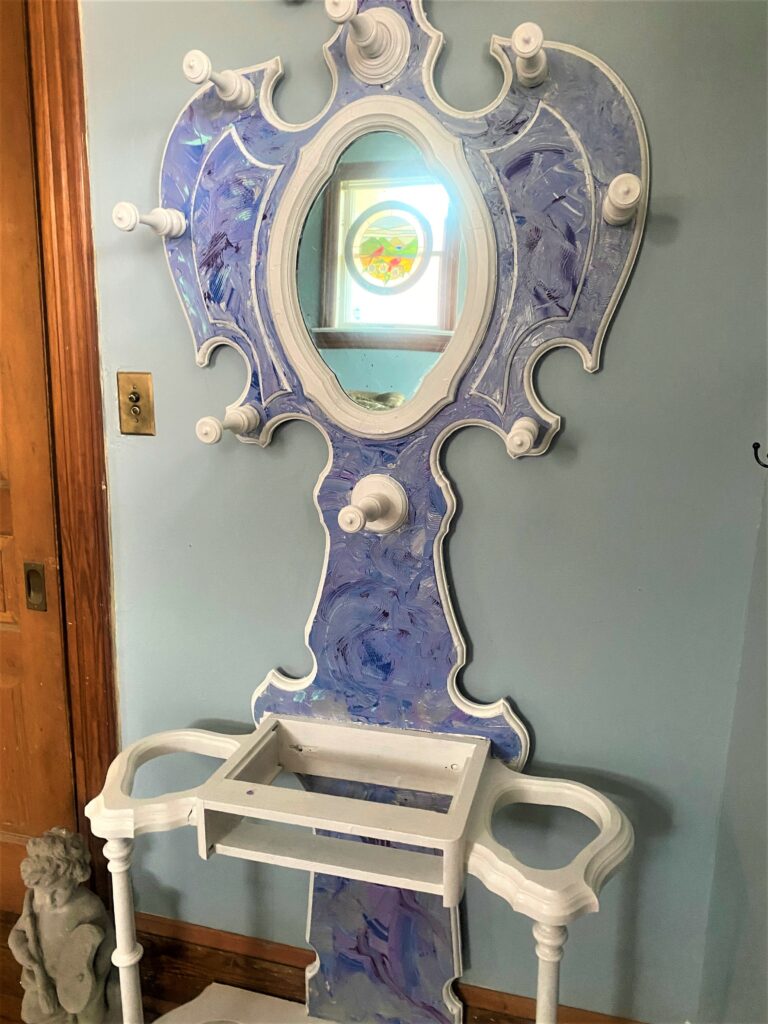
Design idea: Consider what parts of your piece you want to give this poured, flowing painting technique. For my hall tree, I wanted to apply it to the flat part that is upright and faces you as you use the piece. Is there a part of your item that you could with paint this way? This would look really lovely on the fronts of drawers, on frames around mirrors, or on the center back of a wooden chair.
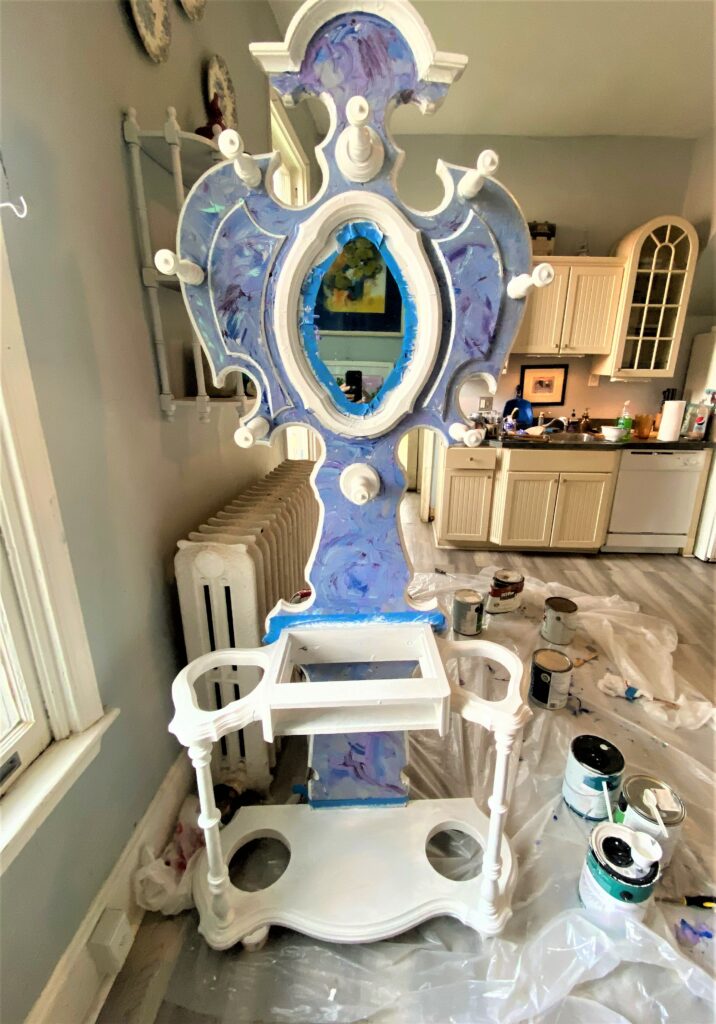
4. Bring out the highlights with bright white brushes
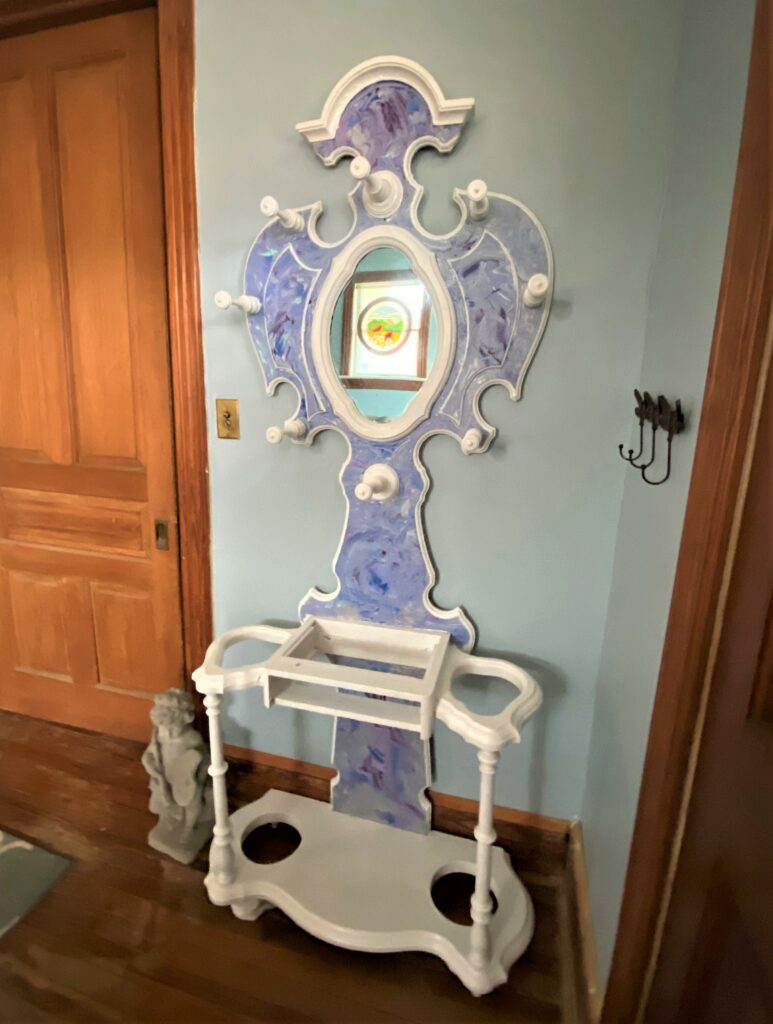
Using a crisp, bright white, the hall tree’s legs, base, hooks, and mirror fame got a couple of coats to provide a sharp contrast between the colorful background and these parts.
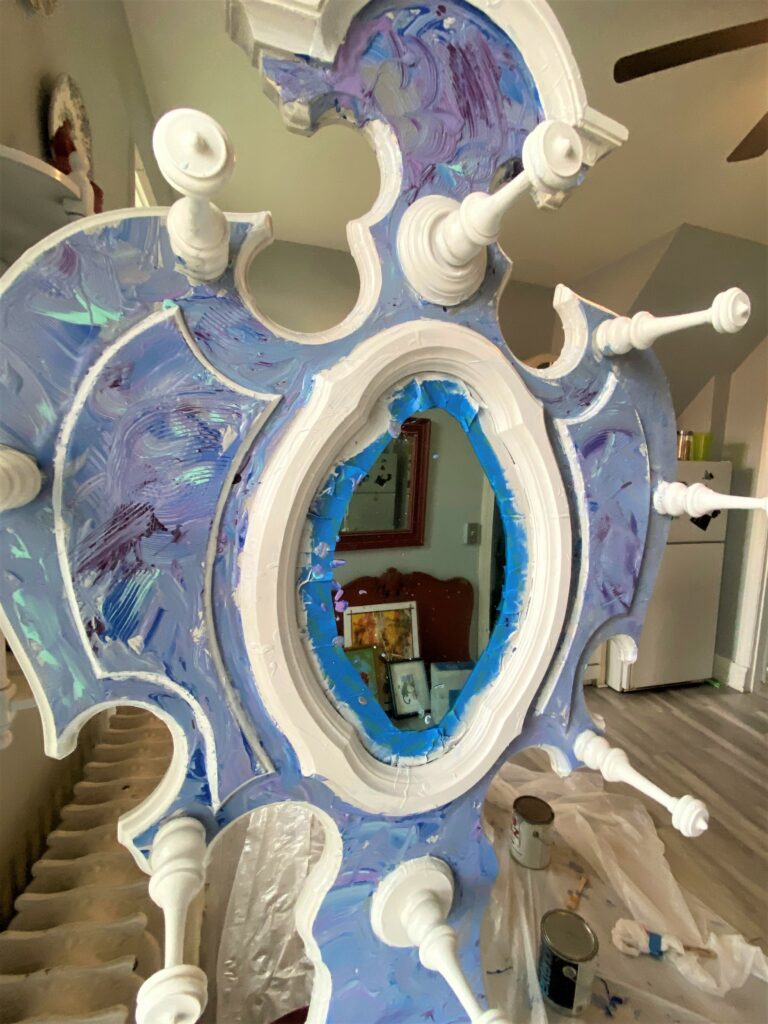
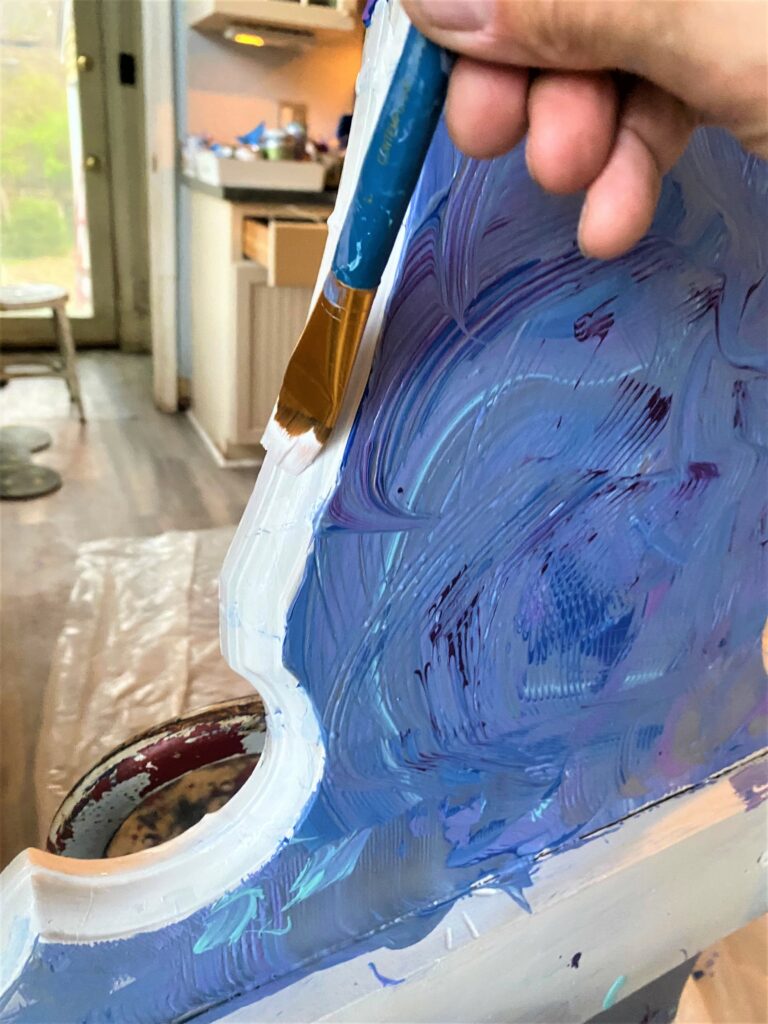
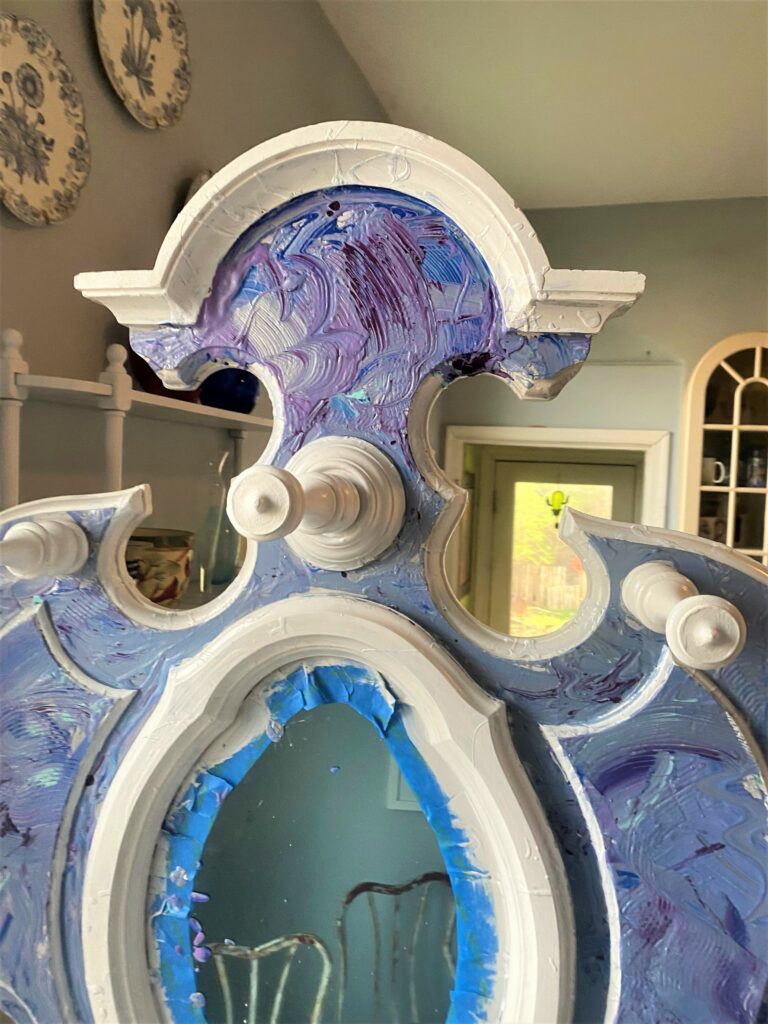
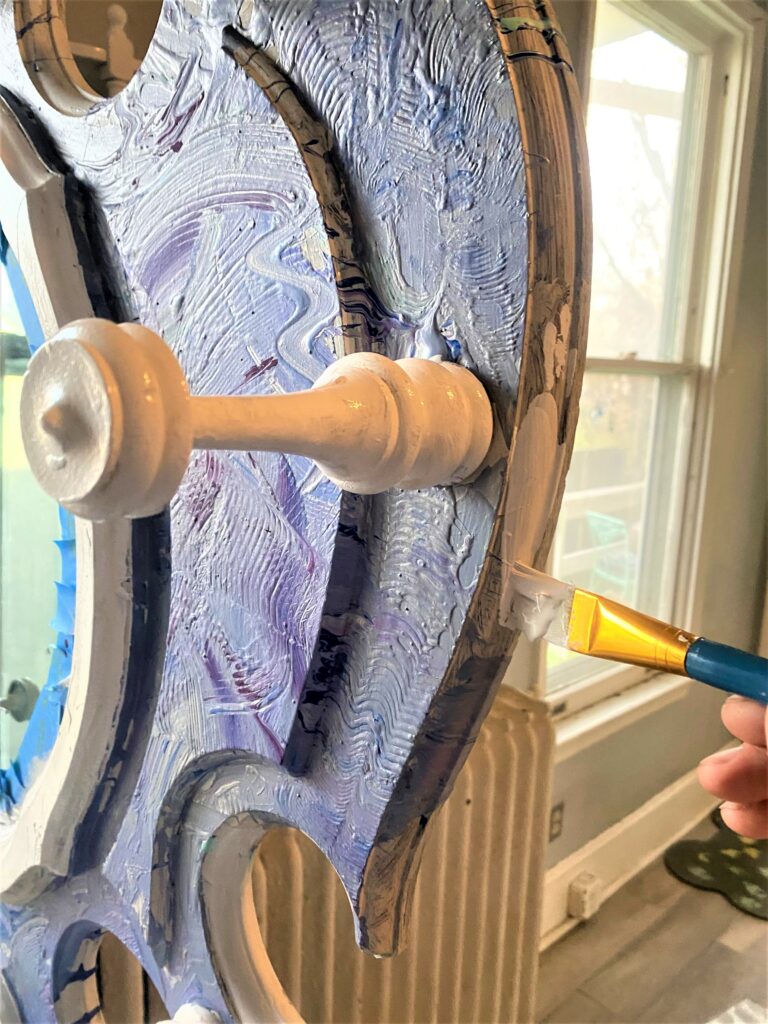
The carved edges around the back piece were highlighted with white paint and helped to further frame the artsy painting process. This white paint really helped to make this piece pop!
5. Set up & step back
Place your vibrant, refreshed hall tree near your front door to hold hats, coats, and, of course, umbrellas. Don’t load it up with too many items because you’ll want to see your creative DIY talents.
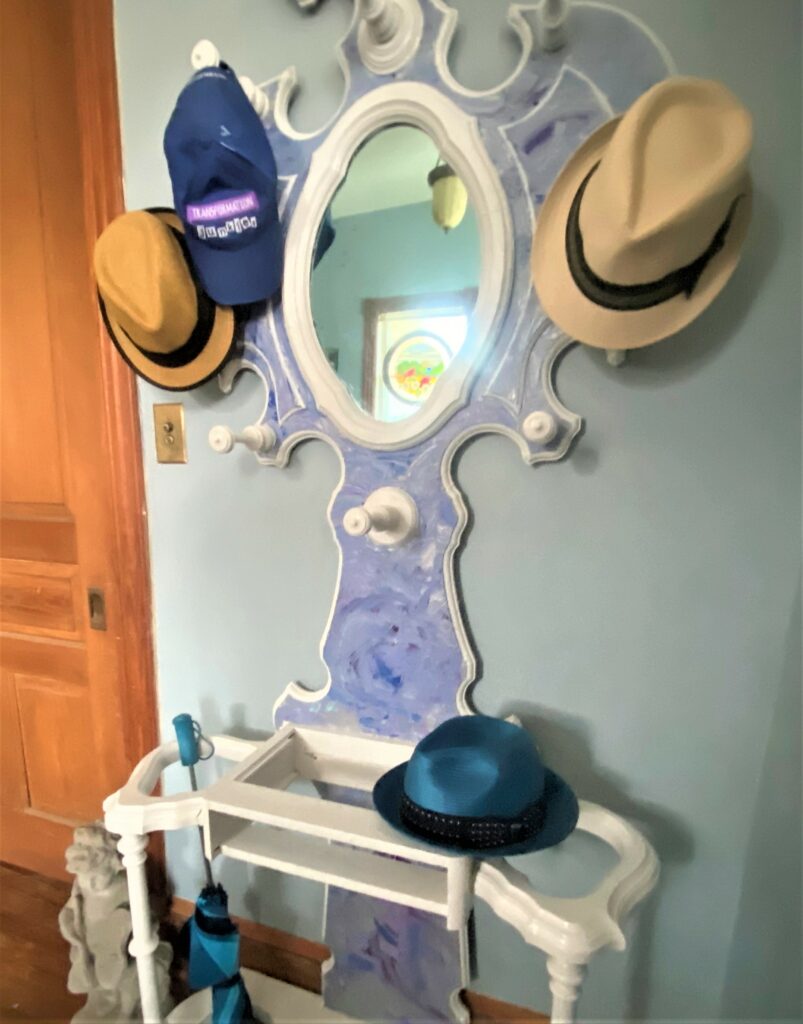
And be sure to step back and check yourself in its mirror—something tells me you will see a smiling face—yours, of course, knowing that this old Victorian piece now has a new look and place in your home. Sorry, Lurch—this won’t scare visitors when you open the door but will welcome them with color and style!
Similar wood DIY reads:
- DIY: Add Shimmer to Your Style with Silver – The Sparkling Sequel – Finding Your Good
- The 3 “H’s” for Upcycling Impact: Hue, Handles, Height – Finding Your Good

Tim Kime
Artist, Motivational Speaker, Life Coach
