You got the kids back in school, so playtime is over. You’re now getting back in the groove professionally, so it’s time to get your home office looking good as well as organized. A gift of the pandemic is that many of us now are able to work at home in some form or fashion…so give your home office some fashionable updates, too. Many of us created a space in our home that we thought would be a temporary workspace which now is becoming part of our everyday new normal. This means it’s overdue to make it feel and function like a real office.
Did you know that you can find many unique and functional items for your office at Goodwill? It’s true! And if you think outside the box (the in-box, that is!), you can have a workspace in your place that is inviting and inspiring.
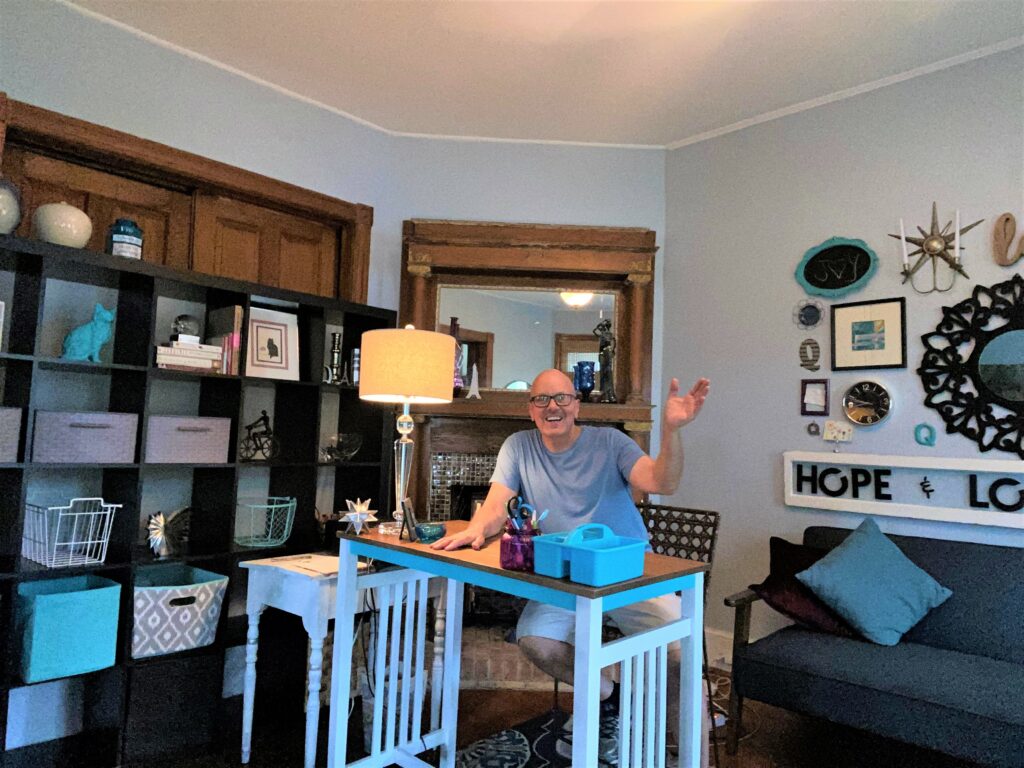
The home office featured here is mine, so I am truly doing my best to walk the talk. With summer vacations and beach weekend getaways coming to an end, it was time to give my office a new beginning. Thanks to my sister Tammy for the bright idea to make it happen. Here’s how you, too, can make it happen for yourself in four easy steps!
1. Clear out & declutter
Step one in any room or office transformation starts with getting down to the basics. Remove all items from the tops of your desk/workstation, shelves, credenza, and more to start with a blank canvas. If you are like me, this means you will need to move everything out of the area where you work so you can see what you have going on—or not. Decide what you will keep or donate (Goodwill is always the best place) and build your transformation from there.
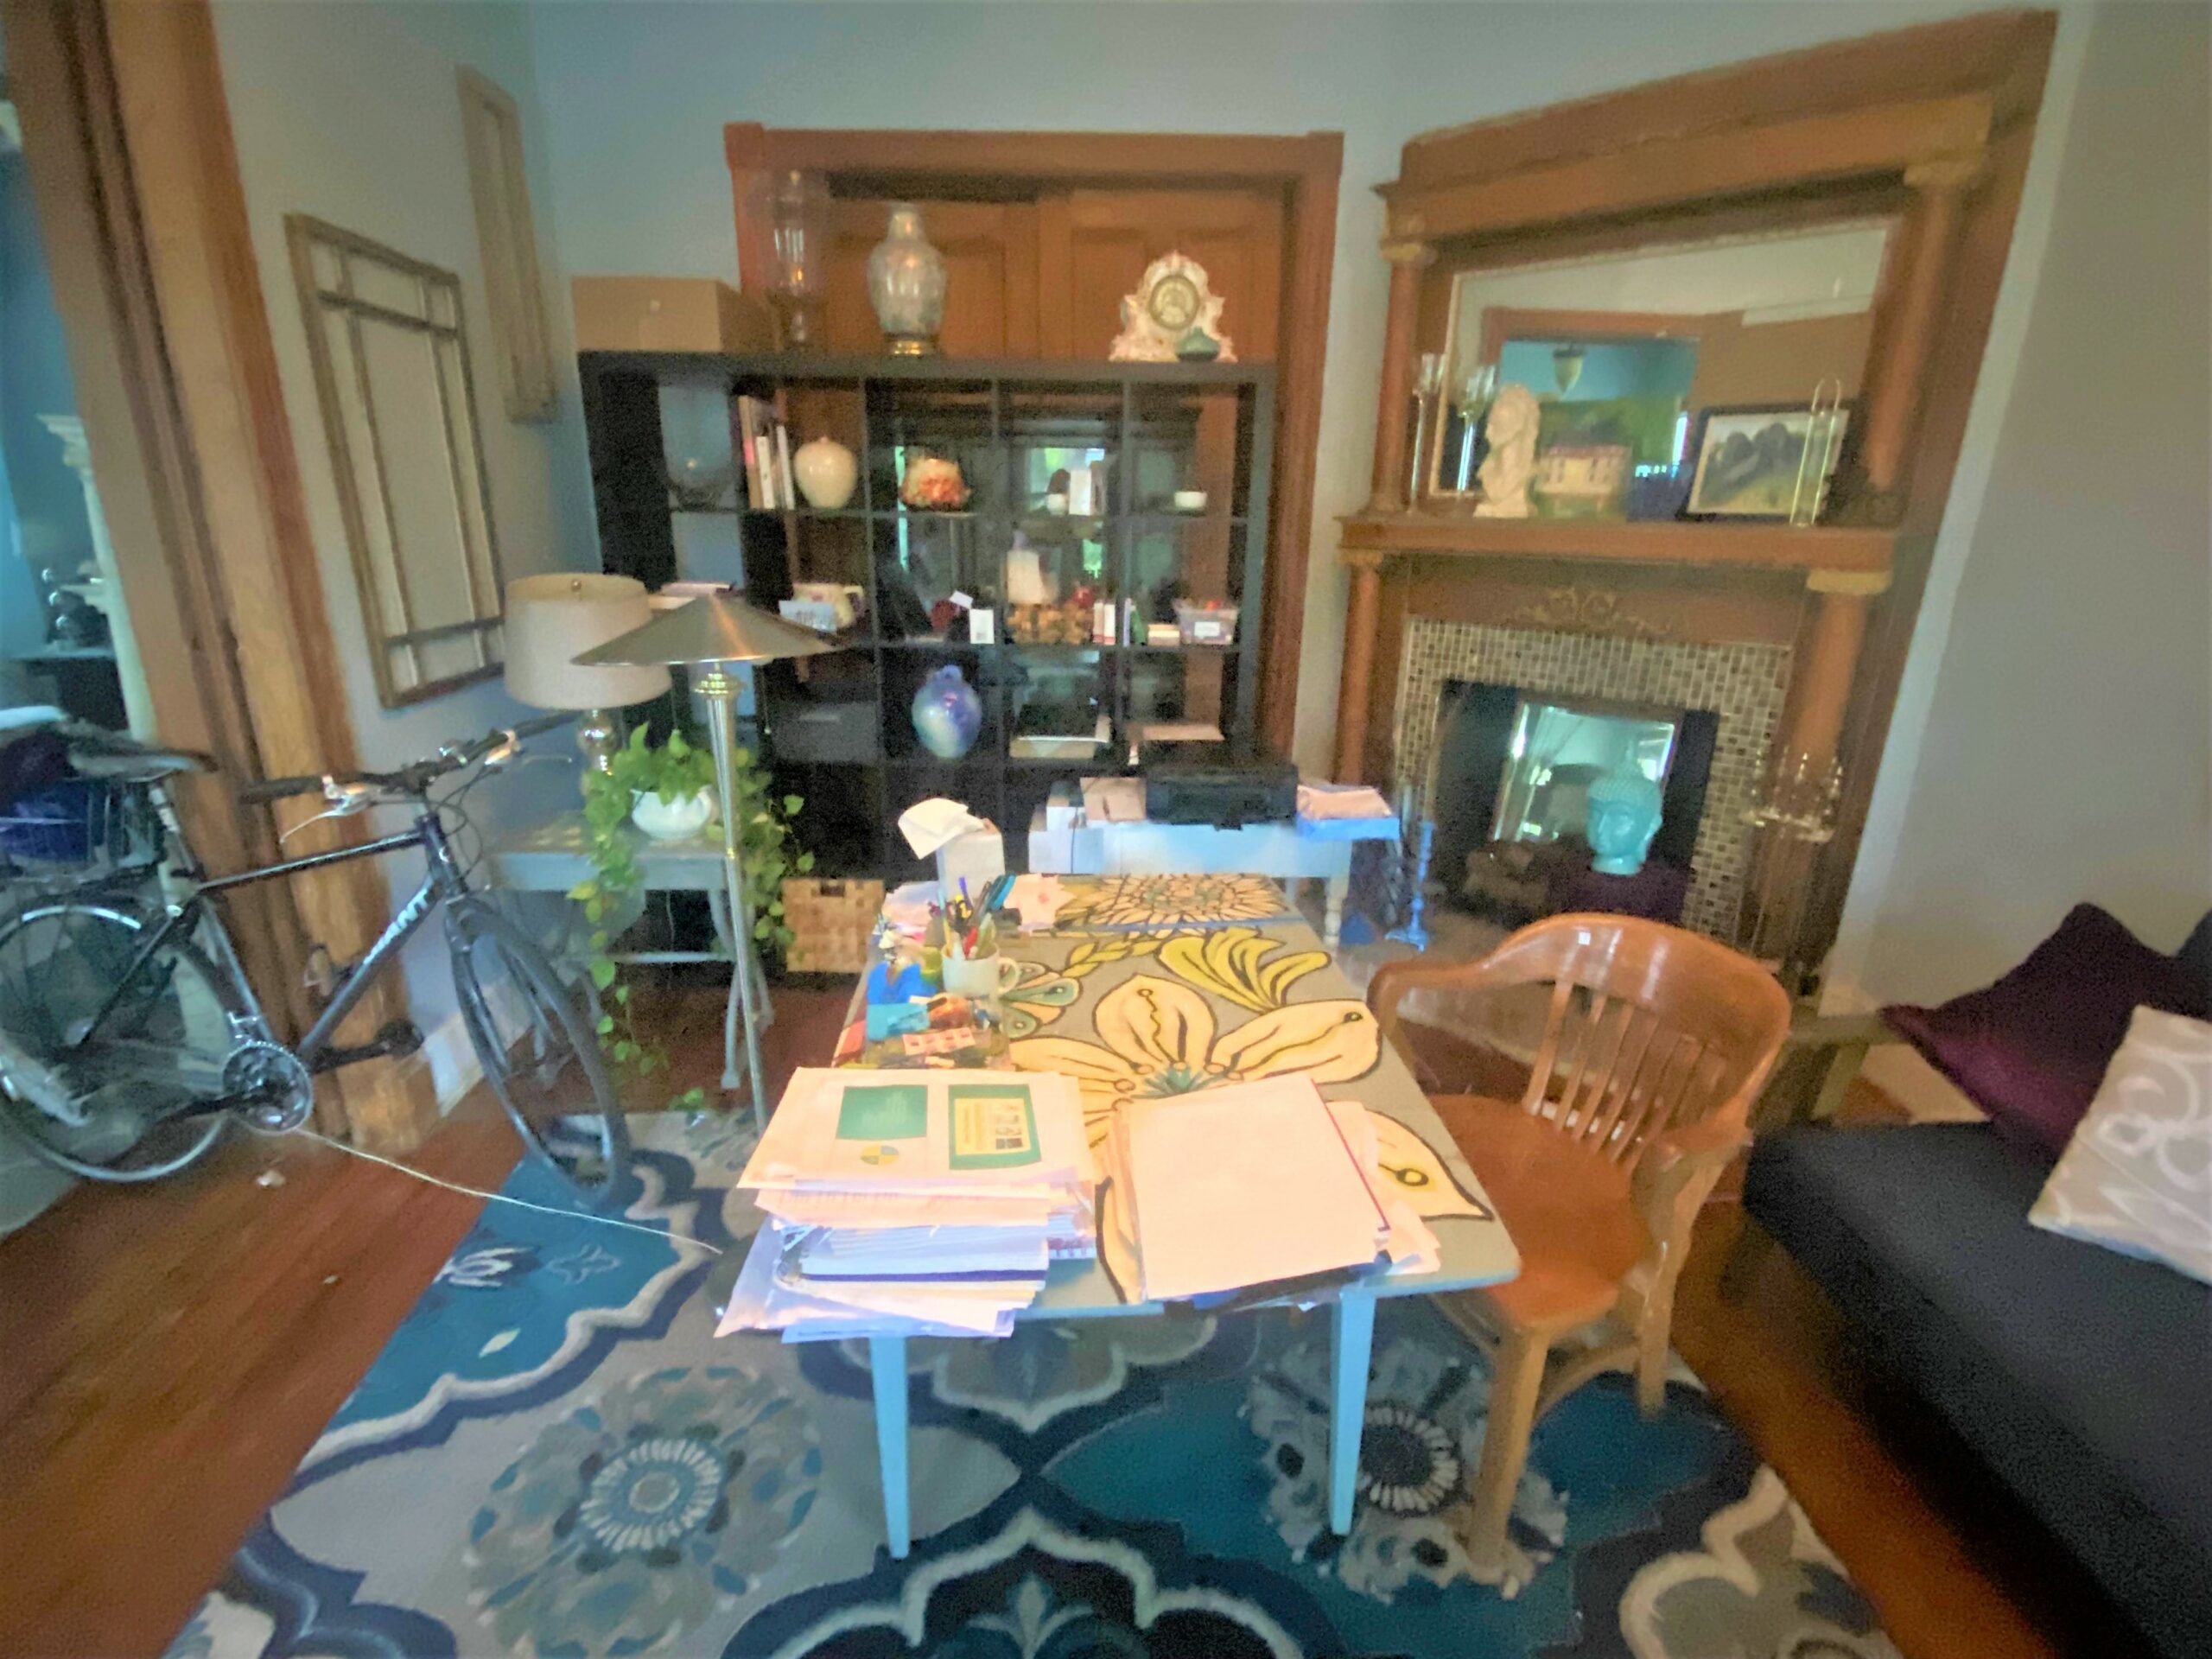
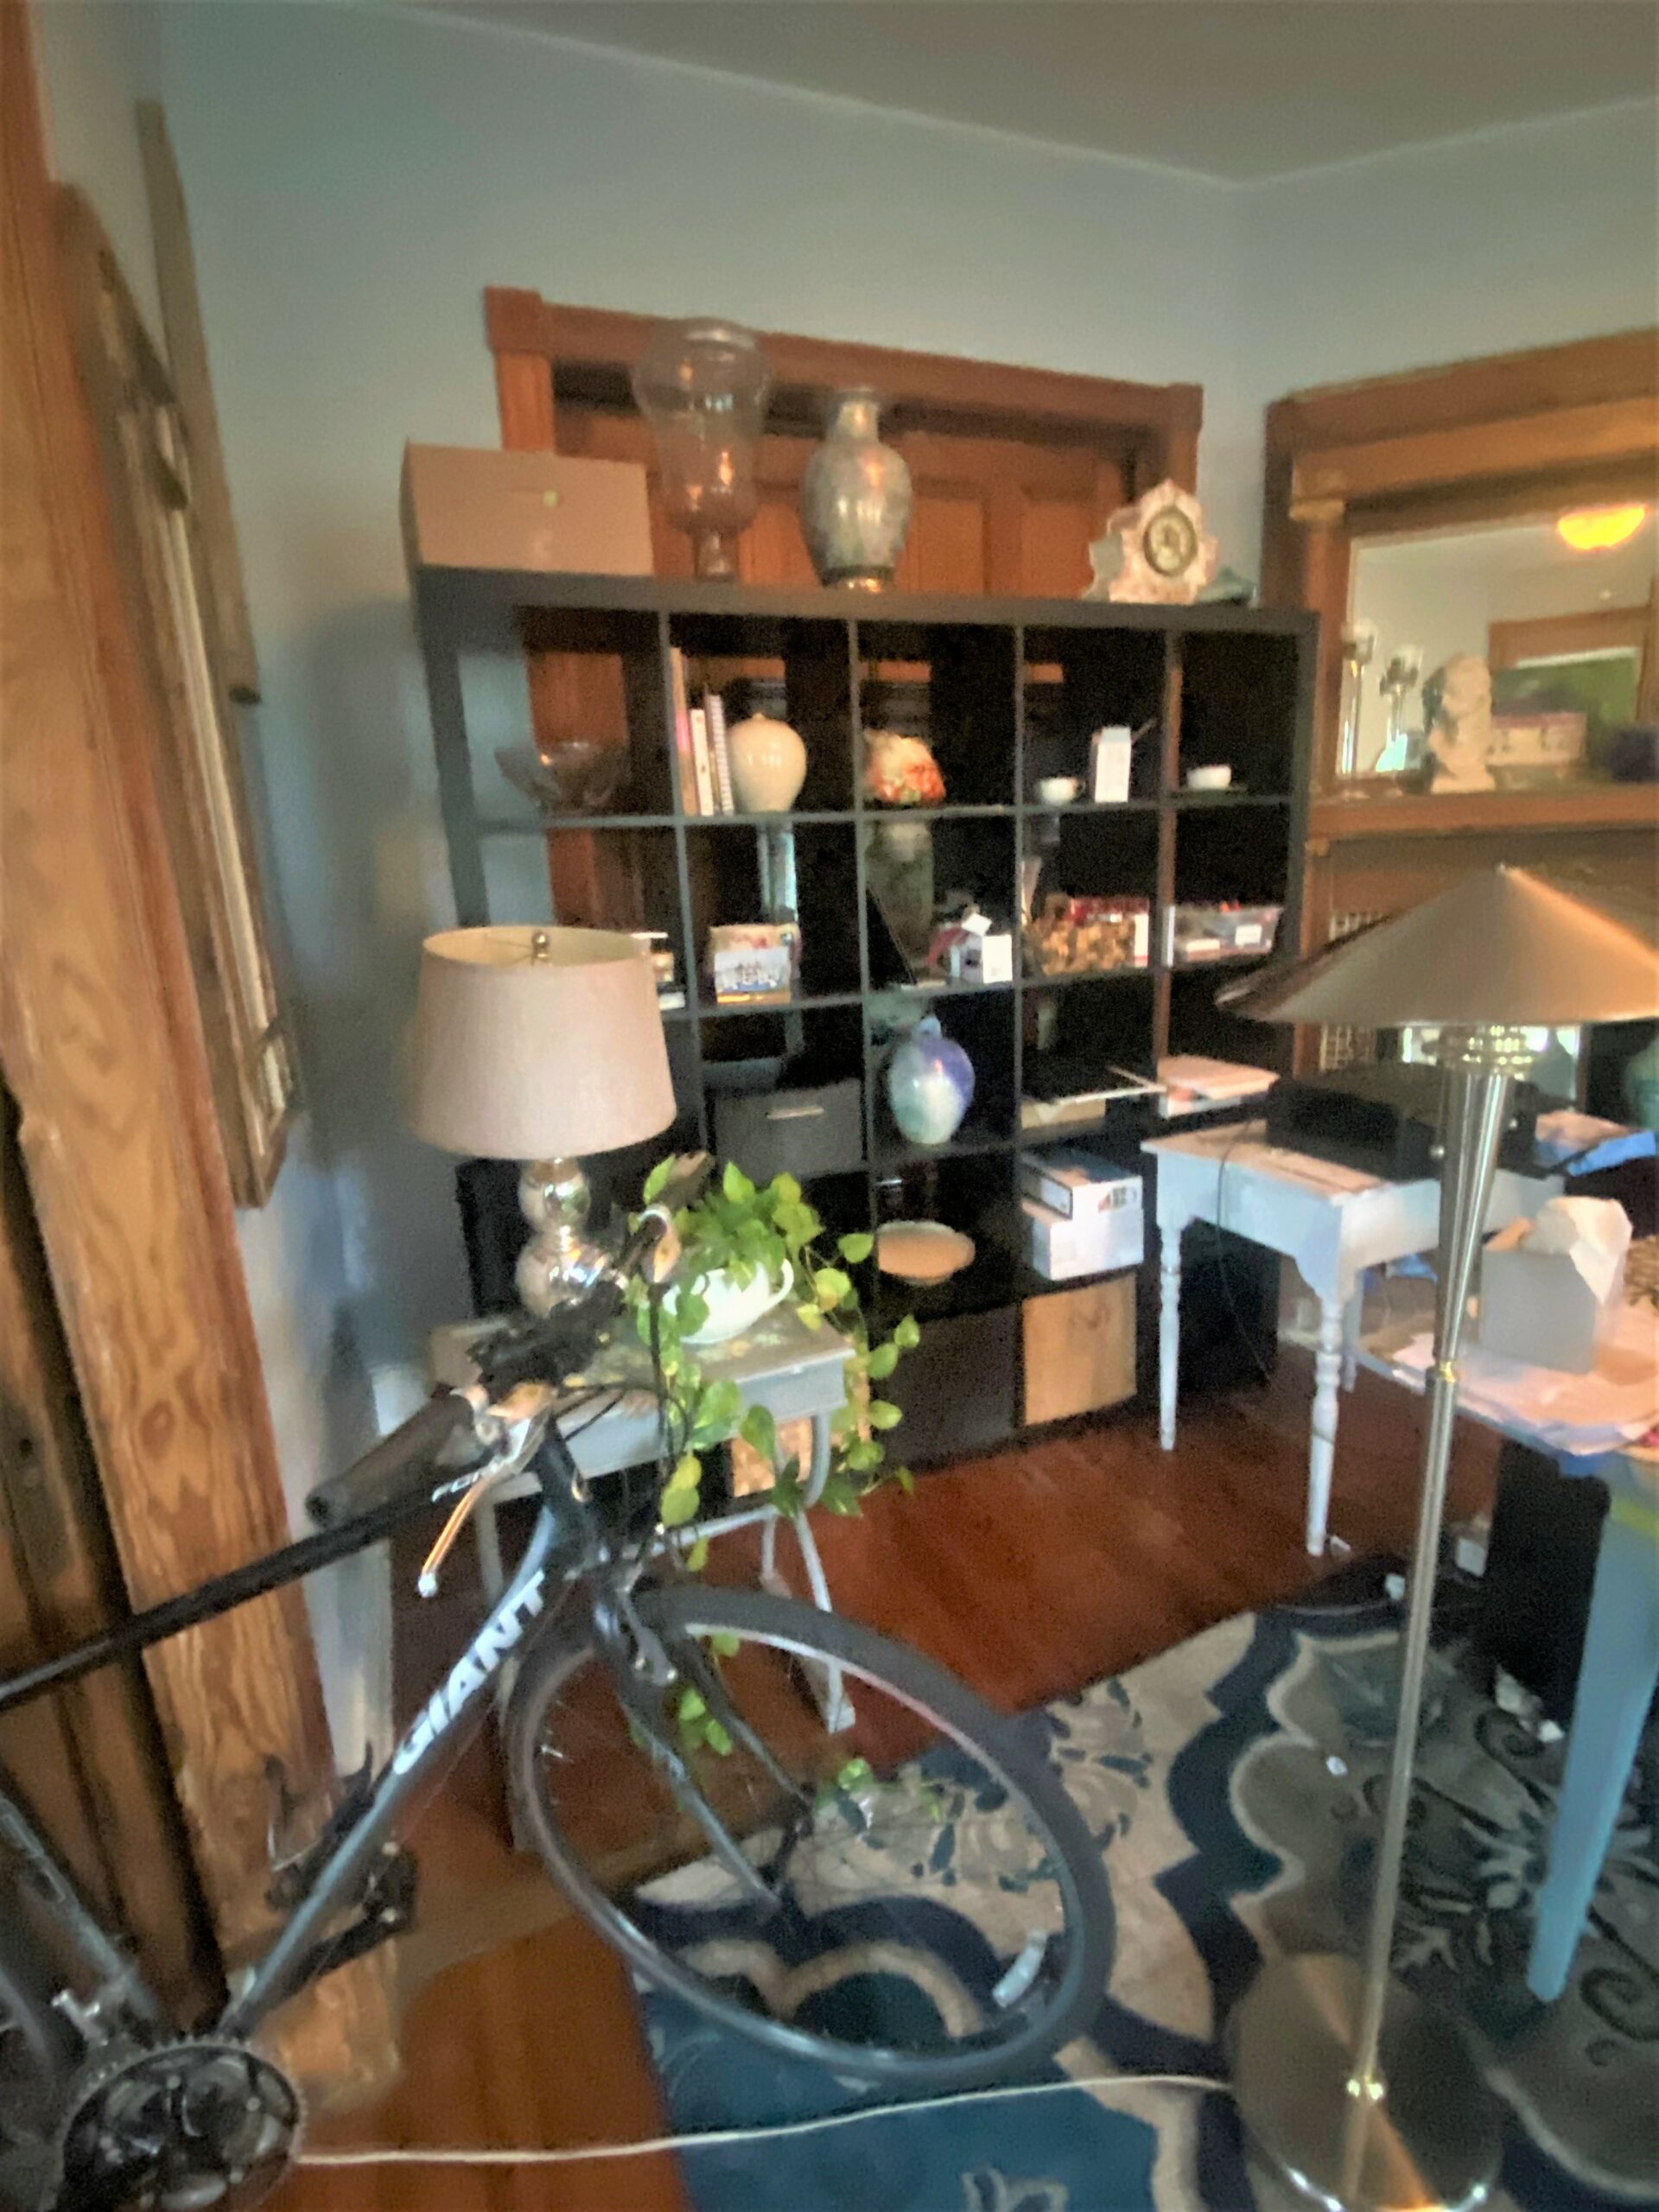
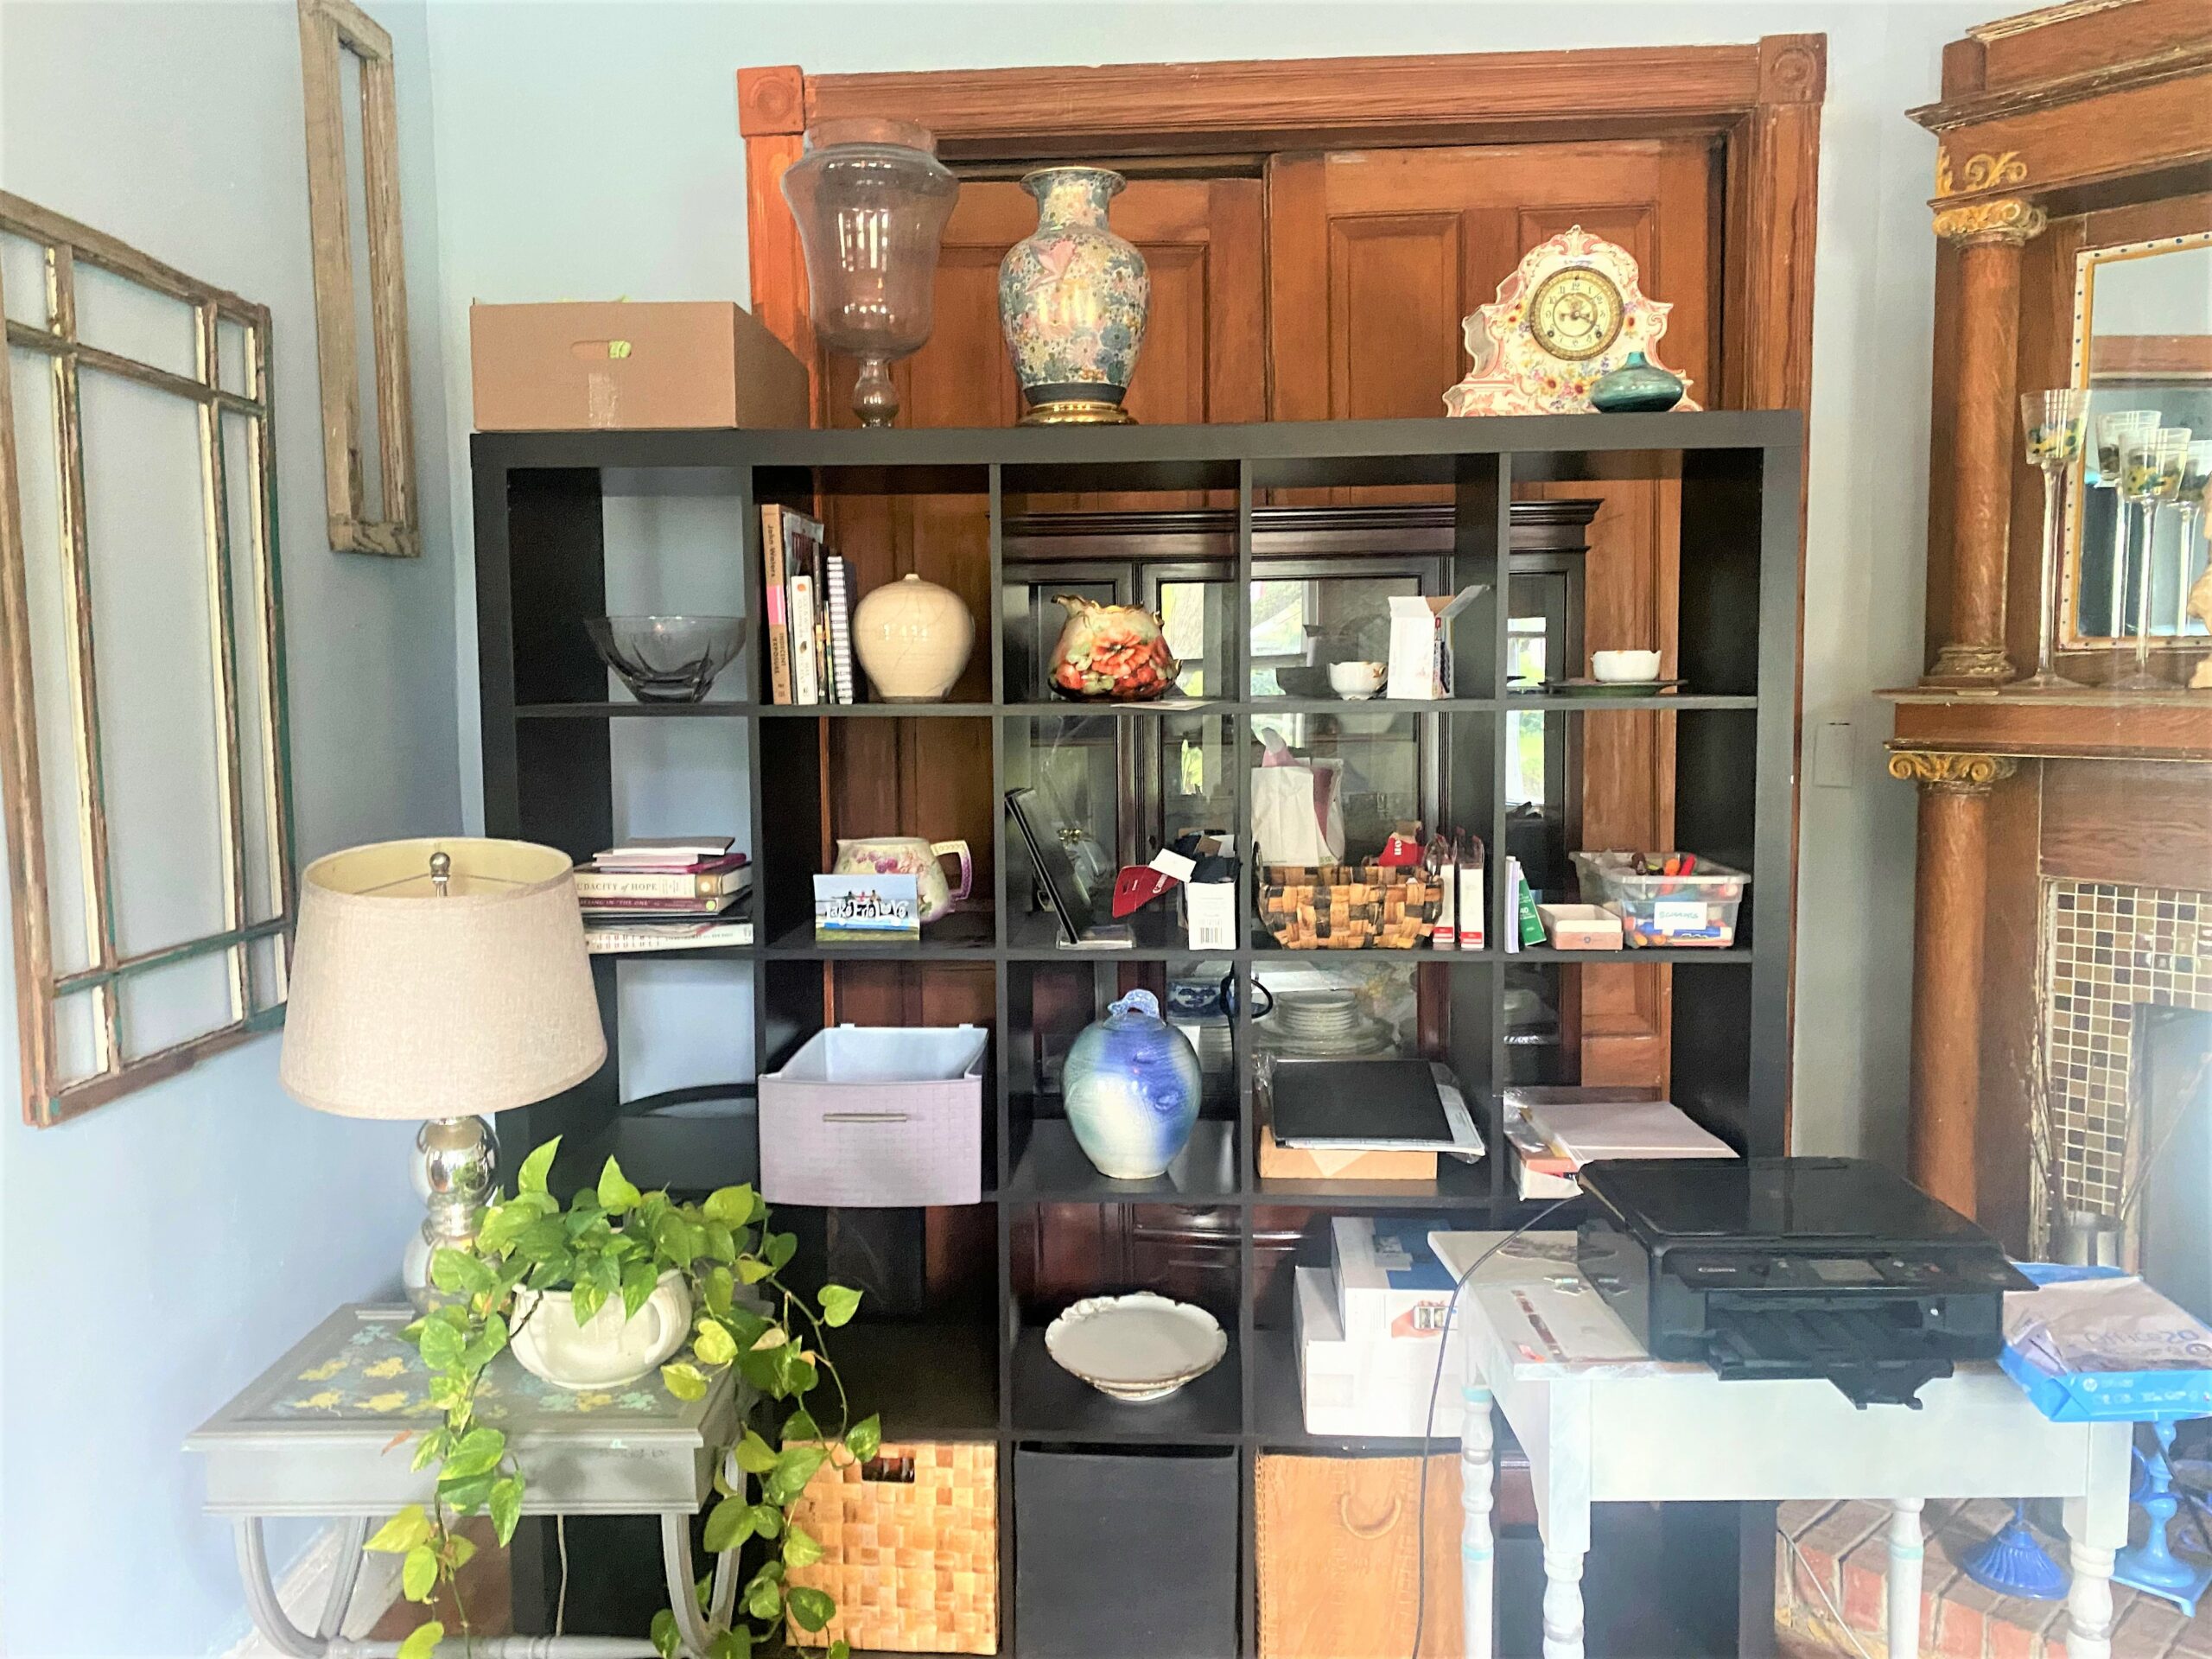
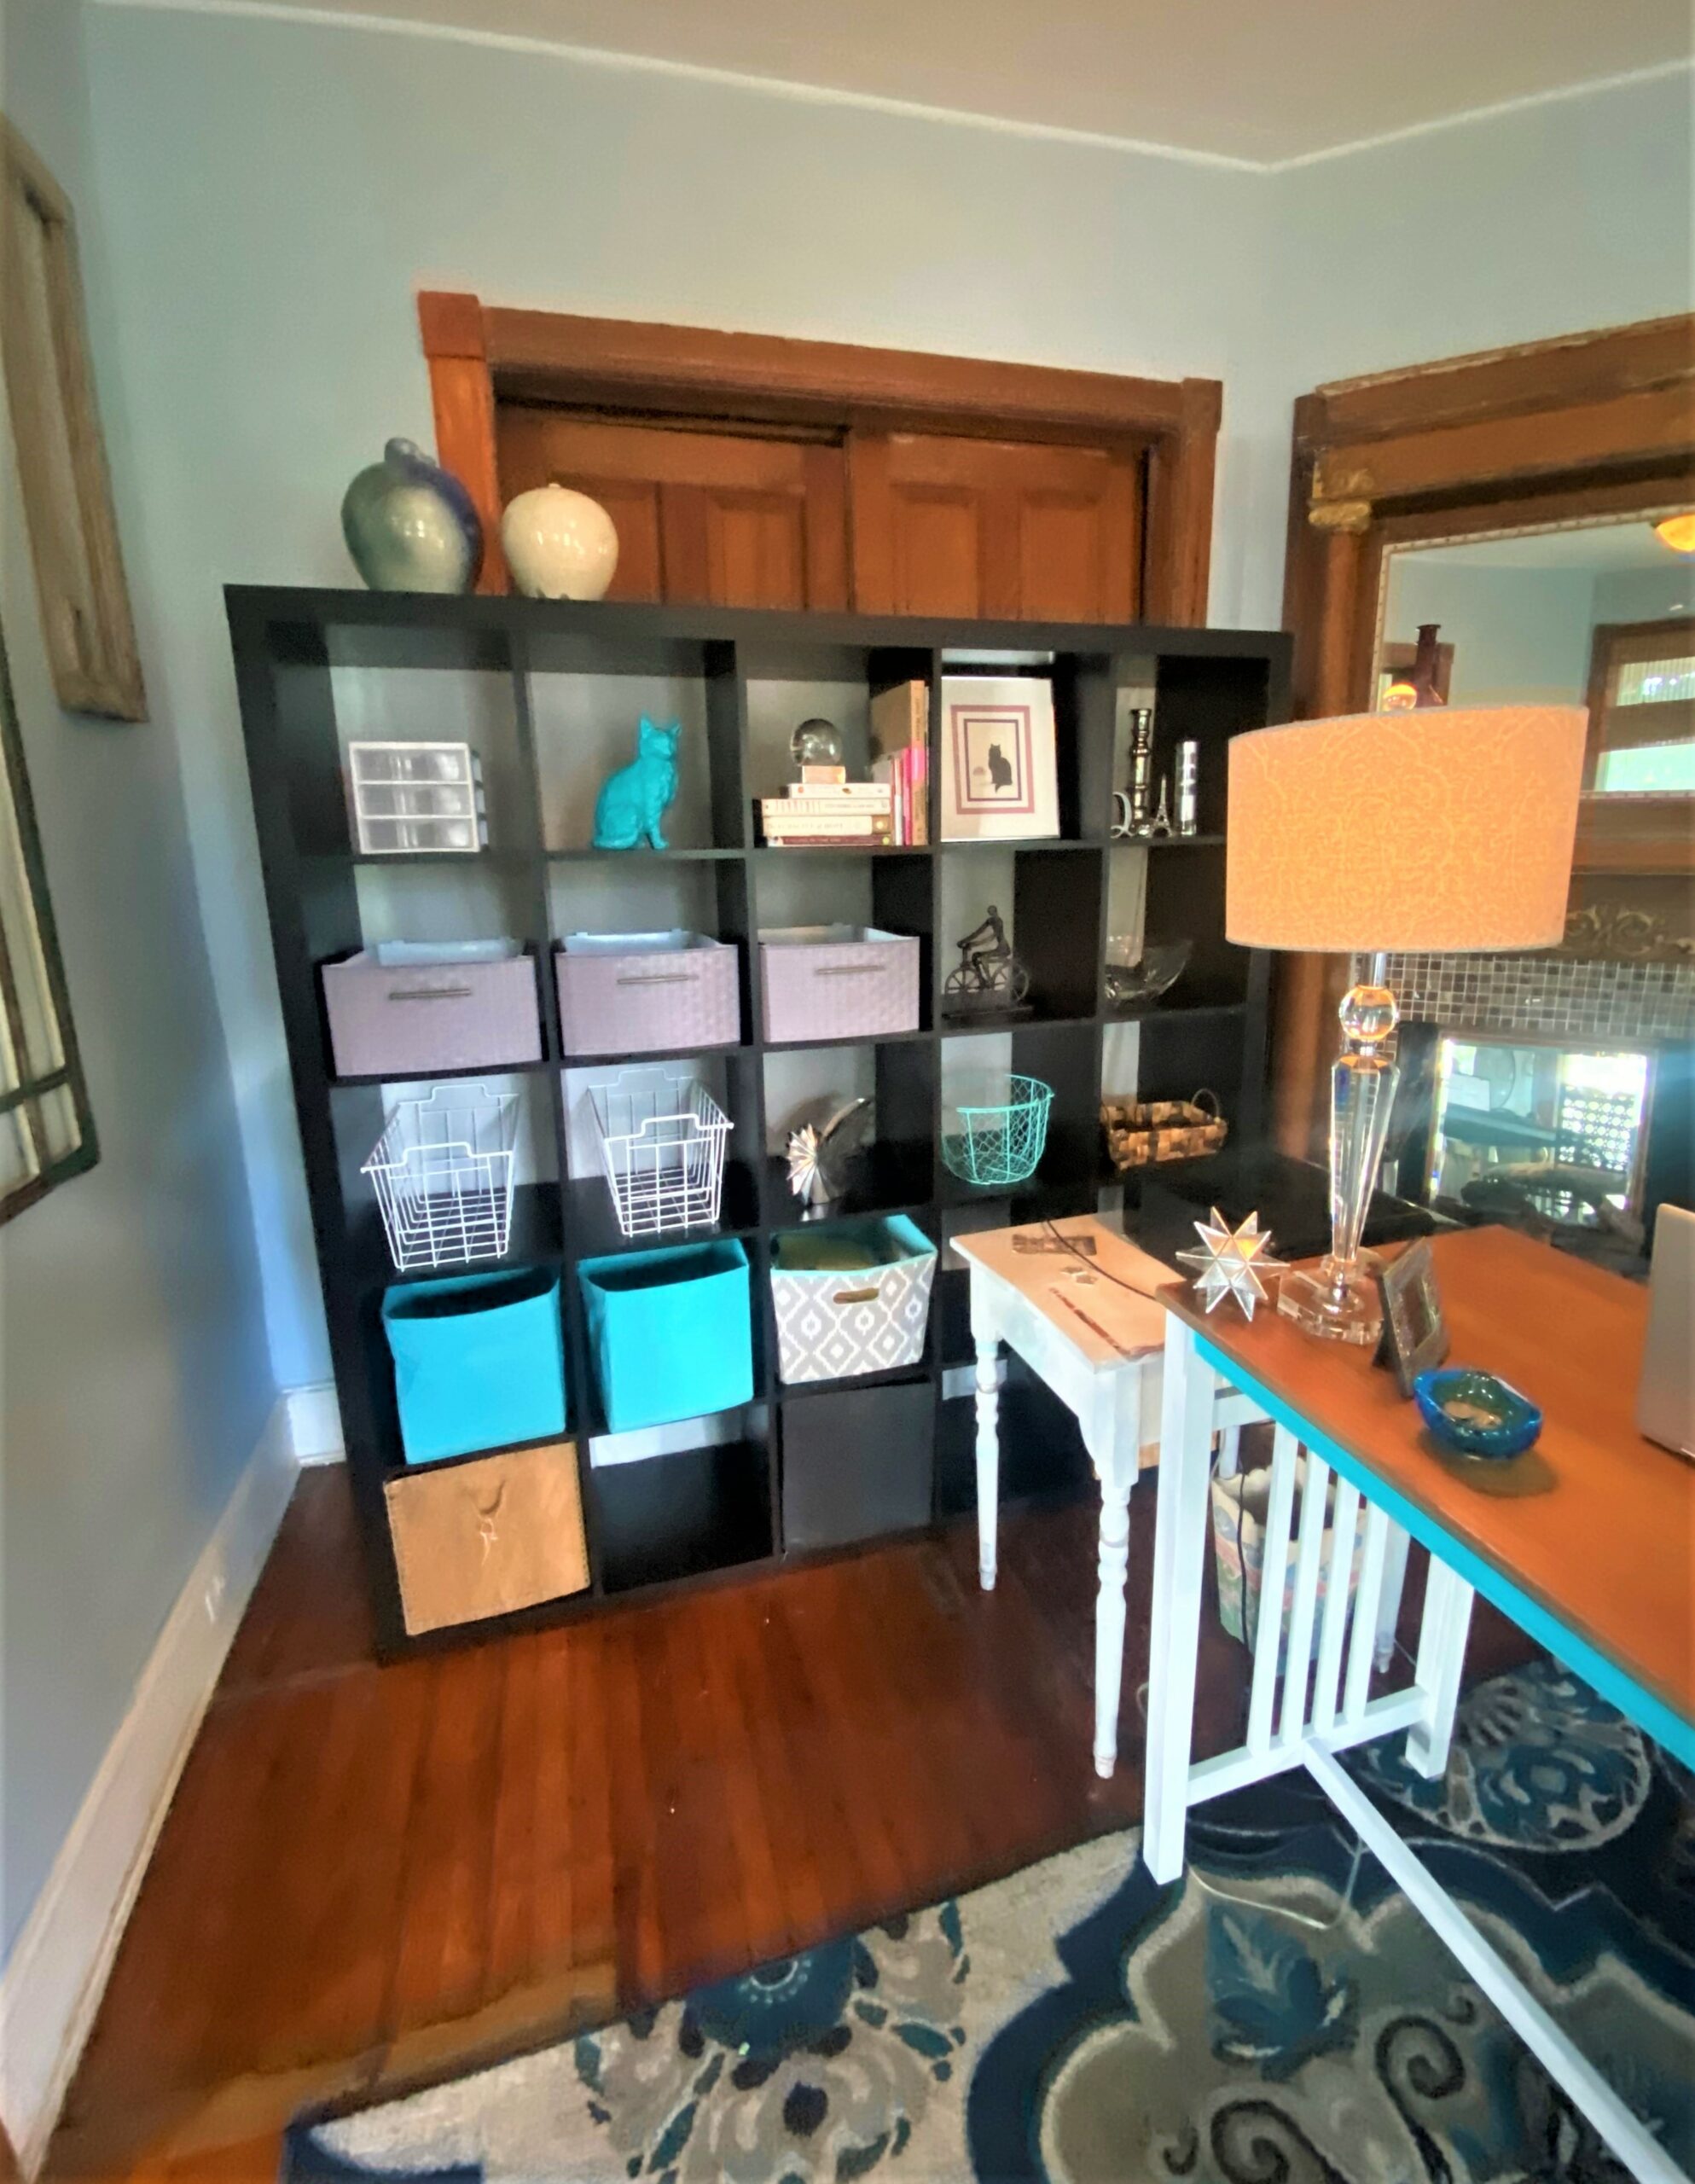
After moving all the stuff out of my home office area (part of my living room), I only kept a big shelving unit. My desk had been an old kitchen table that was a little shaky. I had things to file in a mismatch of containers around the room with no central place to drop incoming mail or place outgoing paperwork. I felt the shelving unit if used properly, could help to keep my workspace organized.
2. Hit Goodwill for office supplies & furniture items
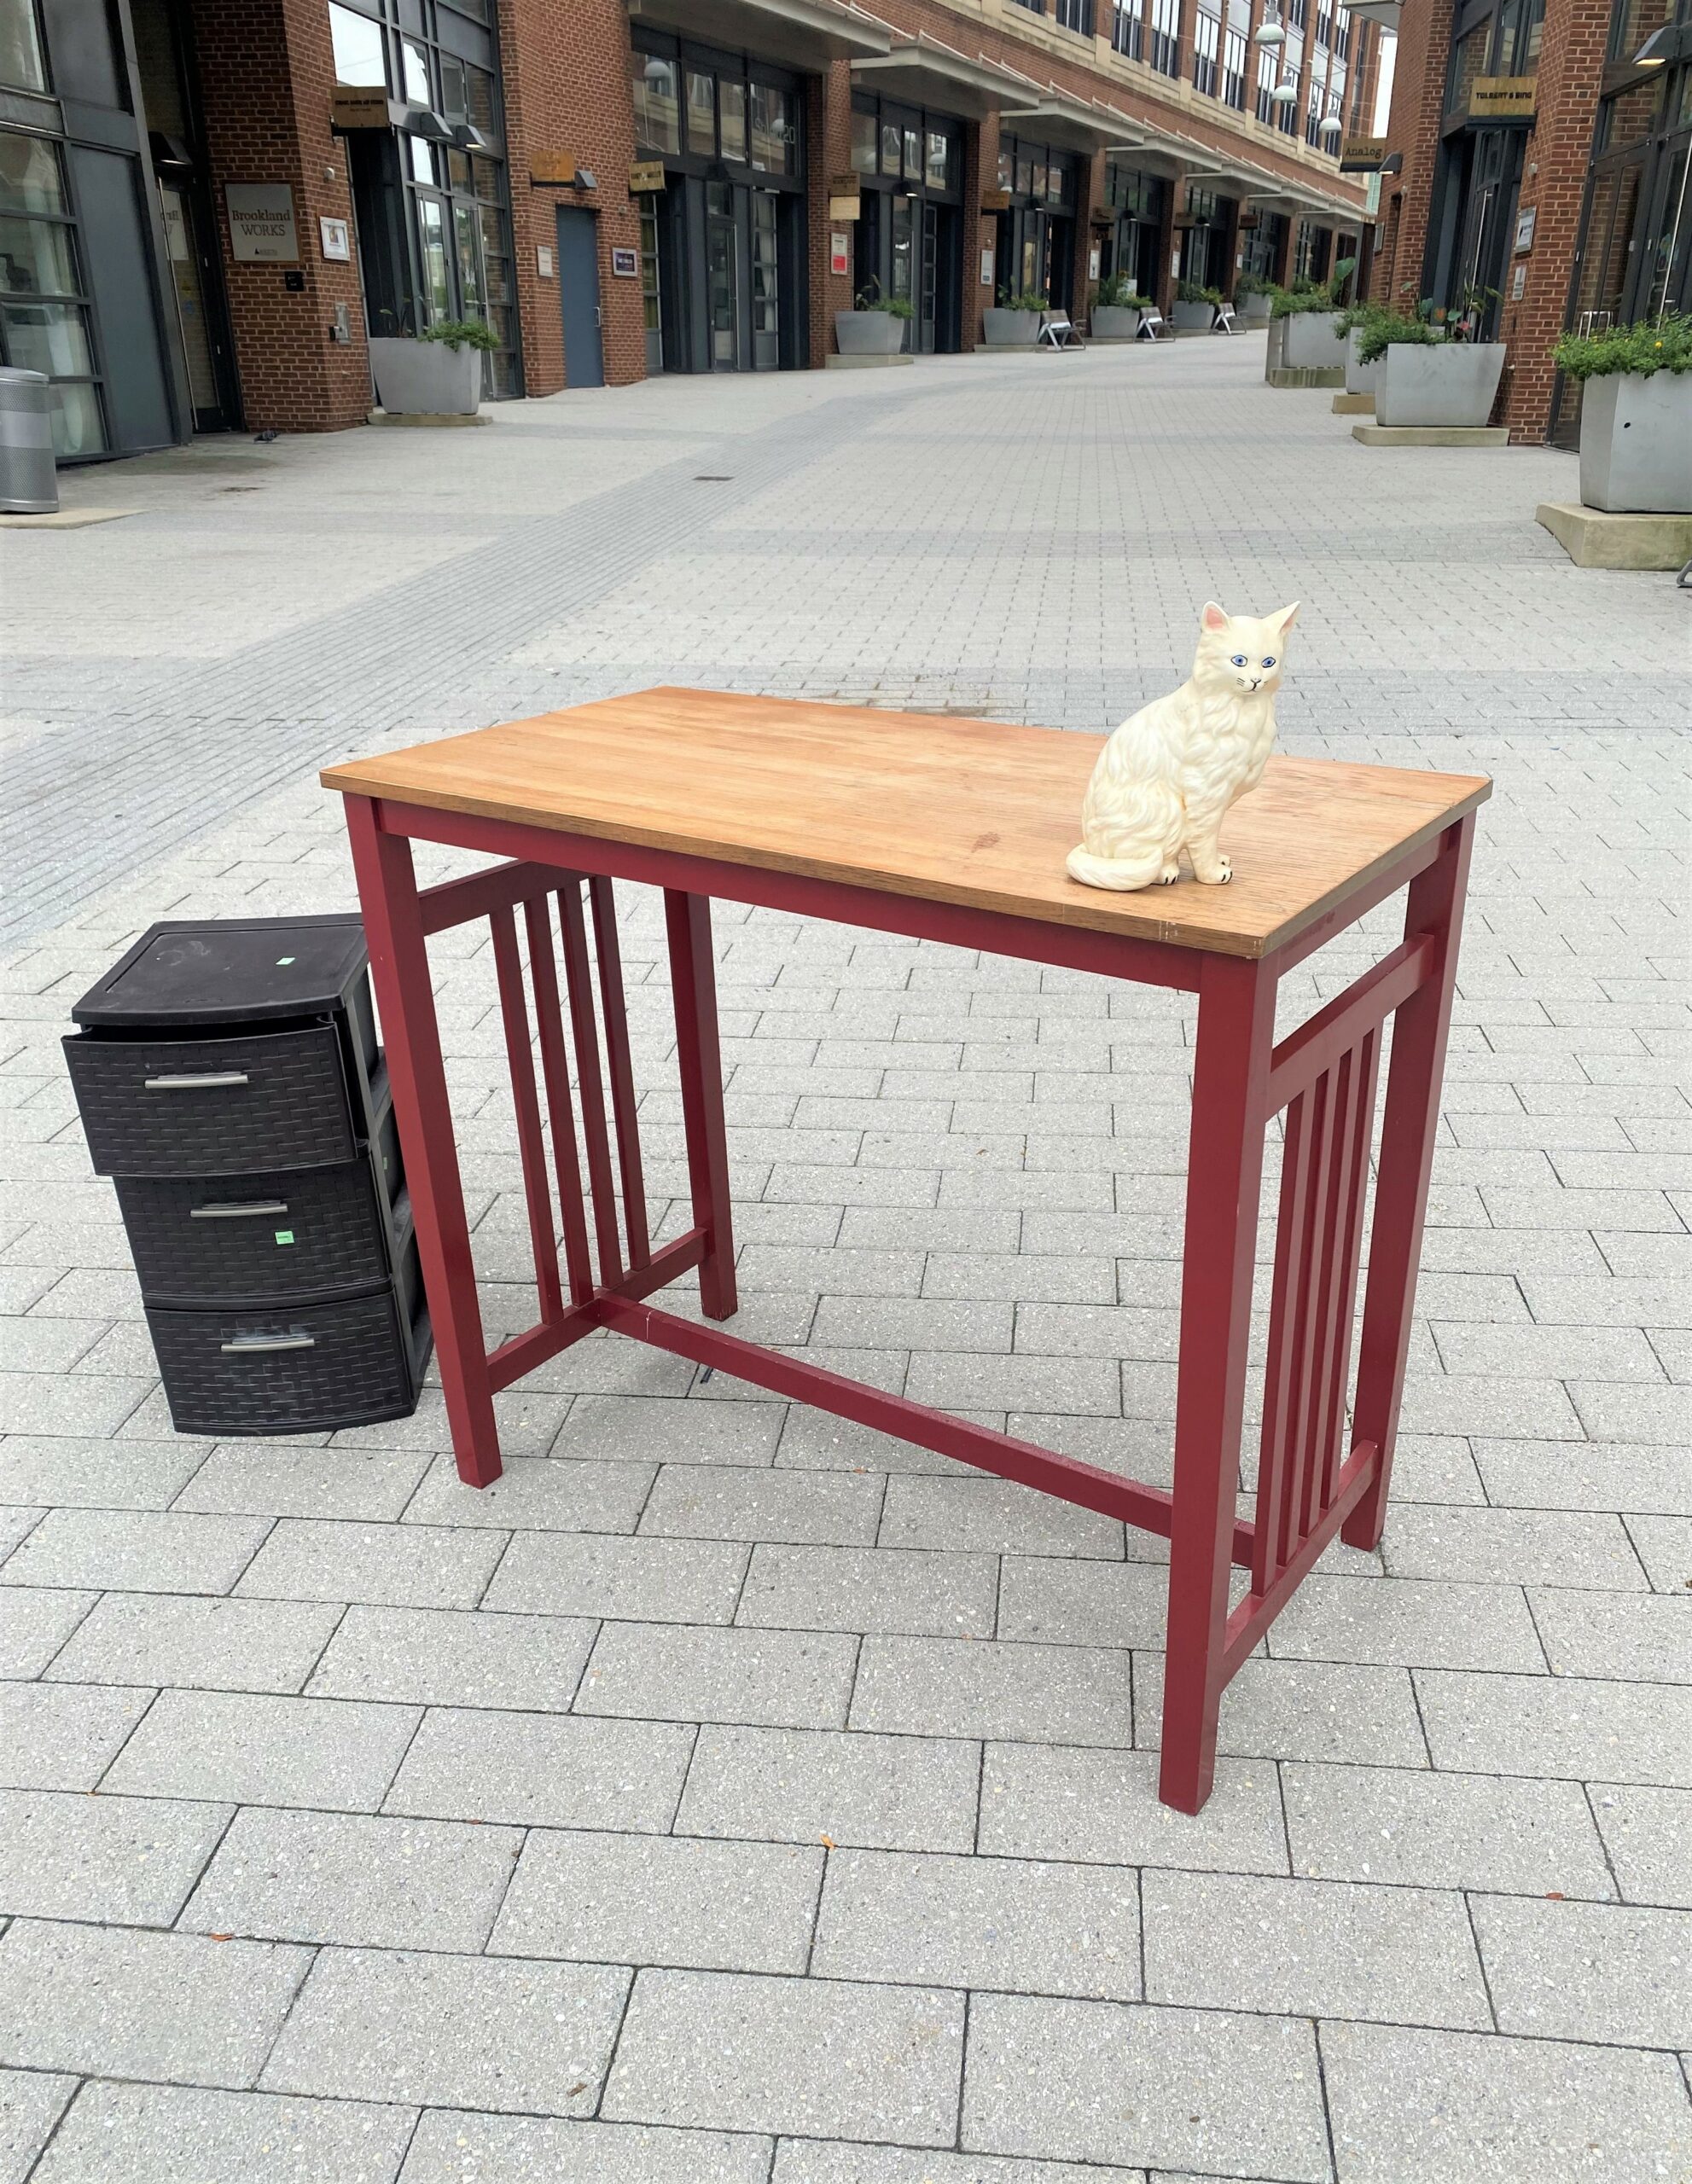
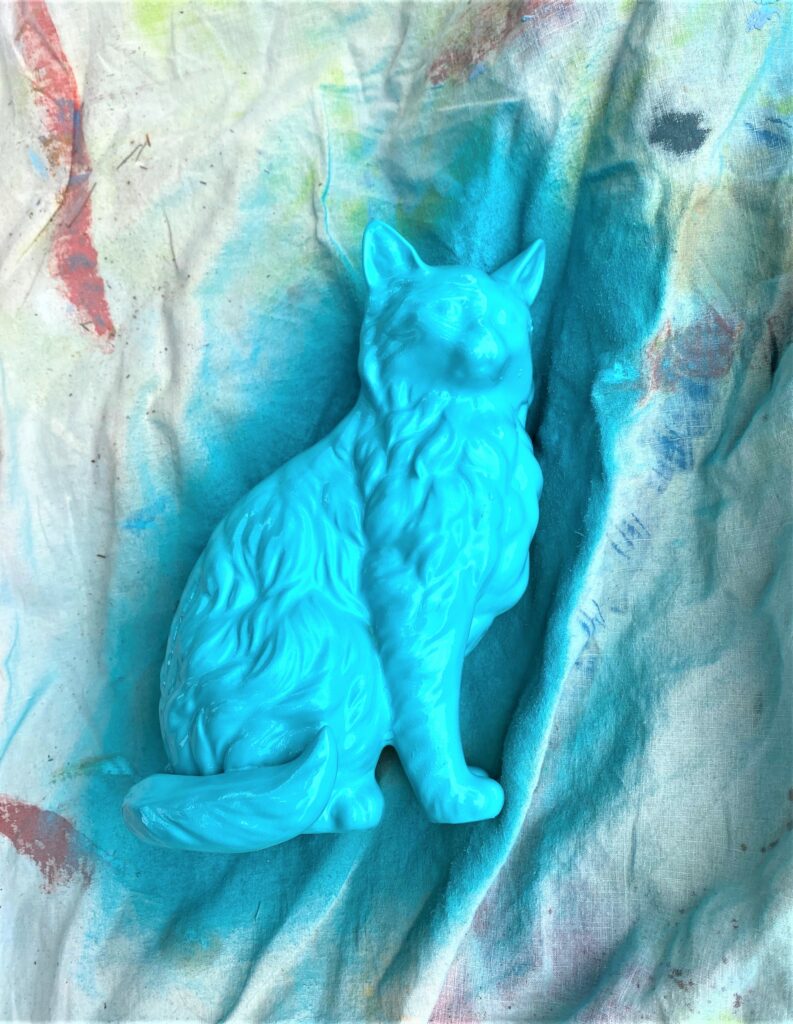
If you have a special piece, like my shelving unit, or a desk you will keep, be sure to take measurements of it, so you know what dimensions you have with which to work. I knew I wanted some sort of square boxes or bins to hold paperwork. I found a sturdy and stylish three-drawer unit at Goodwill and, thanks to my measurements, I knew the drawers would fit on my shelves when taken out of their unit. Other items found there were white wire bins, a small plastic storage container with drawers, and other office items that could be helpful in keeping things in order. A ceramic cat statue and jewel-encrusted picture frame were picked up, too, to add some personality.
A glass-based lamp, a small trash can, a wicker-backed bar stool, and a chair cushion were found during early Goodwill excursions and brought together for the space’s new look. Goodwill always has similar items on hand at very low prices.
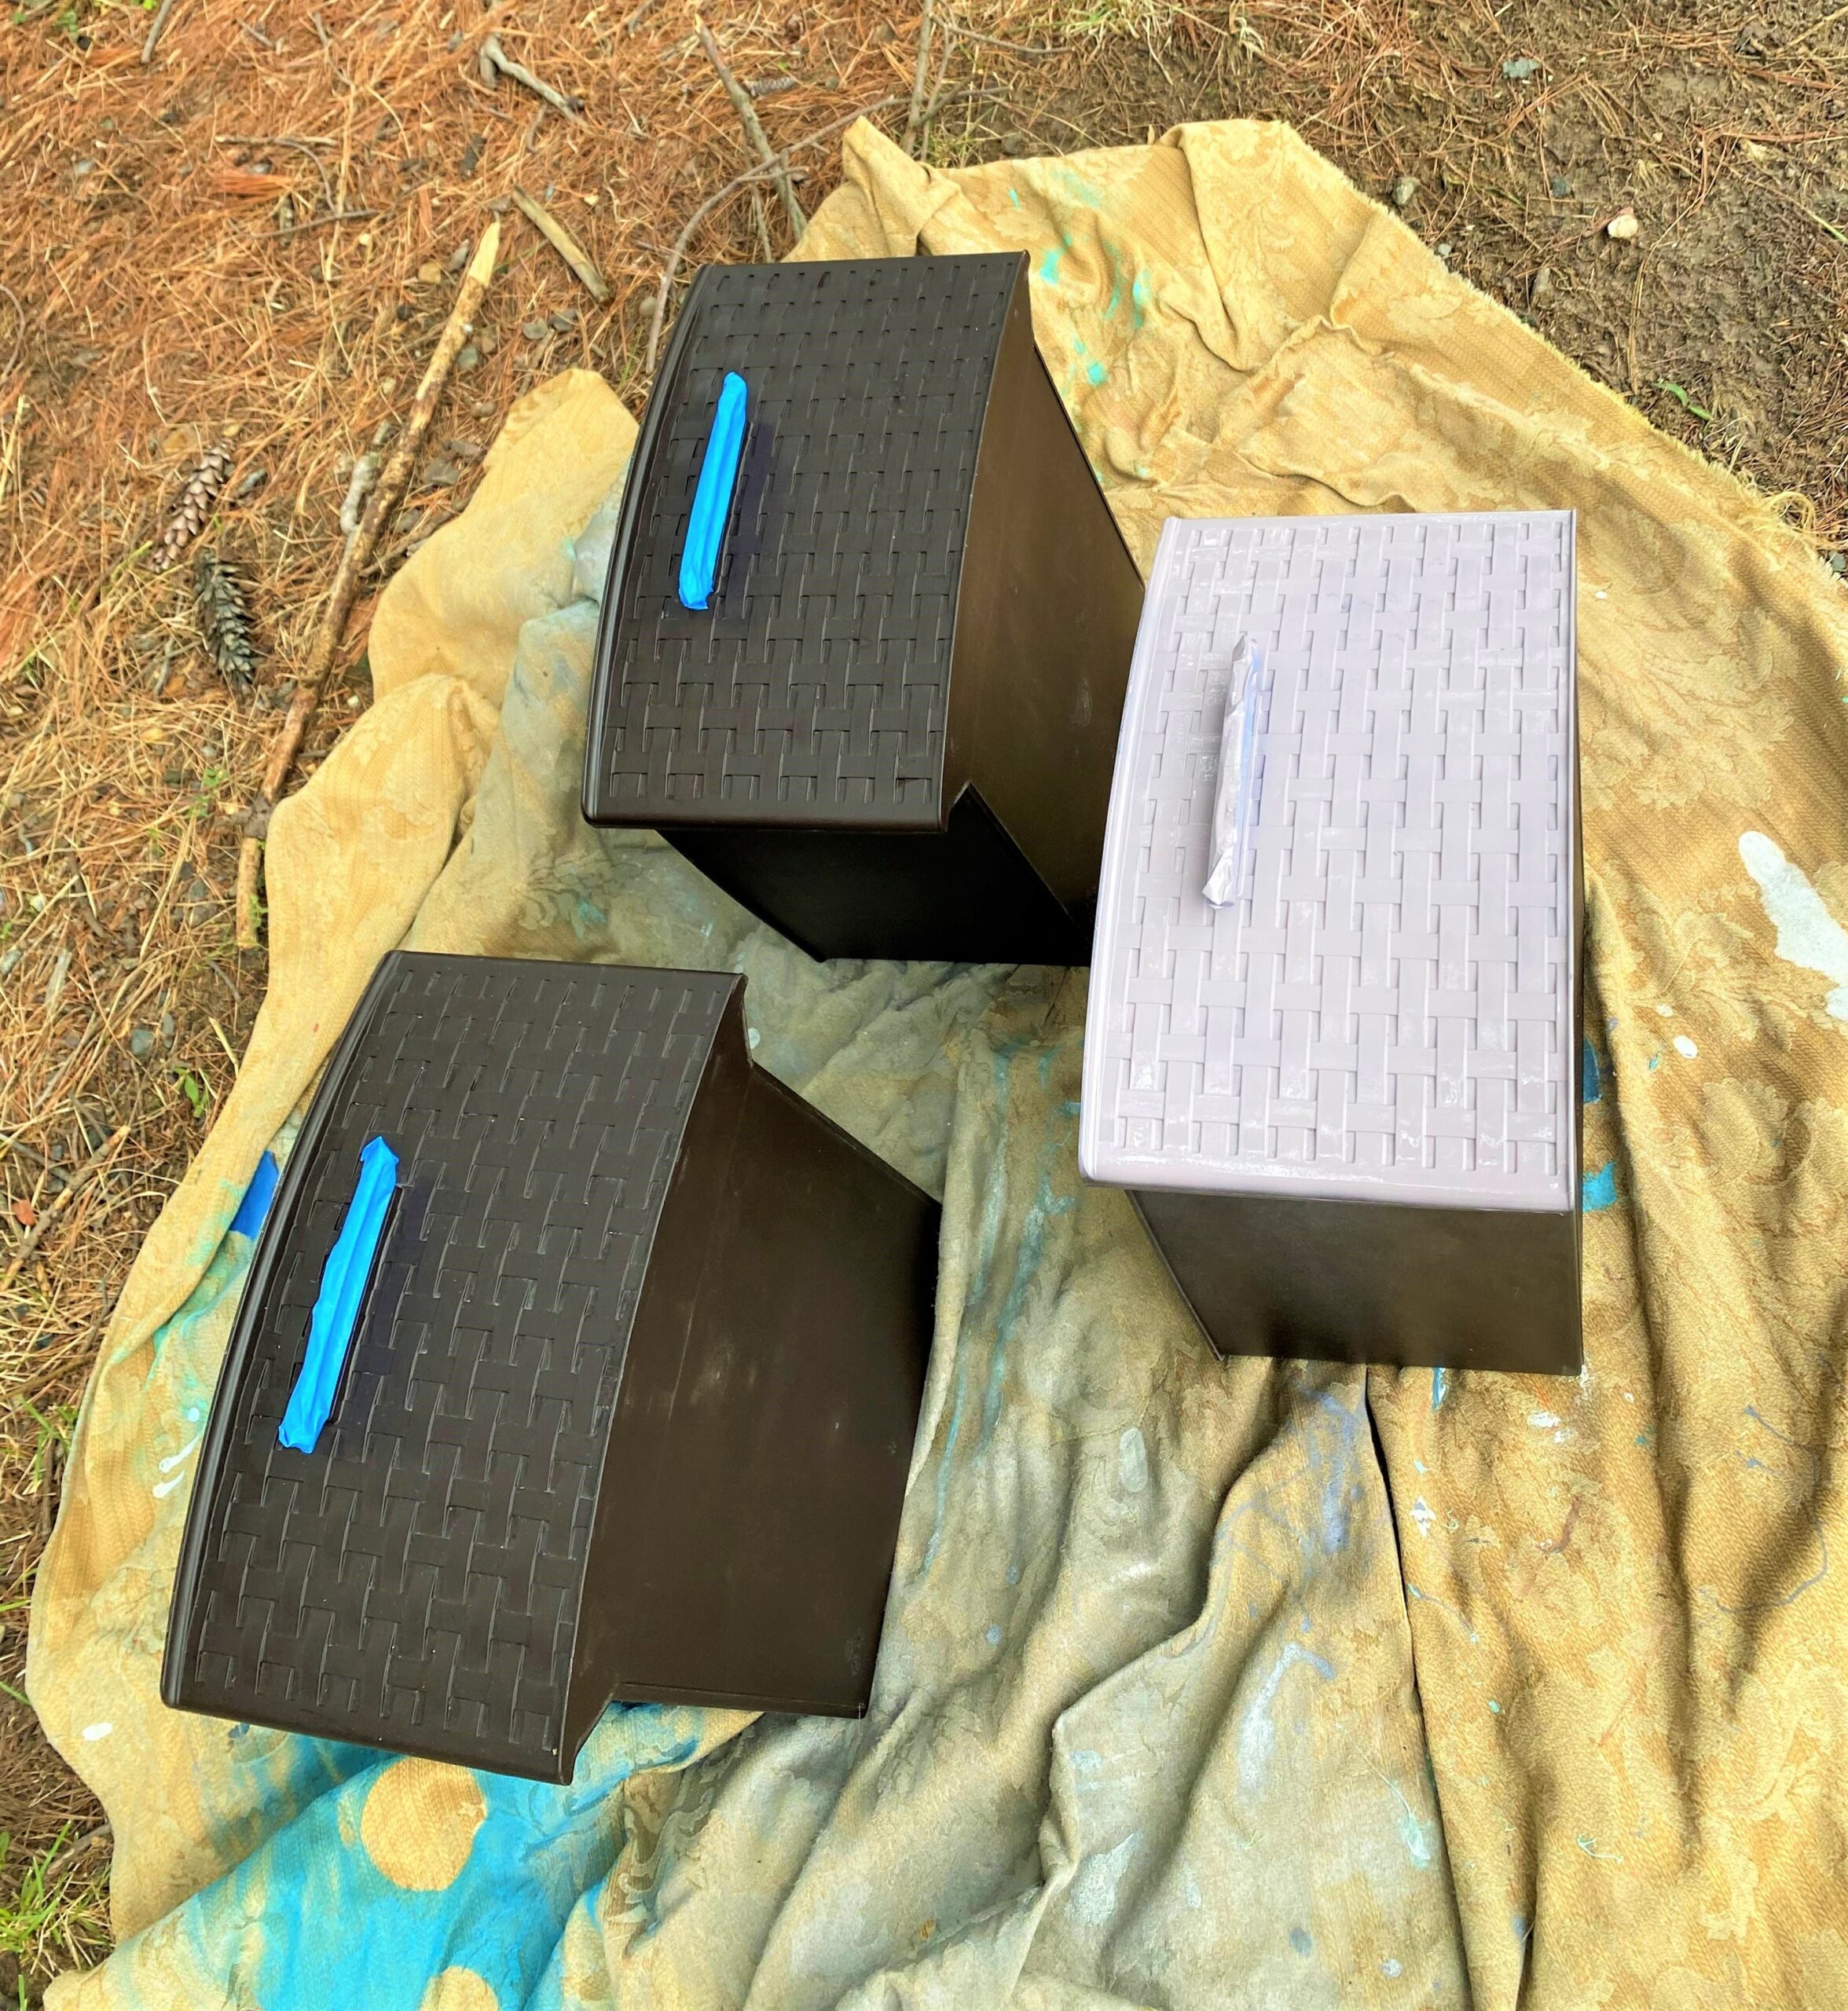
3. Use spray paint to personalize items
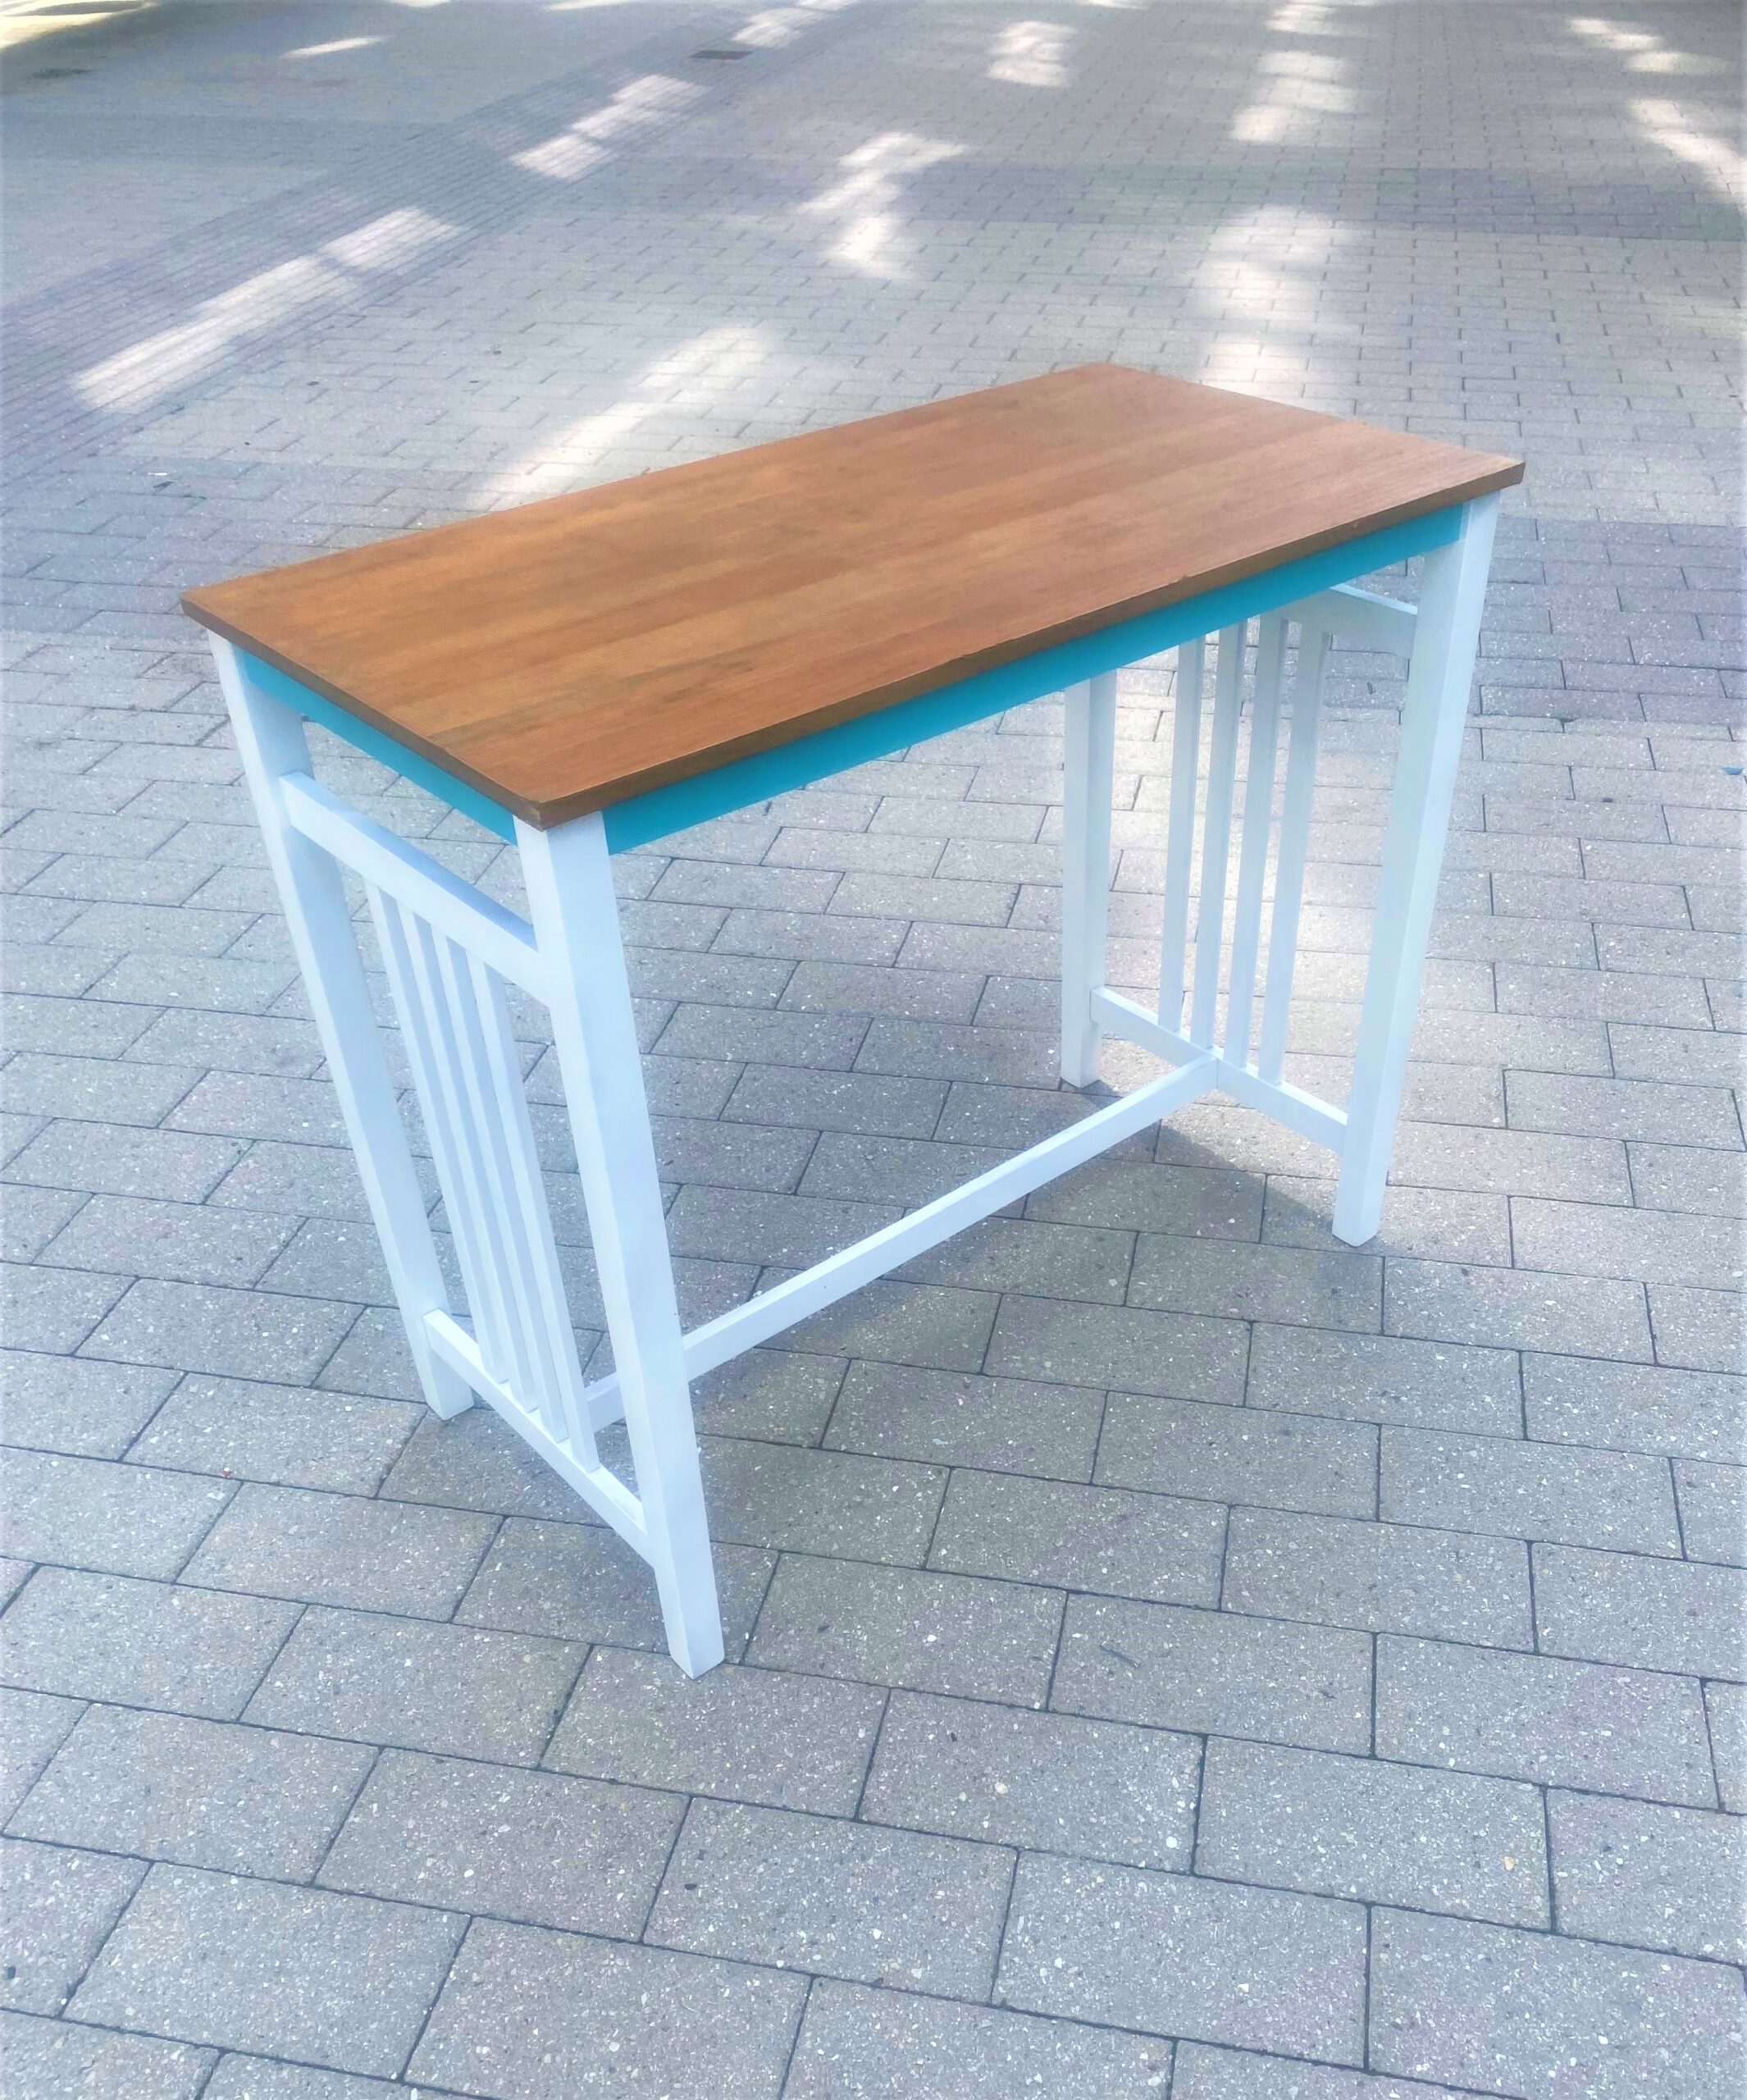
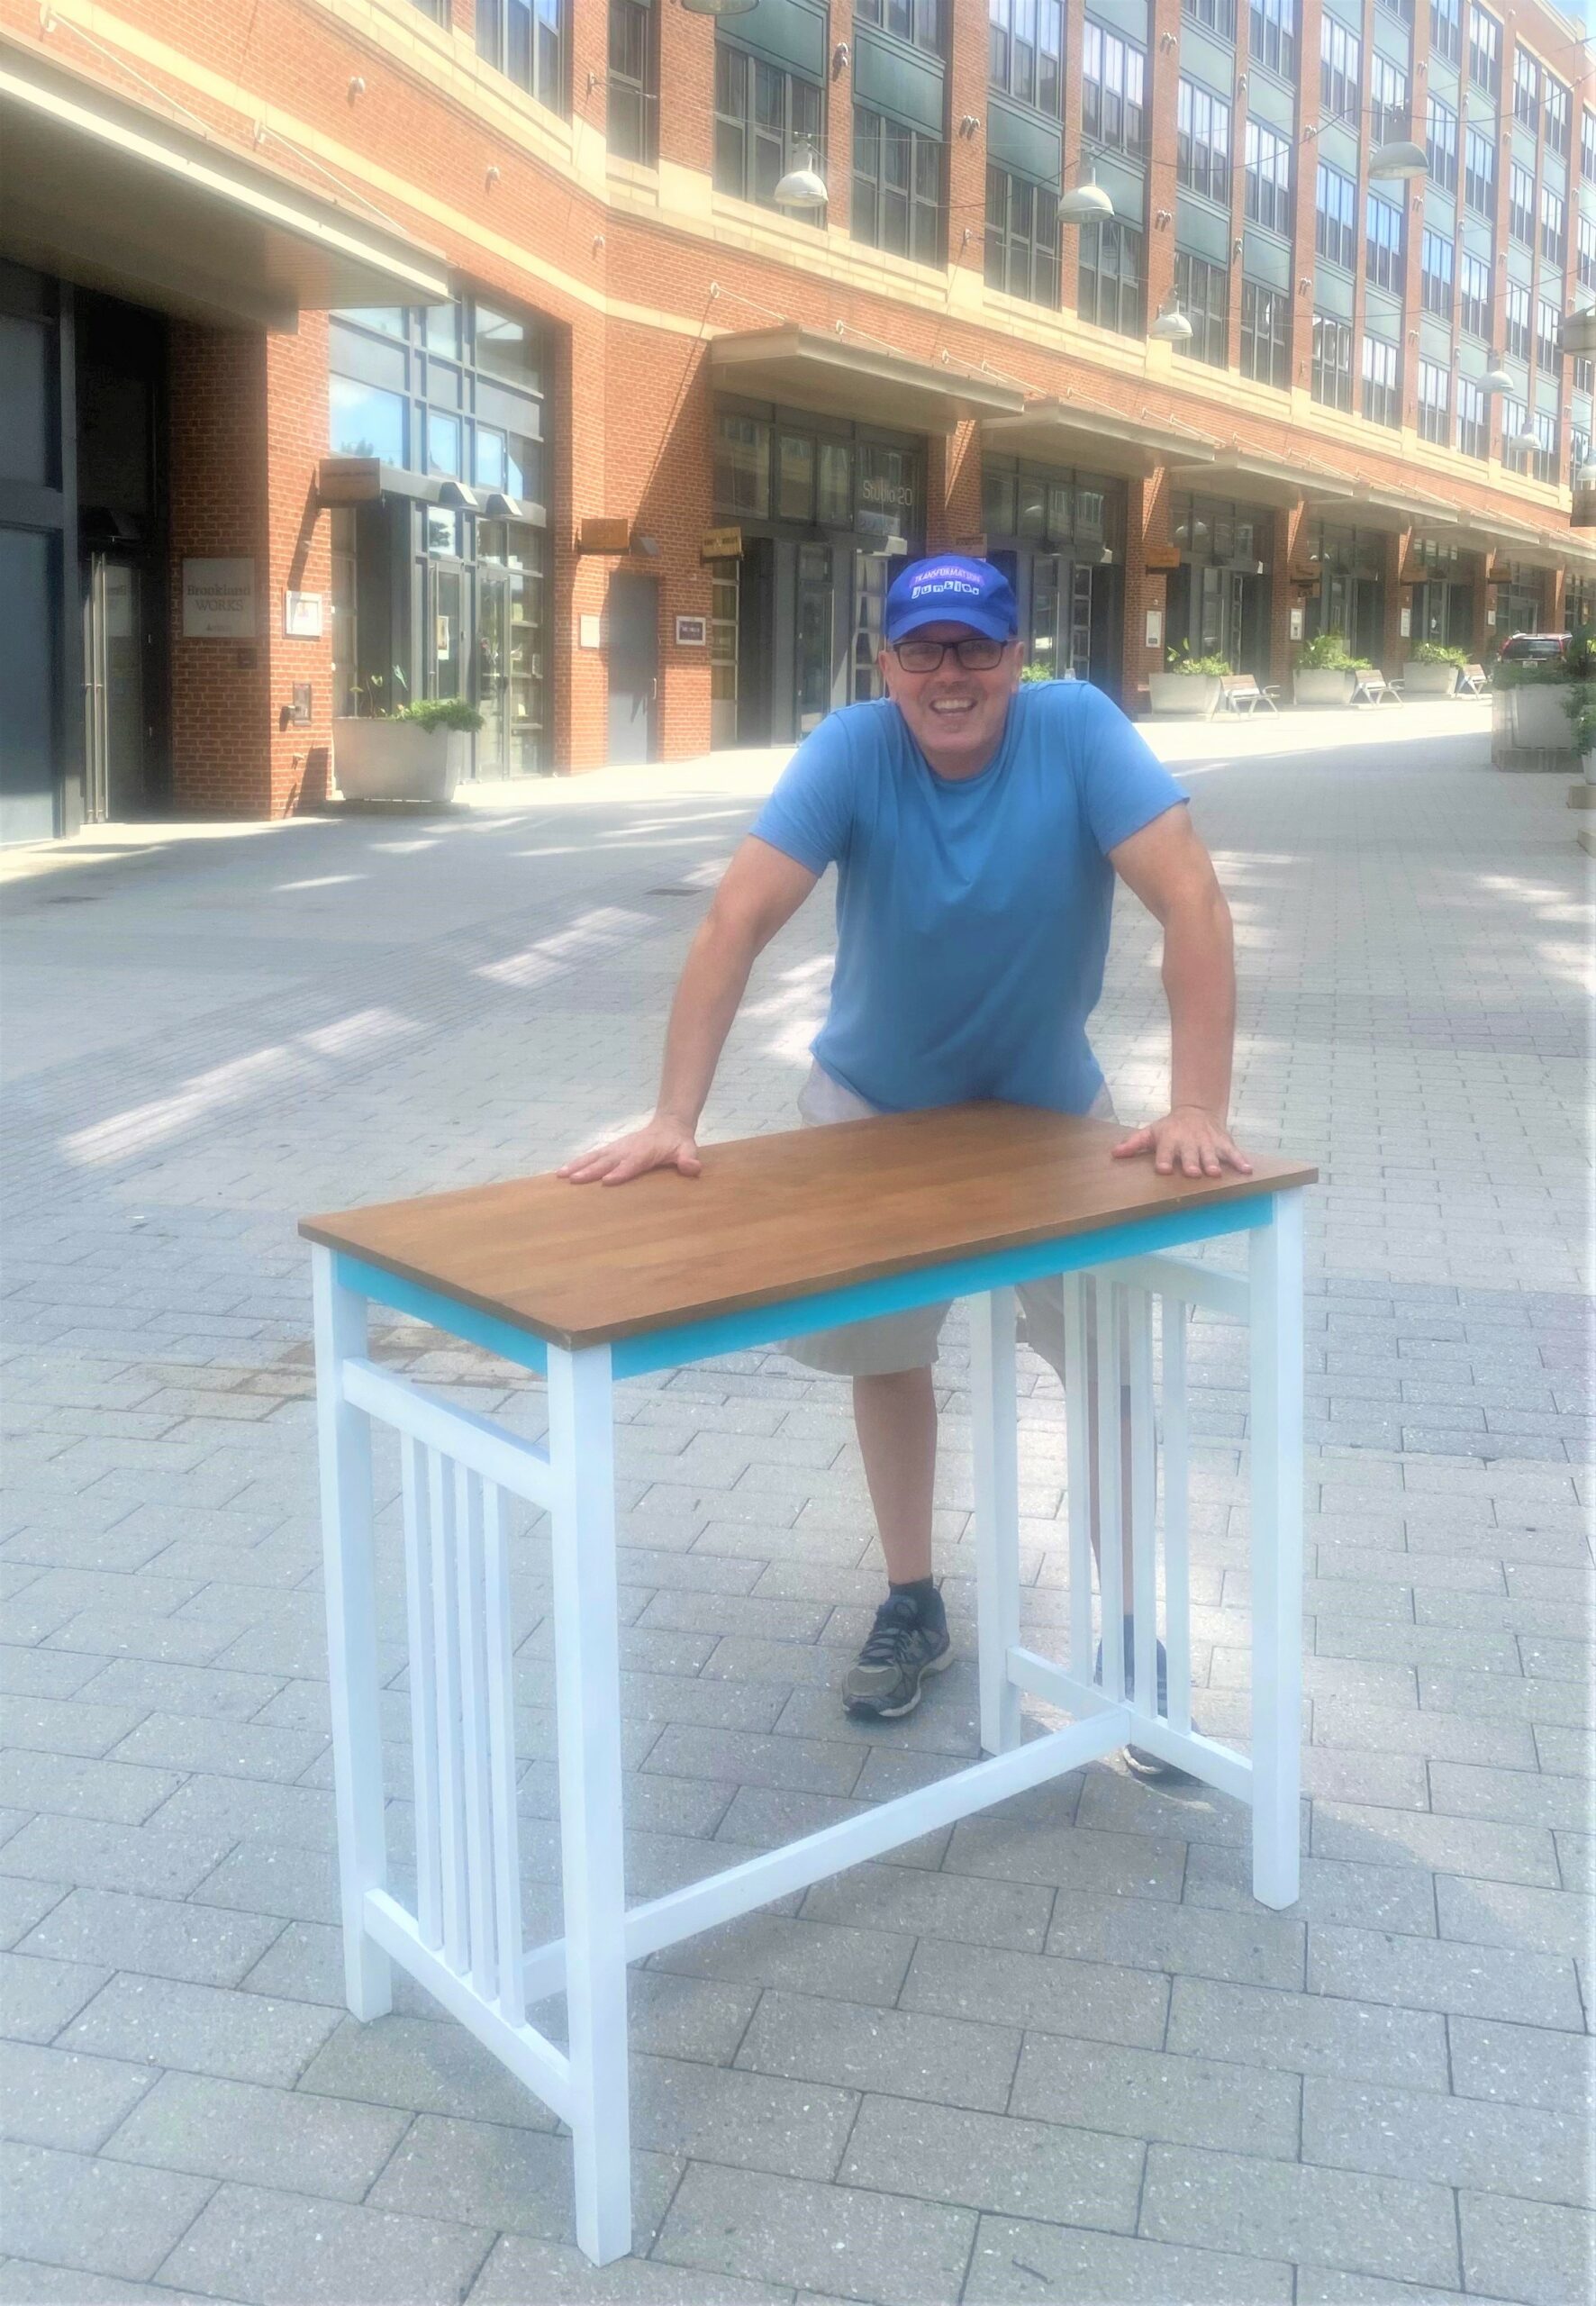
A tall, bar table was repurposed into my workstation/desk to give me the option to stand while working. However, the top’s base and legs were red. If you find a piece you like but don’t care for its color, do what I did—paint it!
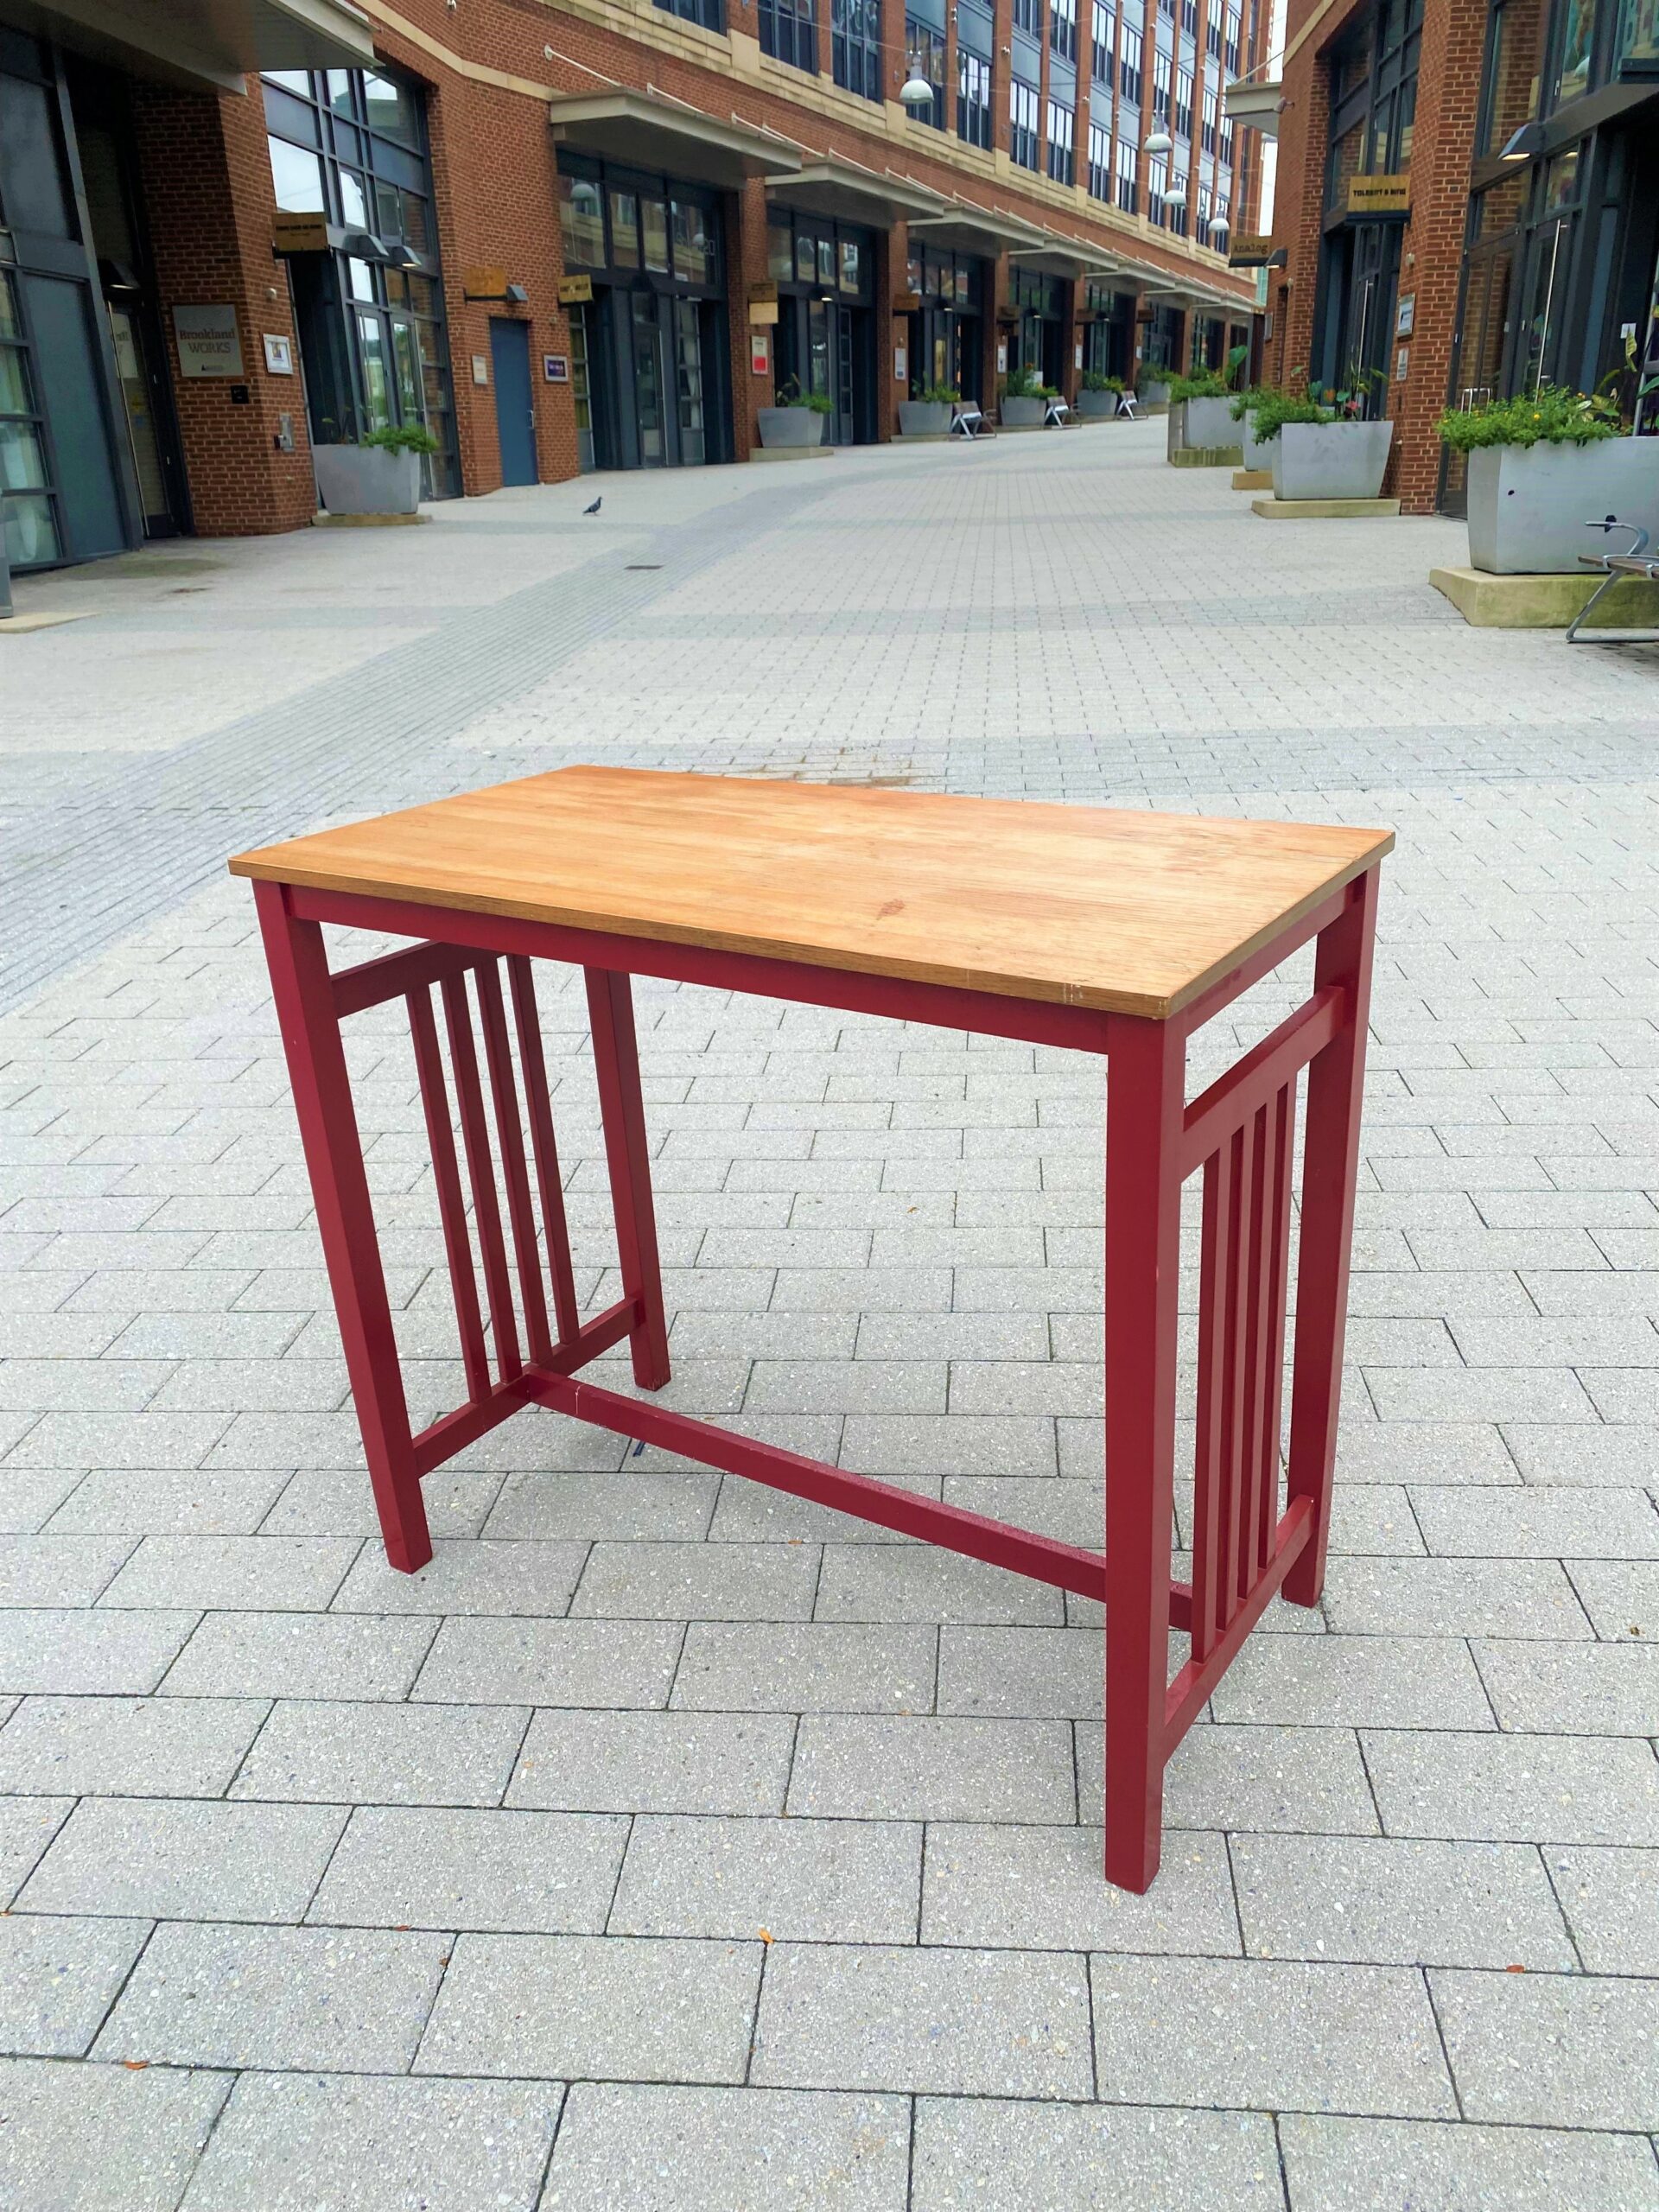
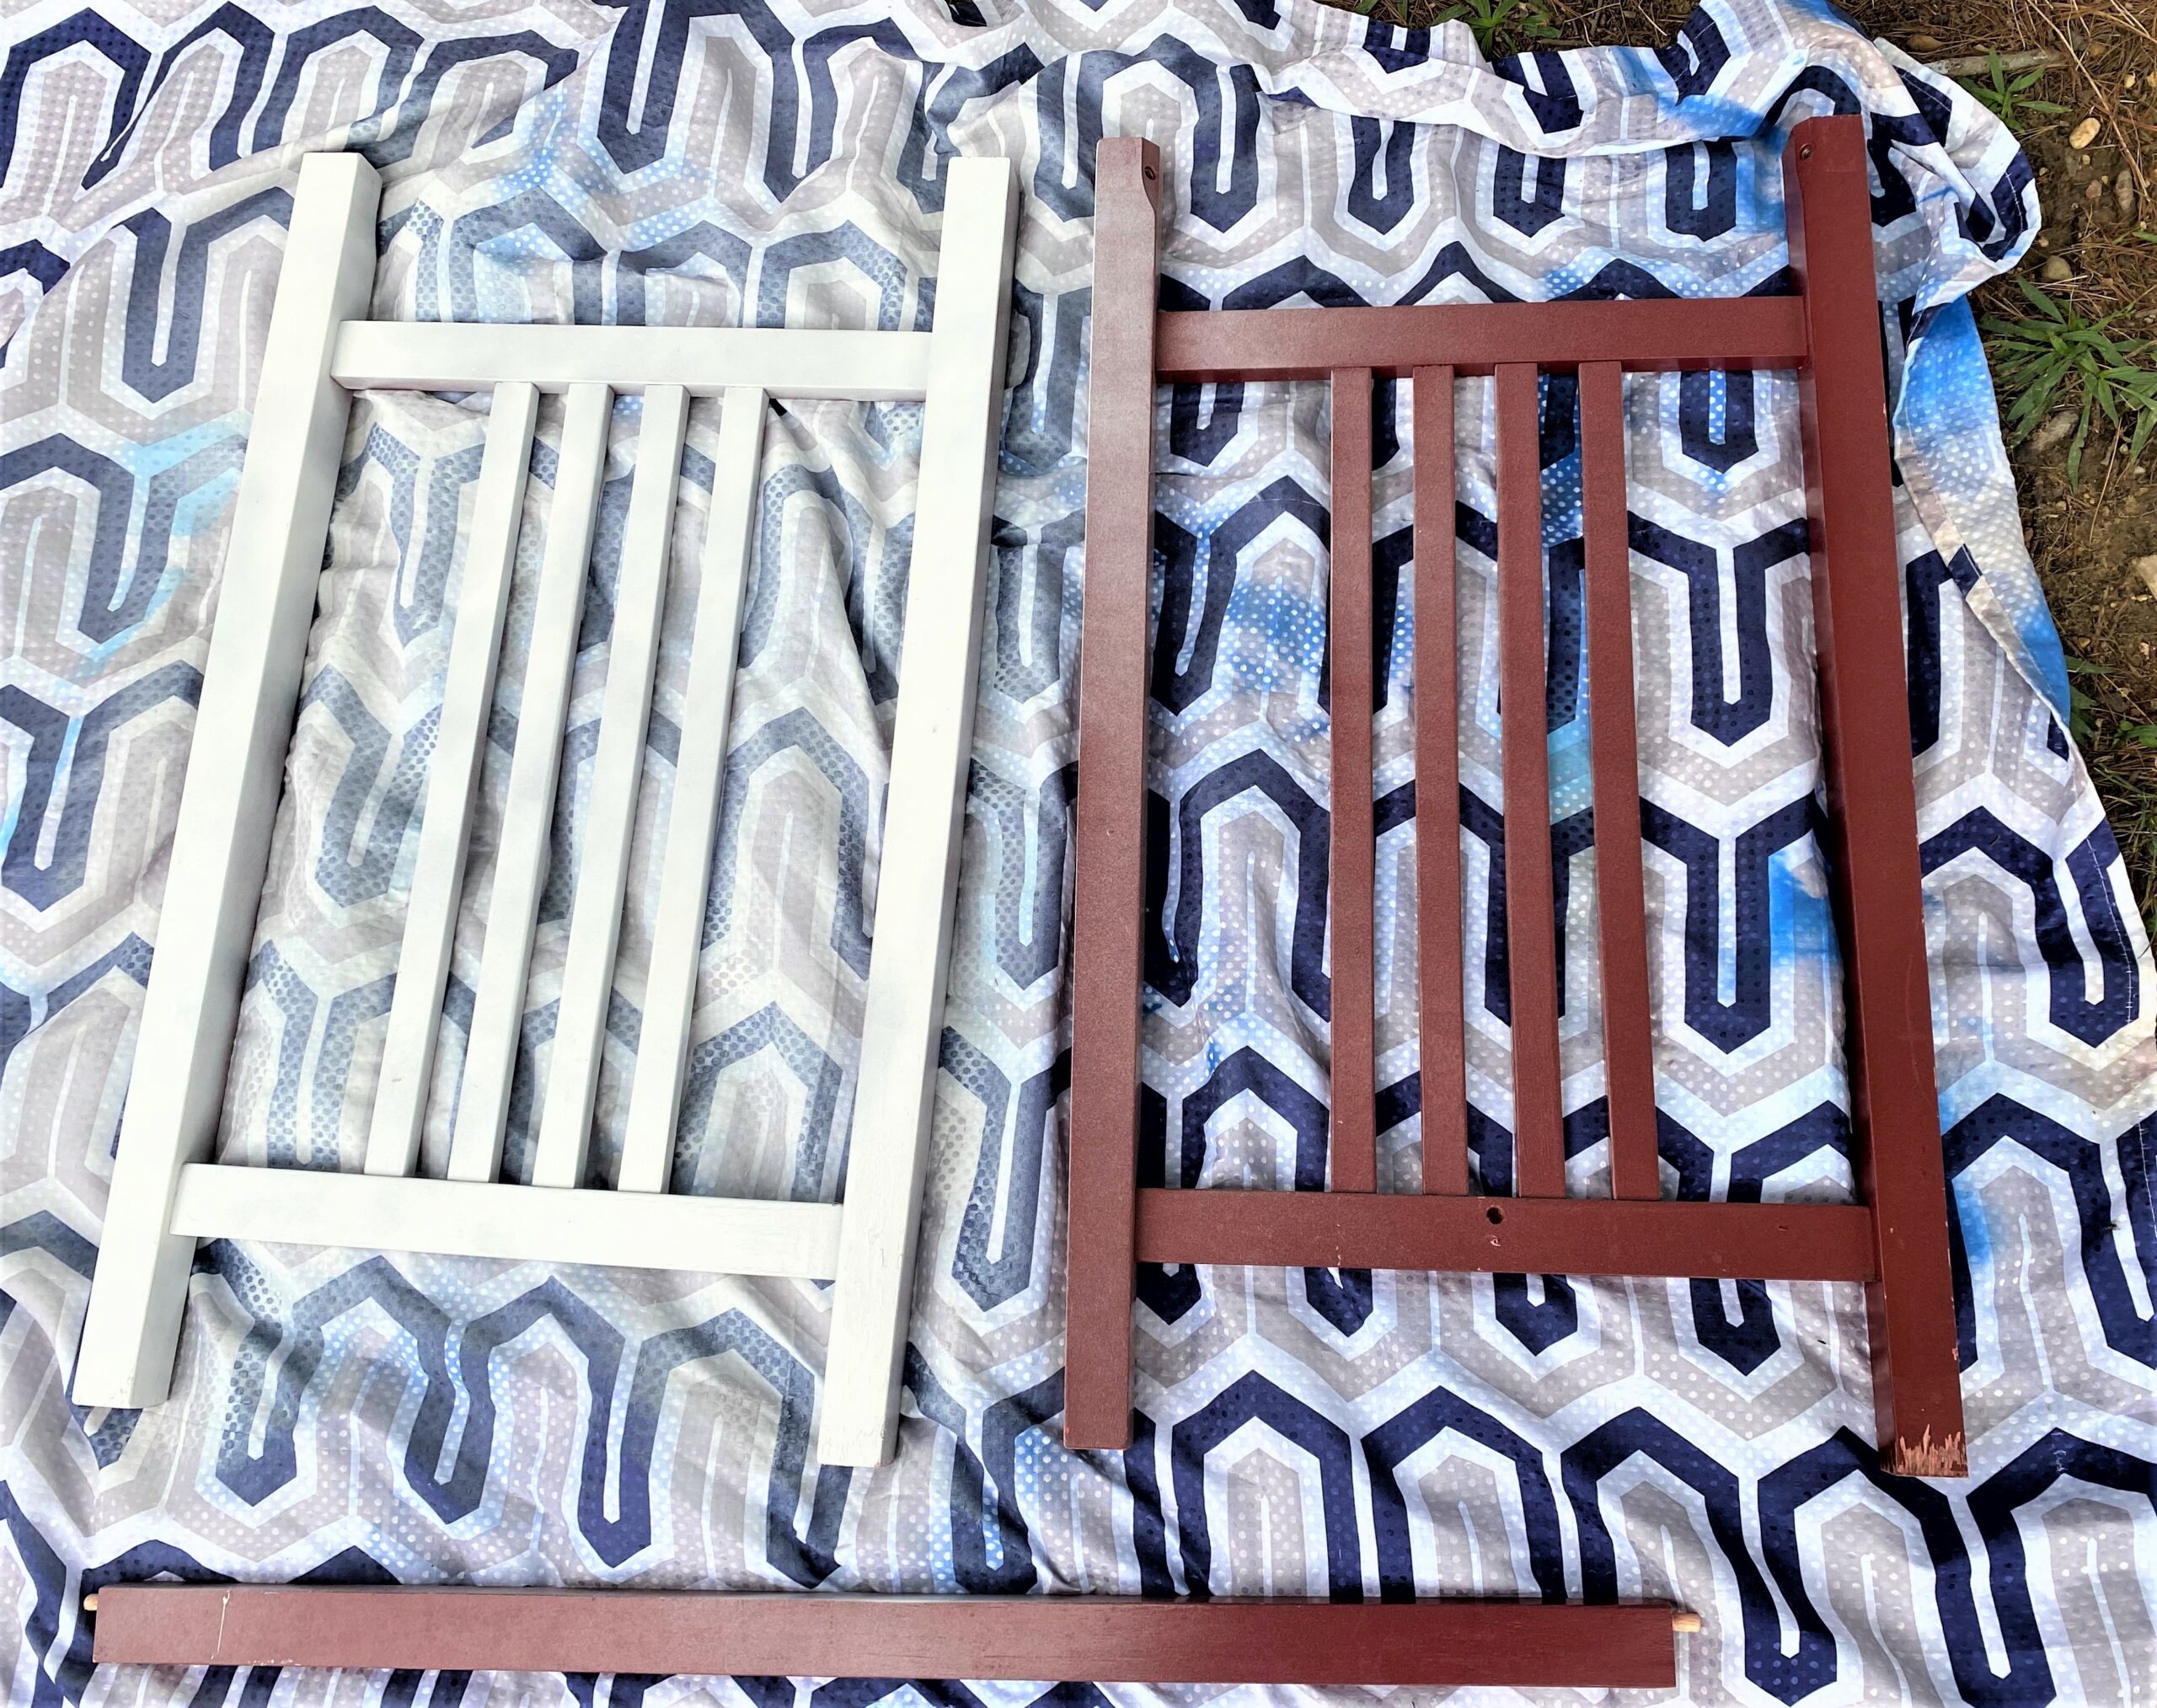
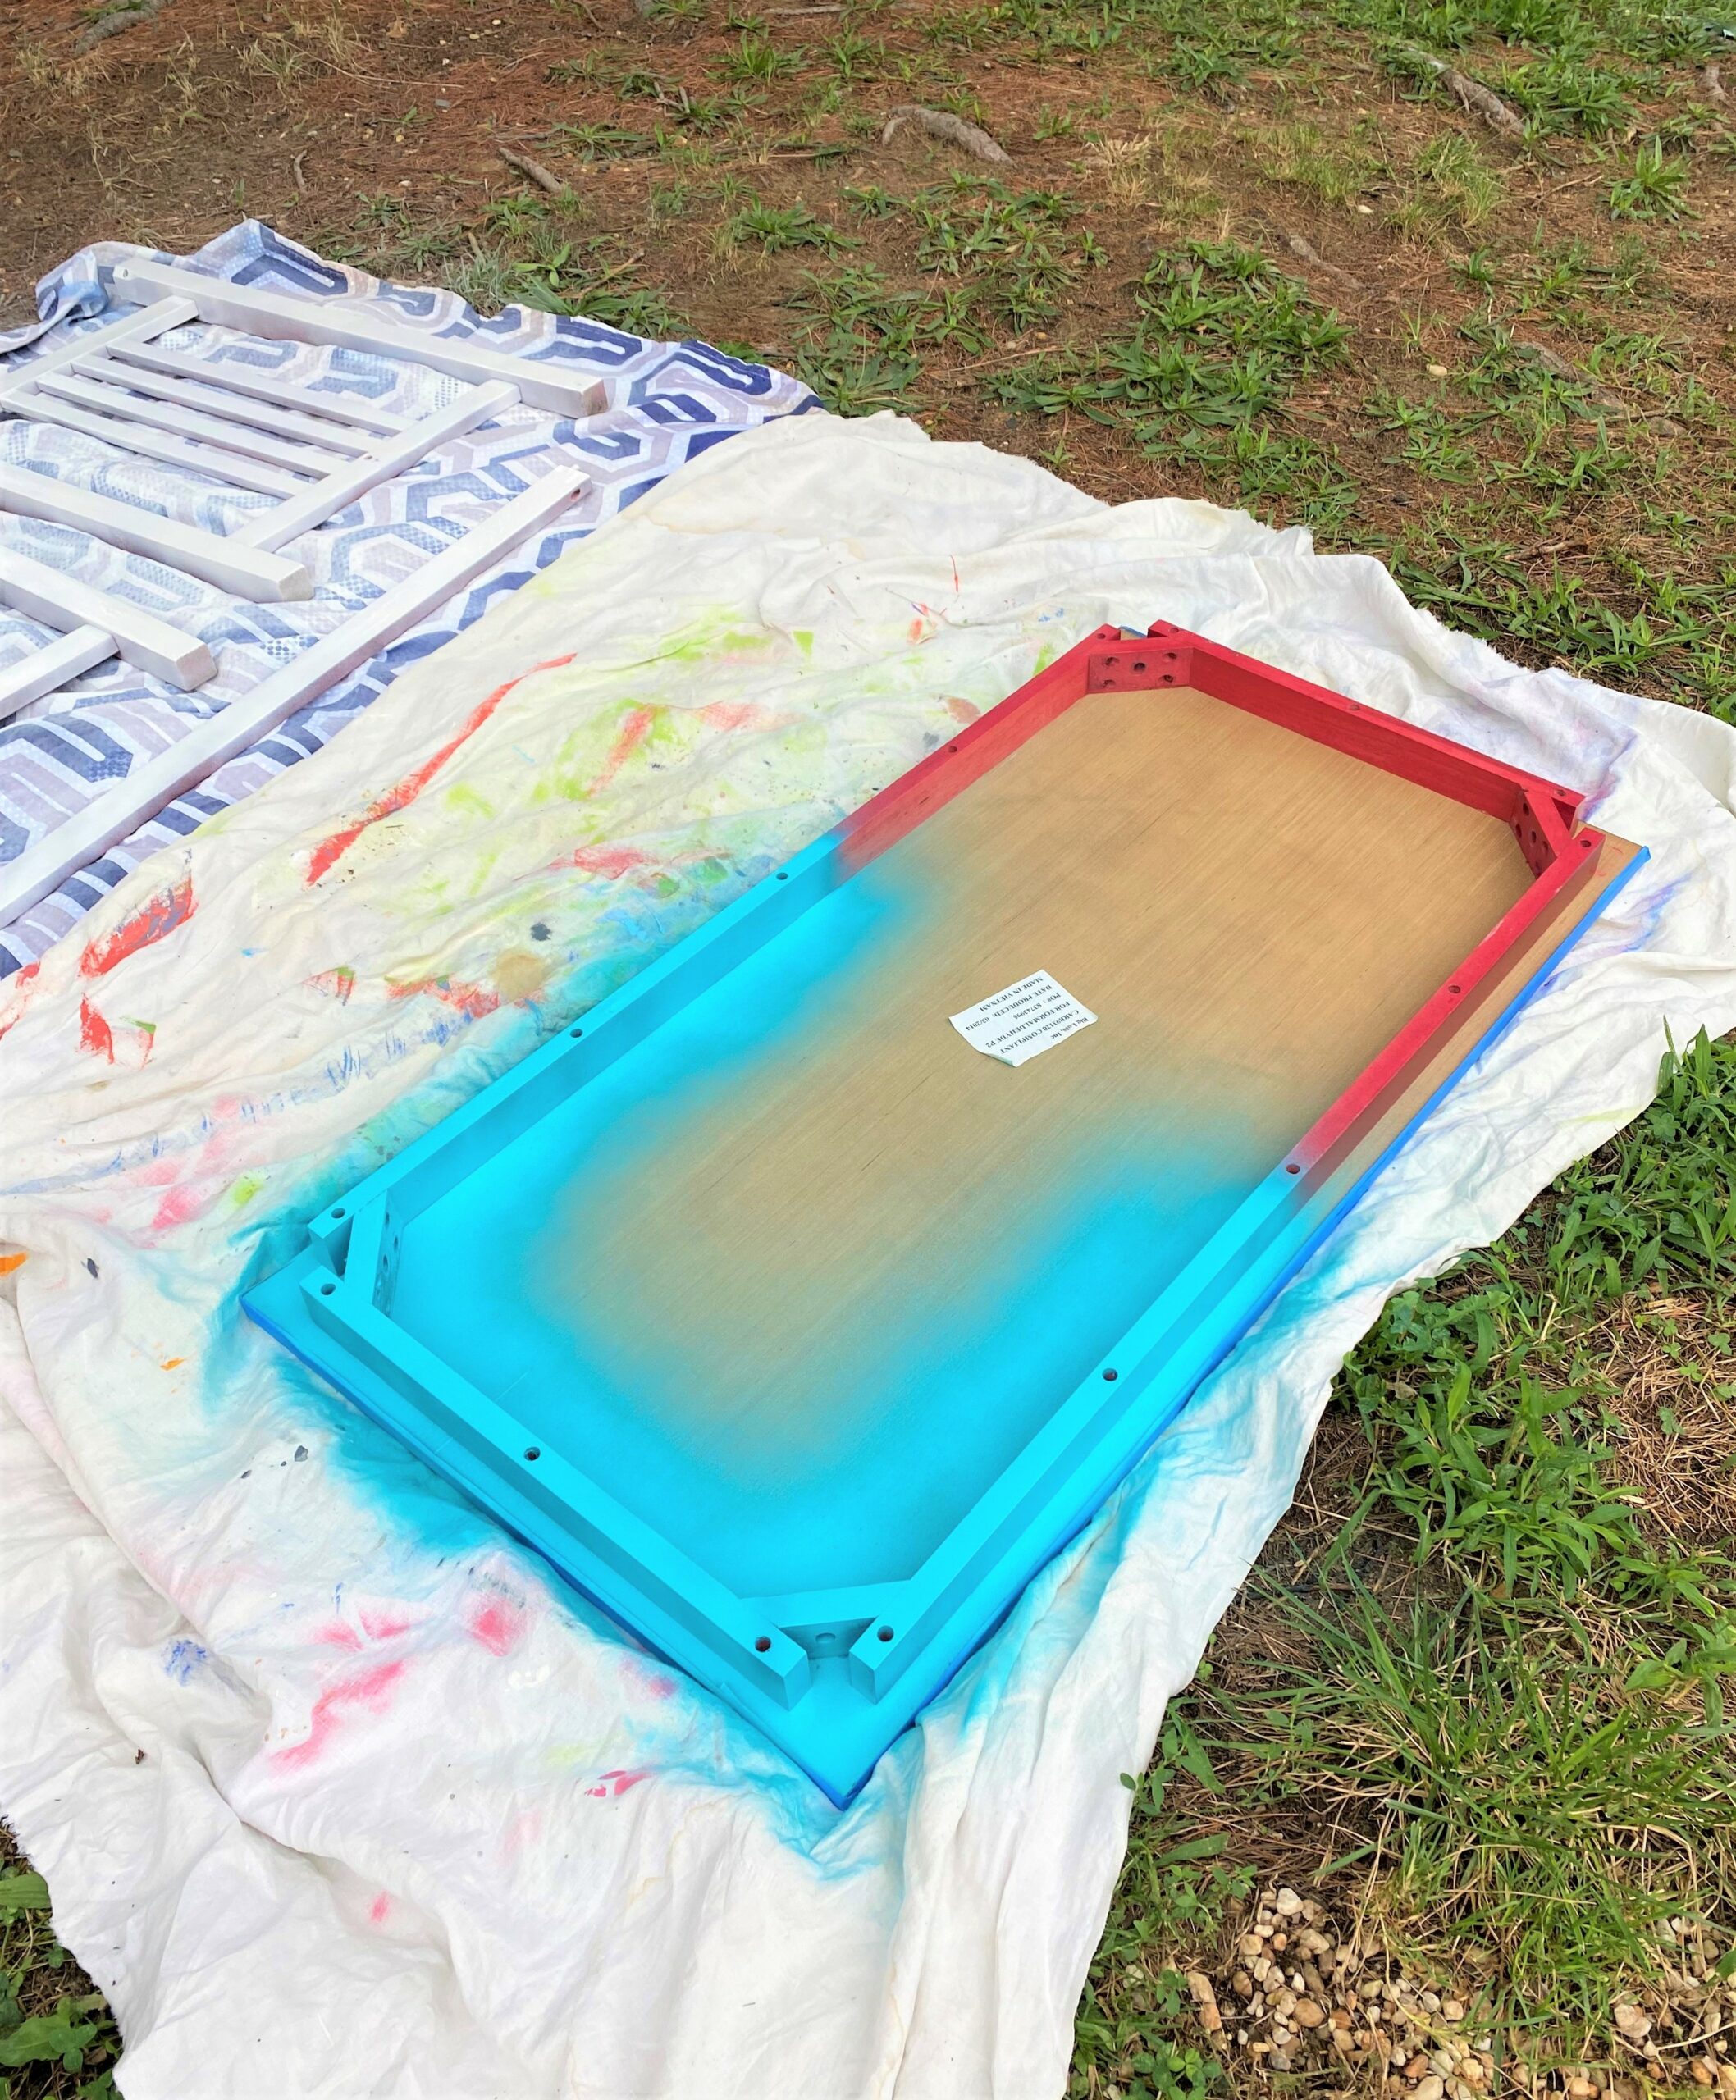
To play up the tones in my living room/home office, the tall table was taken apart, and its legs were given an immediate refresh using bright white spray paint. Teal blue was applied to the top’s base section. Now, I love its brightness and color pop.
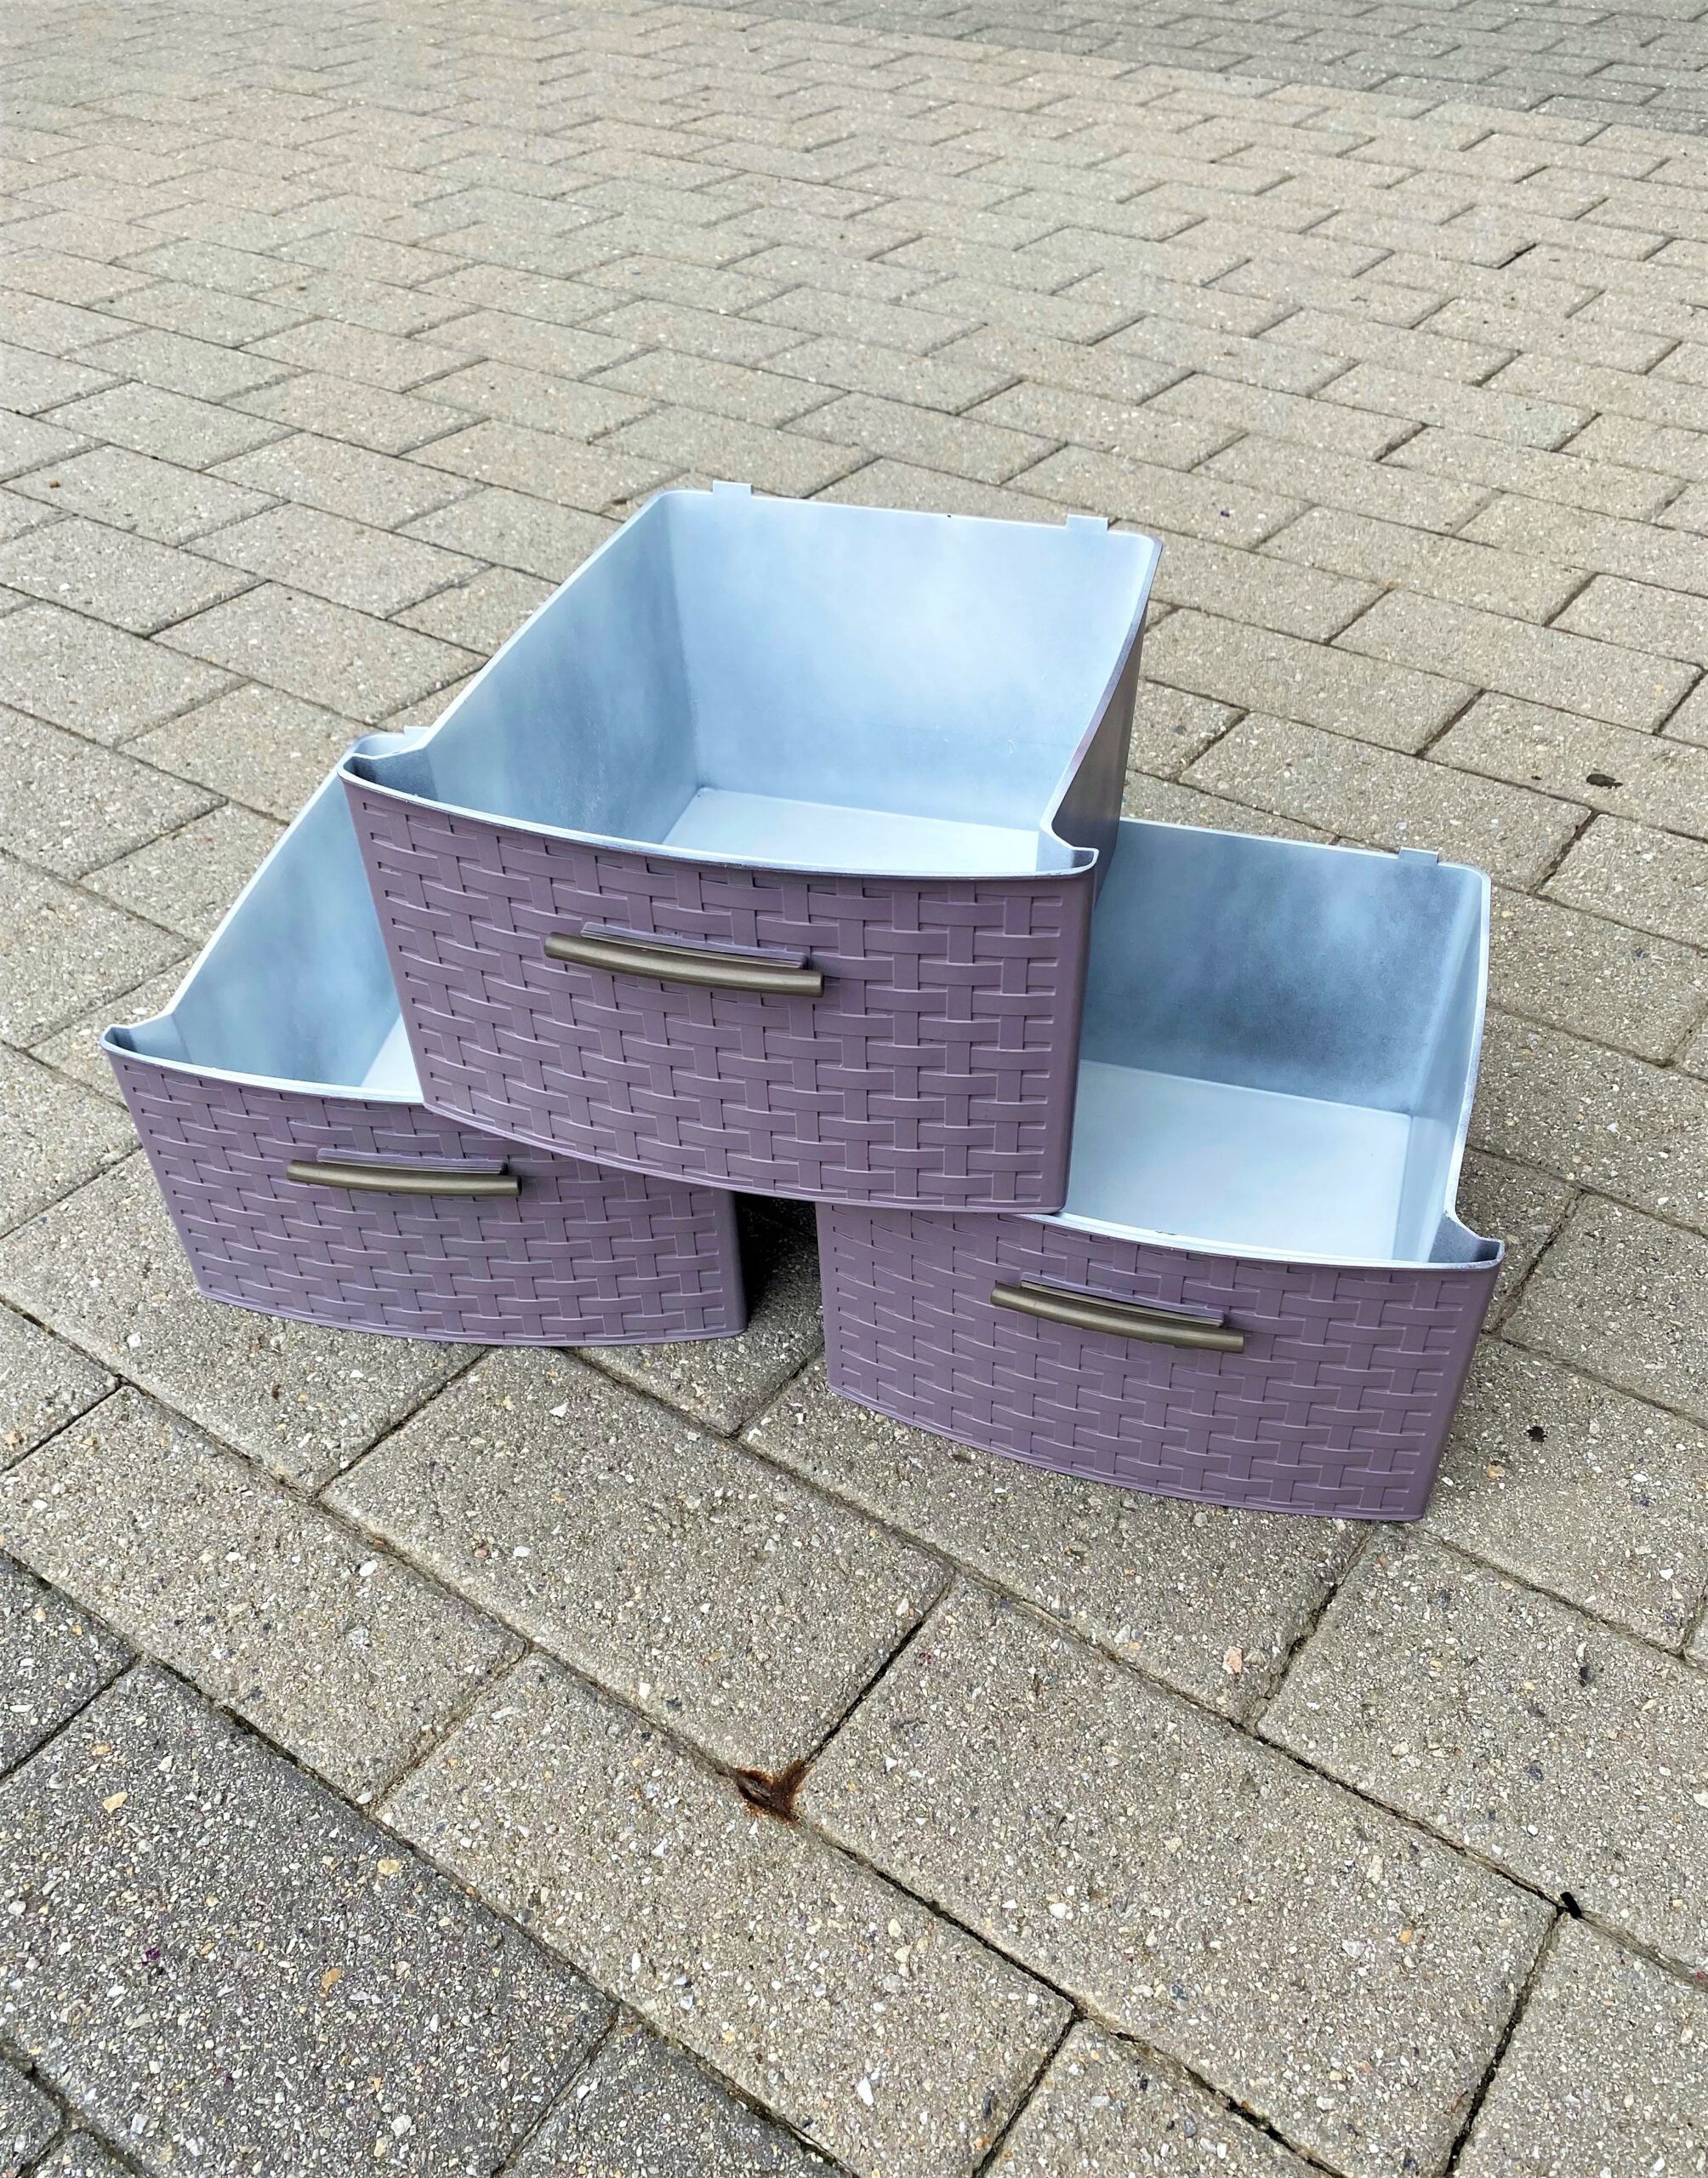
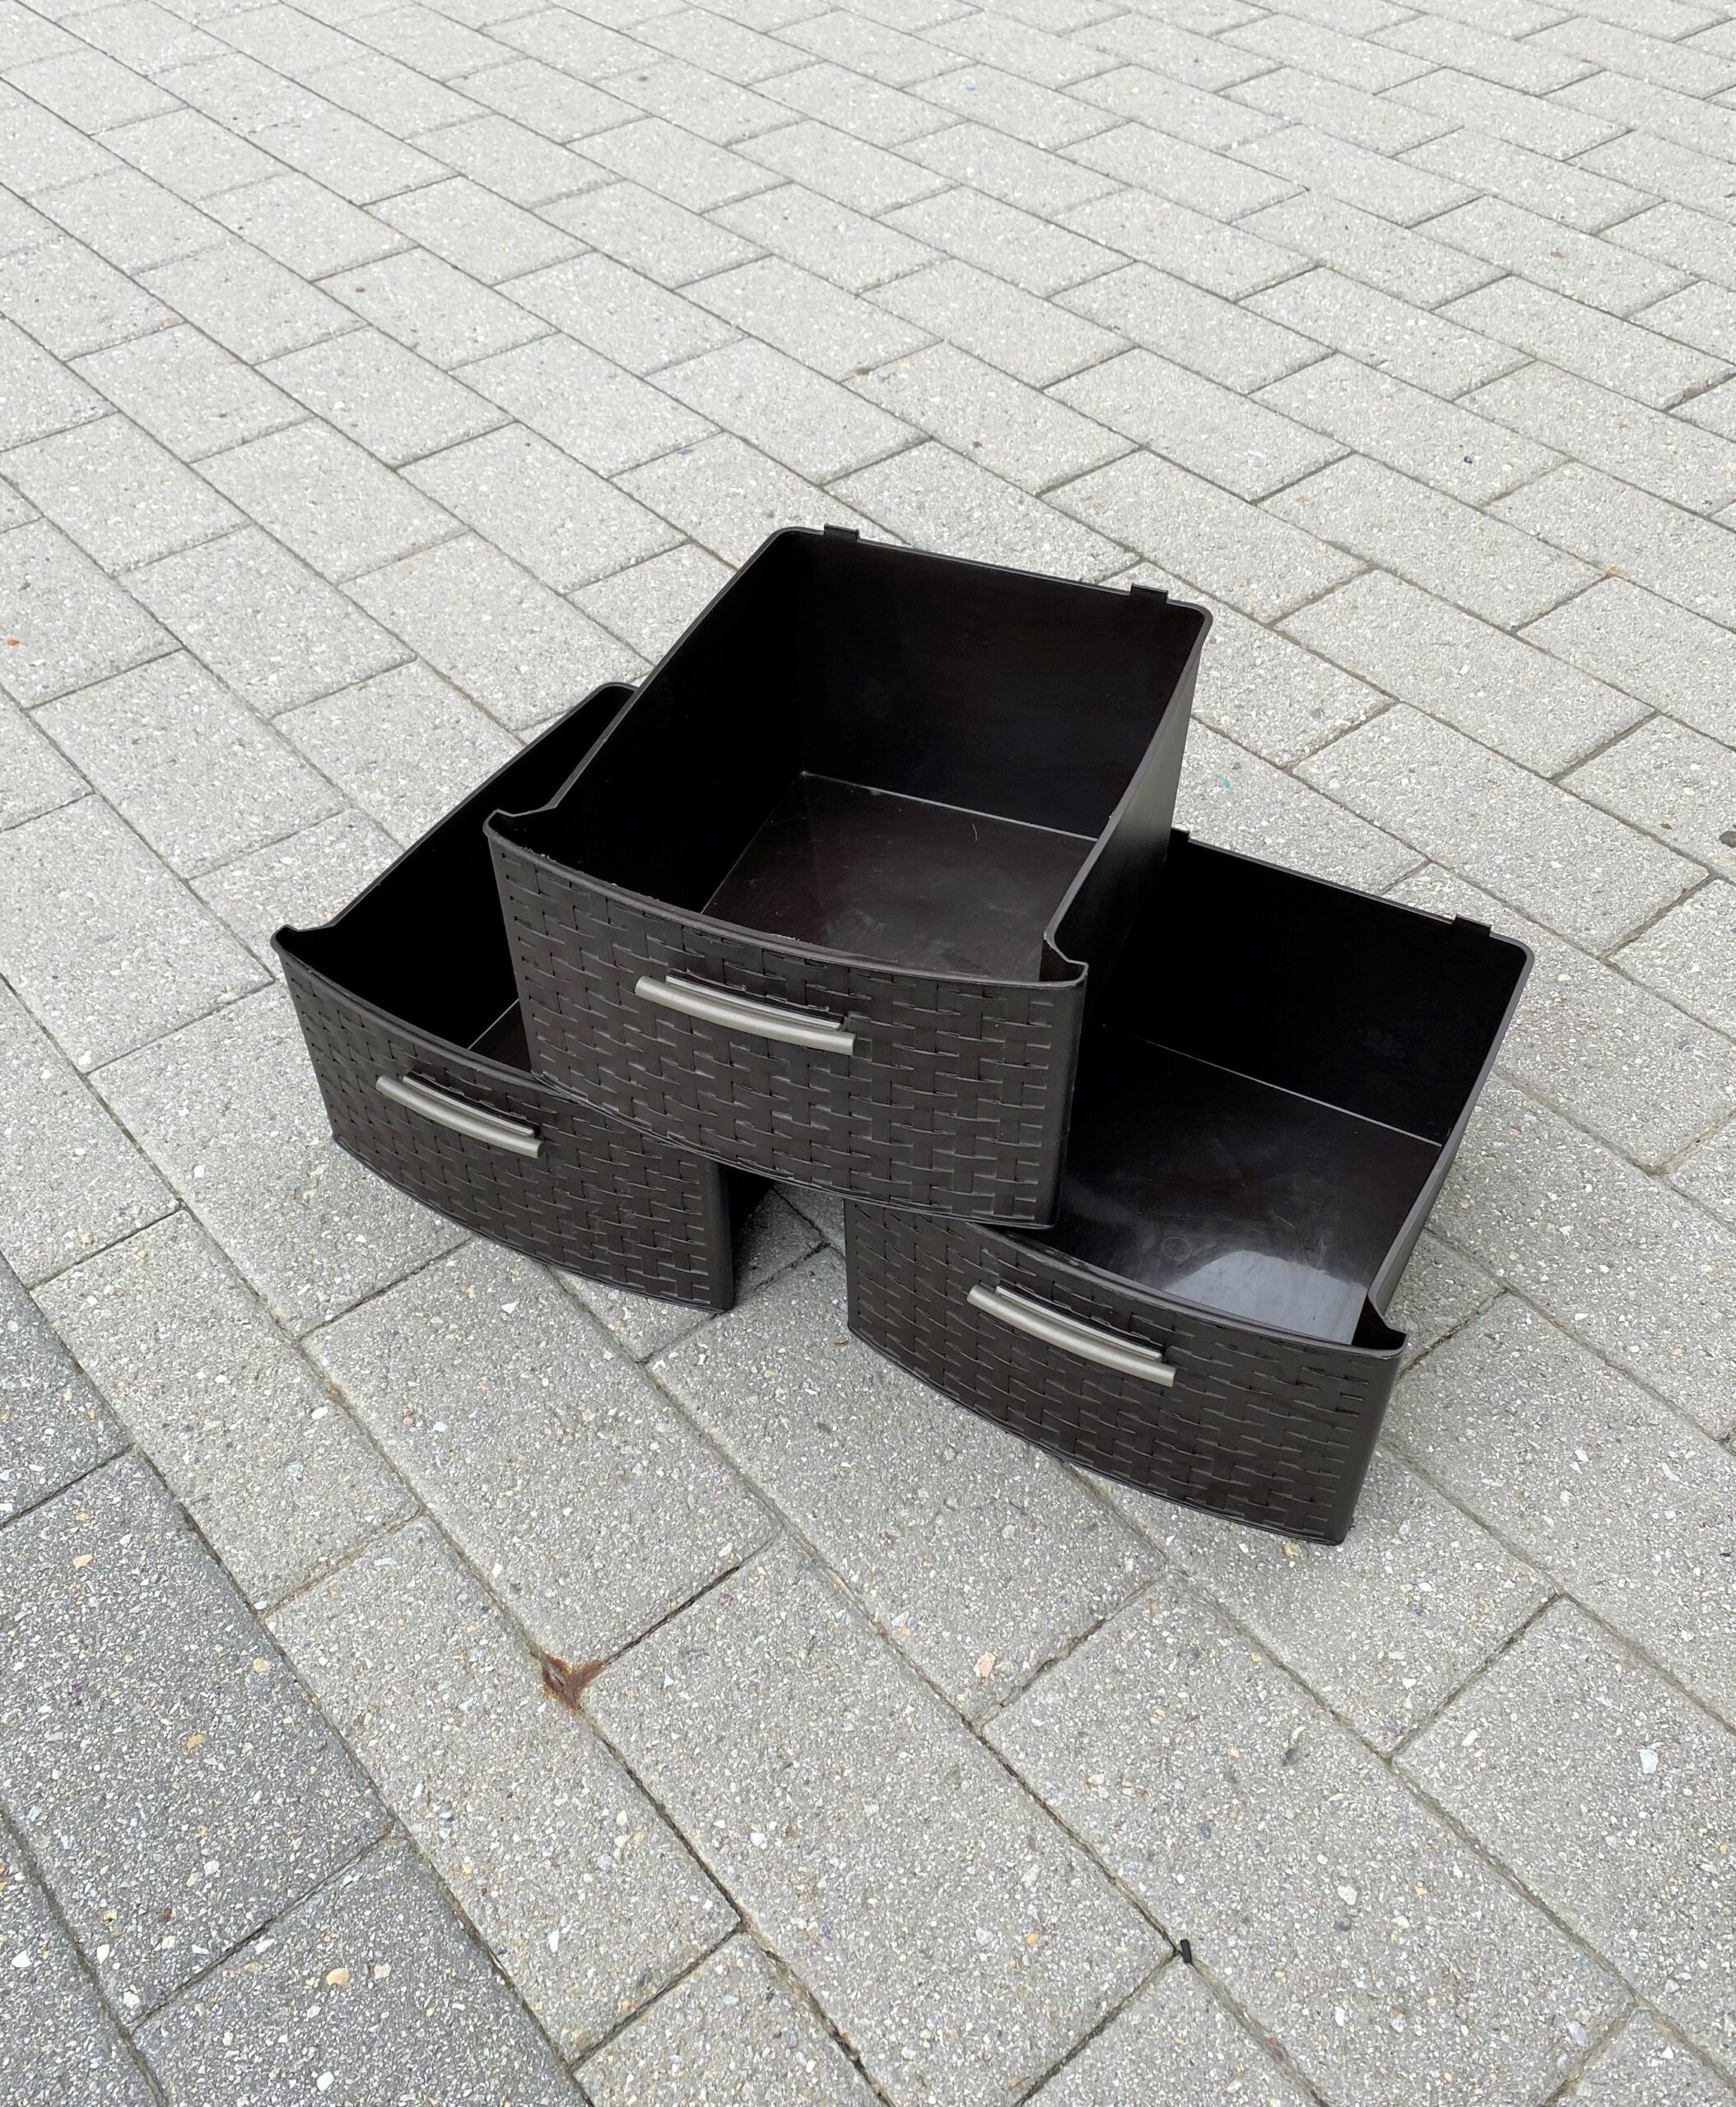
You can also use paint and color to make random accessories look cohesive and connected. A plastic bin with dividers and a handle had the function but not the color I wanted. It got painted.
A cat statue reminded me of my kitty Gypsy, so it when home, too. The statue was white, my cat is black, so I painted it teal! Go figure! The bright color made this little accent piece go from Granny to groovy with a couple of paint sprays!
4. Pull the pieces and parts together
While this is the last step, it truly is the start of a new feel and energy for your home office. This activity is the most fun, in my humble opinion, because you get to see the fruits of your upcycling efforts come together.
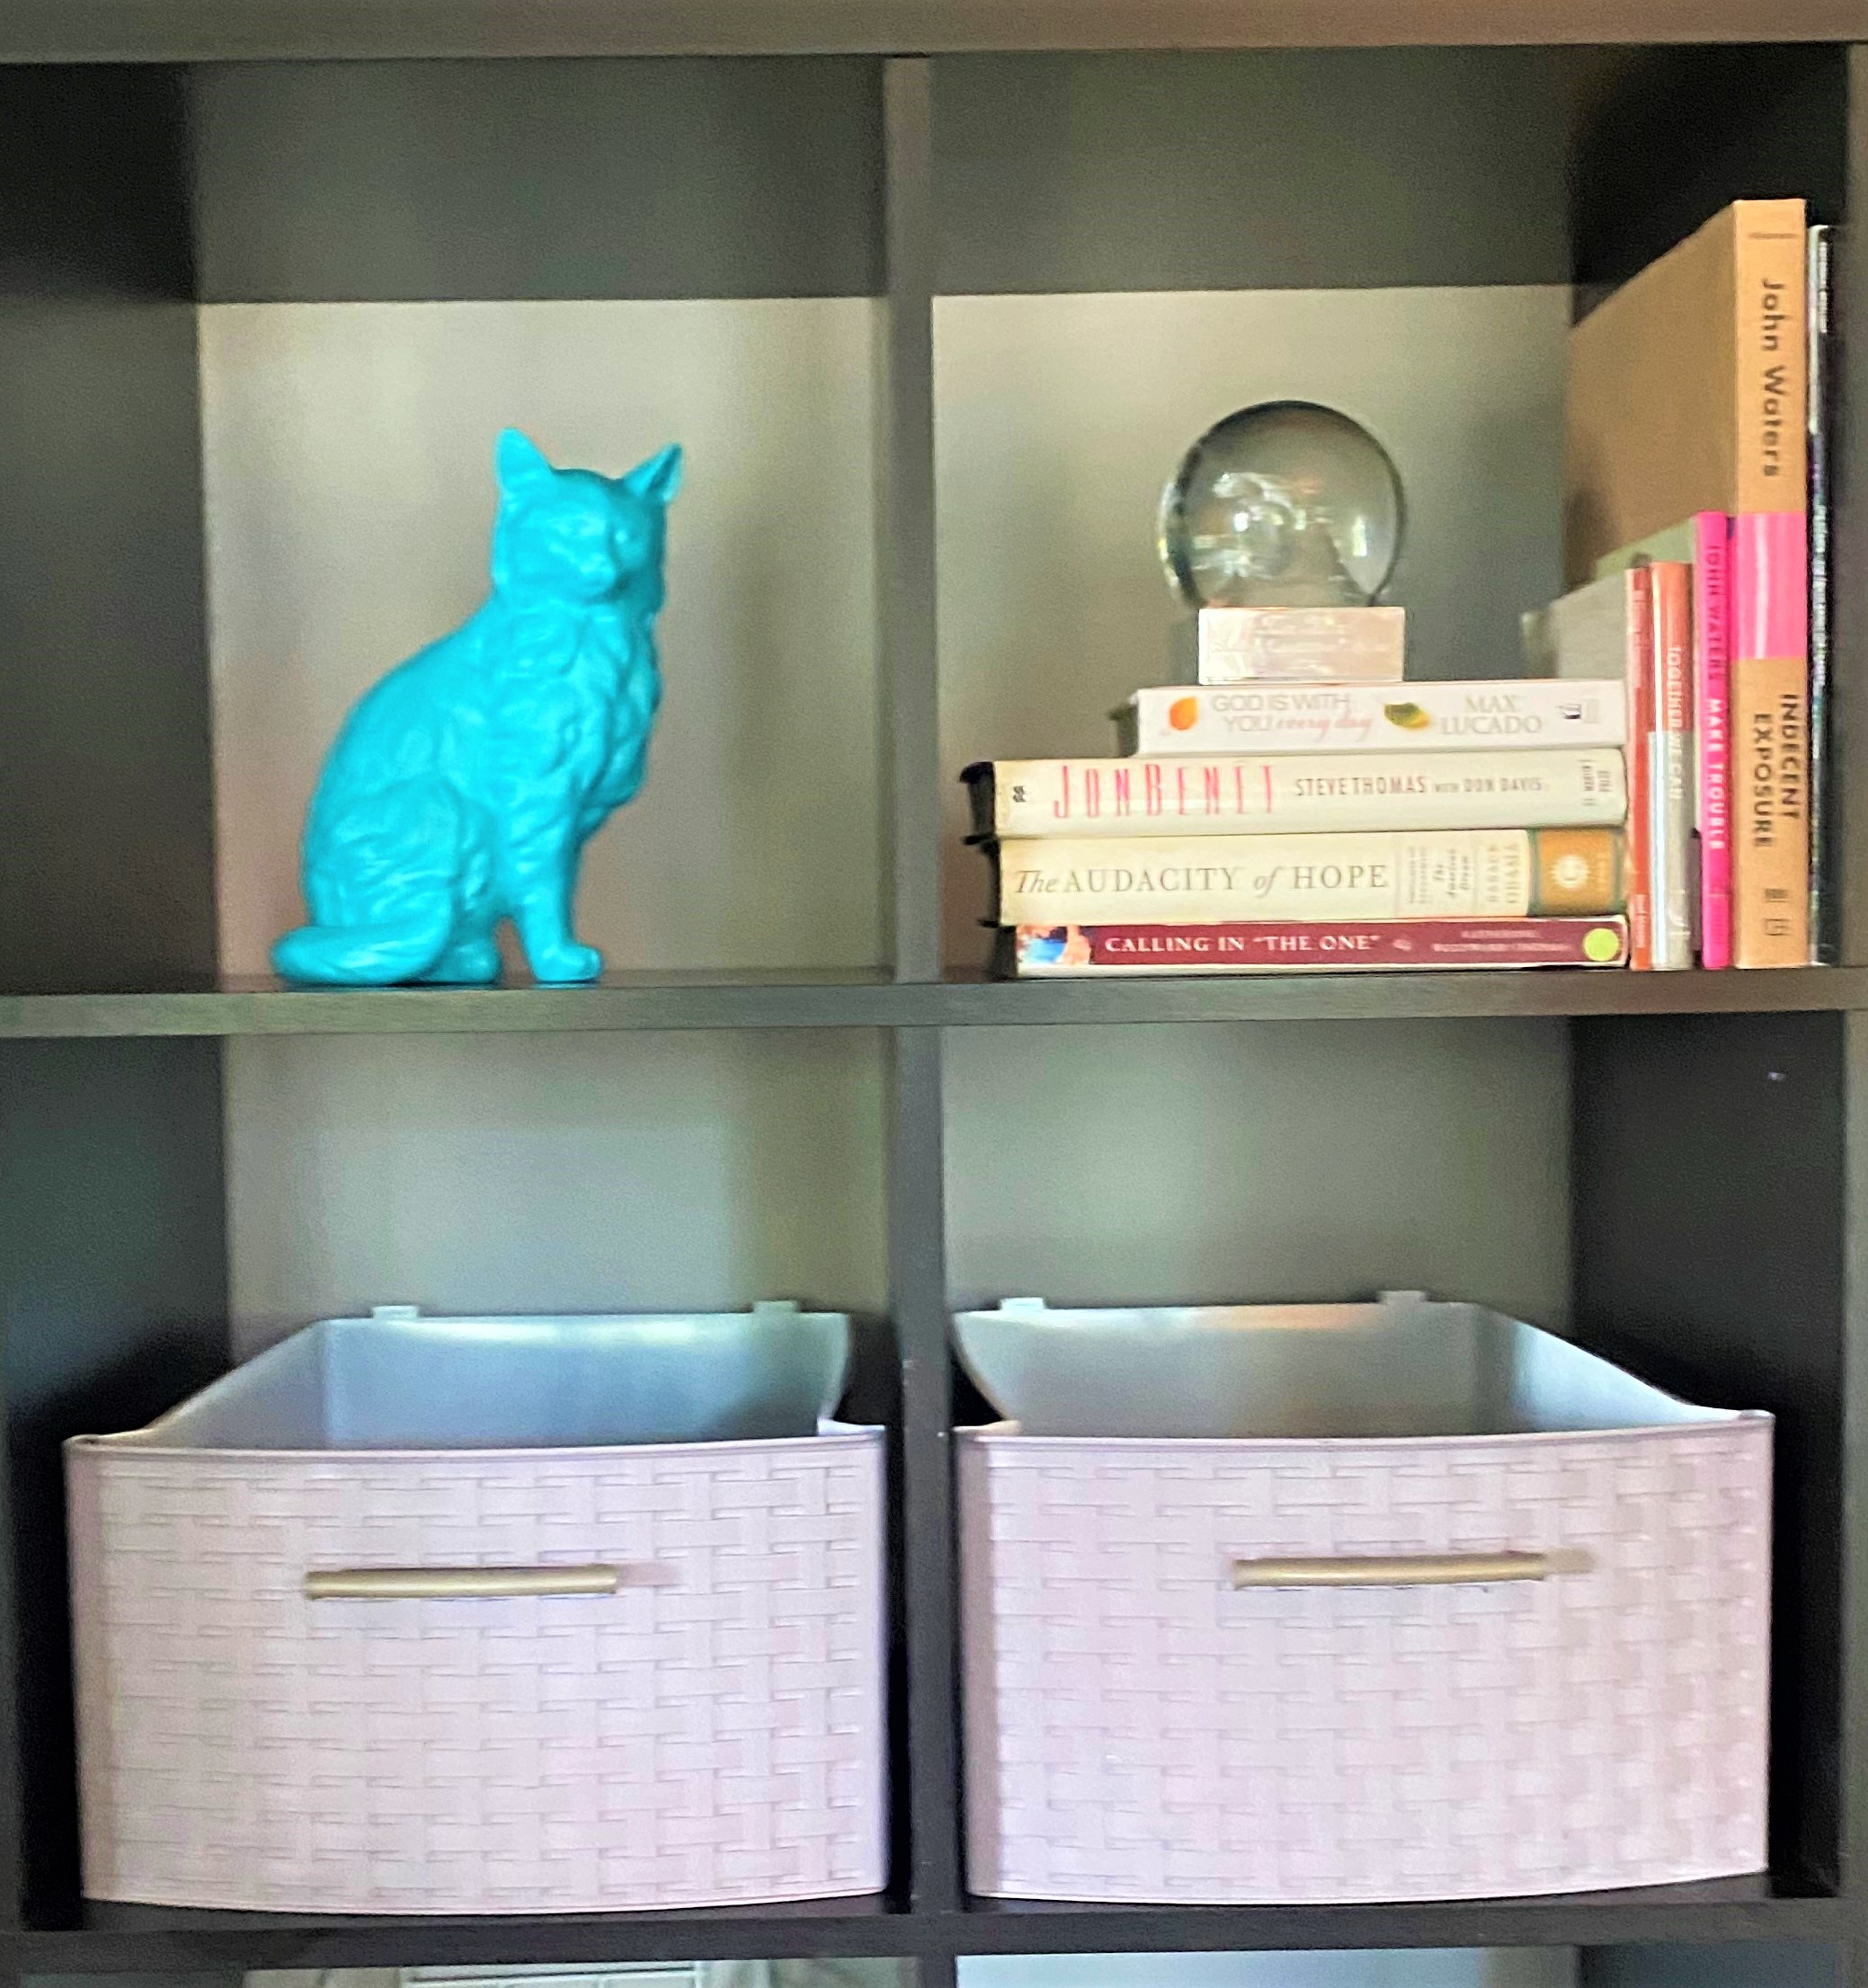
In my previous home office set-up, I had a table, a lamp, and even a bike preventing access to the shelves. Now, nothing is blocking the path to it. The painted storage unit drawers and white wire bins were put at a comfortable level to make them easily accessible. Storage cubes were positioned a little lower since they would be filled with items not for daily use. The shelving unit was personalized by adding special art pieces, a beloved framed print along with meaningful mementos from family and friends.

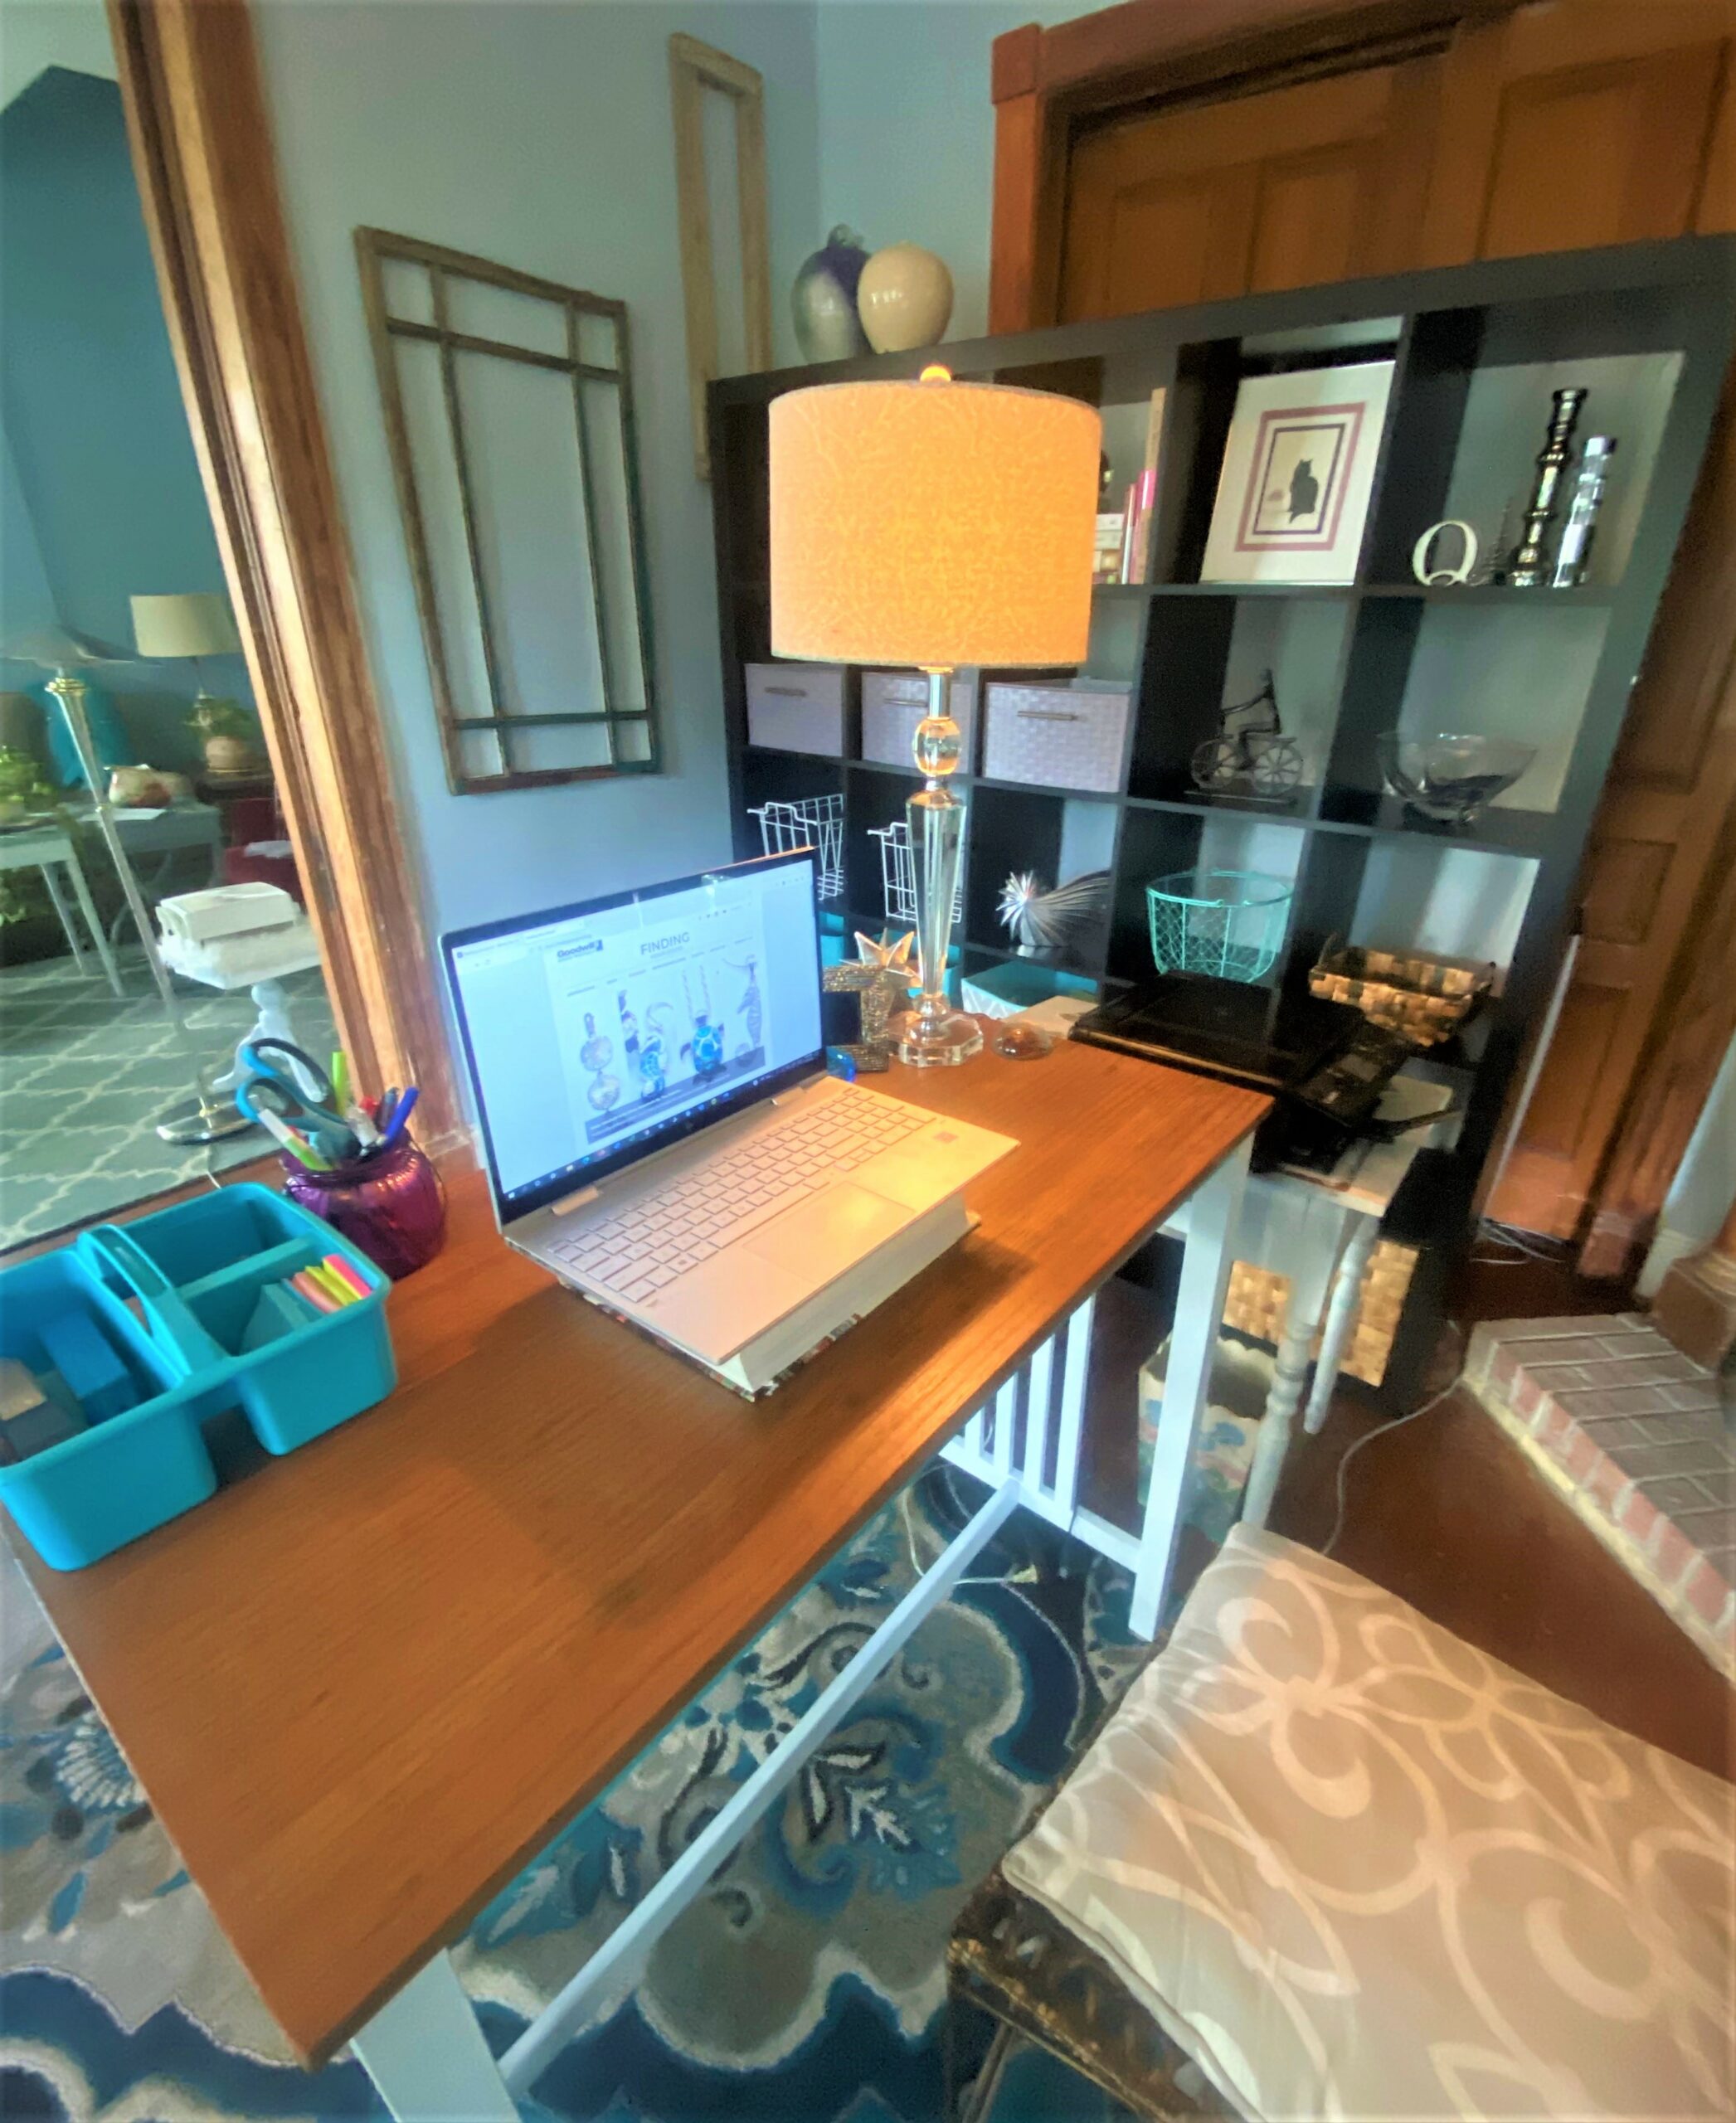
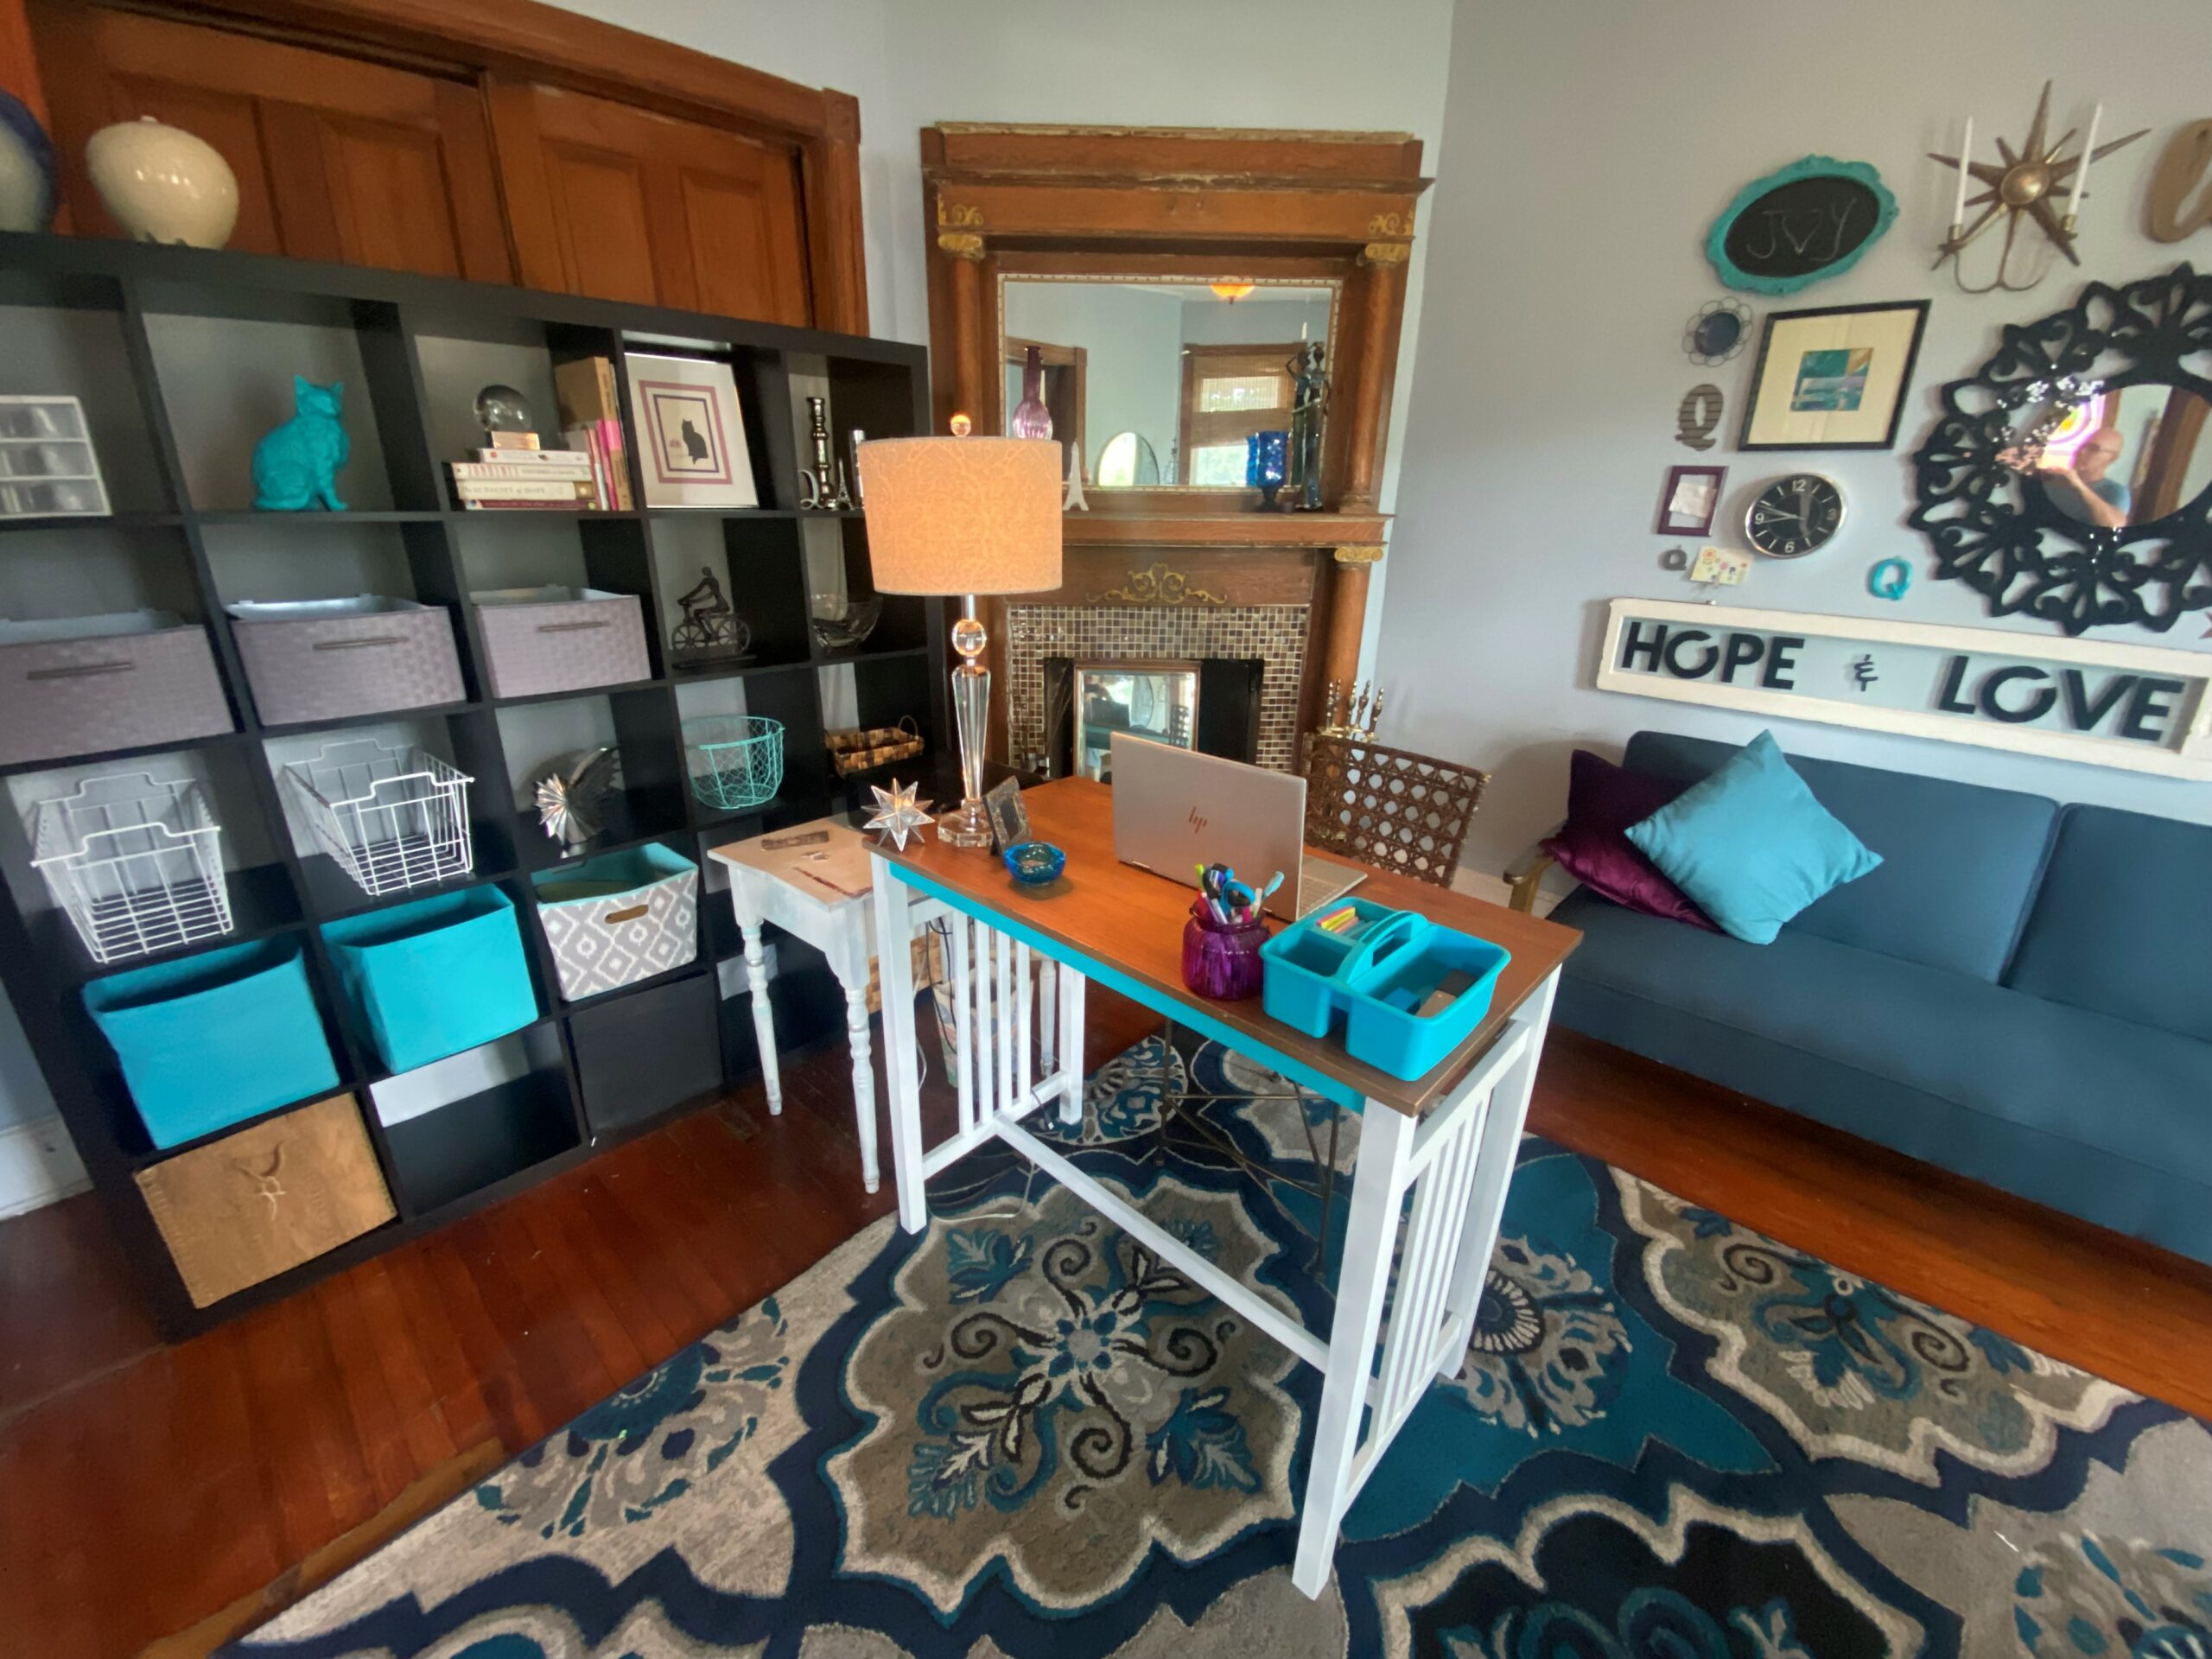
The tall table, now my workstation, was placed near the shelves with space for a second small table to hold my printer. The bar stool was set in place with the chair cushion on top.
The glass-based lamp was positioned in the corner for good lighting.
To keep the top of the workstation decluttered, only essential items and a couple of accessories were added, including the small painted plastic bin to store items and a purple glass lantern repurposed to hold pens.
I love, love, love my home office’s new, vibrant look and more user-friendly way of keeping it (and me) organized. I’m ready to get to work—and maybe some play—there now!
Expert Tips:
Enlist a helper
If possible, enlist the help of a friend or family member to guide and support you through the process. My sister is a great sounding board, so I could think things through with her before tackling the project. A neighbor, Heather, enlisted me to help transform and refresh her living room, using her own items. To see how, here is an earlier DIY blog on that fun project.
Remember your zoom call background
Just because you are working from home, doesn’t mean your place shouldn’t look good and presentable. Even after all this time of working remotely, it is amazing that folks forget their backgrounds while holding virtual meetings. Here’s a DIY blog to help you elevate your zoom presence while in your home office space.
Another DIY Idea:
In the pictures of my home office, you are able to see my living room. The space above the couch is a collection of items and art that make a statement when put together. A lot of thought and energy went into turning this area into a “gallery wall.” To see how it was done as inspiration for your home, here’s an earlier blog on that project.

Tim Kime
Artist, Motivational Speaker, Life Coach
