
From Thrift to Throne: Create a Queen of Hearts Mannequin
What do you get when you combine a thrifted mannequin, a heart-shaped purse, playing cards, and a pile of buttons? A one-of-a-kind Queen of Hearts.
In honor of March as Women’s History Month, I transformed a simple dress form into a playful, royal artwork. Using found objects and art supplies collected over time—many from Goodwill and art supply swap events—I created a whimsical tribute to feminine strength, creativity, and courage.

Here’s how you can create your own regally upcycled masterpiece.
1. Find your good & inspiration at Goodwill
So many remarkable women work at every level of leadership and service at Goodwill of Greater Washington. Their work helps people gain skills, confidence, and opportunities to transform their lives.
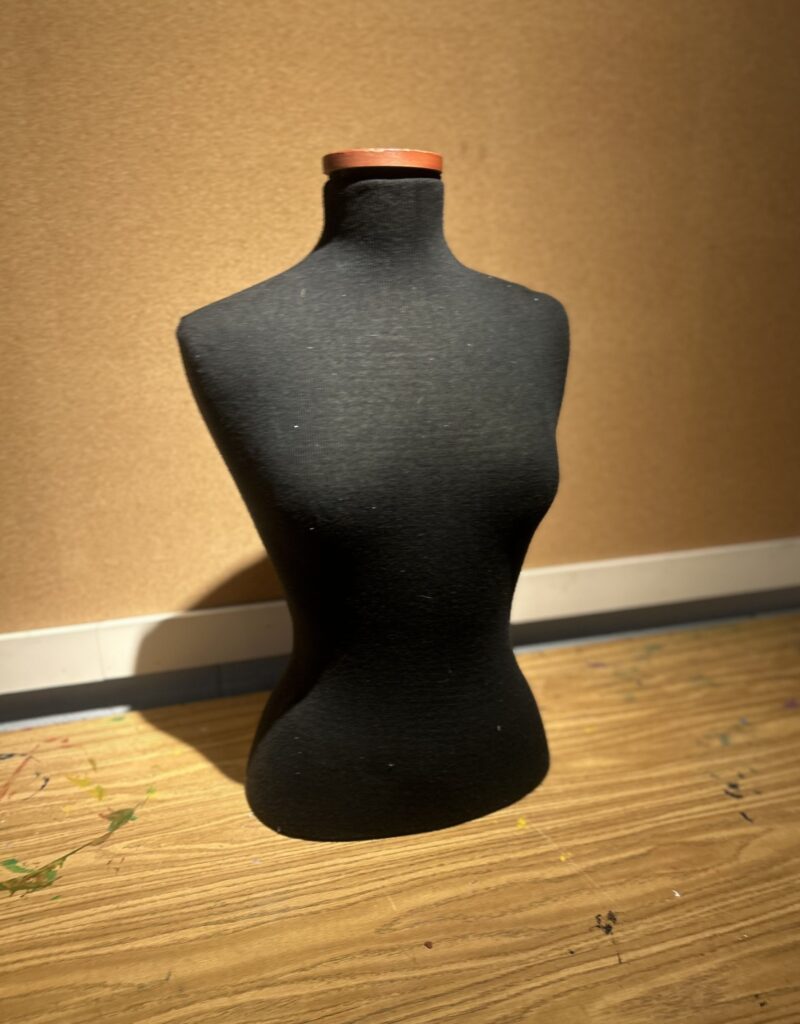
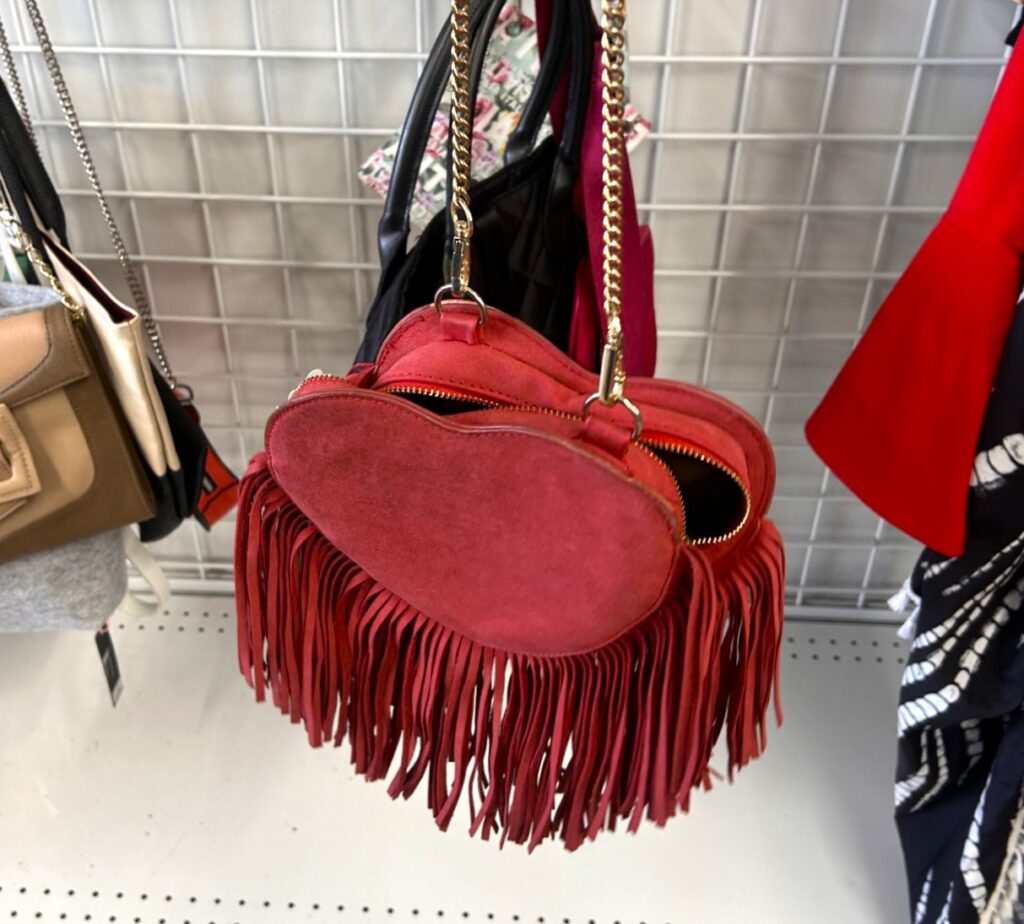
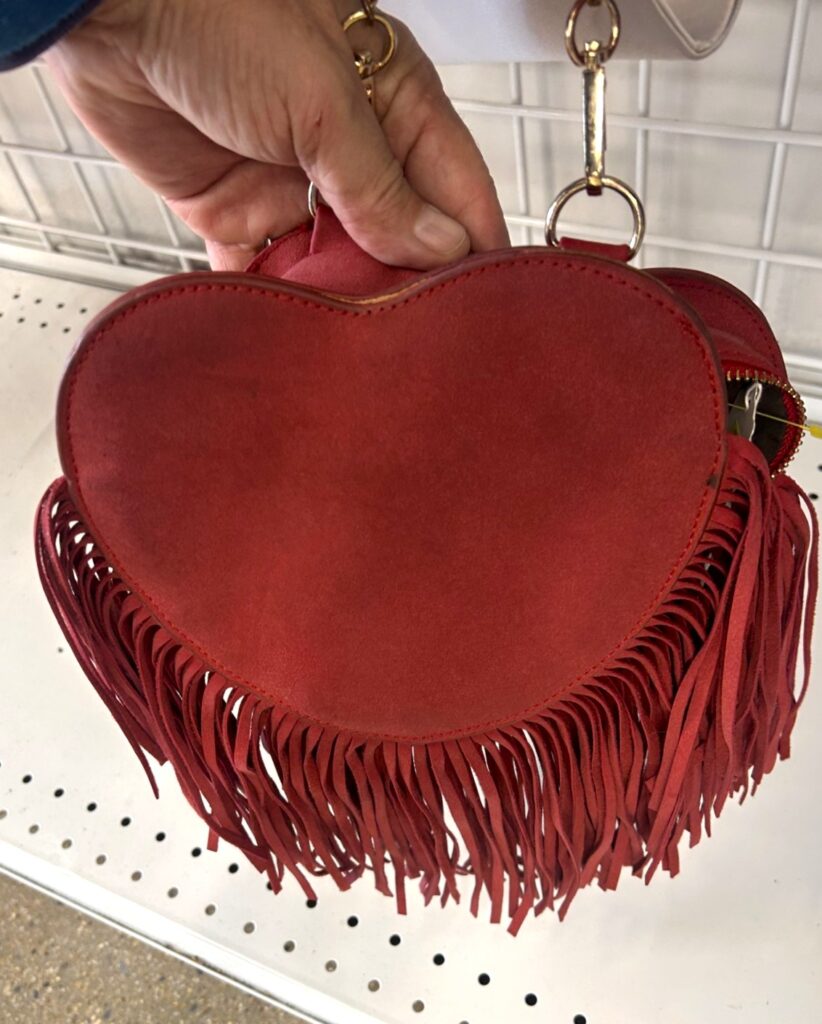
Inspired by that spirit of transformation, I started with a mannequin I had picked up during a previous Goodwill treasure hunt. Other Goodwill finds included a fringed heart-shaped suede purse and a leopard-print belt. At the time I discovered them, I had no idea they would eventually come together in this project.

My advice? If you see something at your favorite Goodwill nonprofit retail store that catches your eye—even if you’re not sure how you’ll use it—bring it home. Creative ideas often appear later when you least expect them.
2. Collect creative treasures
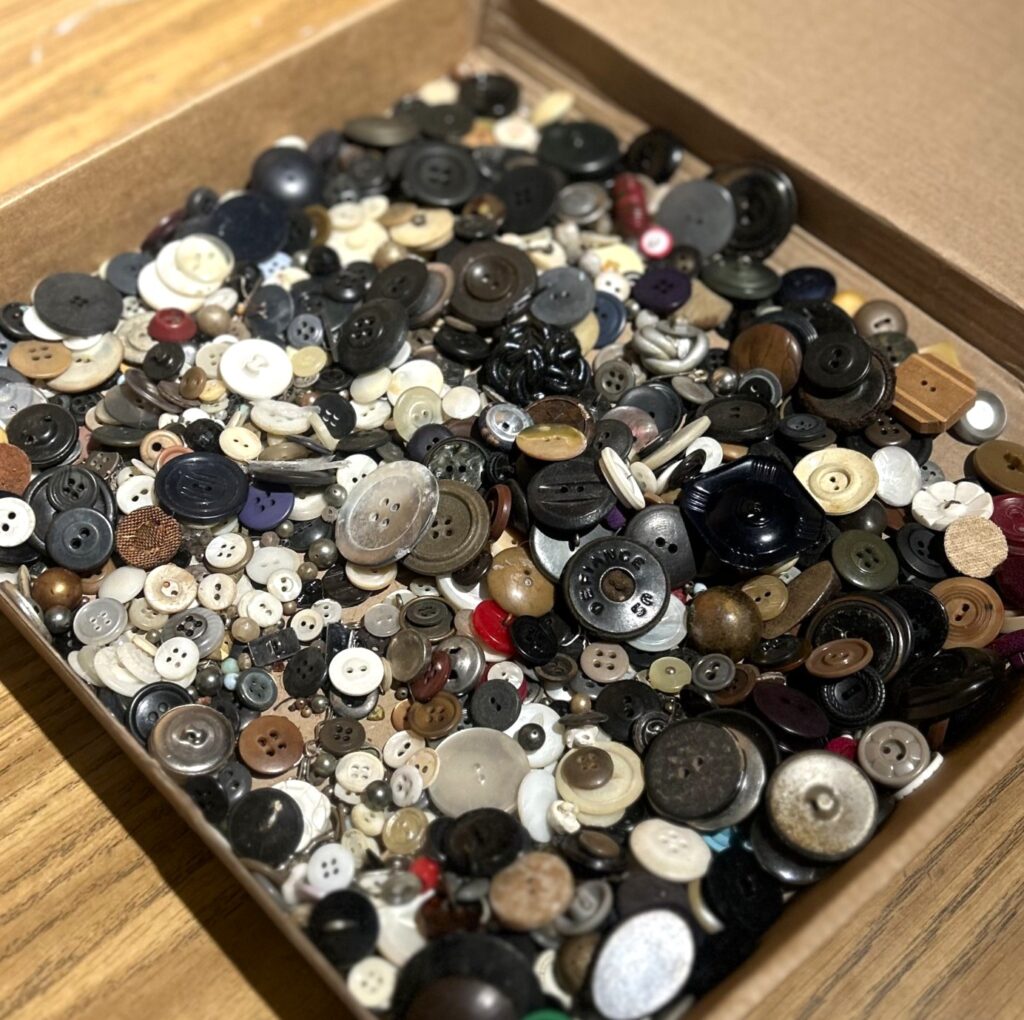
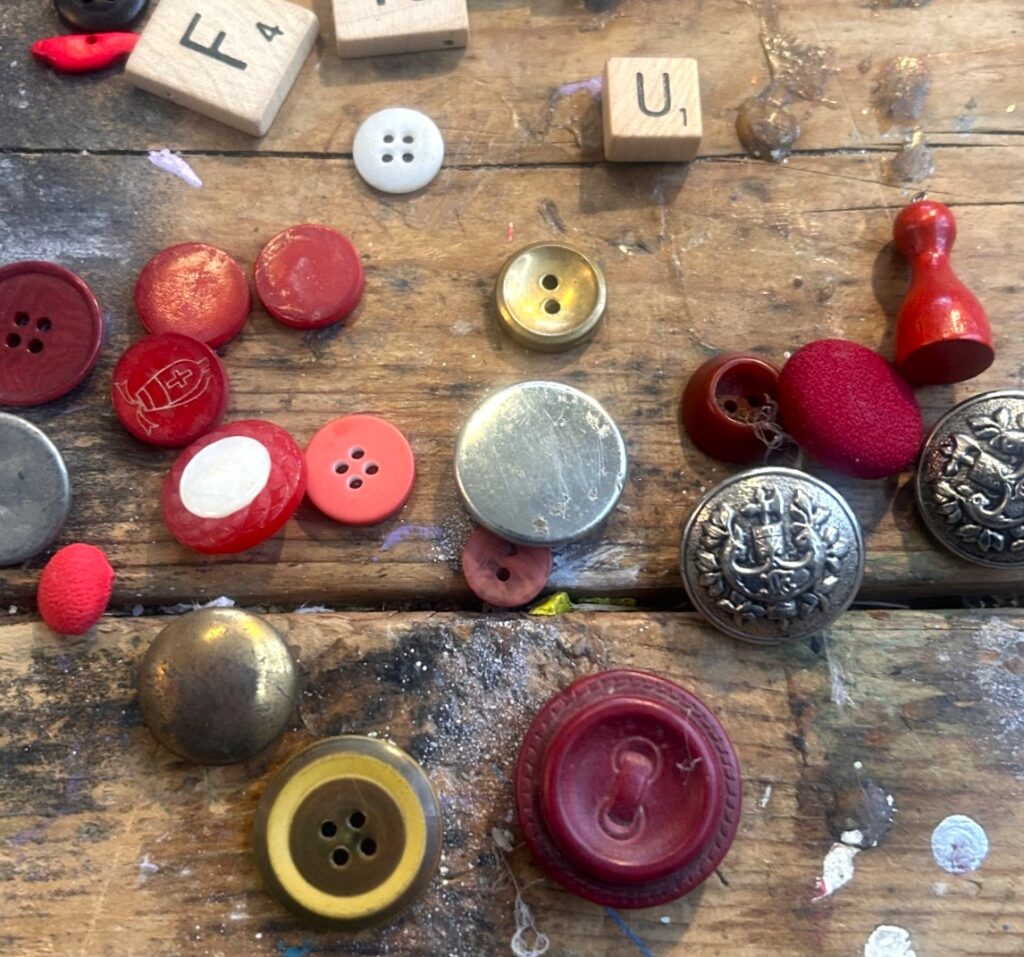
Many of the materials used in this project came from an Art Supply Swap hosted by Finding Your Good and Tim Kime Art during Brookland’s Art Walk on March 10. The event brought together creative people carrying bags full of arts and craft materials ready for a second life. Buttons, playing cards, costume jewelry, and other artistic treasures changed hands—and sparked new ideas.
Events like these remind us that creativity and reuse go hand in hand. And if you miss a swap event, you can often find similar treasures waiting on Goodwill shelves.
3. Choose a theme & color palette
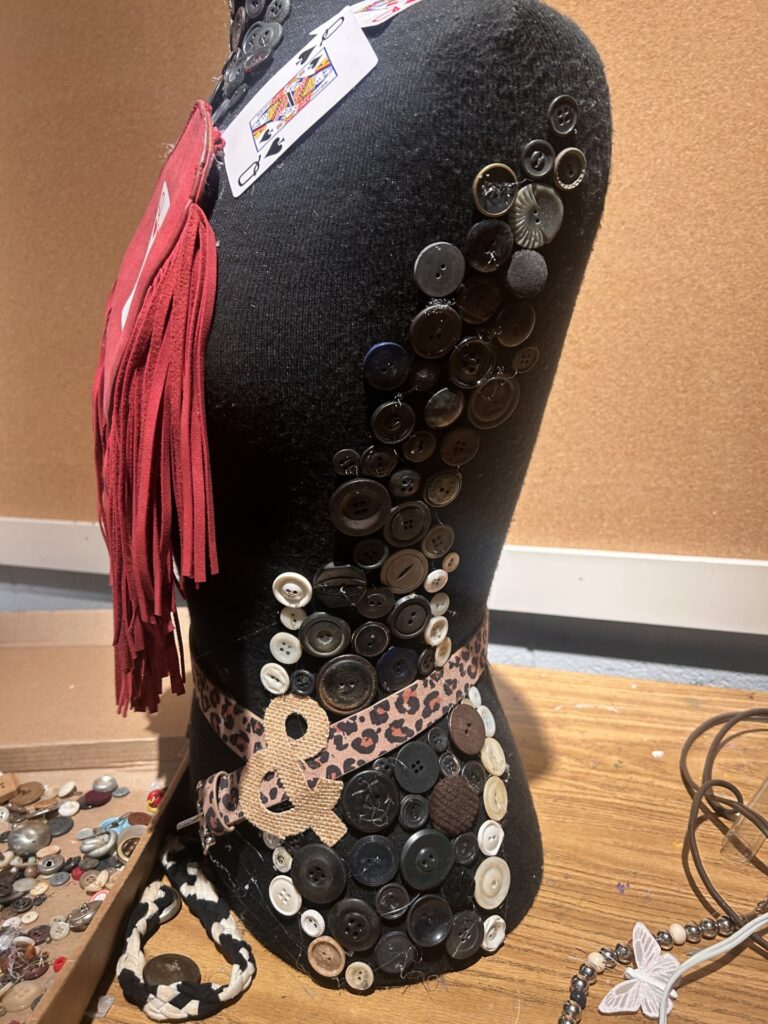
There are countless ways to transform a mannequin into an art piece. The key is to start with the materials you have and see what story they suggest. While sorting through my supplies, a Queen of Hearts playing card caught my eye. Looking at my button collection, I noticed many were black, white, and ivory—perfectly matching the card’s bold red and black colors and the mannequin’s dark fabric.
Then came the finishing inspiration: a leopard-print belt and a red suede heart-shaped purse. The Queen of Hearts theme was officially born.
Other mannequin design ideas could include:
- Collaging with sheet music, book pages, or calendars
- Creating a fabric base from thrifted clothing
- Adding tiles or broken ceramics for a mosaic effect
- Incorporating jewelry, ribbons, or found objects
Design Tip: Keeping your color palette simple helps the final piece feel cohesive and visually striking.

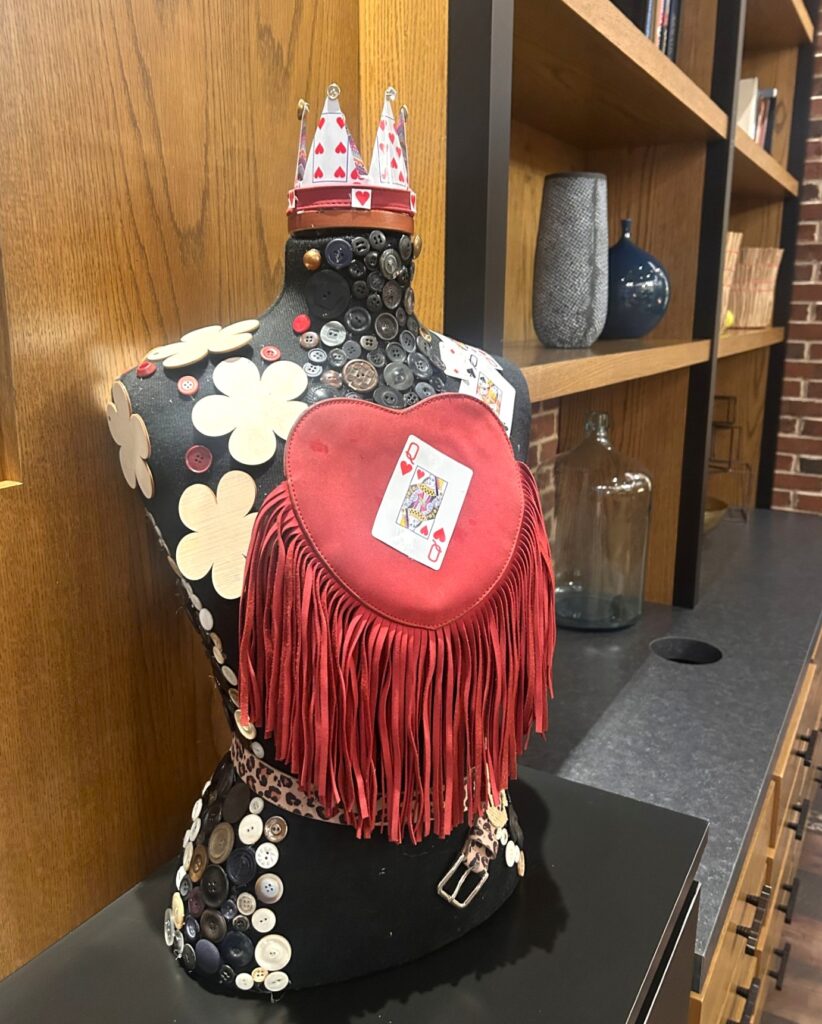
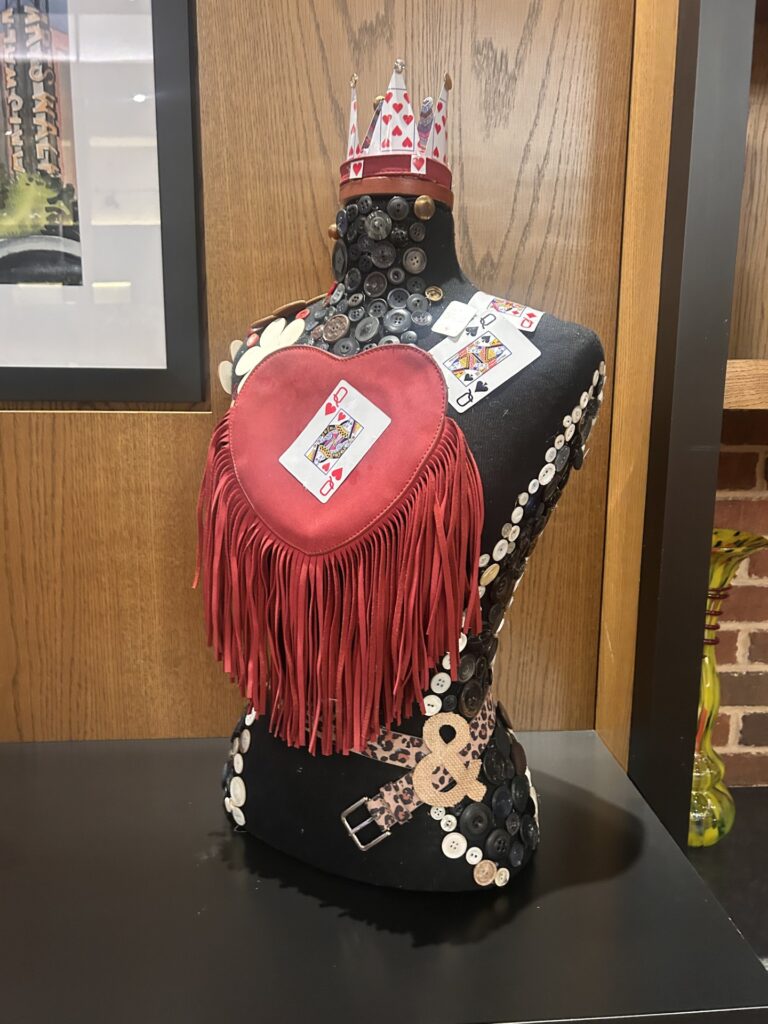
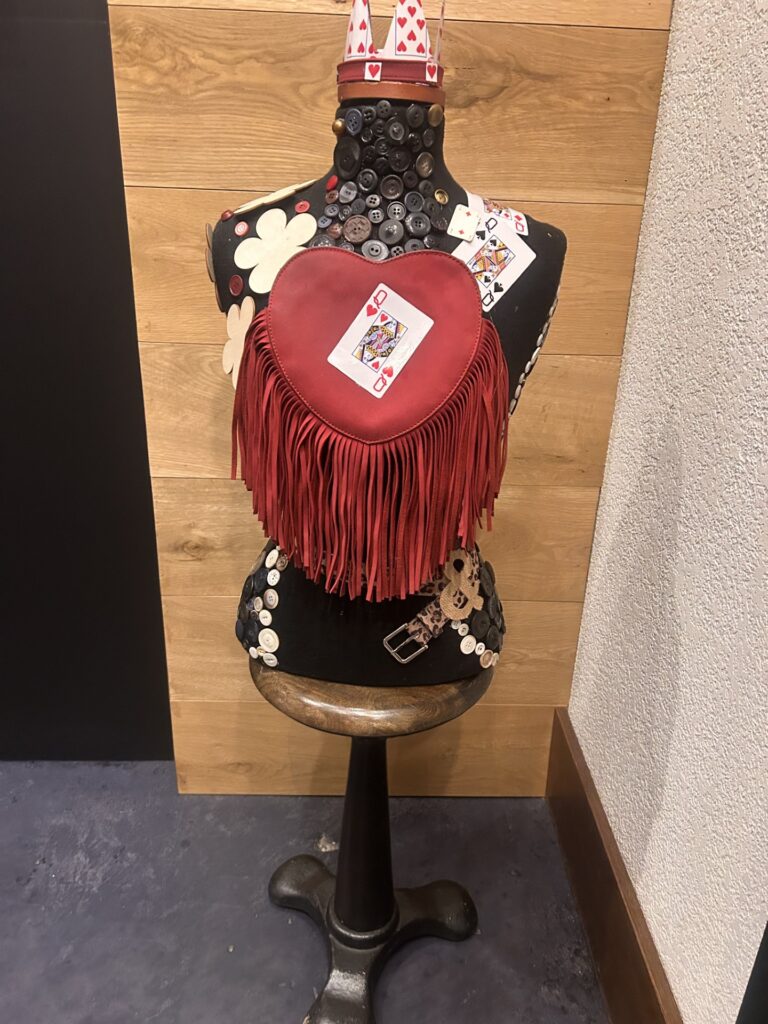
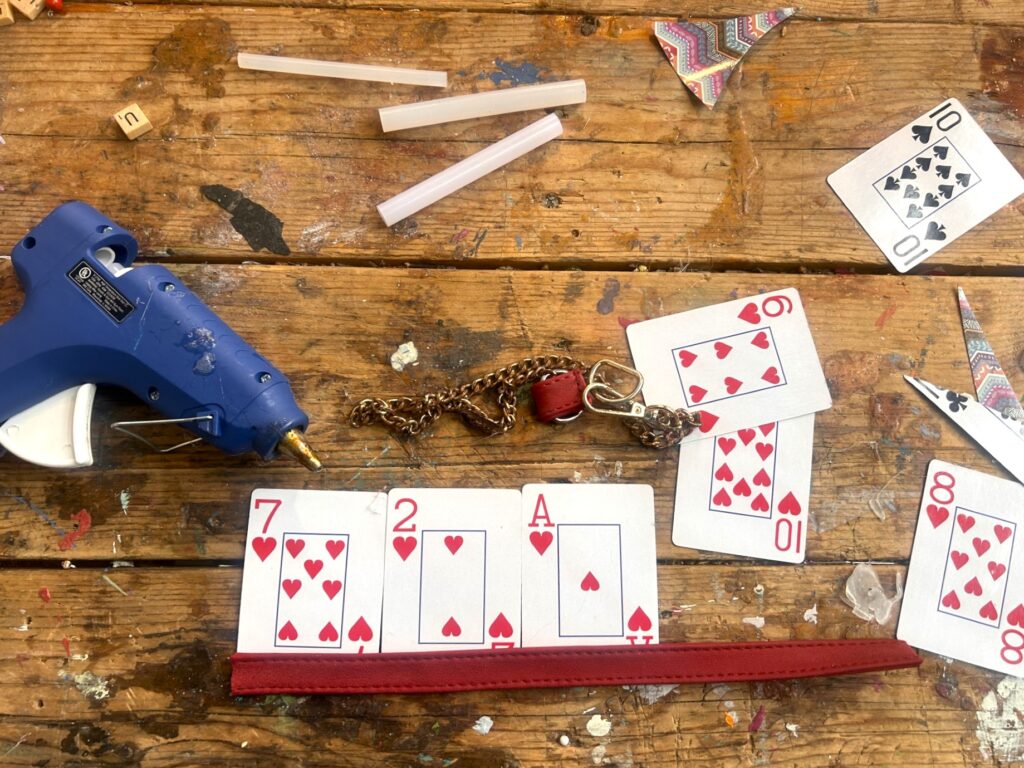
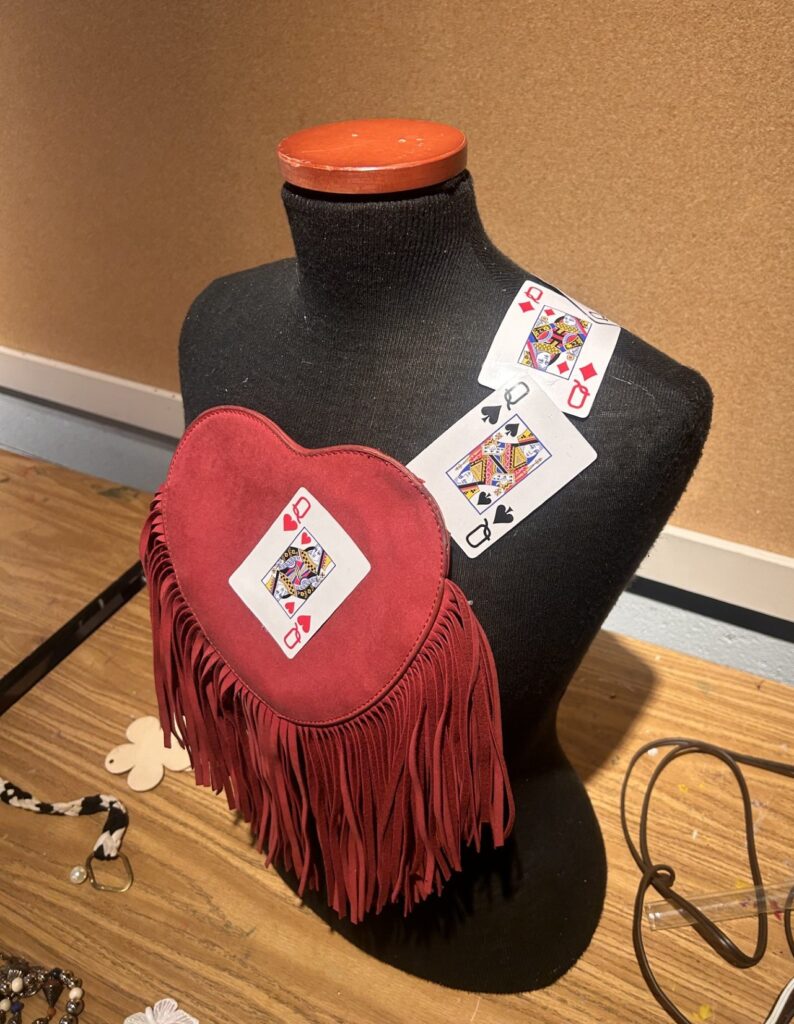
4. Start with the heart
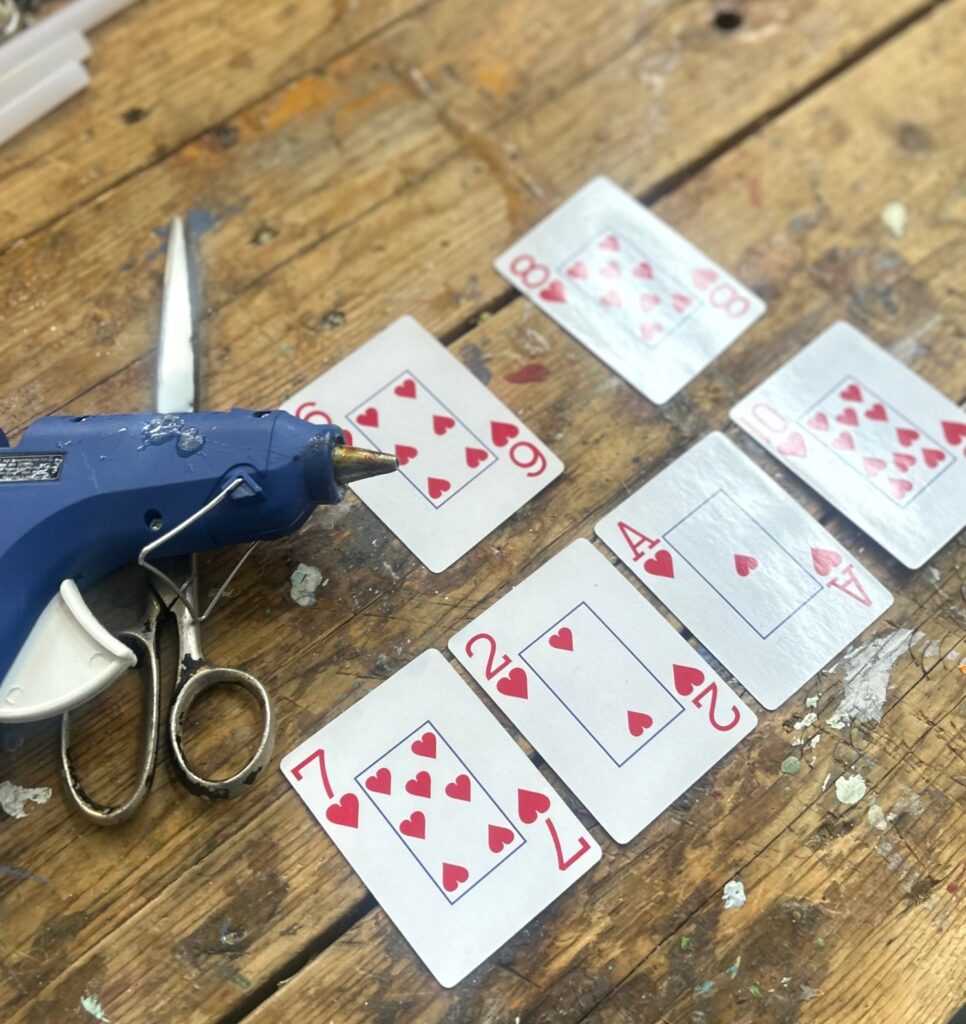
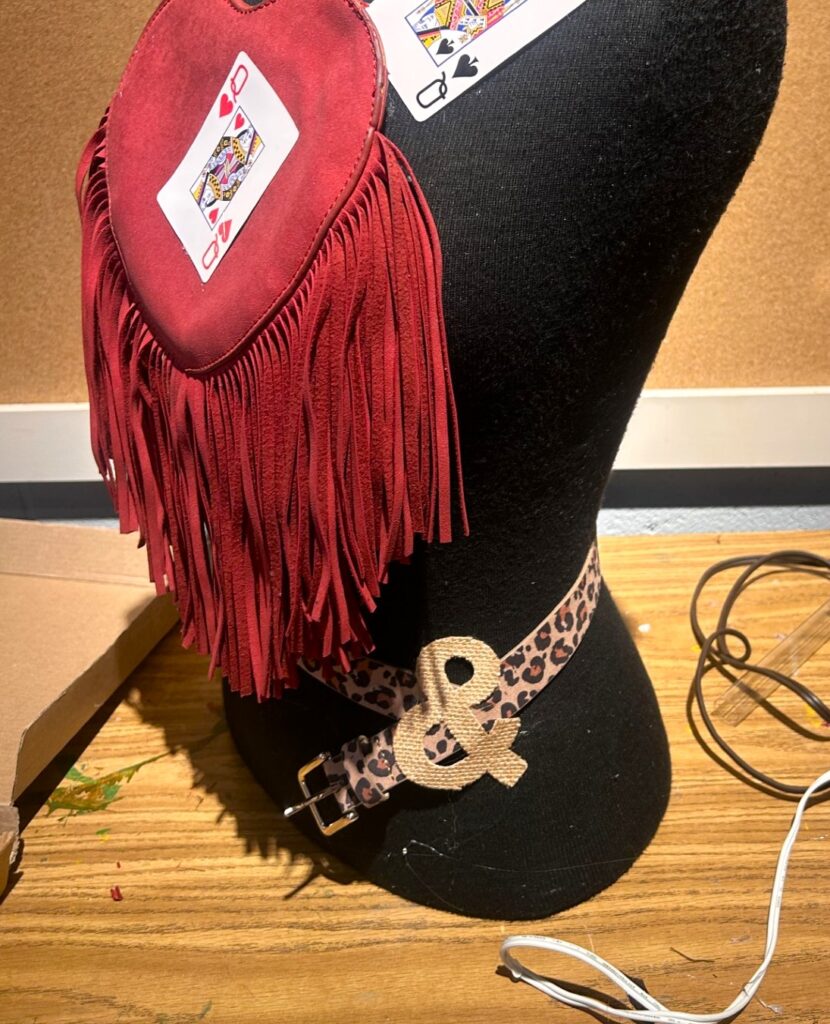
The fringed heart-shaped purse became the centerpiece of the design. I carefully cut the purse and secured the heart to the mannequin’s front with hot glue. A Queen of Hearts playing card was layered diagonally on top to add movement and visual interest.

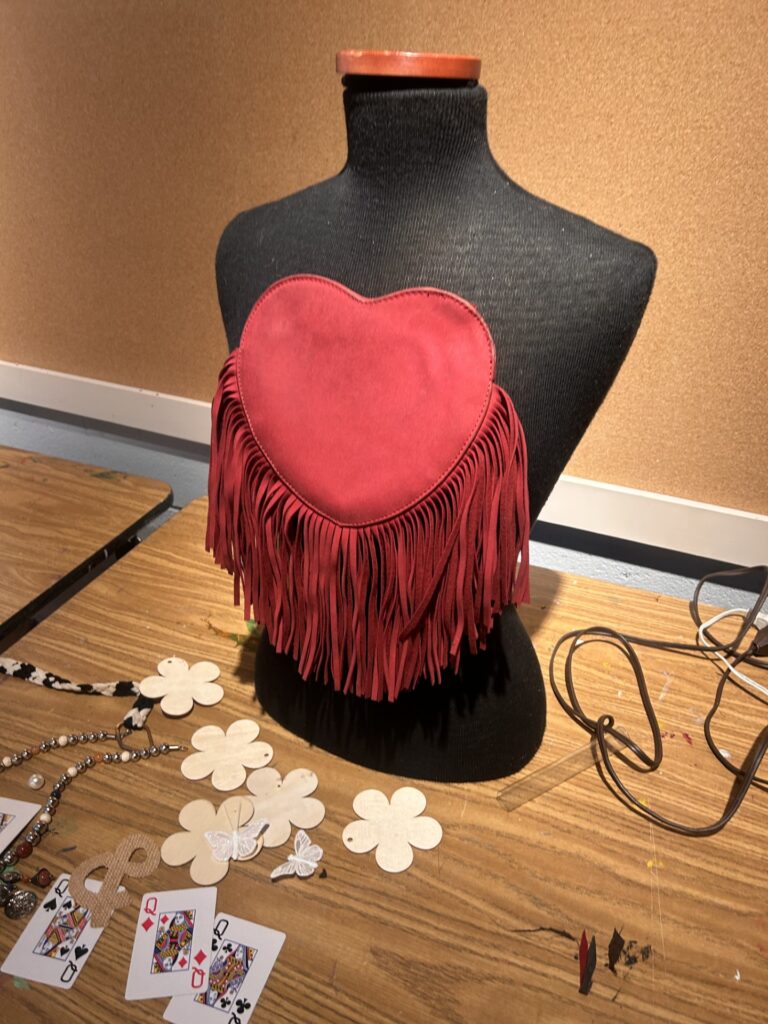
Additional queen cards were placed along the right shoulder, guiding the viewer’s eye upward. Flat wooden flower shapes were added to the left shoulder area for balance and a bit of whimsy.
The leopard-print belt was draped around the waist and secured in place, with a burlap ampersand added on top. The warm tones of the flowers connected beautifully with both the belt and the ampersand.


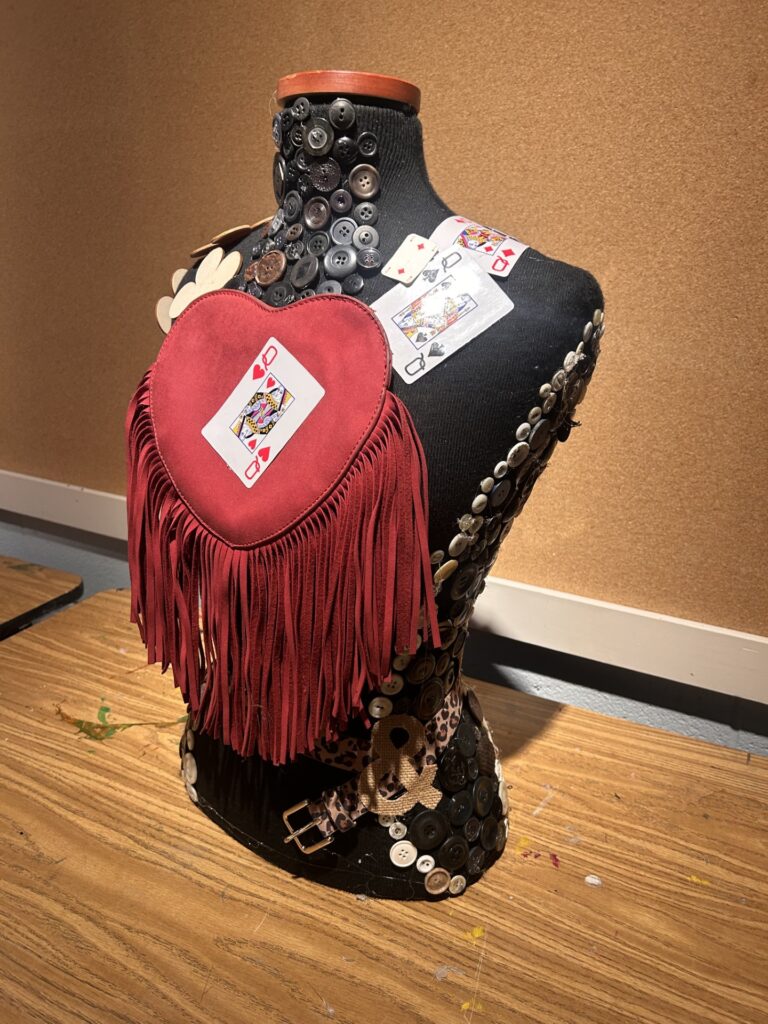
5. Bring on the buttons
This step requires two important things: plenty of glue sticks and a little patience. Instead of covering the entire mannequin, I created flowing sections of buttons along each side. Black buttons were glued one by one, leaving some of the original fabric visible to create interesting negative space. Next, I outlined these areas with white and ivory buttons to add contrast.
More black buttons were added around the neckline and chest, while red buttons were tucked among the wooden flowers to visually connect that area with the red purse and playing cards. Finally, a few gold buttons were added near the neckline for a touch of shimmer and to echo the gold belt buckle.
Expert Tip: A small warning—tiny buttons and hot glue can be tricky—watch those fingers!
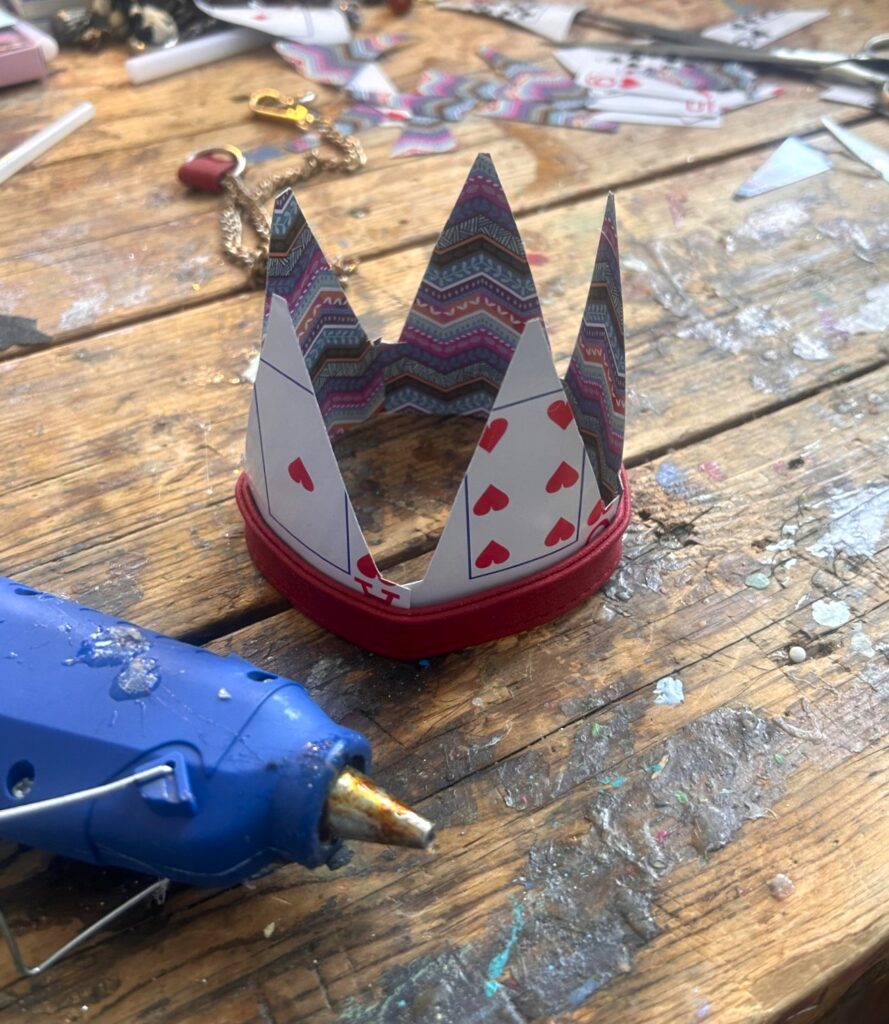
6. Every queen needs a crown
Your queen deserves a crown. To complete the look, I created one using the same materials found throughout the piece.
Part of the purse strap became the crown’s base. Playing cards were glued along the strap, and heart shapes cut from additional cards were layered on top.
Gold buttons were added at the tips for sparkle, and a faux diamond from an old pendant provided the perfect finishing touch.
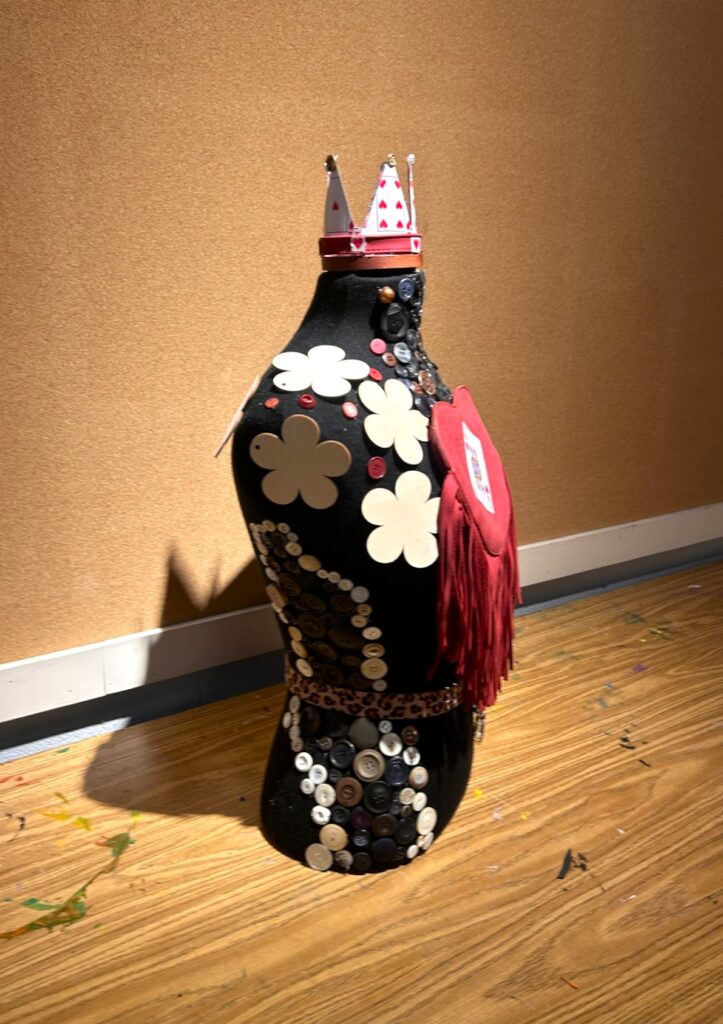

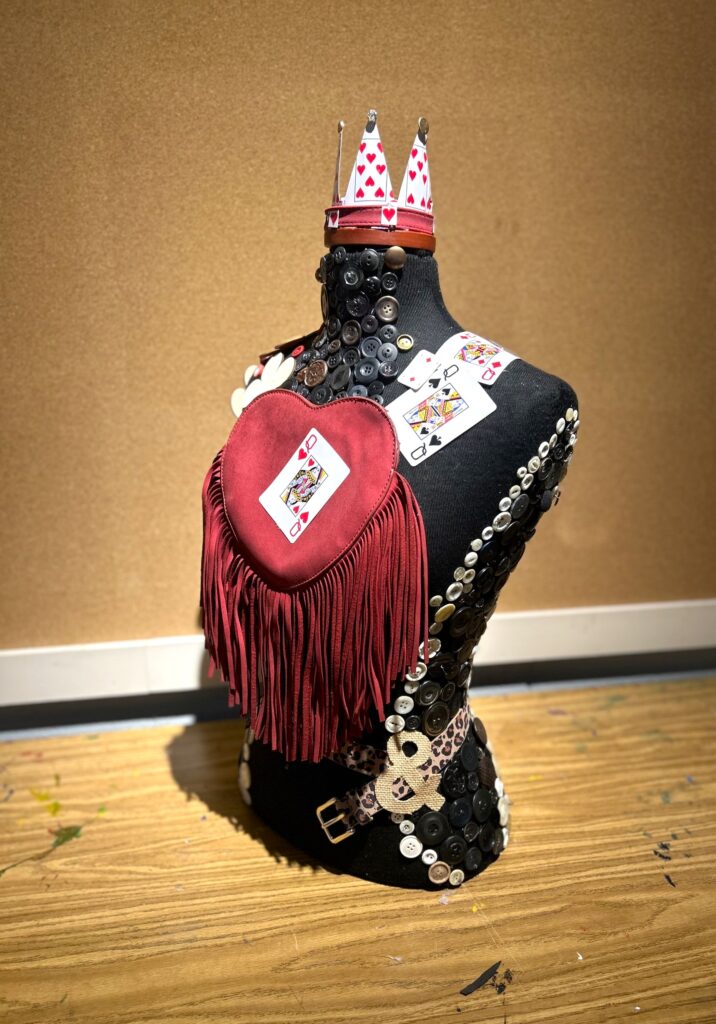
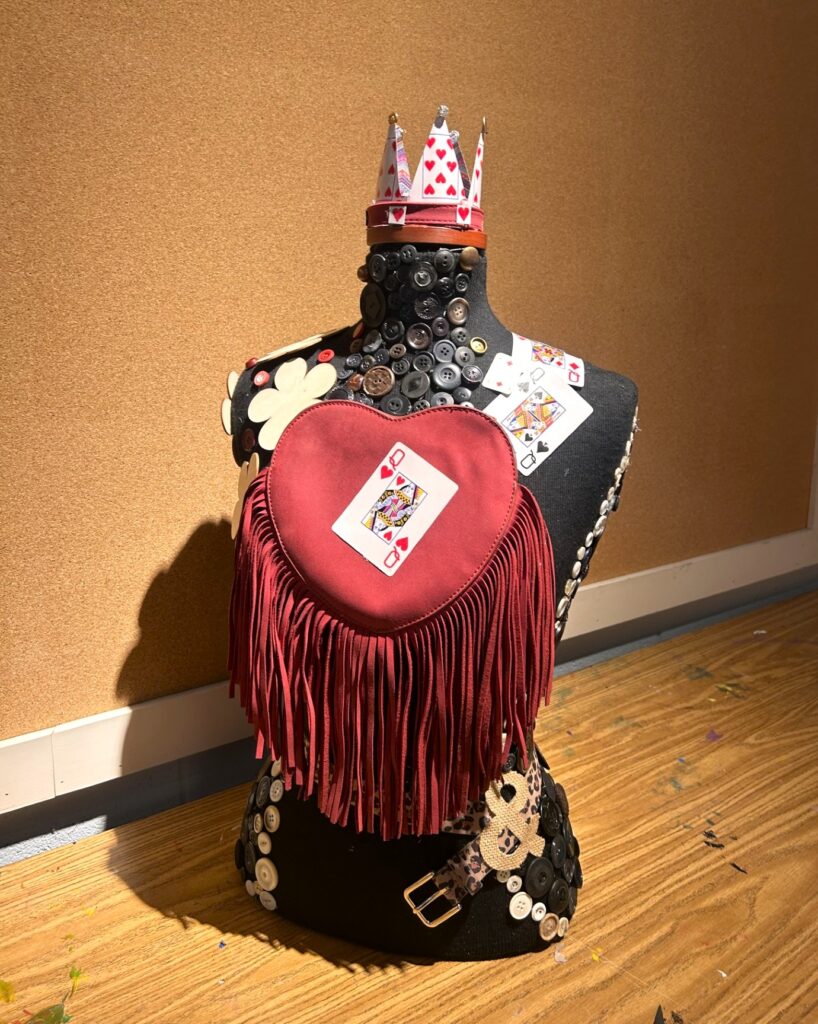
The completed crown was secured at the top of the mannequin, transforming the wooden neck topper into a royal detail.
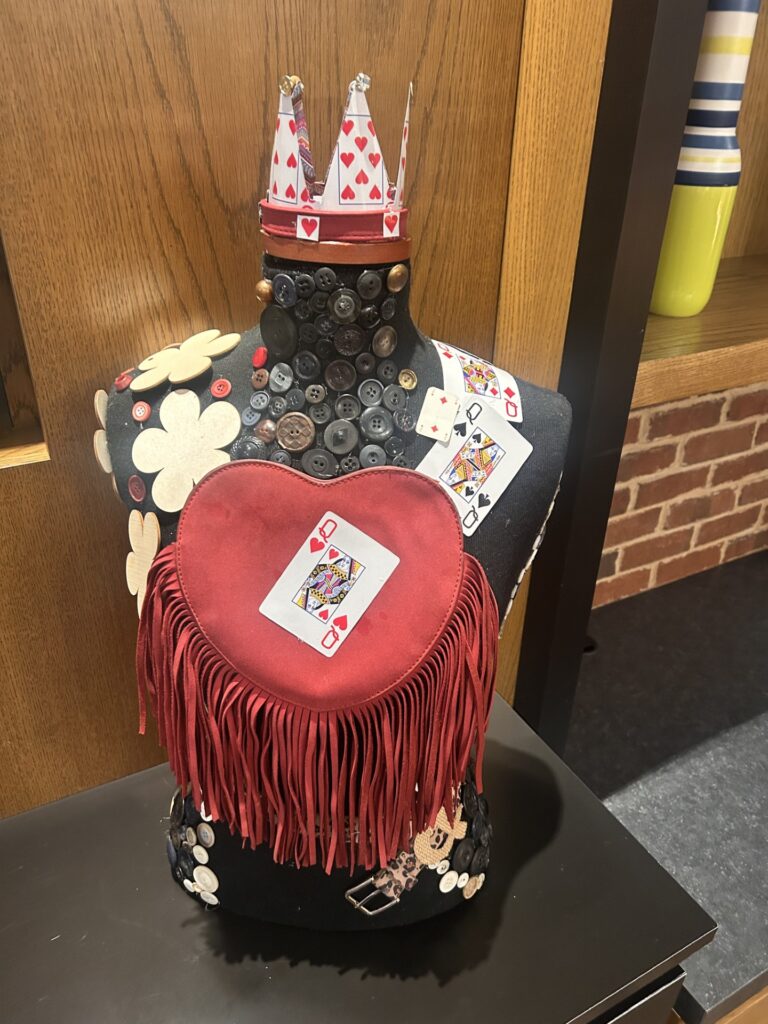
7. Give your queen a place of honor
Once finished, your Queen of Hearts deserves a special place to shine. Place your creation on a small table, pedestal, or display stand in your home, office, or studio. Because it’s bold and unique, it doesn’t need much else around it—this queen easily commands attention on her own.
And while you’re admiring your finished piece, take a moment to celebrate the women in your life who inspire you with their strength, creativity, and heart. One of them is Carolyn Becker of Finding Your Good who always sees and finds the good in others.

Similar Reads:

Tim Kime
Artist, Motivational Speaker, Life Coach
