Looking for an easy, Halloween-themed project for your kids? Don’t be afraid—we have the project for you! Take clear glass containers and make them frightfully fun as the Mummy Family! Visit the glass wares aisle of your friendly neighborhood Goodwill to scare up some clear, glass containers and bring them back to life as Mummy Candle Holders.
Ability level: Easy
Age Level: Fun for every age; but keep an eye on the little ones due to the glass
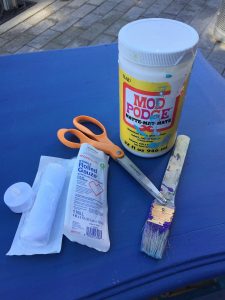
Items needed:
1. Clear glass containers with smooth sides (wide vases, candle holders work well)
2. White First Aid gauze
3. Modge Podge, matte finish
4. Medium-sized paint brush or foam brush
5. Tea light candles, battery-operated
6. Scissors
7. Paper
8. Sharpie/pen/crayon
Time requirement: 45 minutes (not including Modge Podge drying time)
Cost: Approximately $4 to $8 per Mummy Candle Holder
$1 to $4 per glass container
$3 to $6 per roll of First Aid gauze
$5 for Modge Podge (you will have lots left over for other creative projects)
$1 per tea light
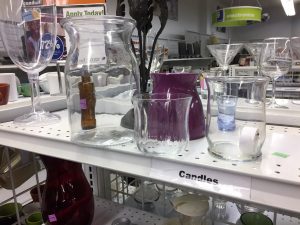
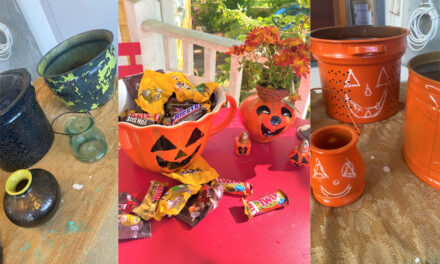
Step 1: Hunting for Glass Containers
For each mummy head, you will want to find a clear, glass container. One with smooth sides and an interesting profile will achieve your best ghoulish look. To create a family, find various sizes to reflect grown-ups, children, and pets. While this project has a mother, father, boy, girl and a dog, you might want to create a family that reflects those in your household to make it special just for you. Look for containers that allow you to easily place tea lights into them.
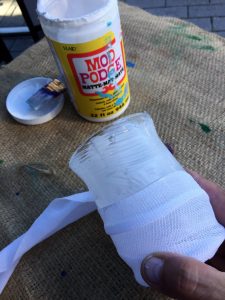
Step 2: It’s a Wrap!
After you clean off your glass container, apply Modge Podge all over it with a paint or foam brush. Be mindful not to put it on the bottom or on the inside. Given that gauze is cloth and will absorb the Modge Podge, put a good layer on the container (it will dry clear). Immediately start wrapping the gauze around the container from top to bottom, slightly overlapping it as you go. You will want to ensure there isn’t any glass showing through so you might have to pull and stretch it. Once you get to the top, cut the gauze; the Modge Podge should hold it in place. You might need to use several pieces to cover the piece or add smaller pieces to fill in the gaps…no worries as this will add character to your soon-to-be mummy’s face. Add another coat of Modge Podge on the entire piece; please let this dry overnight.
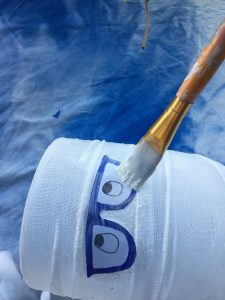
Step 3: Face Time Me
Now that your candle holder is all dry, it’s time to add eyes and a mouth. On white paper, draw eyes and a mouth with a black pen or sharpie. If you are creating one to reflect your family, consider any unique characteristics like glasses. You might also add lip and eye color with a crayon or marker. Cut them out then apply a coat of Modge Podge to where they will go on the candle holder; also apply a coat of it to the back of the paper. Position it then add another layer on top to ensure it stays in place.

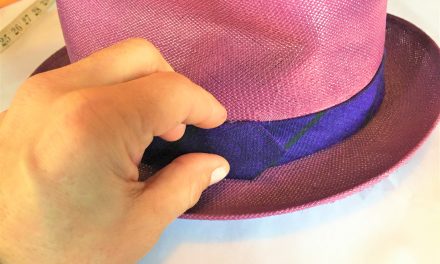
Step 4: Add Personality
For the girl mummy, I cut some gauze into strips, braided it and added orange ribbon bows. For the mommy mummy (a funny phrase), I tied a gauze bow. For the dog, I used two smaller pieces for ears. Affix using Modge Podge, too, by applying to the where you want it to go as well as to the back of the braid, bow or ear. Let this dry for several hours so it stays in place. When it is dry, take a sharpie to draw eye brows, eye lashes, dimples and freckles right onto the gauze.
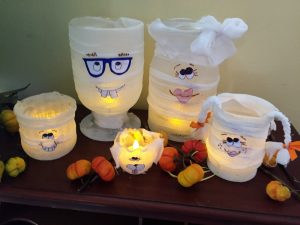
Step 5: Make Me Glow!
The last step is to turn on tea light and place it in the candle holder. This will make your mummy family glow with glee and be ready greet Trick-or-Treaters, party guests or family members in a festive and friendly way.
If you tried this DIY project let me know in the comment section. I’d love to see your creations!

Tim Kime is an artist, life coach, connector. He is President of Kime Leadership Associates offering executive coaching, meeting facilitating and motivational speaking. He is also Chief Creative Force of Transformation Junkies which upcycles furniture and other household items into functional works of art. He combined his two passions—unleashing the potential in people and transforming items with the launch of the Art of Possibilities Workshops. These workshops are part upcycling, part dreaming, part goal setting.