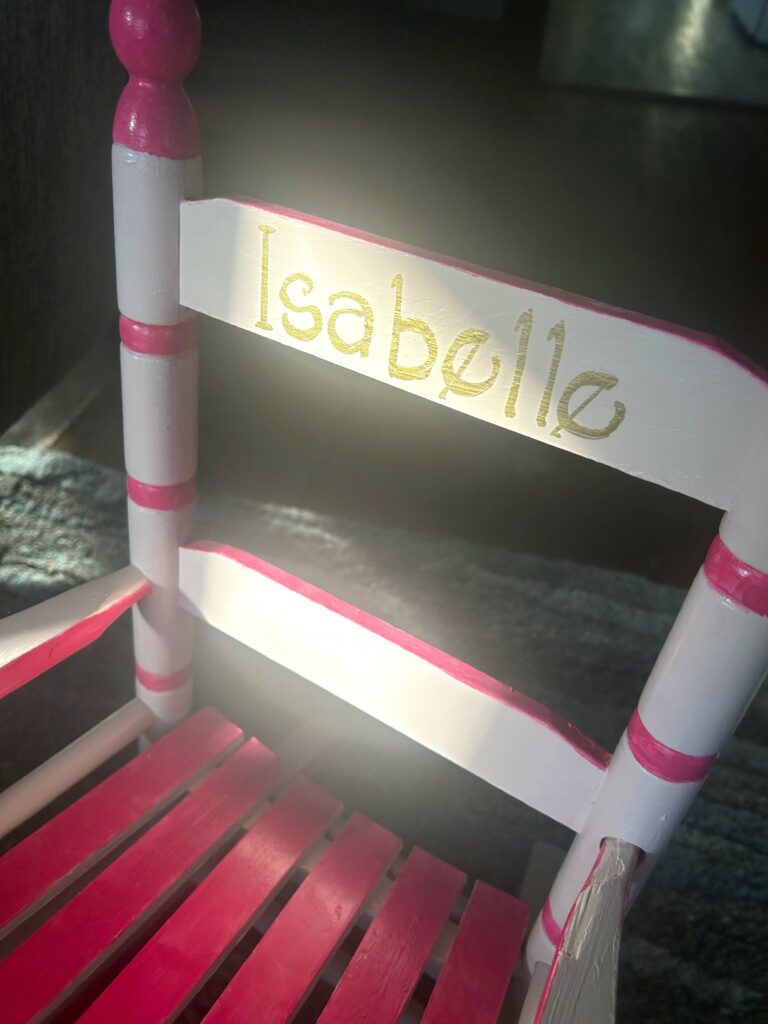
Create the perfect gift for a child by refreshing a rocking chair with pretty paints—and some personalization!
Follow these simple steps to give a thrifted little rocking chair a happy new look for a new generation. You also will be creating a gift to be cherished long after the child has grown up.
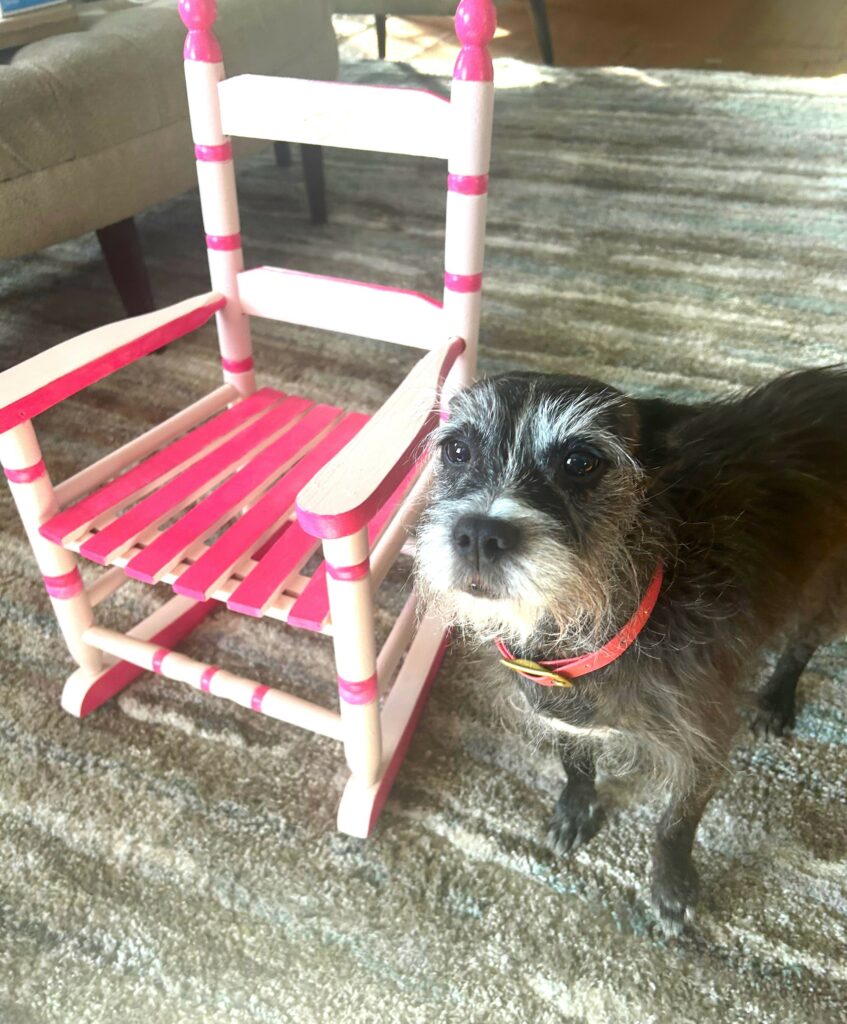
Thanks to Izzy for the chance to transform the rocking chair featured here for his Goddaughter Isabelle. It was a joy!
1. Tighten up for a toddler
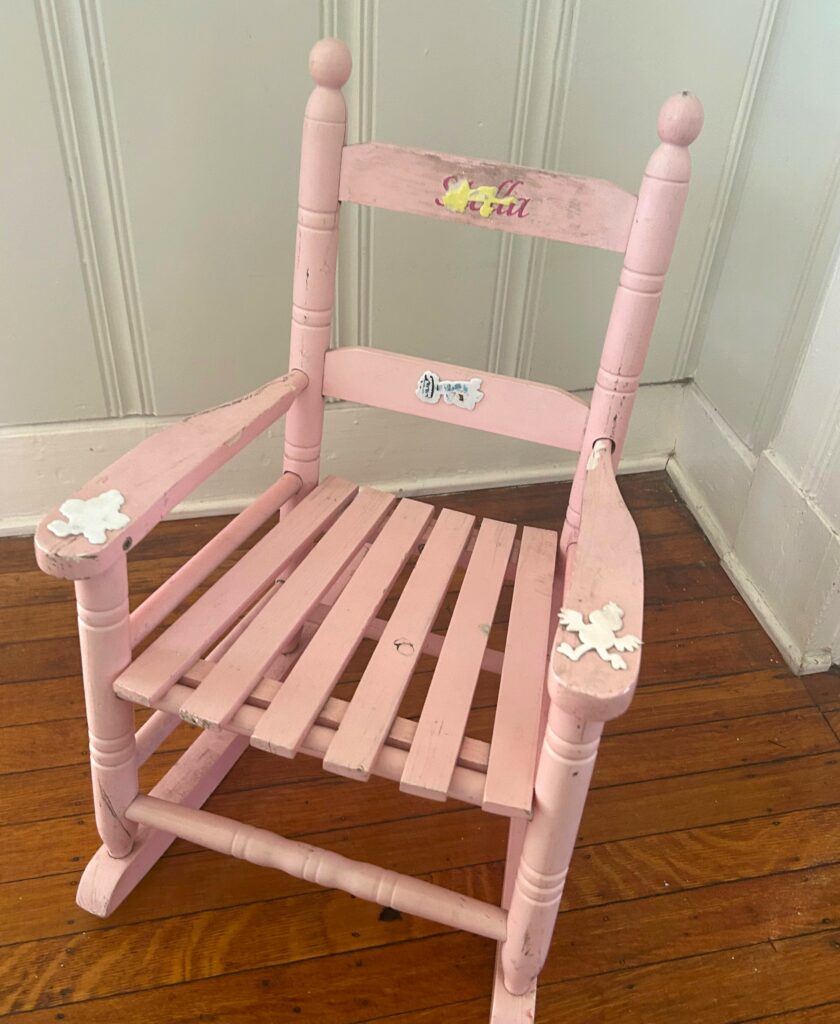
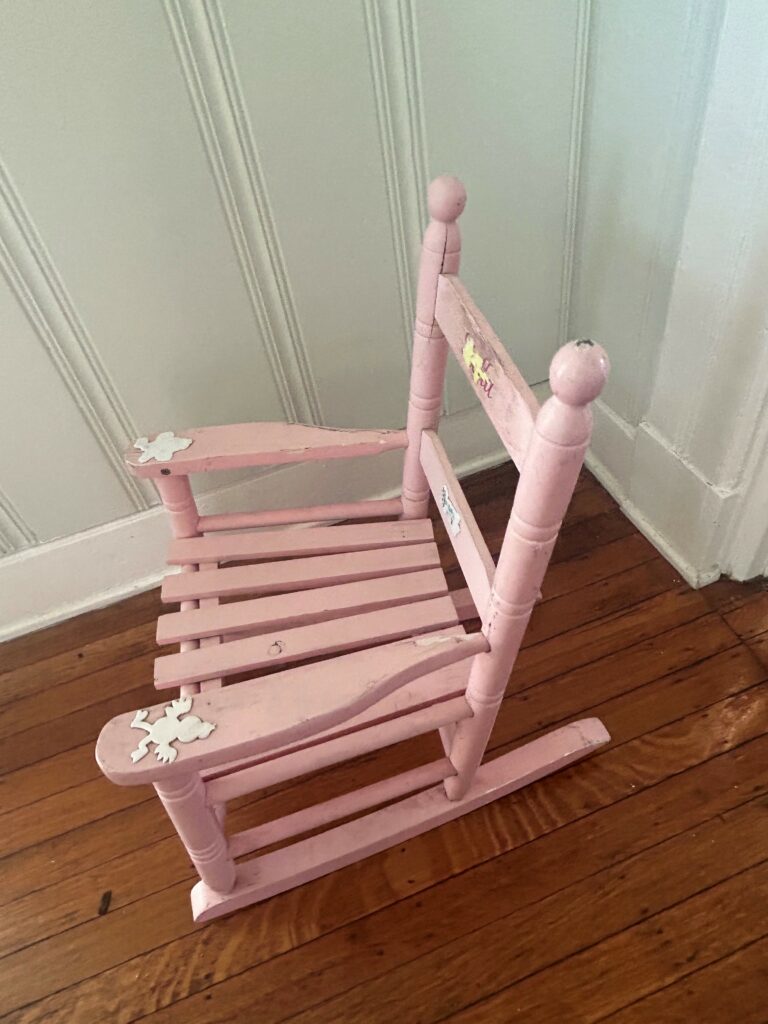
As you are able to see from the “before” photos, this little chair was already very well-loved when Izzy came across it. Made of solid wood with charming details, it was a little wobbly—and not due to the rockers!
All it took was the tightening of screws to ensure it would support a little one for years to come.

Expert Tip:
Sometimes folks discard or give away items because they get worn out and wobbly. Can’t tell you how many times I have come across great pieces that got a new life simply by ensuring all screws and/or nuts and bolts were tightened well!
Also, an often-used piece might need some wood glue, too, to keep it together well. Therefore, if you find a piece you like but feels a little shaky, it might only need a couple of tweaks to make it feel and function like new!
.
2. Prep it for painting
This little rocking chair had stickers and fingerprints all over it!
- Use a screwdriver or paint scraper to remove any decals or details you want to discard.
- Then use a medium to rough grain sandpaper or sanding block to smooth any rough edges and to buff up the current finish.
- If you are transforming a small piece like this little chair, place it on its sides and back as you do to ensure you get all the parts and pieces.
- You are not seeking to remove the entire current paint or stain; just make it more painting-friendly for its refresh/redo.
When finished, wipe your piece down well with a damp cloth to remove all dust, dirt, and debris. Now you have a charming blank canvas!
3. Brush on its base
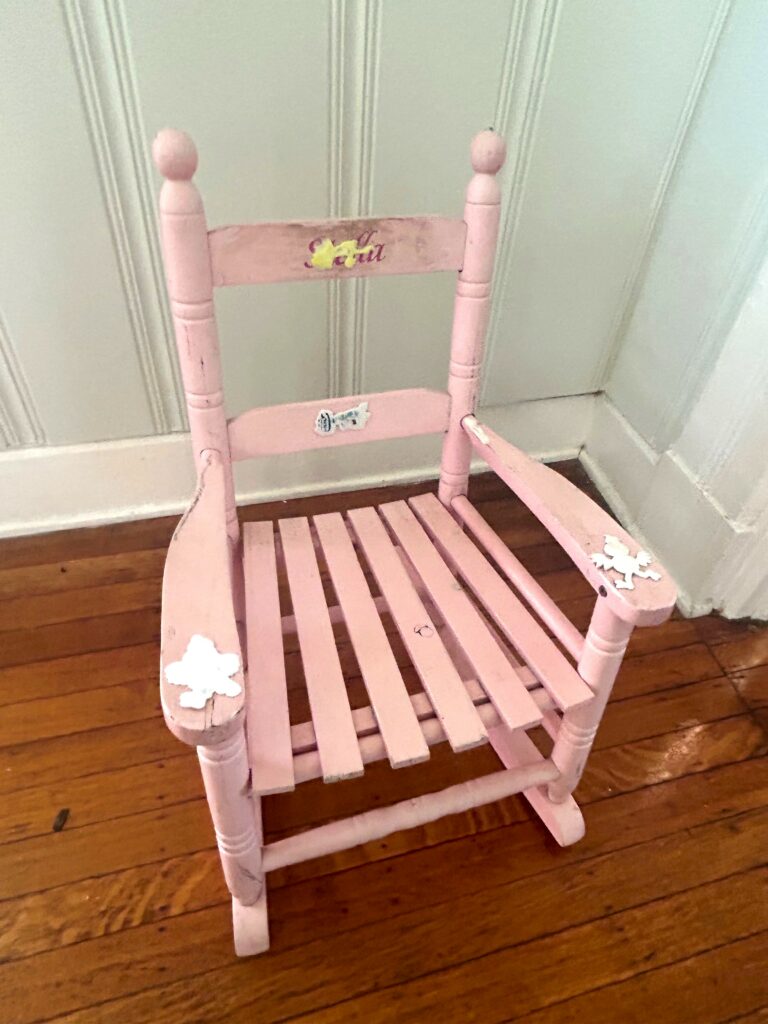
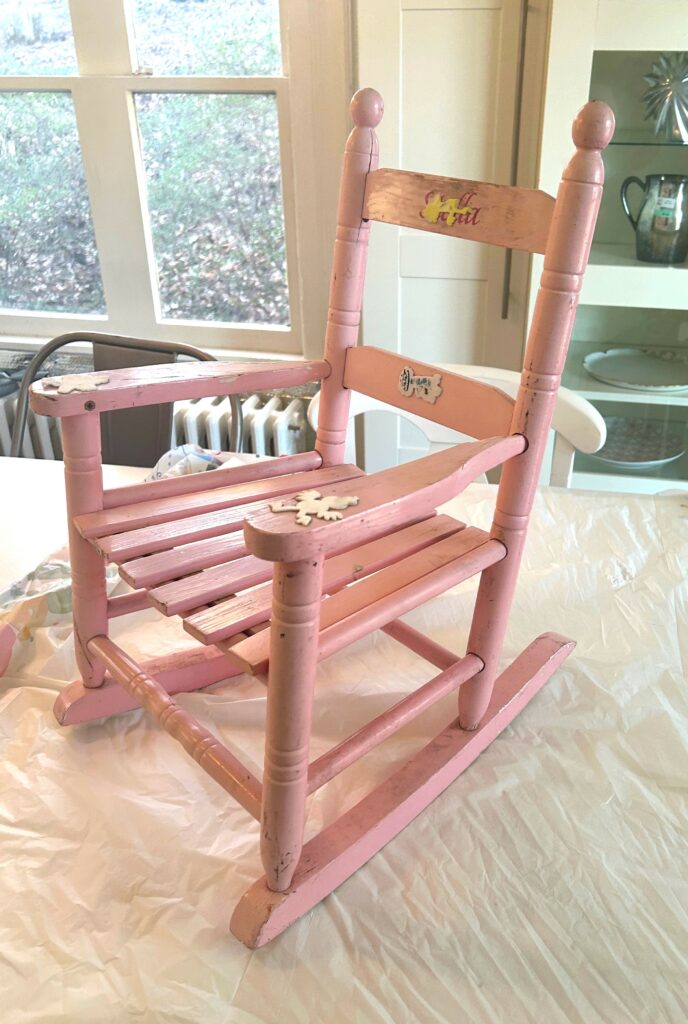
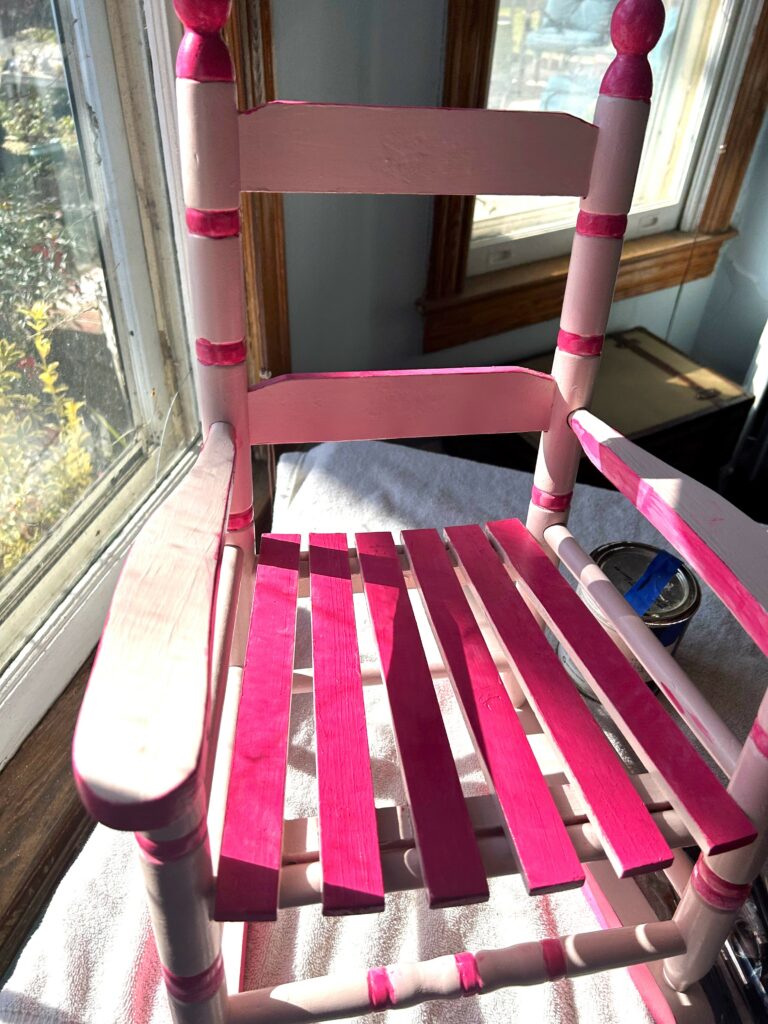
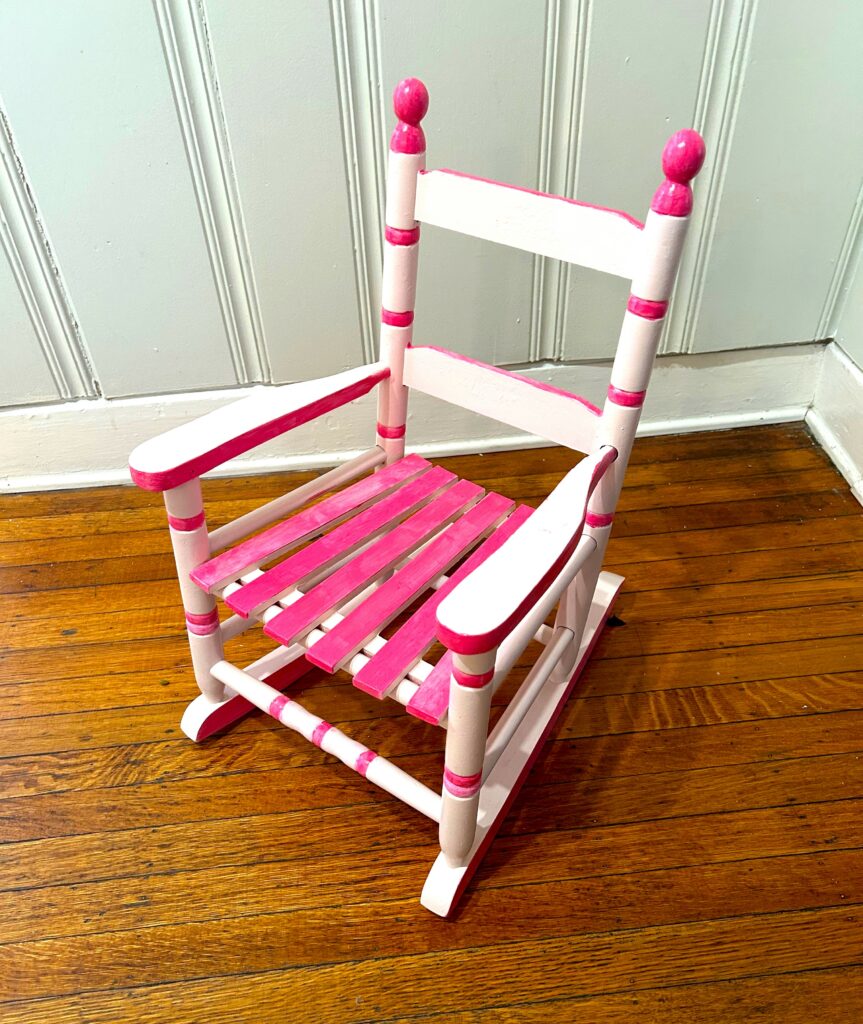
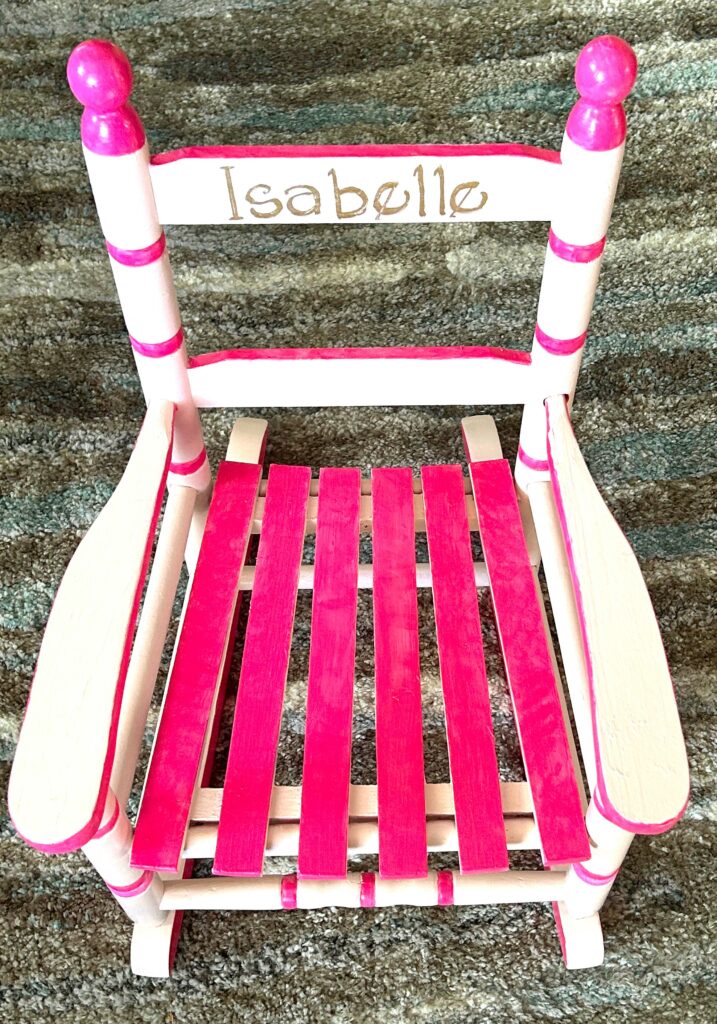
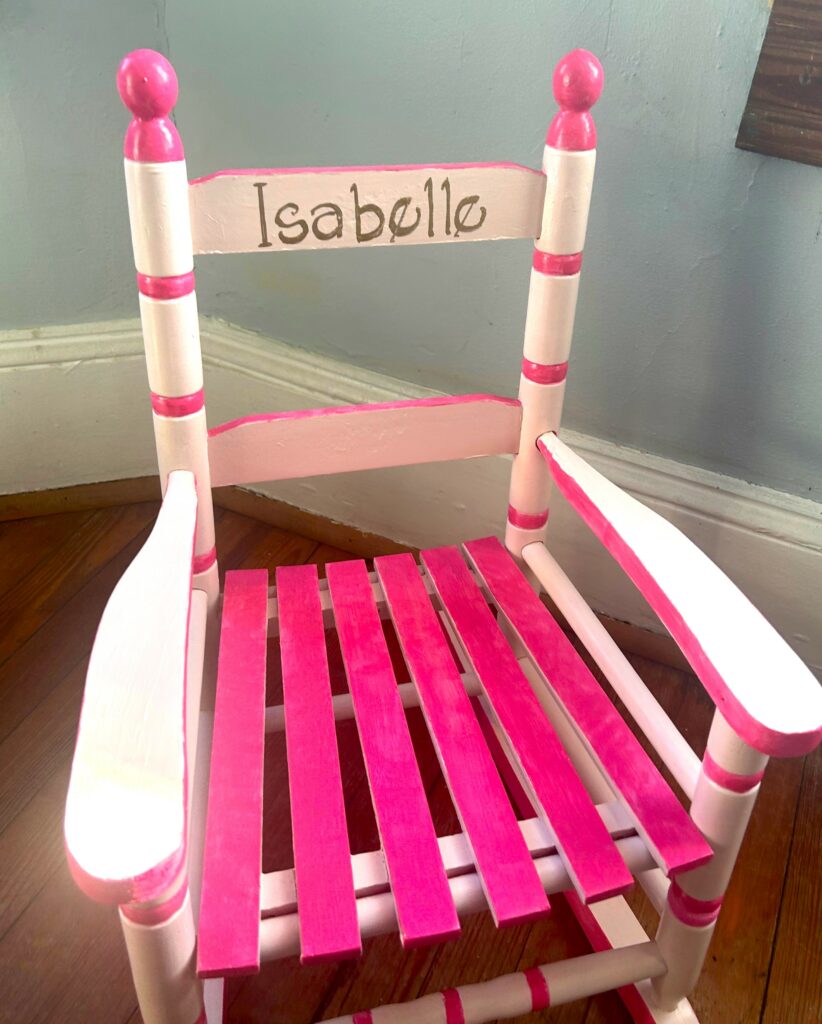
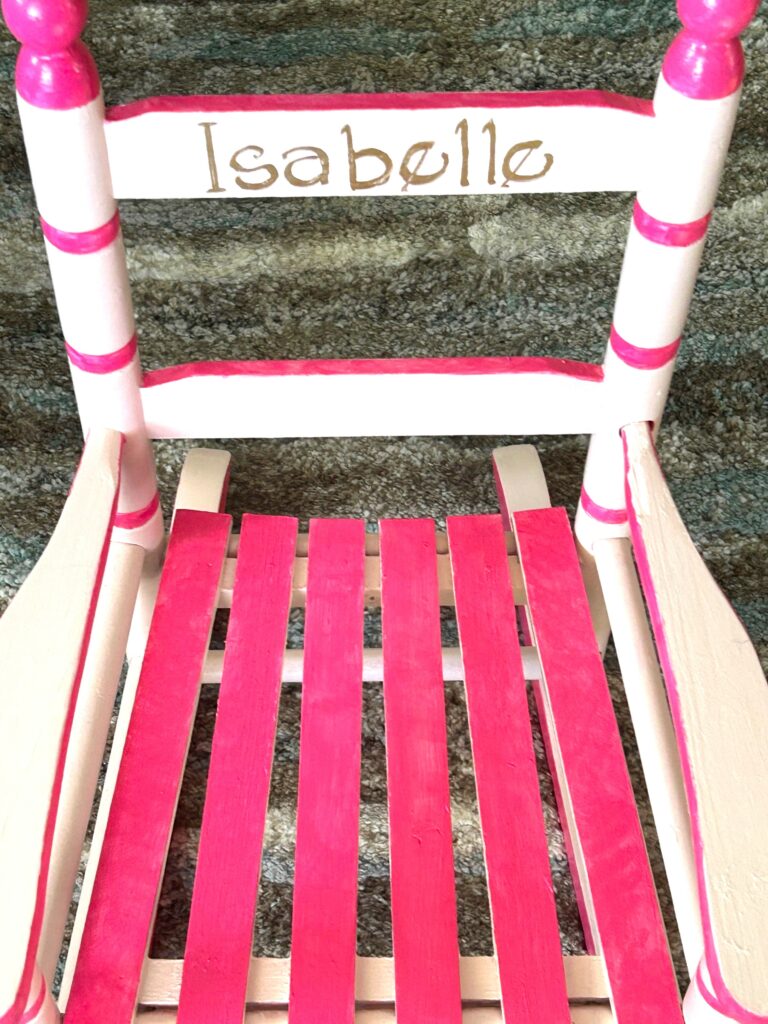
For Isabelle’s chair, Izzy wanted it in shades of pretty pink. While its original color was just that, it certainly needed a big refresh to make it look clean and crisp. A pale pink was applied all over it, making it look brighter after just a couple of brush strokes.
- To apply your chair’s base coat, consider using small foam brushes and small craft paint brushes to allow you to cover all parts.
- Again, as you go, place your piece on a drop cloth and on its backs and sides to get super solid coverage.
- As I was going from one pink tone to another, this little chair only required one good, new, solid coat.
- If you are dramatically changing your chair’s colors, be patient and plan to apply at least two to three layers to totally hide the previous hues.
Expert Tip:
Often folks are not sure what kind of paint to get or what finish works best. No need to get or pay for a separate primer as most of today’s paints combine both primer and paint in one can. For a furniture piece that will get touched and handled often, consider a semi-gloss or satin finish. These finishes will provide a nice reflective quality that is easy to clean up as well.
4. Add artsy appeal
This chair’s new, freshly painted pale pink tone was charming as it was.
However, like all pieces, I wanted it to be special and unique. If you are on board with this design idea, too, then consider adding other tones and shades to bring out your piece’s special details.
- A bright pink paint was carefully applied to the top surface of the chair’s seat; it was also applied to the sides of the rockers and armrests.
- Carved parts were given the pink pop, too.
- What parts of your pieces could be highlighted using a different tone or color to make them stand out even more?
Expert Tip:
Use small paint brushes to apply your accent paint choices. You may need to go over them a time or two as well to ensure their tones are sharp and bright. Also, if you smudge or get paint on parts where you don’t want it, then use another small brush to apply your base coat color to correct it. These little touch-ups will make your piece look professional and precise!

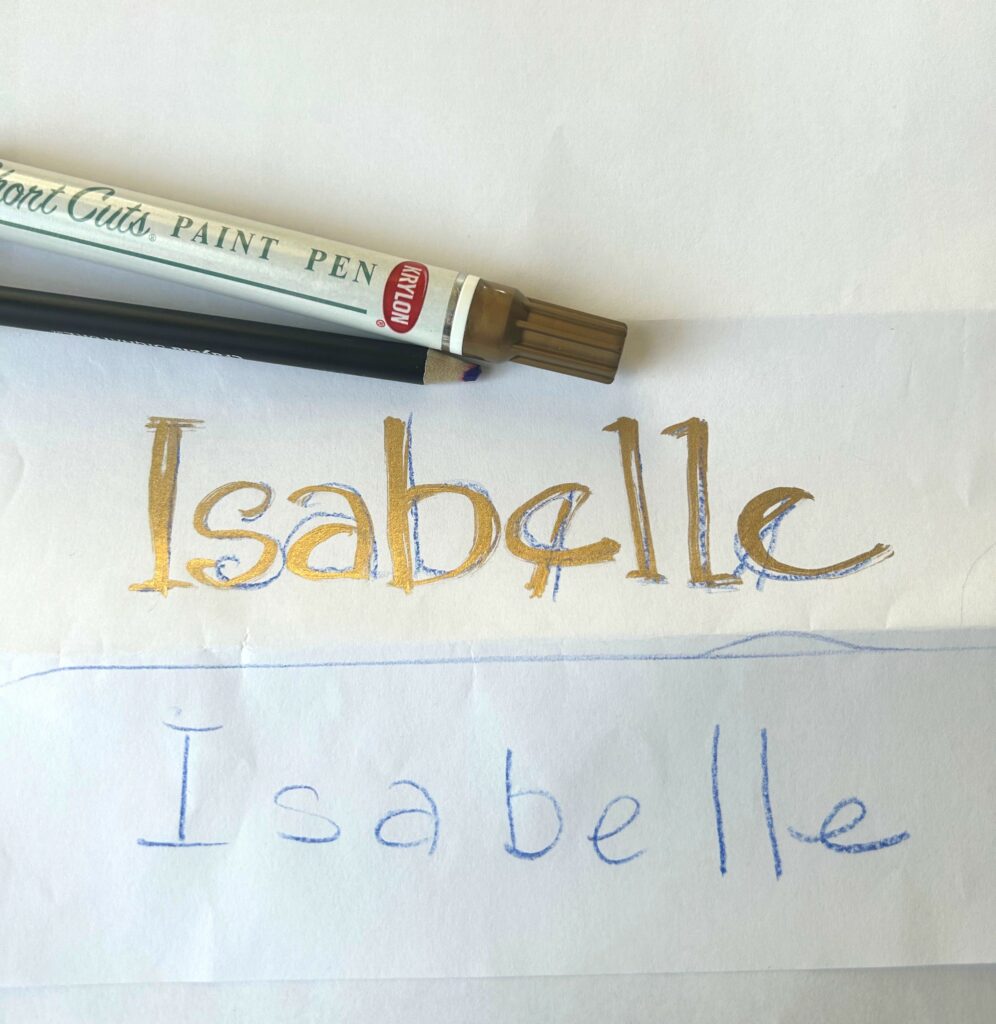
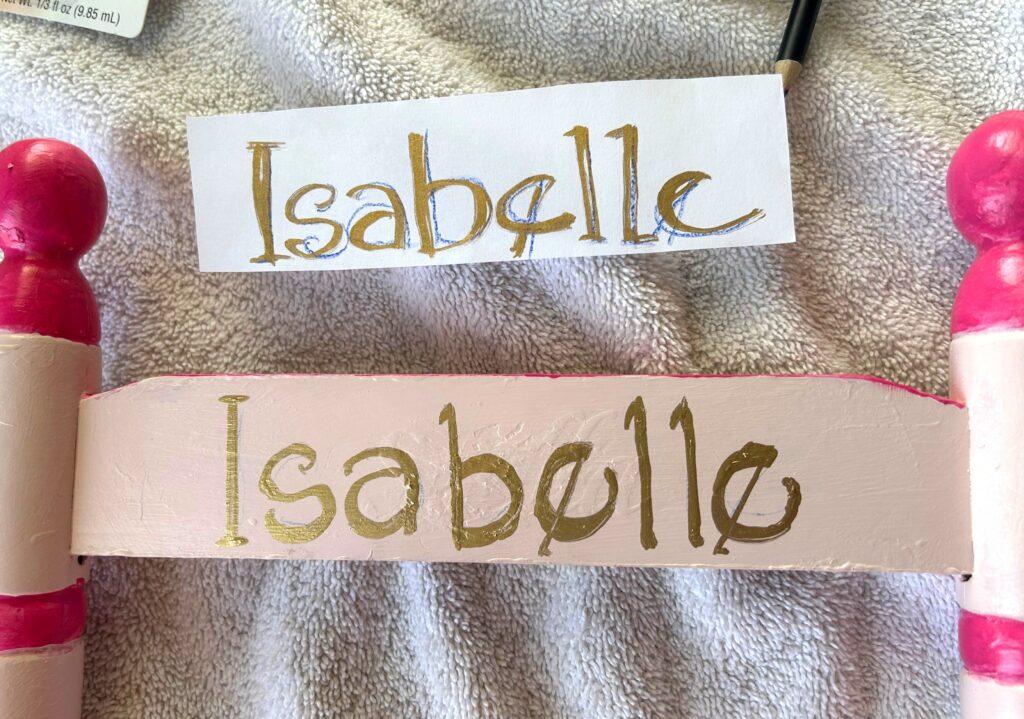
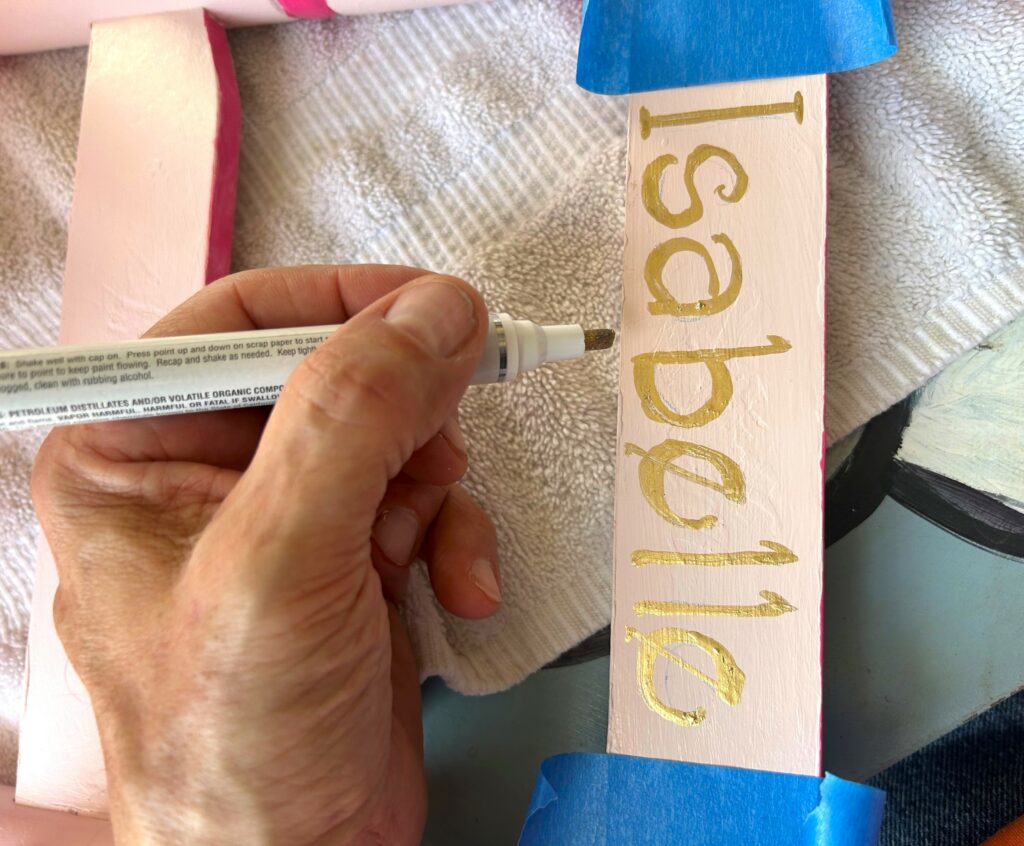
5. Personalize to make it perfect
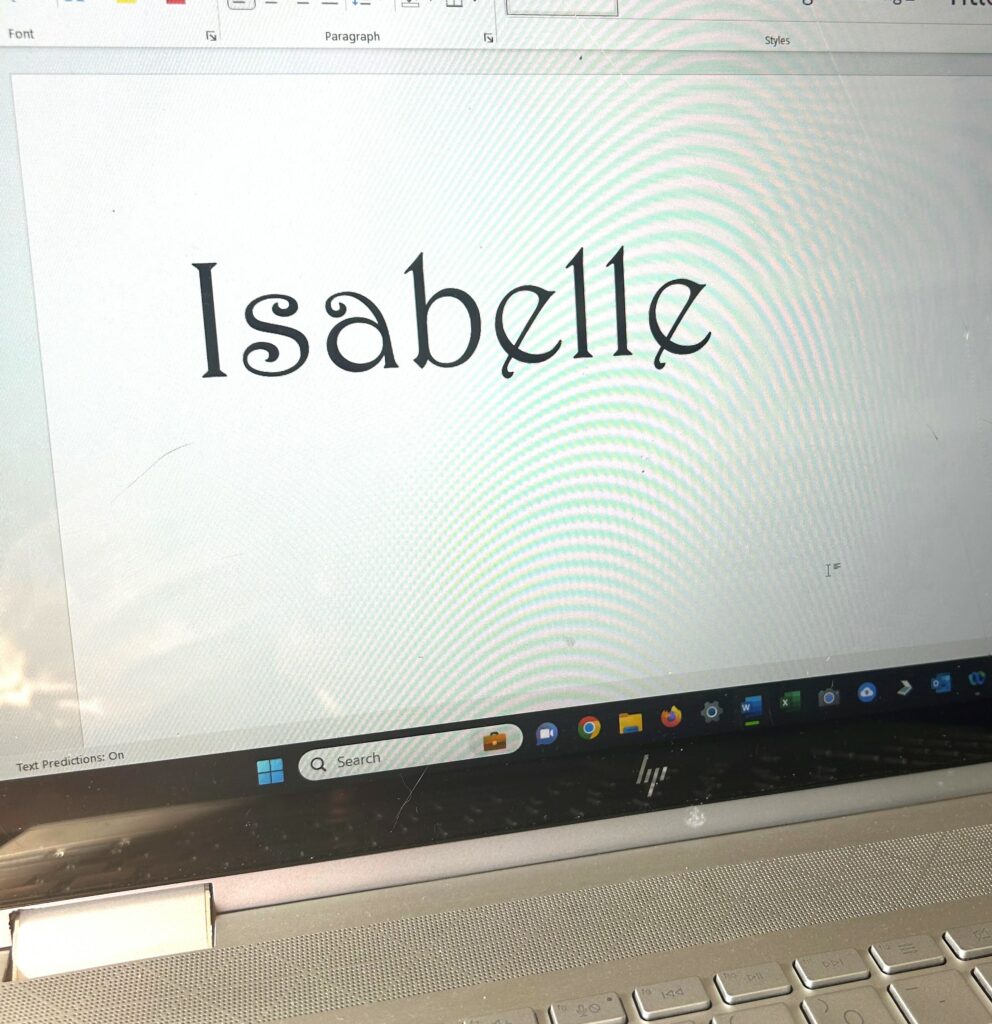
Based on the design of your little rocking chair, consider personalizing it with the little one’s name so they know it is really theirs. Paint pens are perfect for this step.
- Measure out a piece of paper, then practice writing the child’s name.
- Use painter’s tape to help put parameters around the space for the name, then use a pencil to write out their name.
- Carefully paint the pen over the letters, let them dry well, and touch up any parts with your base paint.
Expert Tip:
Sometimes deciding on the typeface/font can be overwhelming since there are so many choices. Consider creating a Word document in your computer, write out the youngster’s name then select different fonts until you get one that has the look and feel you like. For Isabelle, I wanted a look that was charming and felt fit for a princess. How did I do?
6. Protect with poly
Keep your little rocking chair’s new look looking good by brushing or spraying on a coat of polyurethane. Use a satin or semi-gloss finish as well.
Thanks to Izzy—and Isabelle—for the chance to transform this worn-out little rocking chair into a wonderful, pretty-in-pink piece perfect for her!
Similar Reads:
- DIY: How to Paint a Chair Pair to Show Your Pride
- Resolve to DIY More in 2023: Start With a Spray-Painted Fabric Chair
- How-To: Painting $8 Chairs To Match My Favorite Goodwill Table

Tim Kime
Artist, Motivational Speaker, Life Coach


