Create Blooming Branches from Tissue Paper & Transformed Pieces
This time of year is certainly beautiful as Mother Nature struts her stuff! No matter where you go, there are colorful signs of Spring that provide hope and happiness—and inspiration for your next DIY project.
Transform branches into blooming décor for your home or office and keep the positive vibes of the season around all year long.
This simple project is perfect for upcyclers and artists of all ages and skill levels. It is also good for your budget, as most items are found, repurposed, and reused.
Here’s how:
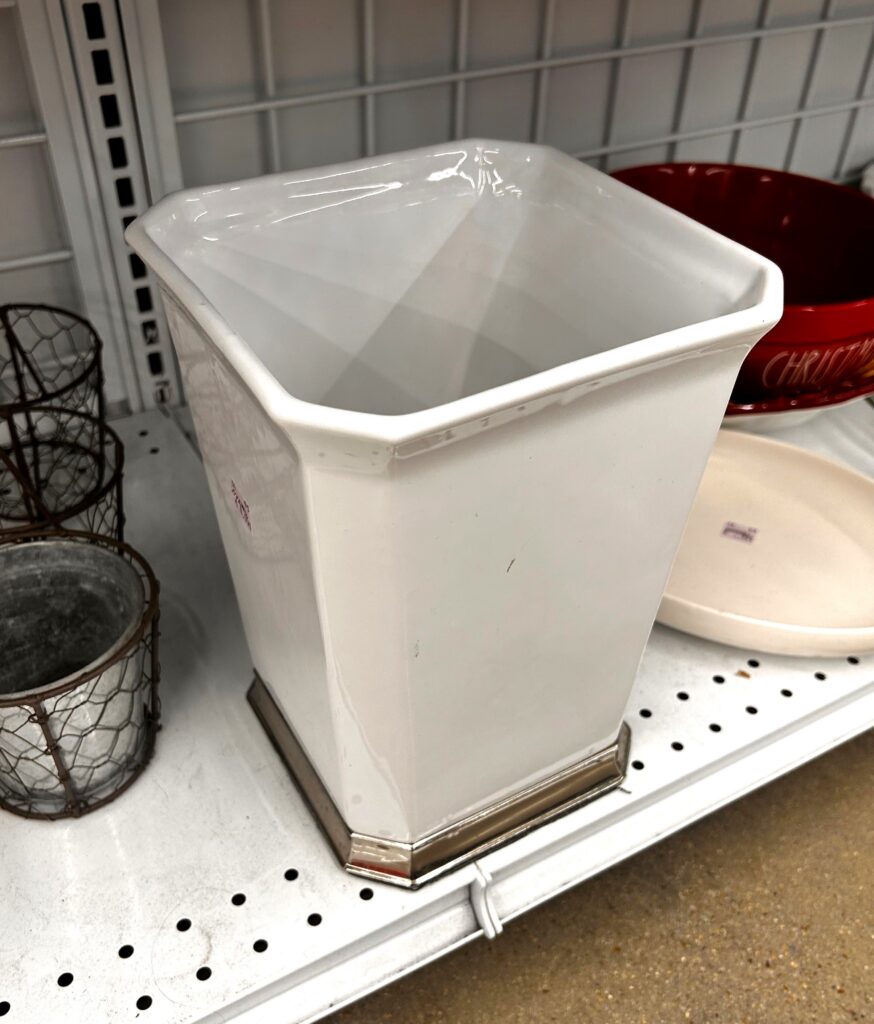
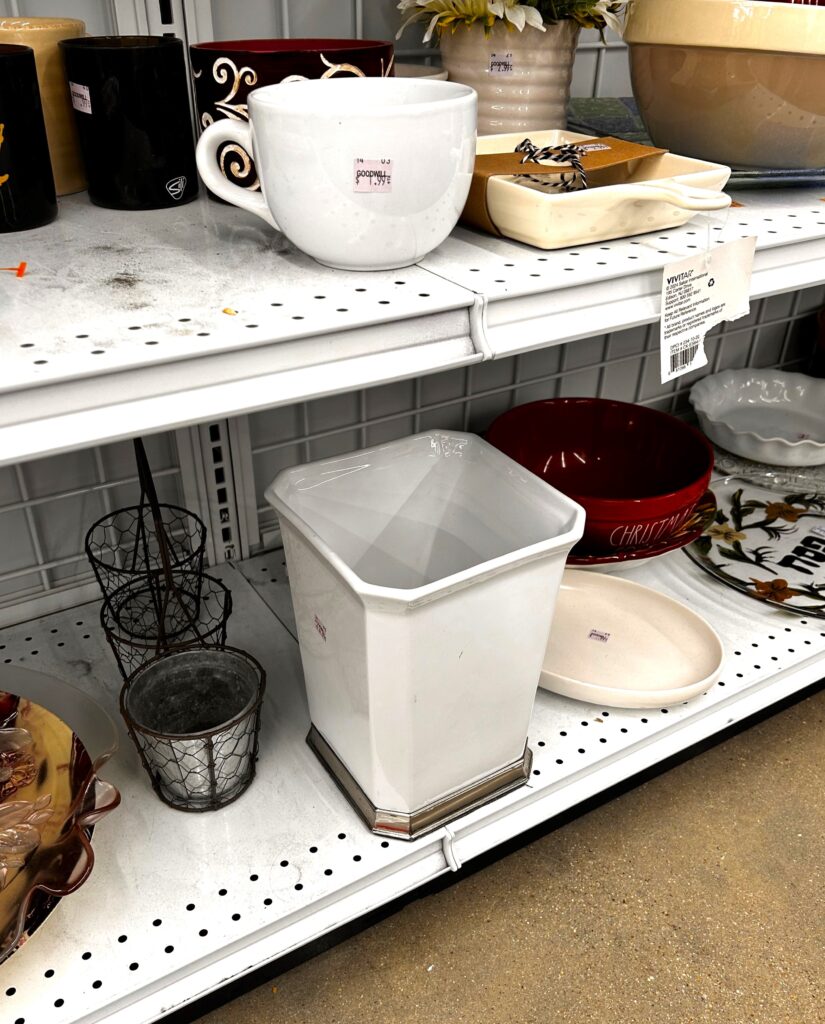
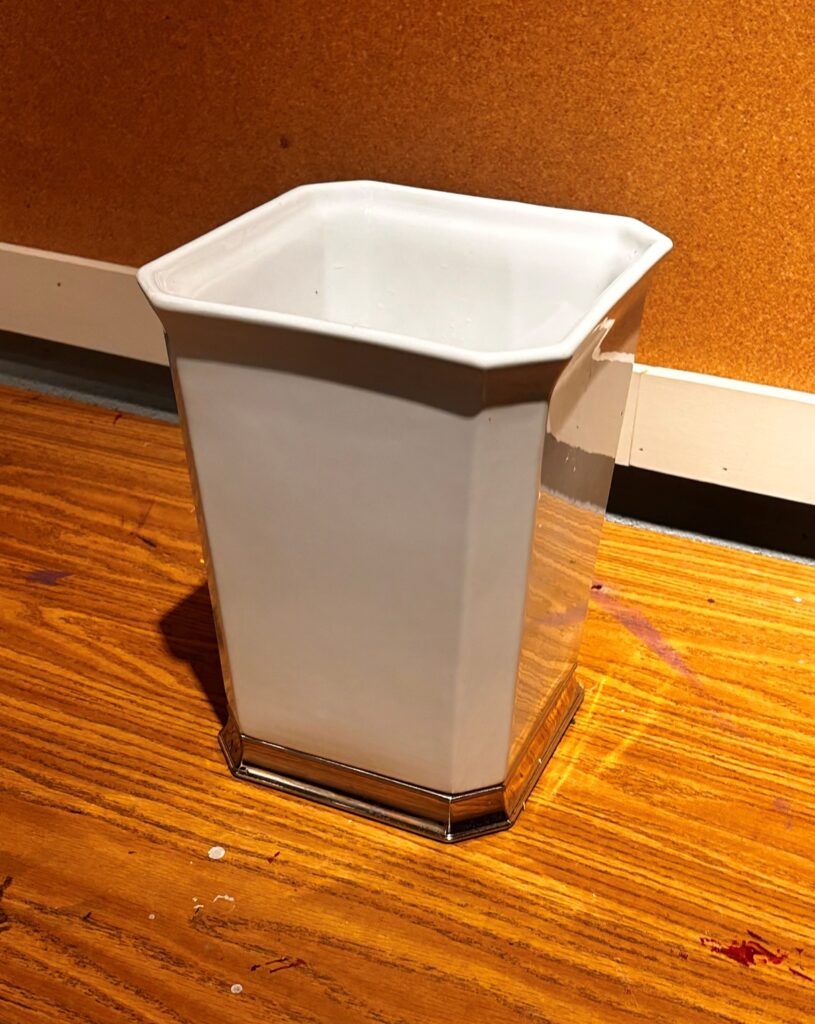
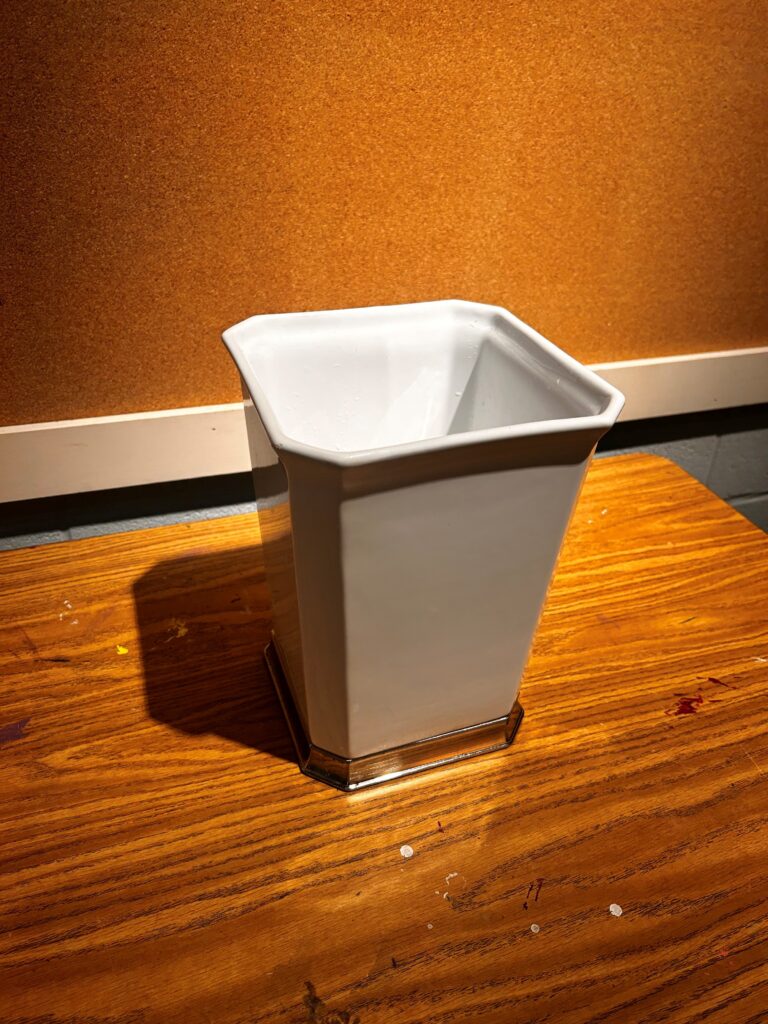
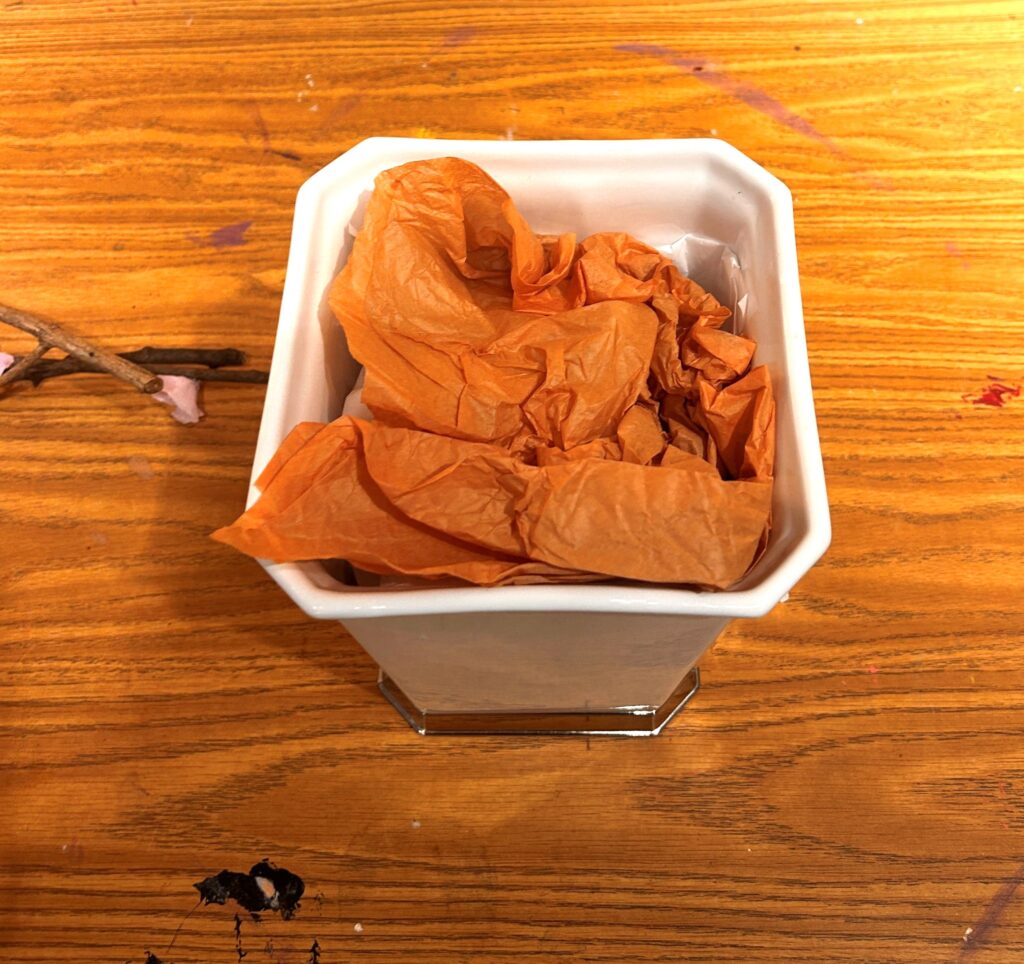
Step 1: Find a vase/base at Goodwill
At your favorite nearby nonprofit Goodwill retail store, there are always interesting vases, containers, and vessels that can easily be used for this cheerful, colorful project.
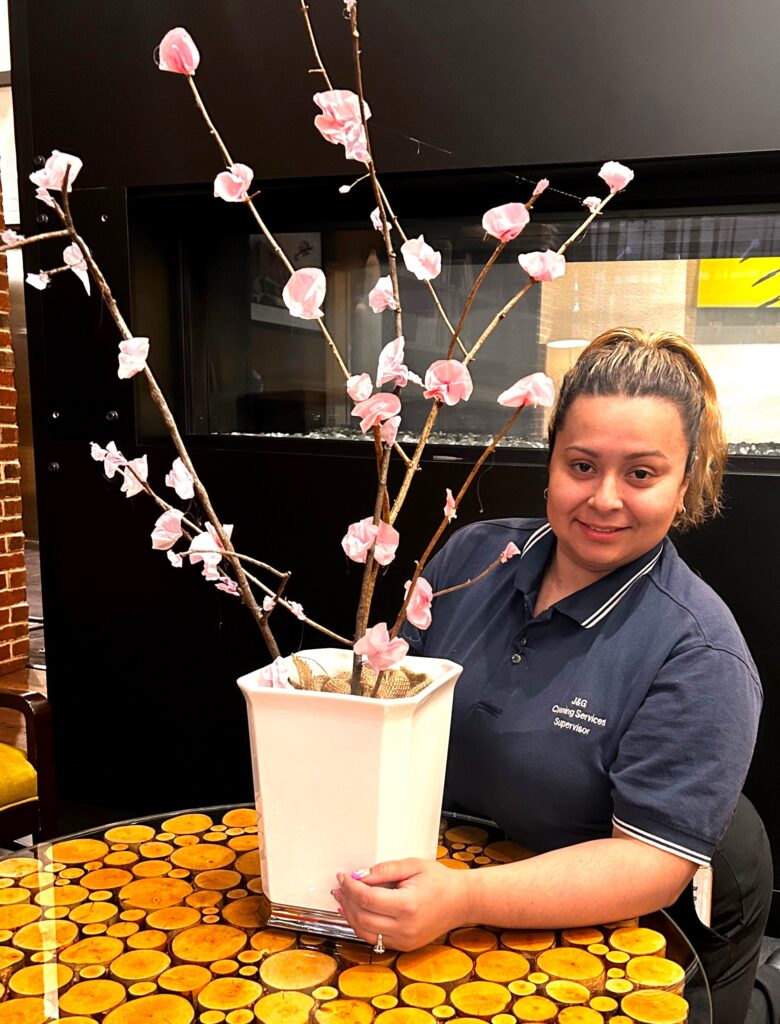
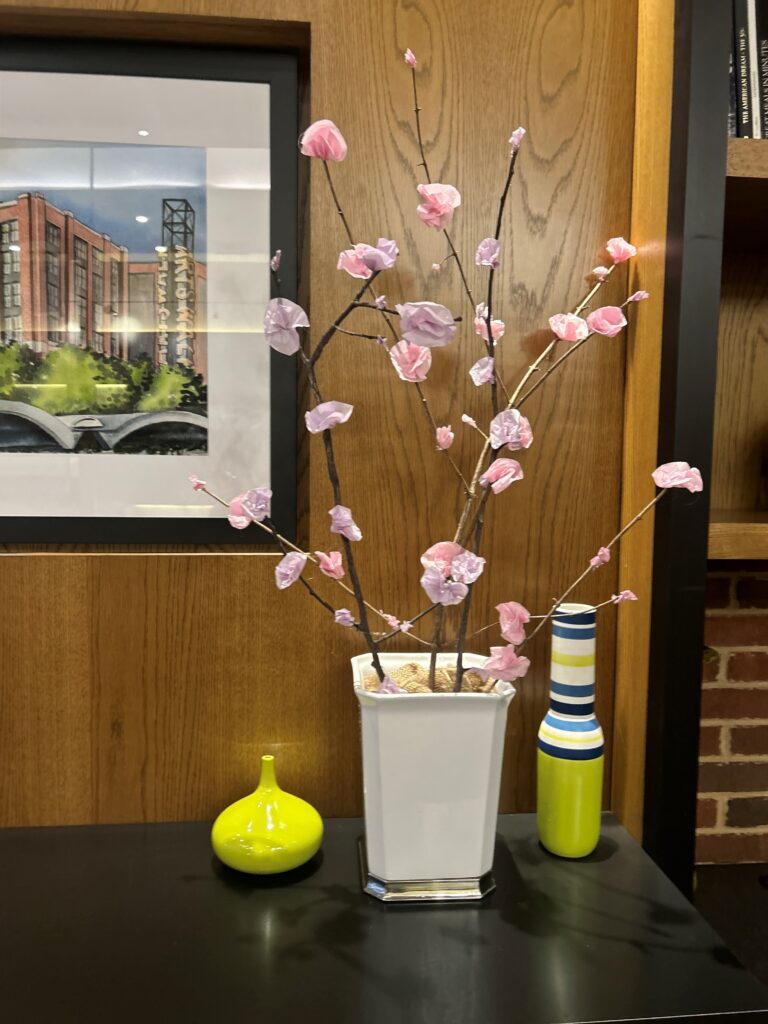
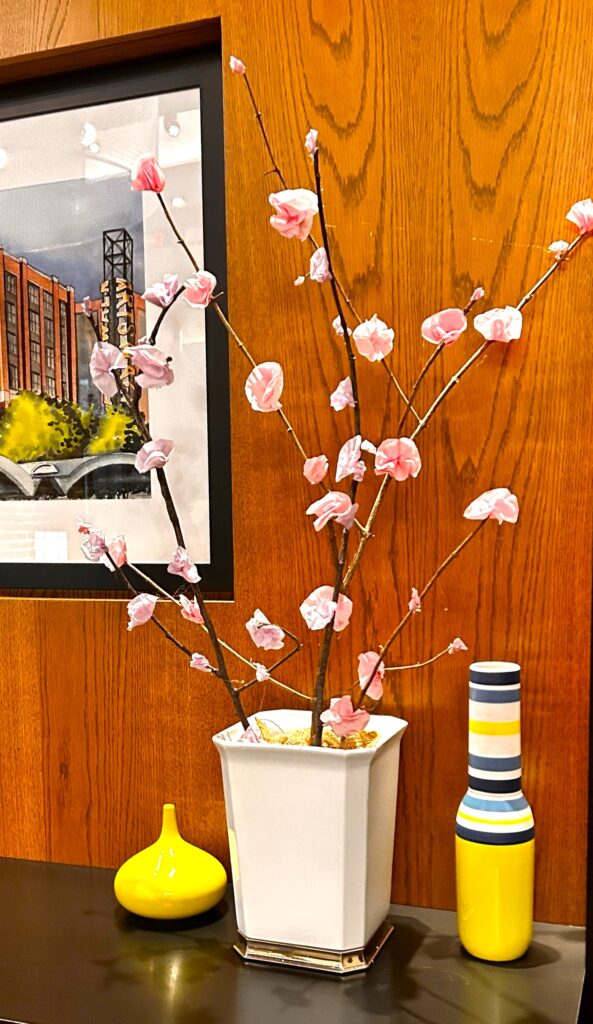
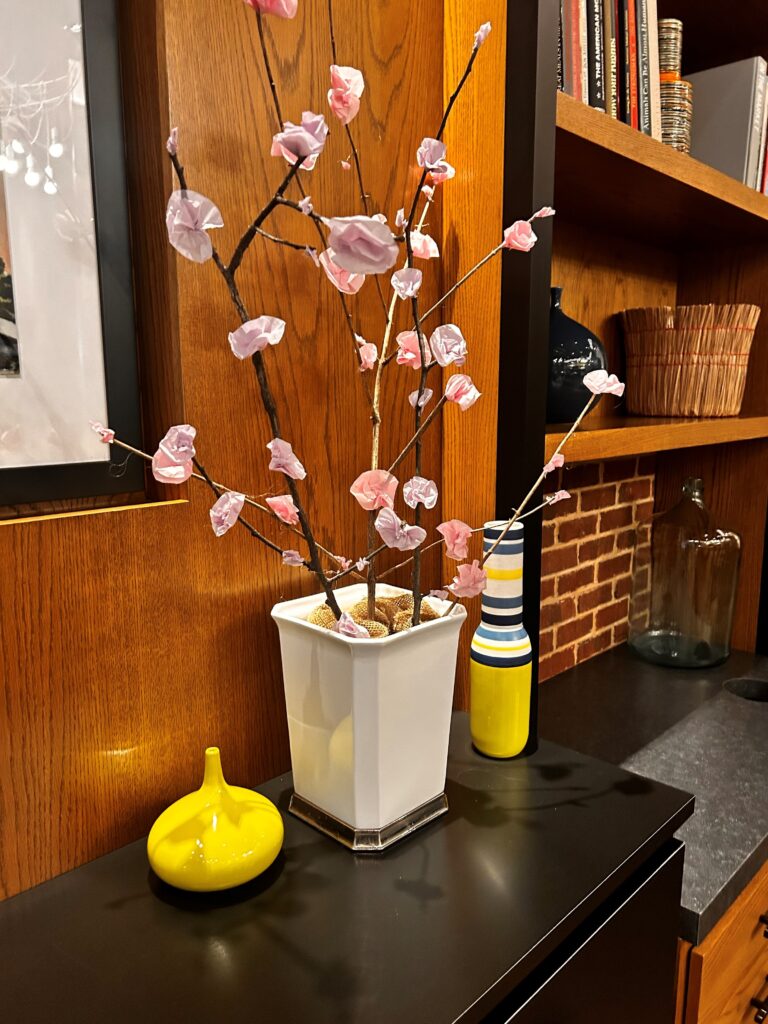
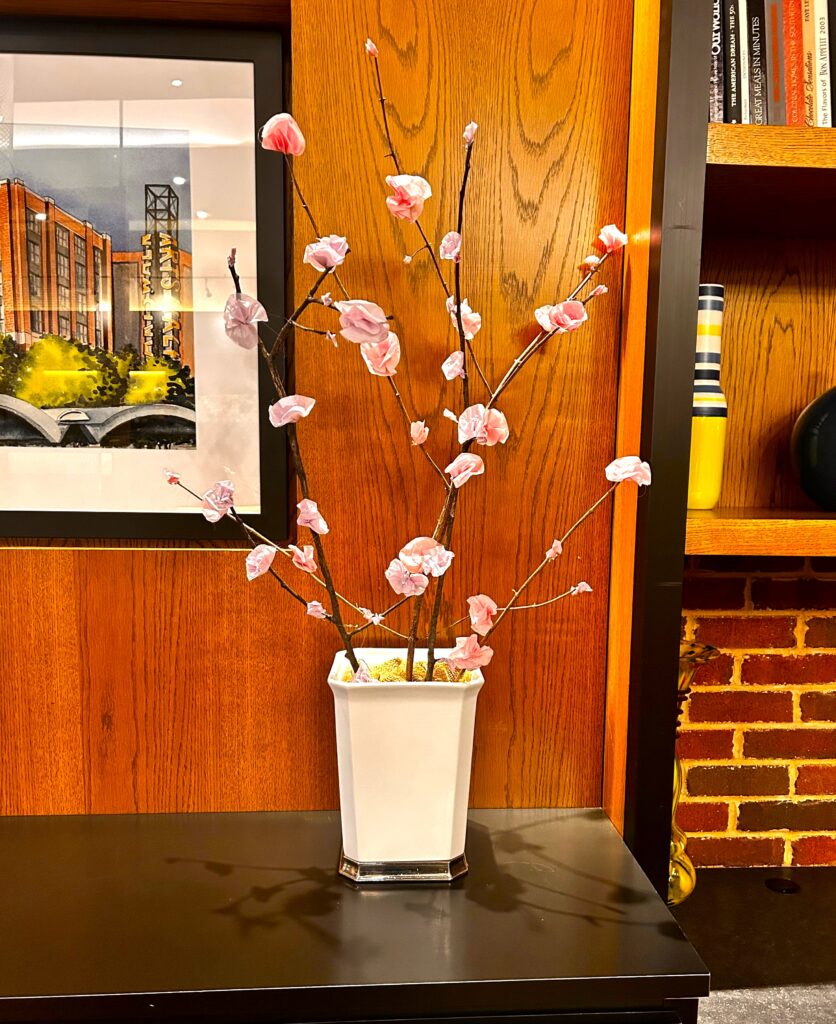
The vase/base featured here was a wastebasket/trash can in its previous life, and it was too lovely to use that way again. It is ceramic, solid with nice lines and a silver bottom edge to boot. Its heavier weight also made it a no-brainer as it easily supports branches without tipping over when used as a vase.
Also, at Goodwill, you might find a flowerpot, an ice bucket, a wine decanter, or a teapot, which are fun, unusual items to reuse for this project. Always keep in mind, too, that if the item isn’t the color you envision, you can easily spray paint it to give it the look you like.
Thankfully, I scored with the waste basket already being a great bright white tone.
Step 2: Be on the lookout for branches
Take a walk around your community to see if you might find a fallen branch that can be picked up for this project. Do you have a yard? Check it out and pick up a branch or two to transform while you clean up your outdoor space at the same time! I love a twofer!
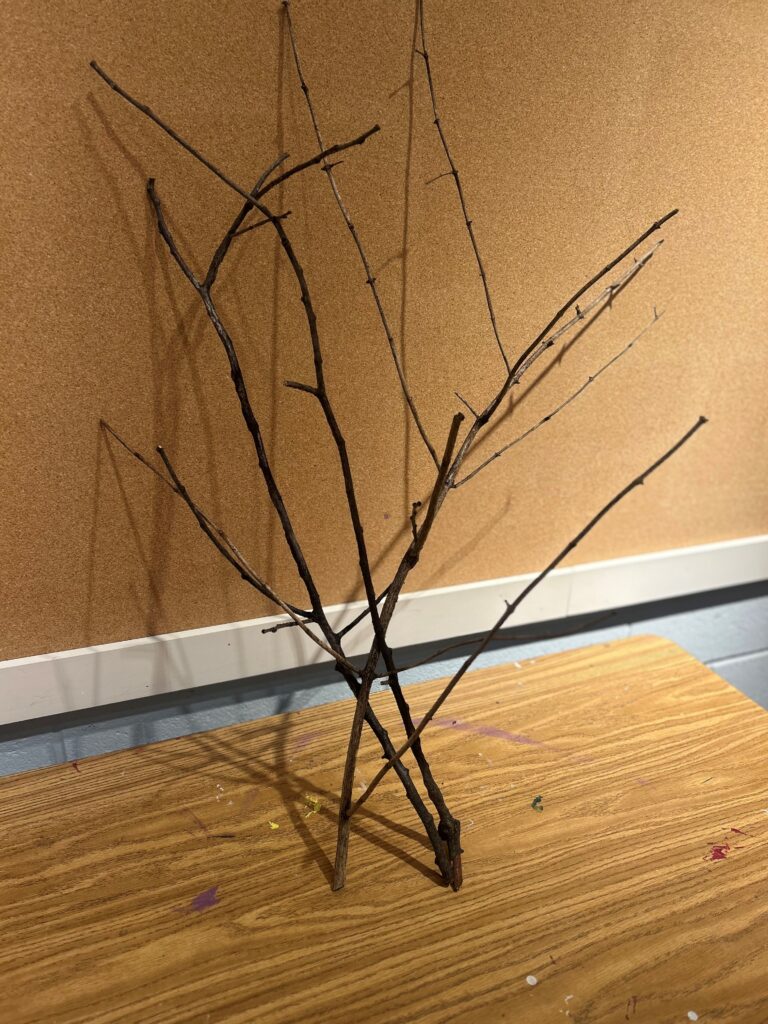
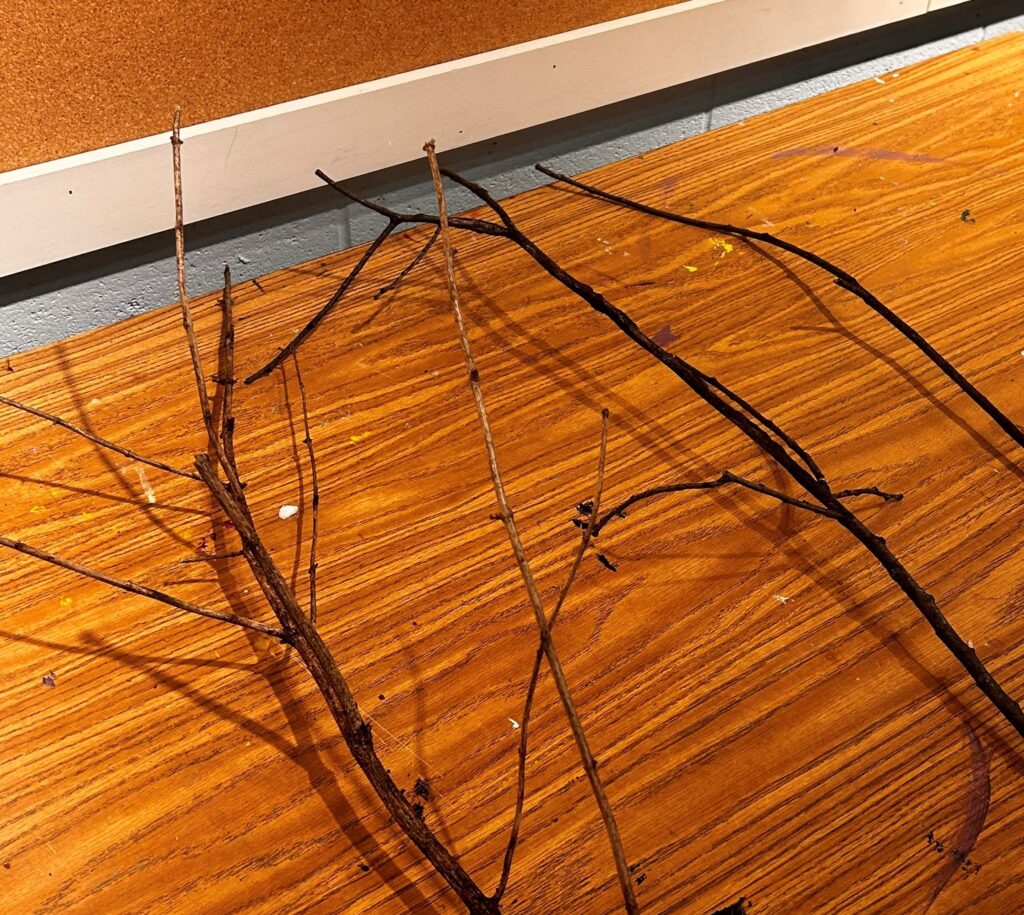
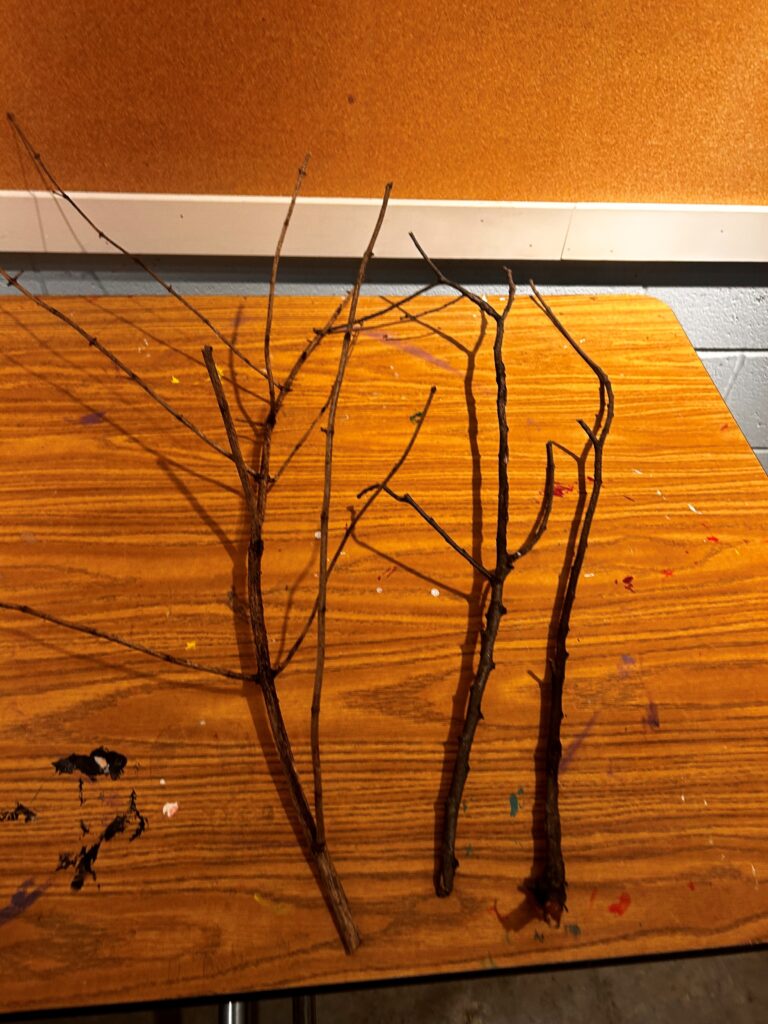
The three branches used here were all about the same length, and one had multiple smaller limbs and parts sticking out from it all. This made it ideal for perching a flower or two. Consider the size of your vase/base, too.
The opening of my container was wide, so it would accommodate multiple branches. However, a smaller container with a slimmer opening would also look so lovely with a solo blooming branch.
Step 3: Trim your tissue paper
For this project, keep in mind the colors you are seeing out and about now. Pinks, purples, yellows and whites are all over the place on trees and bushes now, so select those tones from your collection of tissue paper.
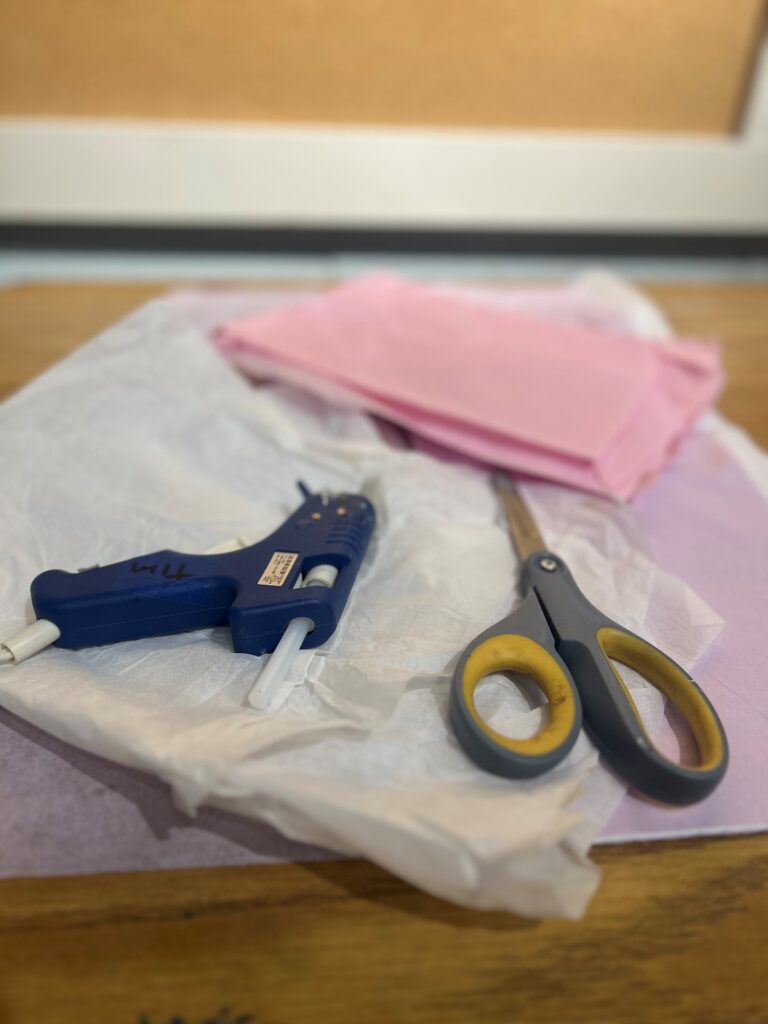
In my stash and obtained during a recent Art Supply Swap event held in partnership with Finding Your Good and Tim Kime Art, I found tissue papers in a pretty pink and lovely lavender.
They made me think of cherry blossoms and red buds, which are now blooming all over the DC area. While I picked my papers up at the art supply swap event, Goodwill often has papers and other craft items for sale for next to nothing.
Check out the store’s section with school supplies, holiday décor, and other house-related items for sale.
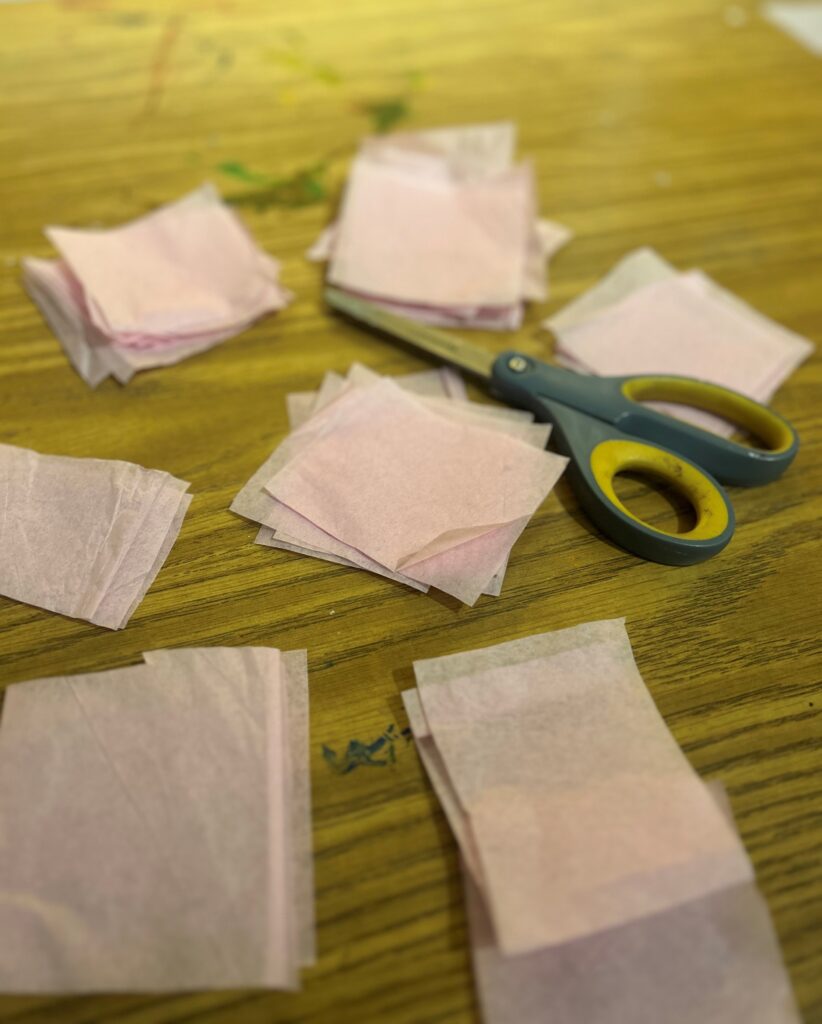
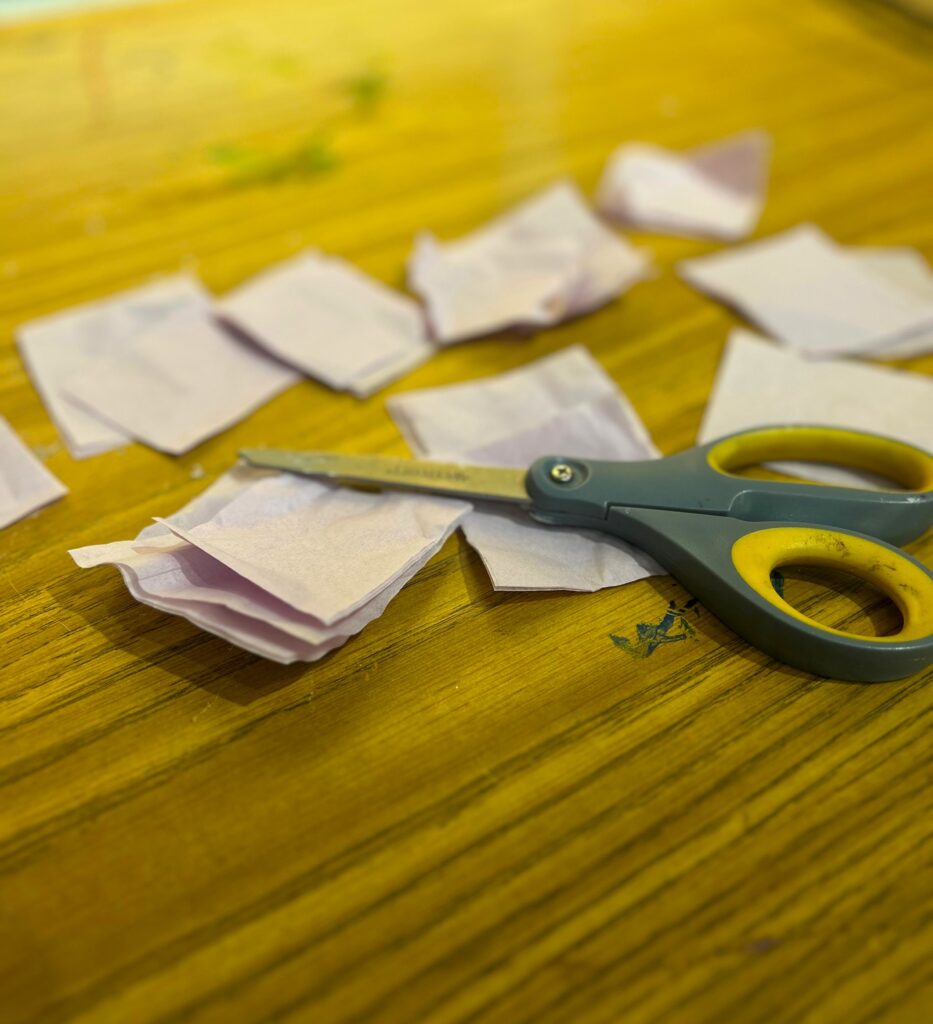
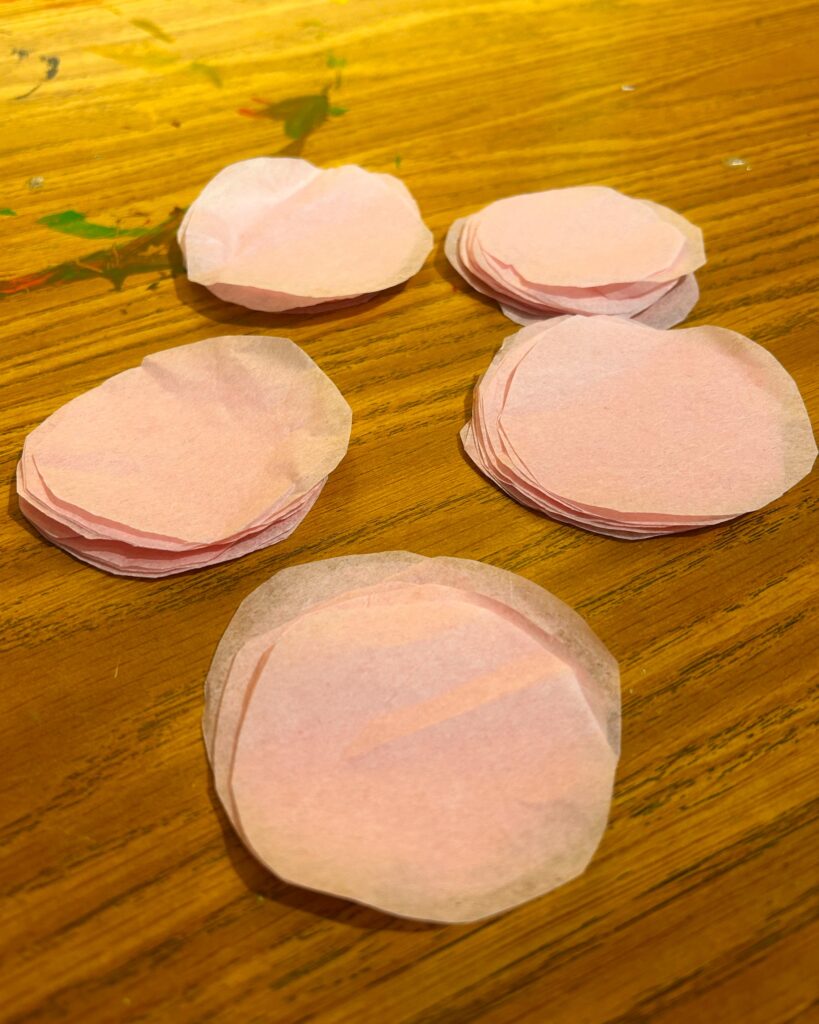
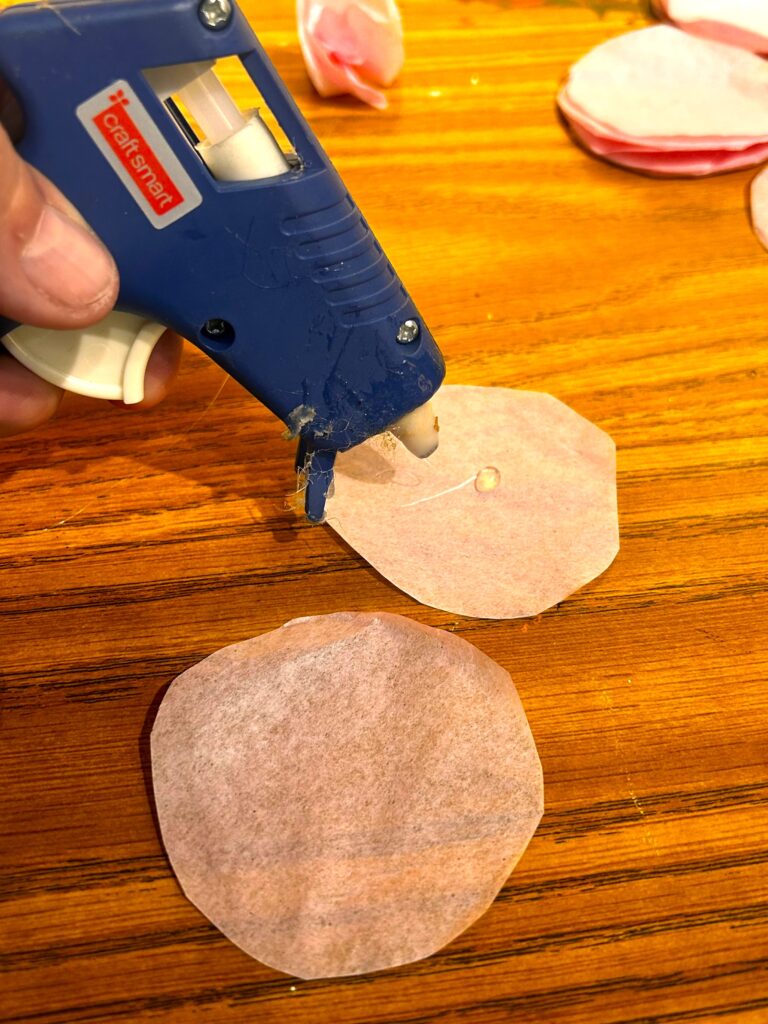
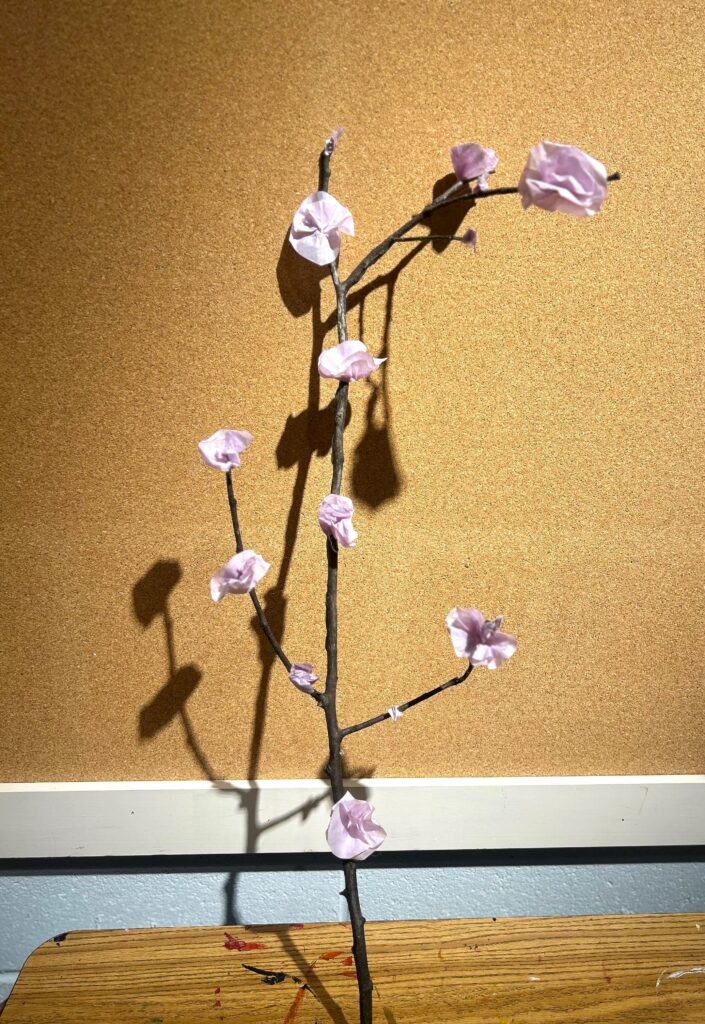
Start by cutting layers of tissue paper into two-inch by two-inch squares. Stack them on top of each other and trim them into circles; don’t worry if they aren’t perfectly round; an oval shape will also work very well.
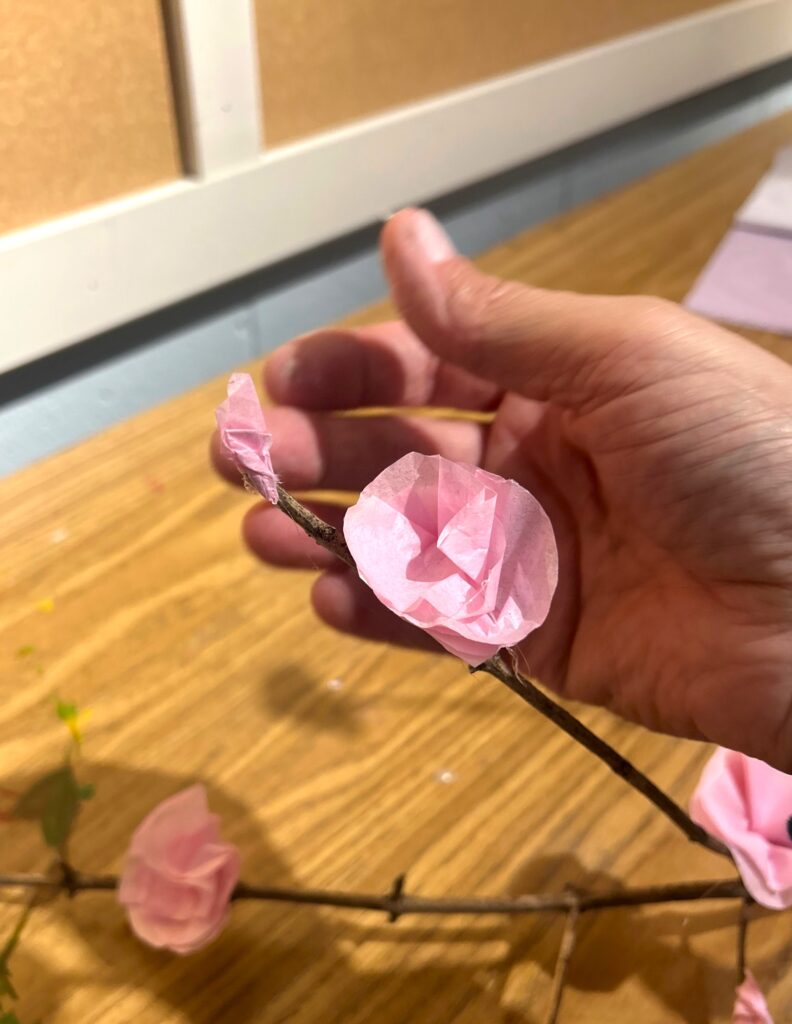
Step 4. Hot glue then, do the twist
Carefully add a dot of hot glue in the center of one of your tissue paper circles. Add a second circle on top of the glue. Pick up the two circles now held together with the glue and use a pointed object to fold and twist your paper petals around; I used the end of a small craft paintbrush. A covered pen or pencil would work well, too.

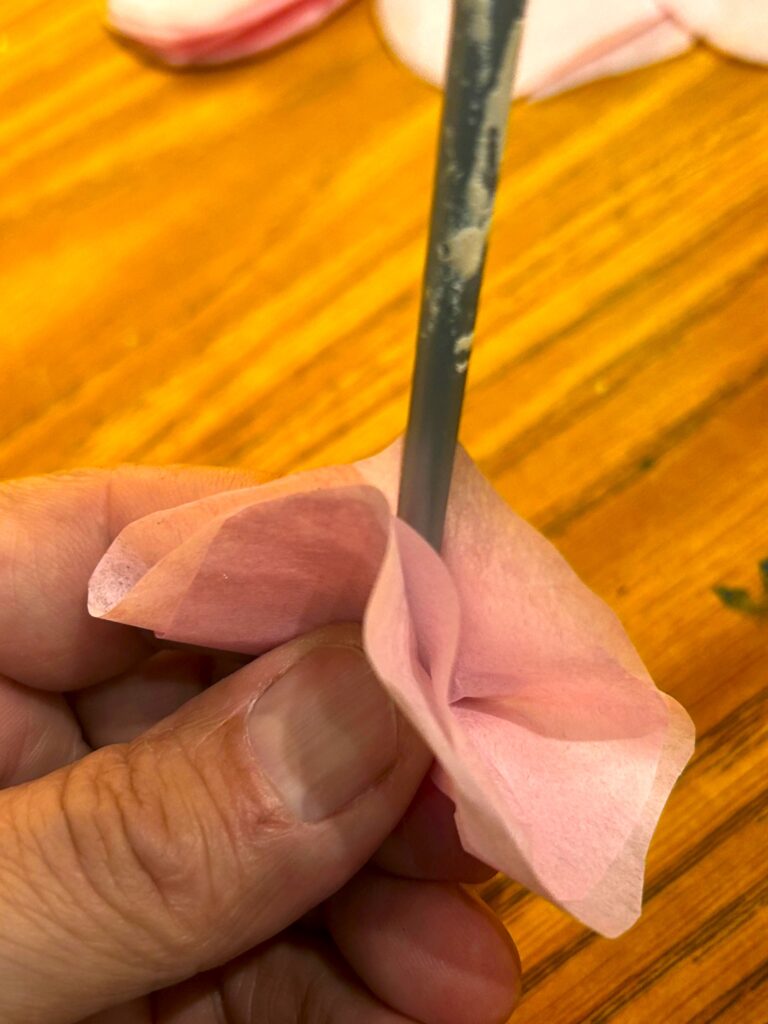
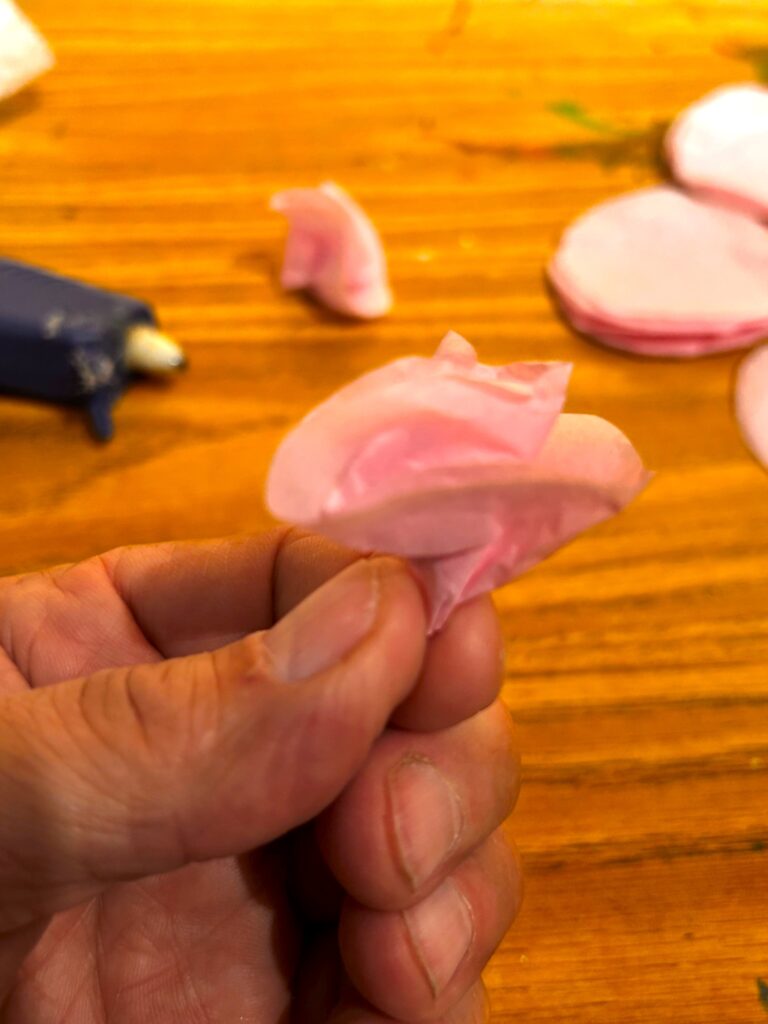
After you place the pointed end of your brush/pen/pencil in the center, twist it and the paper around to make your flower bloom. Remove the brush/pen/pencil and twist the bloom’s bottom with your fingers. You might need to fluff up the petals/bloom part. Voila! You now have a bloom ready to be added to your branches!
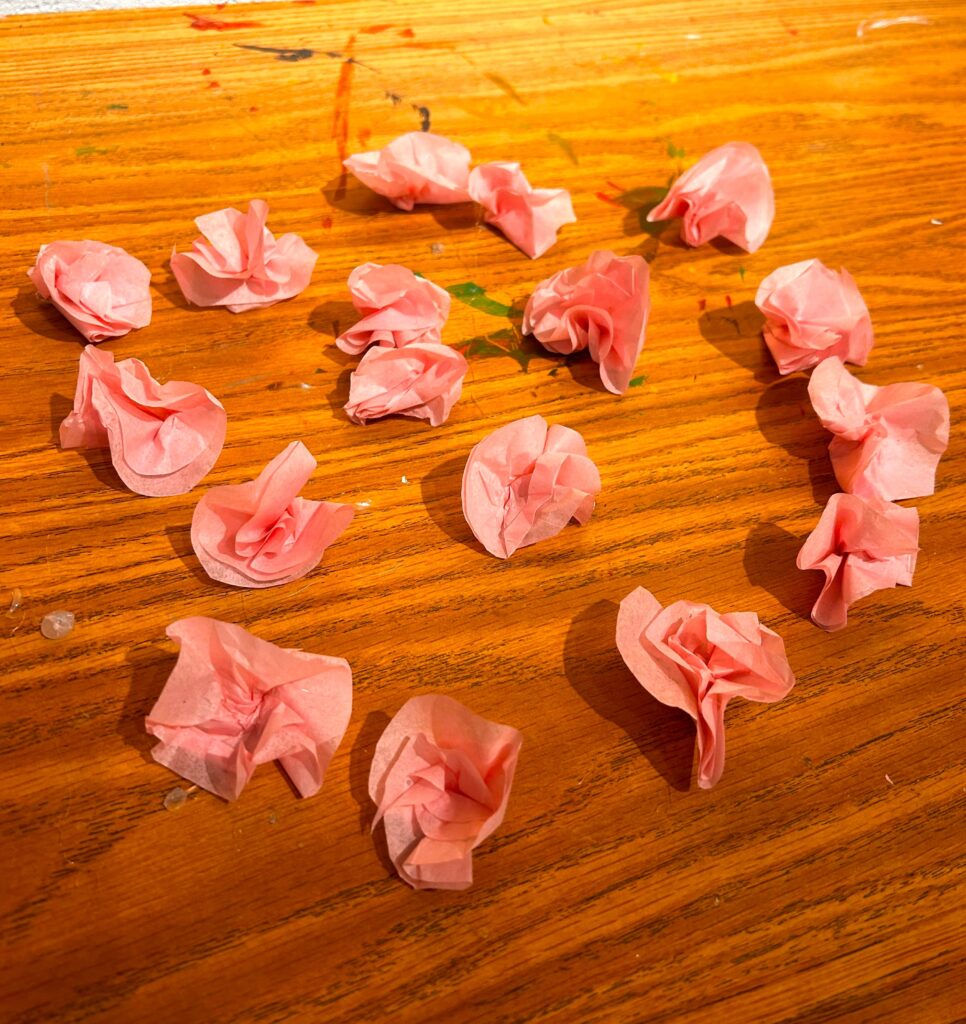
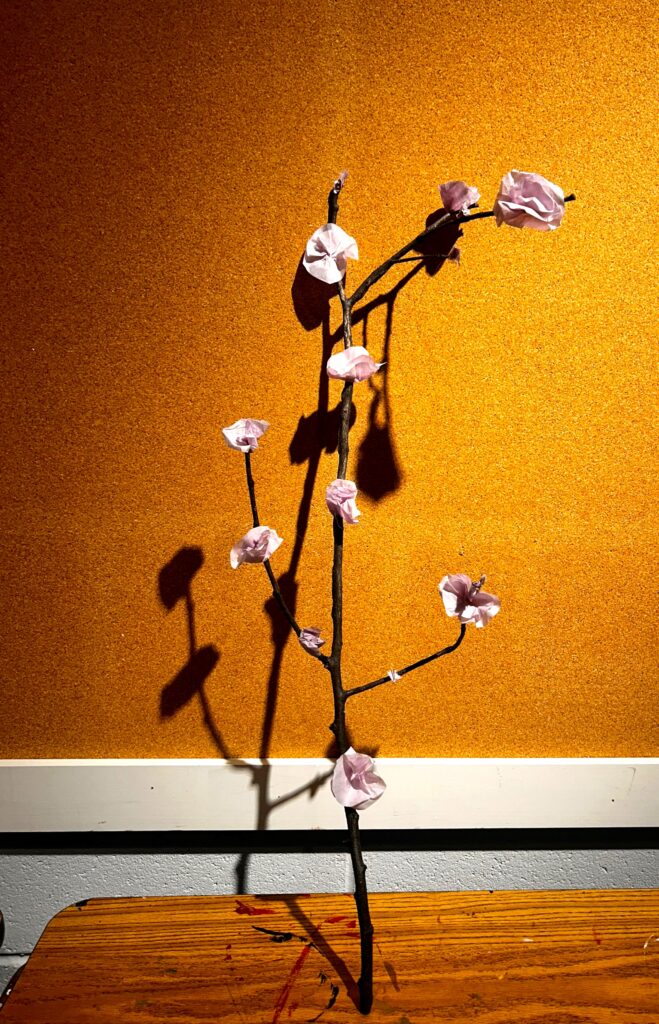
Create a collection to add to each branch; ideally, keep your pink blooms on one branch and your lavender ones on another.
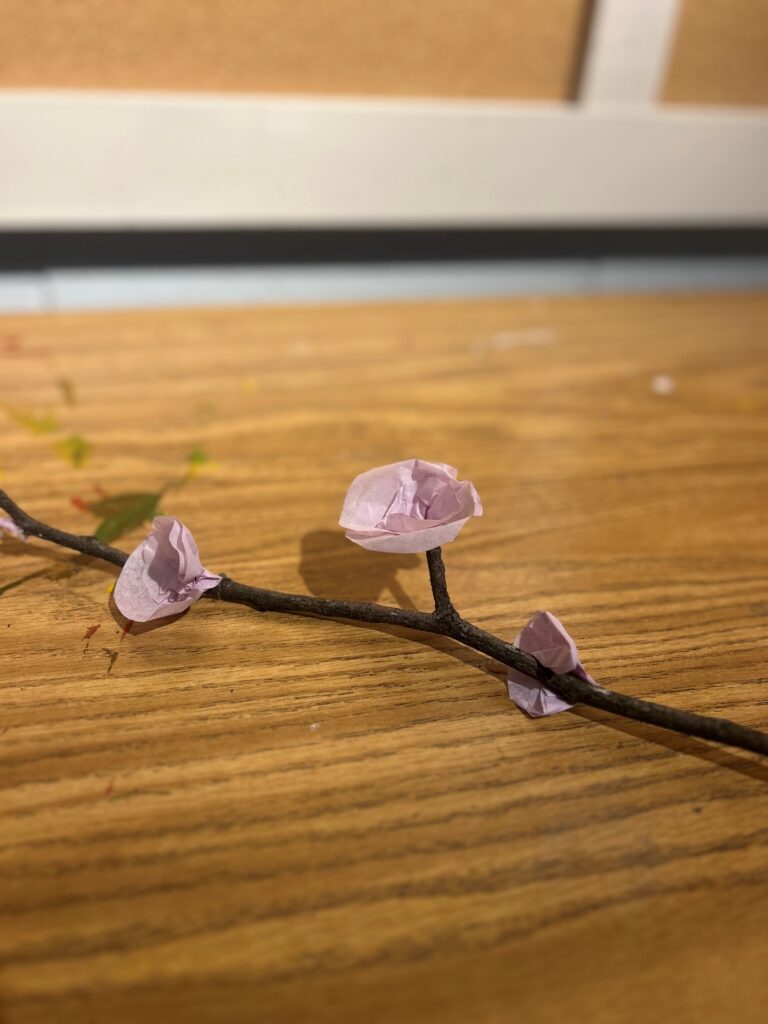
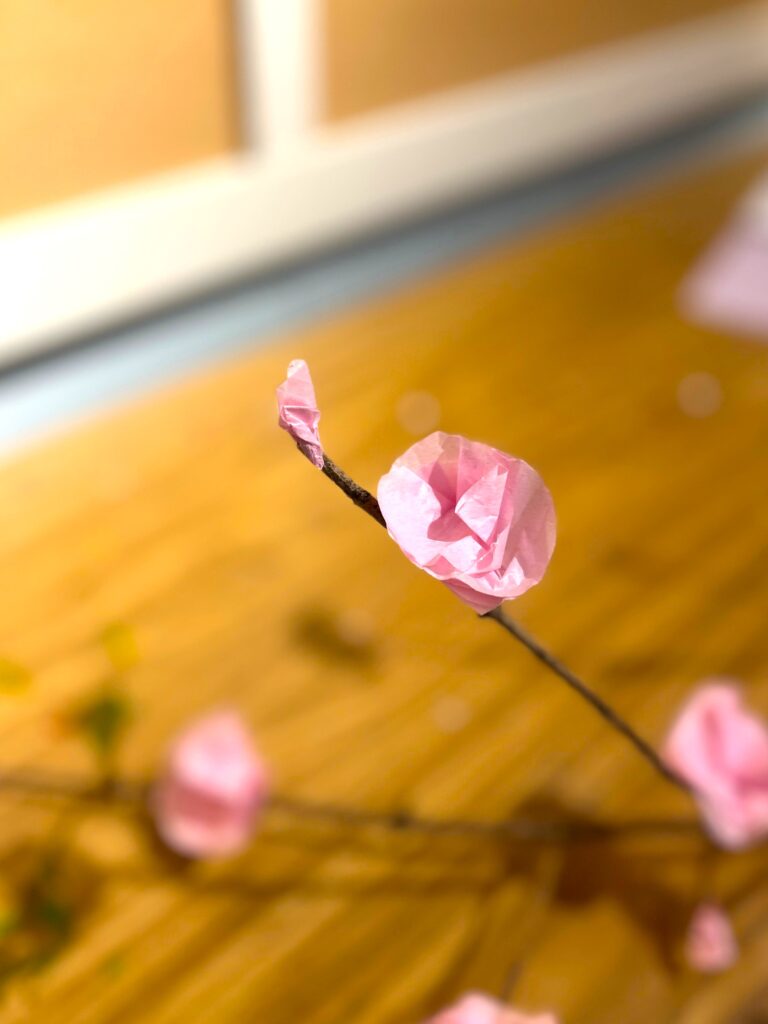
Step 5. Glue your blooms
Up and down your branches, add blooms with hot glue. If there is a small branch sticking out, secure a flower there. Space them out so each part of your branch appears to be blooming away.
Design idea:
Most of your tissue paper blooms will be about the same size and shape. Consider taking some of the scrap pieces and twisting and wrapping them together, too, to make smaller buds. Use your hot glue gun to place them on the ends of your branches and other places, too.
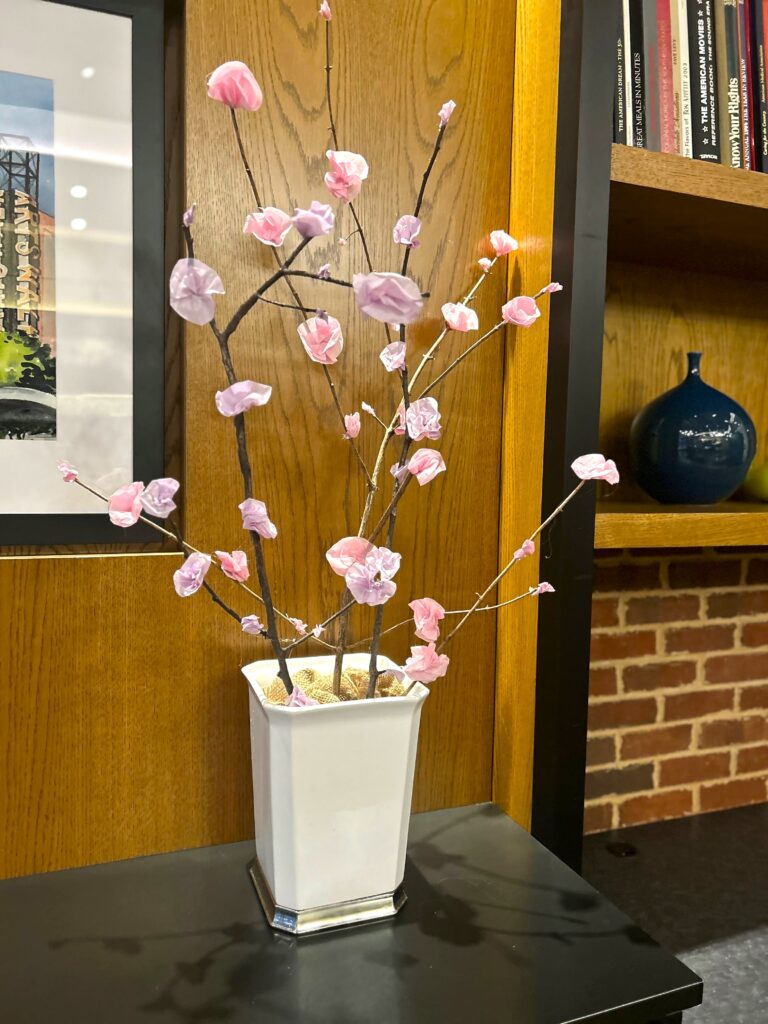
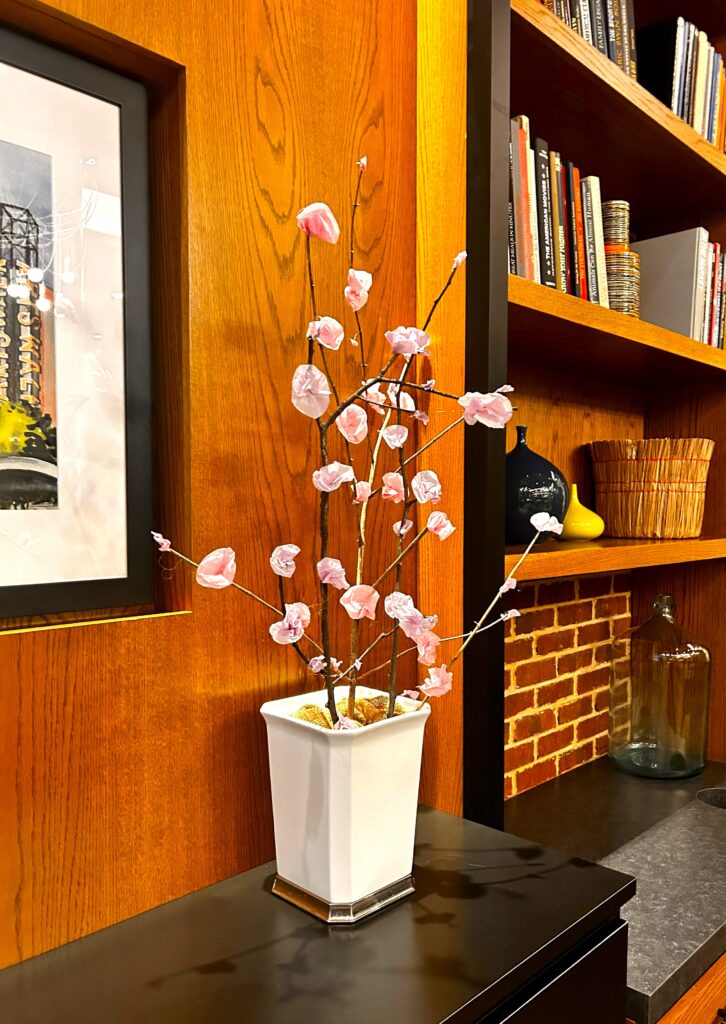
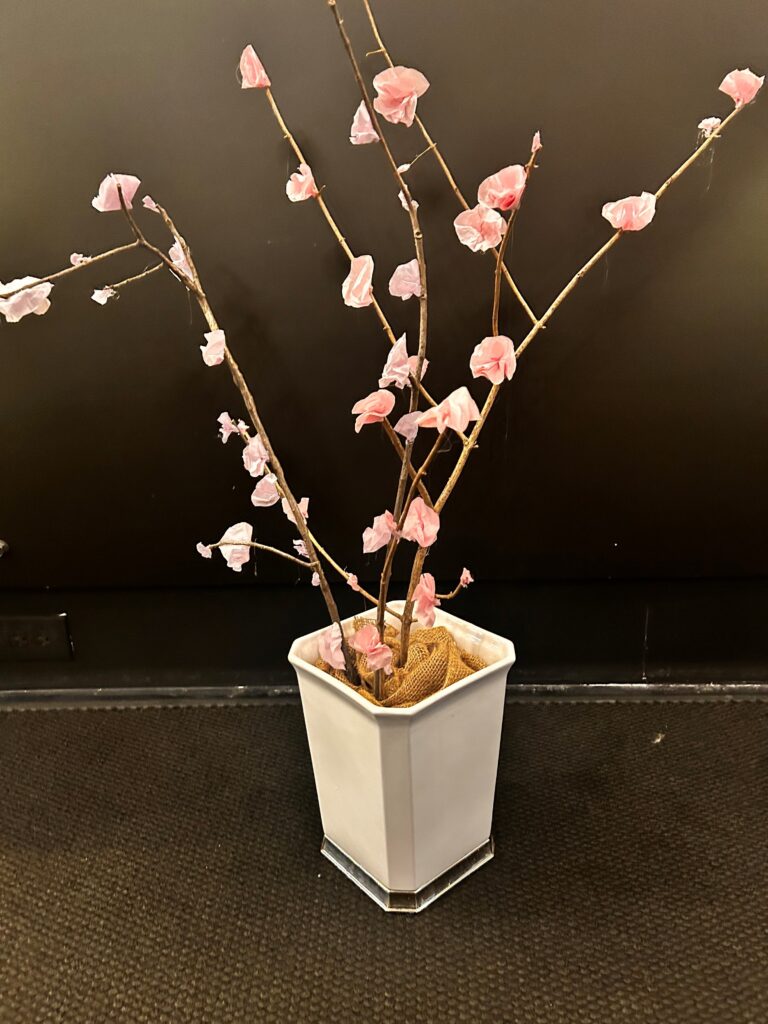
Step 6. Arrange in your vase
Place one or all of your blooming branches in your vase/base/container. For the best final look, stick to an odd number of branches, such as one, three, or five.
You don’t want your arrangement to look too symmetrical but organic and visually balanced.
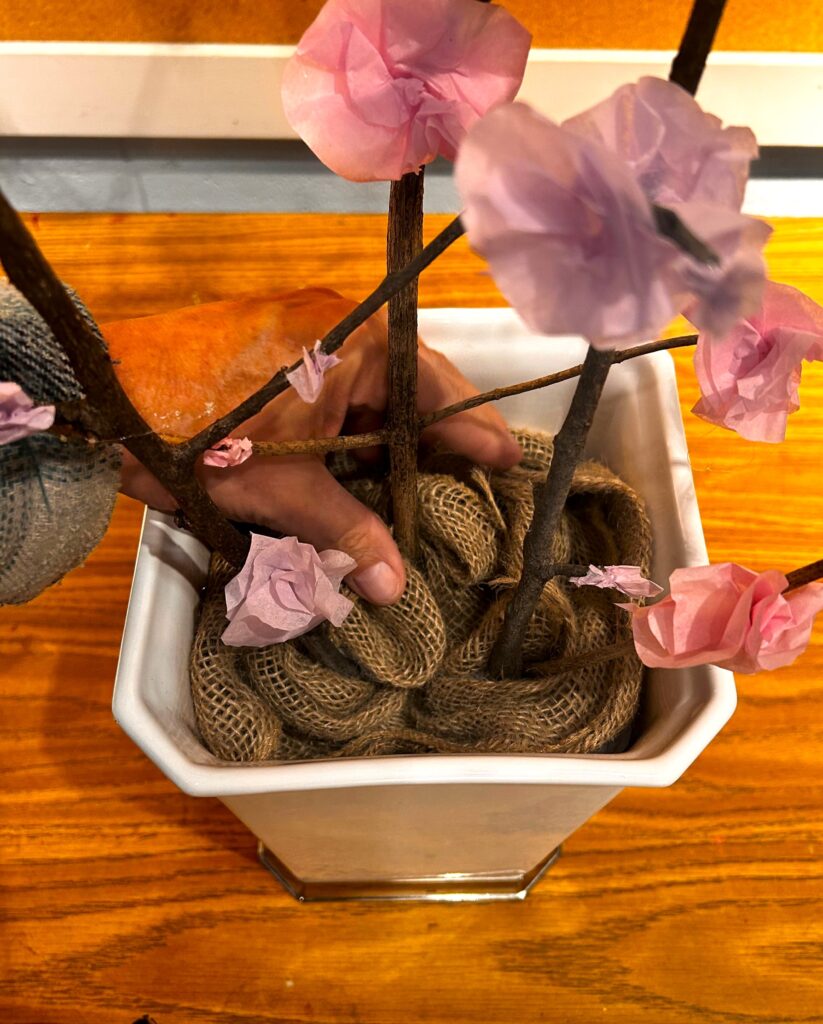
Based on your container, consider adding additional tissue paper, newspaper, or plastic grocery bags to hold the blooming branches upright and in place.
Finish it off by covering the inside of the vase/base with fabric, craft moss, or even pebbles.
This will give it a finished, well-thought-out look and feel.
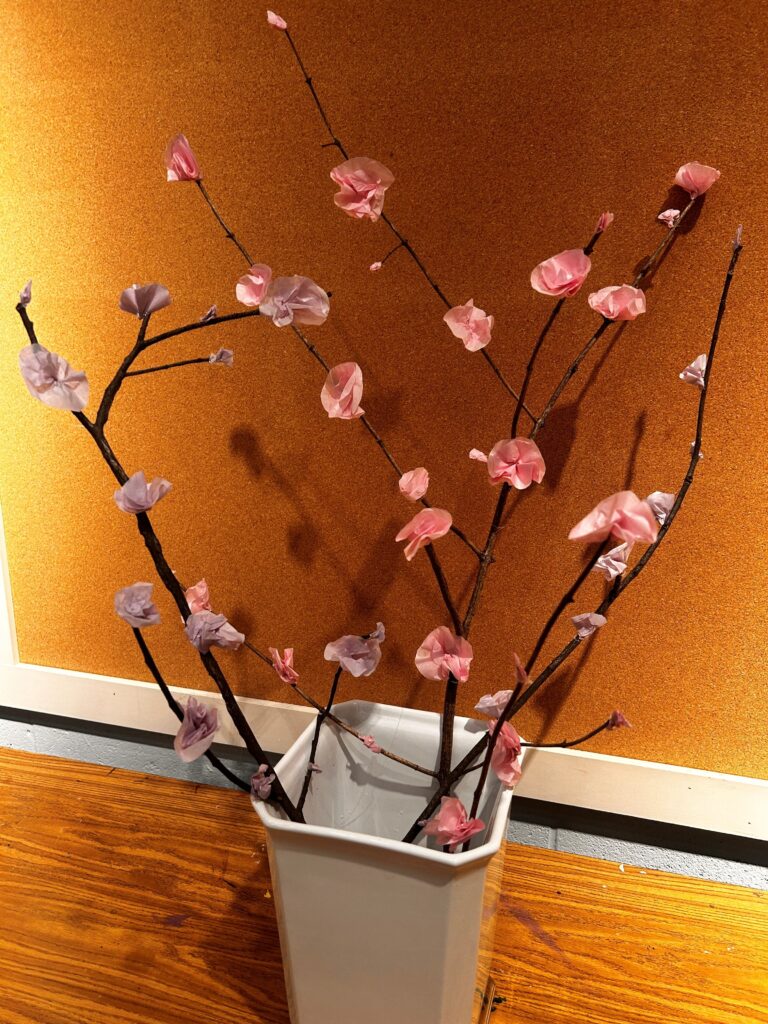
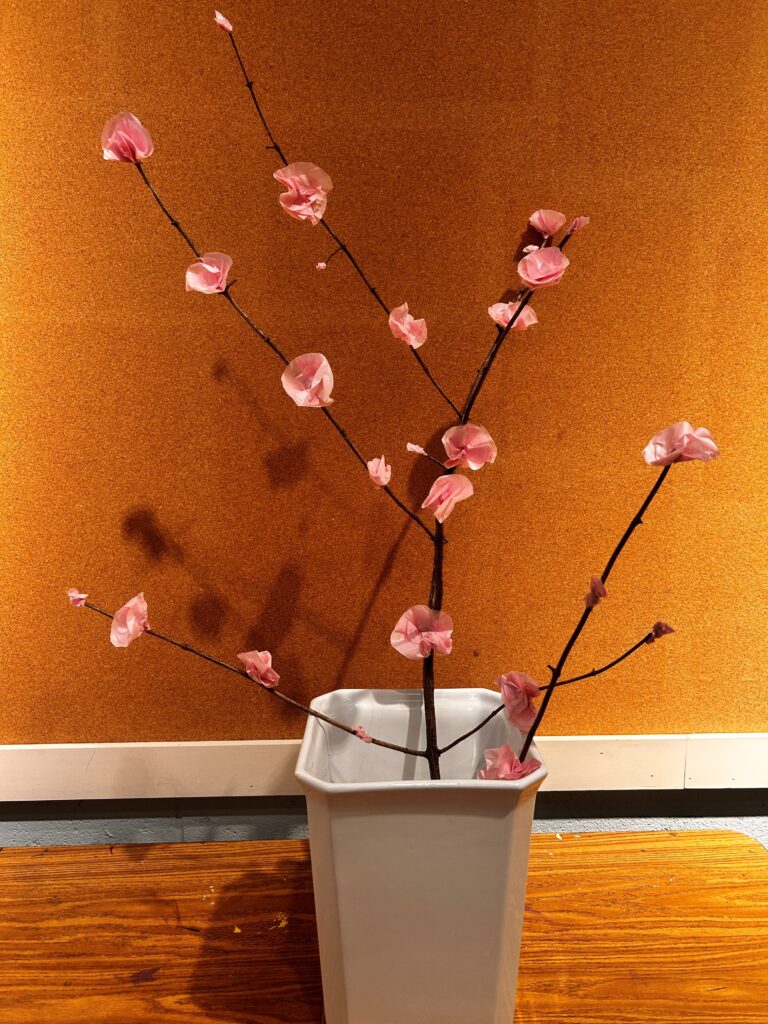
Step 7. Set and celebrate
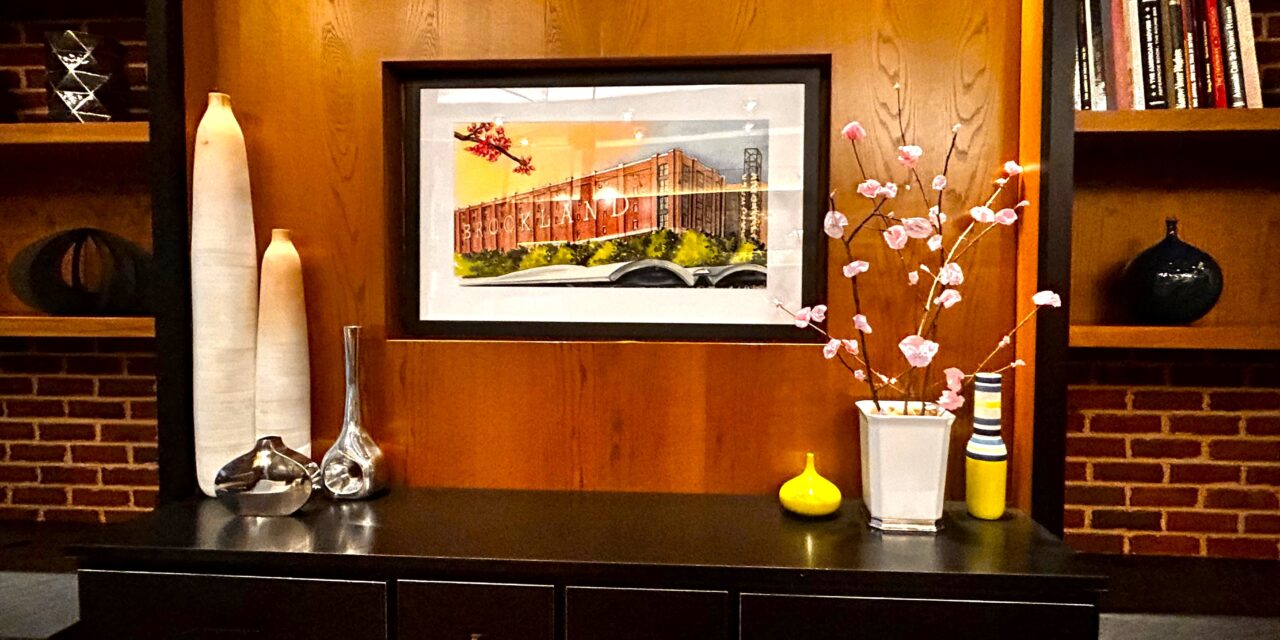
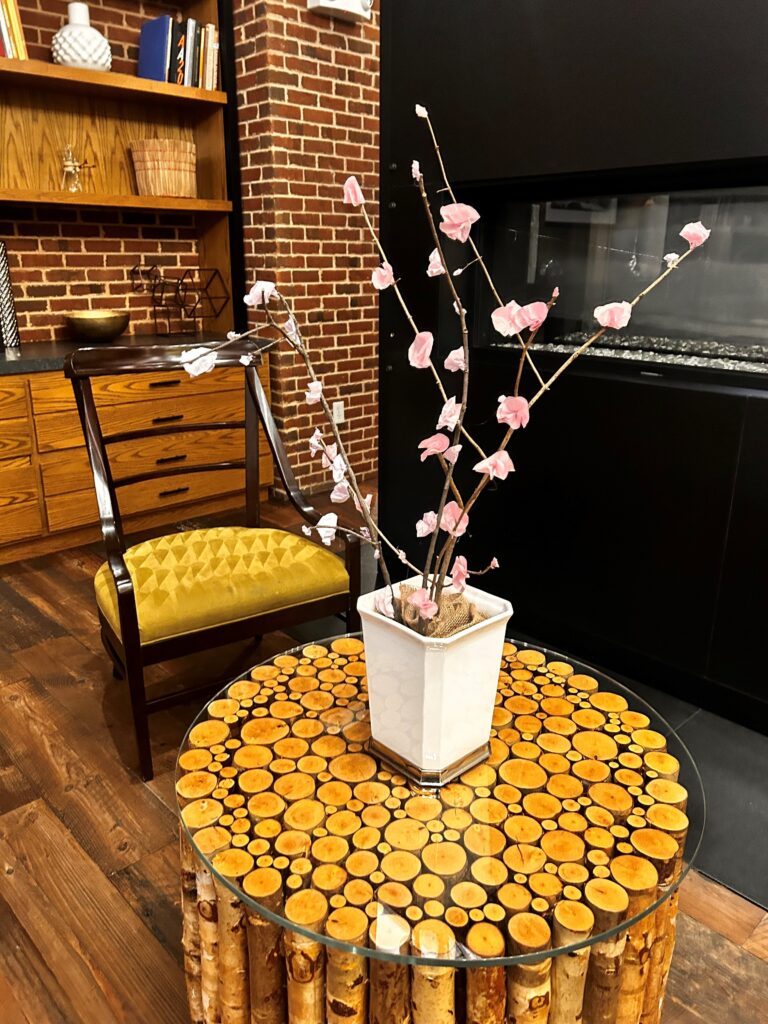
Place your blooming branches vase on a table, countertop, window ledge, or mantel, and add other colorful, complimentary accessories and decorative items.
Goodwill always has great knickknacks to help you create a charming, eye-catching vignette. Your blooming branches arrangement will look vibrant and colorful long after Spring has passed.
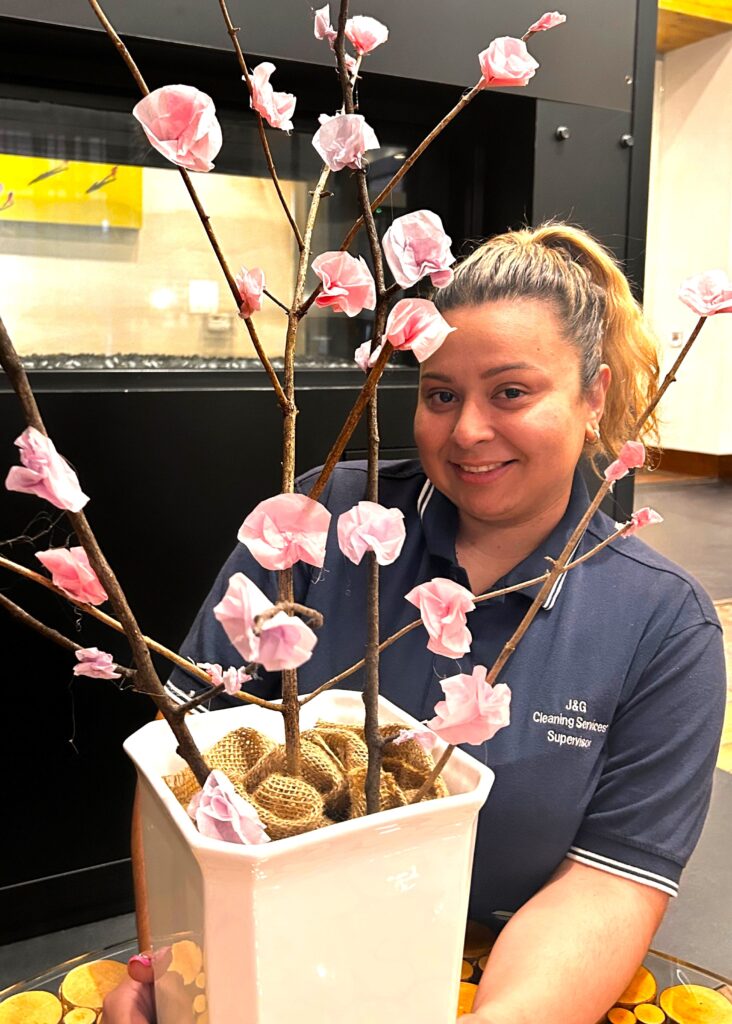
Celebrate the season, Mother Nature, and your DIY skills now as you display this DIY project with delight!
Similar Reads:
- Use Sunflowers to Inspire Your DIY Designs! – Finding Your Good
- Noodle on This DIY: Fun Flowers From Pool Accessories & Goodwill Finds – Finding Your Good
- DIY: Toilet Paper Roll Flowers & Butterflies
- DIY: Cherry Blossom Upcycle Ideas

Tim Kime
Artist, Motivational Speaker, Life Coach
