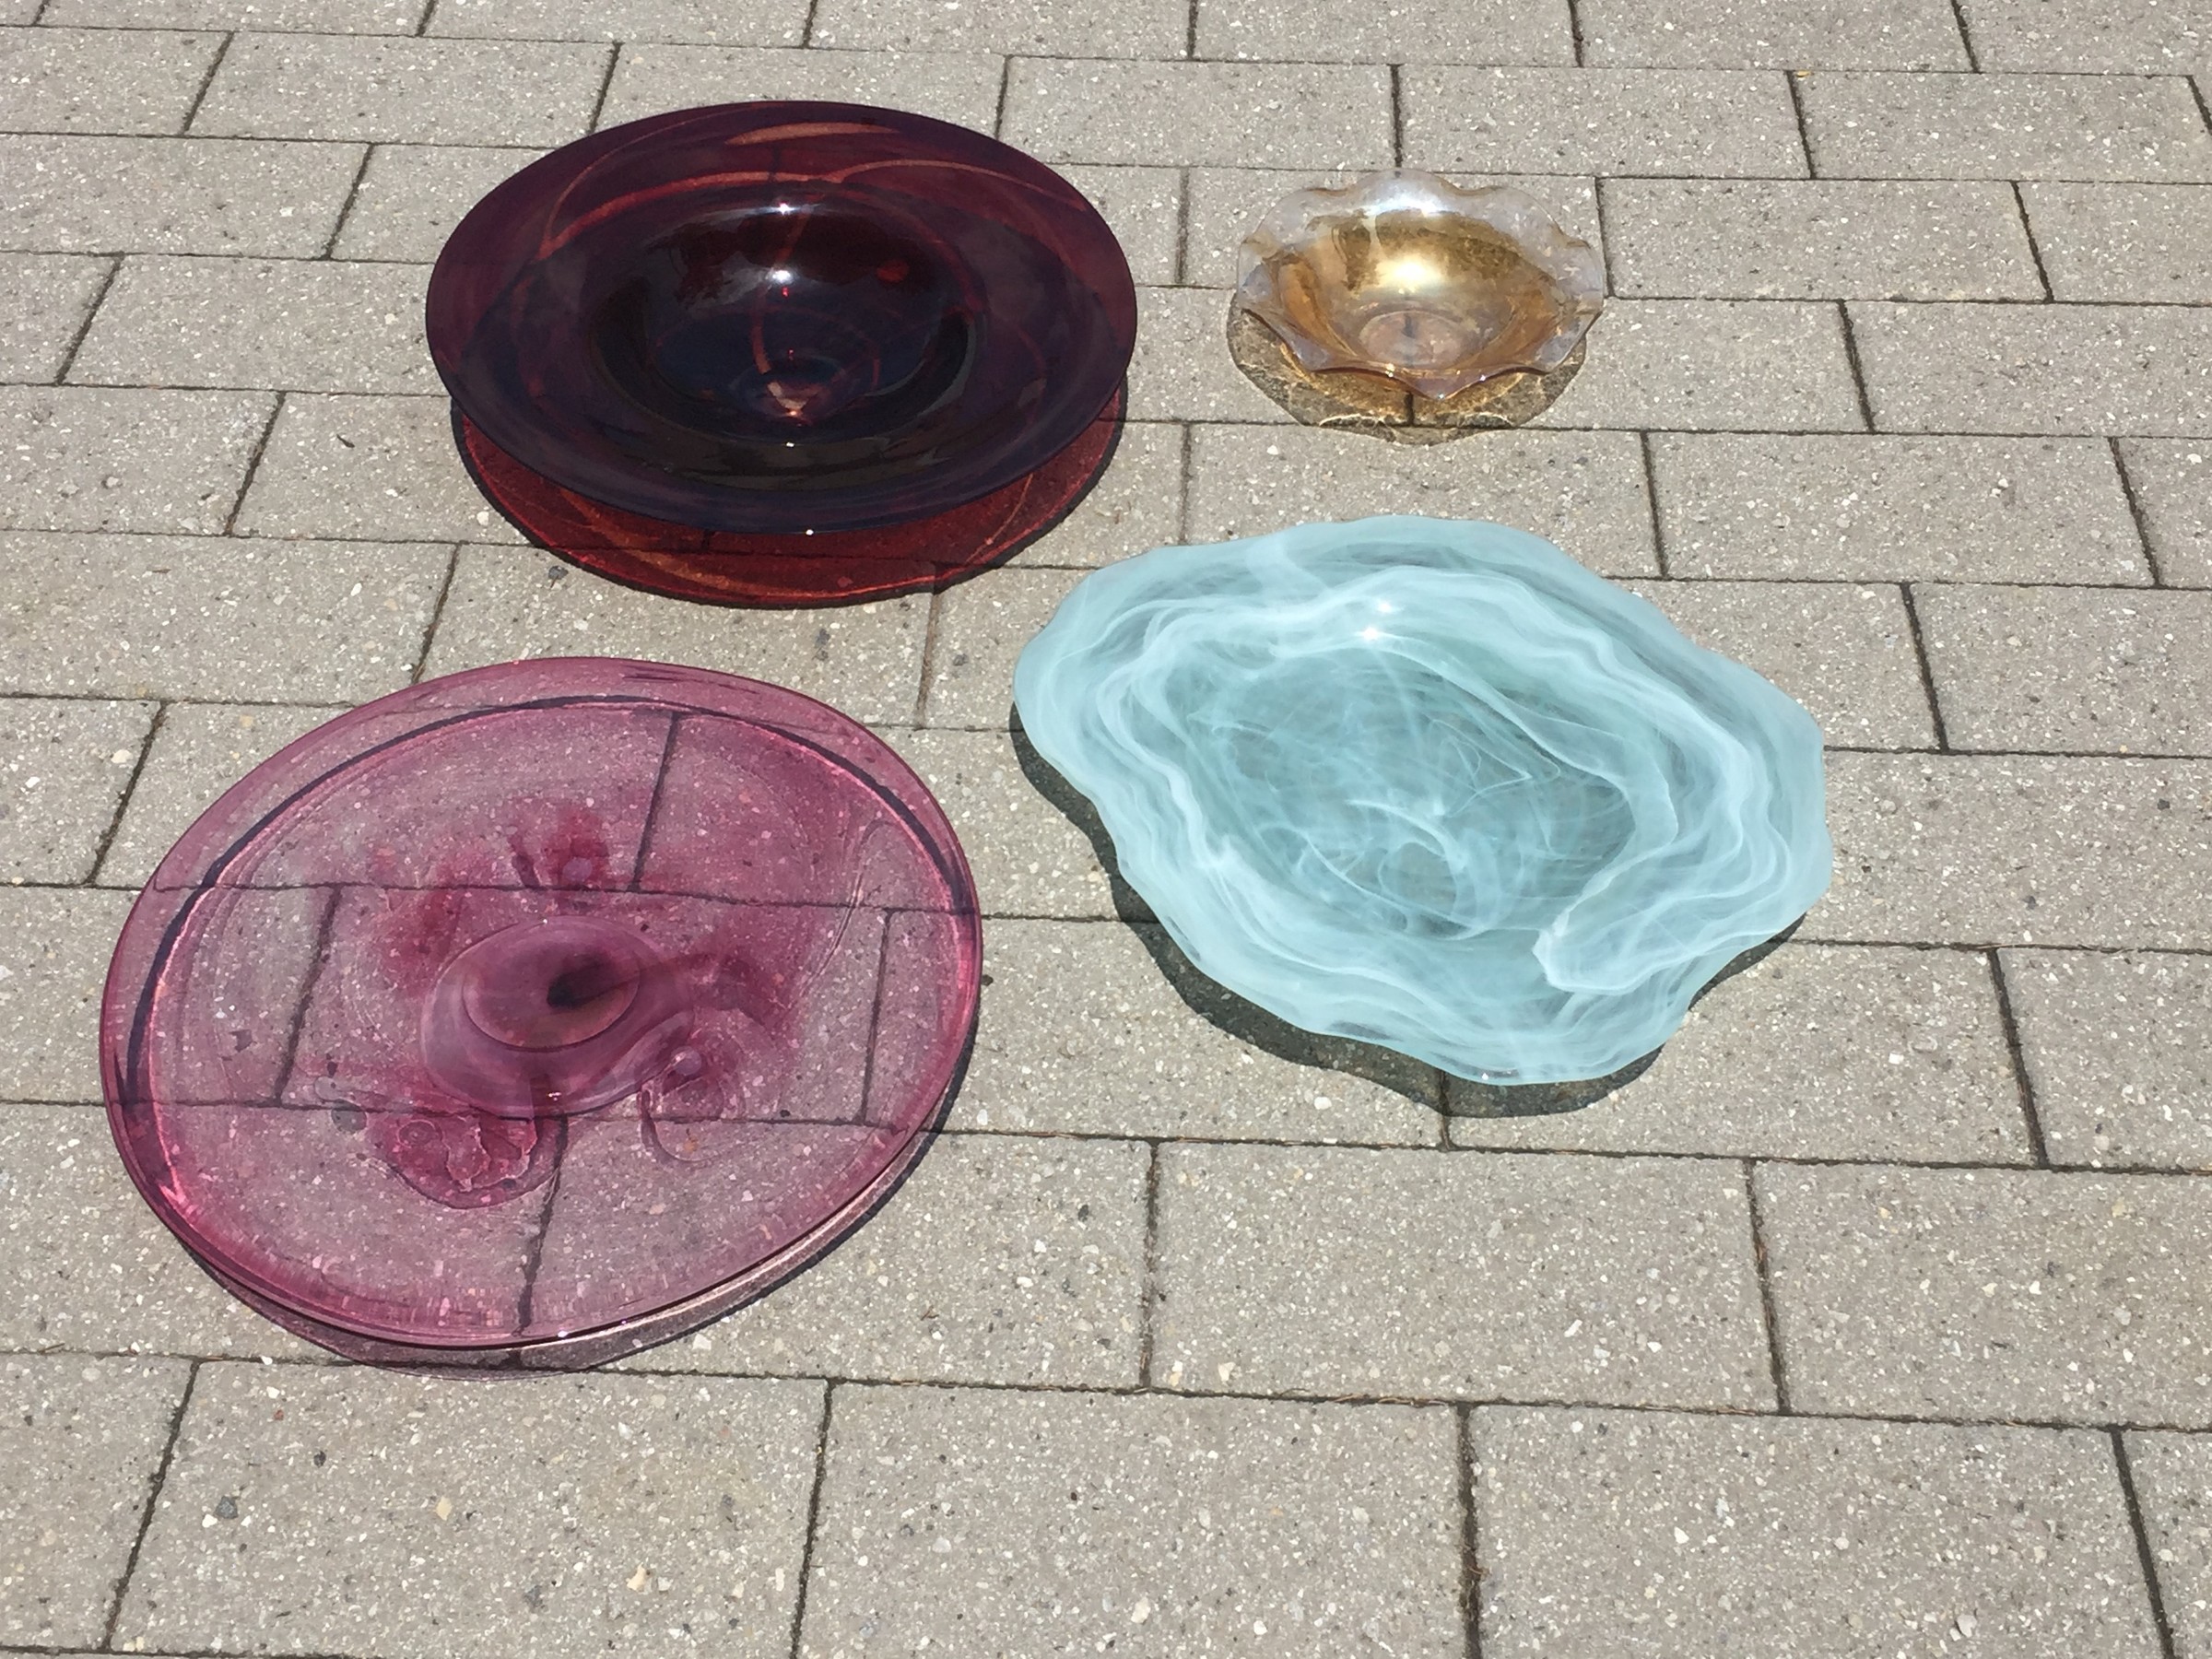
An upcycled glass platter is sure to capture the attention of birds as well as your family, friends, and neighbors when it steps up as a functional art piece and bird bath. Move these glass platters from the coffee table or buffet into your yard or garden where they will be eye-catching centerpieces.
Ability level: Easy to moderate due to glass and drilling
Age Level: Older kids and adults
Items needed:
- Colored glass platters or colored clear glass bowls
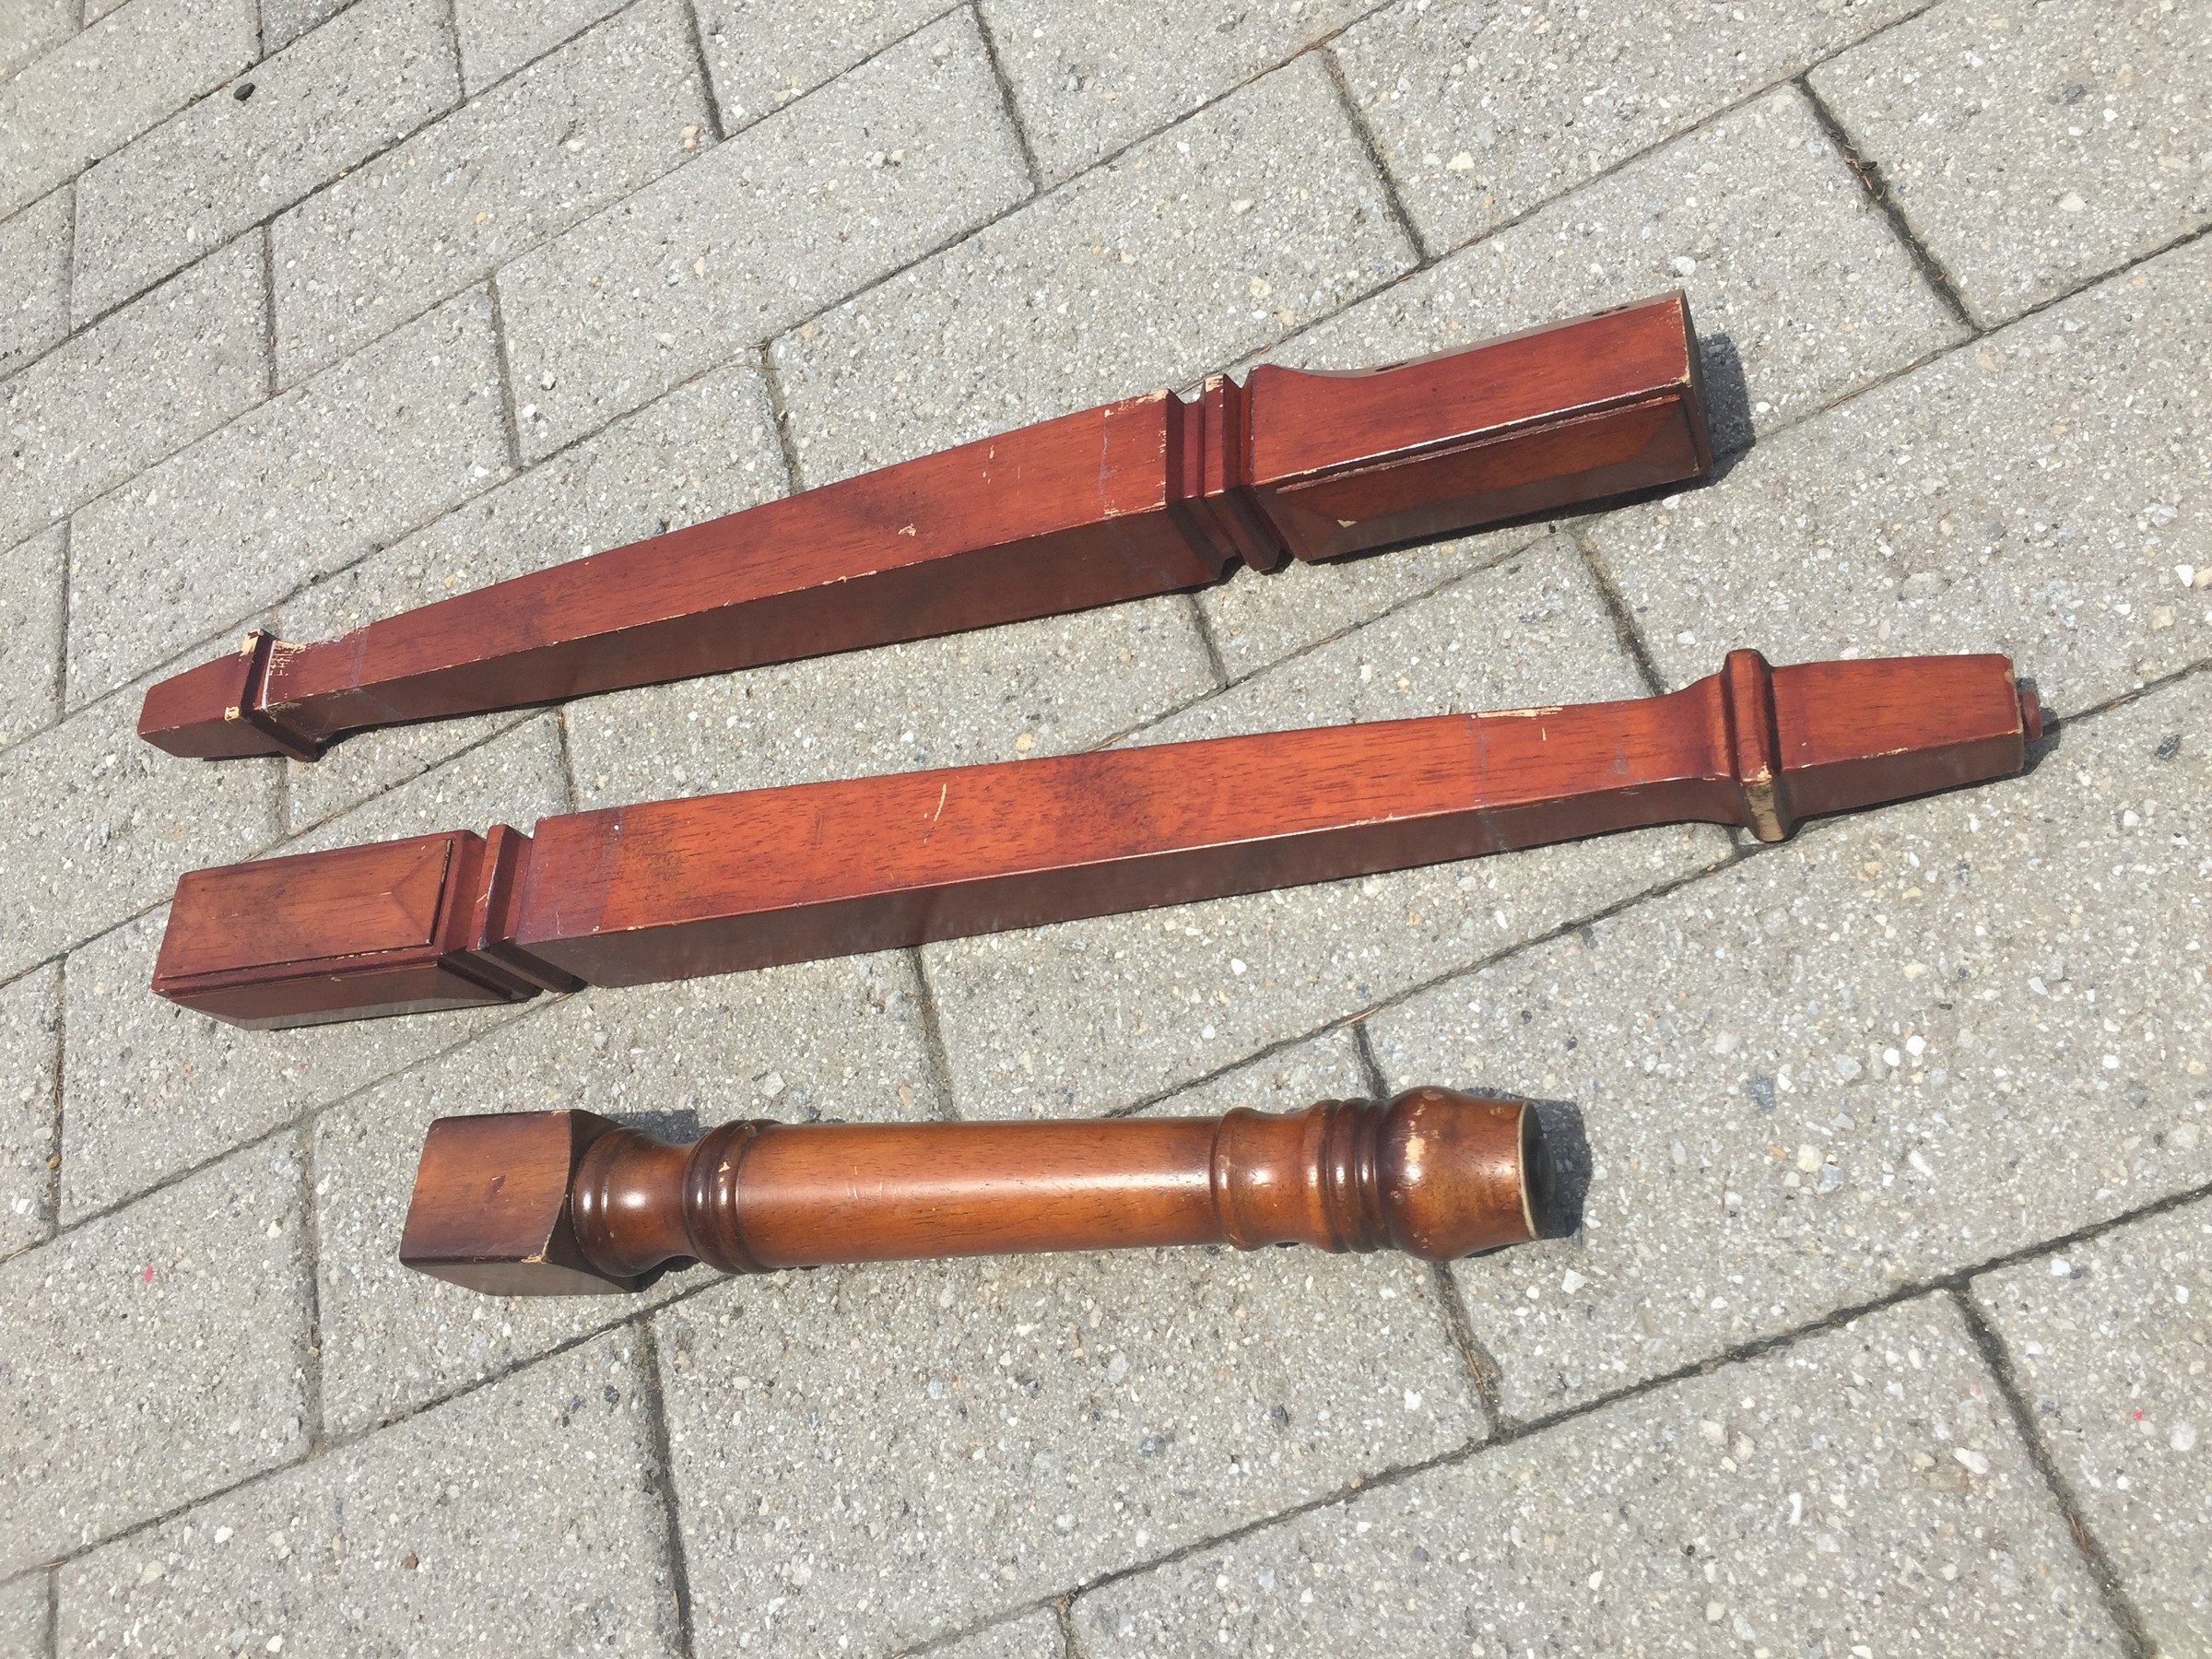
- Table legs
- Goop adhesive/glue
- L-brackets
- Painter’s tape
- Long wood screws
- Drill
- Screwdriver
- Shovel or garden trowel
- Exterior paint (optional)
Time requirement: 30 minutes (not including glue drying time)
Cost: Approximately $18
- $10 per glass platter
- $2 for table legs
- $5 for Goop glue*
- $.50 for long wood screw
- $5 for Painter’s tape*
*There will be lots left over for your next transformation
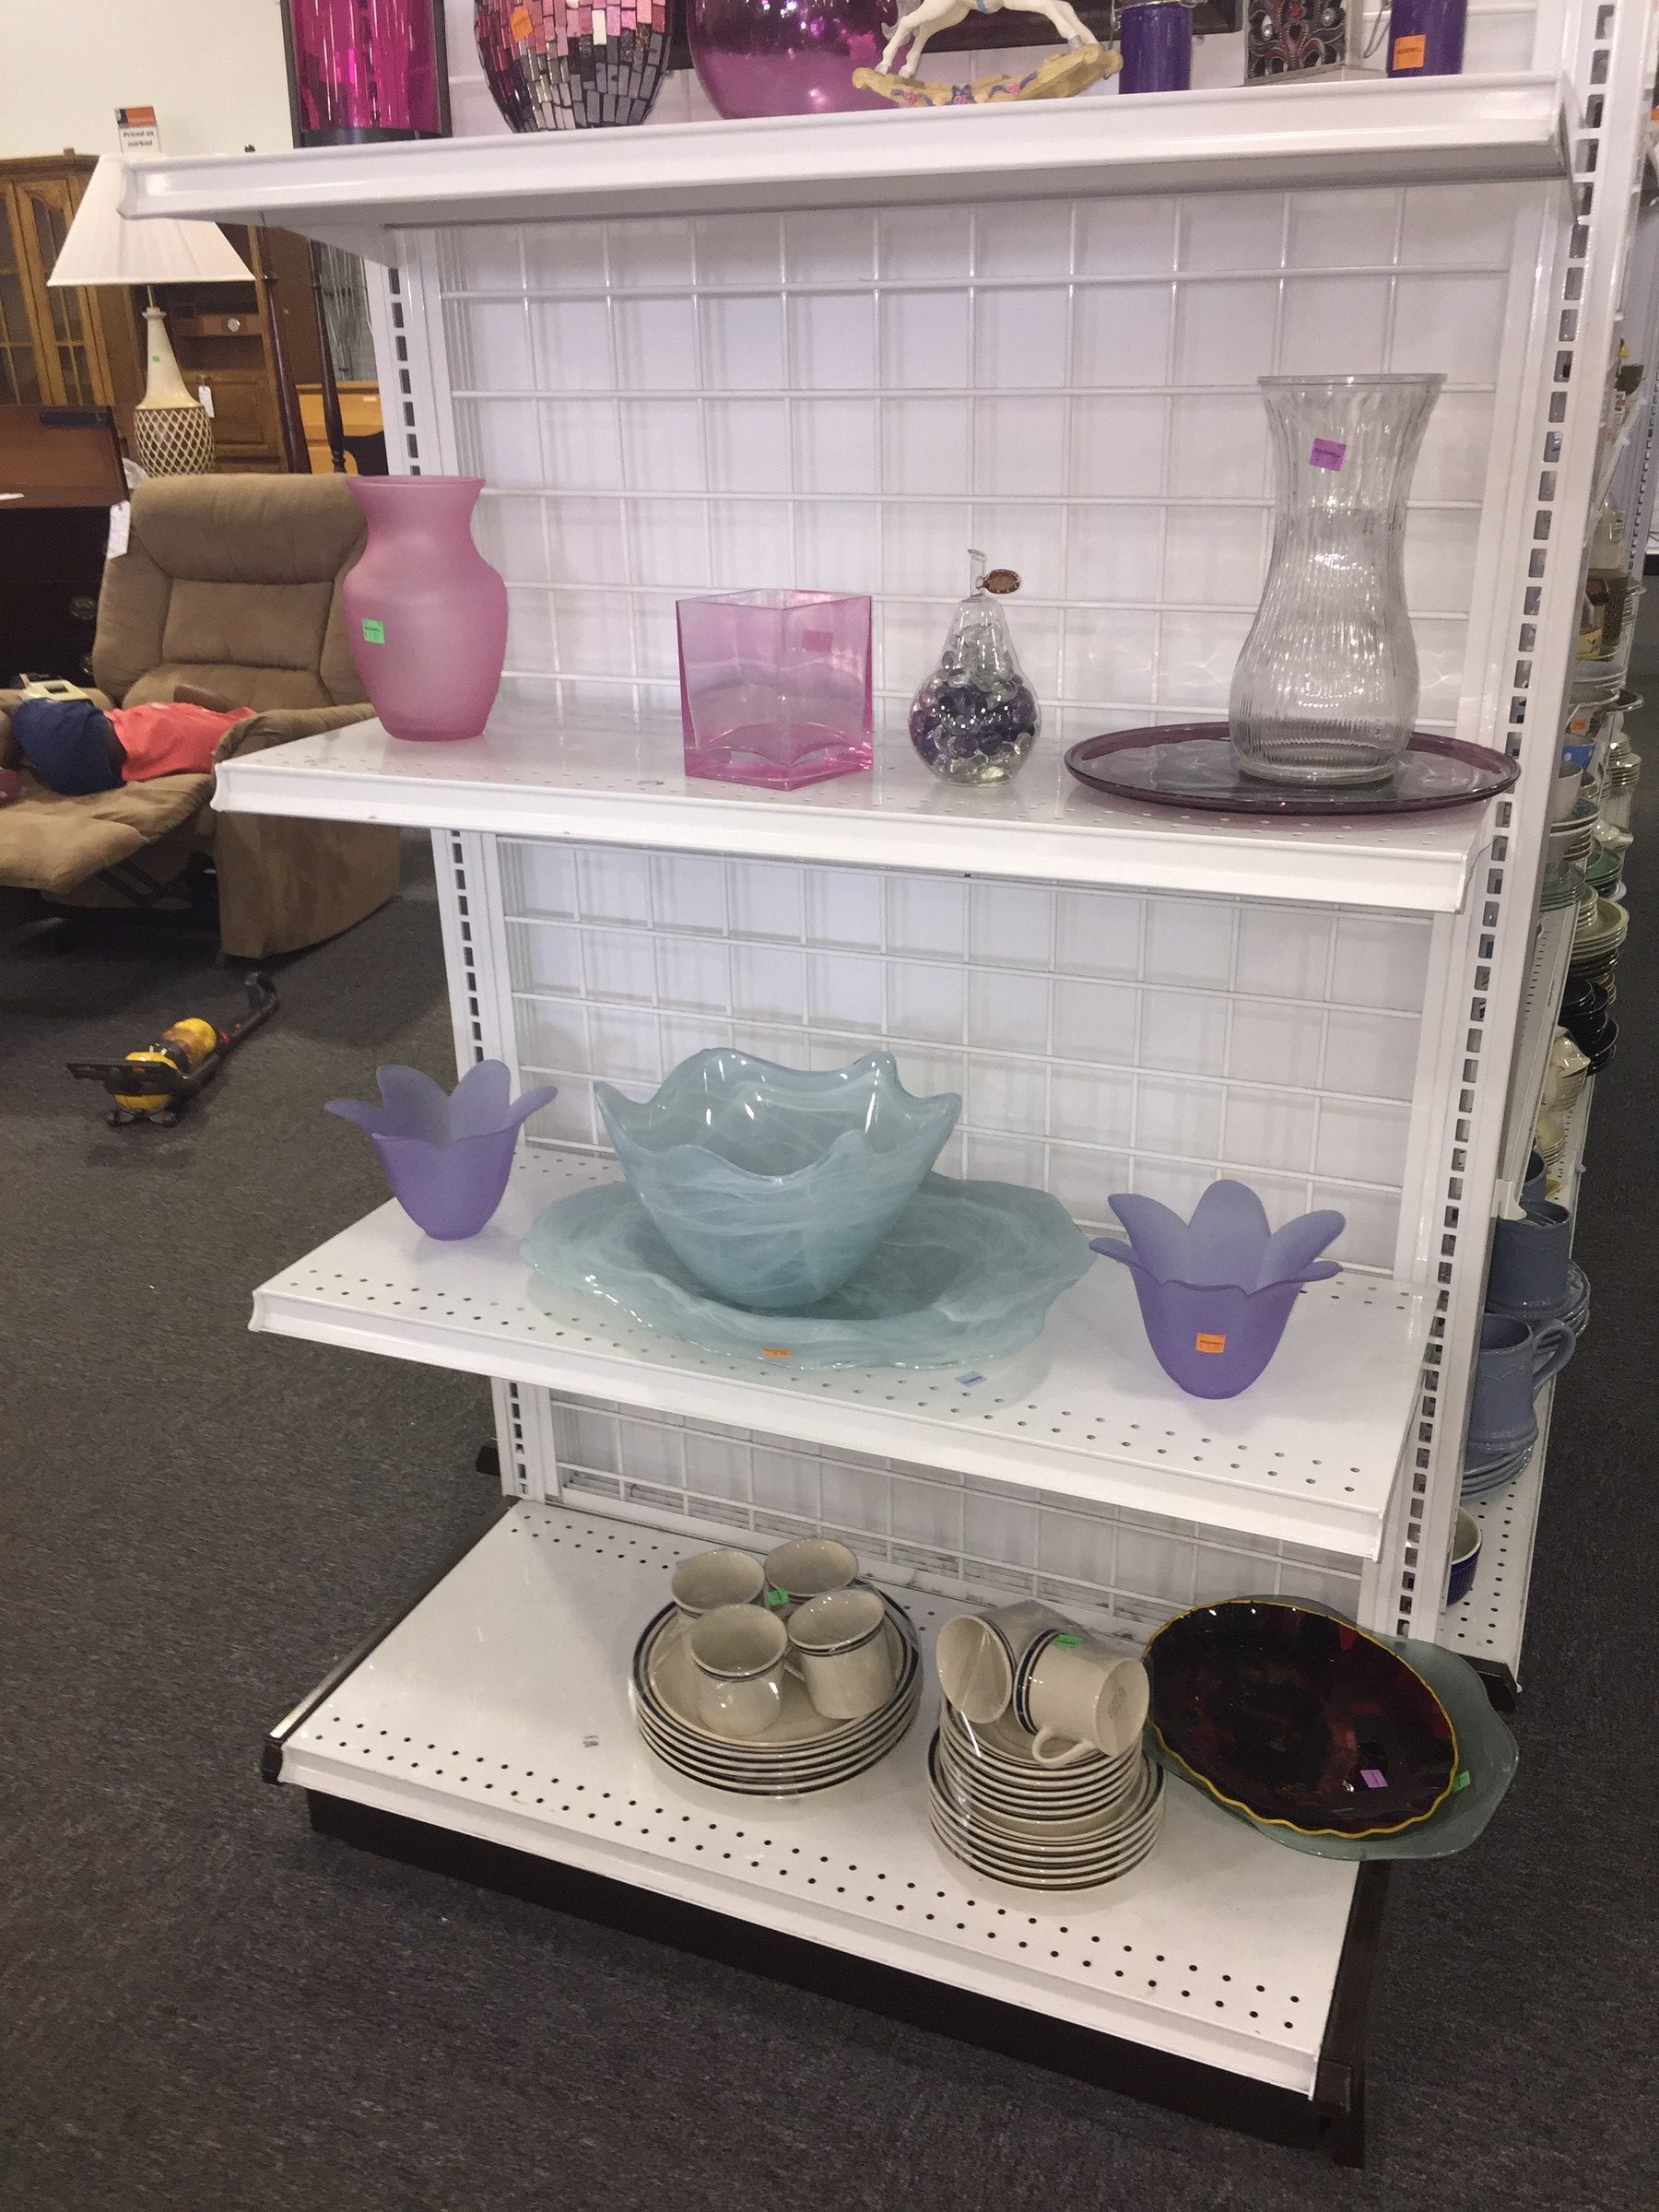
Step 1: You never know what you’ll find when you go hunting
One of the great things about stopping by your nearest Goodwill store on a regular basis is that there are always unexpected and unusual things waiting to be taken home and given a new life. Case in point: colored, clear glass platters typically used in a home as a decorative accent piece. With this project, these platters go from one of many accessories in the room to a one-a-kind piece for your garden that the birds get to use. While at Goodwill, look for a coffee or side table with solid wooden legs that can be removed and reused for this project.
Step 2: Go on and glue it good
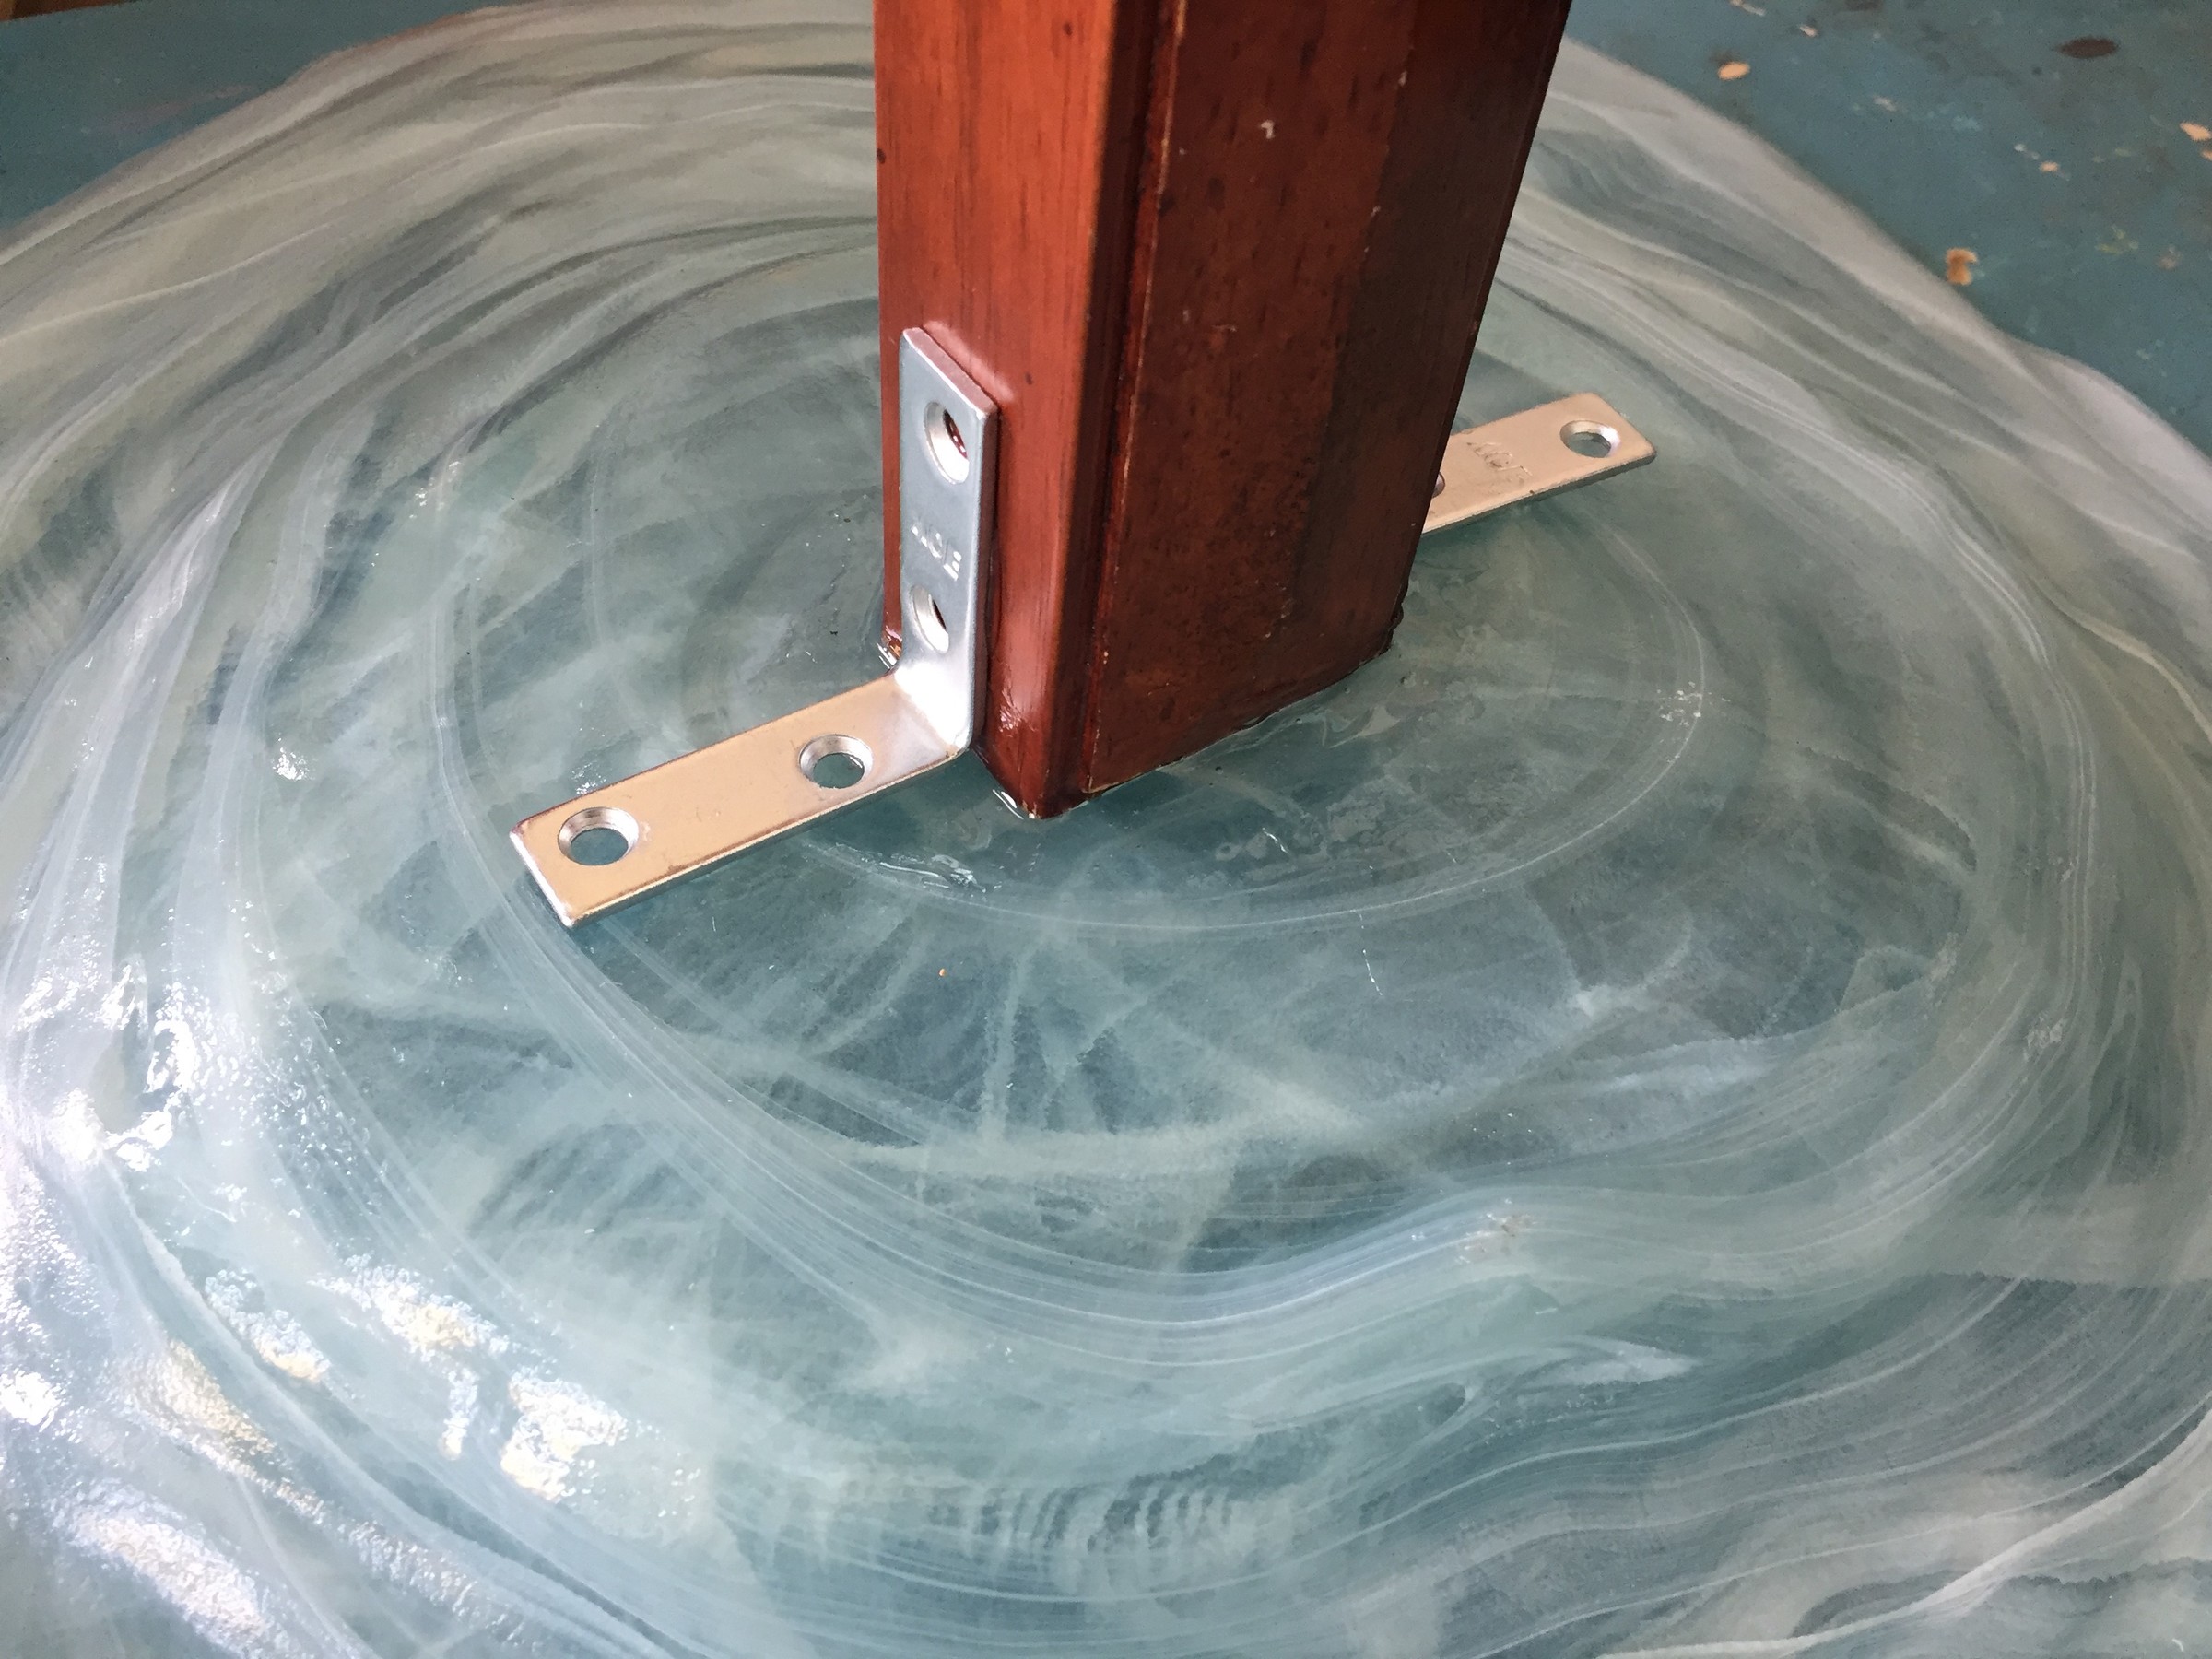
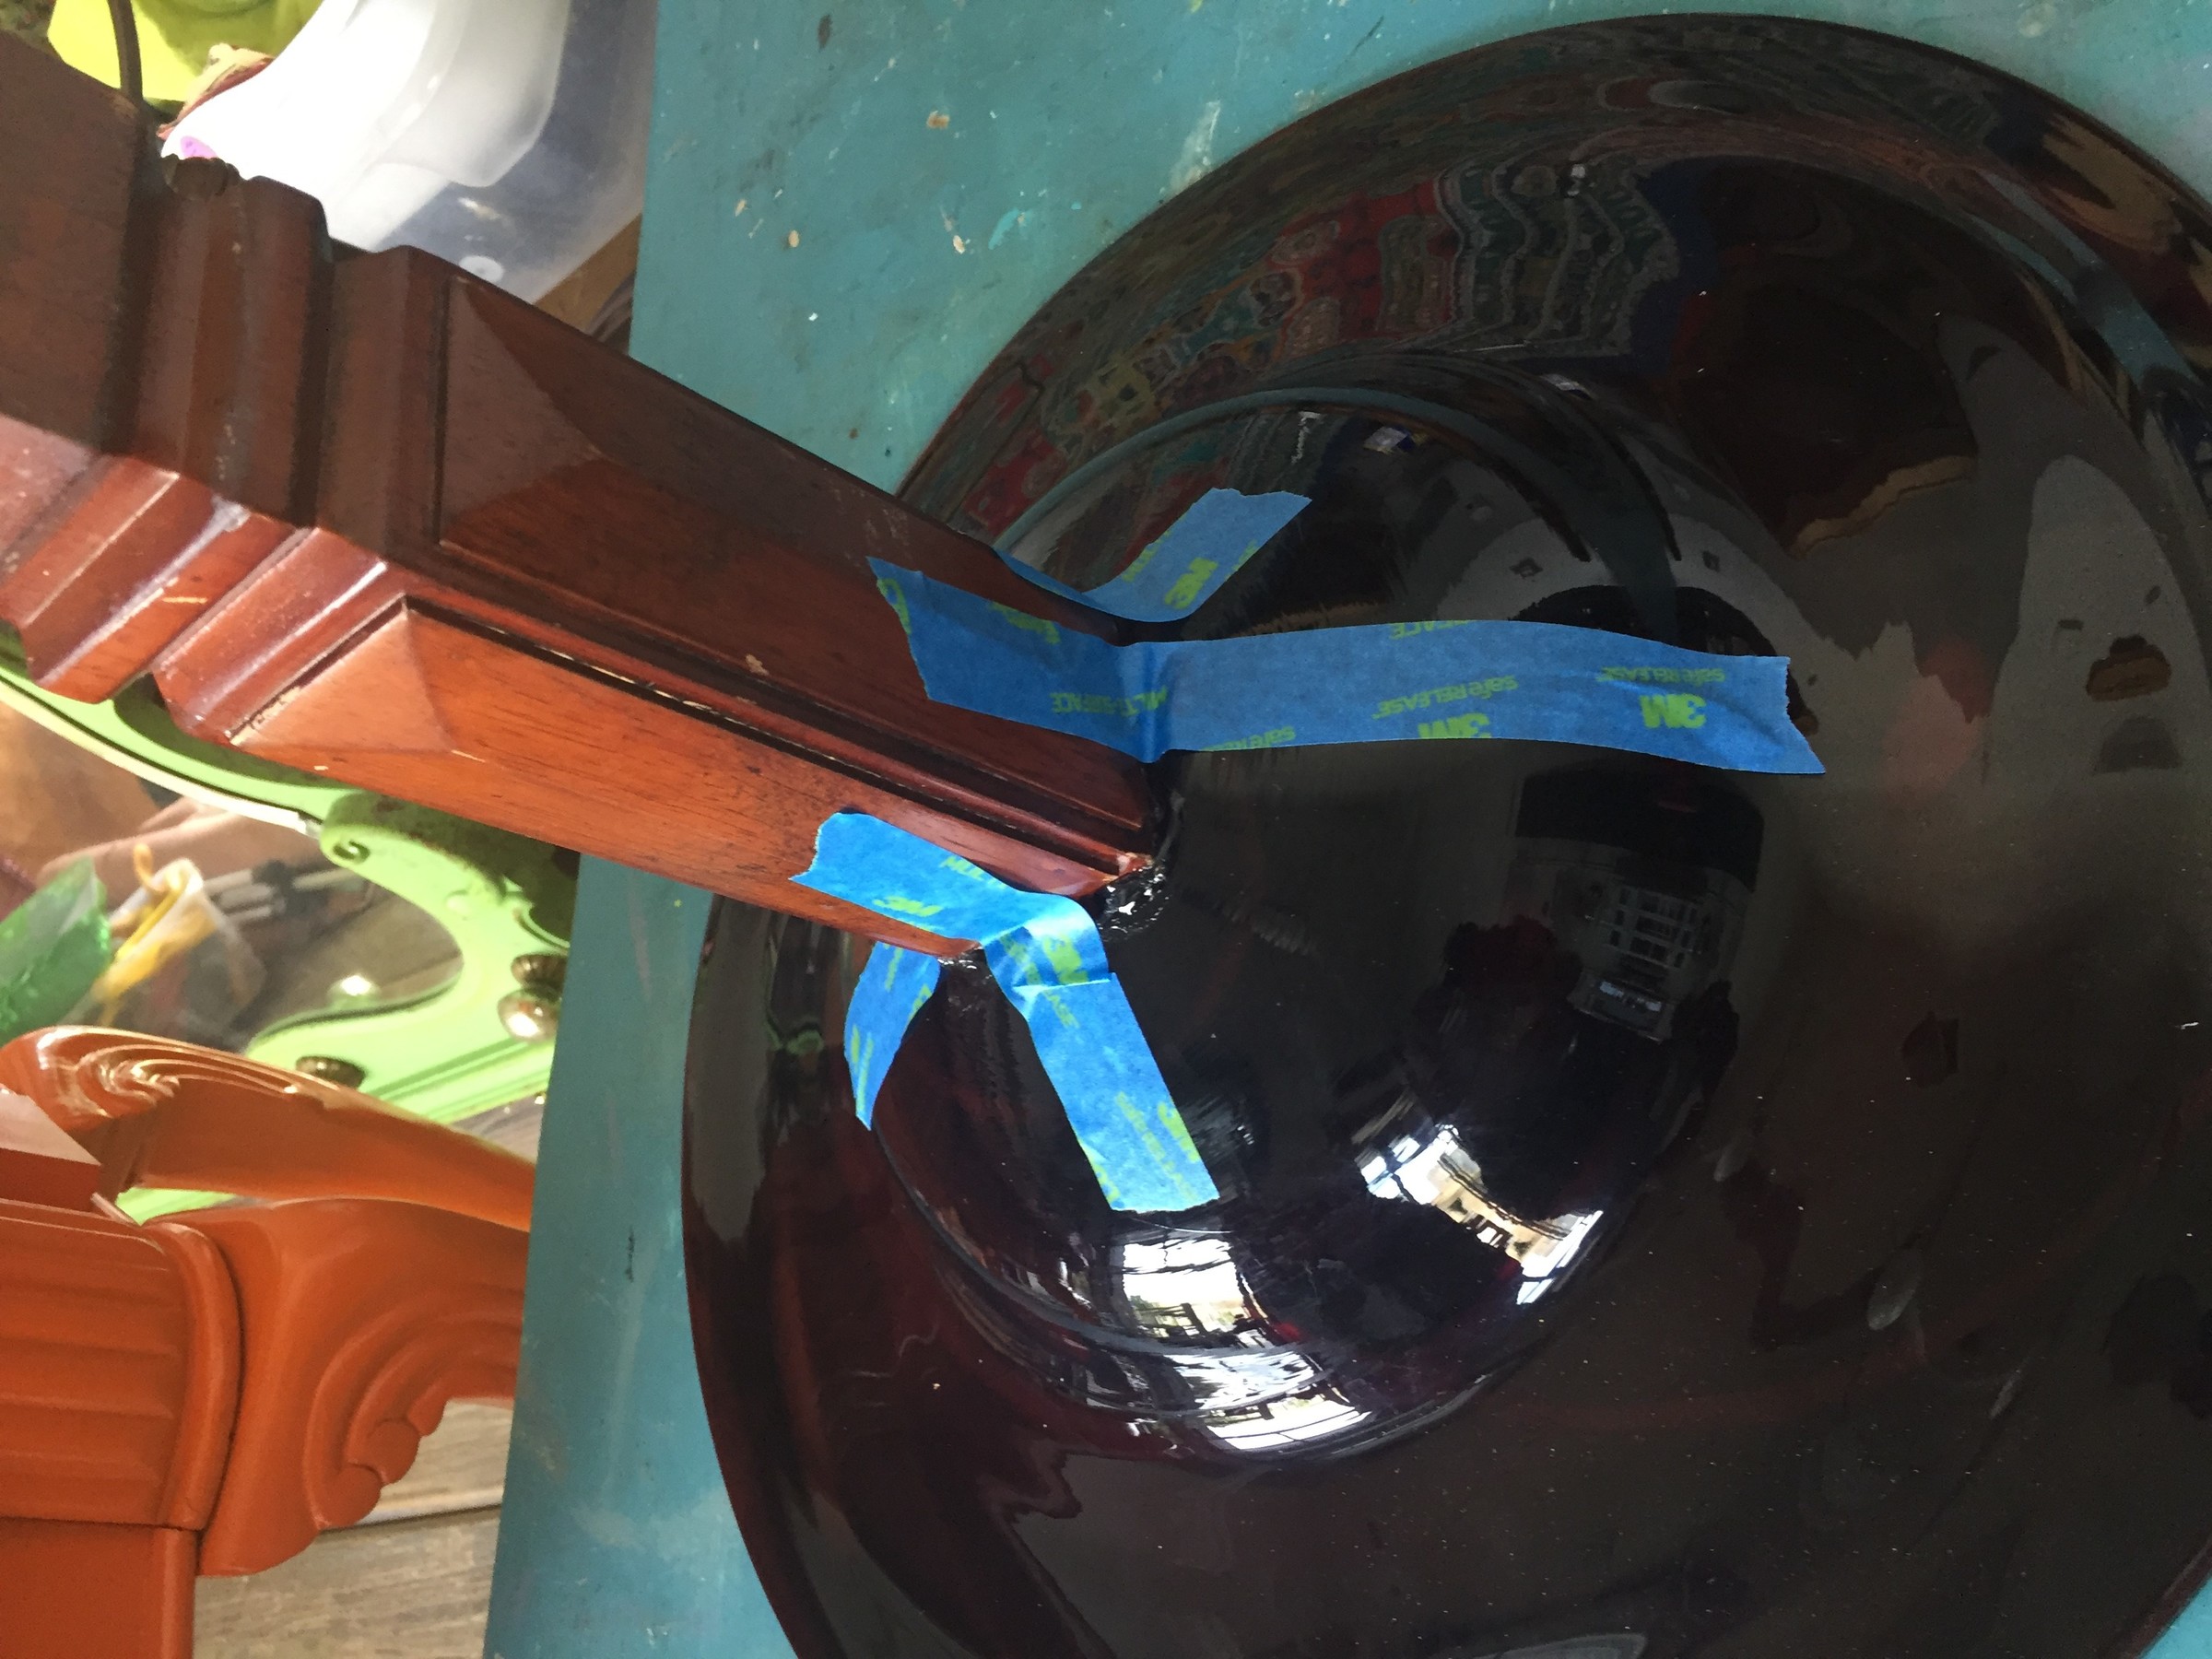
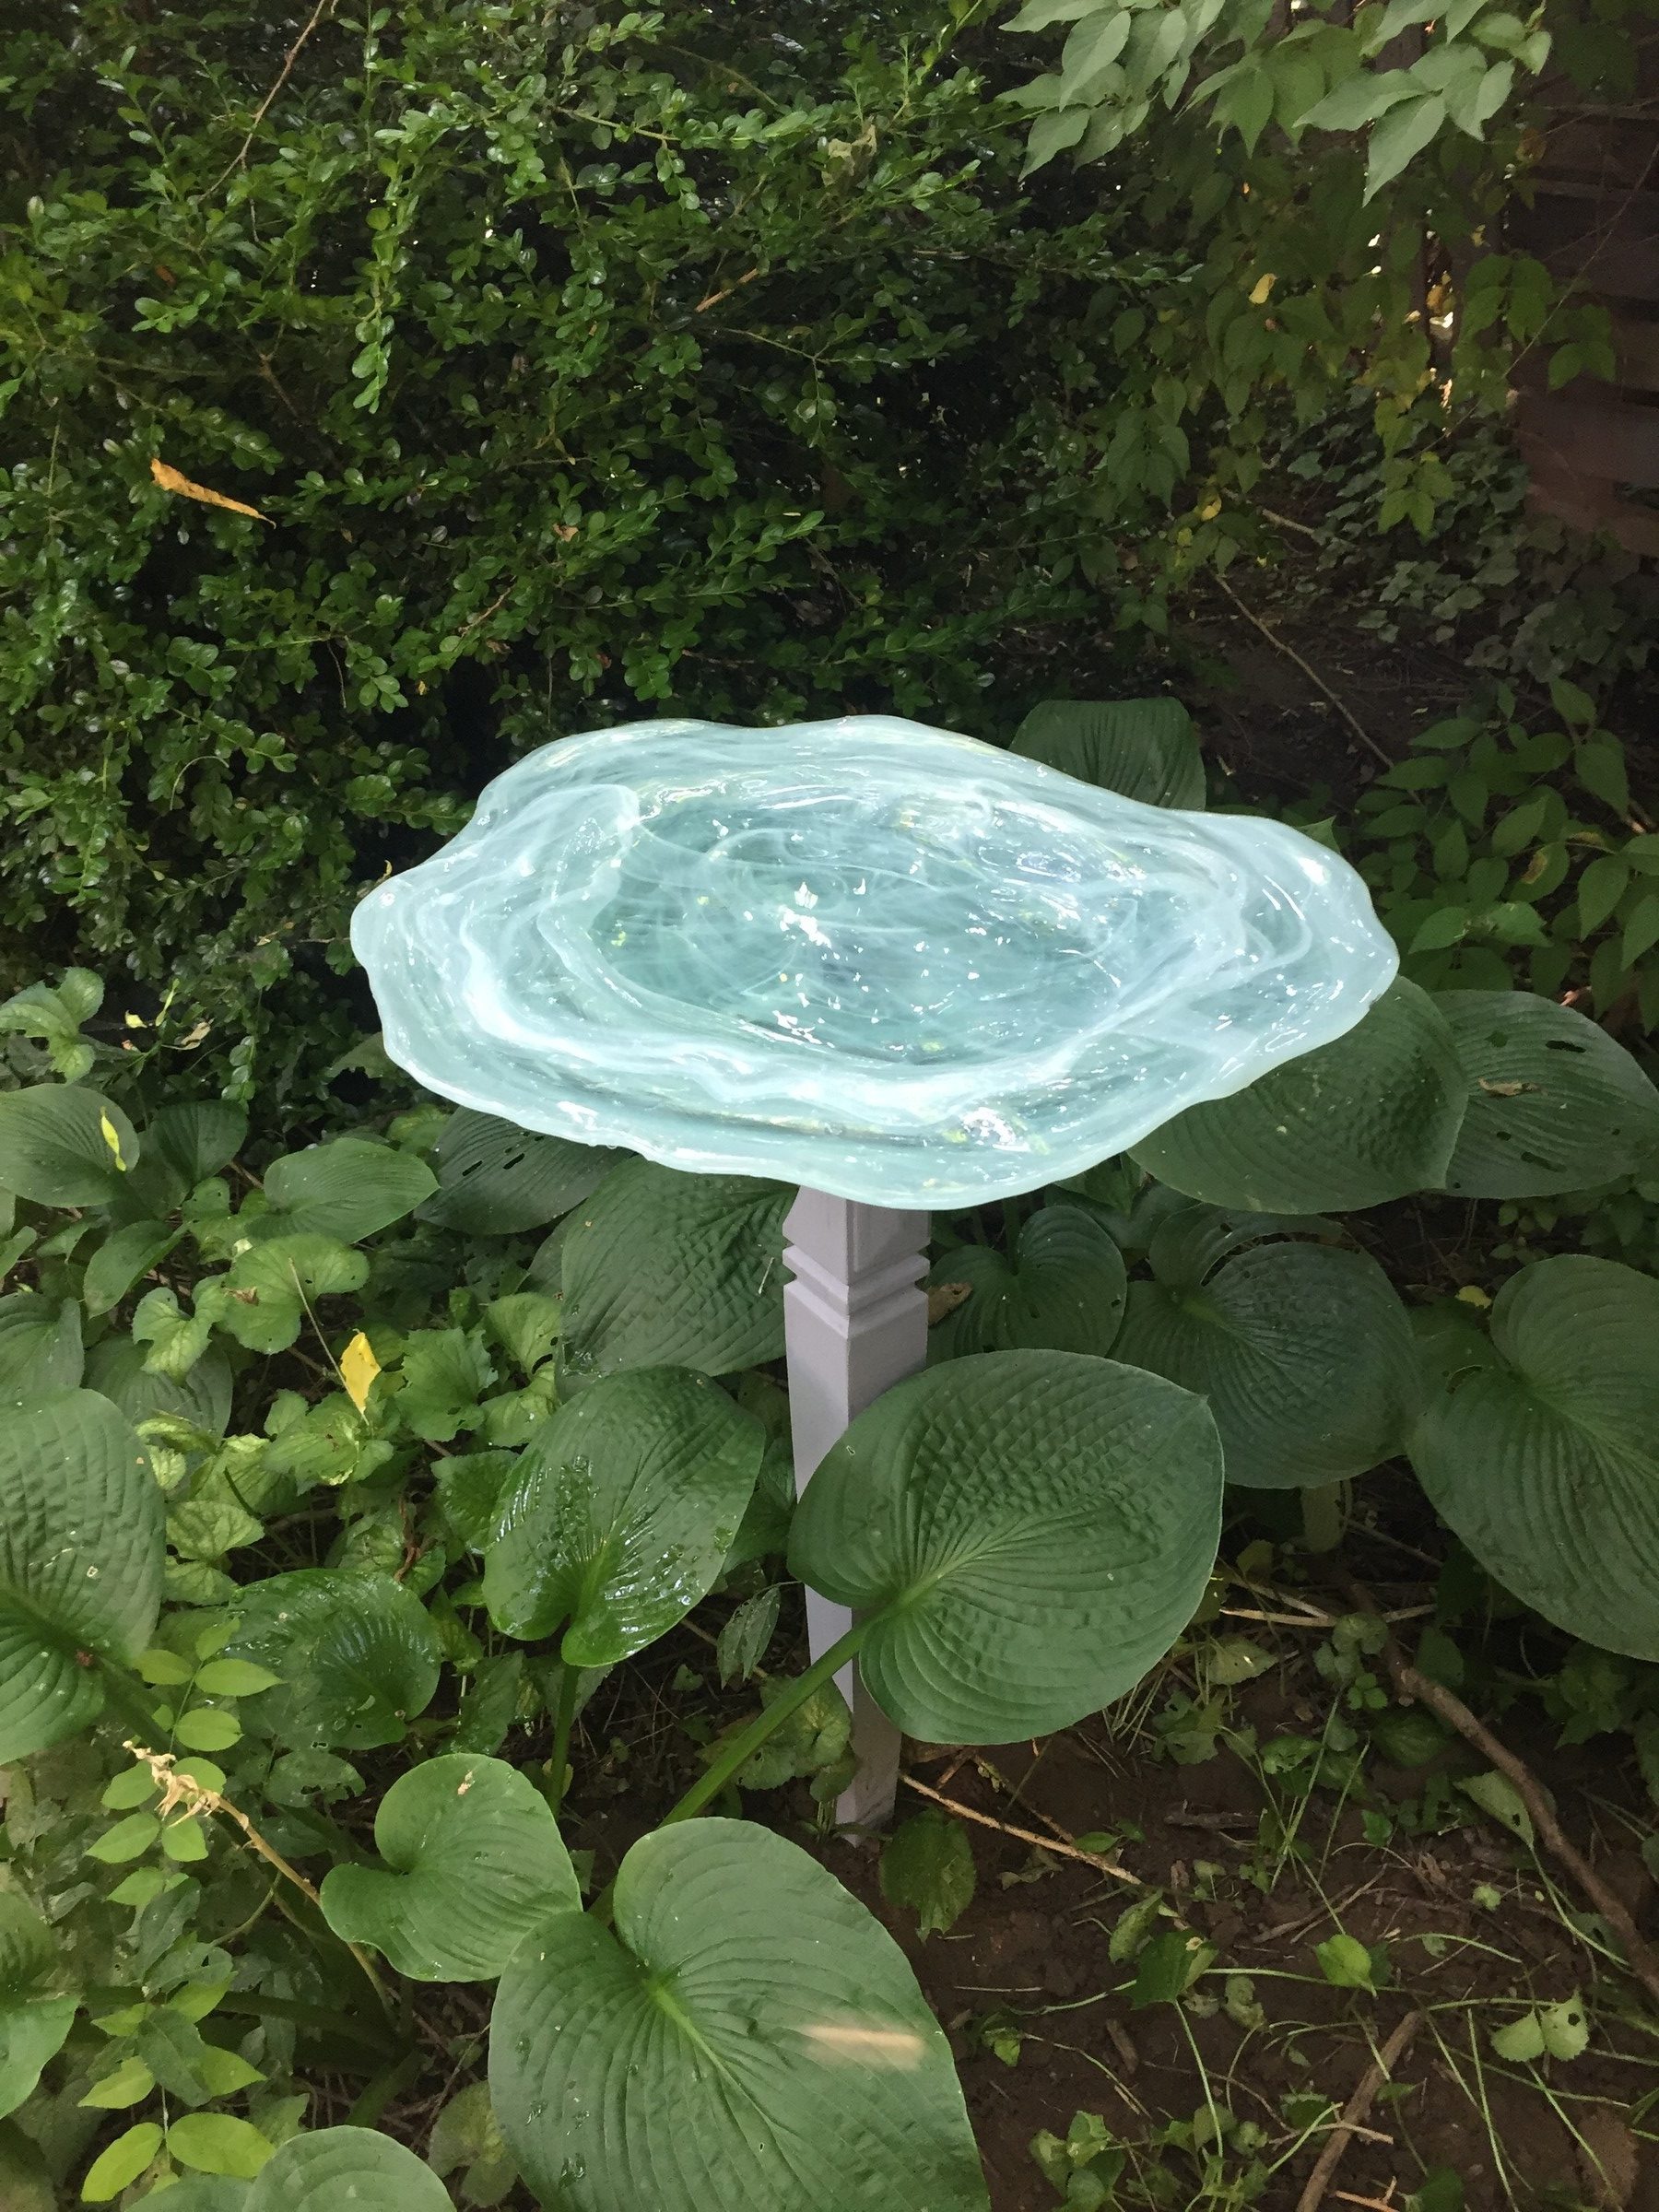
Remove any labels or felt pads from the bottom of your piece then flip it over to start the transformation. On the top of the table leg (after being lovingly unscrewed from the table), add a generous amount of adhesive. I recommend the brand called Goop because it goes on thickly, dries clearly and weathers the elements well. Place the leg upside down on the bottom of the platter. If you have a platter with a larger and flatter bottom space, consider adding L-brackets to offer additional support to the bird bath. Use your painter’s tape to hold the inverted leg in place. It is very important to allow this to dry overnight so the glue can work its magic and adhere firmly.
Step 3: Paint the leg/base piece (optional)
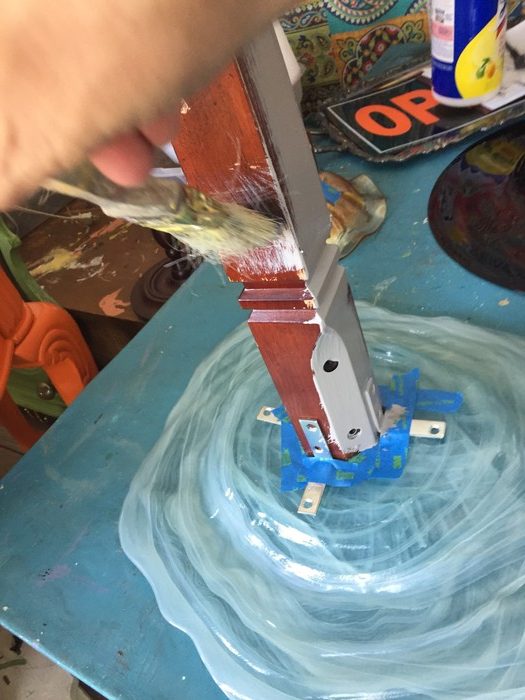
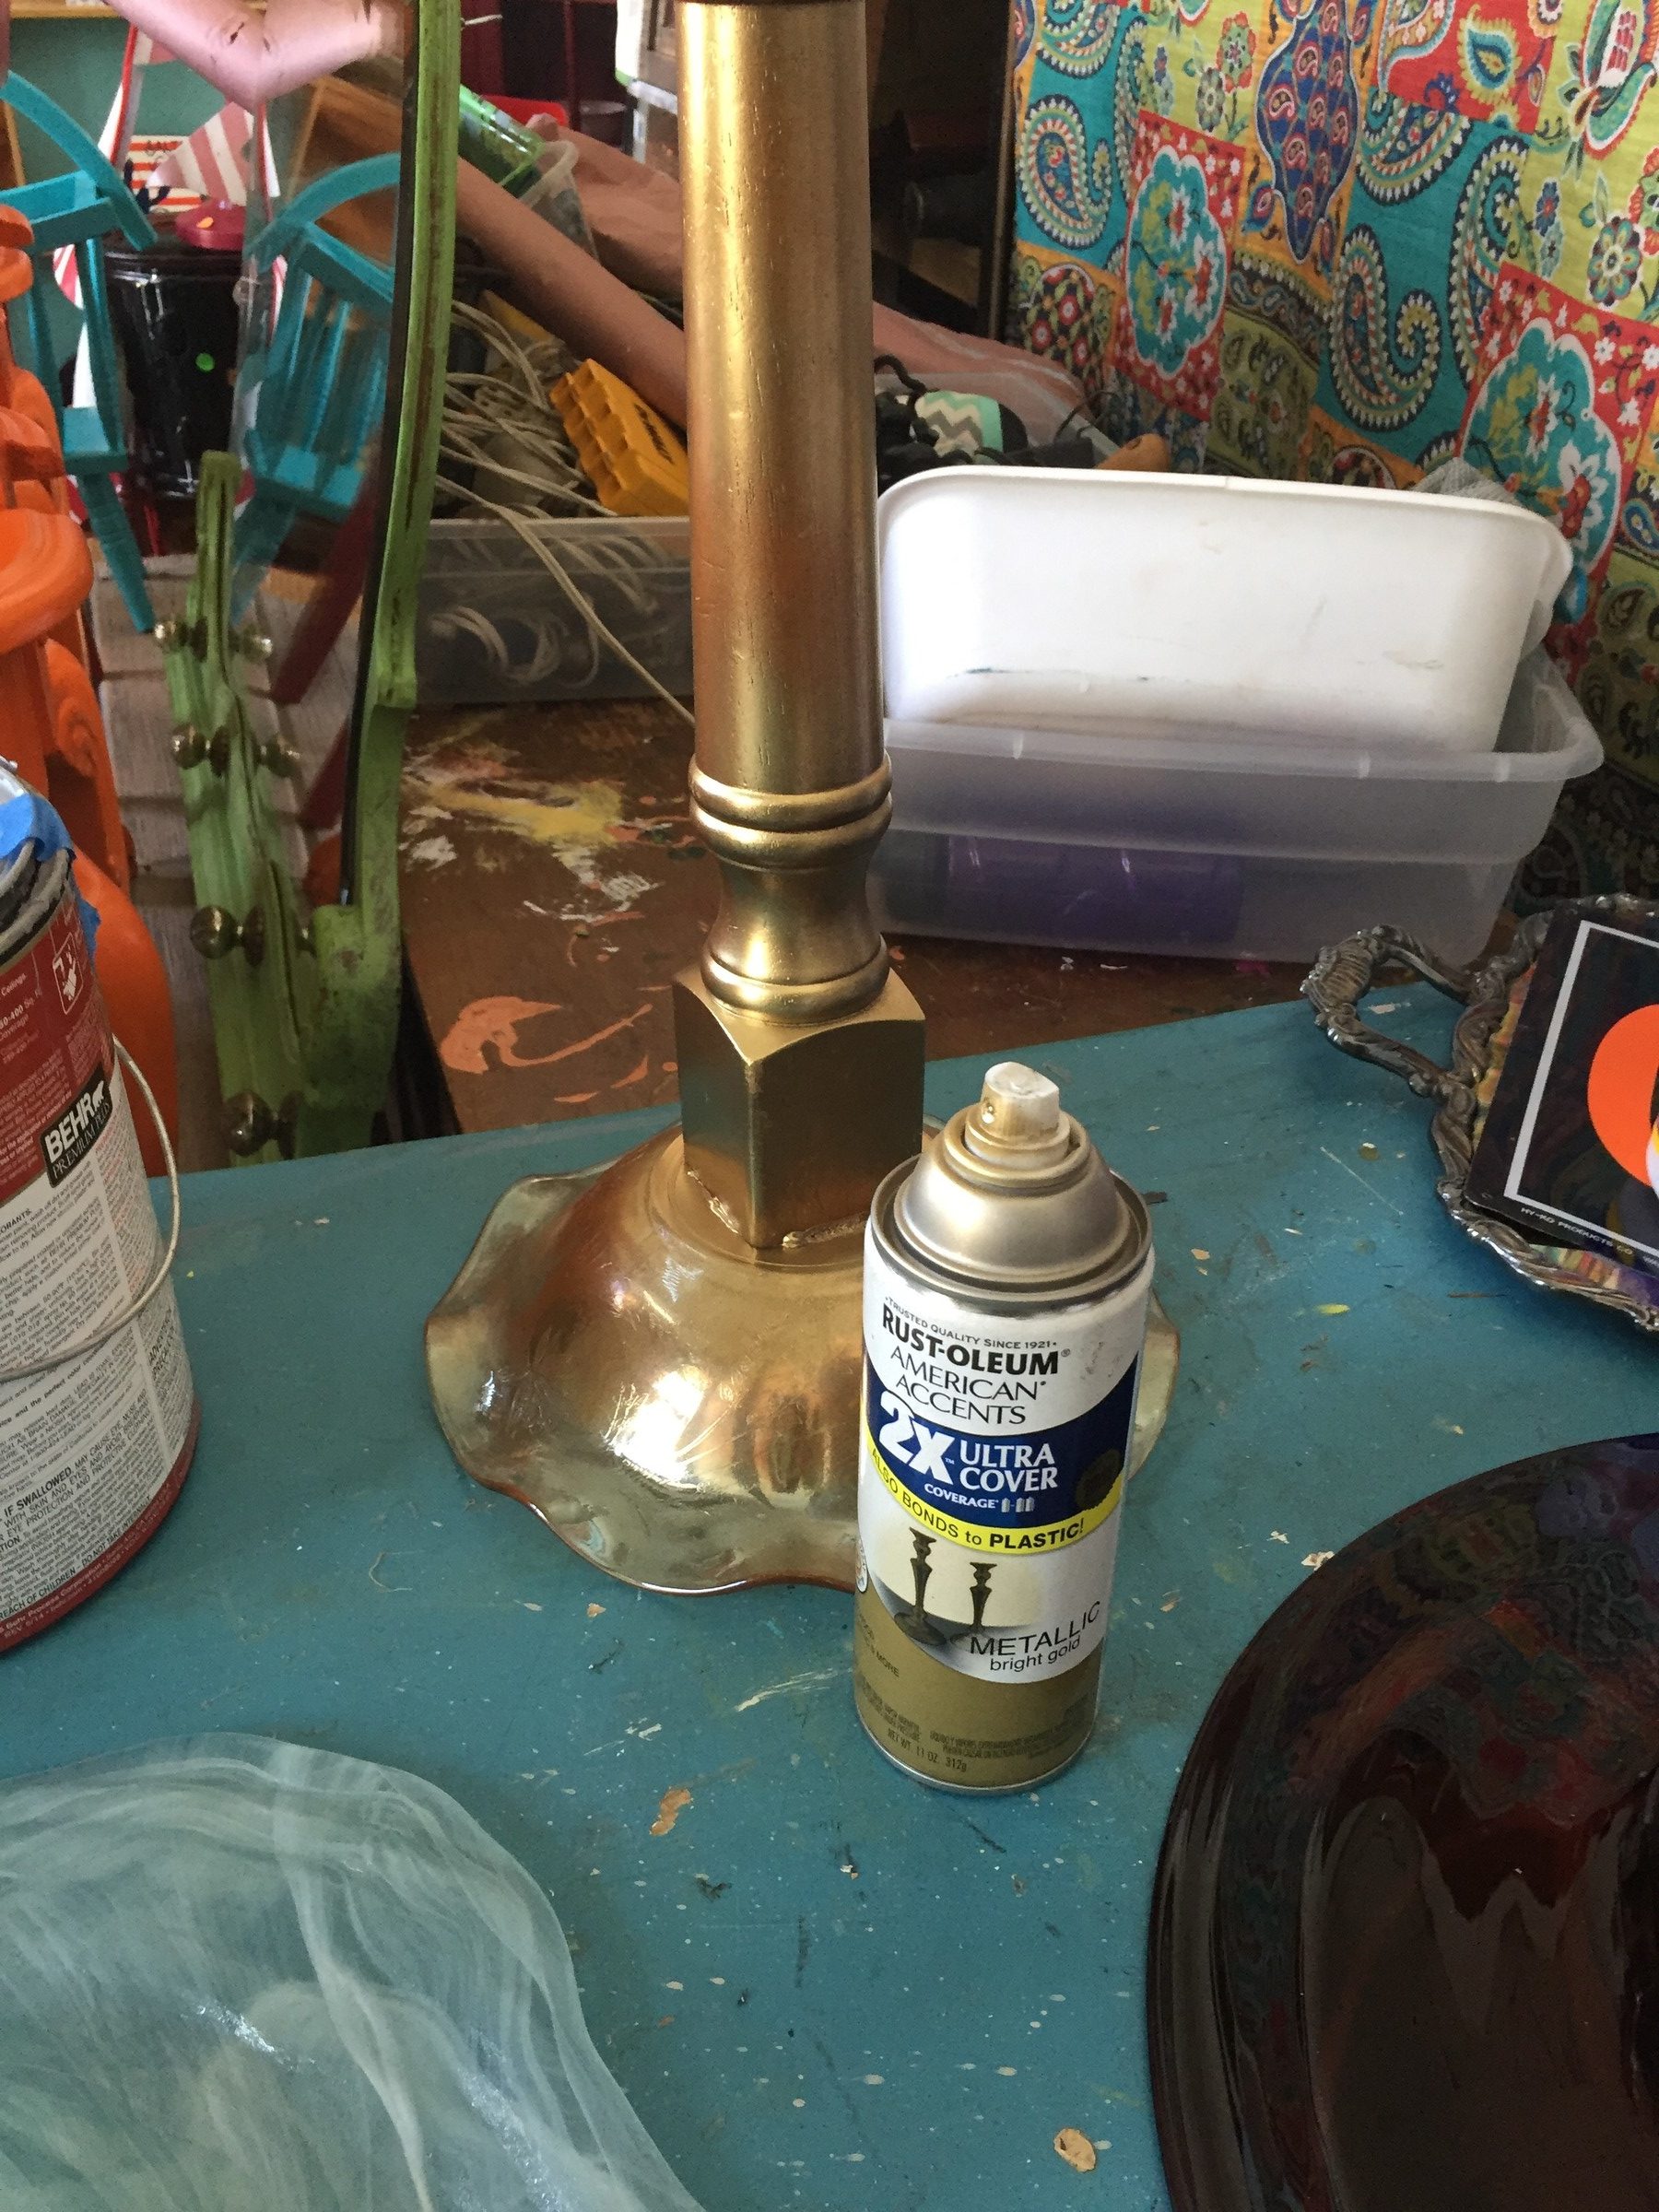
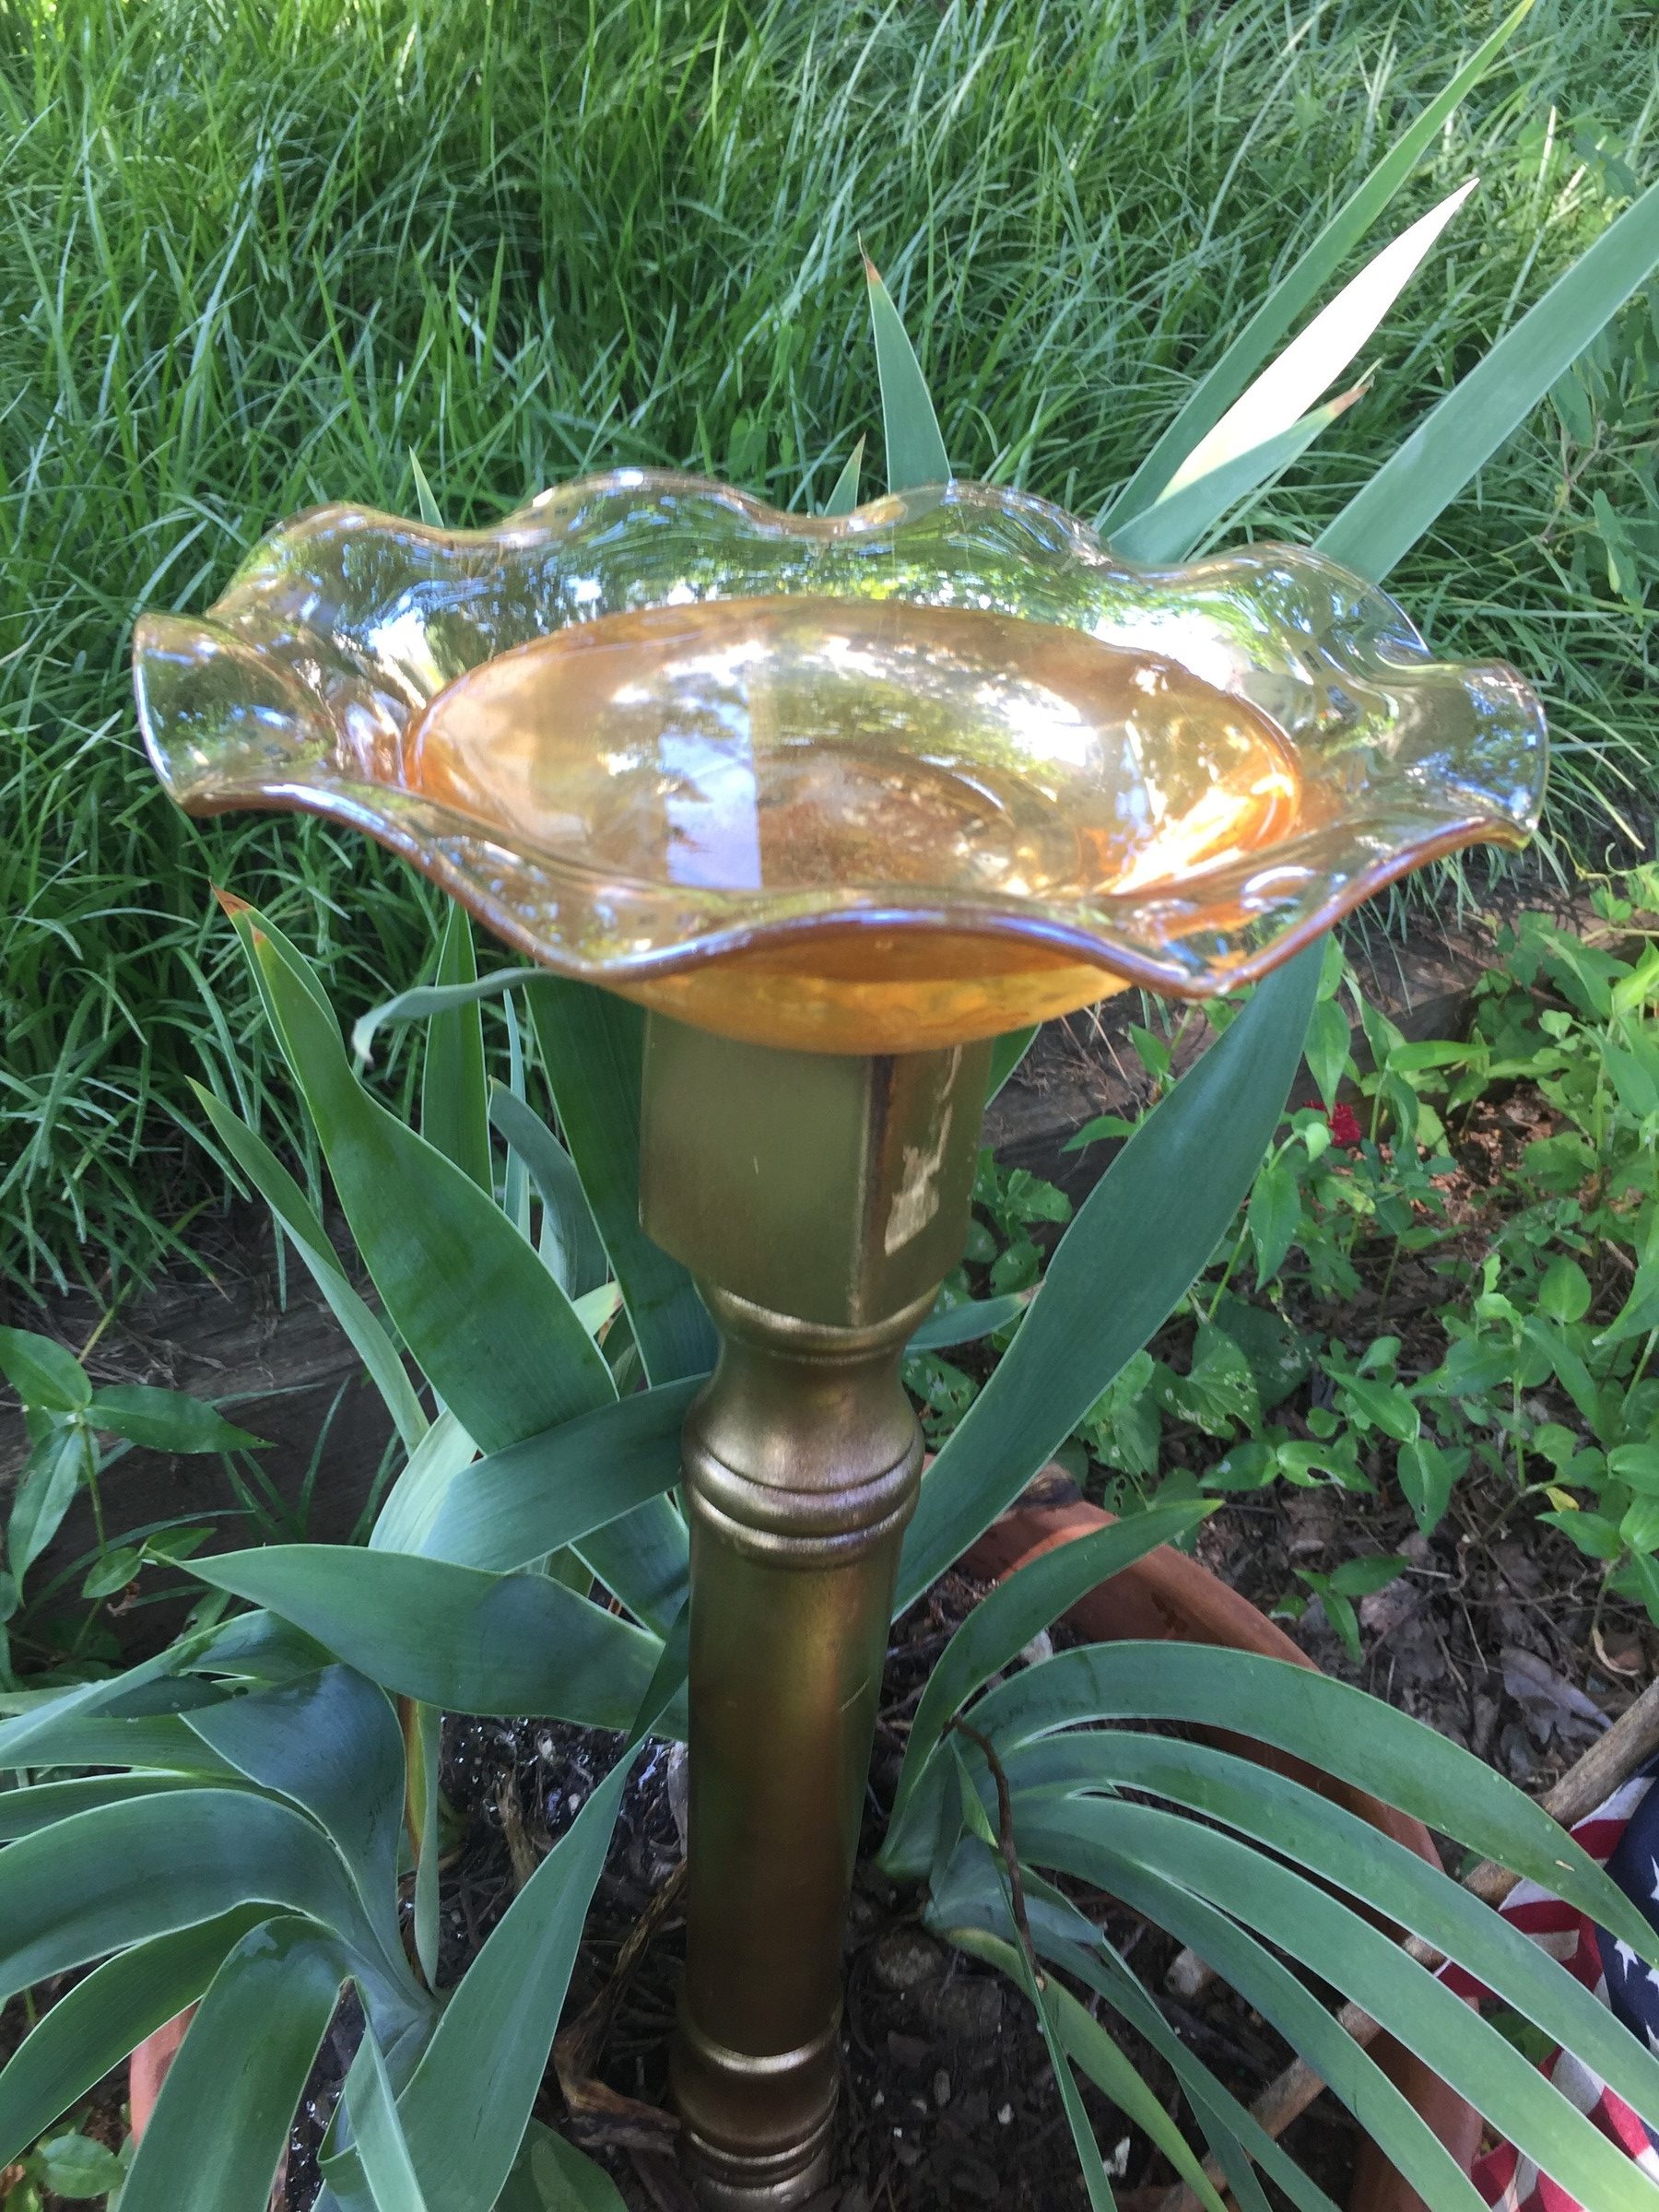
You may consider painting the table leg, now the base of your birdbath. Paint can be used to mask the L-bracket if used, while also giving it a fresh look. For my project, I used gray exterior paint to compliment the white platter while spraying another with gold to match the tones of the bowl used.

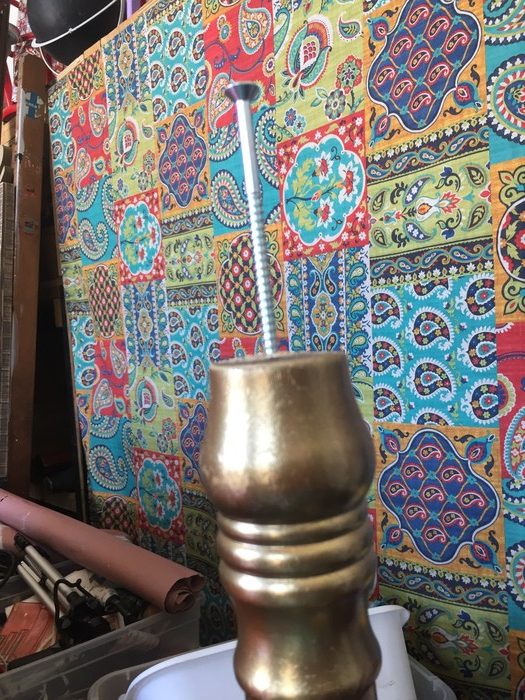
Step 4: Screw in more support
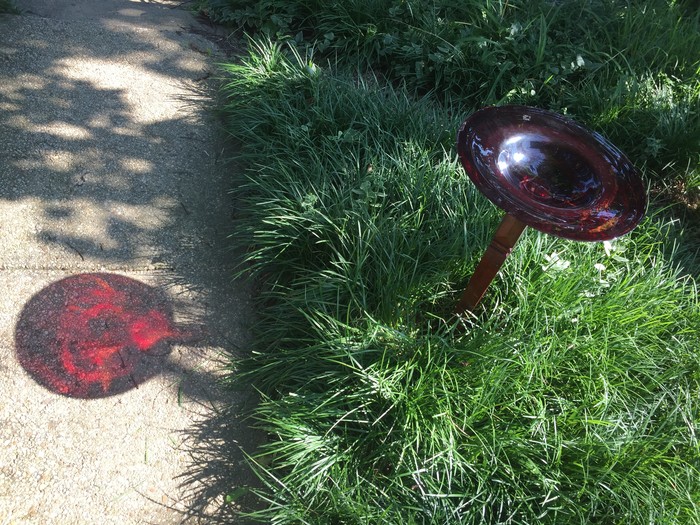
After the glue and paint have dried overnight AND before your remove the painter’s tape, gently use your drill to create a hole in the bottom of the table leg. Next, use your screwdriver to carefully screw in your long wooden screw just part way. Once done, then you may remove the painter’s tape. Hold both the leg/base and platter tightly as you flip it so the platter is now on top and the screw is pointing downward. Ta-da! You now have a fantastic and attractive bird bath that is both unique and functional.
Step 5: “I dig it!”
Find that perfect spot in your garden, yard or even in a deep flower pot, then dig a hole deep enough to cover the entire screw and several inches of the table leg/base bottom. Place your birdbath in the hole, replace the dirt and use your weight as your step around it to ensure a solid, secure fit.
Step 6: Water Welcomes Winged Ones
The last step is so exciting! Add water and you now have a special place for your feathered friends to refresh and clean themselves. Now you have a unique bird bath that will shine in your space and add a smile to your face.
Tim Kime is an artist, life coach, connector. He is President of Kime Leadership Associates offering executive coaching, meeting facilitating and motivational speaking. He is also Chief Creative Force of Transformation Junkies which upcycles furniture and other household items into functional works of art. He combined his two passions—unleashing the potential in people and transforming items with the launch of the Art of Possibilities Workshops. These workshops are part upcycling, part dreaming, part goal setting.