Upcycle An Outdated Headboard Into A Timeless Bench!
Repurpose a child’s headboard into a charming bench that’ll be happily used for years to come! This headboard went from destined for the attic to ready for a prime spot in any room in the house.
While you’ll want to sit on it all day, you’re gonna stand out and shout with glee when you create this memorable and oh-so whimsical transformed piece!
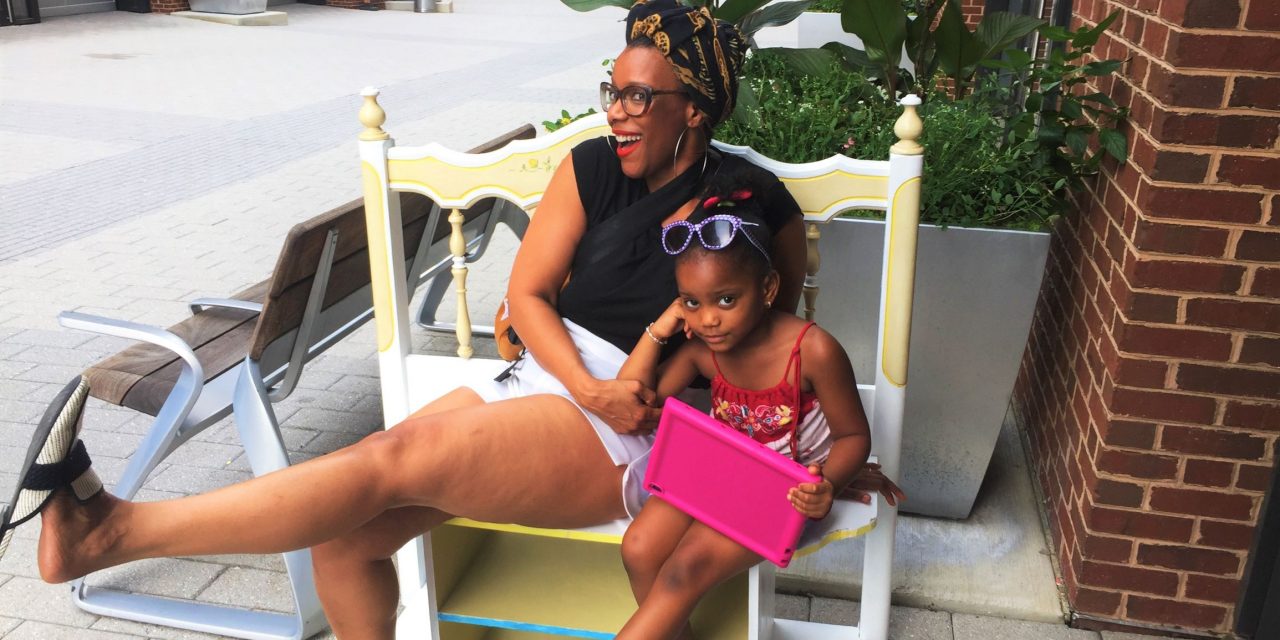
Thanks to Tori and her daughter, Auset, for inspring me to create this piece for them and for being the perfect models for this blog!
Age level: Adults with assistance from teens
Ability level: More challenging and patience-requiring
Items needed:
1. Child’s headboard
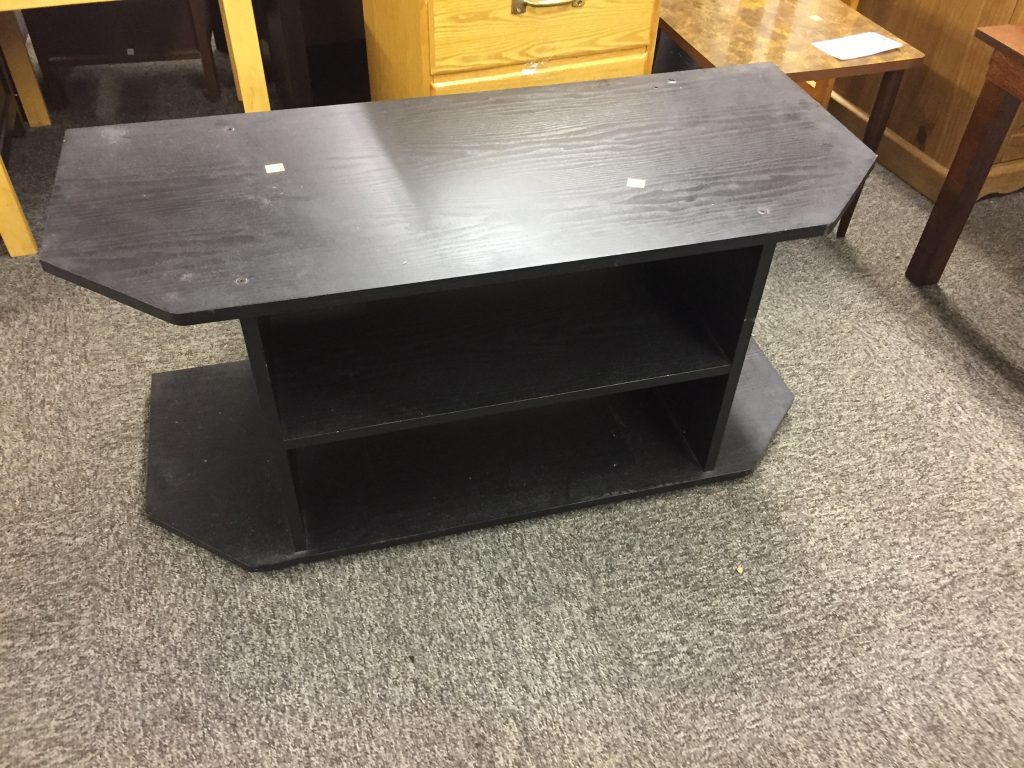
2. Short shelving unit
3. Lots of wood screws
4. Drill
5. Screwdriver
6. Jigsaw
7. Sandpaper
8. Adhesive glue
9. White paint
10. Accent paints in yellow, blue, beige
11. Various sized paint brushes
12. Spray primer
13. Scrap wood
14. Polyurethane
Time requirement: Ten hours, not including paint and poly drying time
Cost: $80
- $15 for headboard
- $18 for shelving unit
- $6 for can of spray primer
- $20 for white paint
- $5 for accent paints
- $5 for adhesive glue
- $5 for woodscrews
- $5 for can of poly
- $2 for sandpaper
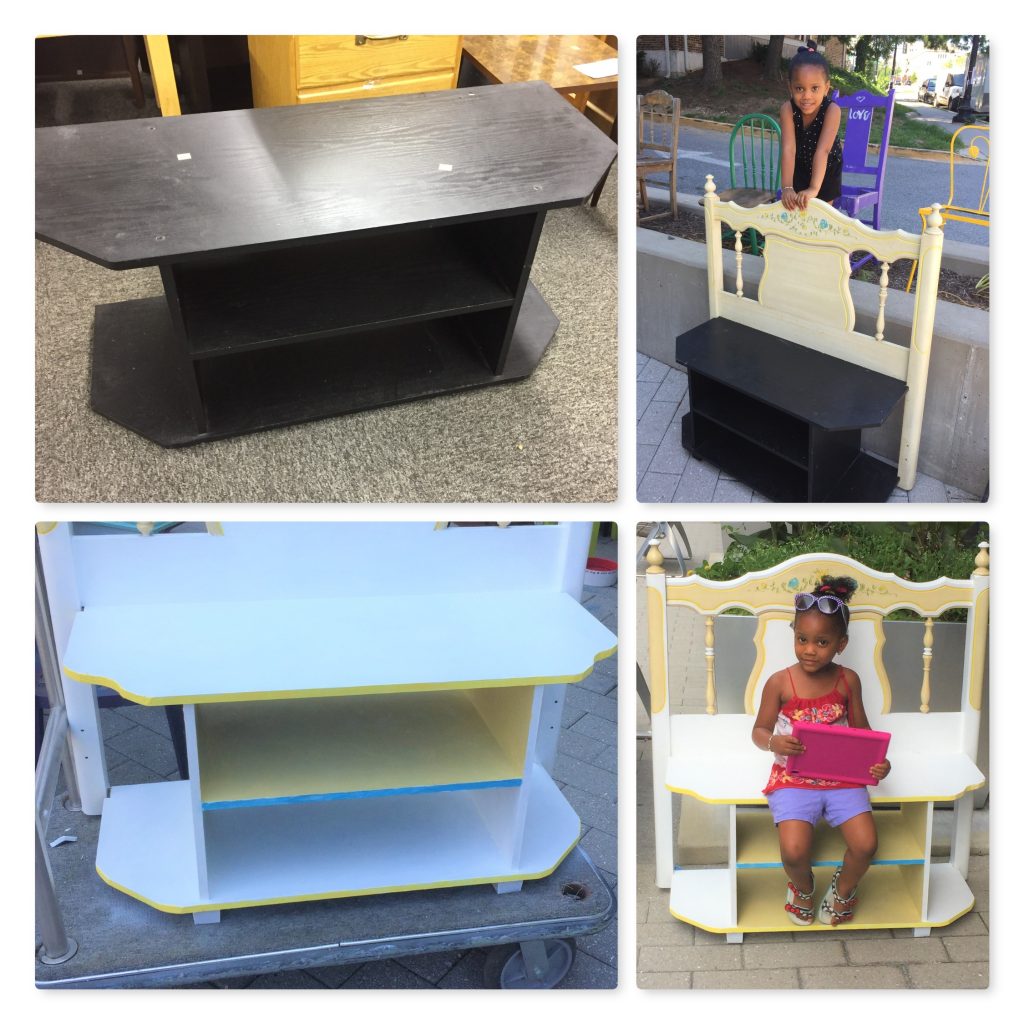
1. Goodwill’s got the parts you’ll never outgrow
What is so great about Goodwill is that you can always find unique items to use toether and create a truly one-of-a-kind piece, all at “make your feet dance” ridiculously remarkable prices. This DIY project, that will earn you lots of kudos, “oohs” and “aahs,” is pretty simple in concept: a headboard plus shelving unit equals bench. It all adds up to a joyful transformation!
This upcycle is extra special because the headboard belonged to the cutest little girl whose smart mother didn’t want to discard it because of its lovely curvy lines, friendly hand-painted floral design and super solid construction (and, of course, it’s heartfelt sentimental value). At Goodwill, I found a short and sturdy shelving unit that was the perfect height and width to be paired with the headboard. You could also use a short dresser, coffee table or even a piano bench, too, to combine with a headboard to this repurposed project.
2. Add short legs
To raise up the shelving unit to make it chair-seat height and more comfortable for sitting, short wooden legs were added to its underside. Scrap wood pieces were cut into squares then glued and screwed into place. Also, the added height allowed for top of the shelving unit and bottom of the headboard to meet and provide another place to secure the two pieces together.
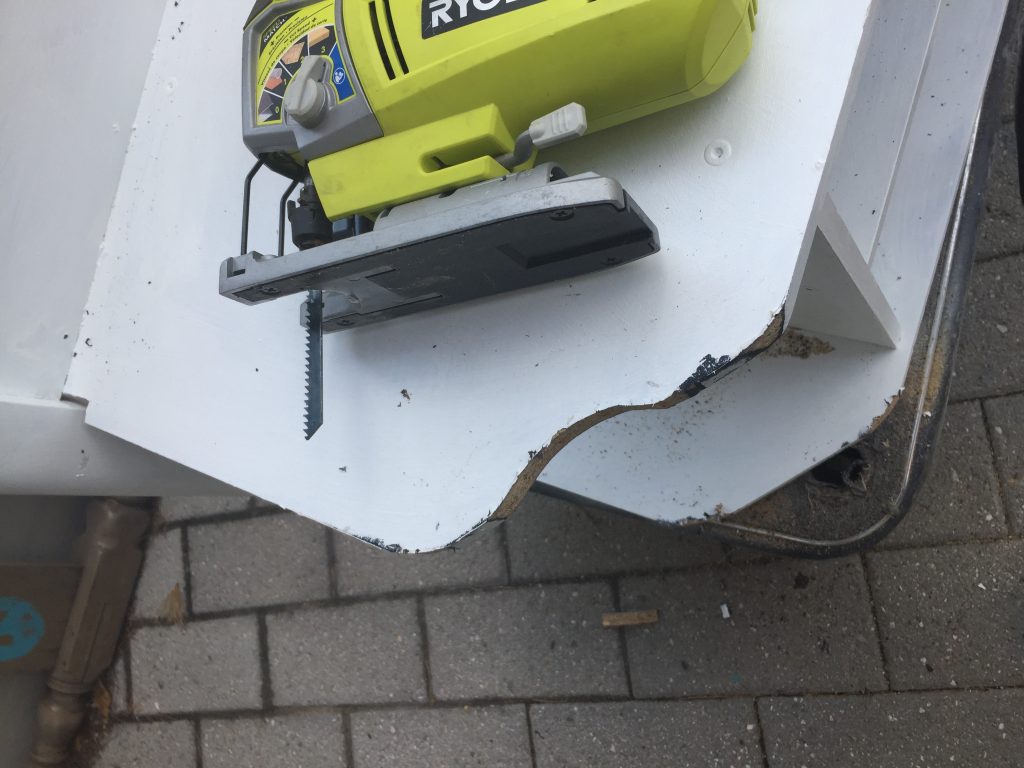
3. Nodding to notching
To ensure a tight fit, the notches were cut from the back corners of the shelving unit to fit in between the legs of the headboard which stood out a little bit from the other headboard parts. Use your jigsaw to cut the corners after measuring how big the notches should be. Use your sandpaper to smooth the cuts.
4. Secure with screws, glue (& sweat, too!)
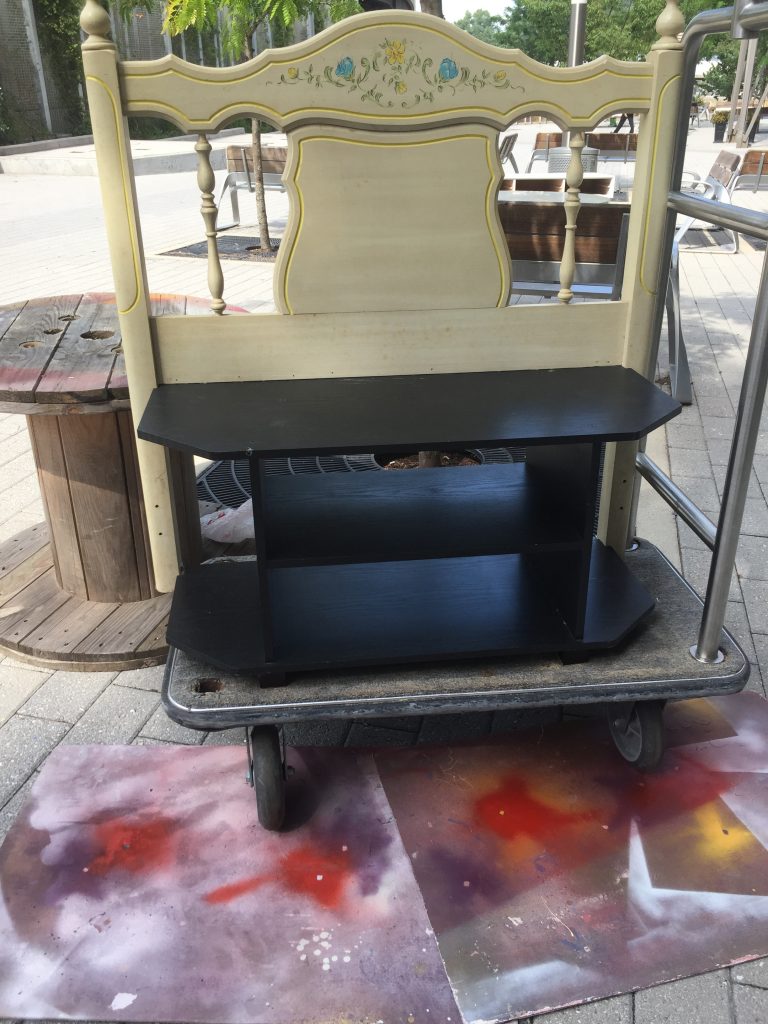
Lay down the shelving unit on its front with its backside facing up. Do the same with the headboard so its front is downward then fit the two pieces together. You may have to place the headboard on something, so it is flat and its bottom lines up with the topside of the shelving unit. I have an old moving cart that was perfect for this step (it came in handy, too, for moving the bench in and out of my studio so I could paint it outside!).
A line of glue was placed on the bottom of the headboard. The shelving unit was moved into place, then with the drill, holes were added from the underside of the shelving unit top into the bottom of the headboard. The woodscrews were screwed into place, again through the shelving unit into the underside of the headboard bottom. Many screws were used. Also, a thin piece of scrap wood (that almost looked like a yard stick) was glued in place along the back so that half was on the headboard and half was on the shelving unit. Holes were drilled along each edge of the wood piece and wood screws were screwed into place. Again, many screws were used! This wood piece provided extra support.
Let the glue dry overnight, then turn the piece (now a bench!) upright for the next step in its transformation. (See, I did mention sweat with all this moving!).
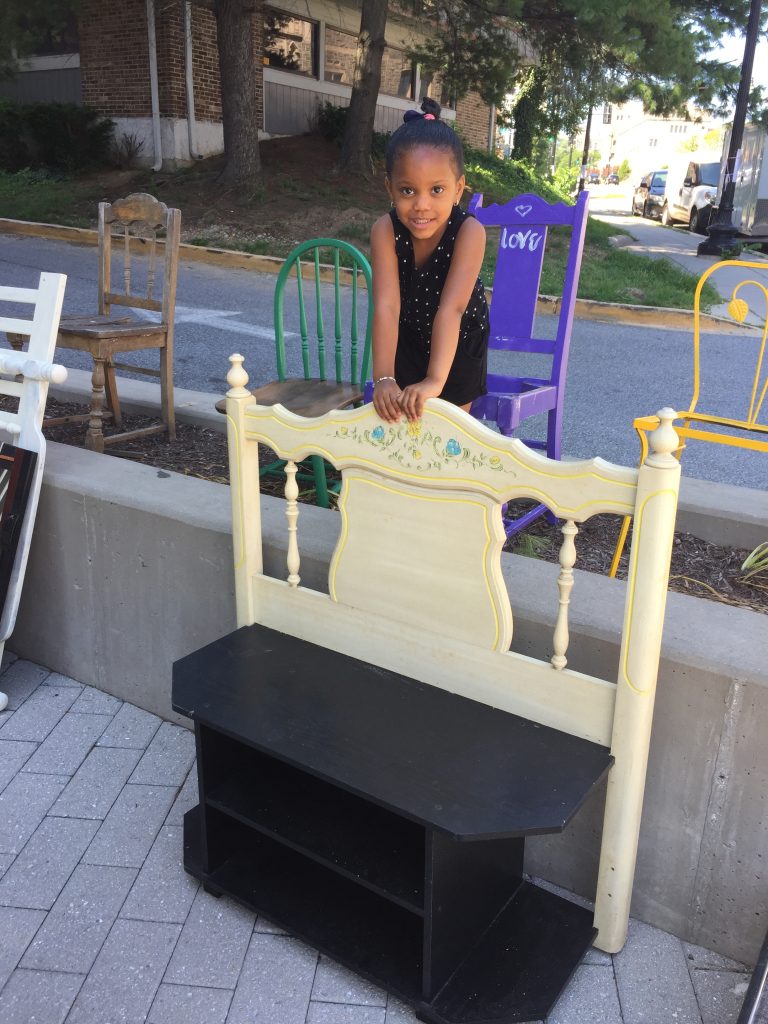
5. Cut in curves
To make the shelving unit match and mimic the headboard’s flowing lines, its sharp edges were trimmed with the jigsaw. To provide the curves and ensure all cuts matched, a small plate was traced with a pencil. After cutting, which made such a delightful difference, sandpaper smoothed any rough edges.
6. Priming for paint
Given the black color of the shelving unit, white spray primer was used all over it to make it more paint friendly for the finishing coats of paint. Place your bench outside and spray all the sides. You might want to cover your headboard to protect it if it has details like the flowers on the one used for this project. Once dry, wipe down the primed part to remove any “dust” created by the primer.
7. White to unite
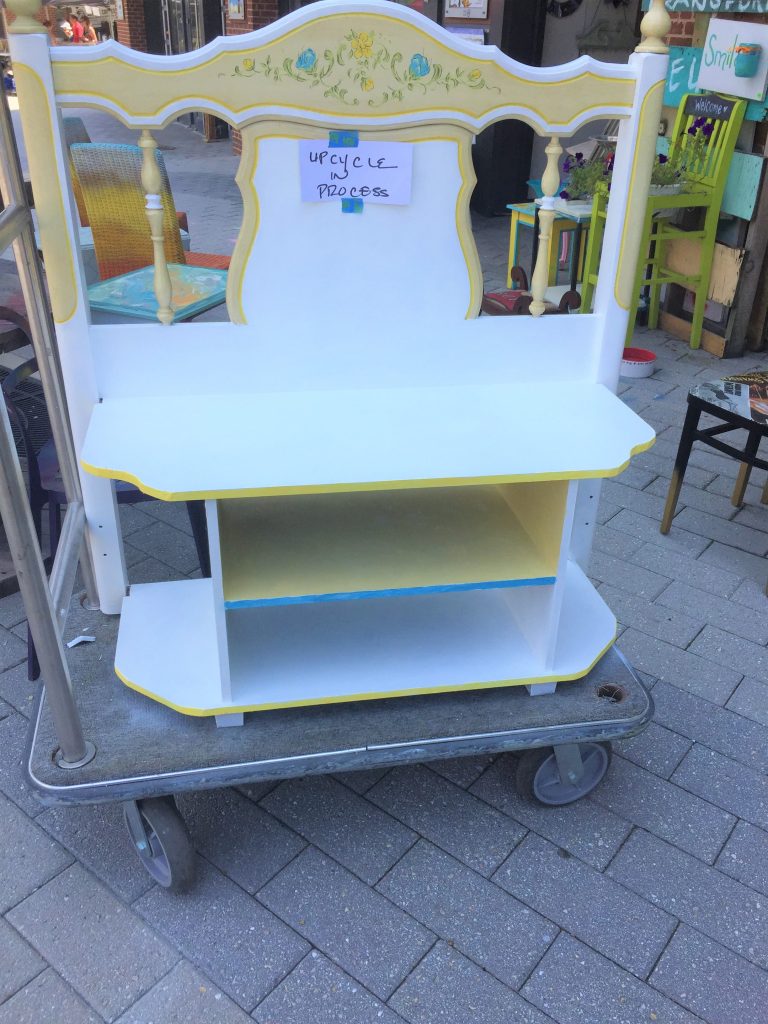
One of the powers of paint is its ability to easily and immediately connect objects based on color. To freshen up both the dated look of the headboard and the dark shelving unit, a bright white was selected. Several layers were painted on both pieces. To highlight its details, the white was painted on parts of the headboard, too, using a small detail brush.
8. Add colors to connect
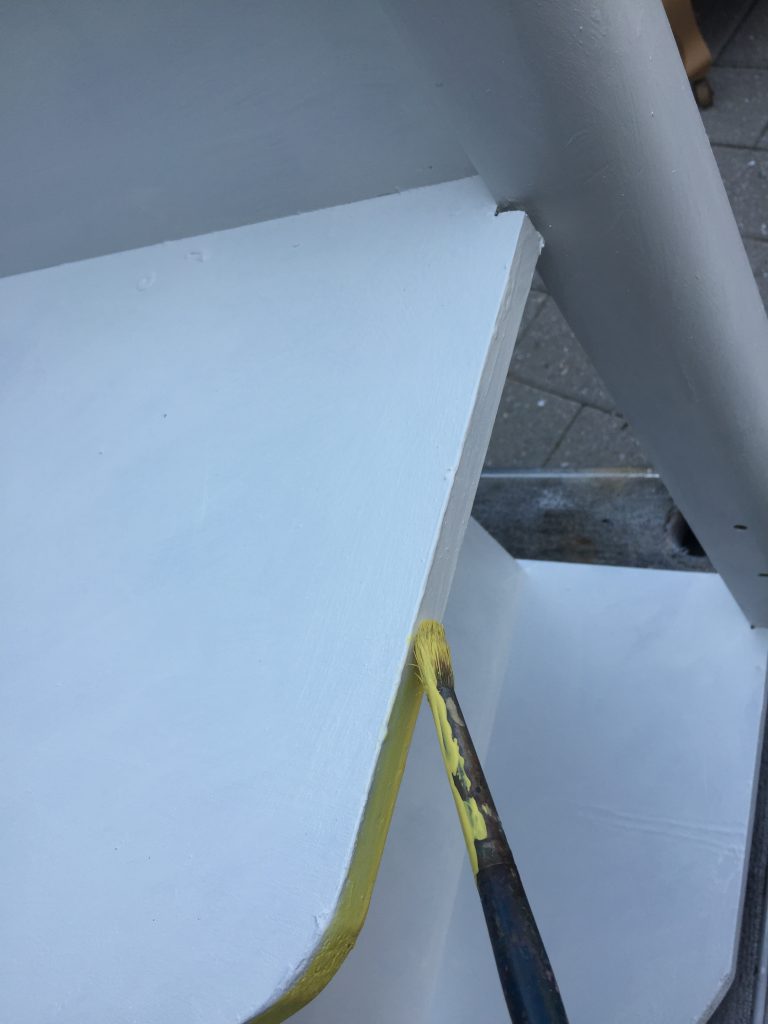
Again, to connect the headboard’s floral design with its bench, yellow, blue and beige paints were added to strategically selected parts. The yellow was added to the outer edge and the front part of the shelf was highlighted with the blue. The shelves’ insides were painted with beige which matched the headboard’s original tones. These small pops of color totally made the two pieces look like one cohesive item—a very charming bench, if I do say so myself!
9. Poly to protect
To add more durability to the paint, especially since the piece will be sat upon and might store shoes or boots, you will want to brush on a coat or two of polyurethane, letting things dry overnight before using.
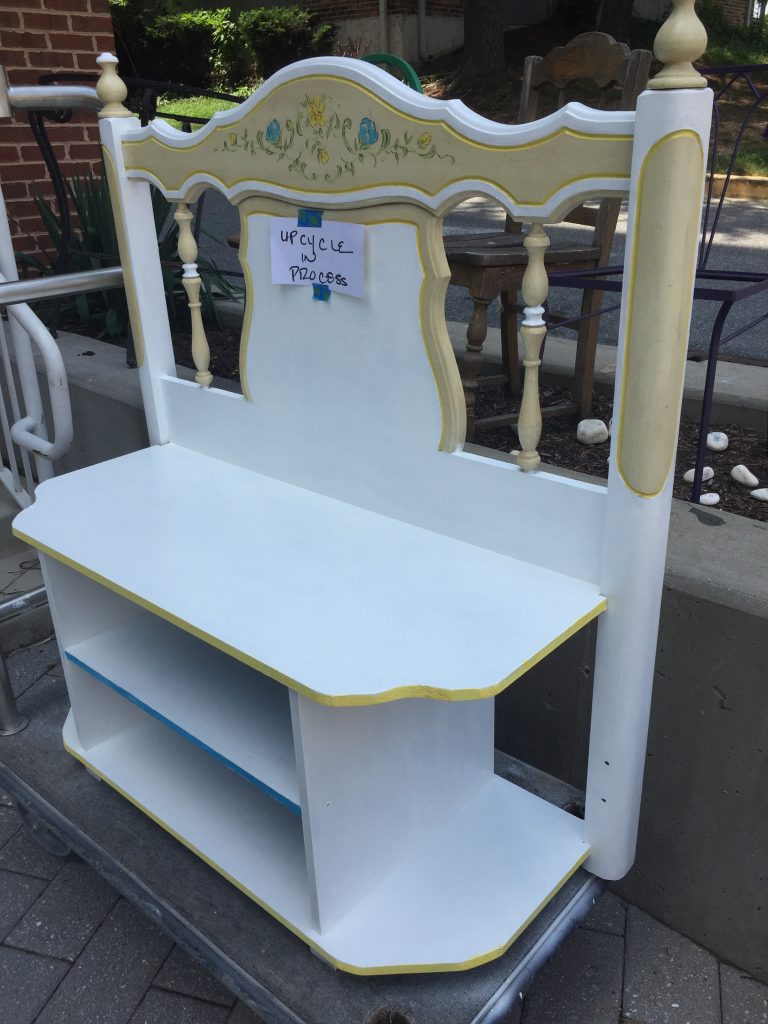
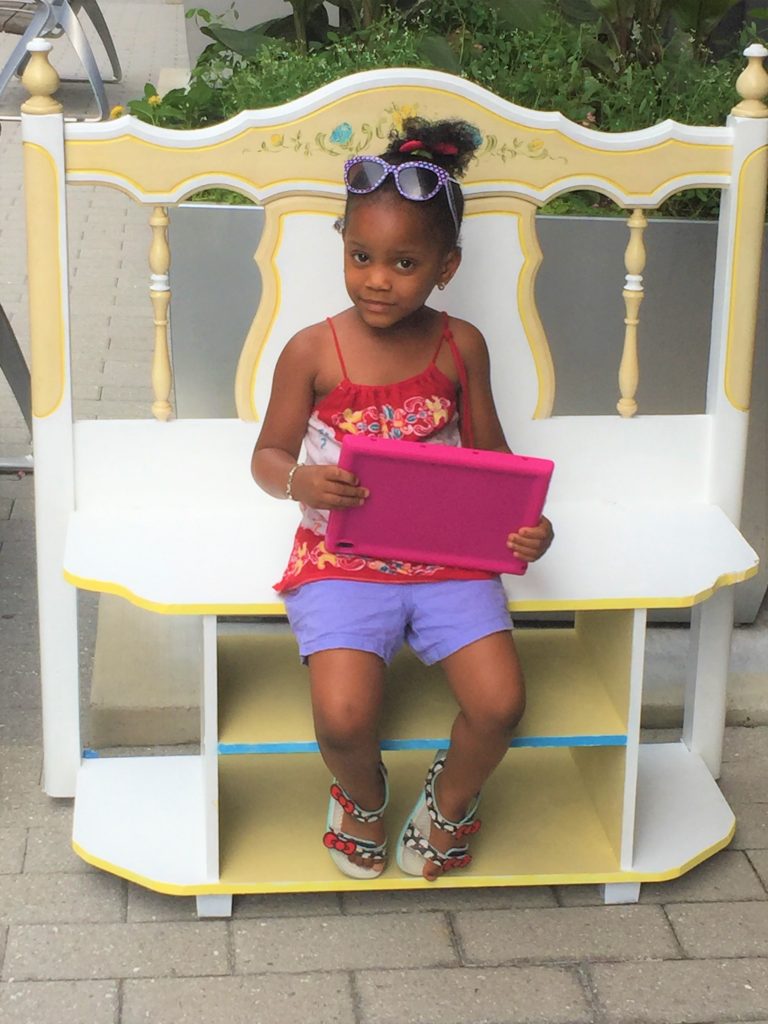
10. Sit and strike a pose
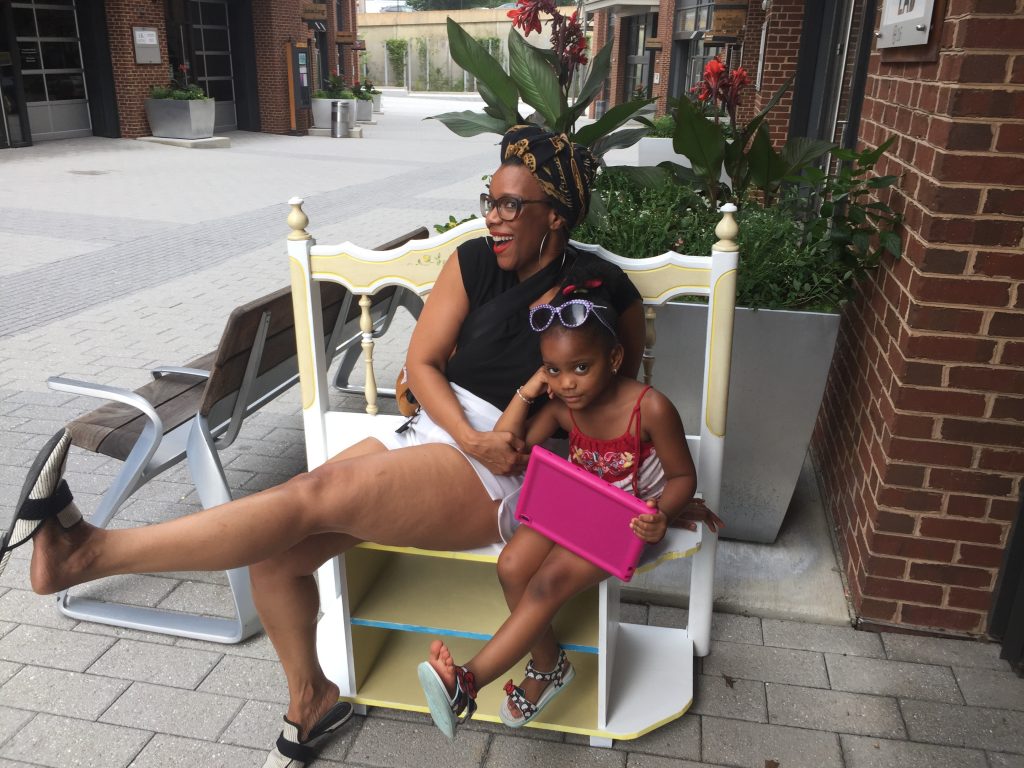
While this bench was created for a young girl, any adult will want to use it too! In the bedroom, it could hold books or sweaters. In a foyer, your headboard bench is a place to sit while putting on or removing shoes and boots. Its shelves could hold gloves, hats or small pieces of sporting equipment.

Get your phone ready to capture images of your family, friends and guests who will want to be photographed enjoying this treasured and timeless bench!


