So many colors, so little time! It can be overwhelming when deciding what hue to use when transforming your piece.
“How do I pick the right color?”
I often hear this statement nervously from people.
Well, folks, here’s an easy solution: use your artwork to help determine your tones. By doing so, your piece will look cohesive and connected to the space and will call attention to your wall decorations, too.
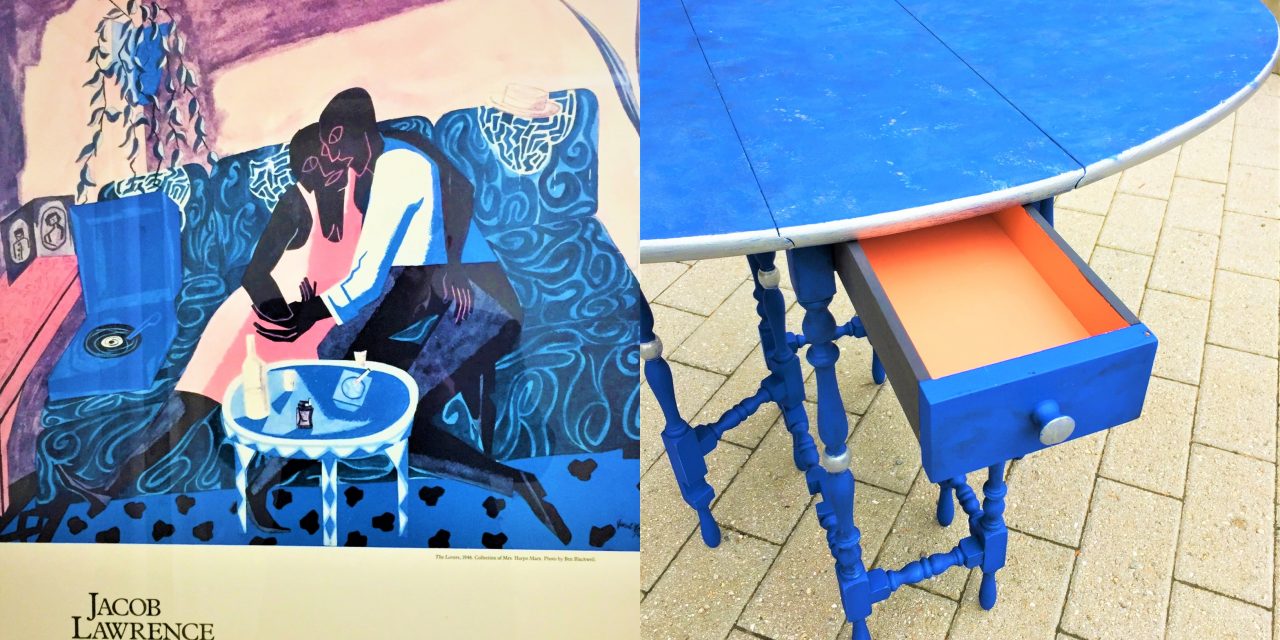
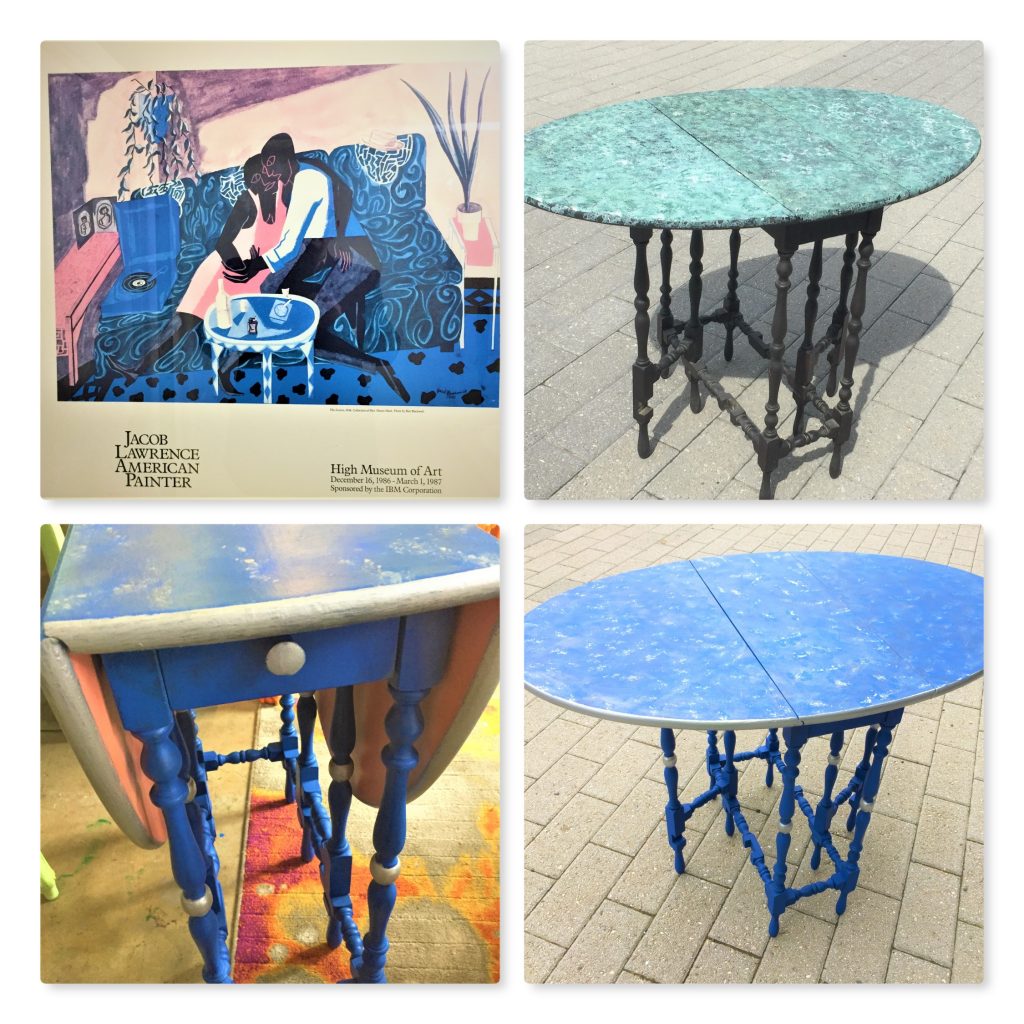
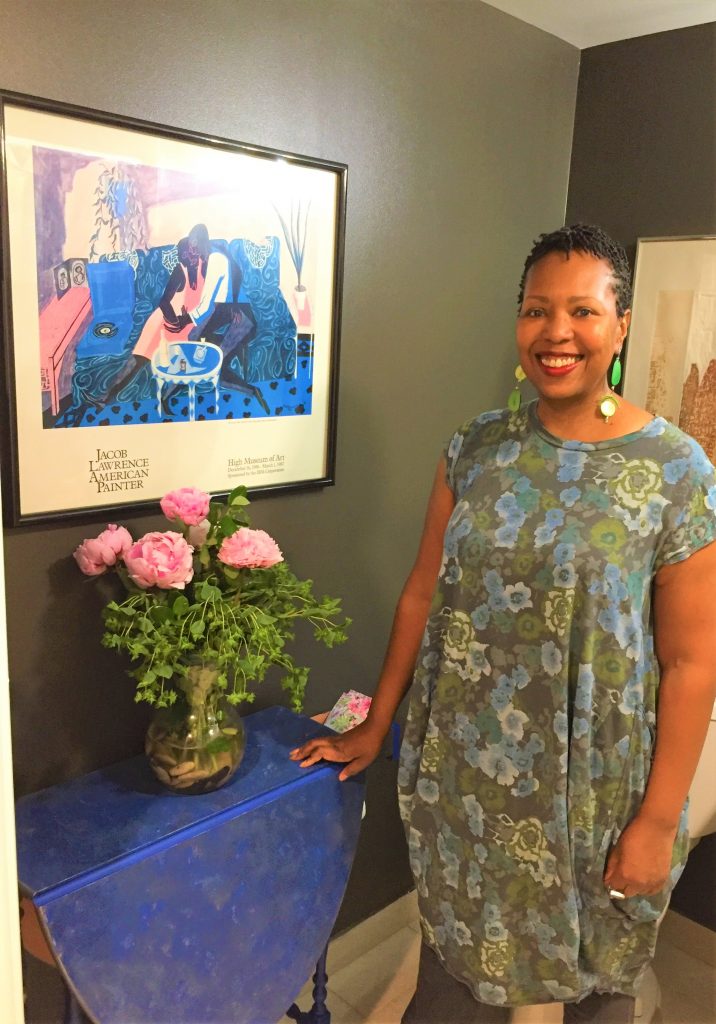
I so appreciate the chance to update the table featured here for Marva and for opportunity to take her beloved family heirloom from mismatched to perfectly paired. While transforming this piece in my studio, it was amazing how many people said they, too, had a table like Marva’s, also from a relative, and were unsure how to make it work in their space. To that, I say, “Read on people, read on!”
Age level: Older kids and adults
Ability level: Surprisingly simple
Items needed:
1. Wooden table
2. Blue, silver, black and peach paints
3. Paint brushes
4. Fine-grained sandpaper or sanding block
5. Spray poly
6. Rags
7. Paper towels, wet wipes
8. Painter’s tape
Time requirement: Five hours, not including paint and poly drying time
Cost: $45
- $10 for wooden table
- $25 for various paints (with tons left over for other upcycling fun!)
- $5 for spray poly
1. Go treasure hunting at Goodwill
Fortunately for you, Goodwill always has an abundance of wooden pieces that were someone else’s heirlooms. Often people give remarkable things away because the item doesn’t match the look of their new space. Sometimes, we can’t see the forest through the trees because of a not-so-cute or dated color choice. Do your best to look beyond that for its shape, sturdiness and functionality. Look for a piece with interesting lines and details.
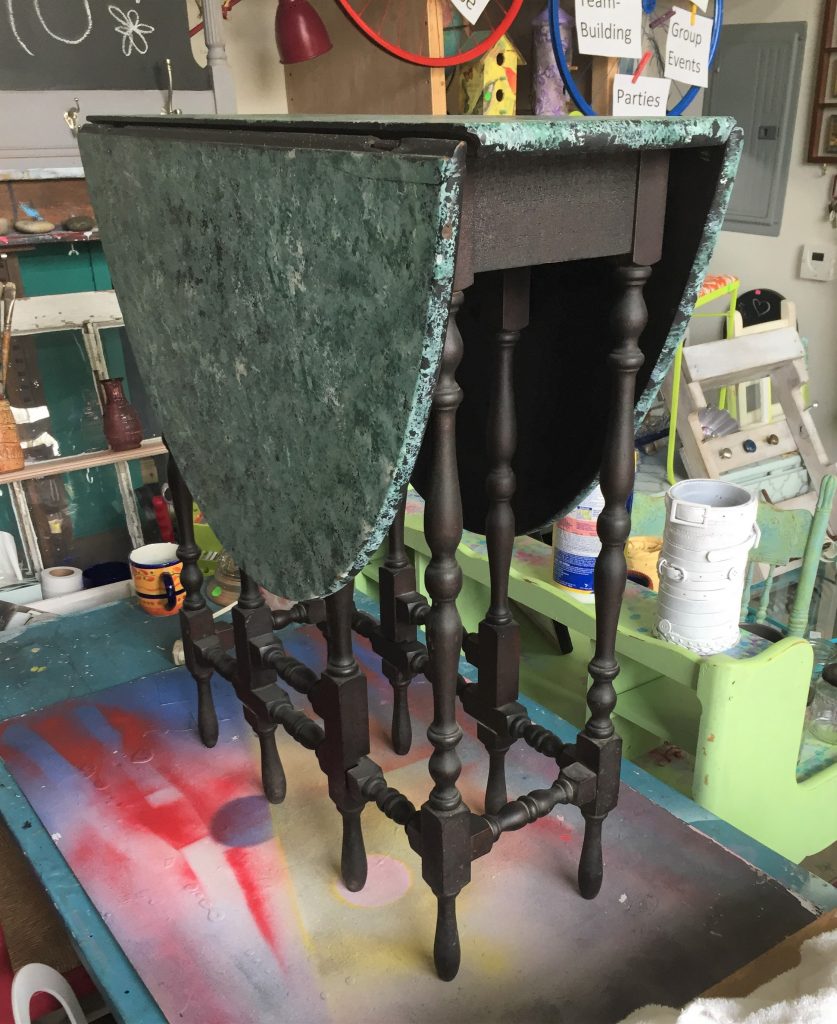
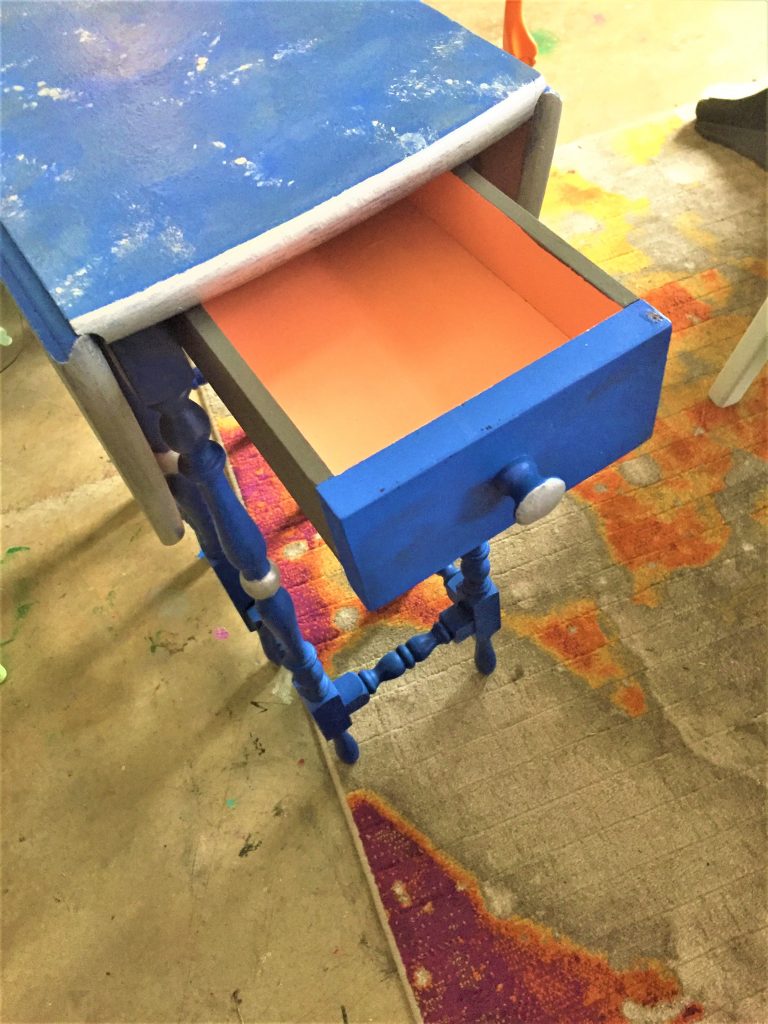
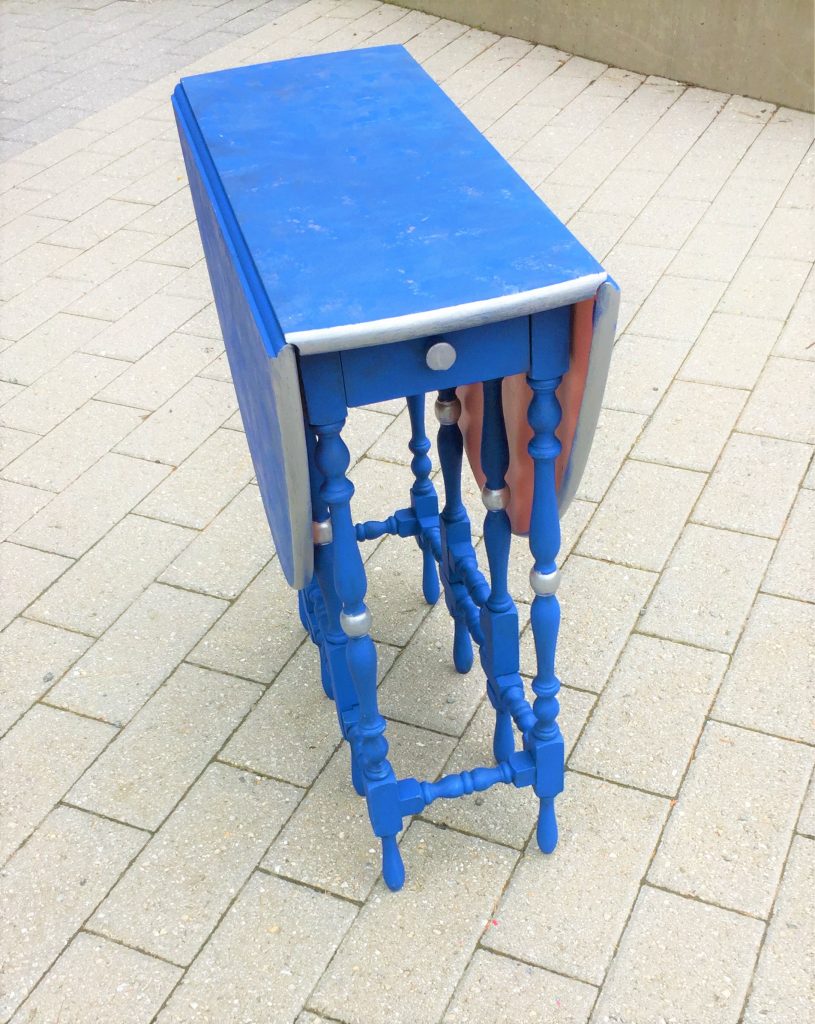
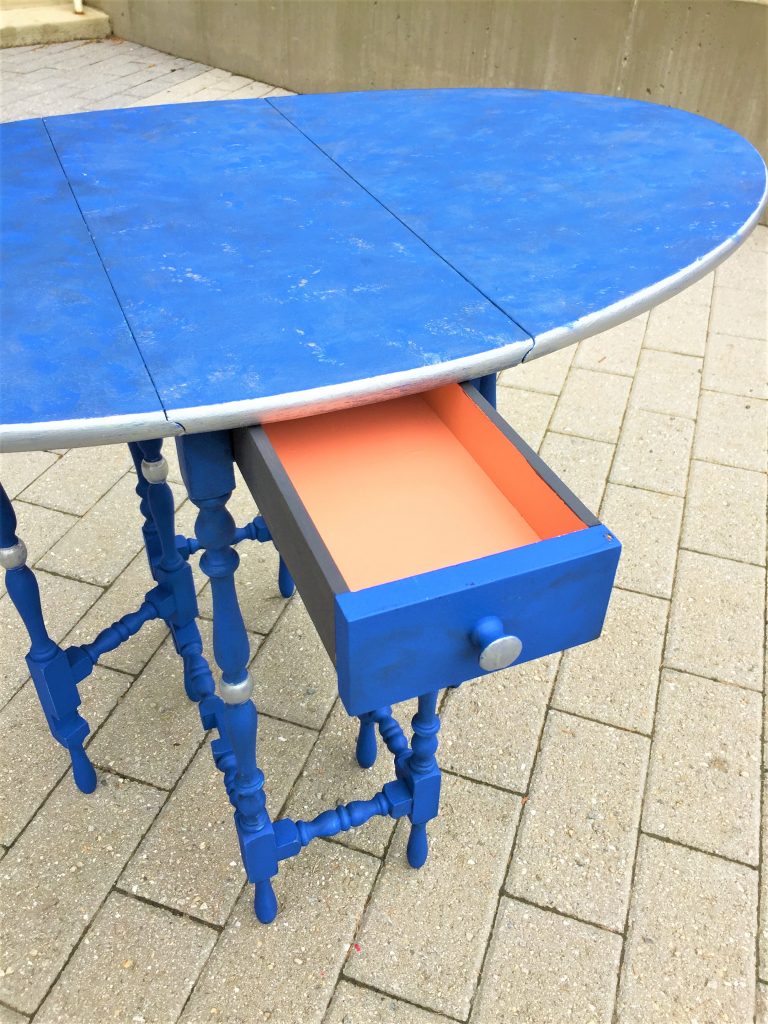
In addition to its sentimental value, I can see why Marva wanted to keep this table. Its drop leaf design gives it lots of flexibility without taking up lots of space, its slim but deep drawer is a place to stash items and its carved legs makes it dance with charm.
You can also find great artwork for your home or office at Goodwill, too. Framed posters, original paintings and other decorative pieces await you there. And remember, if you don’t like the frame, you can paint that another color, too, to go with your current interior design.
Food for creative thought: While looking for my good at Goodwill, I found a matching pair of eye-catching prints in wonderful frames. However, to make them better match my décor, I removed the prints and painted in color accents that complimented my look, then put them back in the frames and hanged them up. The colors I added looked like they had always been part of the original prints!
2. Pick a perfect palette
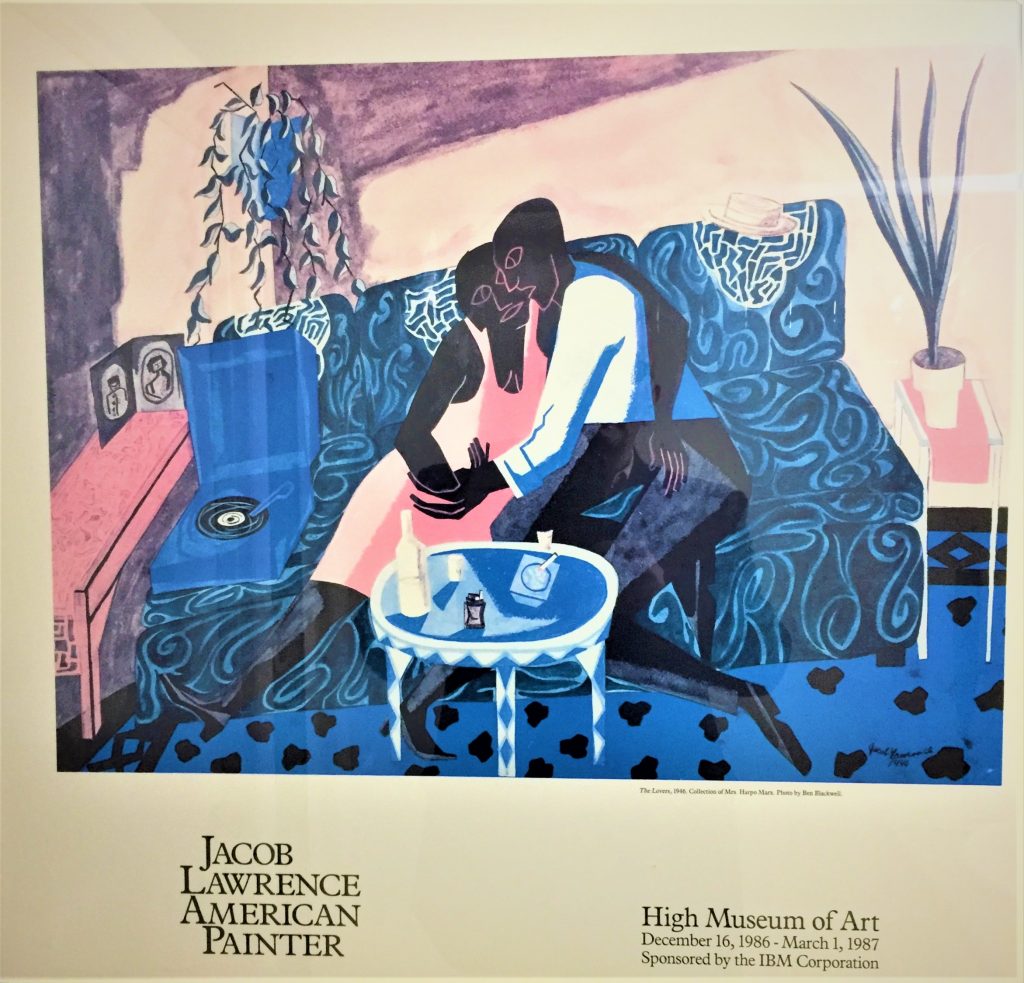
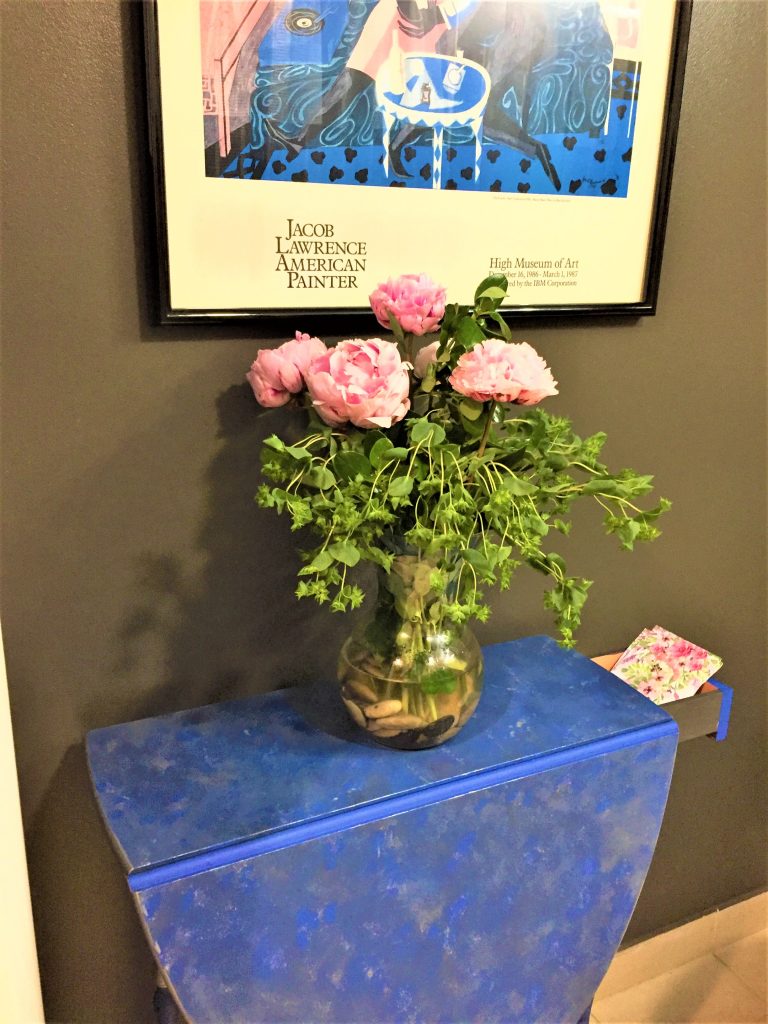
Look for colors in your artwork to play up in your accent piece. Marva had a lovely print with lots of blue, silver and black tones so I picked those for the colors for the upcycled piece. The artwork had some warm pink tones, too, so as a surprise, I used that color in unexpected places. (See more about that at Step 5.)
3. Get your piece ready for paint
Lightly sand your piece from top to bottom with a piece of fine-grained sandpaper or sanding block. You are not taking off the entire current paint layer or finish, simply buffing it up to make it more friendly for its new coats of paint. Do so quickly and don’t spend lots and lots of time, just a quick once over and you are good to go!
When done, bush off the dust created by sanding then wipe down the entire piece with a damp rag.
4. Layer paint to add dimension, depth
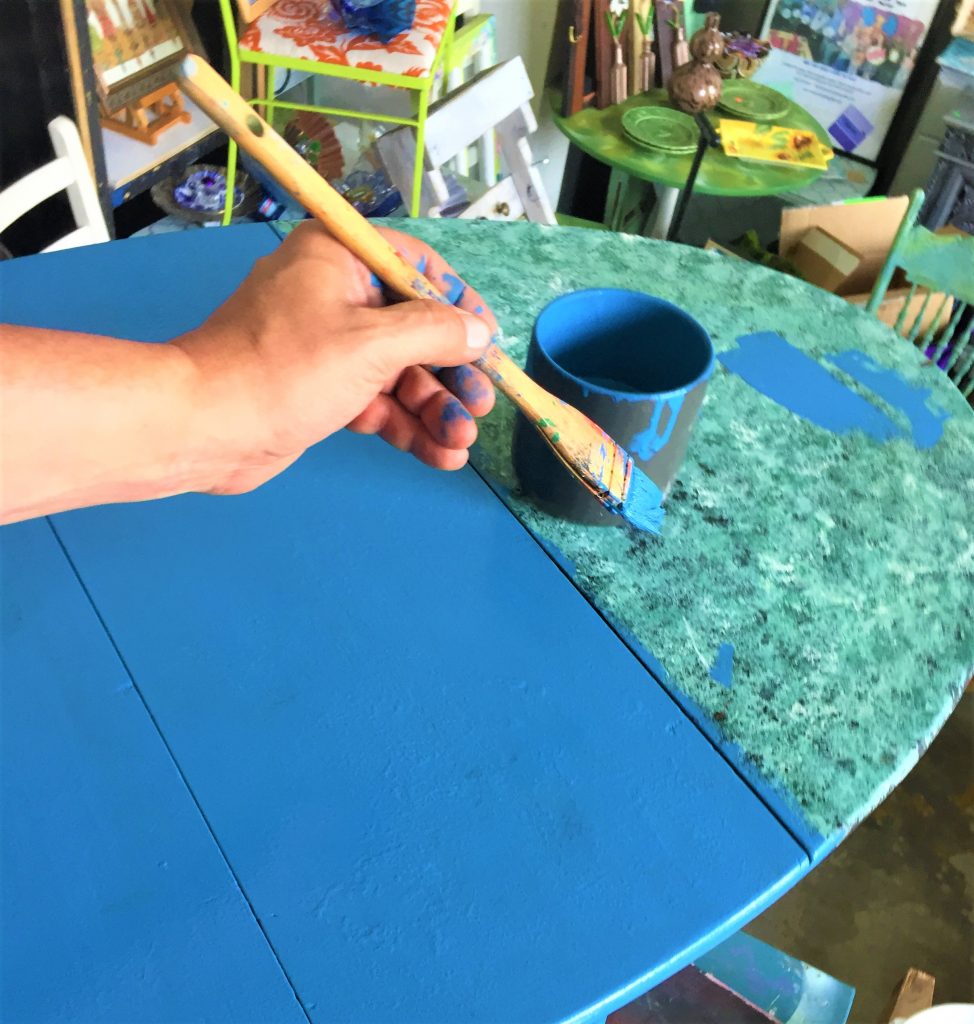
For this table, a coat of royal blue was painted over the entire piece. Remember, brush on a light layer and let it dry. Don’t put on a thick heavy coat but several light ones. Your layers will ensure the previous tones disappear and prevent runs and drips, too. Remember to lay your piece on its side or on its top so you are sure to get every edge and section.
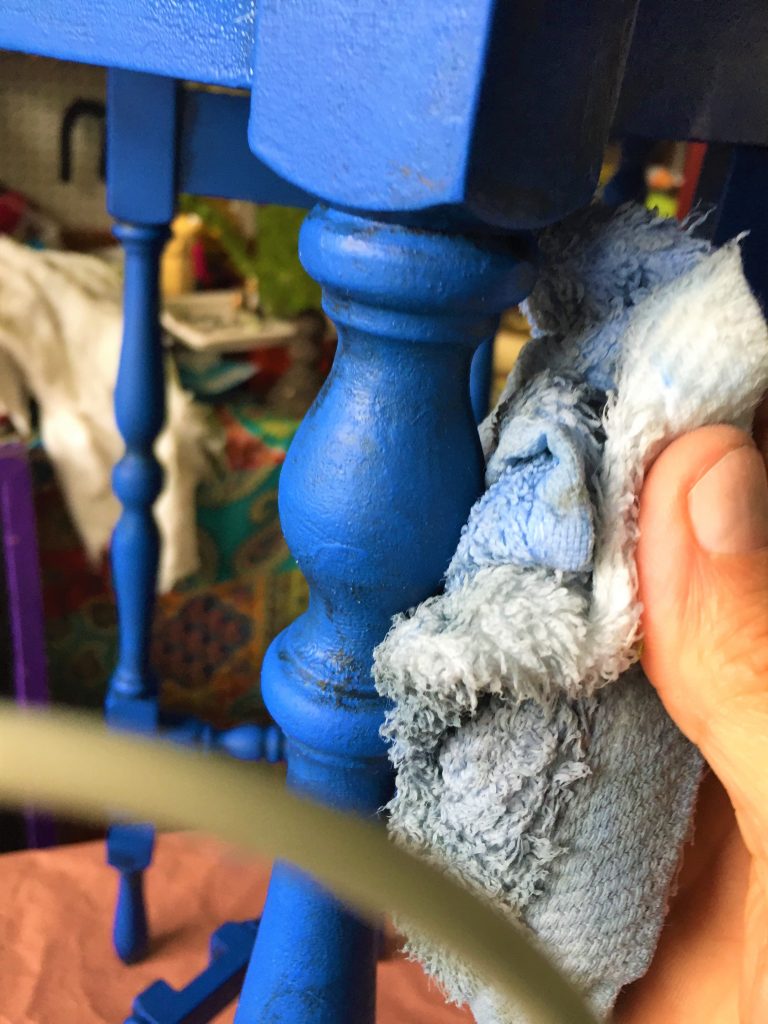
Once the table had two to three coats of the blue, it looked so different and wonderfully bright. Could I have stopped there? Certainly. However, I wanted the piece to be truly one-of-a-kind so I brushed on black paint then immediately wiped it off with a damp rag. The result? The black remained in the various nooks and crannies which helped to call attention to these charming details. For best success with this step, paint a small area black then wipe it away right away. Move to another part and do the same. This will prevent the black from drying too much. While this process will take a little time, the end result is worth it. And if you leave a little bit too much of the black layer on, you can always touch it up with your blue paint and repeat the step. The beauty of painting is that it is really easily to tweak it or fix it!
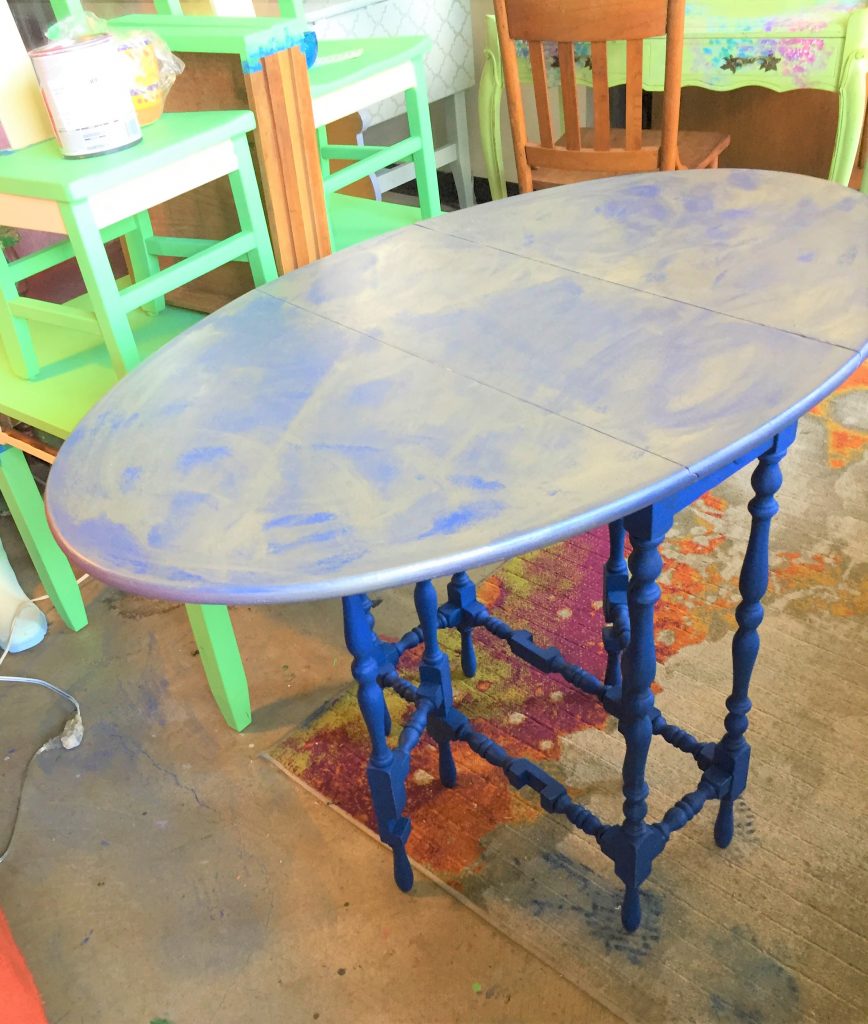
This process was repeated with silver paint on the table’s top. Silver paint was brushed on quickly then immediately wiped away to leave a translucent layer. Once it dried, I wanted more of the silver to show, so with a dry brush, I lightly dabbed on more silver on the top, again moving quickly and working to make it look balanced. This helped to make the top sparkle!
Let your piece dry over night before the next step so you avoid any smears!
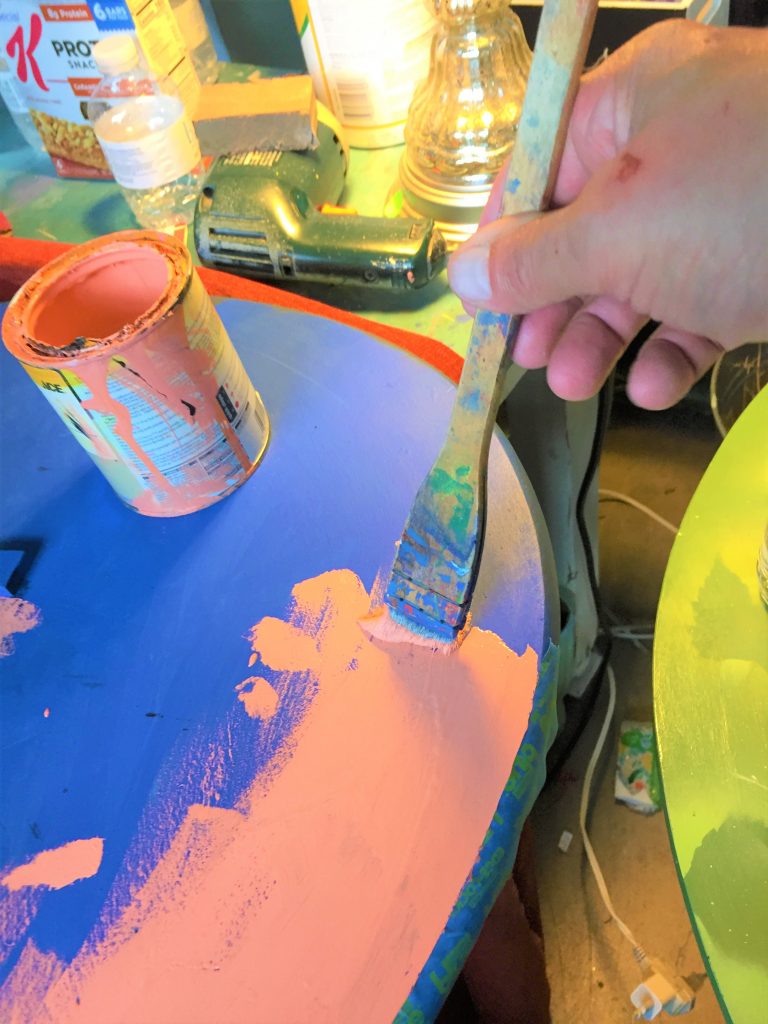
5. Add “pops” of color
This is a cool step in the transformation process because you are calling attention to the unique parts of your piece. Silver paint was added around the tabletop’s edge to make this curved part catch your eye. On the legs, this paint was added to knobby-looking places to make you notice this special detail. Use a small paint brush to highlight these parts; you may need to touch them up to ensure solid coverage.
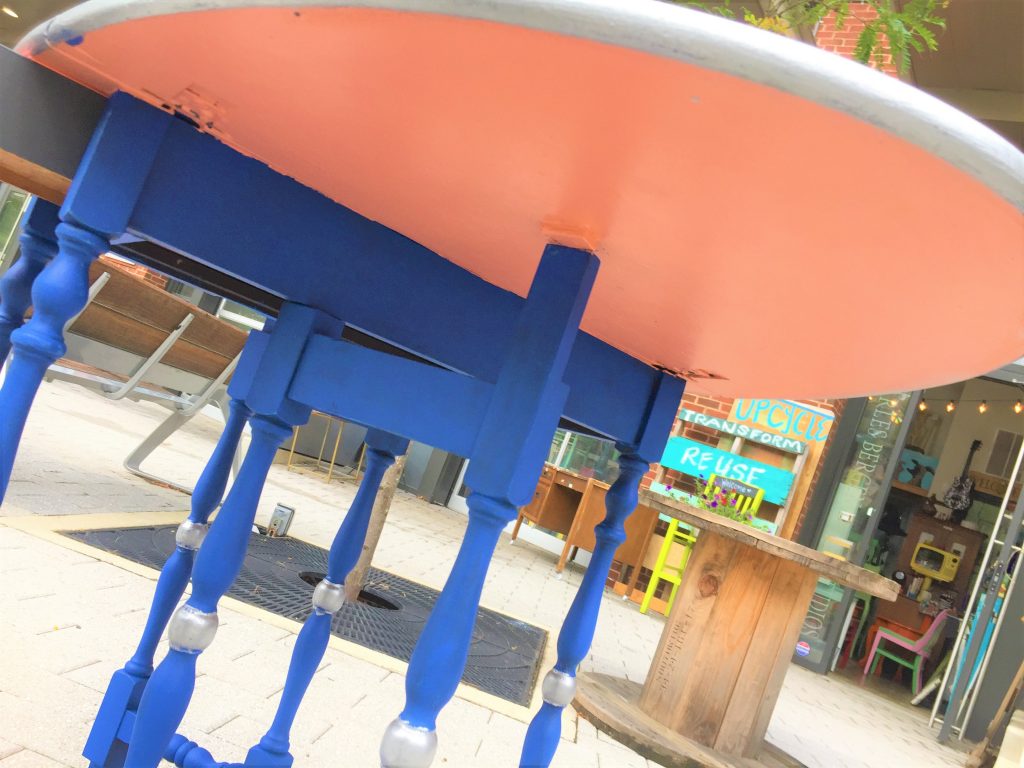
As a surprise, the inside of the drawer was painted with a peachy-pink tone featured in the inspiration artwork. Also, the underside of the leaves was painted that hue, too, so that when the leaves are folded down, you can see this pop of color.
6. Poly to protect
When your piece has dried completely, add an extra layer of protection from dirt and fingerprints by spraying on polyurethane. Given all the carved parts, spraying it on made good sense, time-wise, rather than painting it on by hand. Put on several layers on the entire piece, let dry and you are ready!
7. Accent your artwork
Pair your eye-catching piece with your inspired artwork. Add flowers and other accessories to complete a beautiful vignette. You will be thanking yourself—and Grandma—for transforming your treasured piece and giving it a fresh look!


