You won’t need a spoon full of sugar to make this DIY project go down! Extra-large, hand-carved wooden spoons, used for decorative purposes, get transformed for fun & function as this week’s DIY project. One time these super big utensils make a statement as folks decorated their kitchens and eating places with them but are now, thankfully a trend of the past!
With a little creativity, some of these now serve up scares while others hold their own–and other items. Thanks to my studio neighbor’s Topaz’s wife Melanie (@melanielovesdc) for gifting me these; she was right when she thought I might do something funky—and spooky—with them.
Be sure to check out the aisle at Goodwill where various wooden items like cutting boards, small storage crates, picture frames, rolling pins, and more are for sale for super cheap prices. You might score and find similar-sized spoons to transform, too. You also could pick up regular-sized wooden spoons, often found at Goodwill, and follow these steps with a similar creative result!
5 Ways to Upcycle Your Super-Sized Wooden Spoons
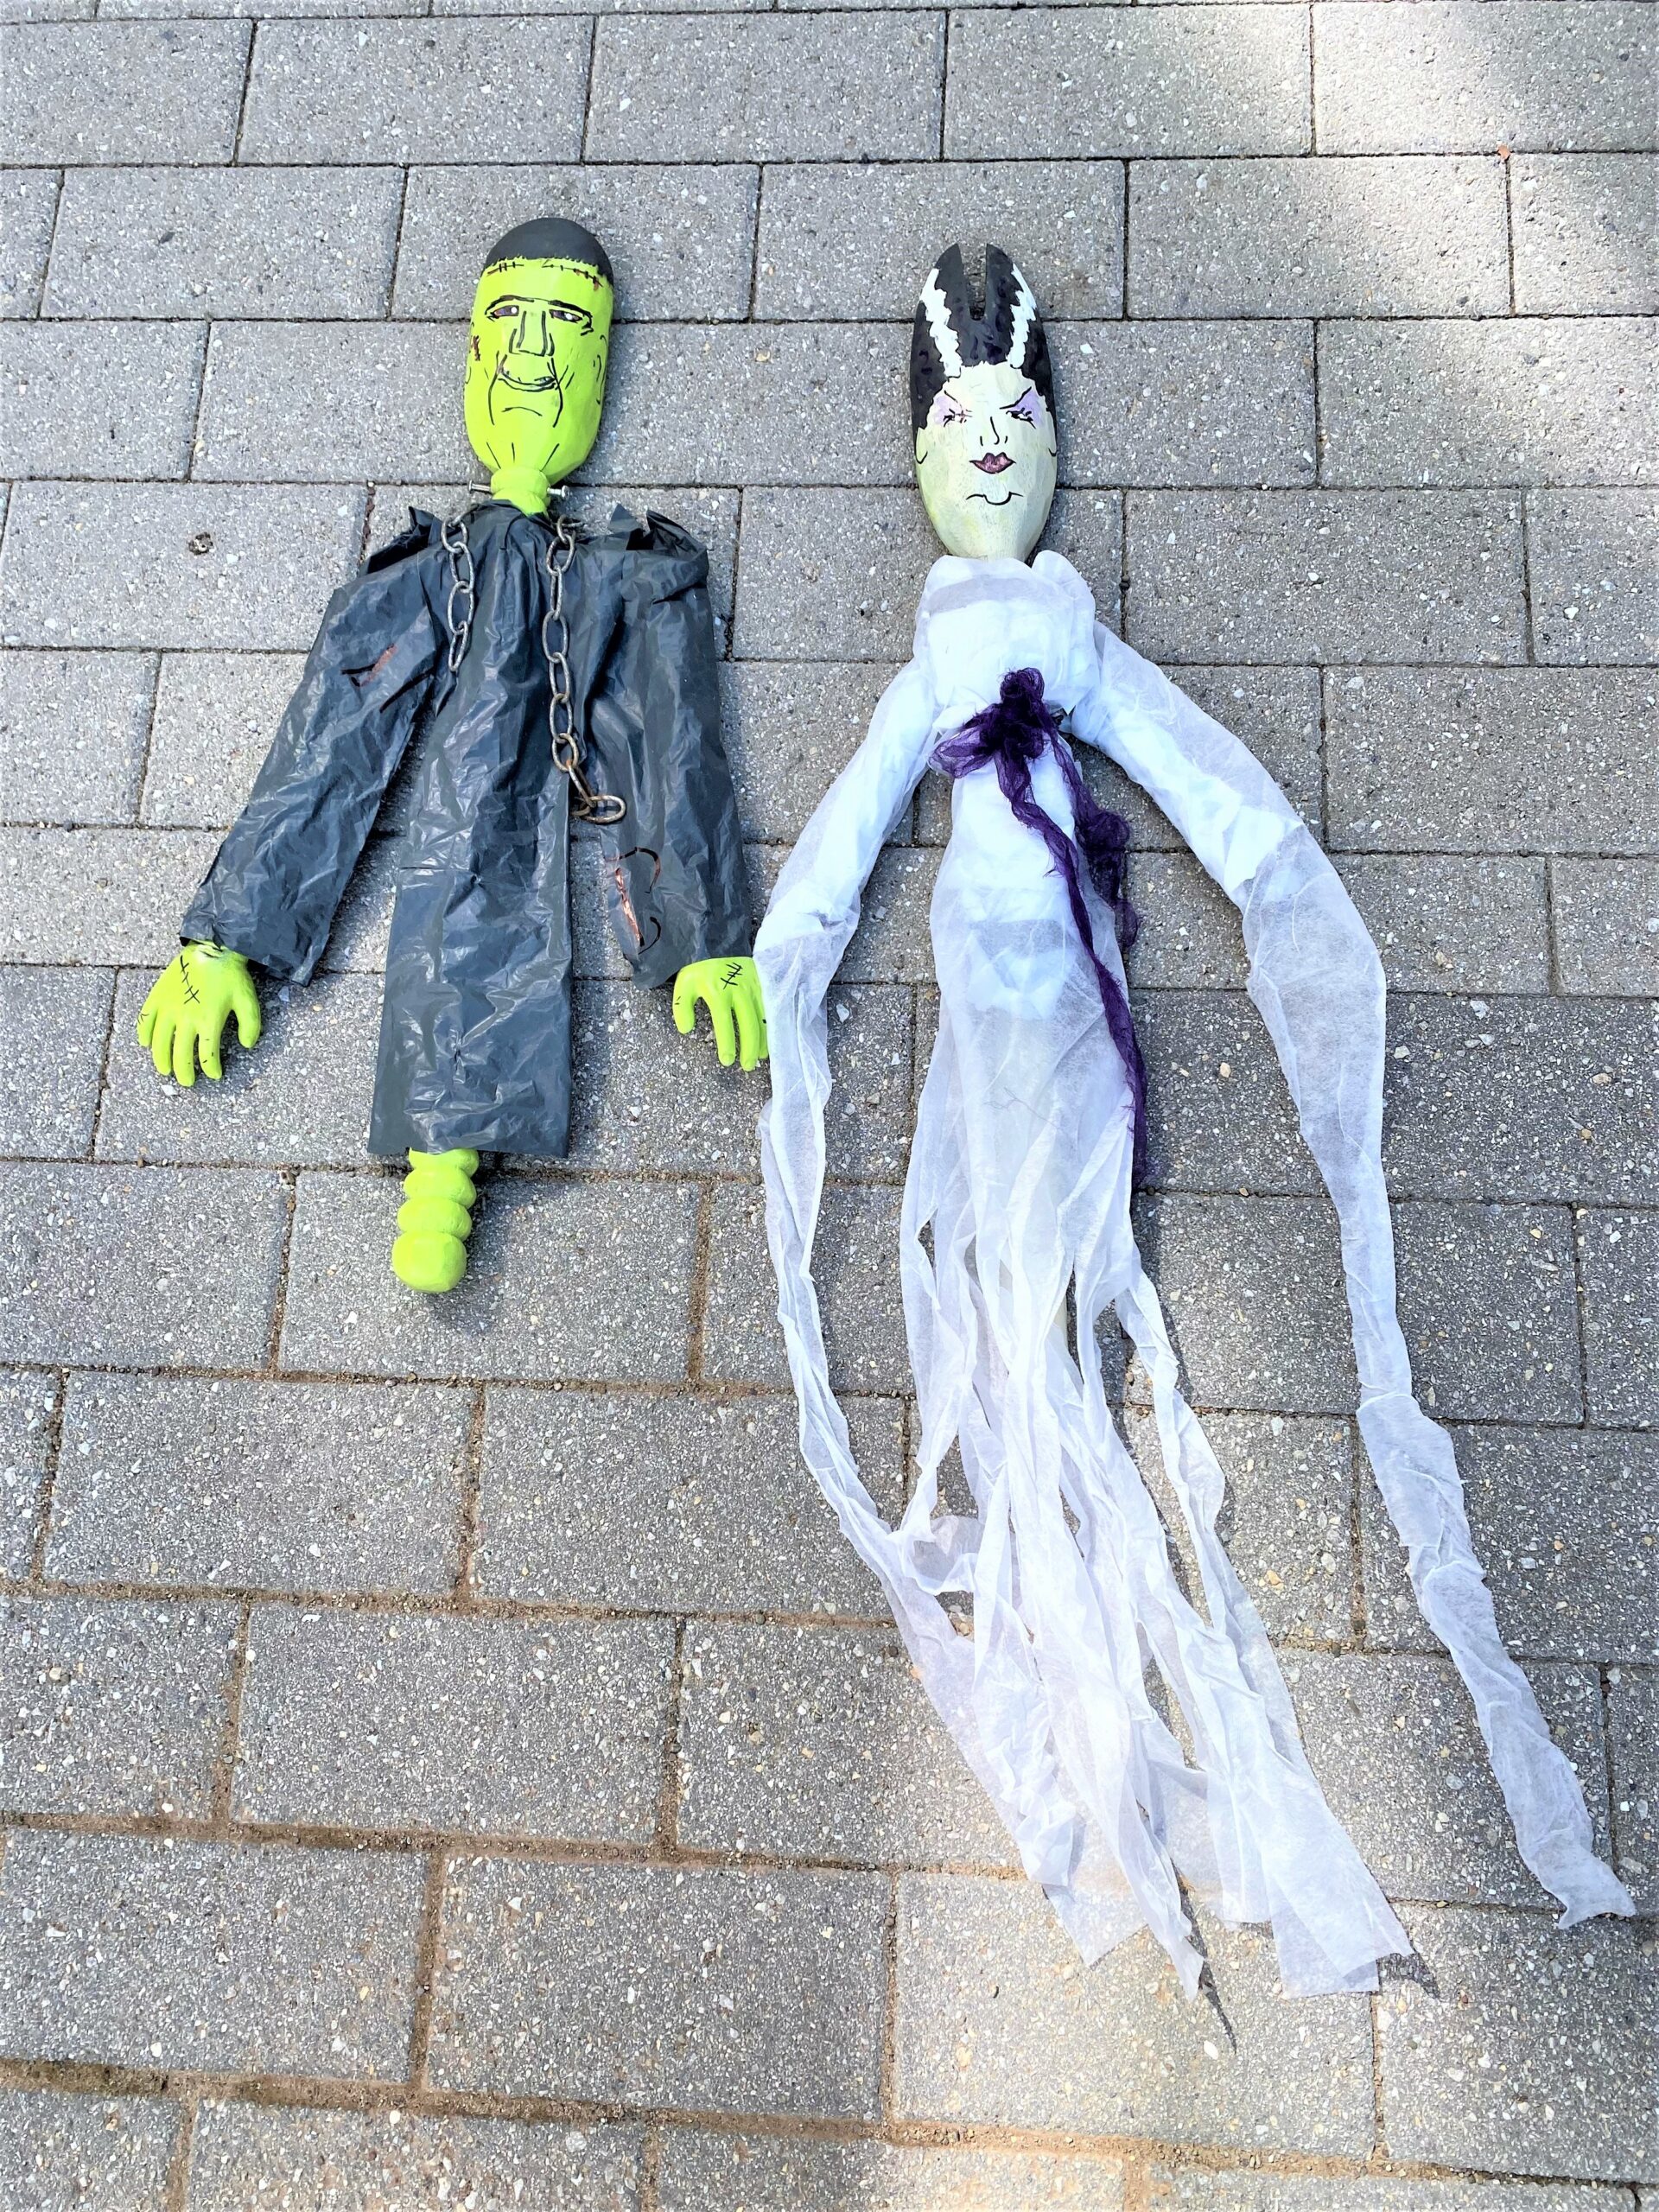
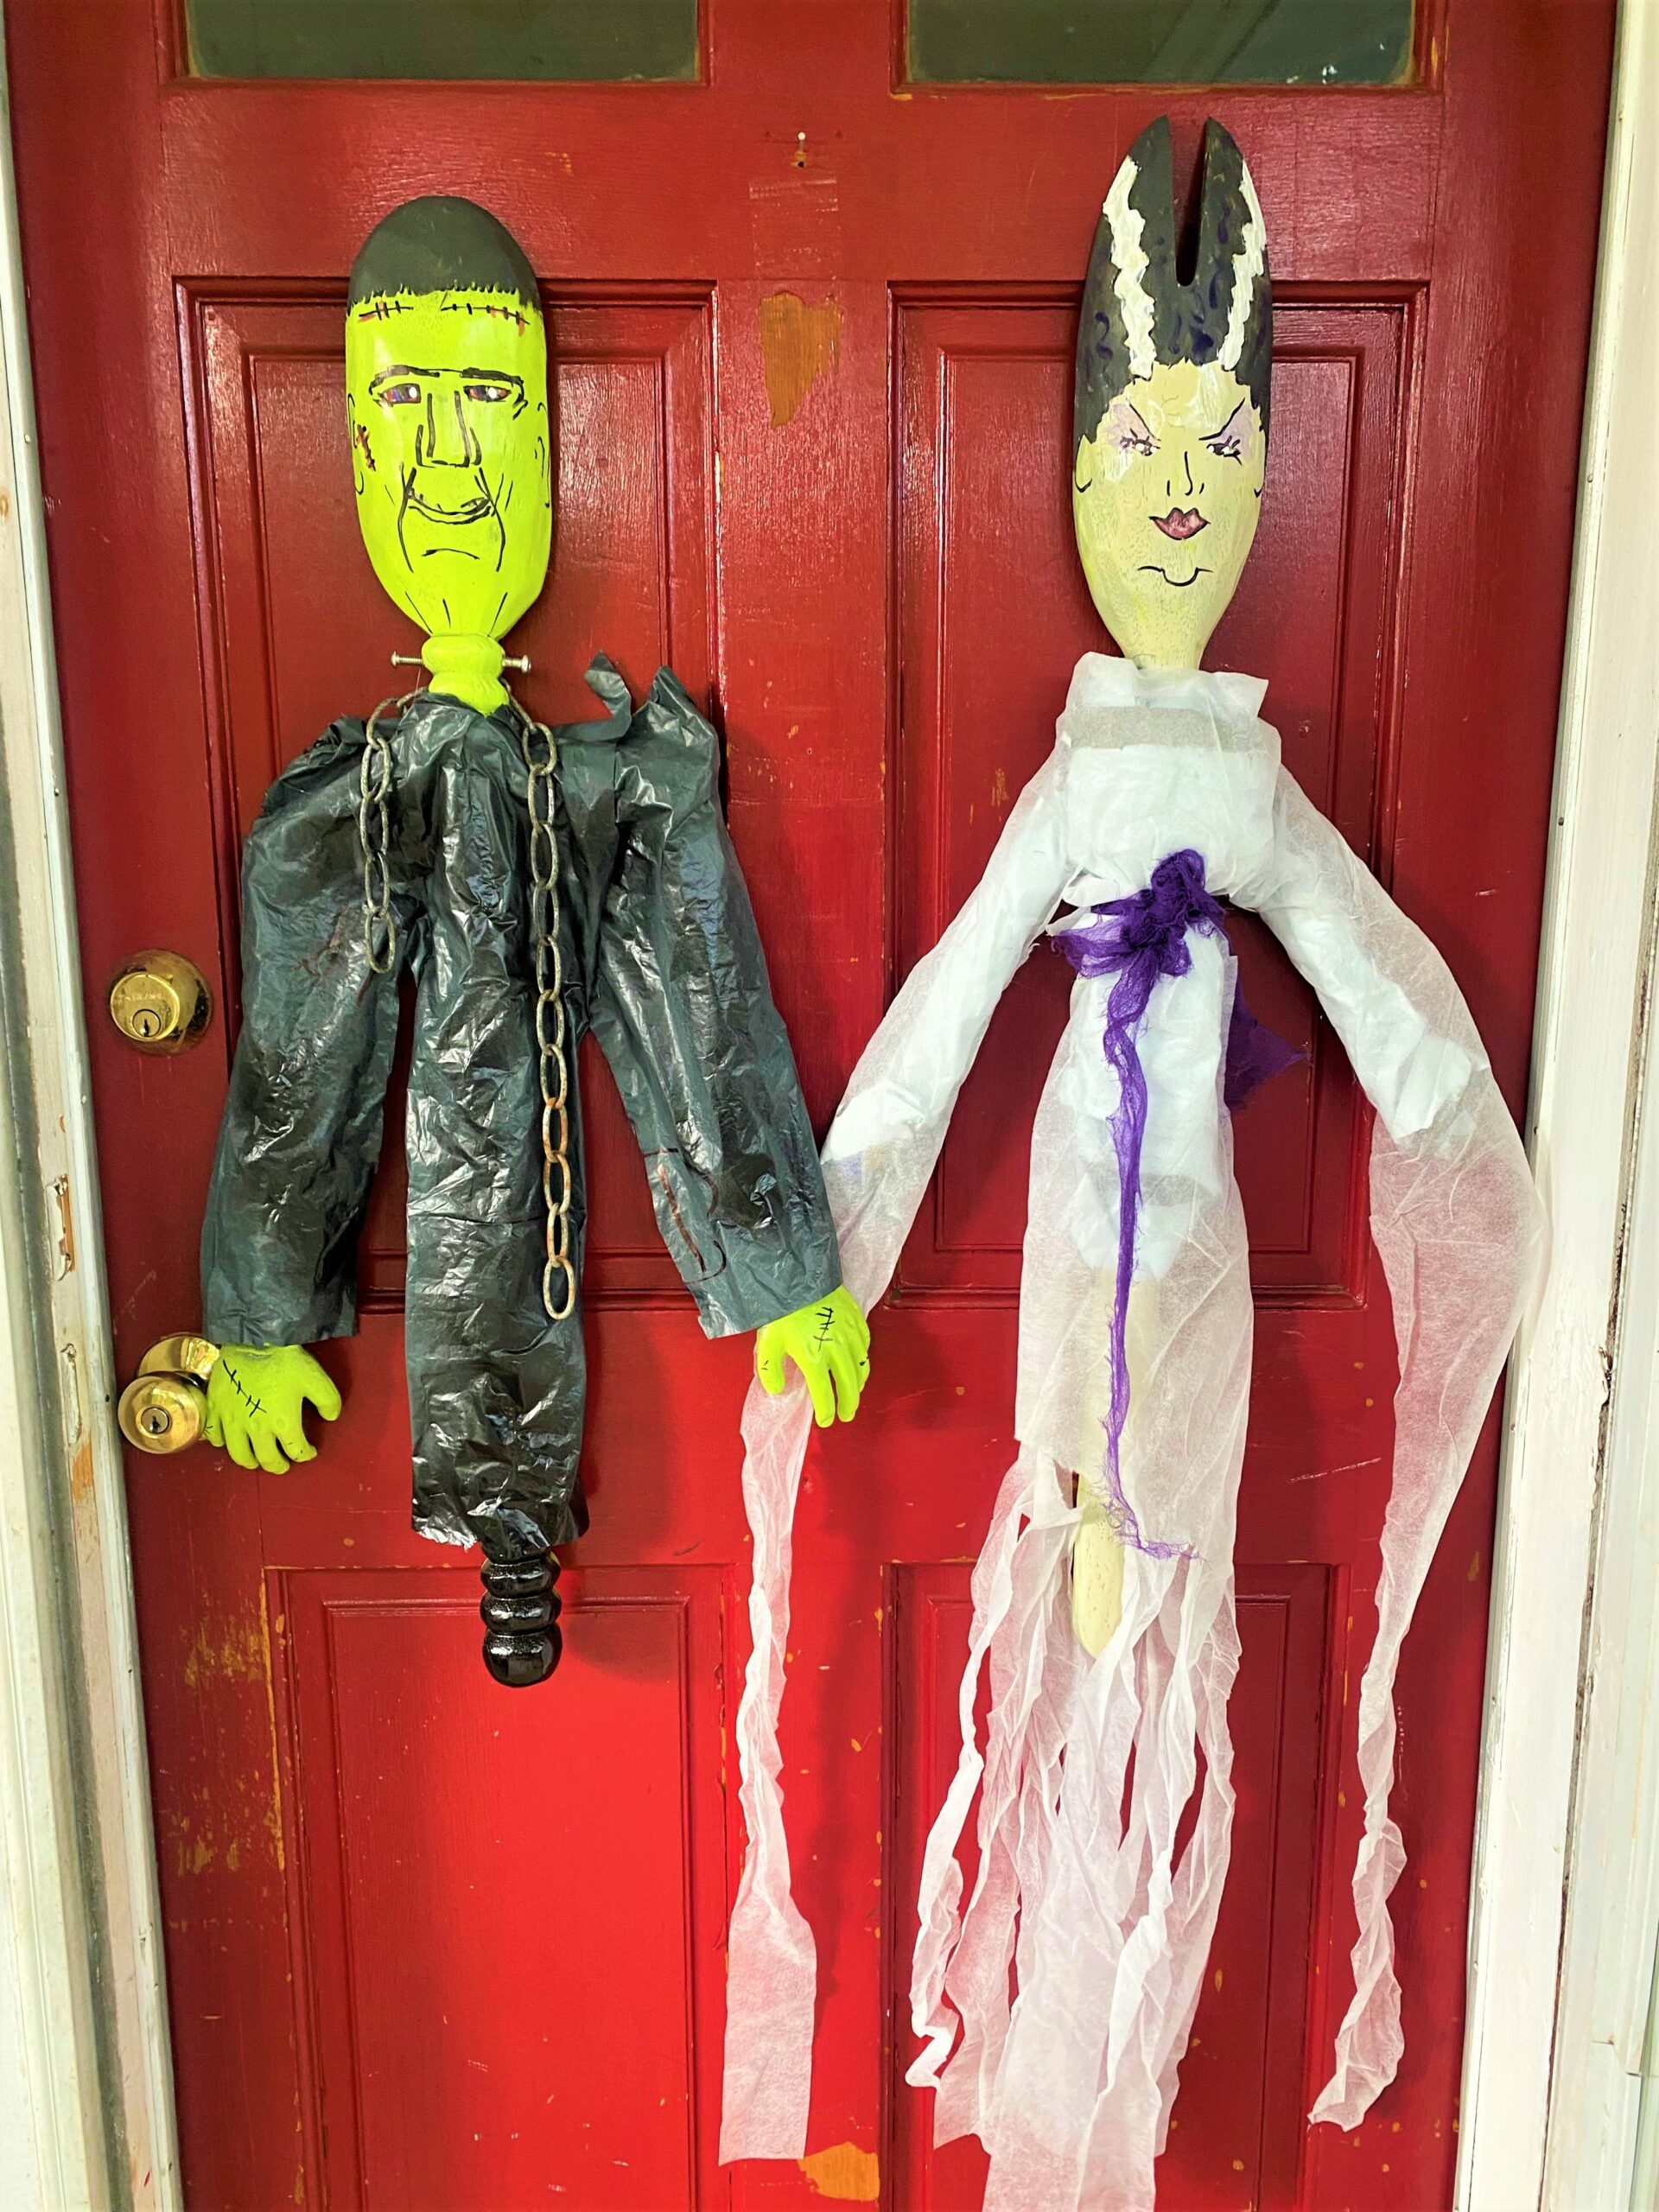
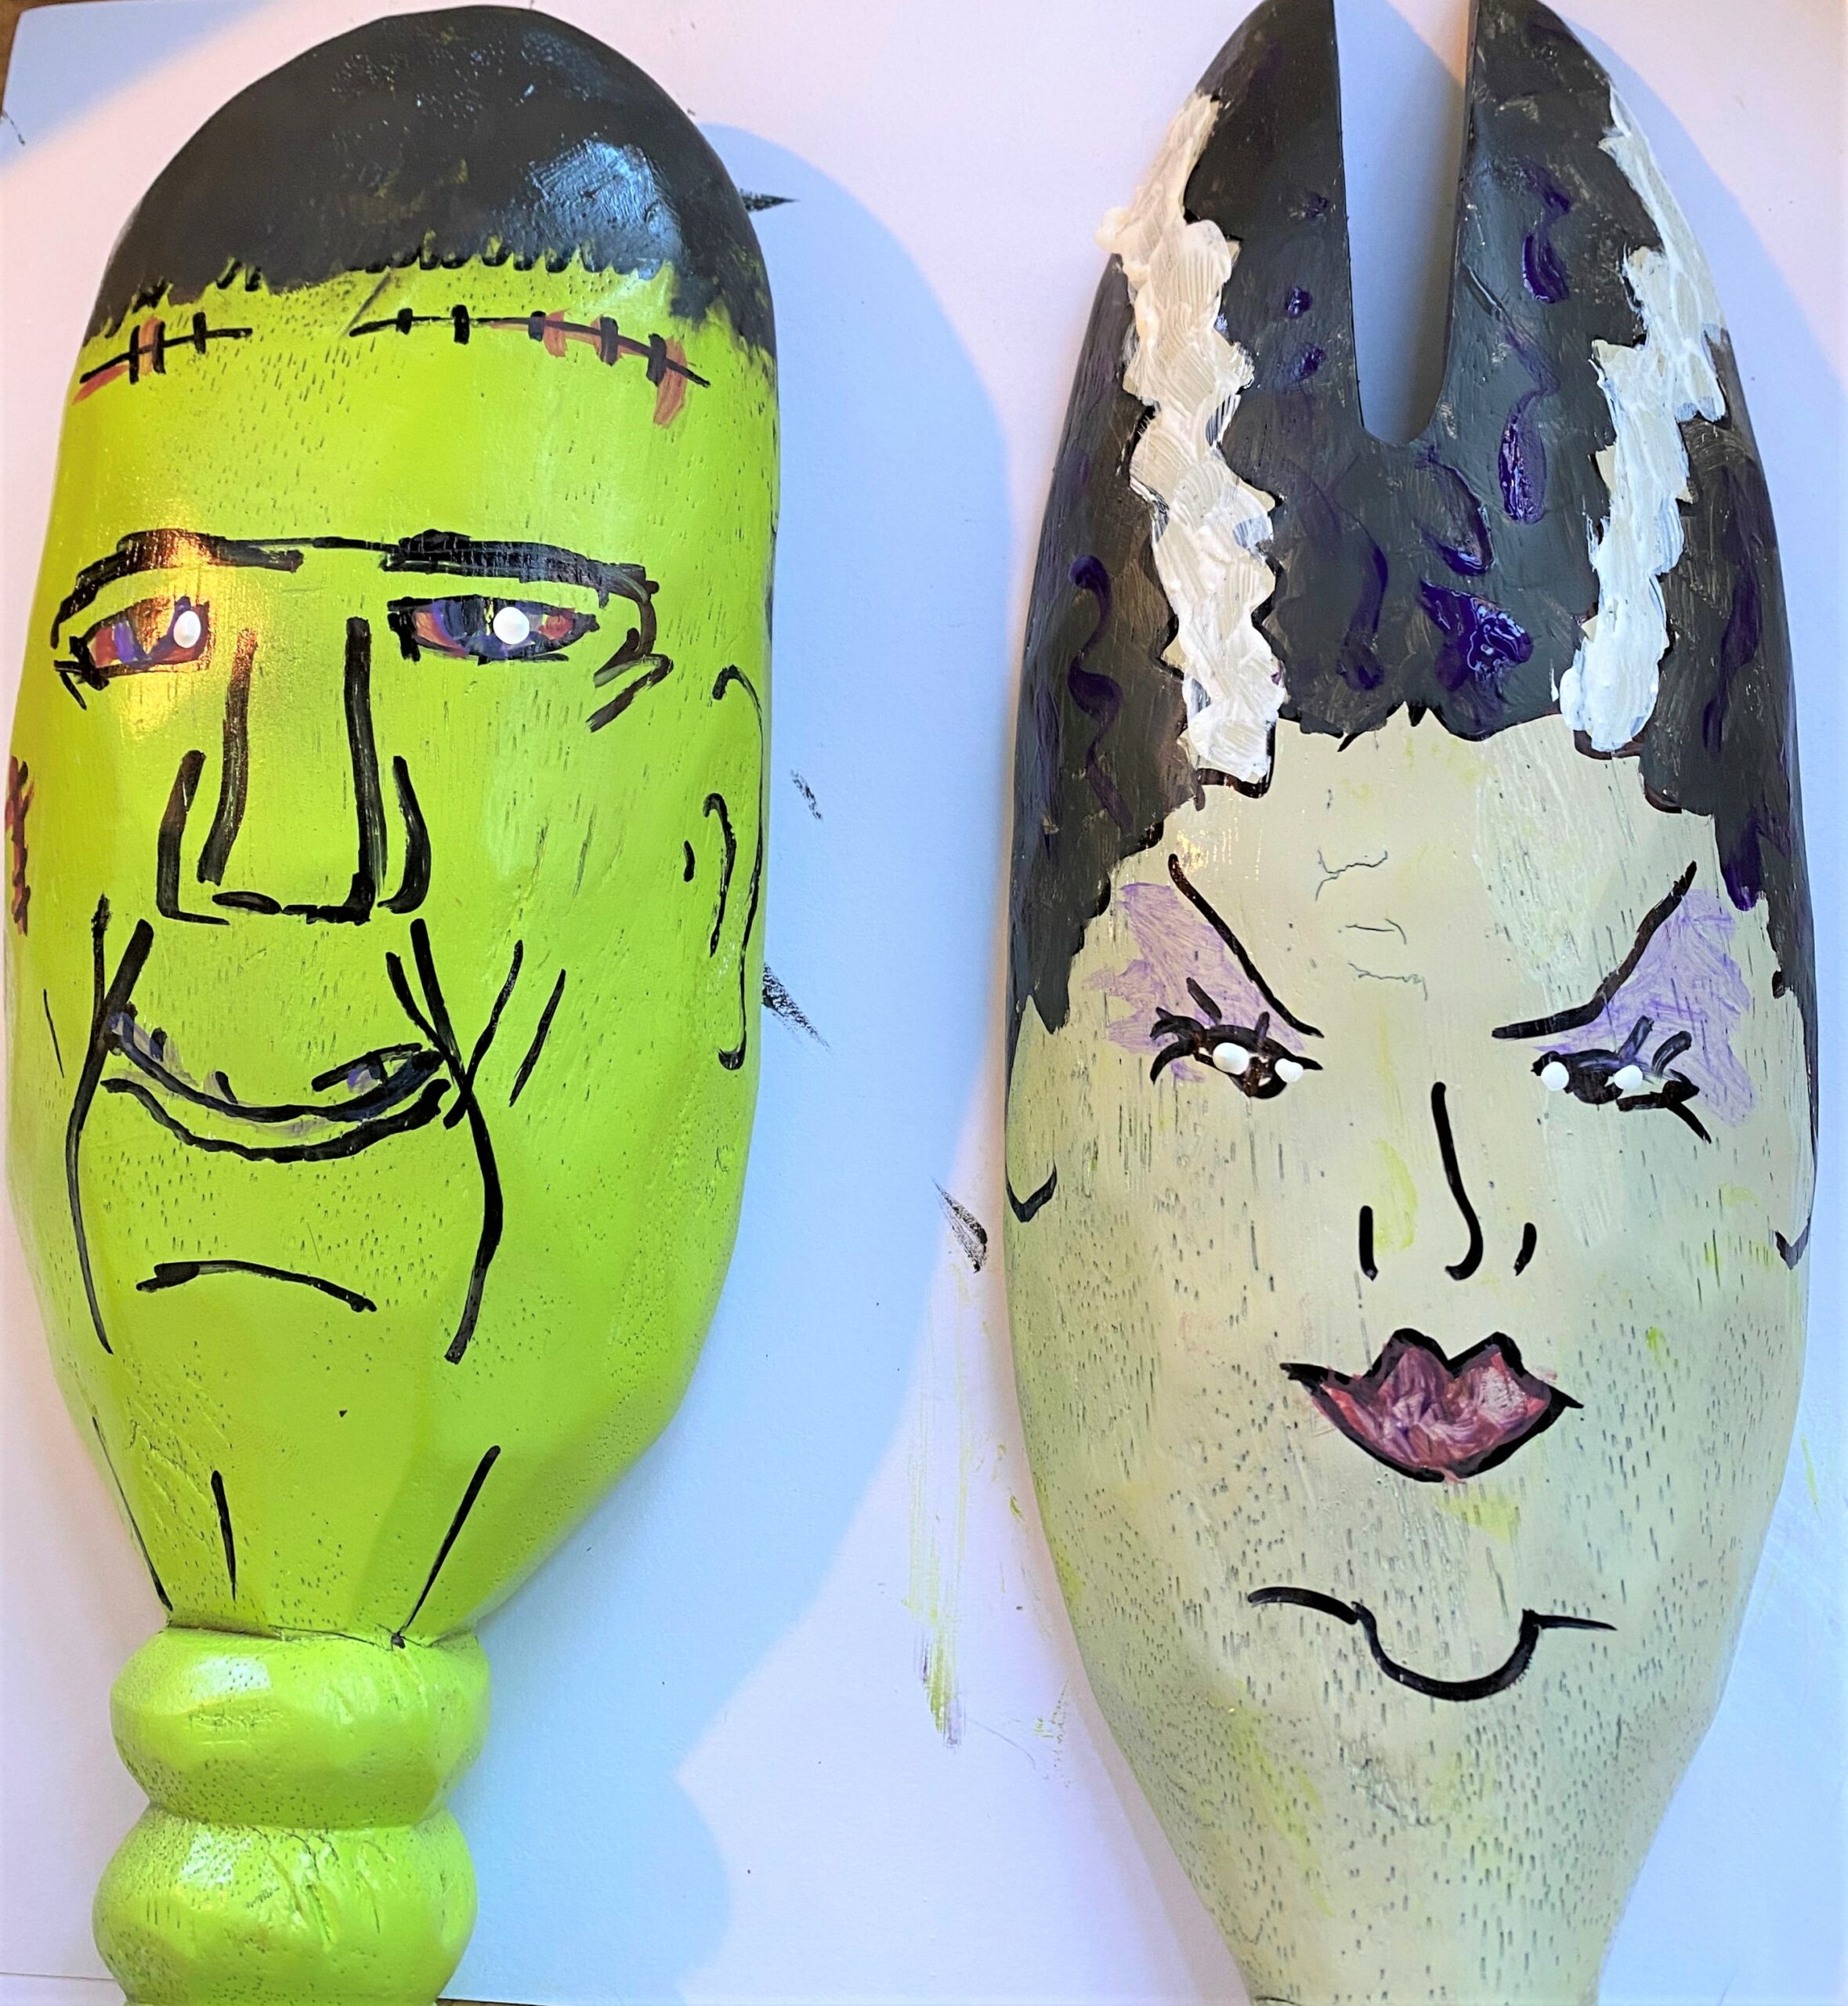
1. Frankenstein
Here’s How:
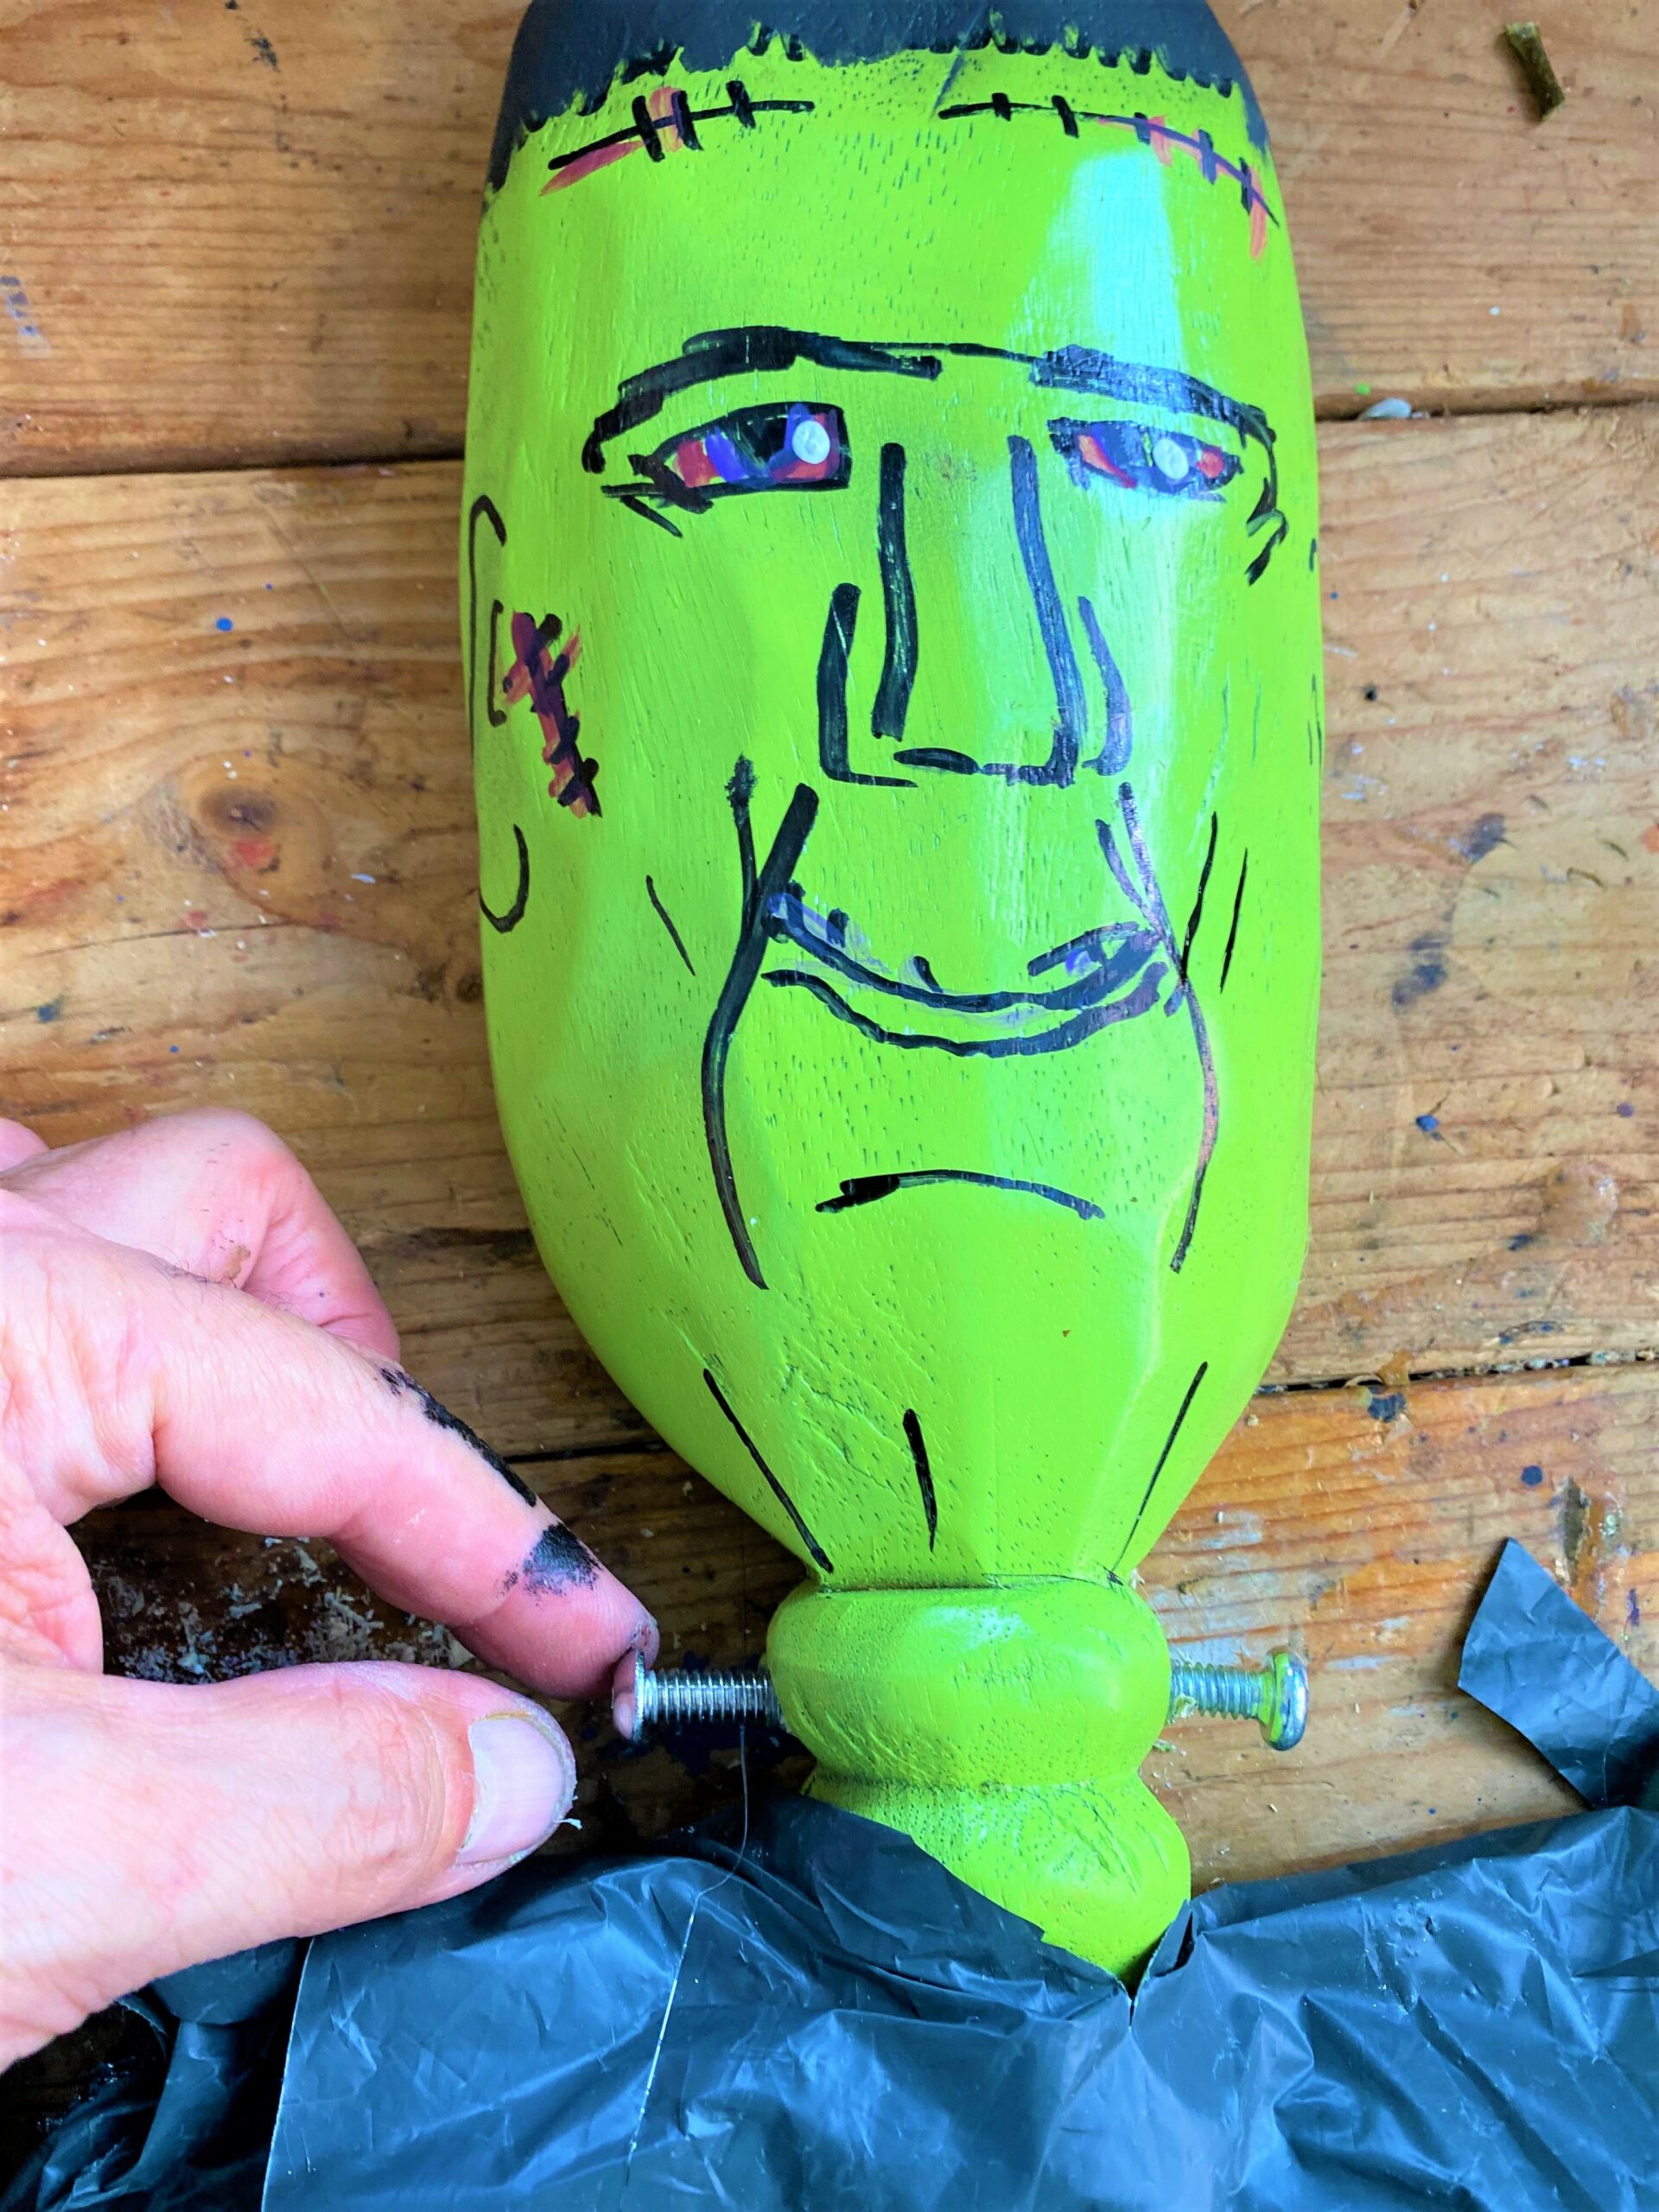
- Spray paint your spoon bright green.
- After it dries, draw on the monster’s face with a black Sharpie. With craft paints, add red, purple, and white to his eyes.
- Brush on black for his hair. Add bolts on his neck by drilling small holes, then hot glue them in place.
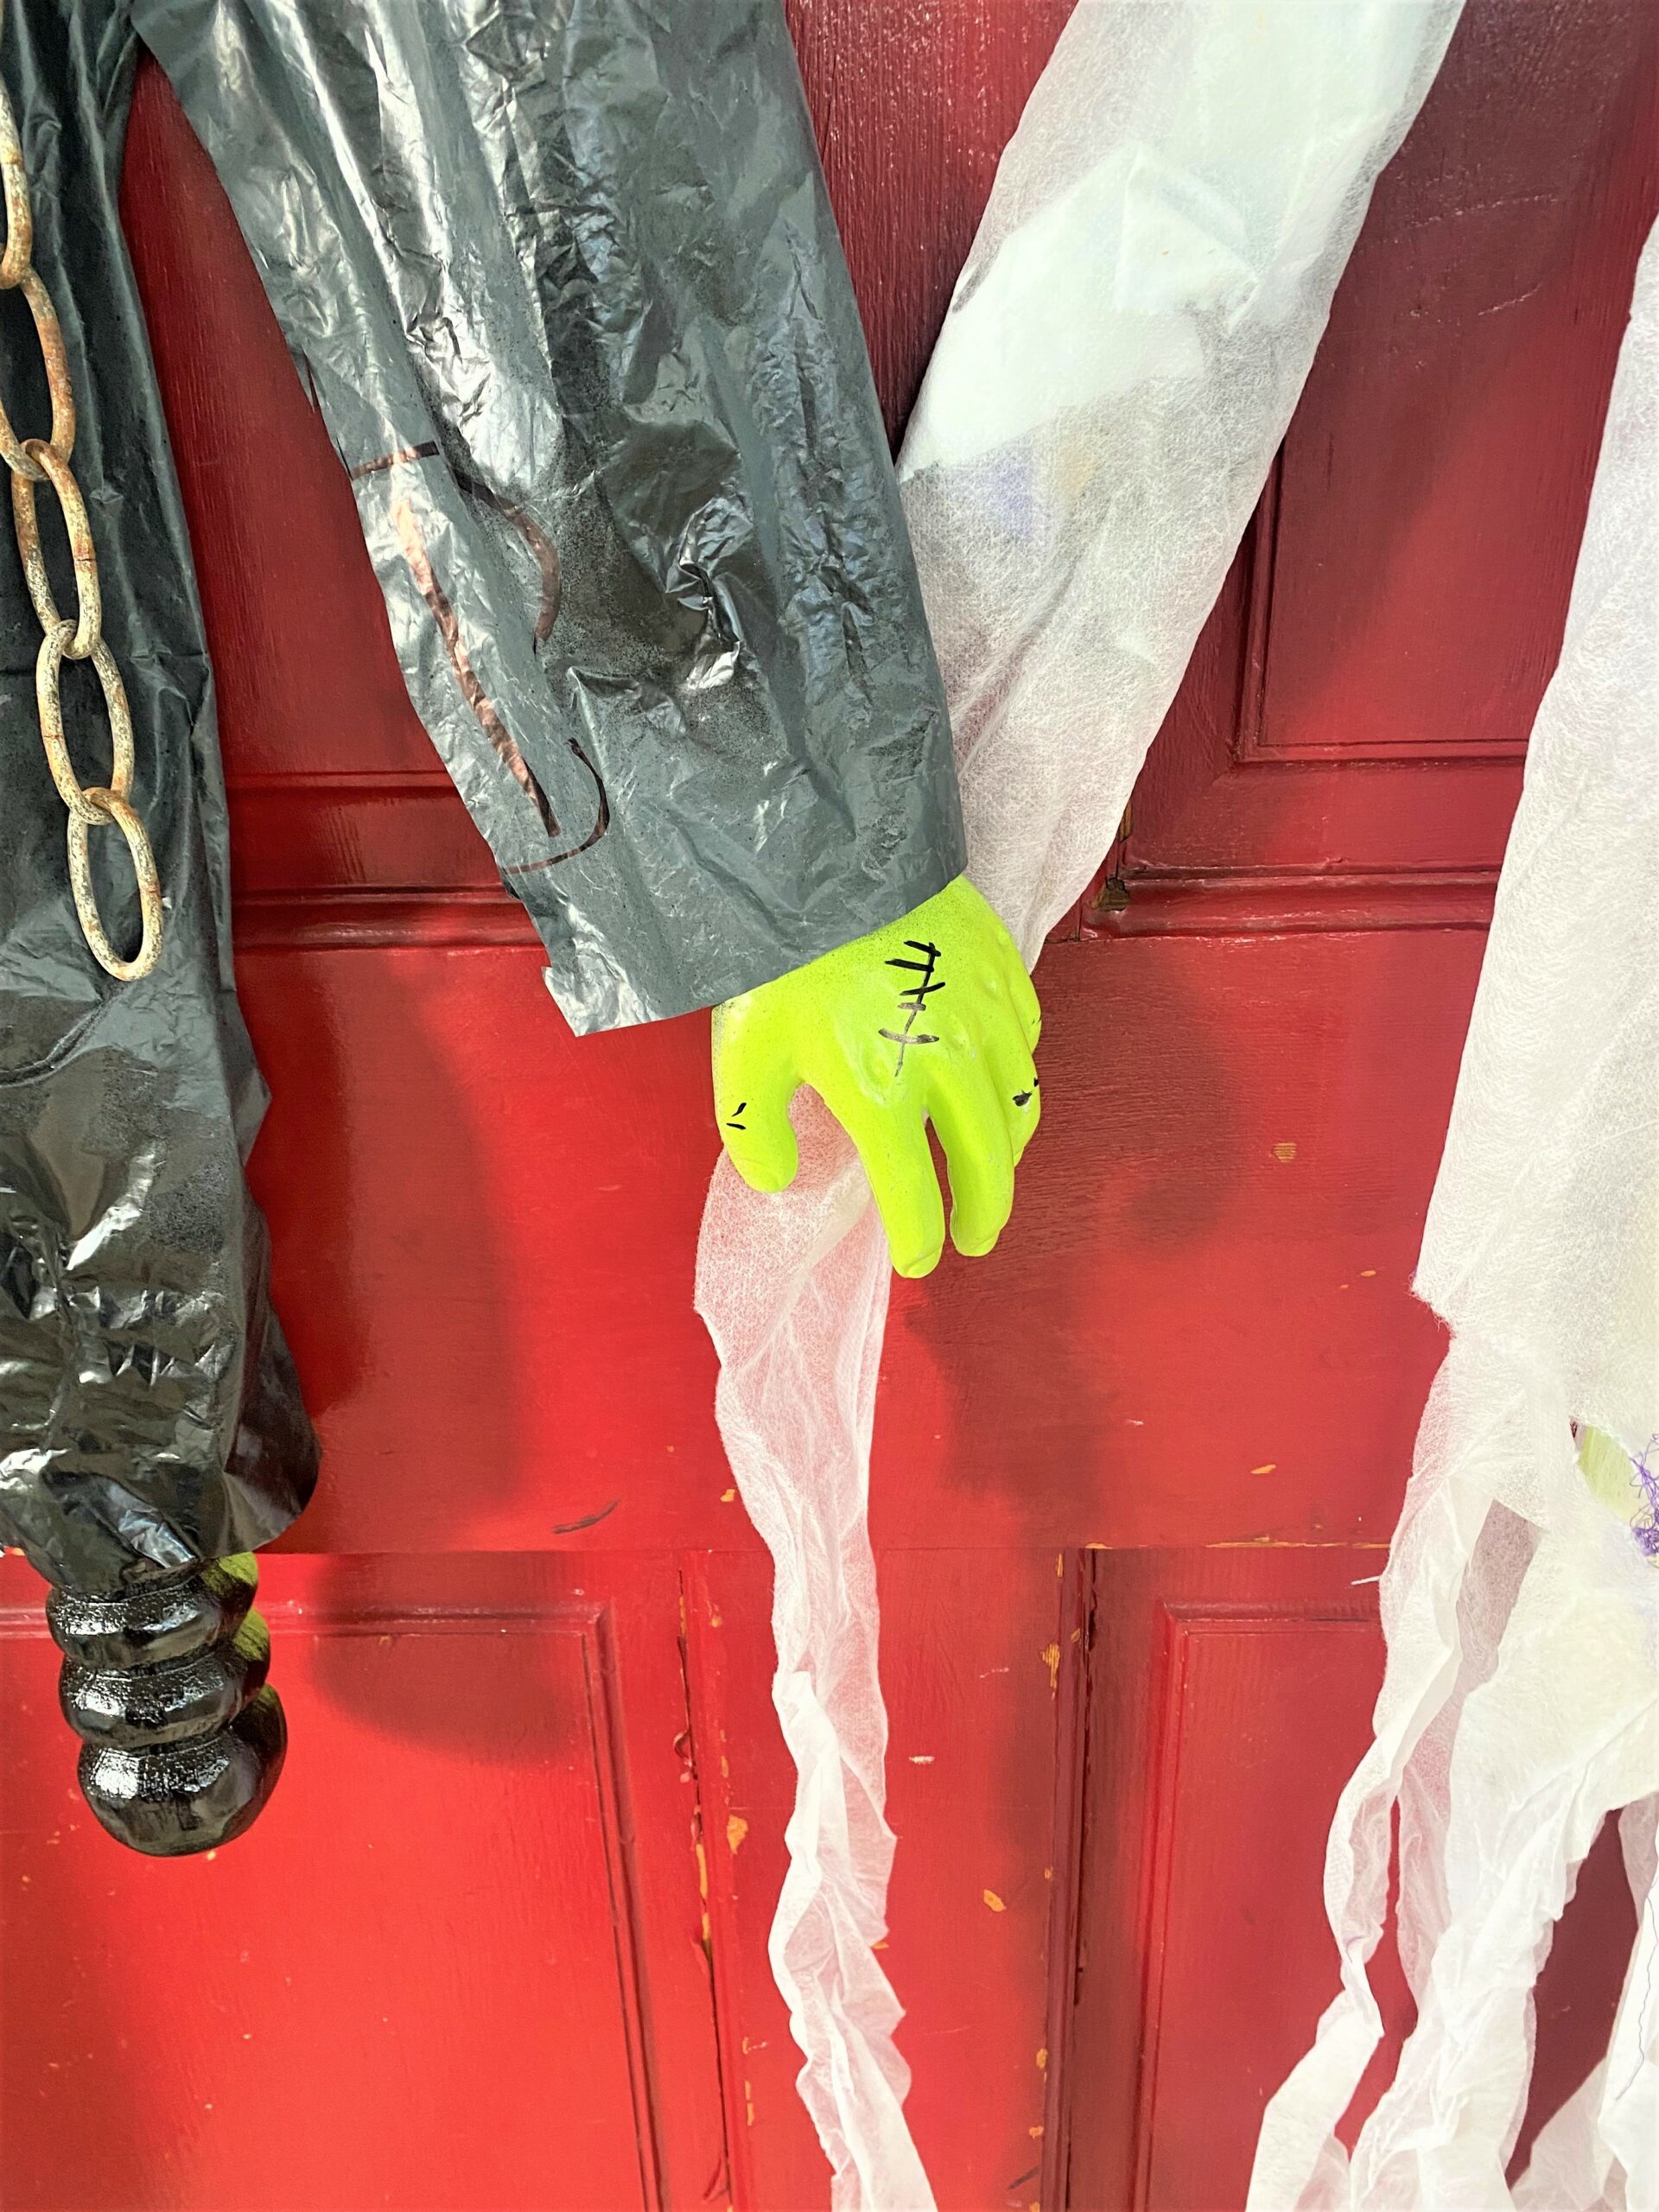
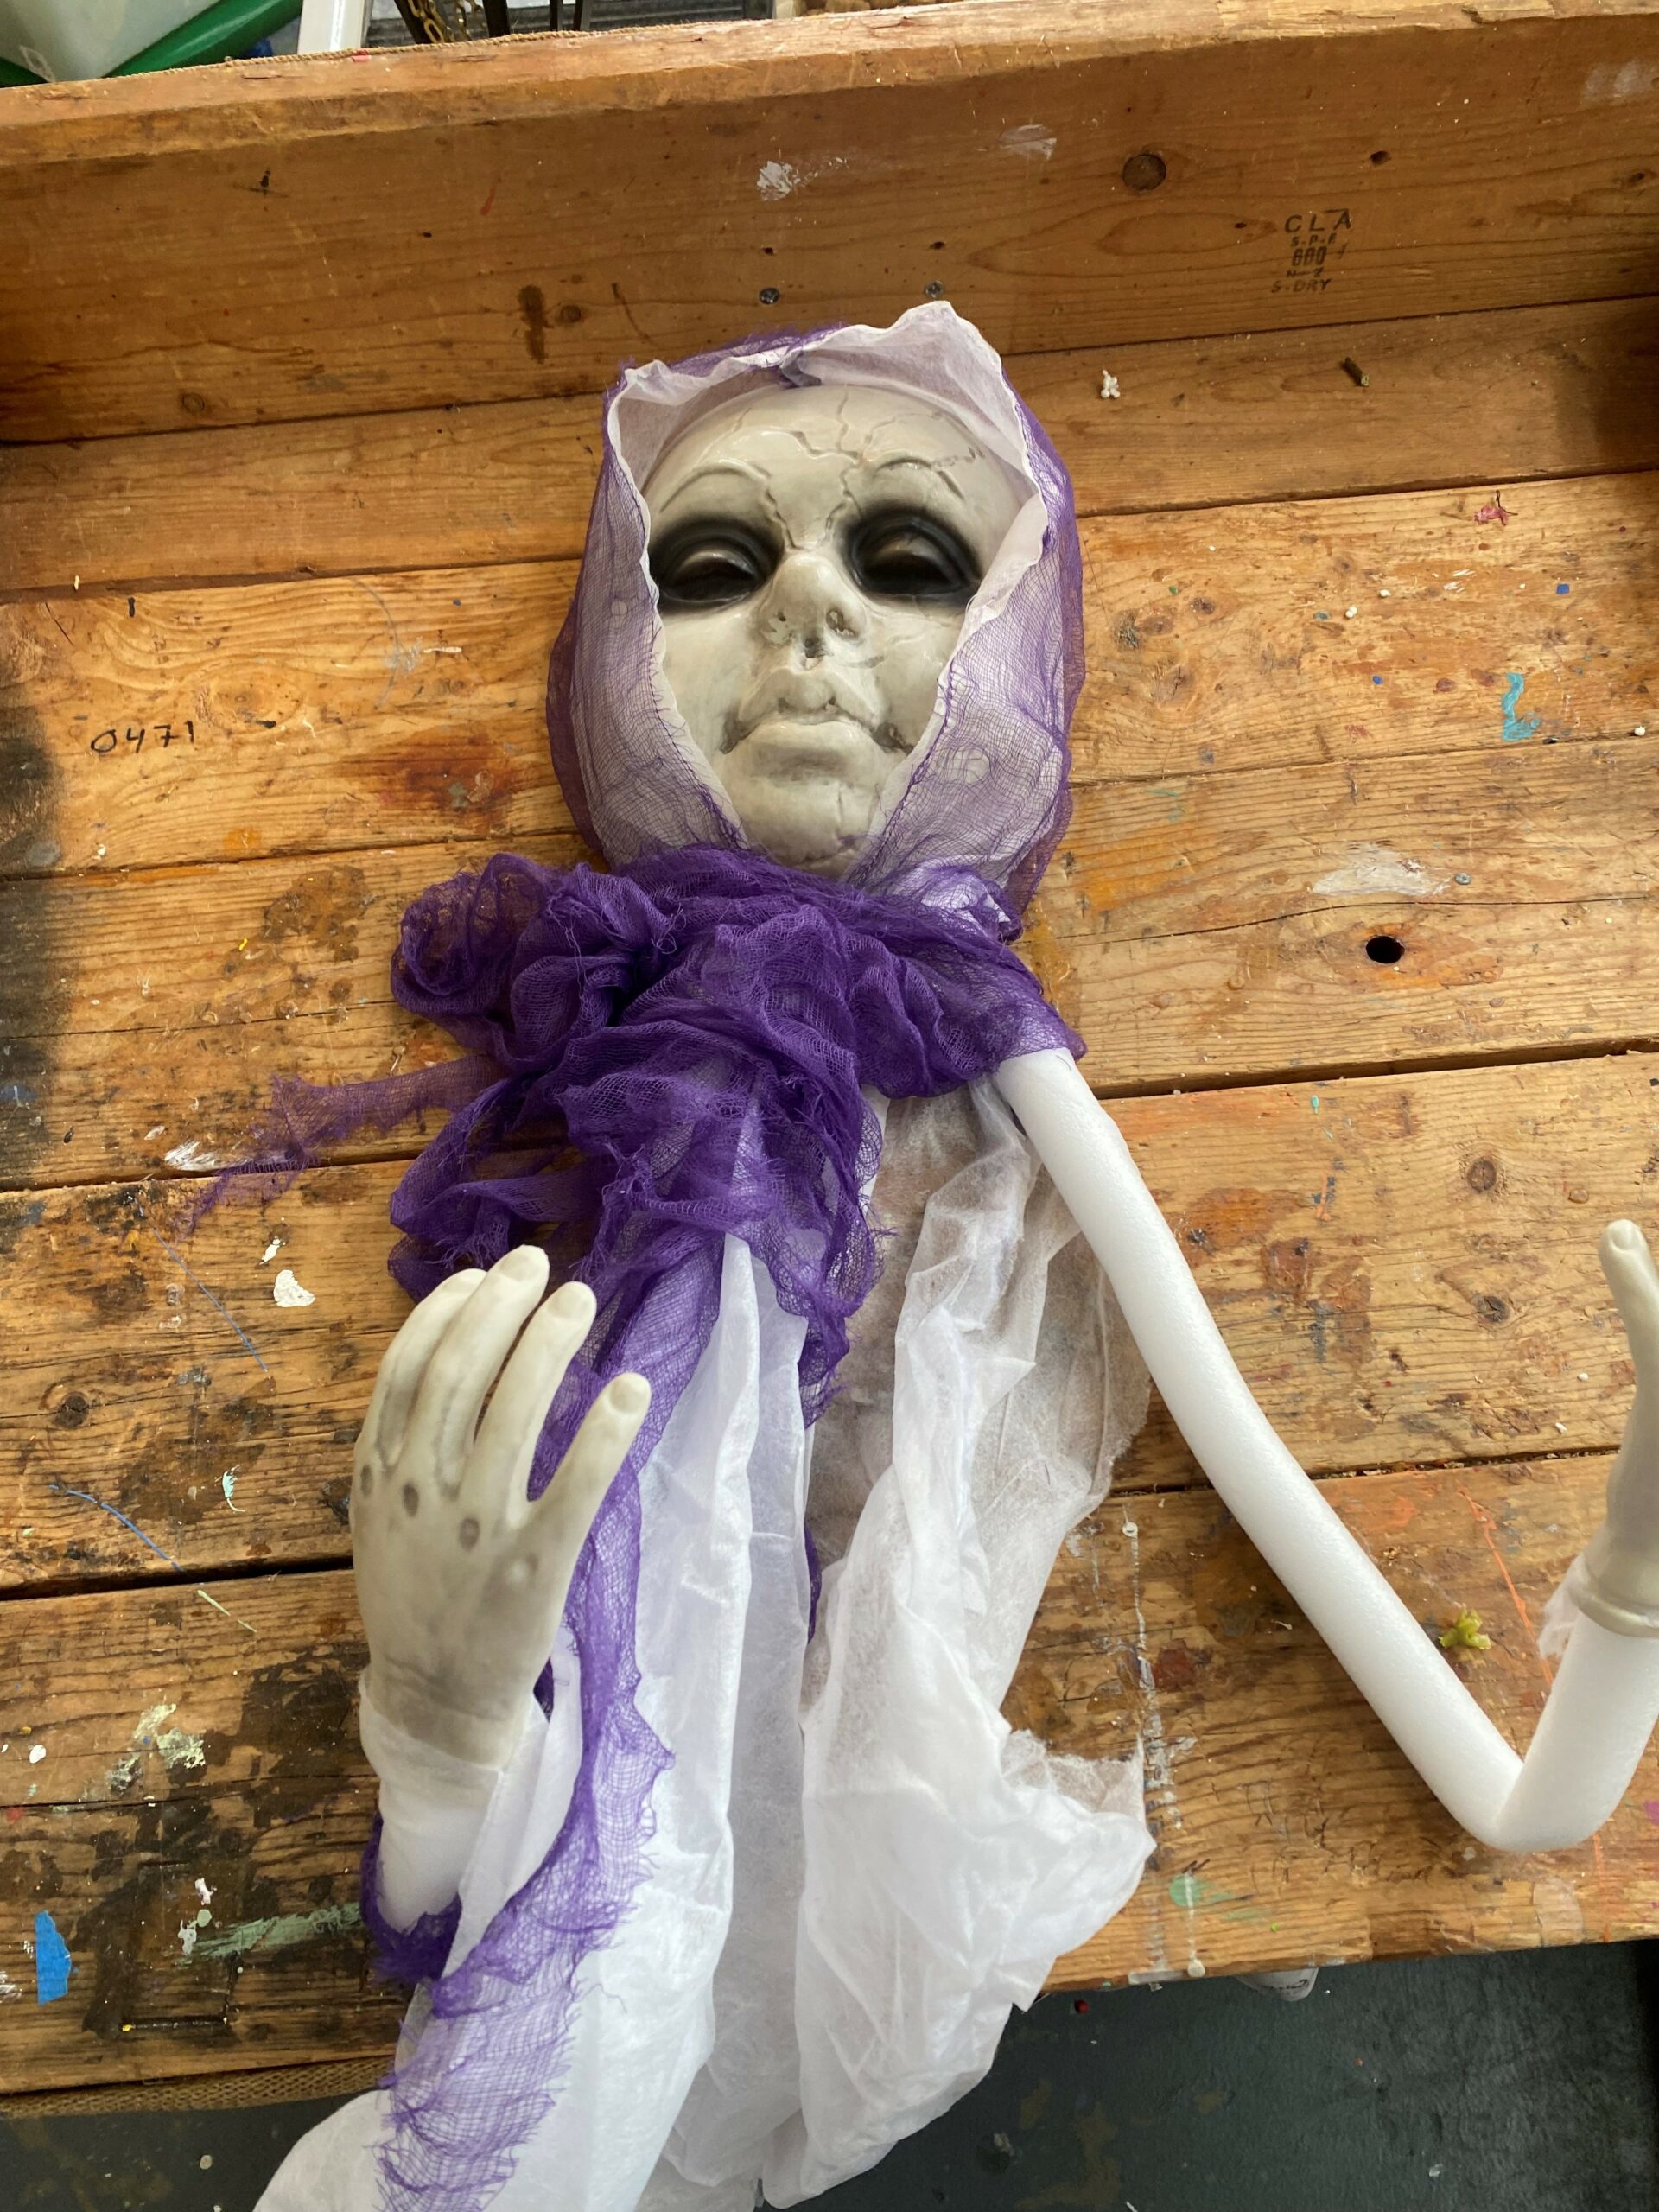
- Stop by the dollar store to see if you might find some decorations to take apart and reuse. I found a scary ghost and wanted its hands for this project, so bought it. I cut the arms apart and then painted them black and green to match.
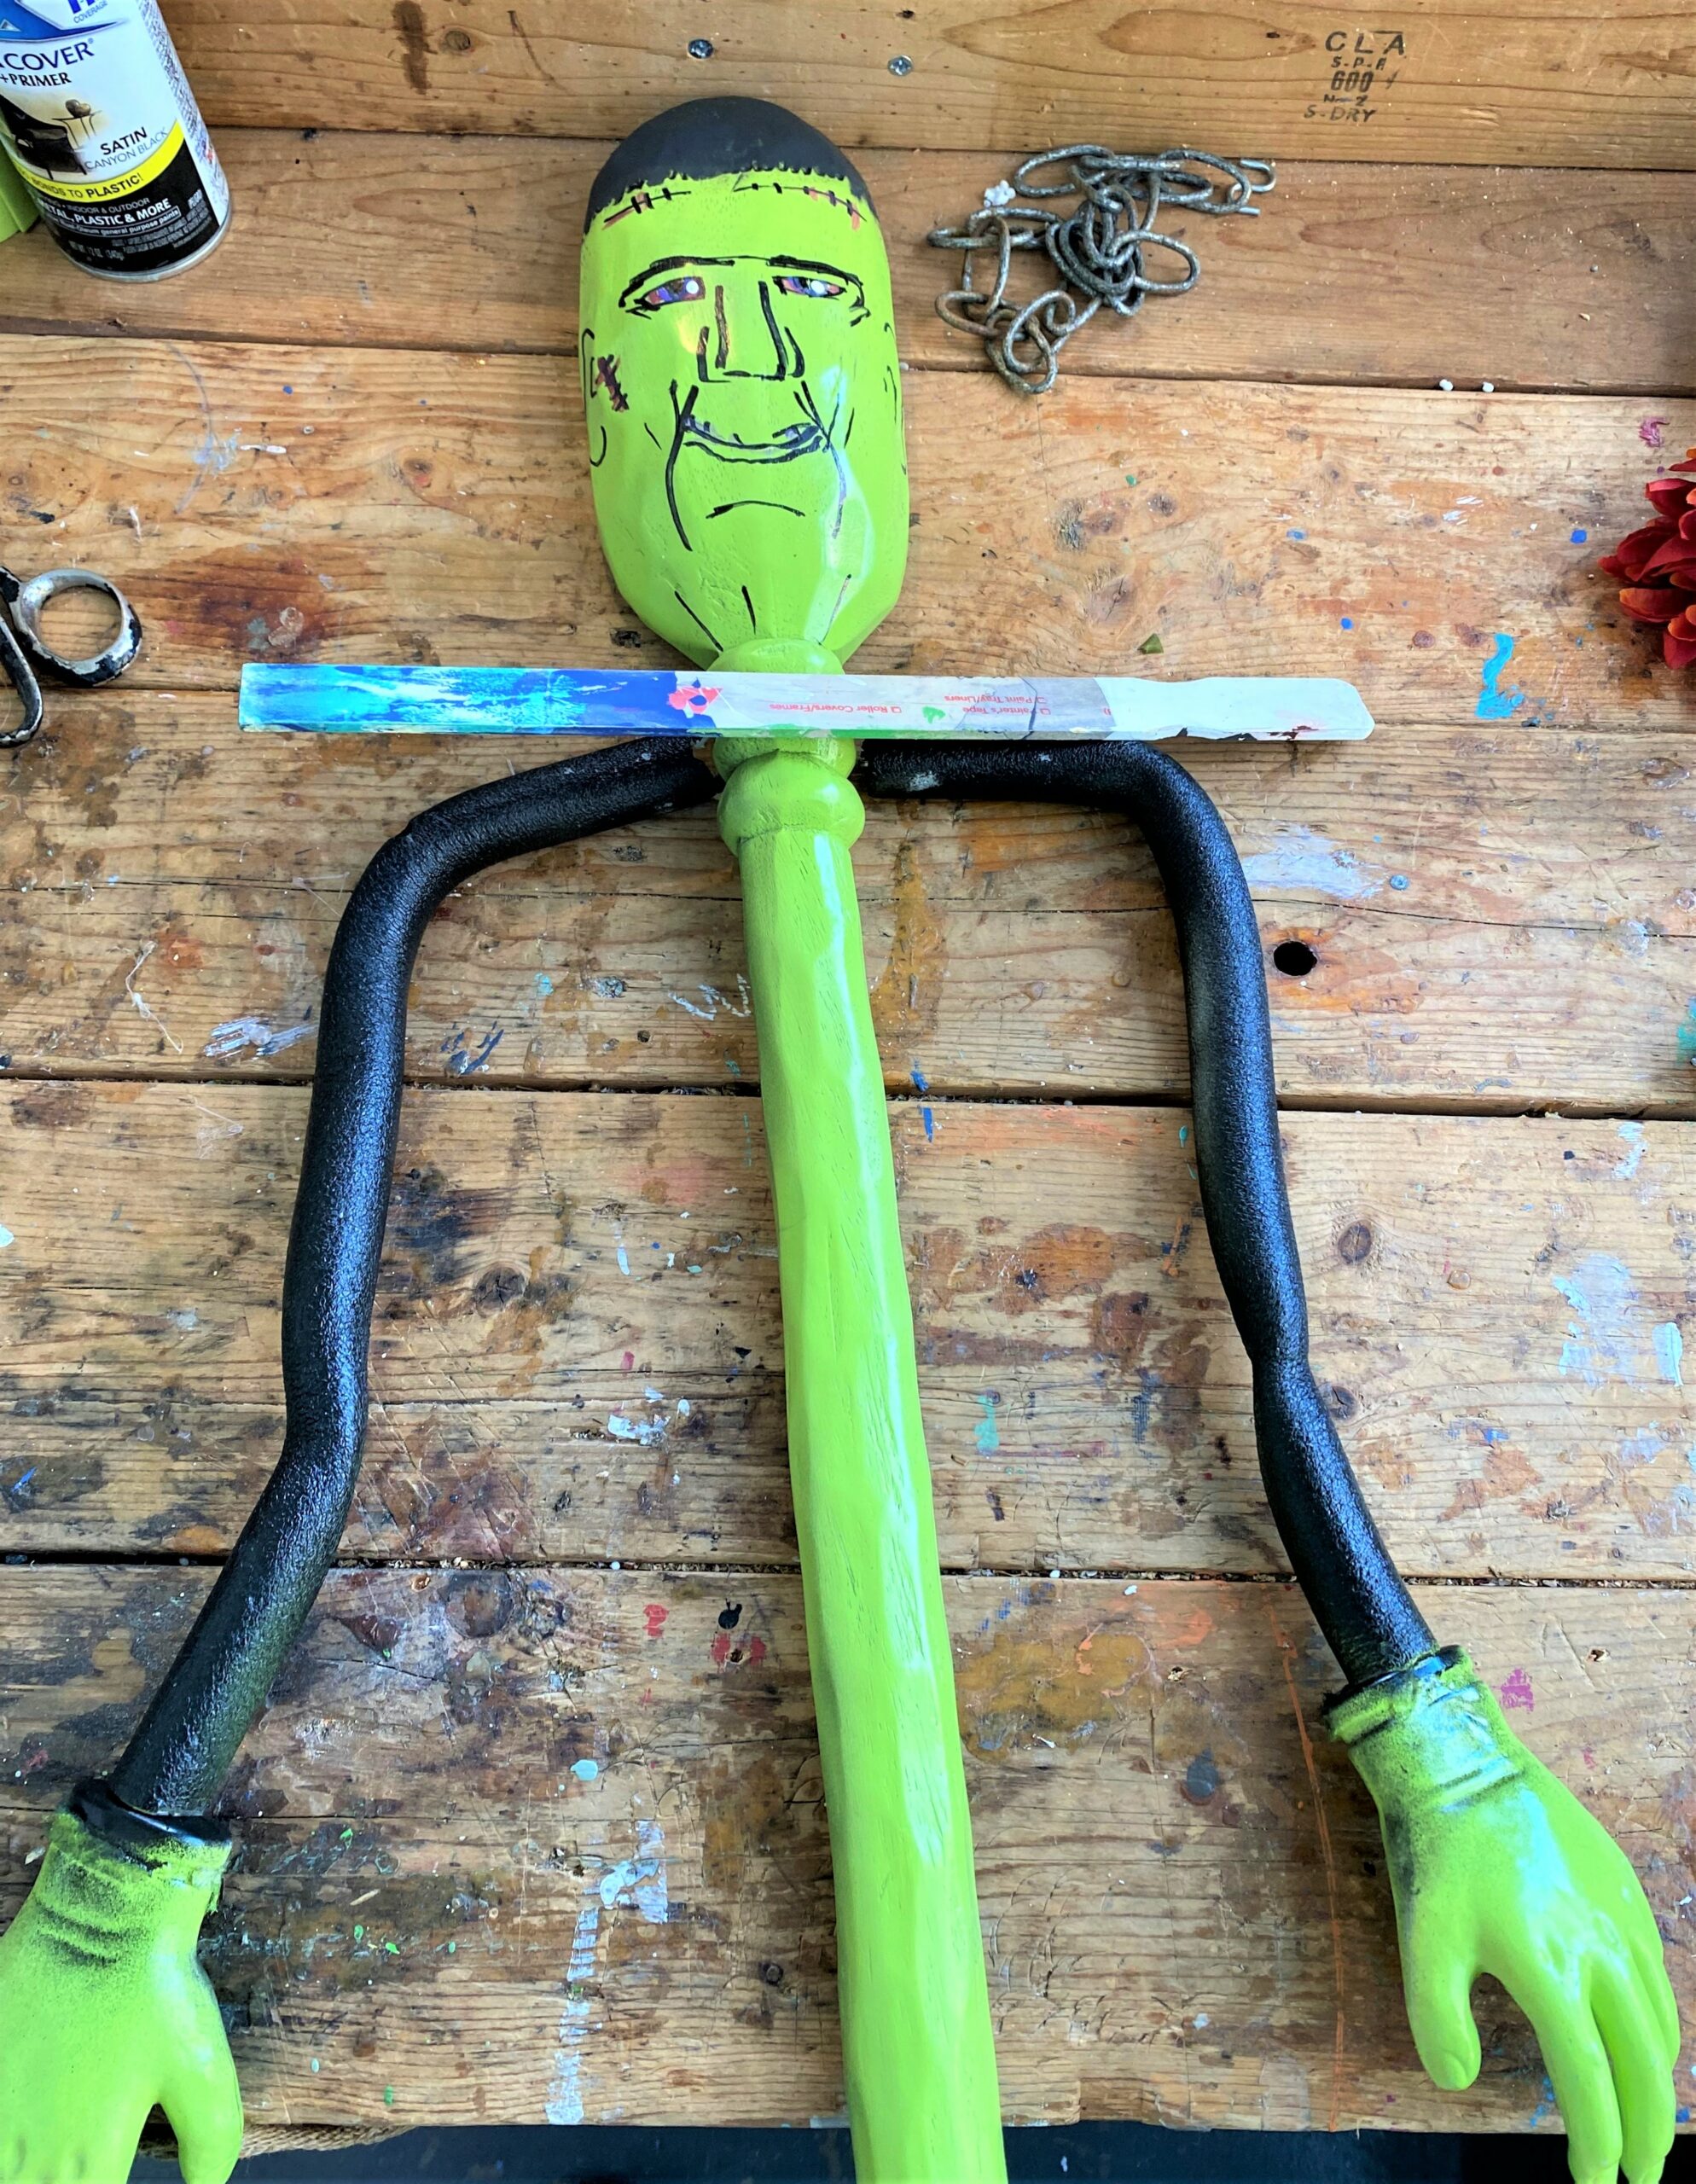
- Glue part of a paint stirrer to the back of the spoon where your monster’s shoulders would be. Secure your now-painted arms and hands in place with more hot glue.
- For his clothes, see what dark material you might have on hand. I had a dark plastic mailing package that I cut up and glued in place. A scrap piece of chain was draped over his shoulders and secured, too.
- A small hook was screwed into place on the backside to hold him in place when displayed.
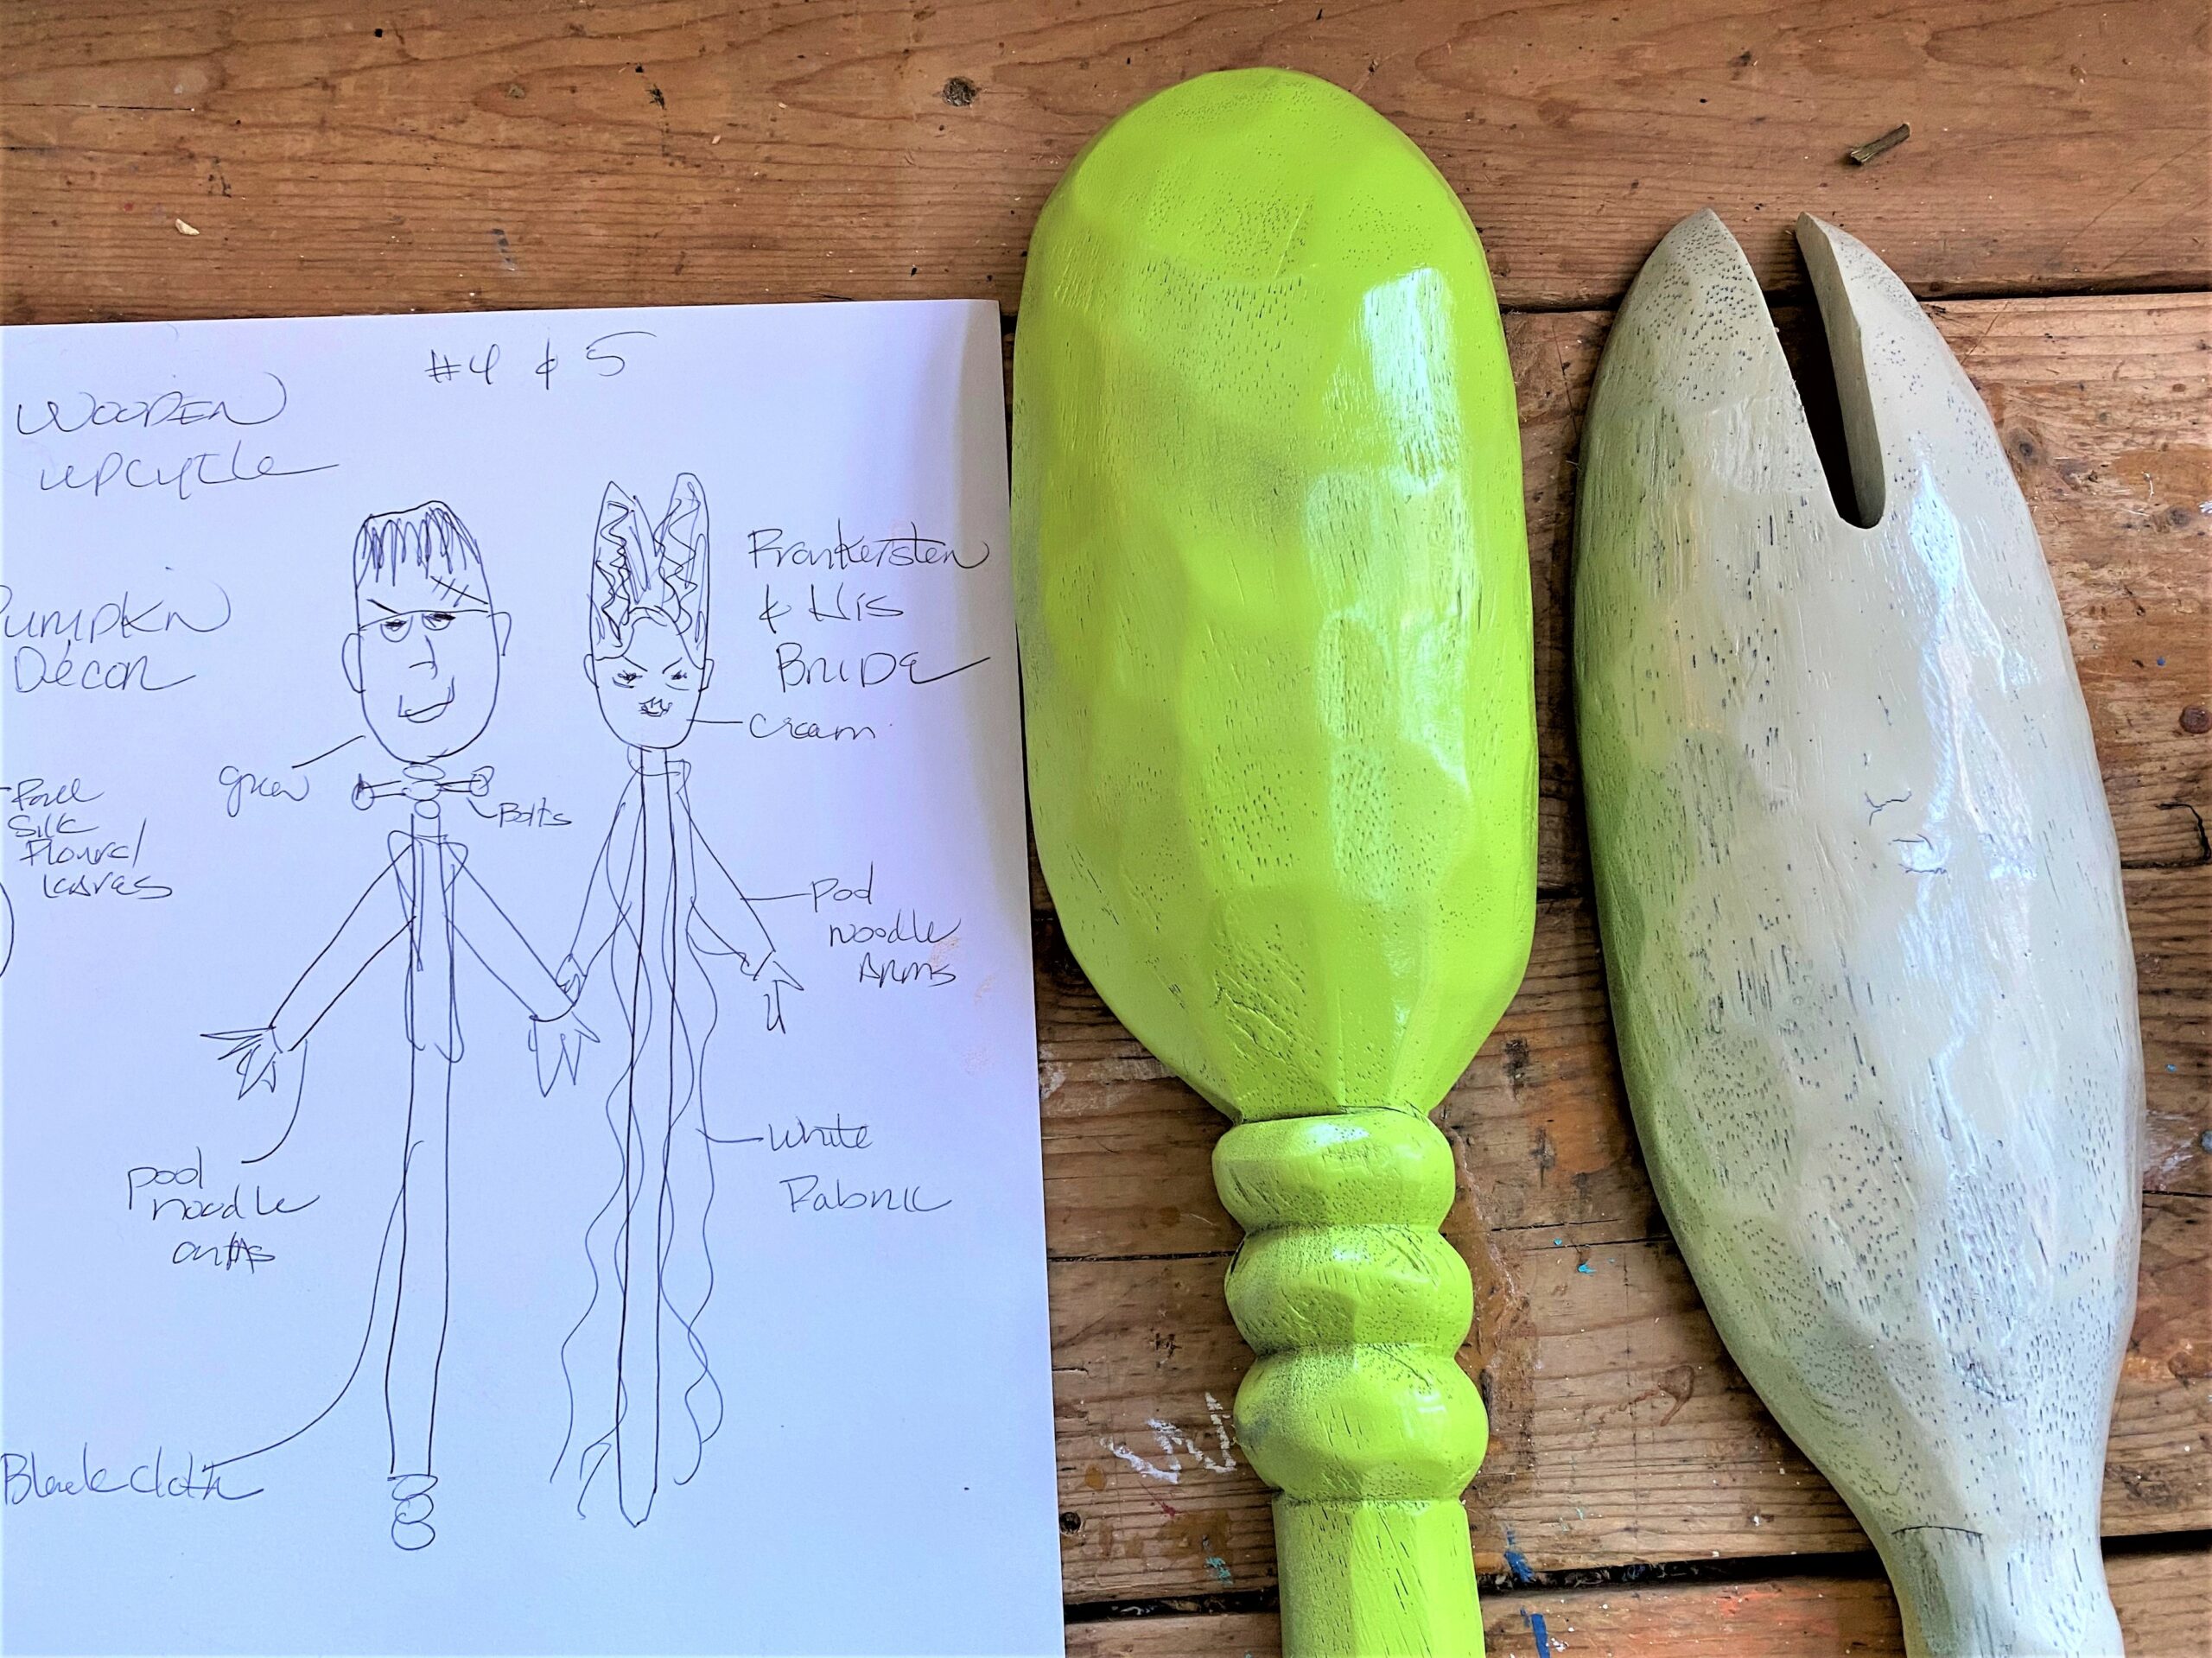
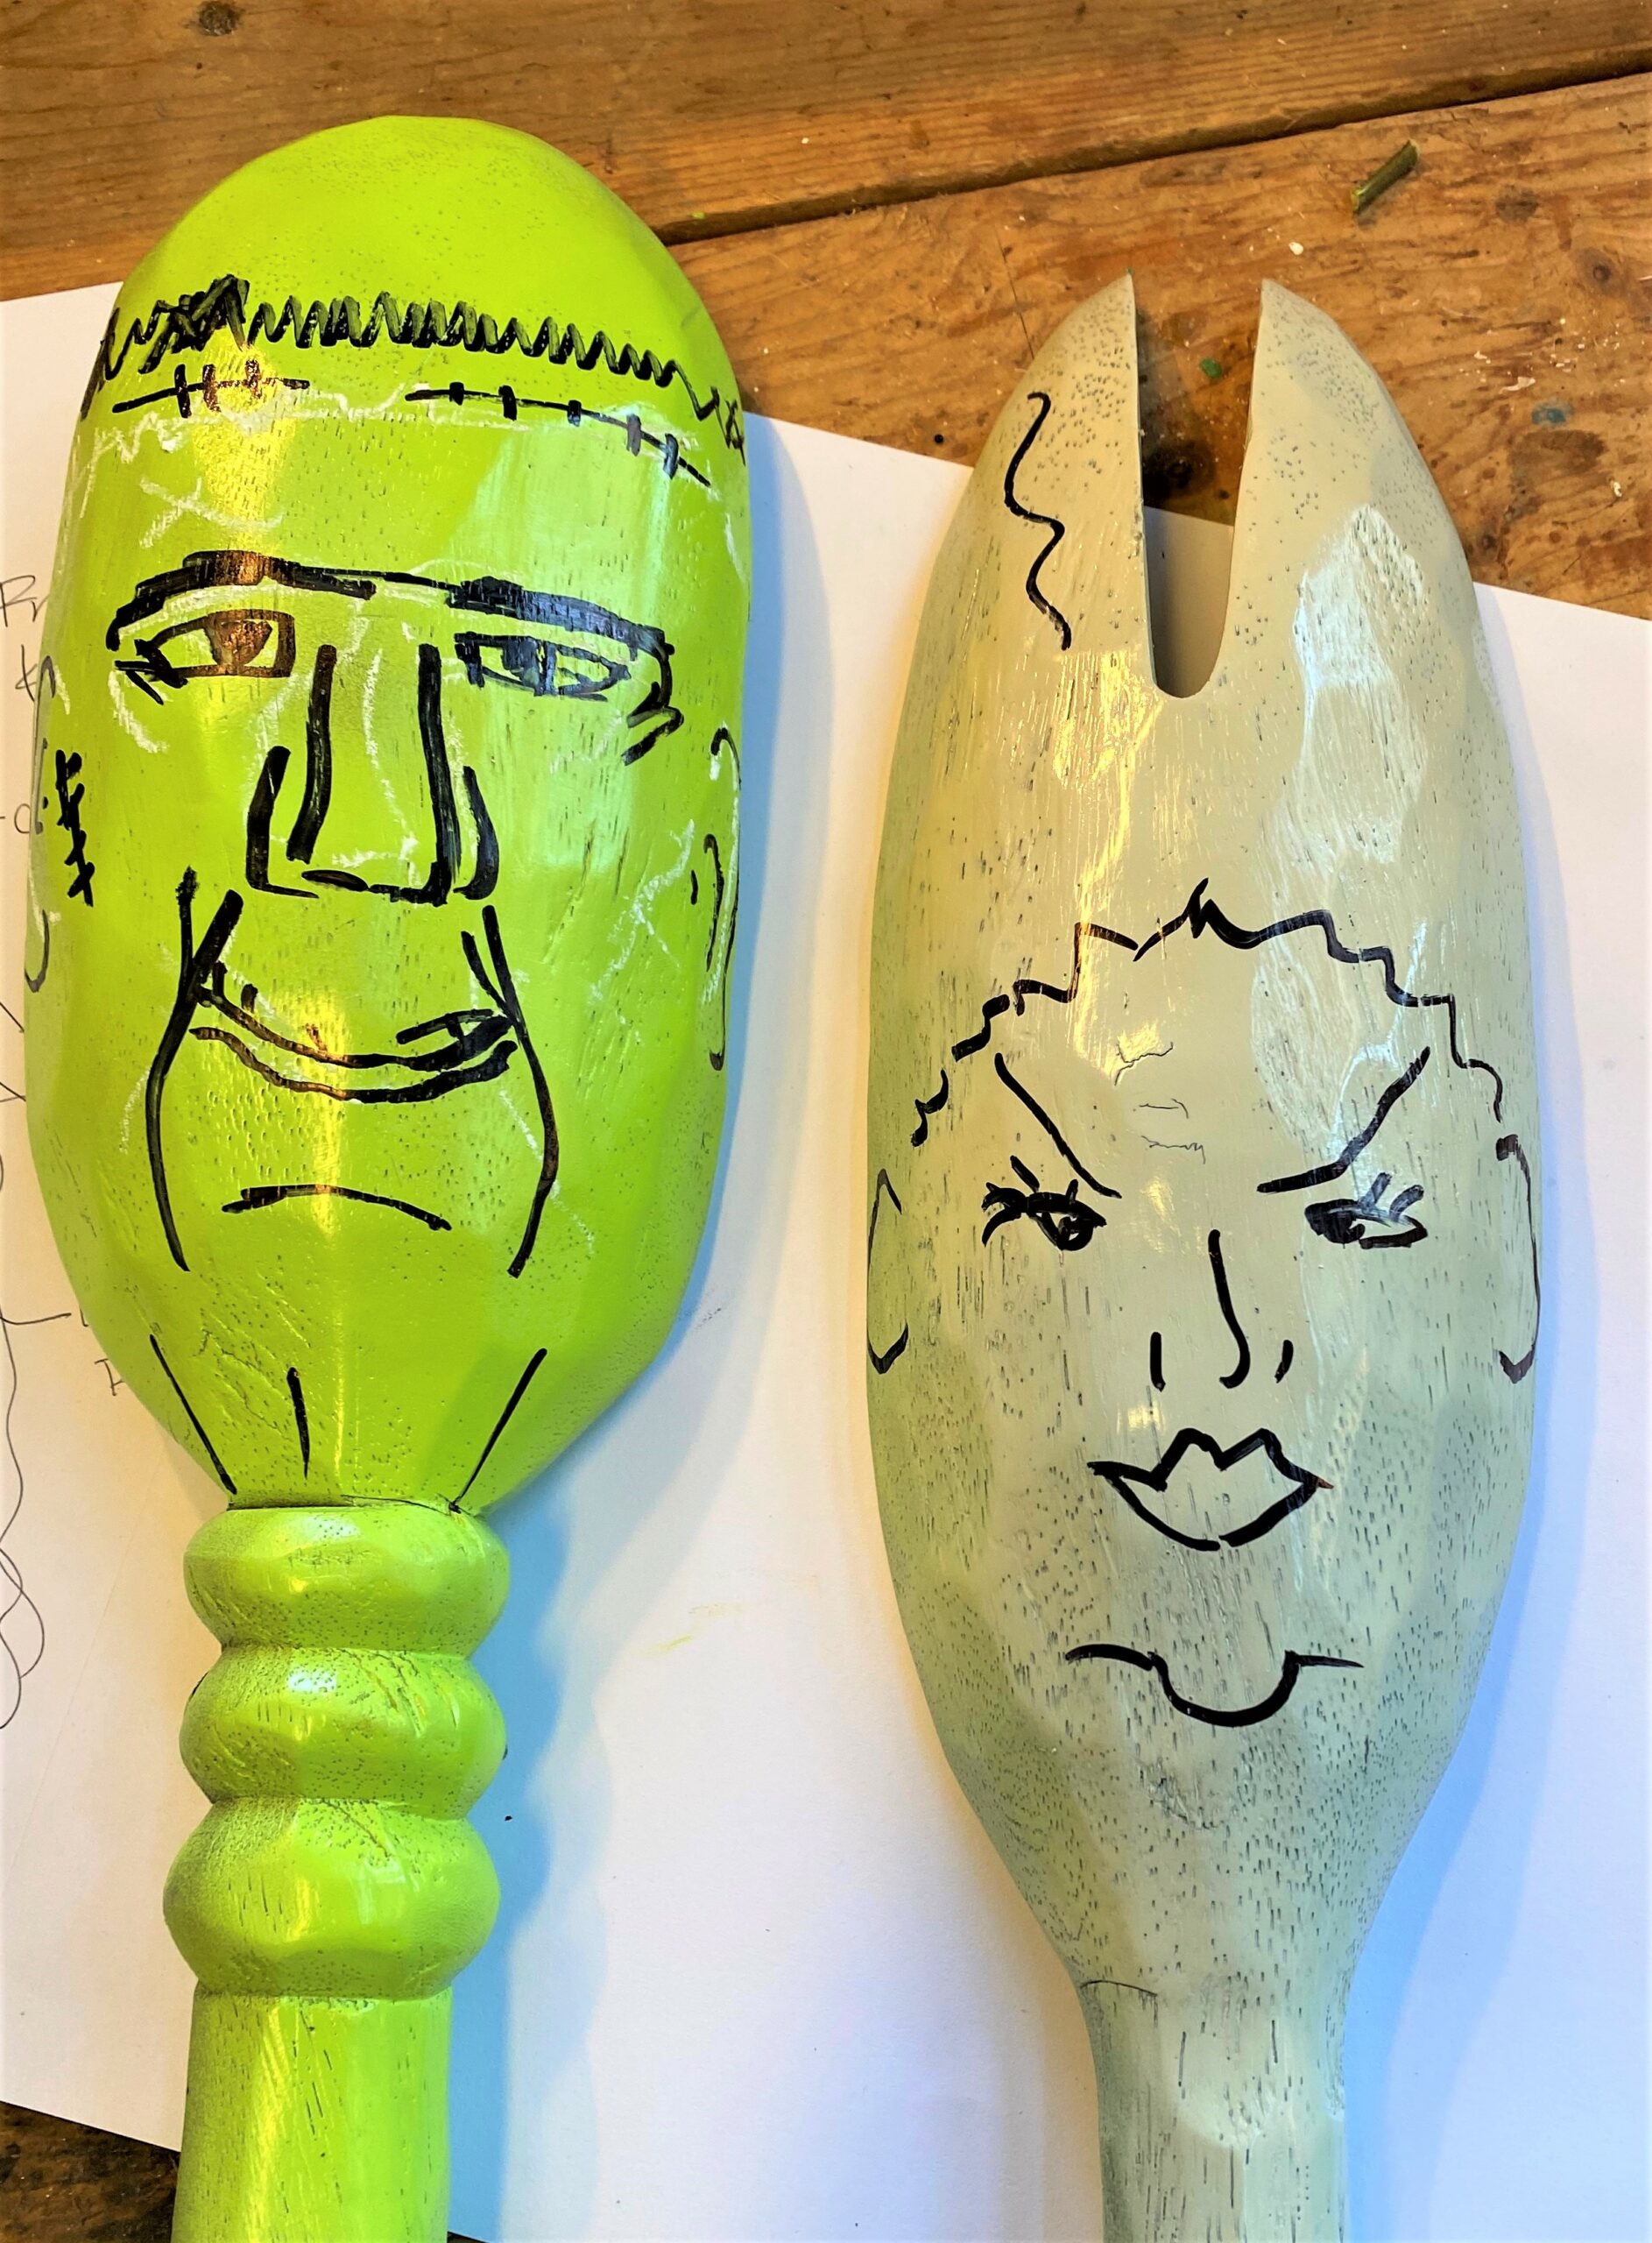

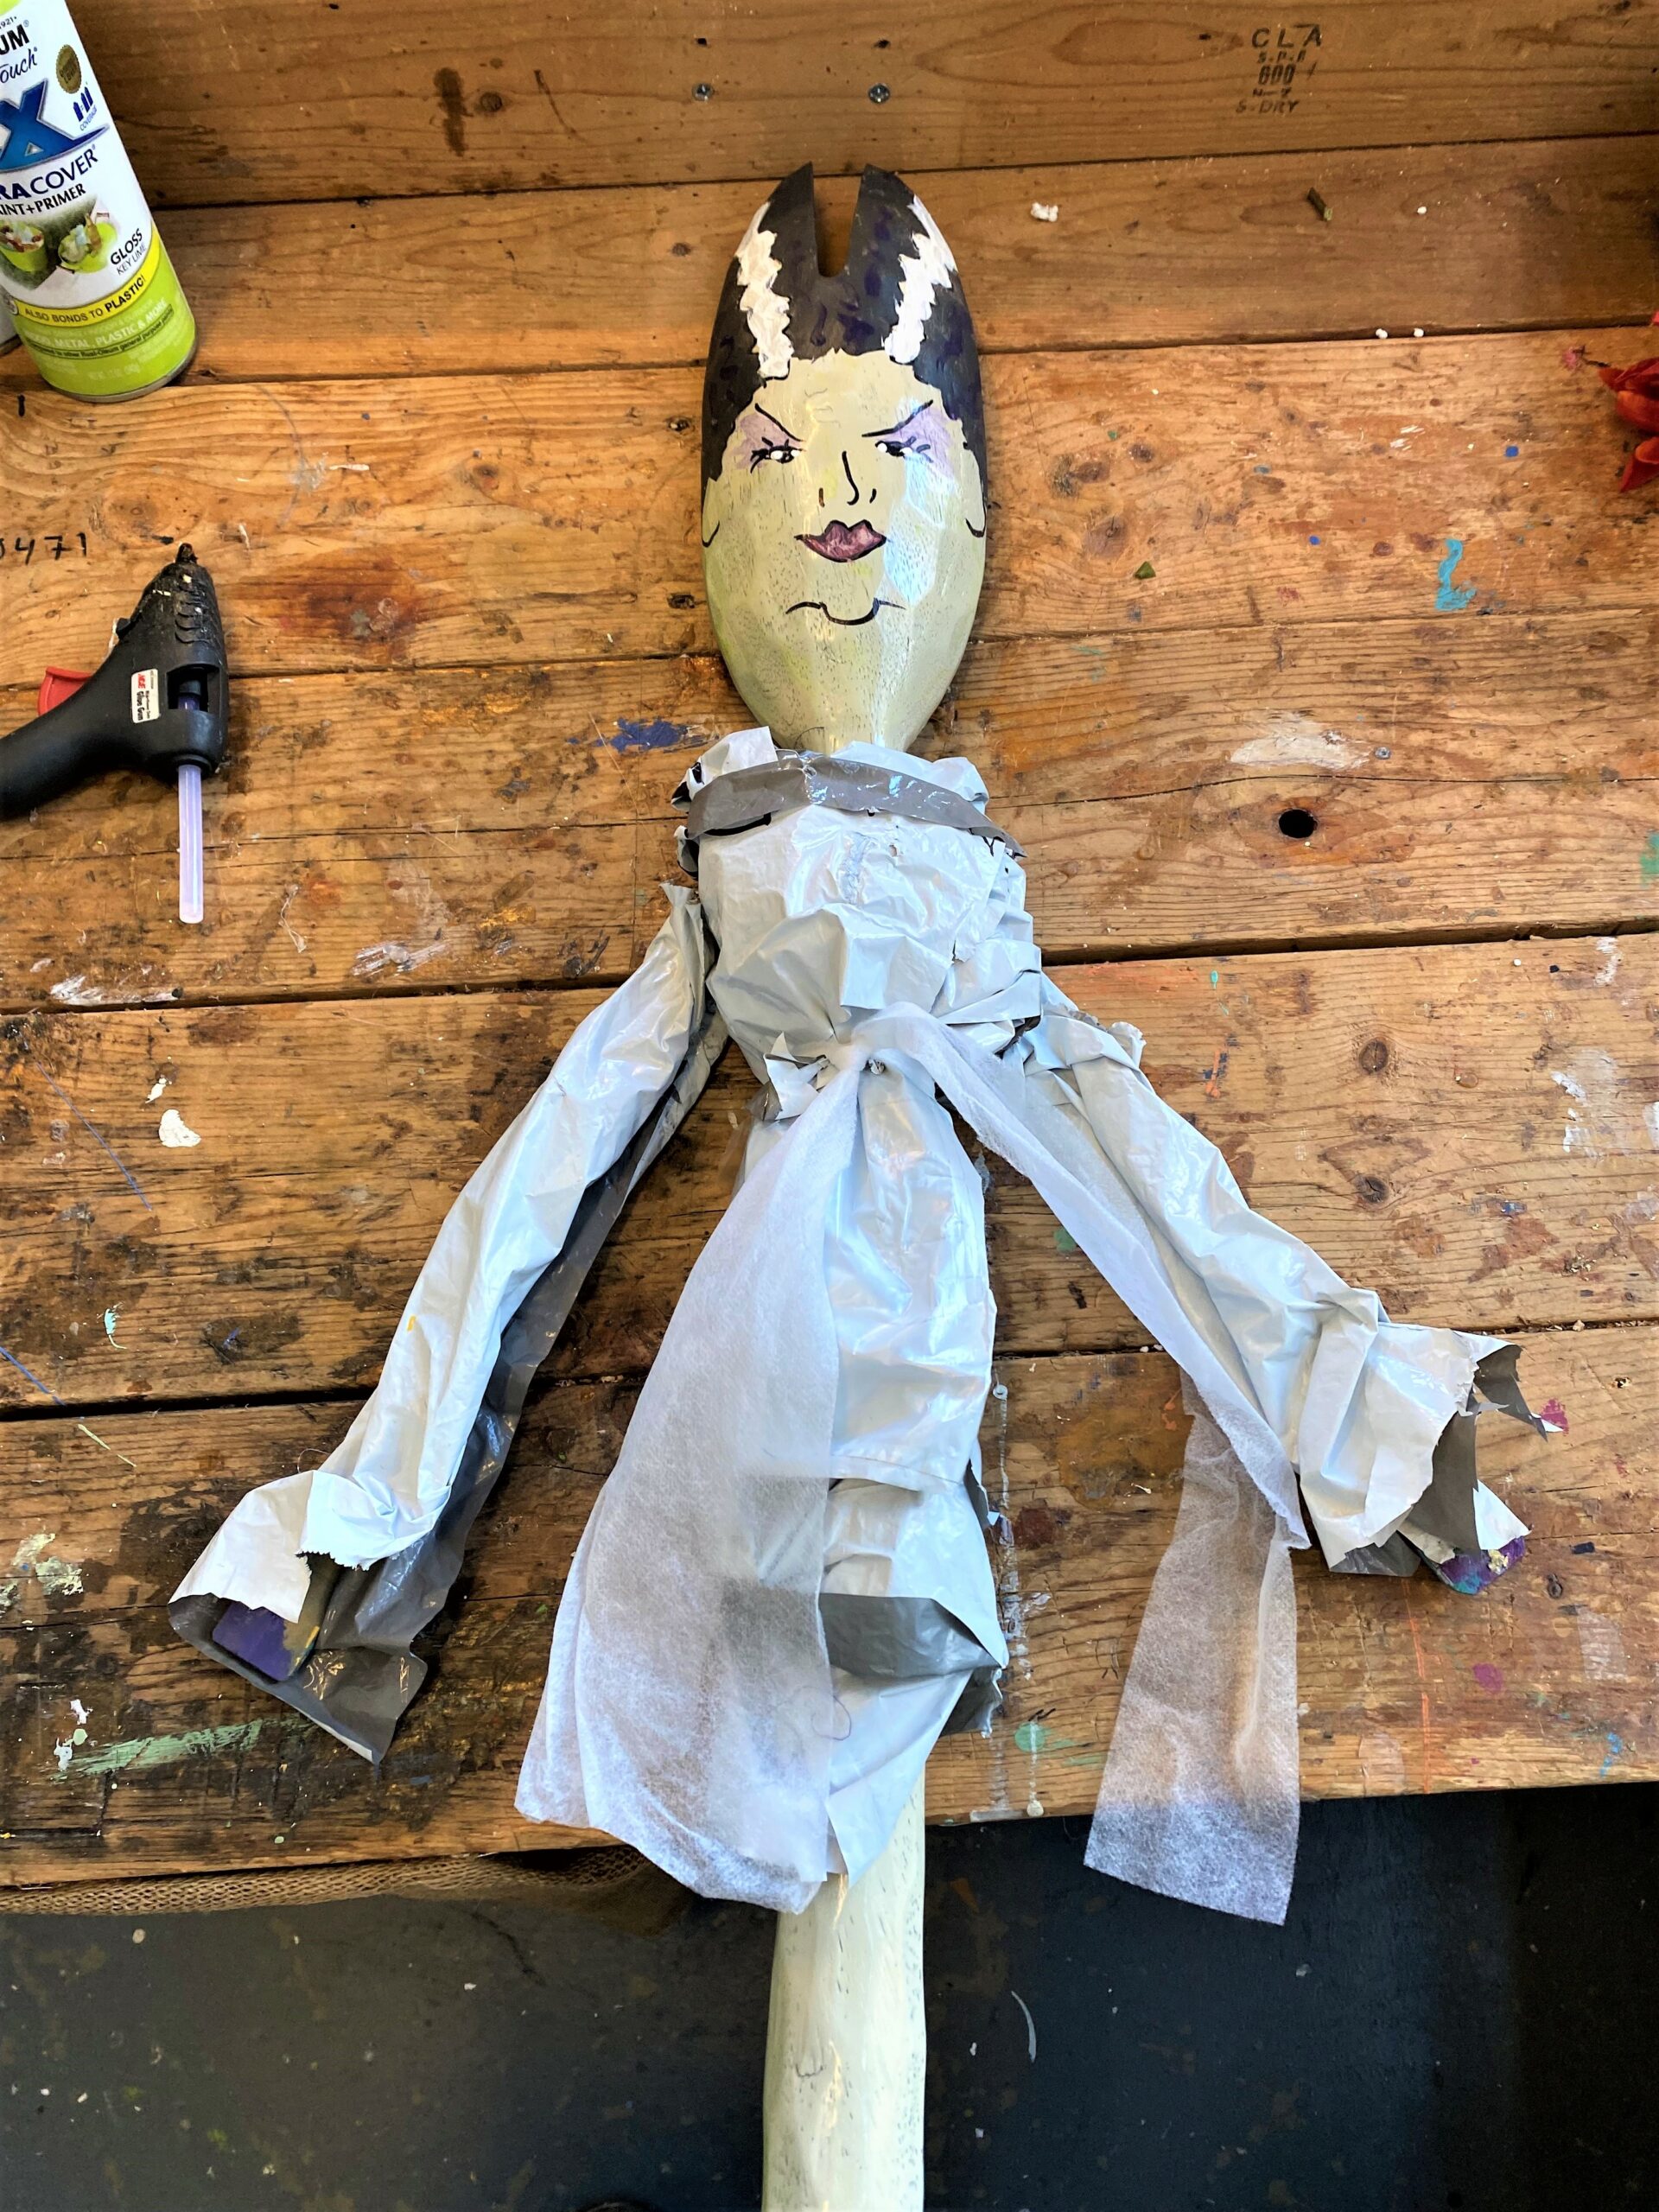
2. Bride of Frankenstein
Here’s How:
- Give the big guy a big squeeze by painting another spoon (this was actually more like a fork which was perfect for her hair!) in an off-white tone.
- Once the paint dries, use your Sharpie to add her hair with those famous white streaks and draw her face.
- Paint in her lip color, eye shade, and her hair with your craft paints.
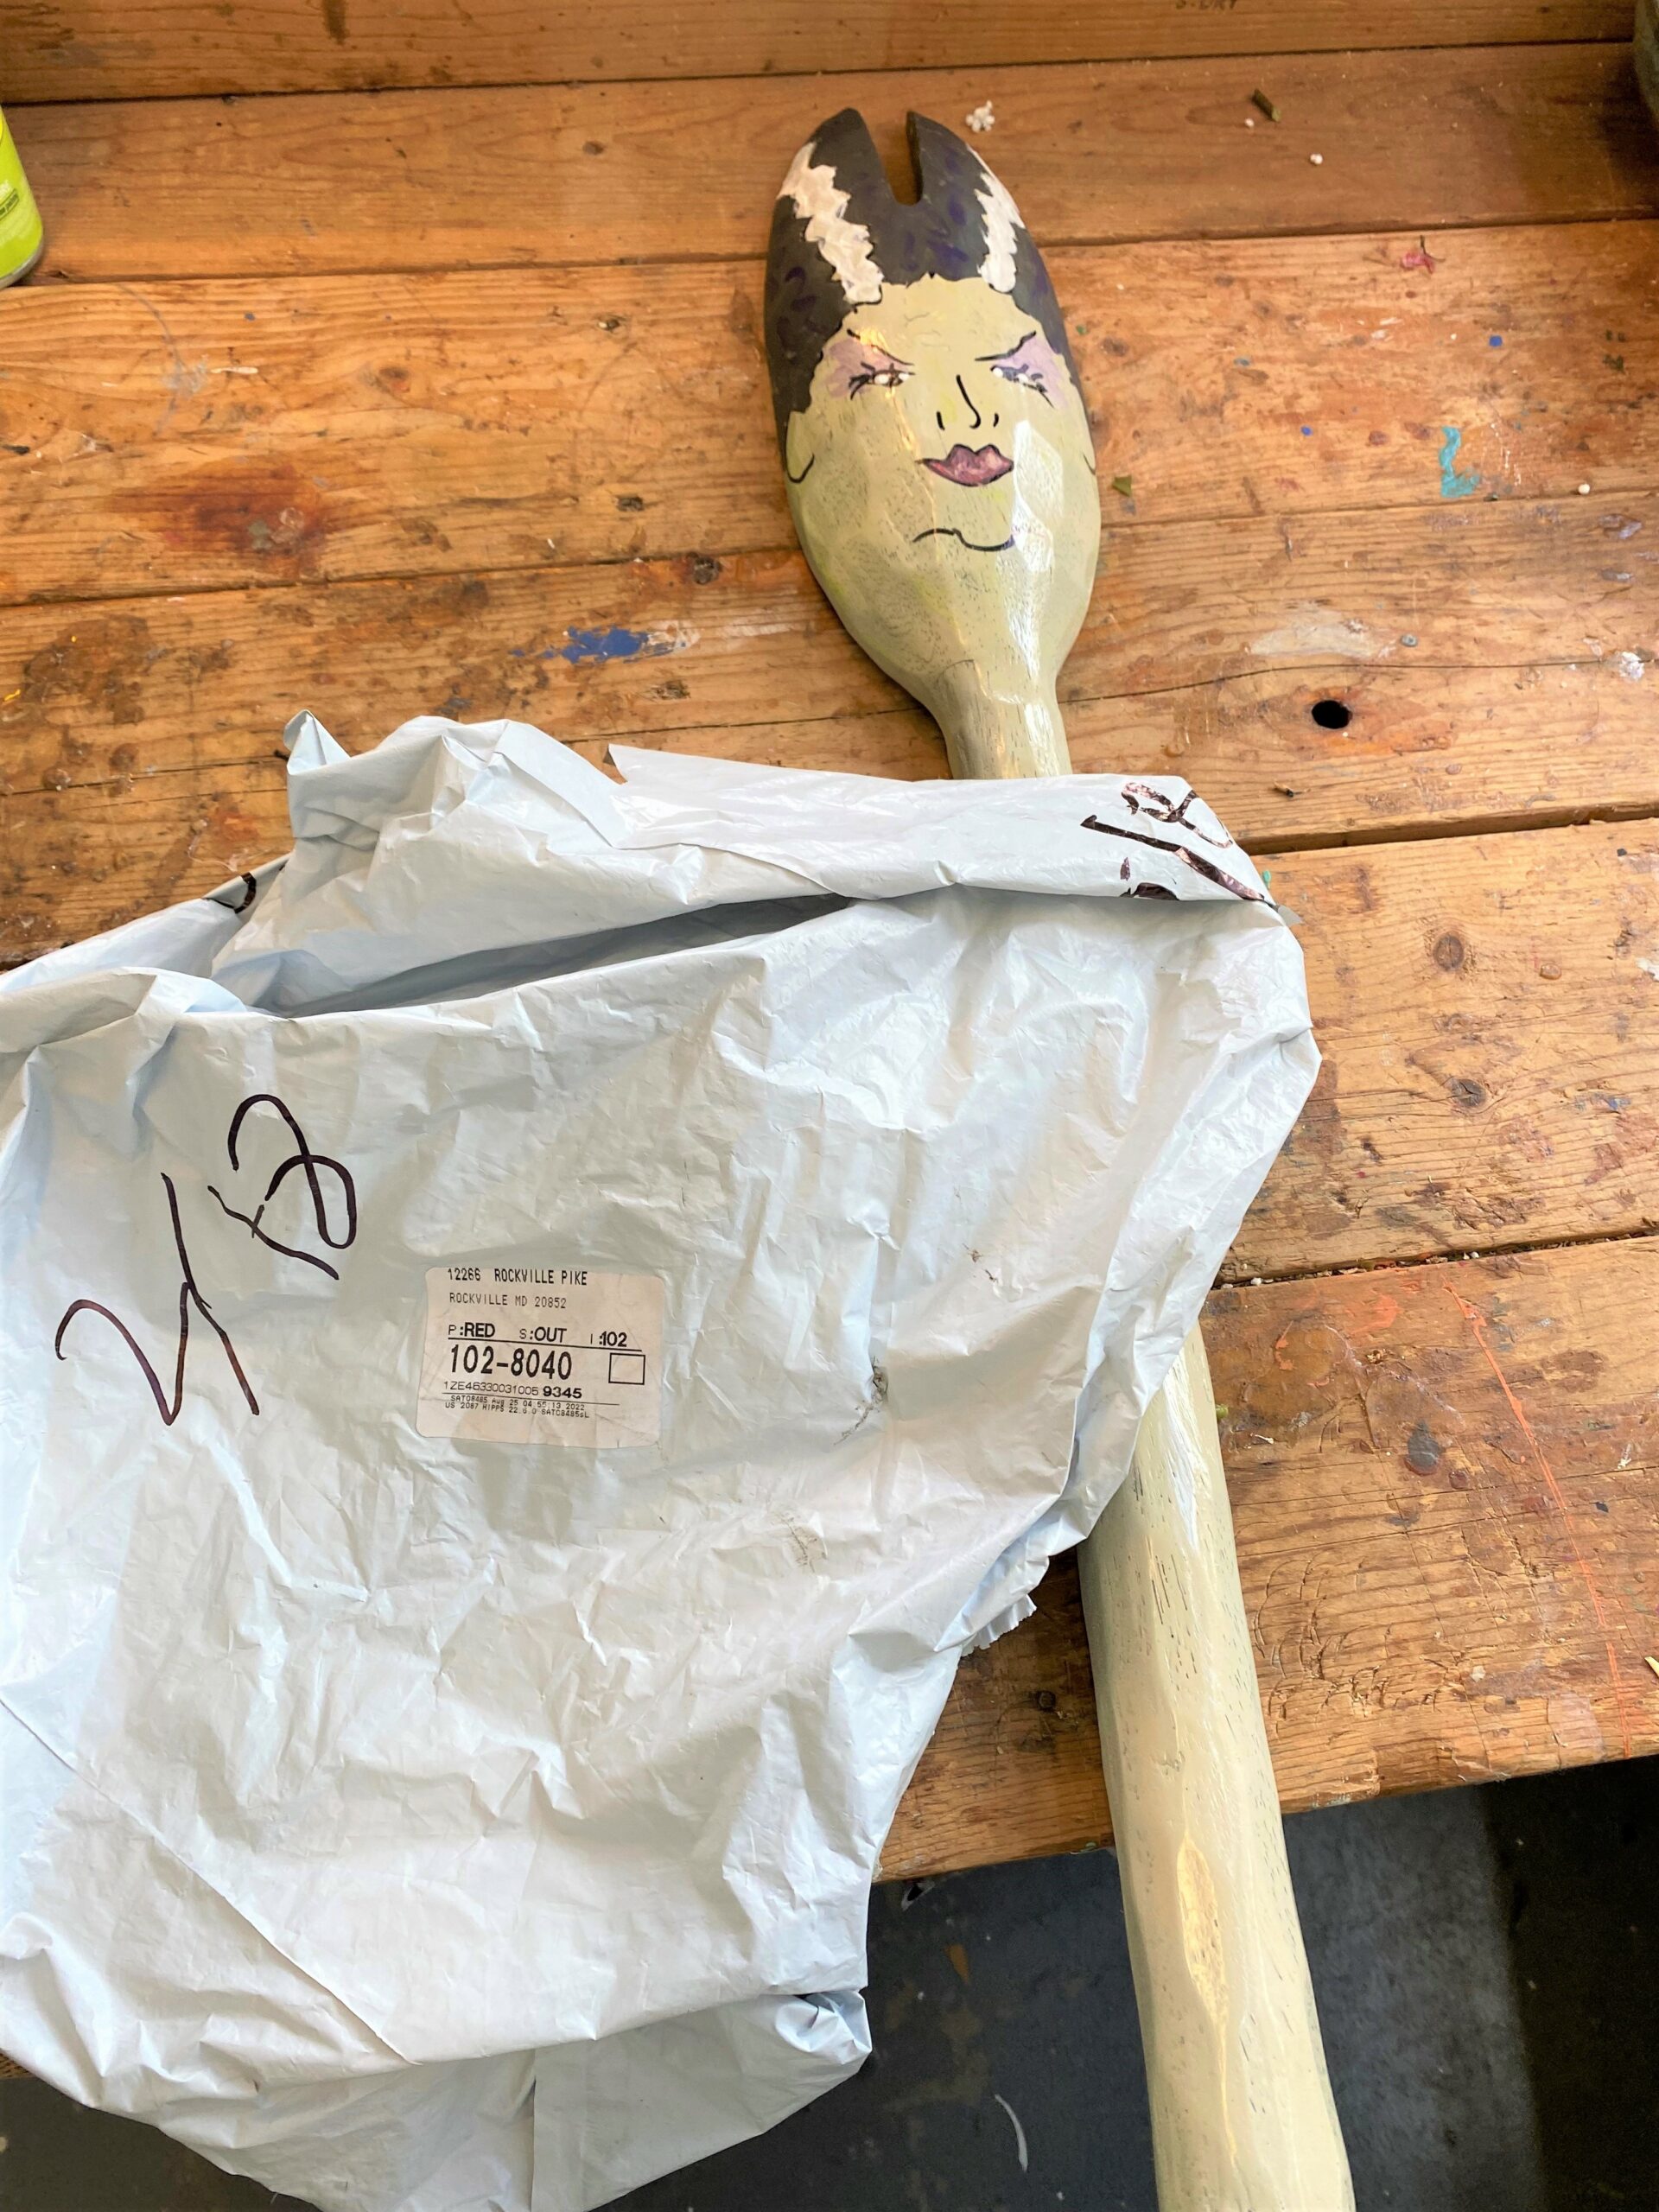
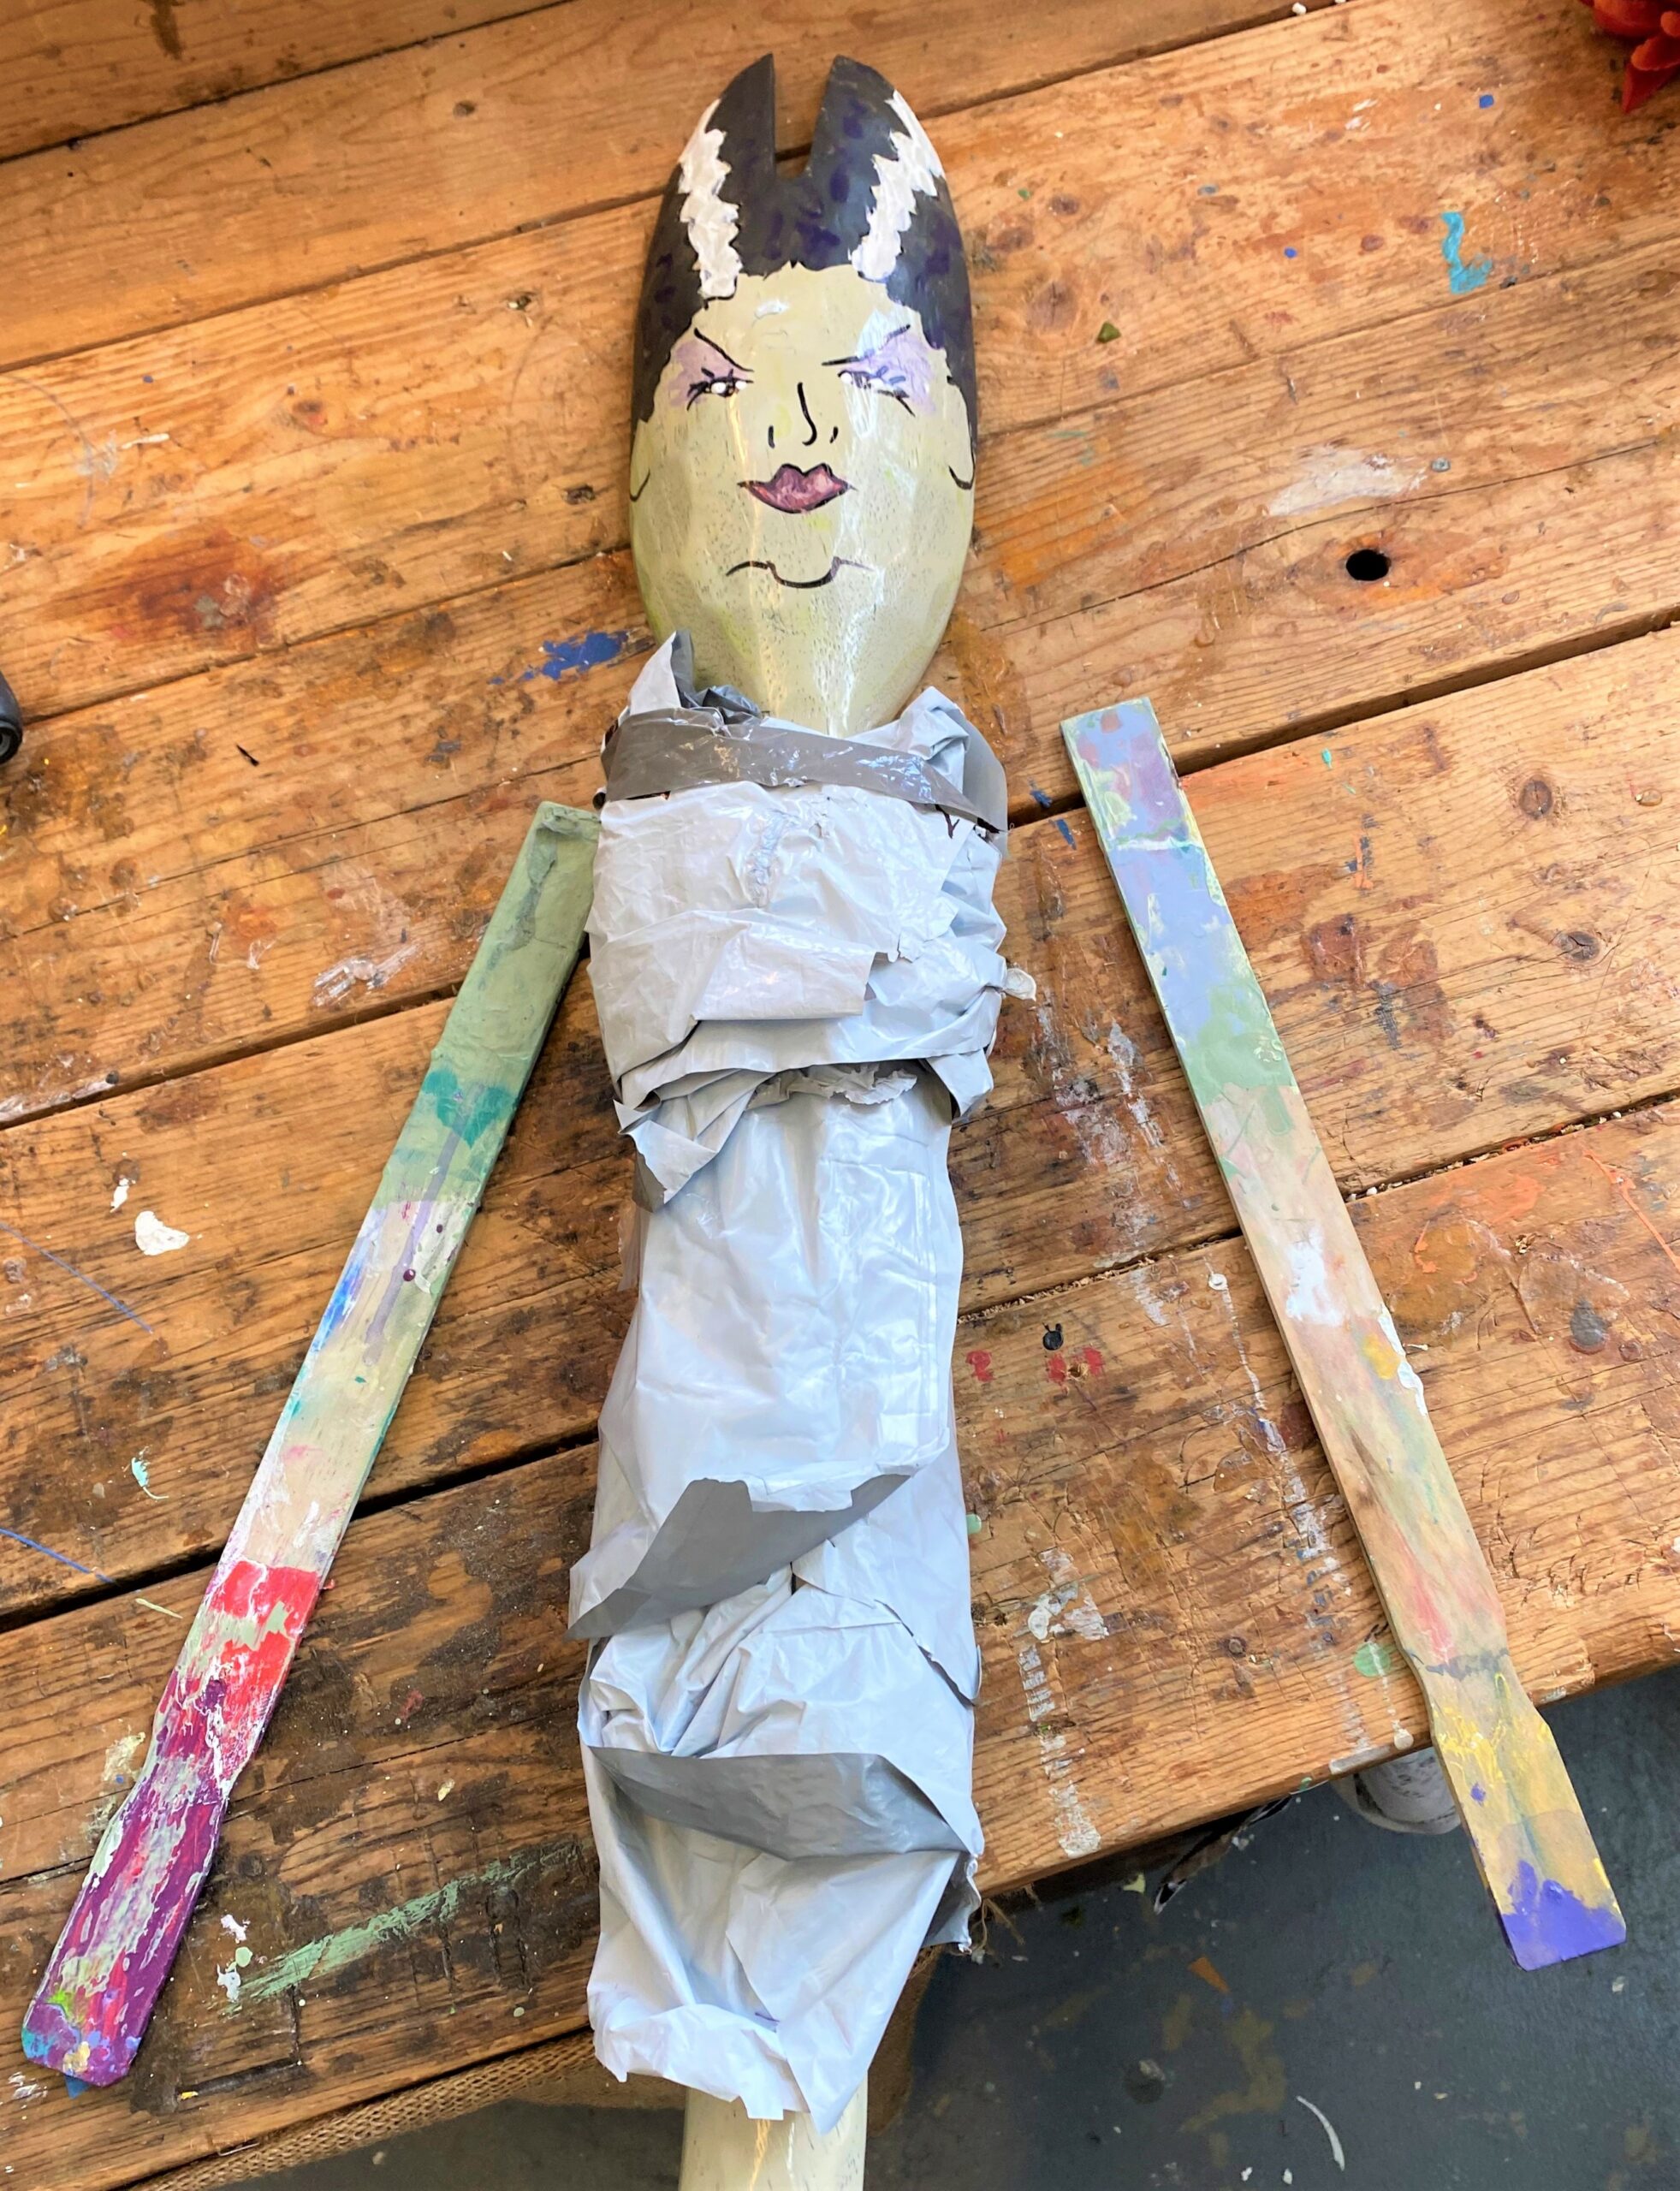
- For her body, two more paint stirrers were hot glued on her back and right below her neck.
- To give her body some shape, reuse more white plastic from envelopes and glue in place.
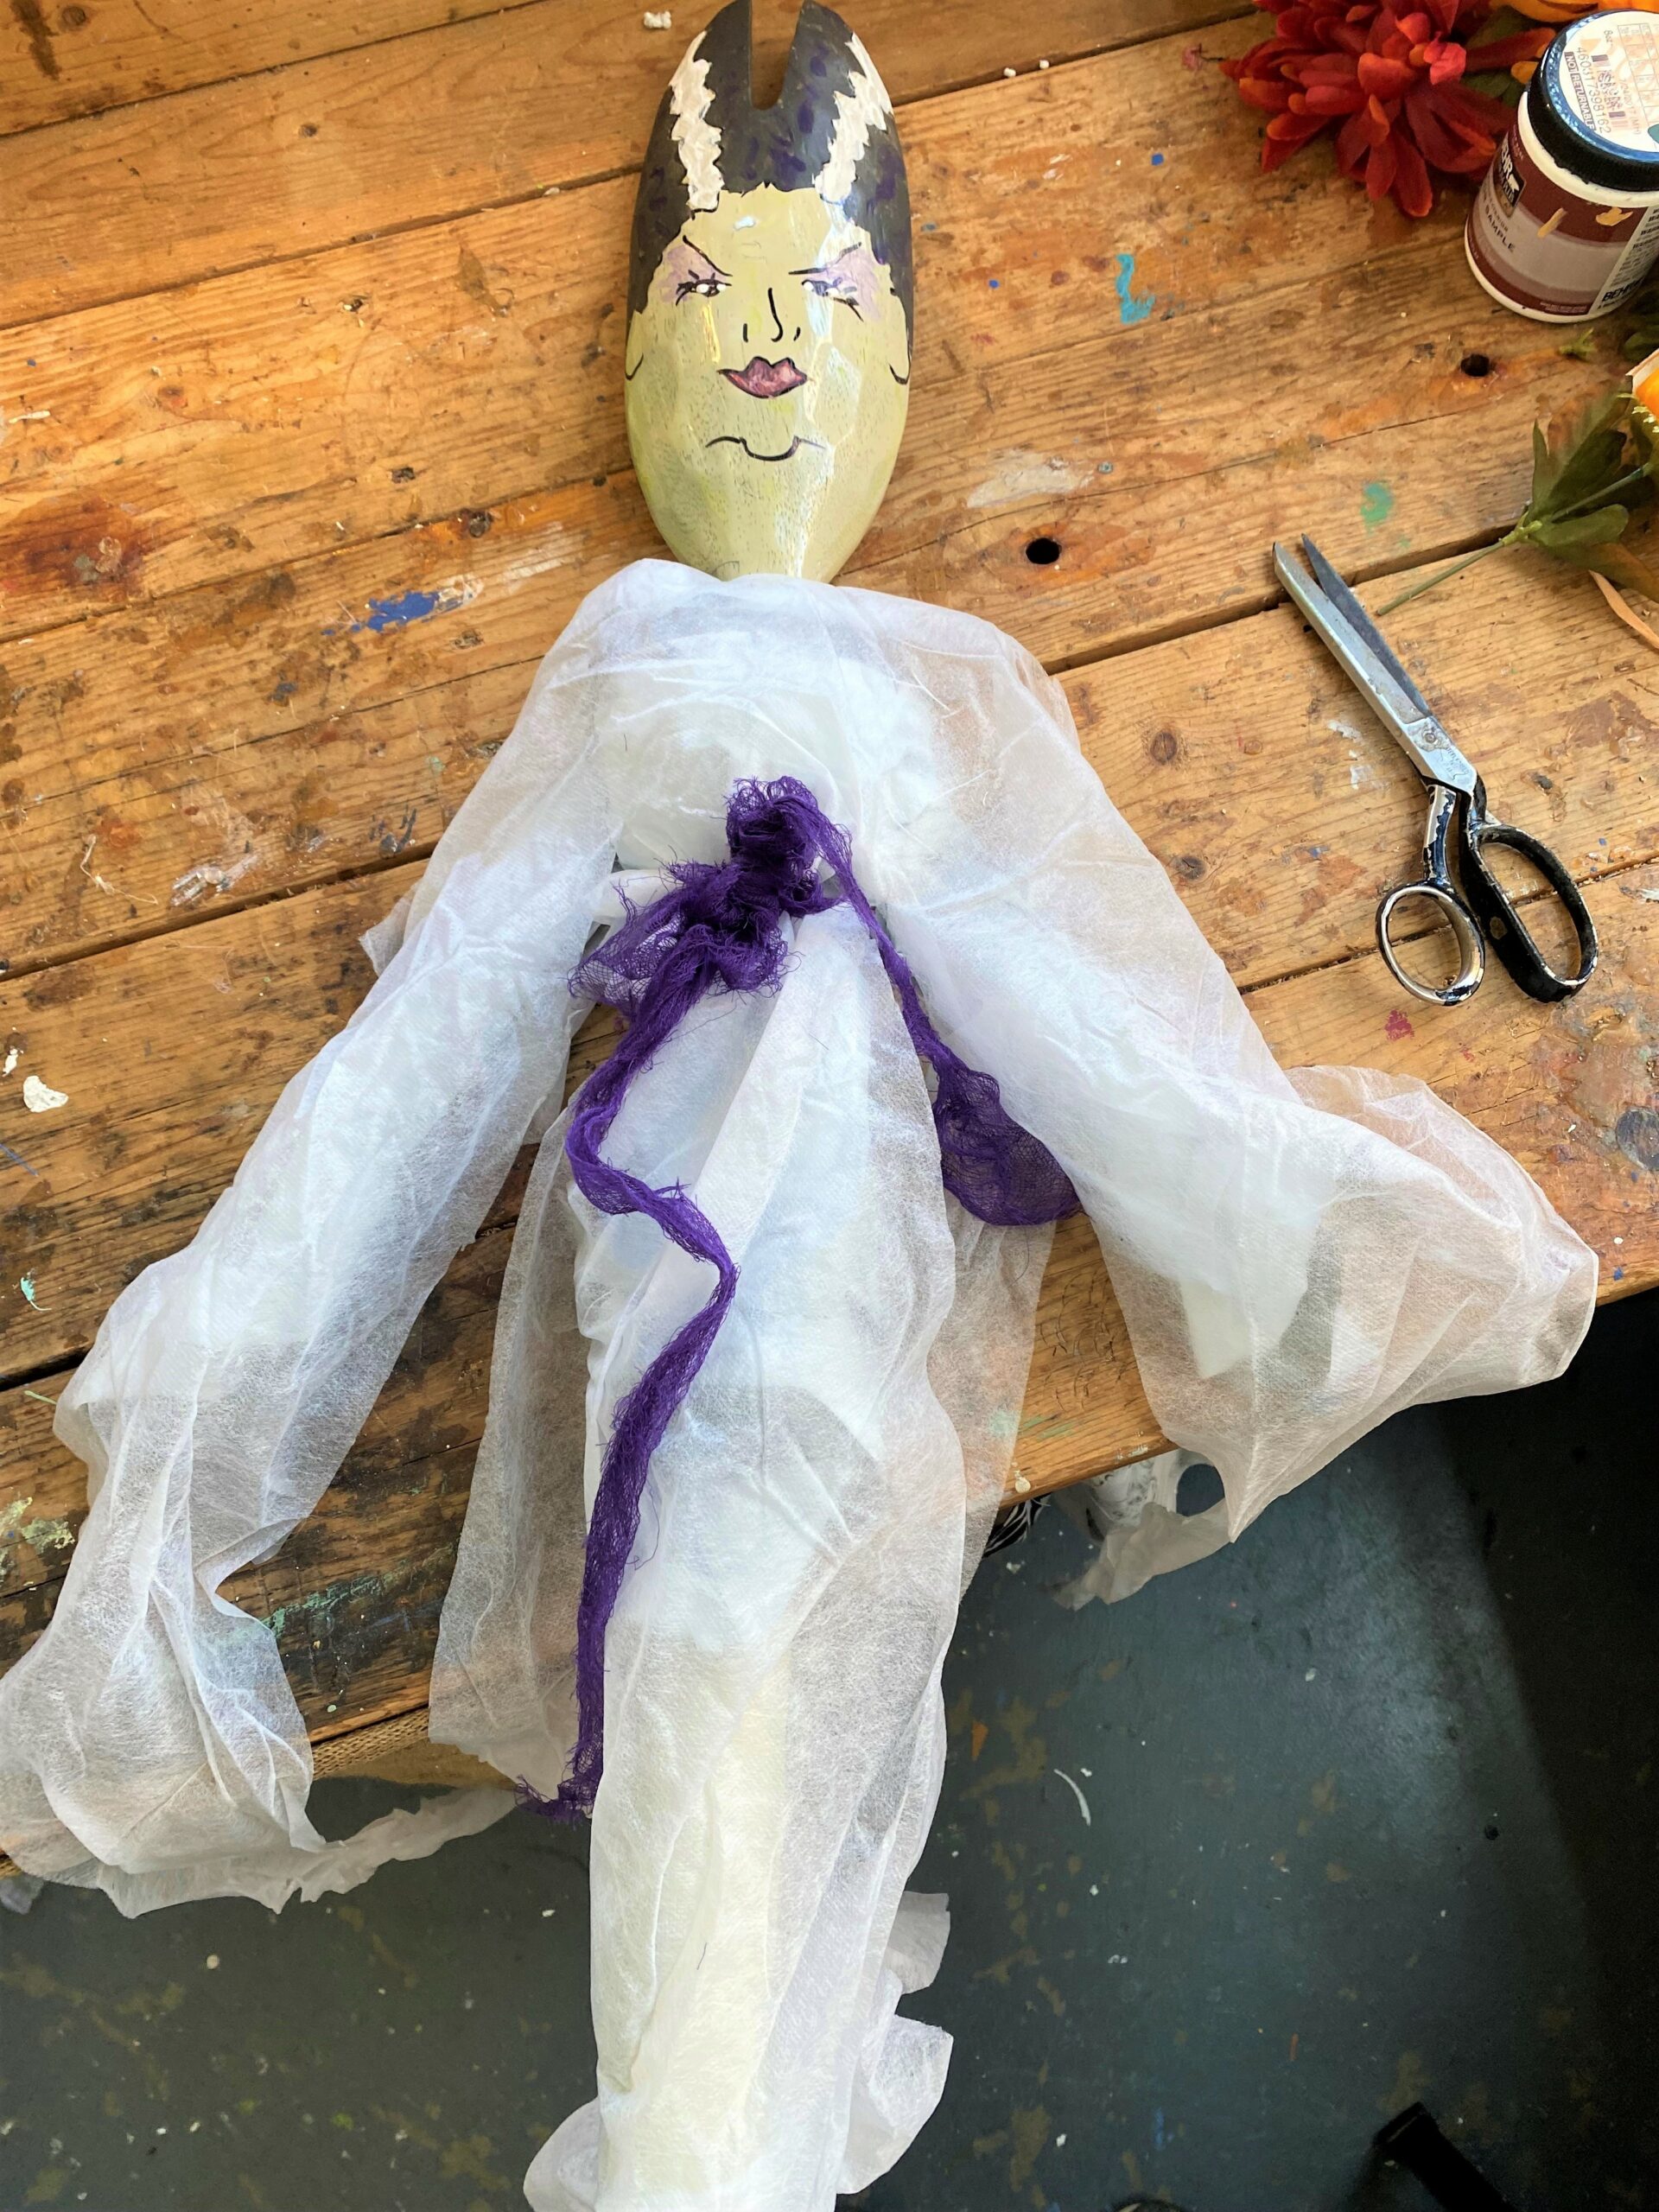
- Using the dollar store decoration I picked up, I cut the white gauzy fabric away from it and then draped it over her body, leaving lots to hang from her arms.
- More hot glue held it all in place.
- A piece of purple gauze was tied around her waist as a belt.
- Like her boyfriend, a small hook was secured on her back to allow her to hang around.
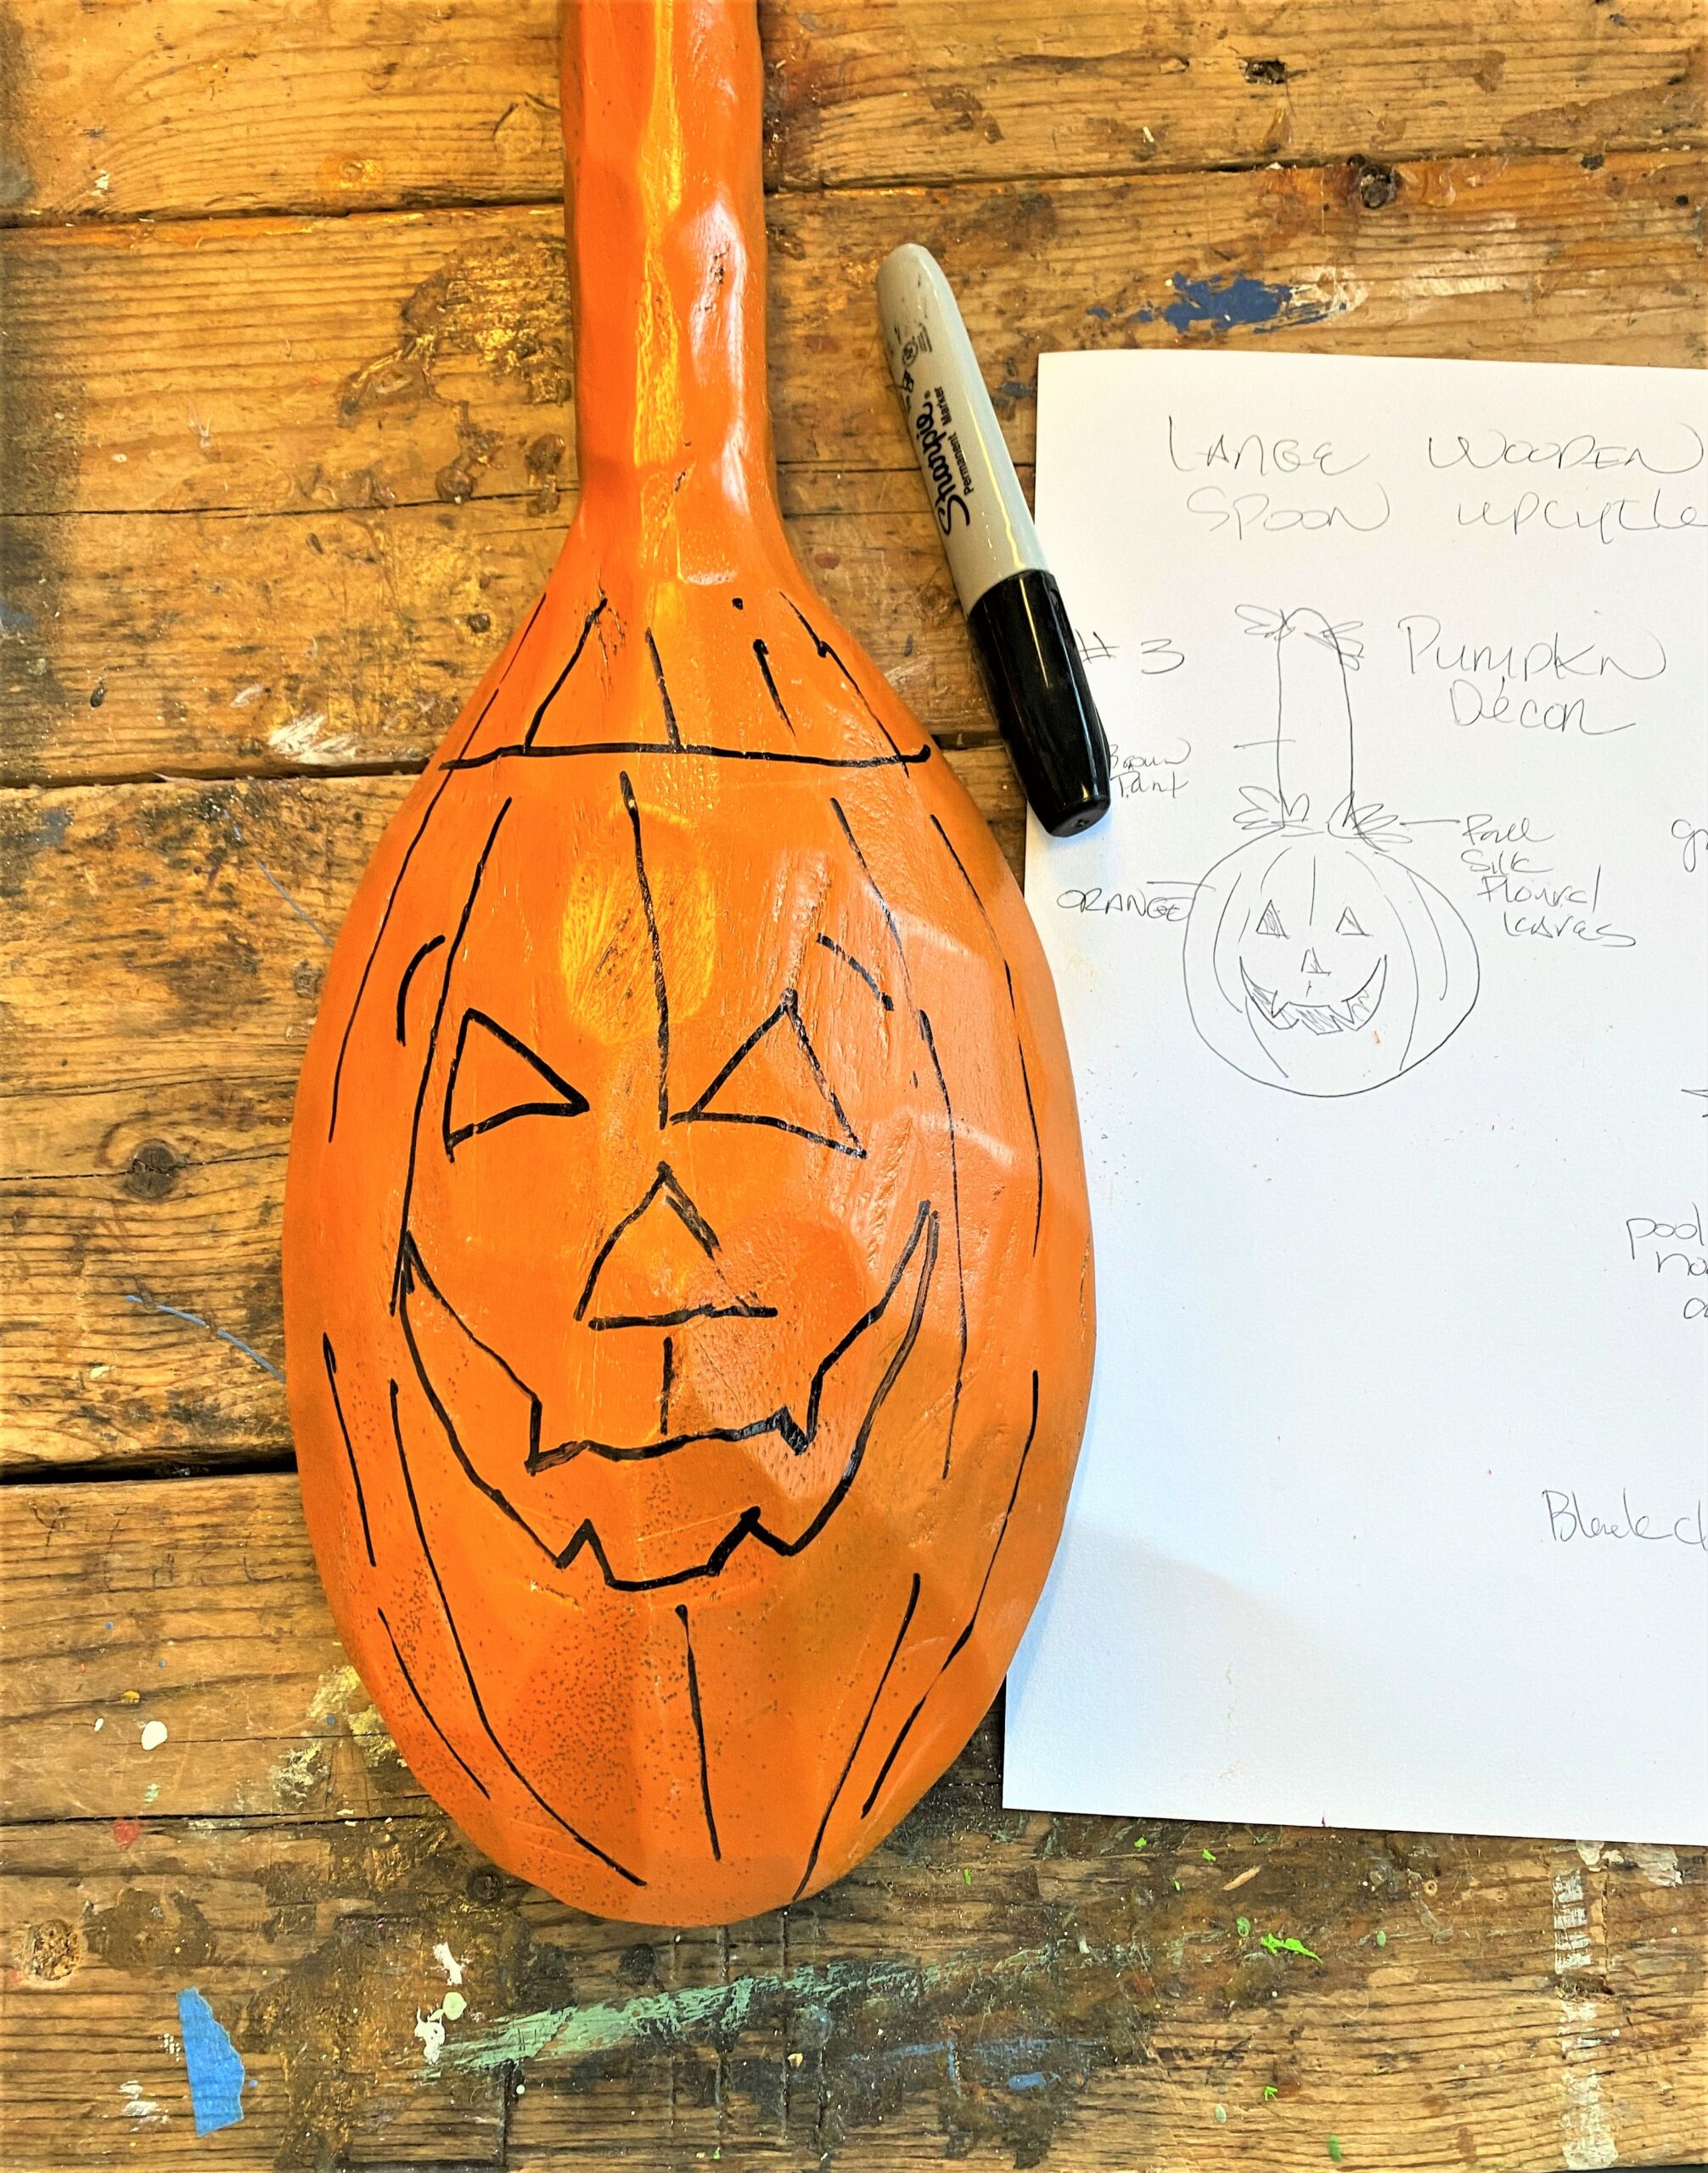
3. Jack-o’-lantern
Here’s How:
- To give your spoon a pumpkin look, spray on some bright orange paint.
- Give it time to dry well, then use your Sharpie to add eyes, a nose, and a mouth, as well as curved up and down lines to represent the pumpkin’s ridges.
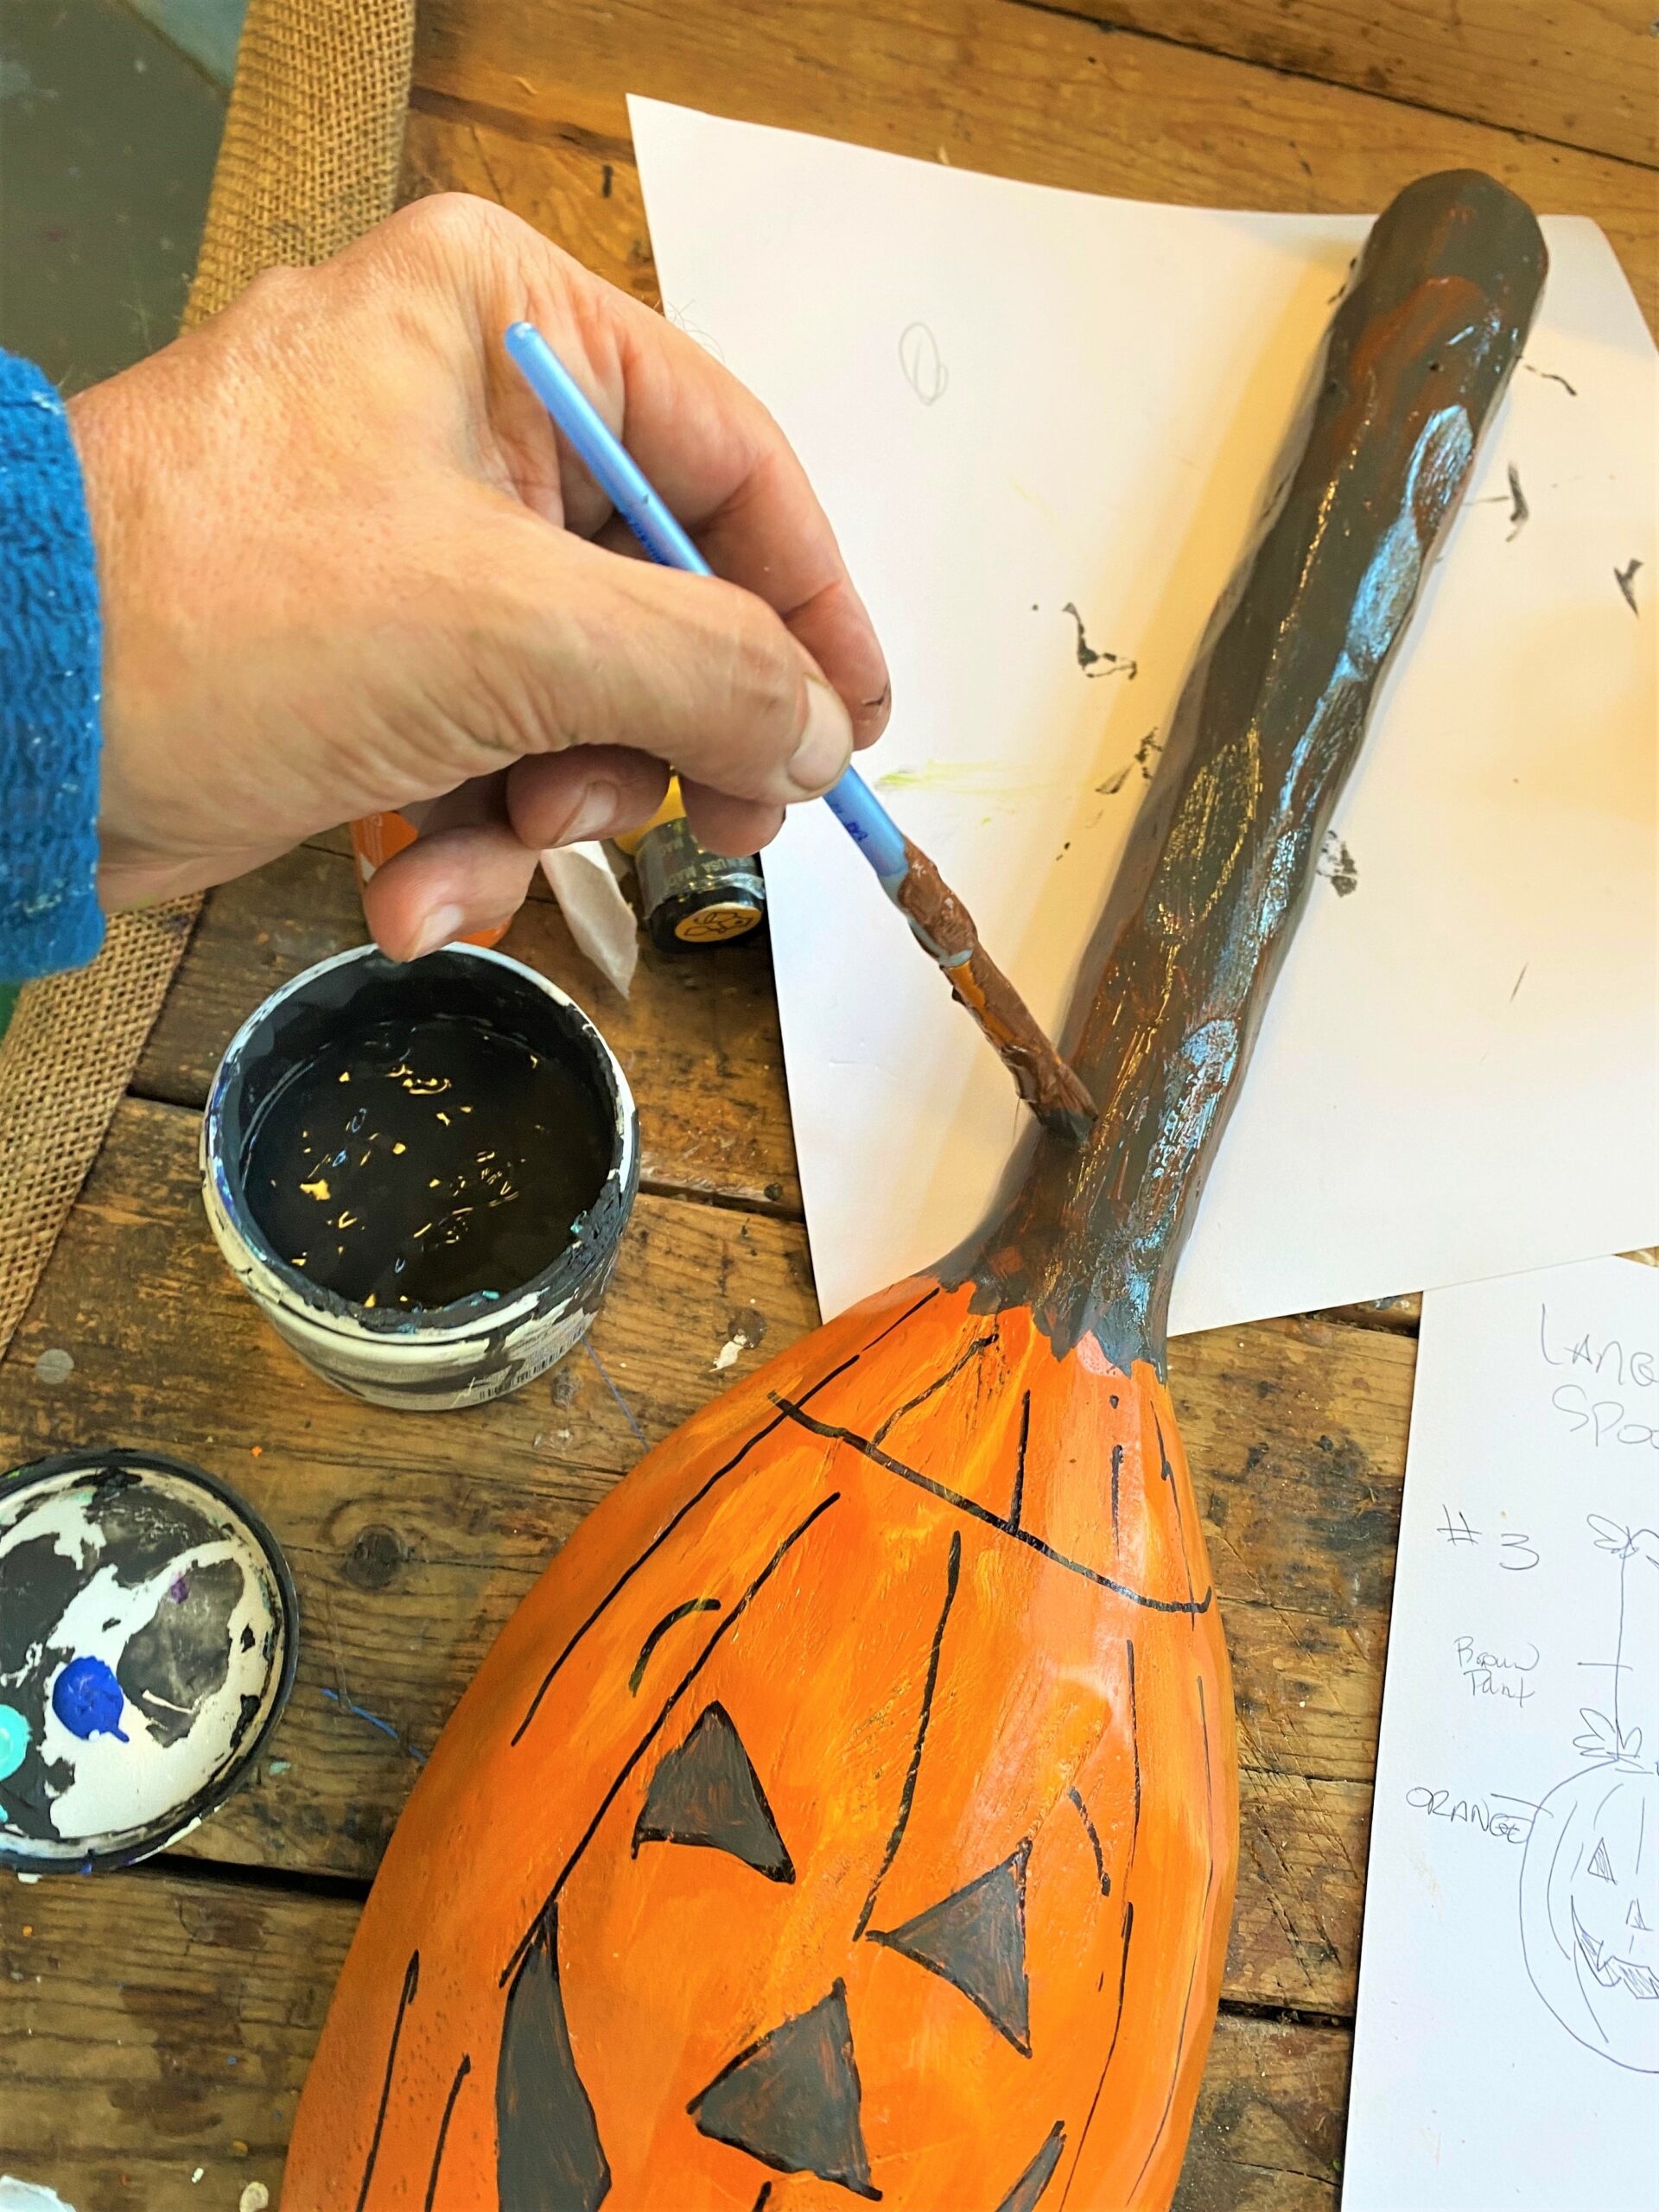
- Draw a half circle at the top to represent where it would have been cut open. Use black craft paint to fill in the eyes, nose, and mouth.
- With some brown paint, give the spoon handle—now its stem—a good once over or two.
- To give your lantern some additional depth, consider brushing on some orange and yellow craft paint to highlight the face and ridges.
- Add some black or even purple paint to the stem to add more visual interest.
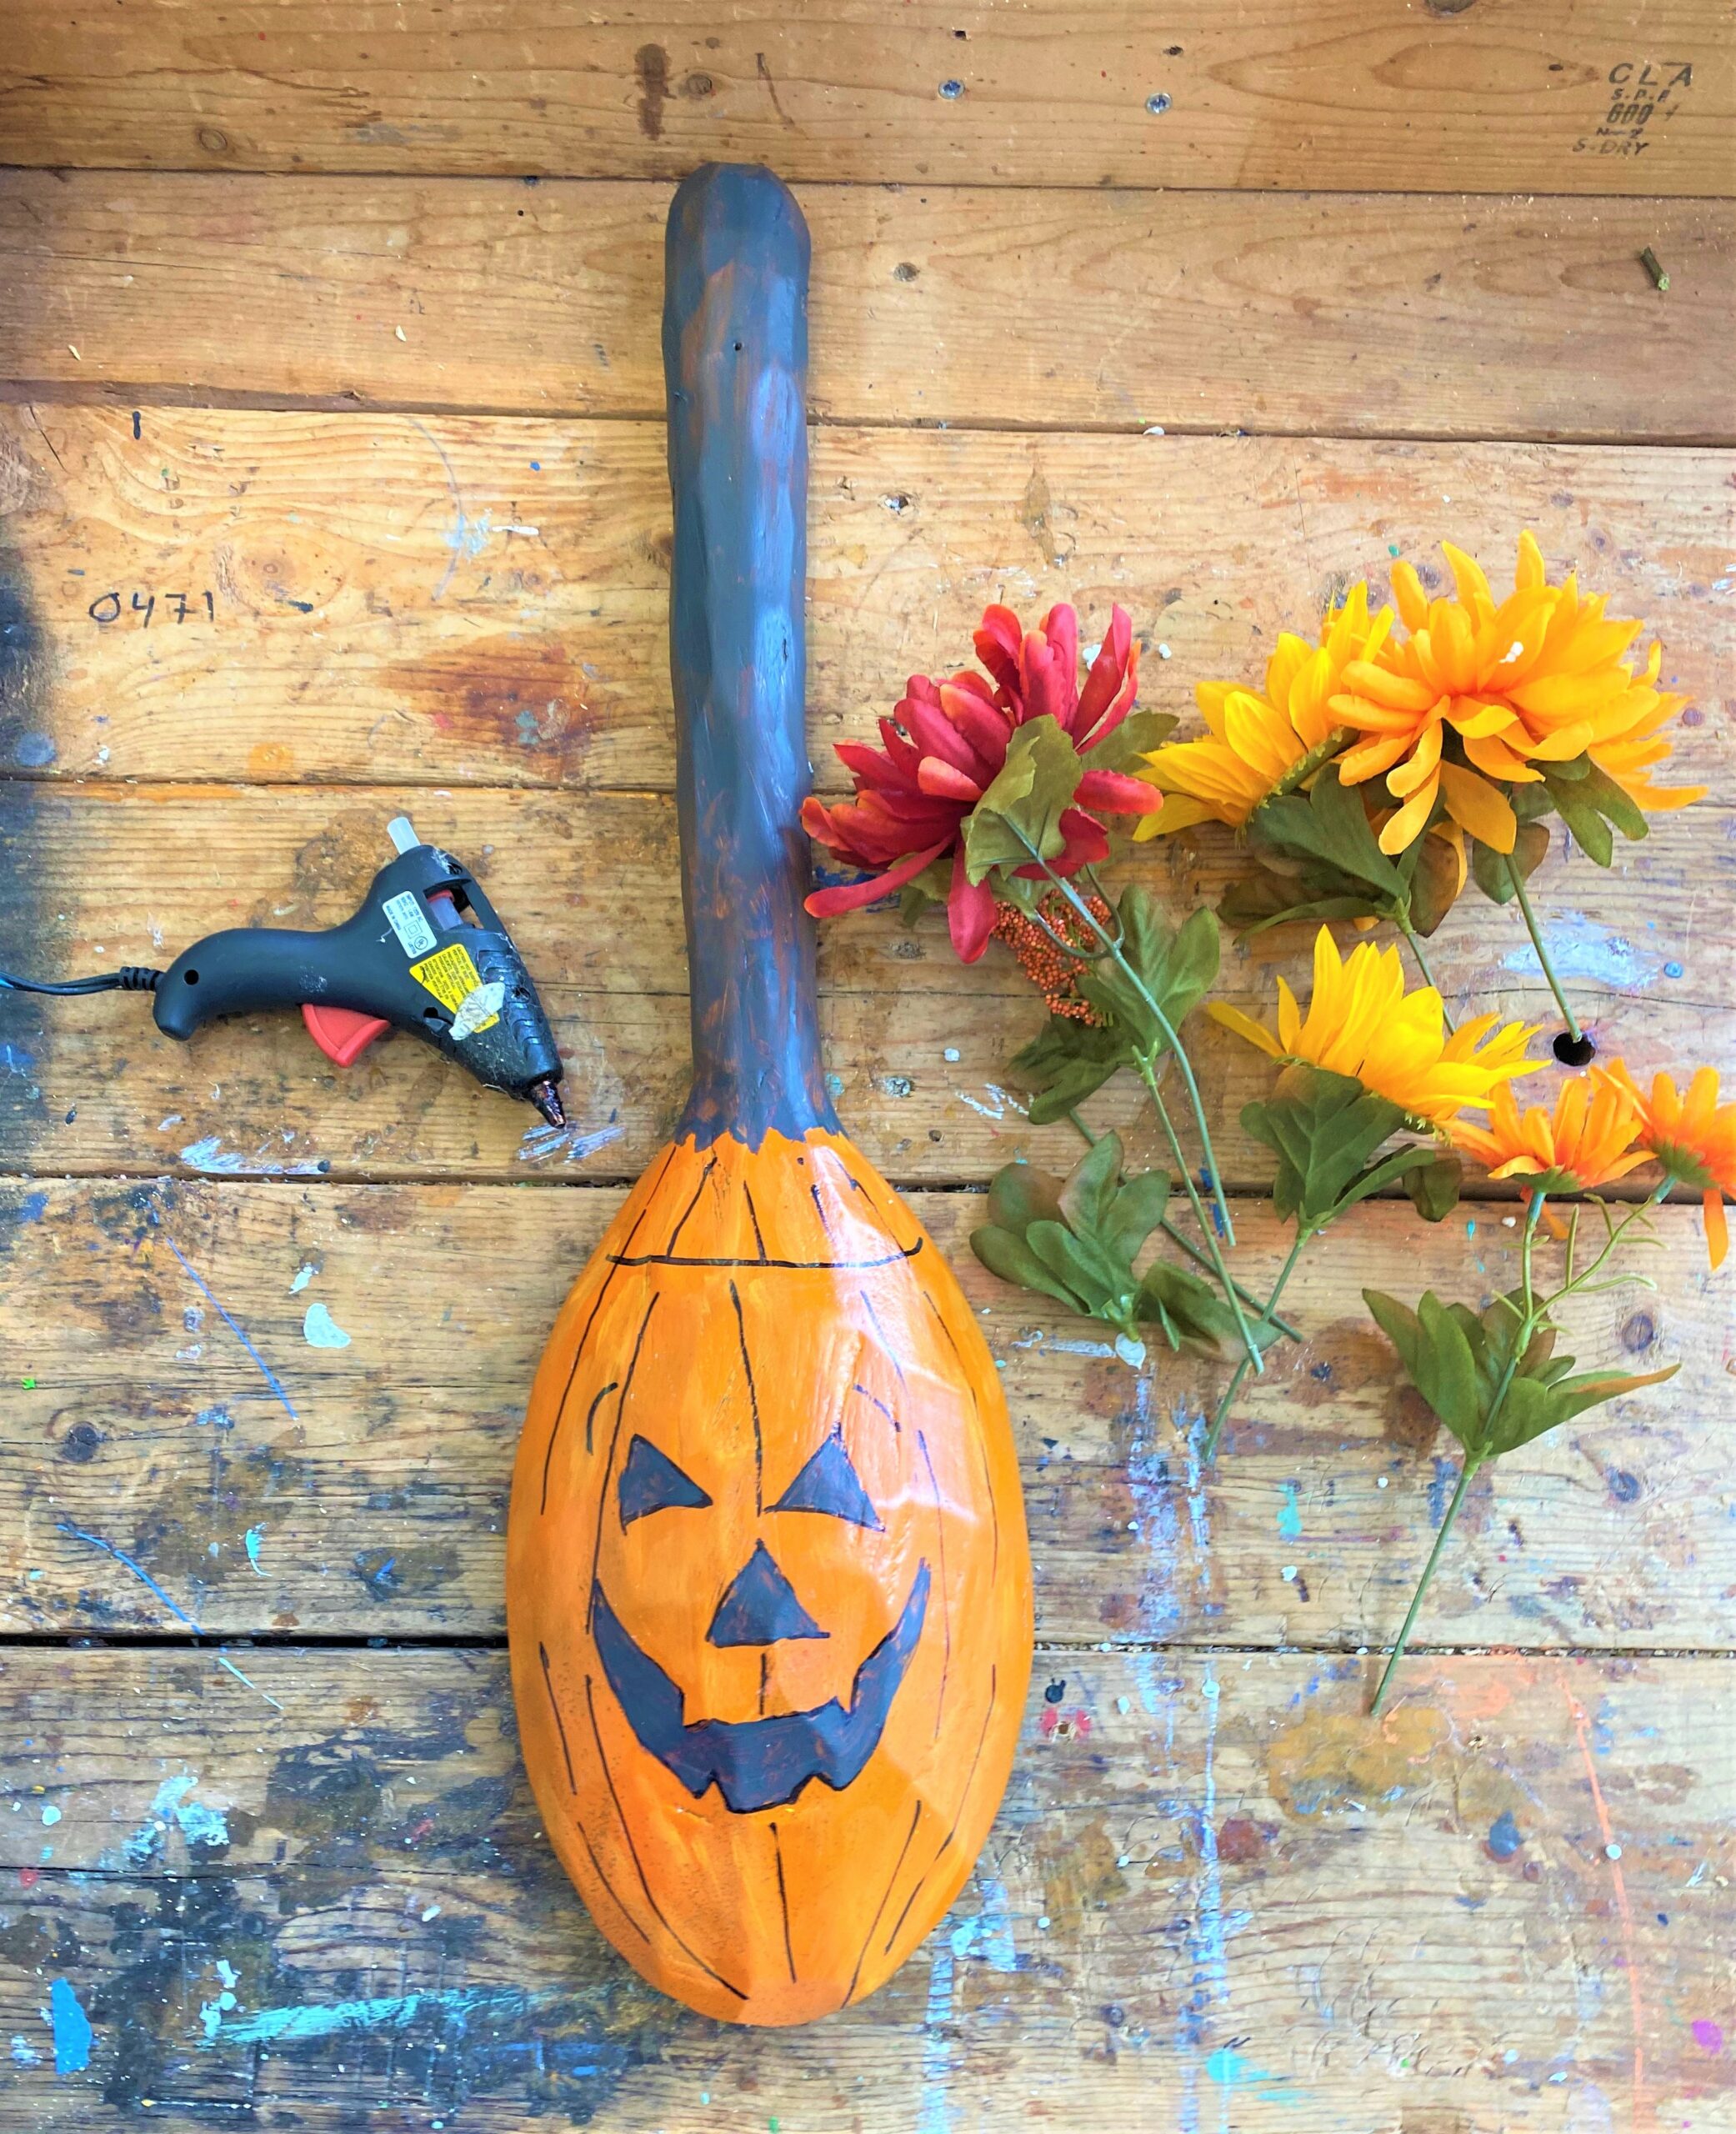
- Pick up a silk flower arrangement in fall colors (check Goodwill first to see what might be there for you) at the dollar store, too, then cut off the flower leaves and glue gun them in place along the top of your Jack-o’-lantern’s head and in various spots up the stem.
- Secure the bright flowers along the top and sides as well, so it all looks very festive and ready to celebrate Autumn.
- The original hooks on the back were repositioned to allow it to hang the handle—now stem—first and upright.
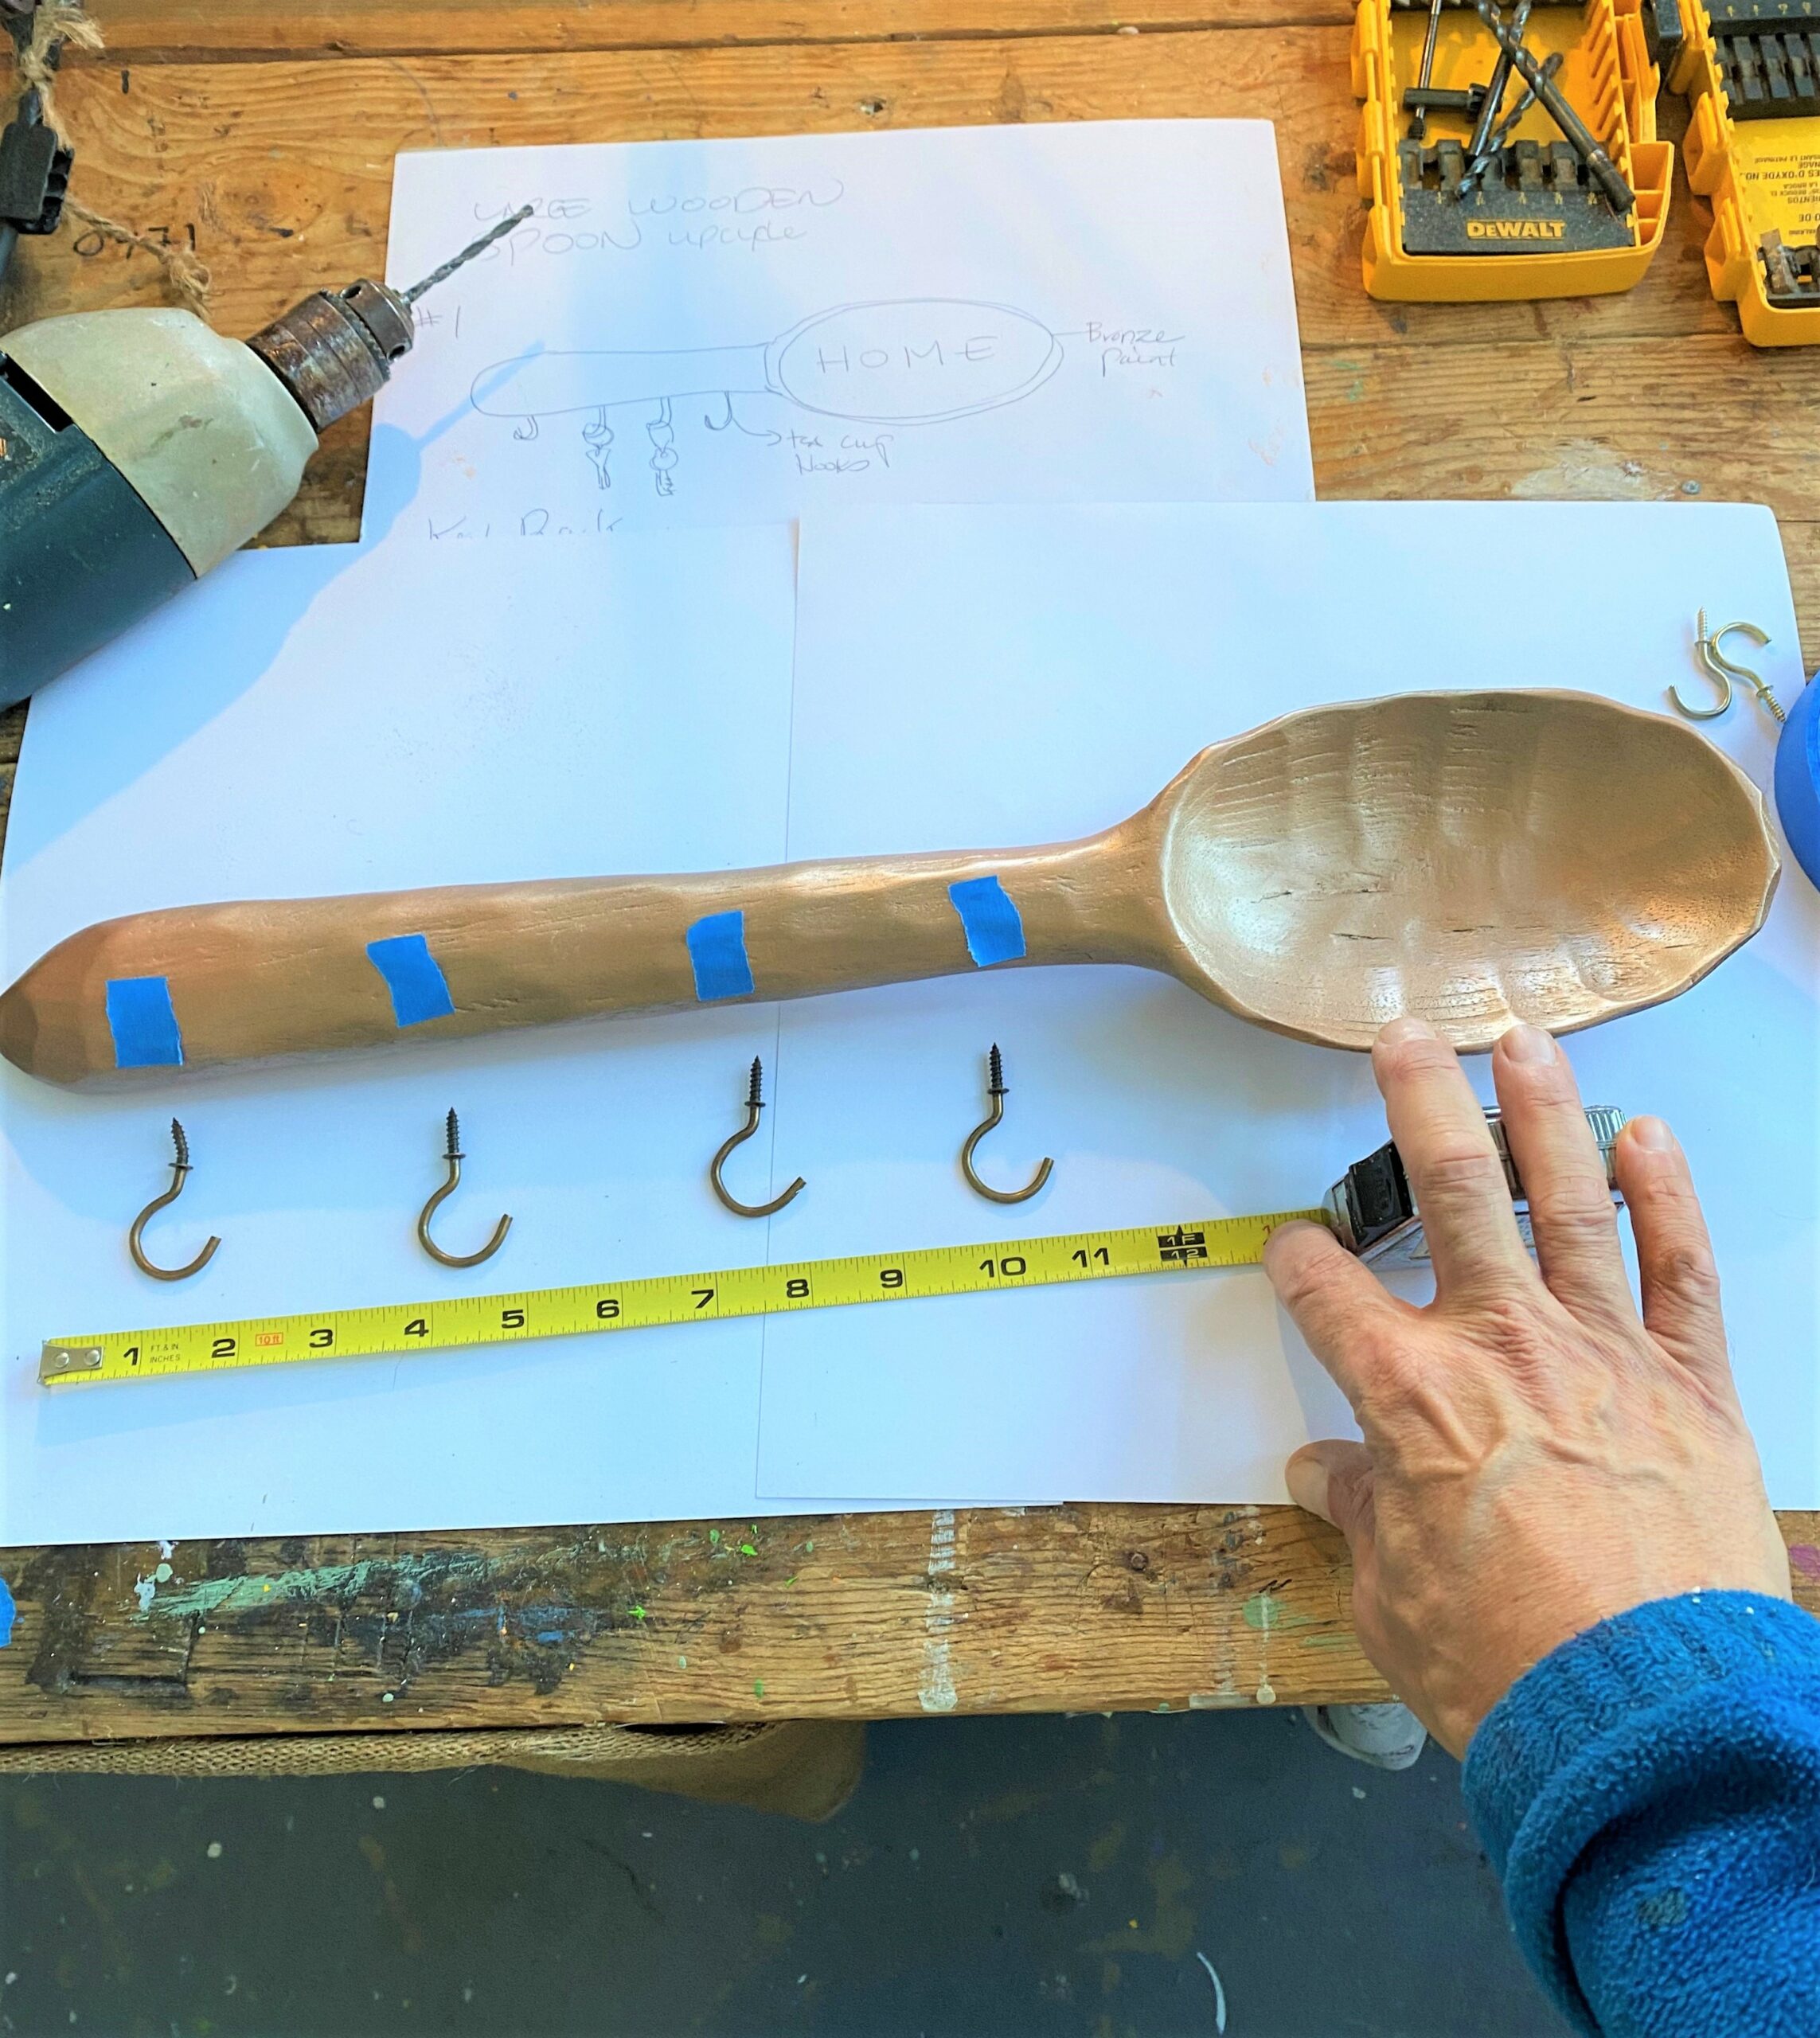
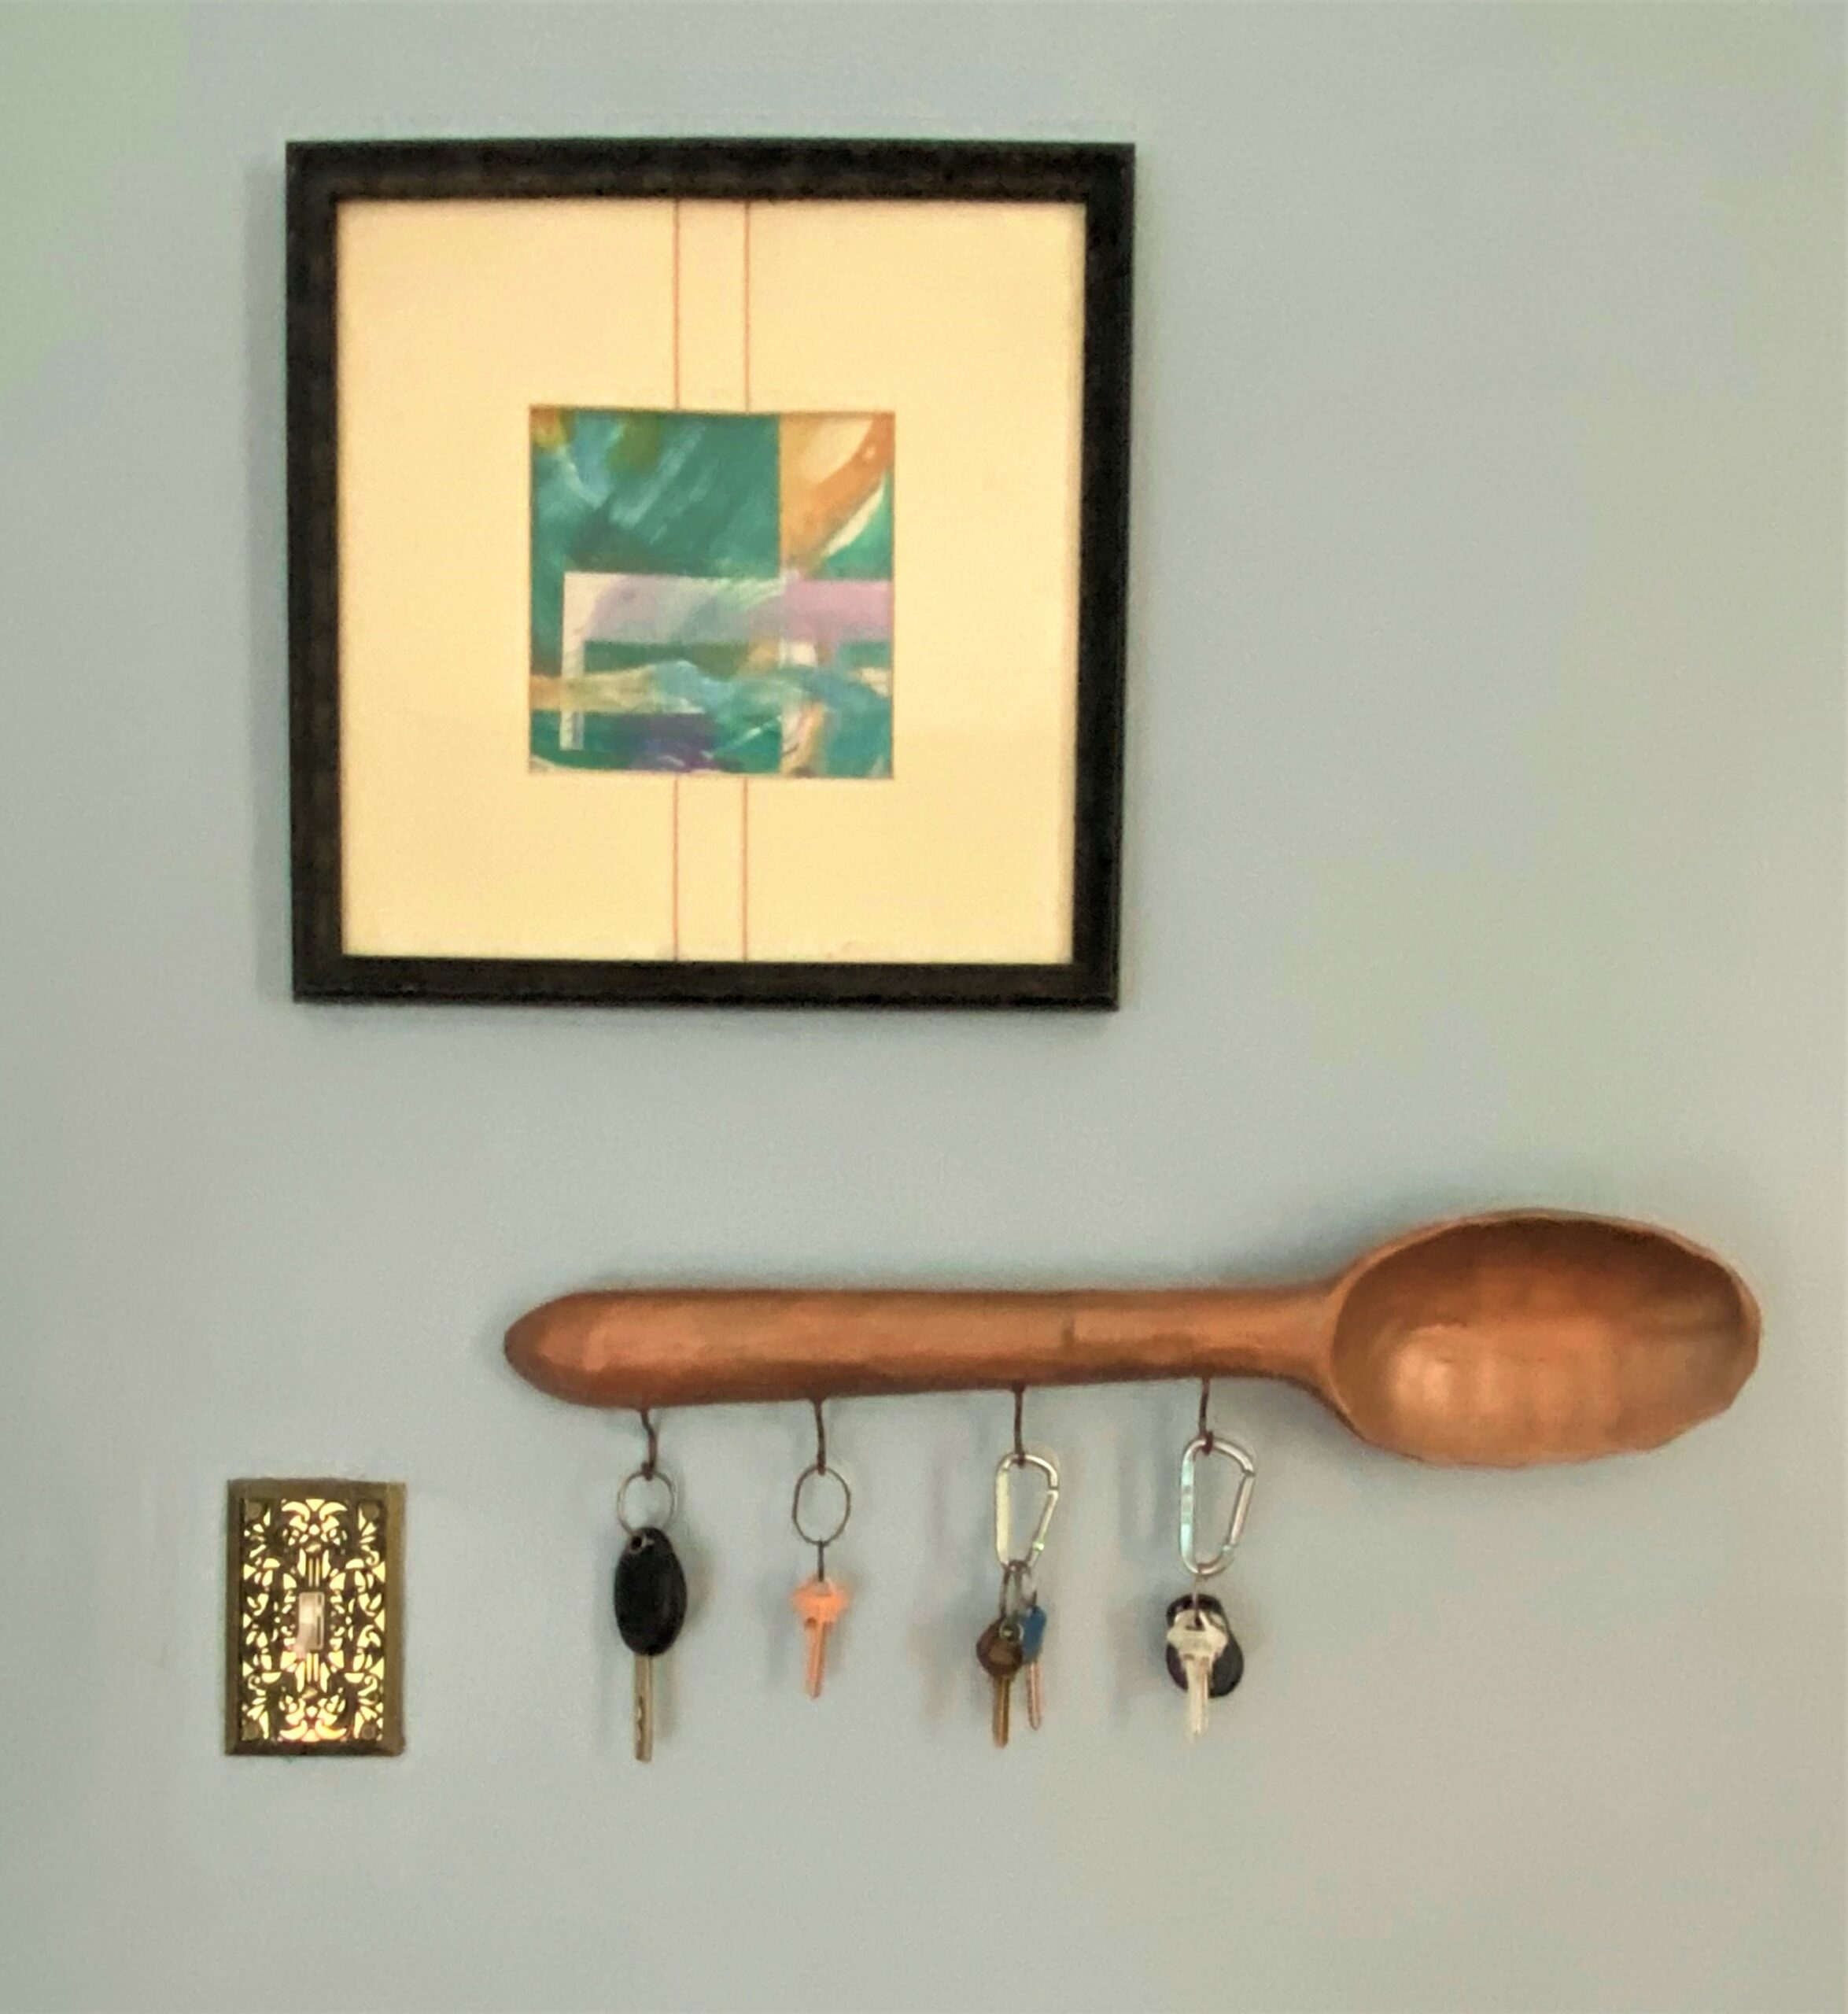
4. Key Holder
Here’s How:
- Add a nice bronze finish to your wooden spoon.
- The metallic paint will add some nice sheen to your soon-to-be key holder.
- Use your drill to add four holes along the bottom side when the spoon is held or displayed horizontally.
- If possible, find bronze teacup hooks at your local hardware store; you could also paint whatever hooks you have to match.
- Add to D-hooks on the back.
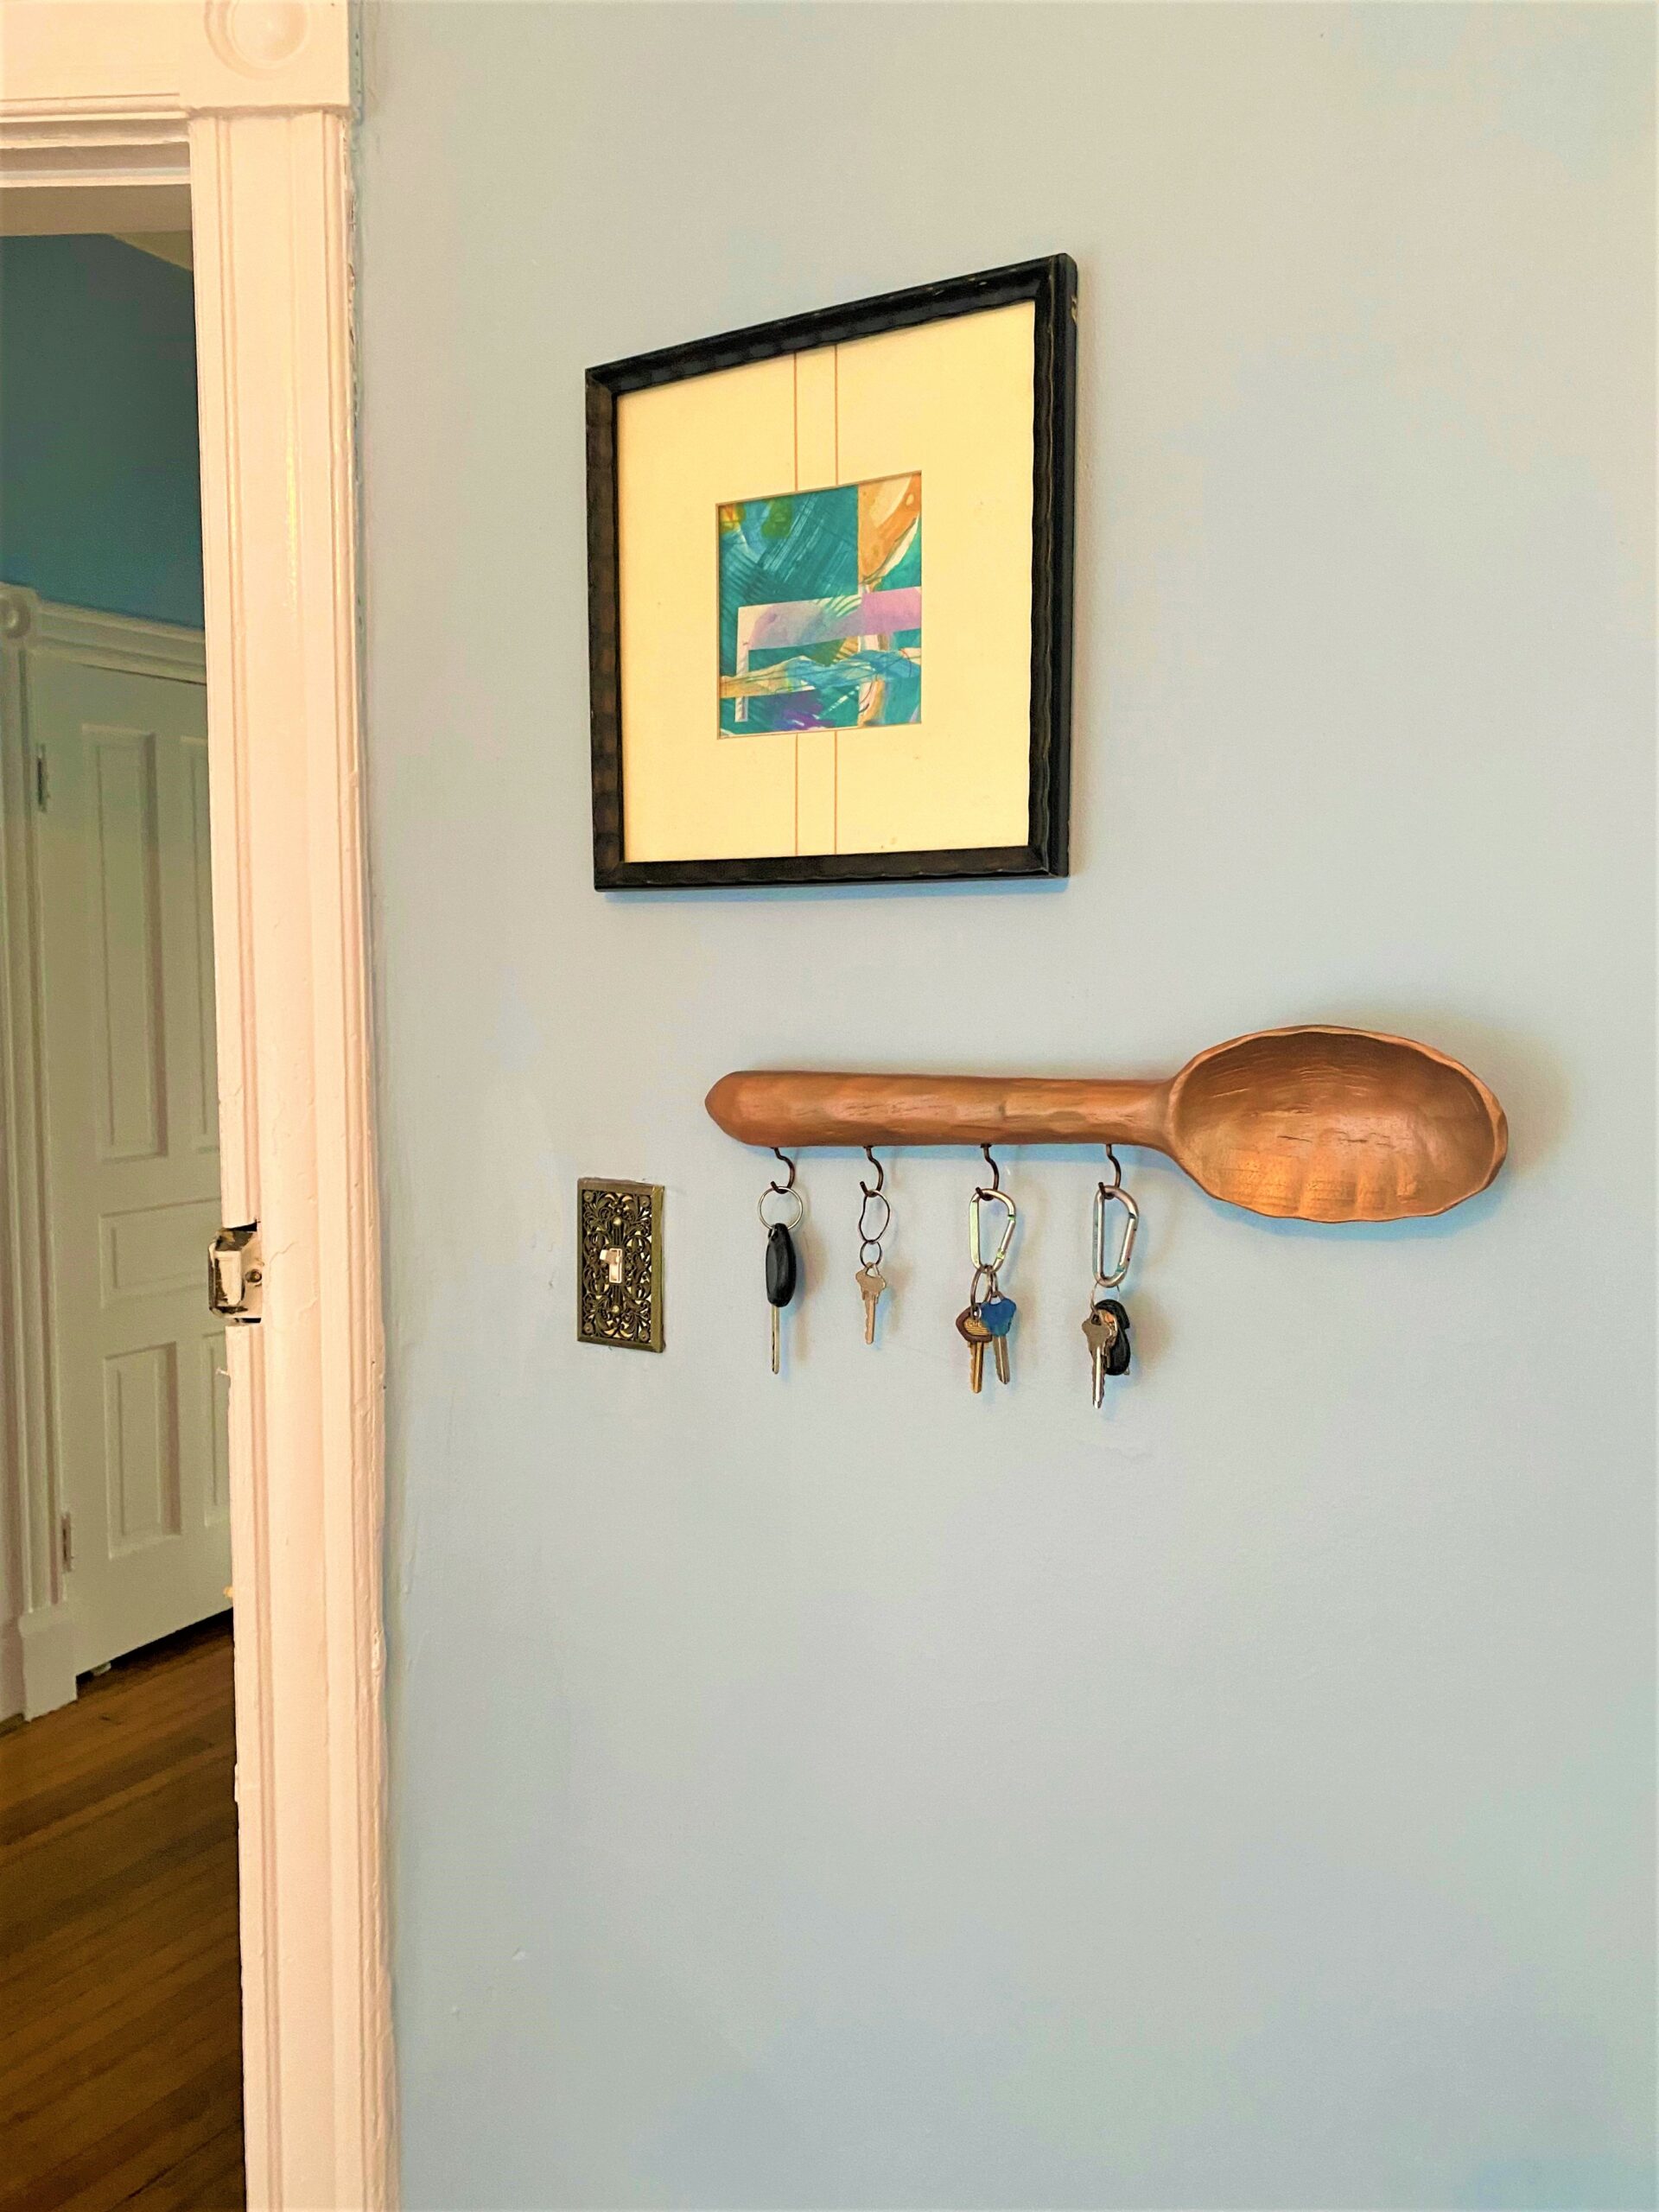
- Hang it on your wall by your door for easy access as you come and go. You will always know where your keys are from now on!
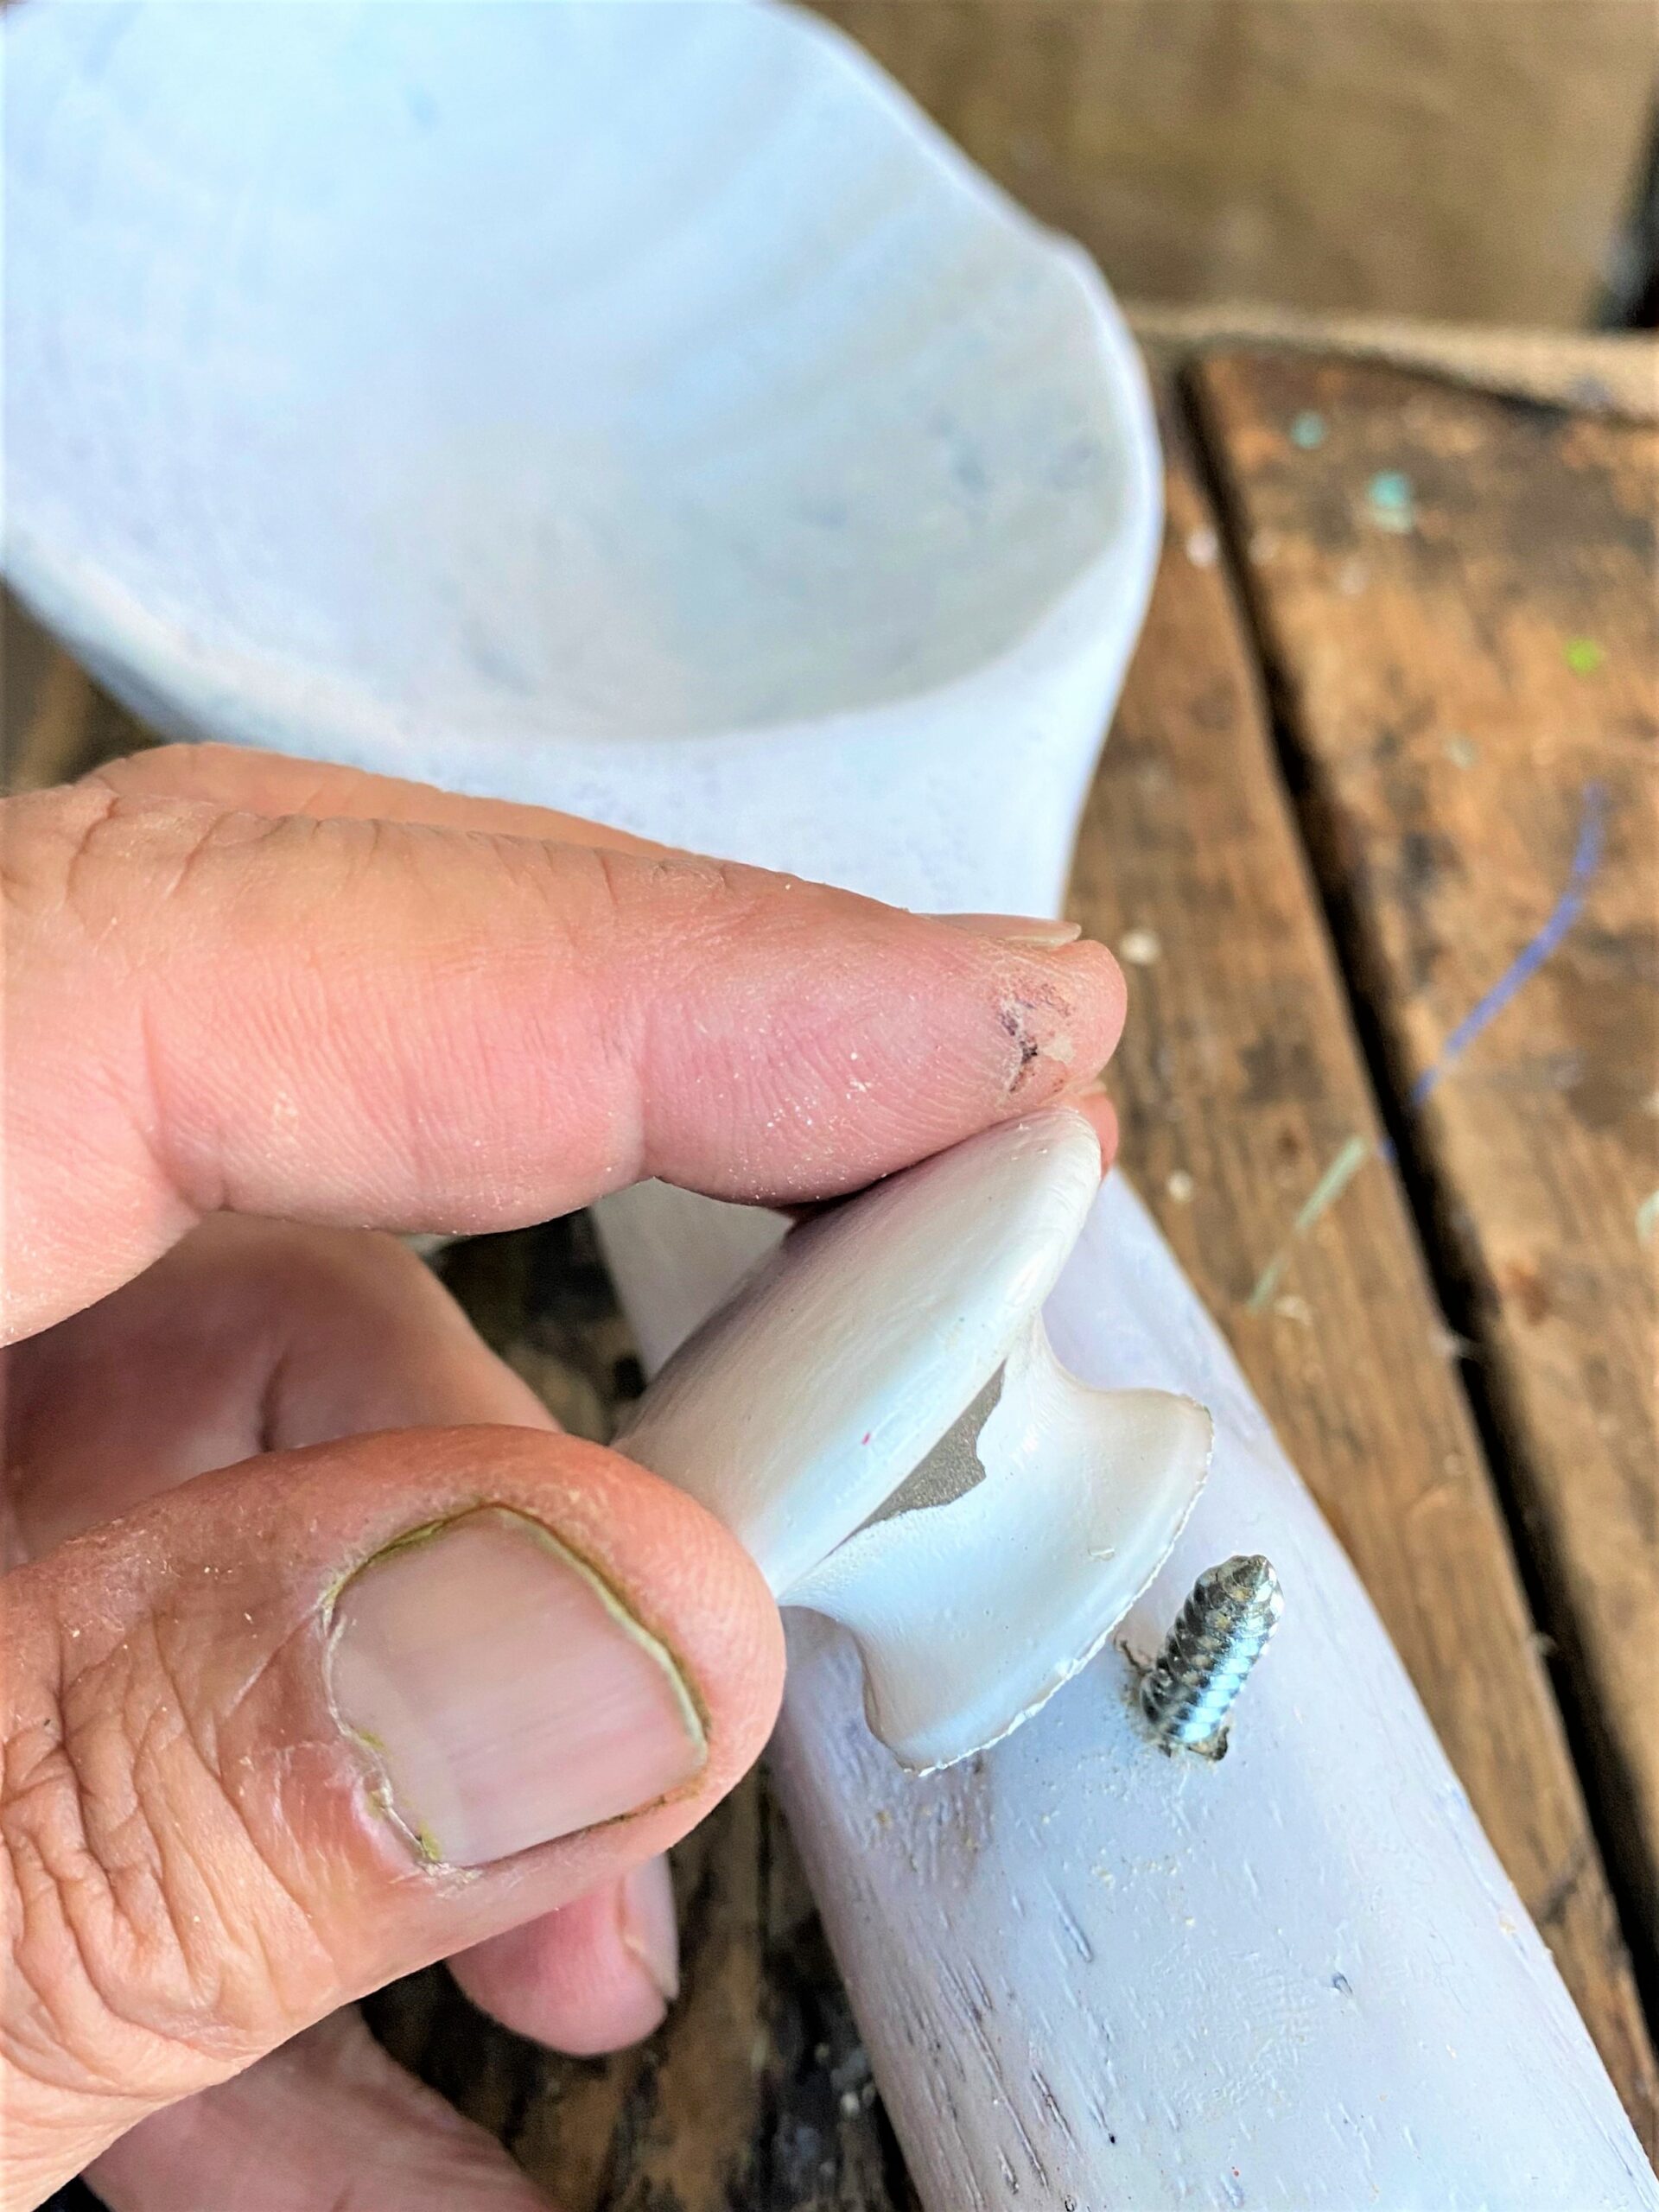
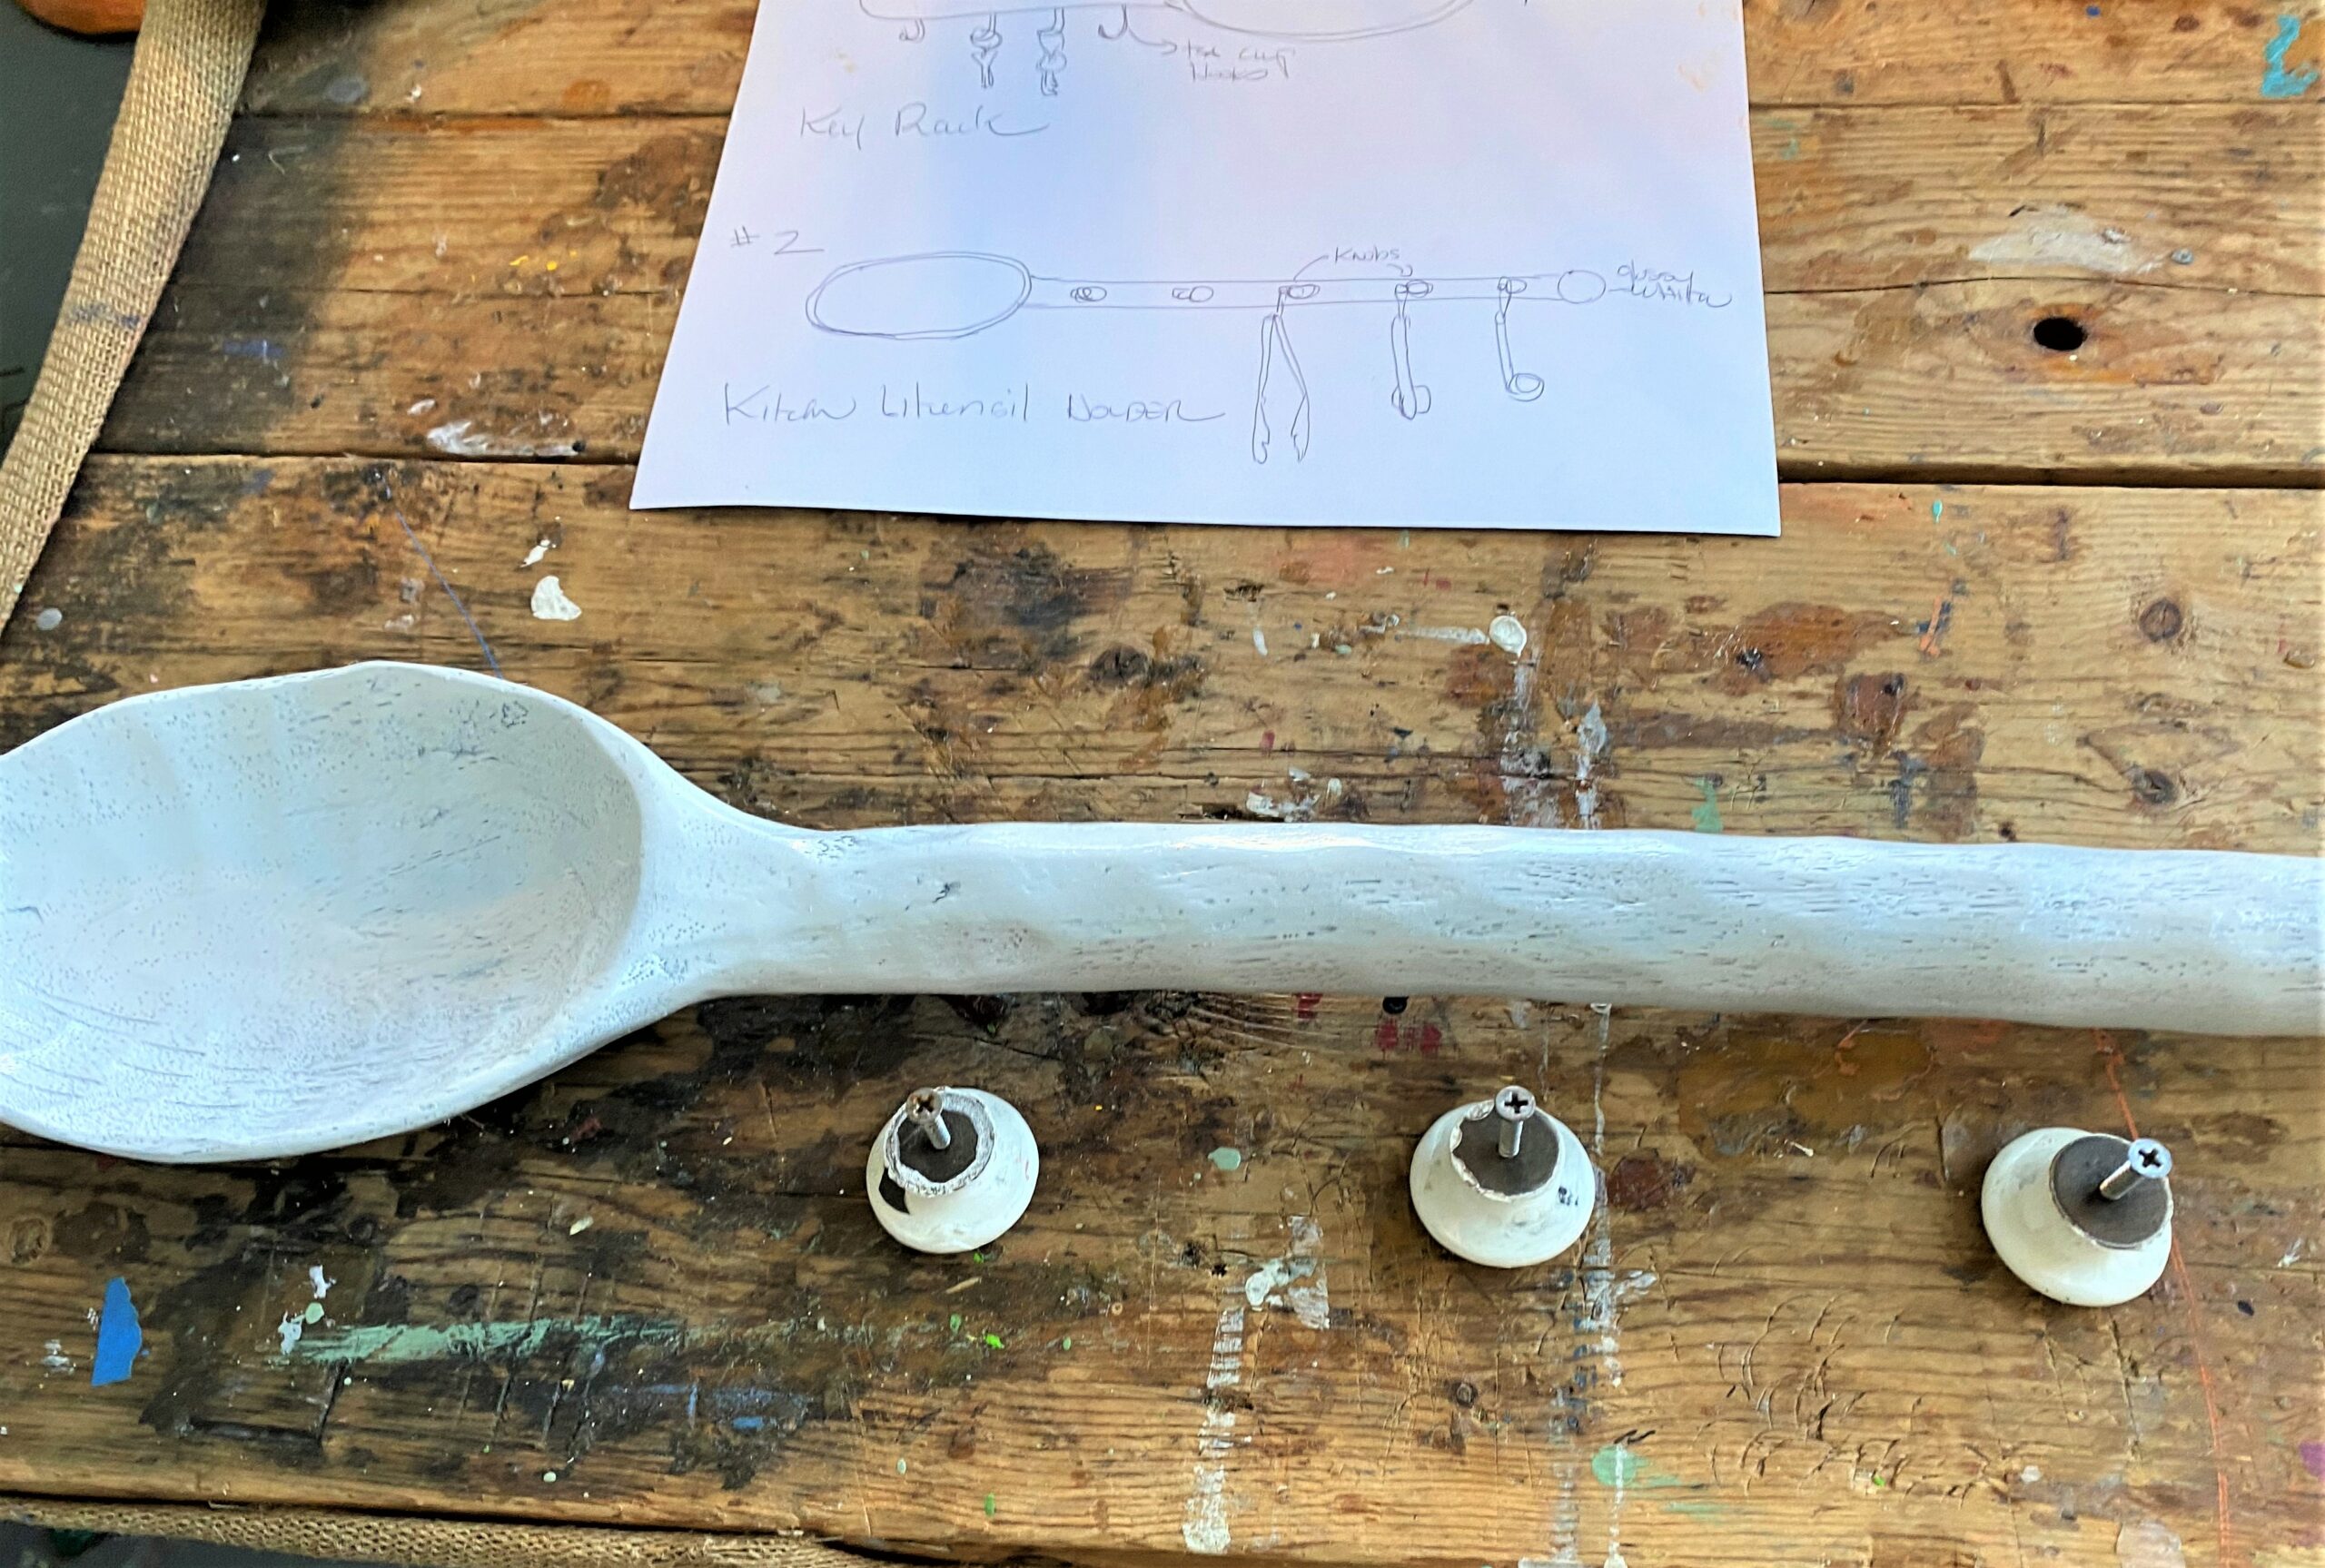
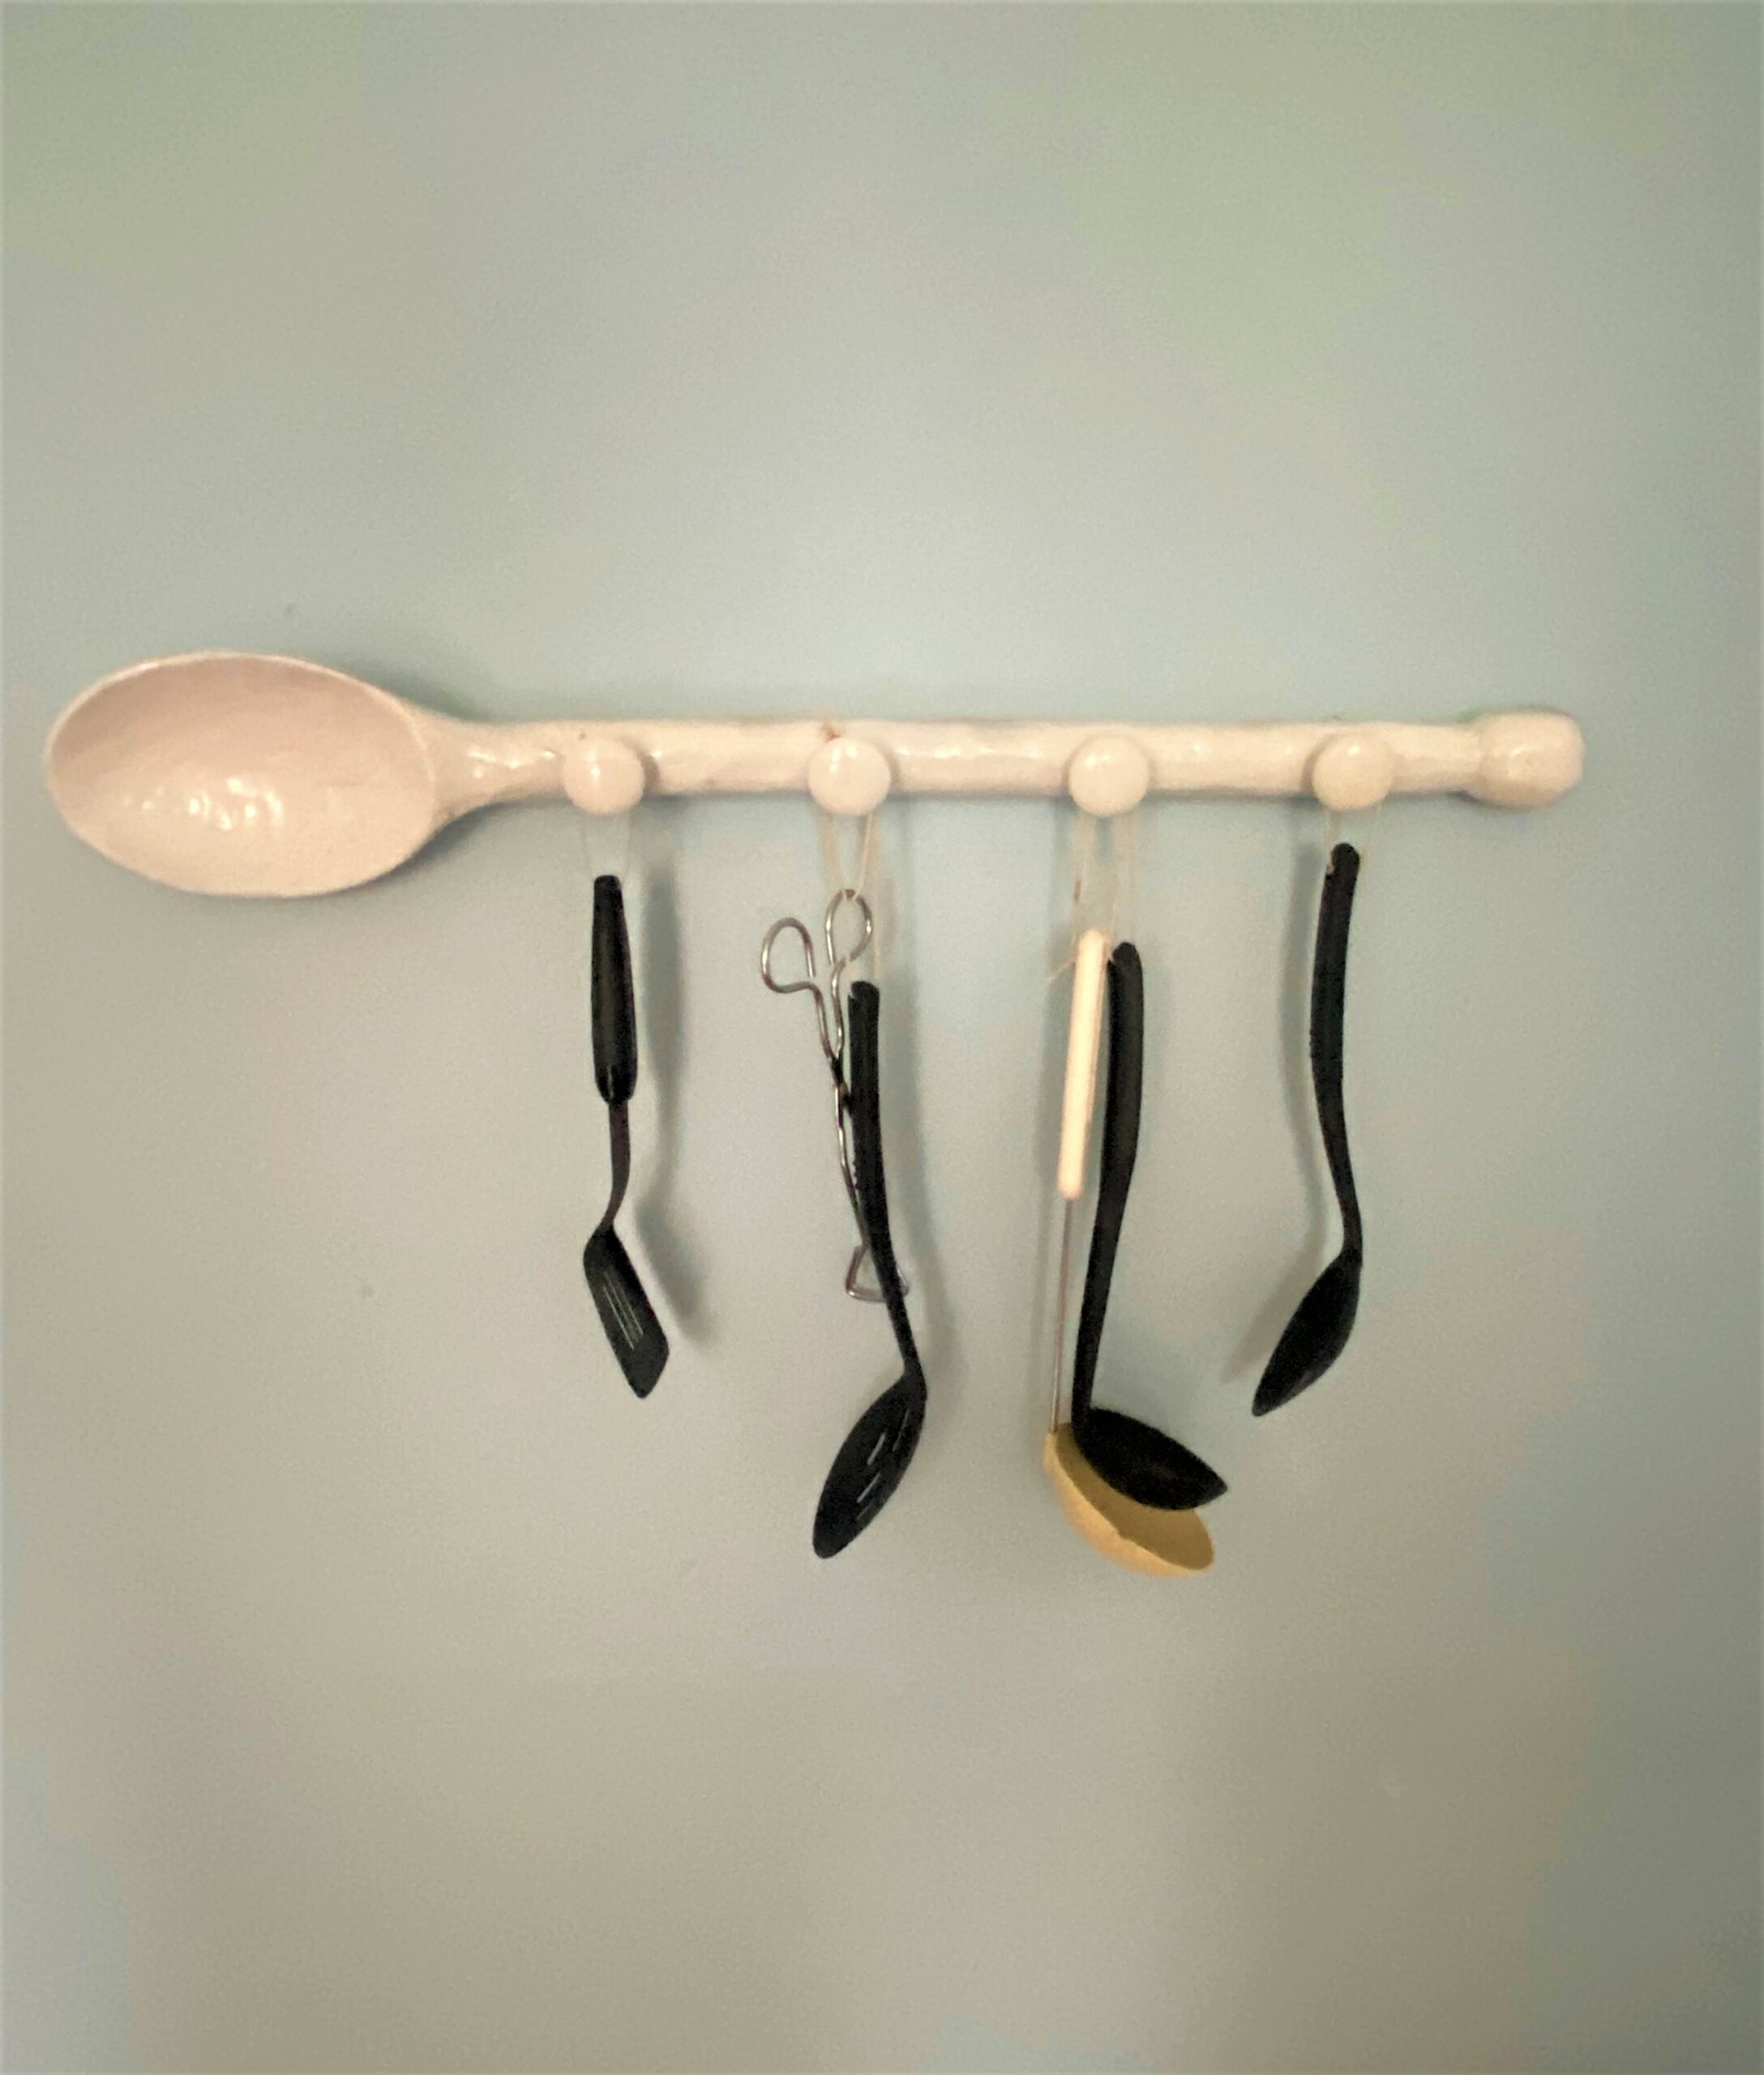
5. Utensils Rack
Here’s How:
- Give your dark wooden spoon an immediate brightening up by using glossy white spray paint.
- Give your knobs a once over, as well.
- Allow all to dry very well; glossy paints take longer to dry than others, so be patient.
- Place your now white spoon face up and along the handle, and drill holes that go all the way through it.
- Flip it over and, with longer screws, use your screwdriver.
- Put your wooden knobs on top and turn them until the screws pull them tightly into place.
- Place your new, whimsical utensils rack in your kitchen. Add wire, string, or twine to the handles of your ladles, soup spoons, and other cooking tools (you may even find these for sale at Goodwill). Then hang them in a happy row, so they are ready for the next meal.
Thanks to Melanie for her confidence in my talents to transform these dark, larger-than-life wooden spoons. It was a fun way to serve up a totally unique DIY project!

Tim Kime
Artist, Motivational Speaker, Life Coach

