
Out of the box idea: Combine a rake and pallet into a rack—3 ways to use it!
An old yard rake and a discarded wooden pallet join forces as hip, urban rack. Talk about repurposing while being eco-friendly! It’s a wine station, jewelry holder, kitchen catch-all, depending on how you want to use it.
Age level: Older teens and adults
Items needed:
1. Smaller-sized wooden pallet
2. Yard rake end
3. Cabinet/drawer knobs
4. Small screws
5. Two bolts
6. D-shaped picture hooks
7. Jig saw
8. Drill
9. Screw driver
10. Wood glue
11. Paint (optional)
12. Accessories to store, hold, display (all which can be found at Goodwill!!)
Time requirement: Two hours, not including paint and glue drying time
Cost: $10
- $0 for pallet
- $5 for rake
- $2 for knobs
- $5 for D-shaped picture hooks
- $5 for wood glue or Goop (lots more remaining for more upcycling fun
- $0 for paint
Step 1: Collect your parts
Rake: Consider this project as one to inspire you to look at every day items in a new way, especially those destined for the dumpster! Go to Goodwill to hunt in the Tool Section for a yard rake and consider yourself fortunate if you find one. They are popular items and never stay in the store long.
The one used for this DIY project was going to be tossed out because of a broken handle— this was no problem at all because the handle was going to be removed any way.
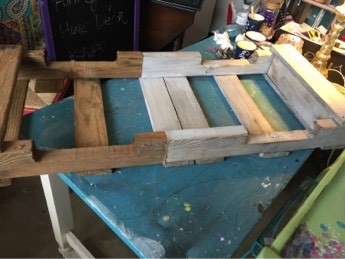
Pallet: It seems that whenever one drives past a dumpster, there are old pallets stacked against it, waiting for a ride to the local dump or landfill. Keep your eyes out for a smaller one like the one here which is half-sized of the typical one you see. You can also cut a regular sized one into smaller pieces.
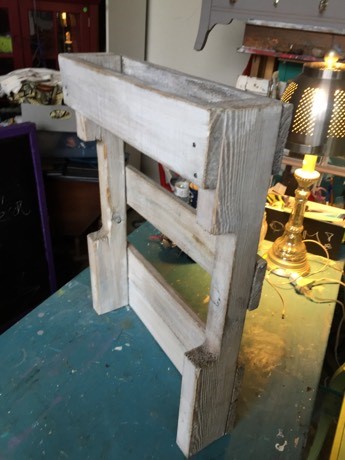
Step 2: Prune your pallet
- If you score and find a smaller sized pallet, simply cut off a quarter of it to shorten it.
- After you cut it with your jig saw, use coarse sand paper to buff the cut edges and other parts to help smooth them out.
- To create a shelf, cut a piece from the part you just cut away. This will become the bottom of the shelf when inserted so sand, add wood glue to the edges.
- Position and use painter’s tape to hold in place until the glue dries.
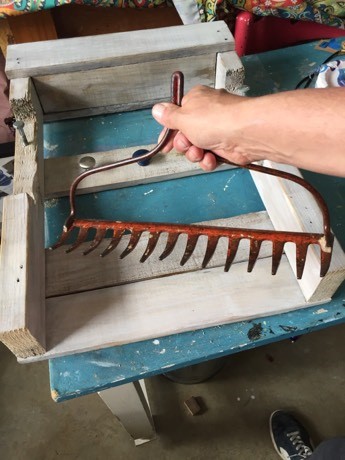
Step 3. Ready your rake
- Remove the handle from your rake end by taking out any screws holding it place. (And, of course, you will want to save the handle for another DIY project!)
- With warm water and soap, thoroughly clean the rake.
- After it dries, then spray the piece with gloss or semi-gloss polyurethane to seal it and keep it water proofed.
Design Idea: There is something beautiful about an item that is weathered from use. I debated over the idea of spray painting it or not and am so glad I trusted my gut and kept it as it. However, if you have a newer rake and don’t like the color, you can easily change it with an inexpensive can of spray paint to match any décor. As always, I encourage you to select a bright color for a punch of pizazz and energy.
Step 4: Wash on the weathering
Consider giving your rake rack some color and dimension by white-washing your trimmed pallet!
- In a jar or can, pour in some light-colored latex paint and add water to it then stir it well. This will allow you to add a thin and translucent layer of paint which will brighten it up and still looked aged.
- When dry, you can sand the edges to bring out the wood beneath further distressing—and enhancing—the piece.
- After more drying time, paint or spray on a coal of poly to seal and protect it.
Step 5: Delightful D-hooks
To ensure your rack is secured solidly and evenly to the wall, flip your piece over and add a D-shaped picture hook in each of the top corners. Mark the holes, drill, then screw them it.

It’s truly as easy as 1, 2, 3!
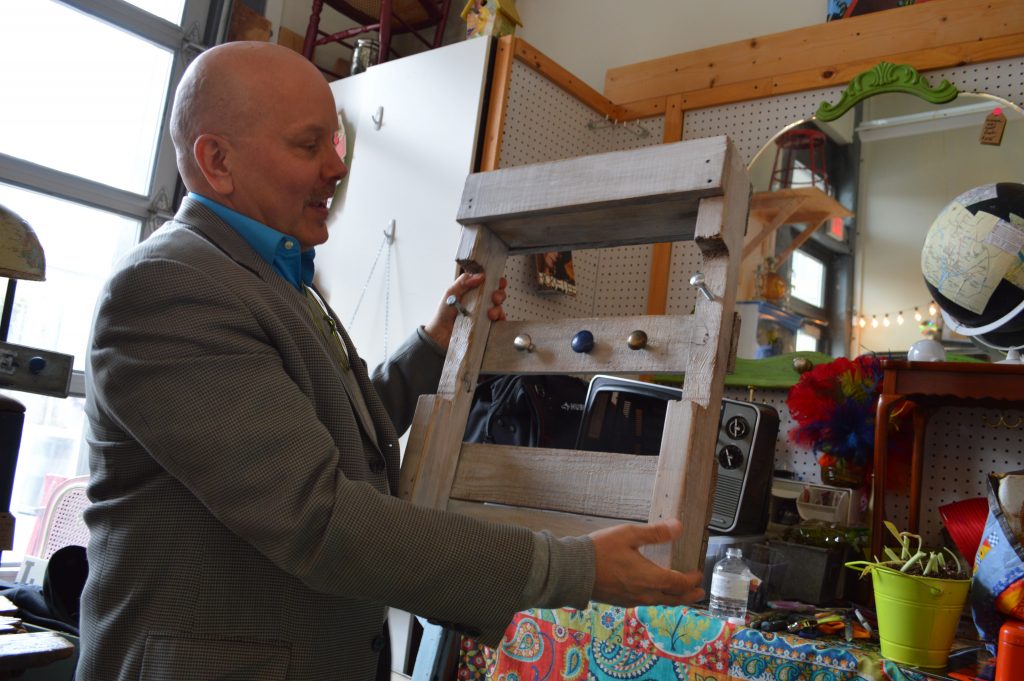
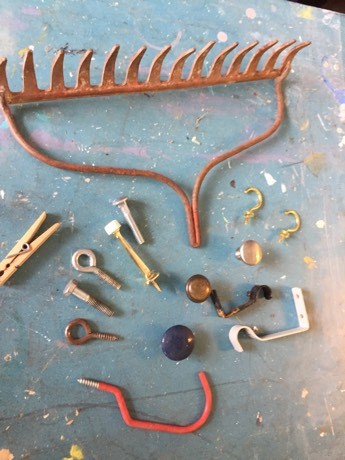
Step 5: Hold off on hooks: Bolts and knobs will do
Part of the appeal of this project is all of its pieces were something else in former lives. So why use hooks which would be so predictable?!
Look for knobs, drawer pulls, bolts and other items you have around the house to serve in that function. Various metal tones of the bolts and knobs add more flair to the piece too!
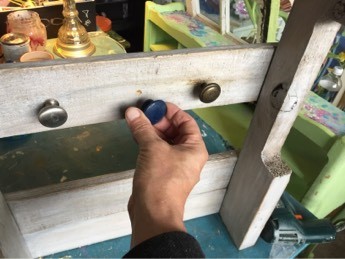
While you can certainly paint the knobs, bolts and rake the same color and it will look terrific, the eclectic blend of items and colors has great appeal.
Use your drill to make holes in which to add your upcycled “hooks.”
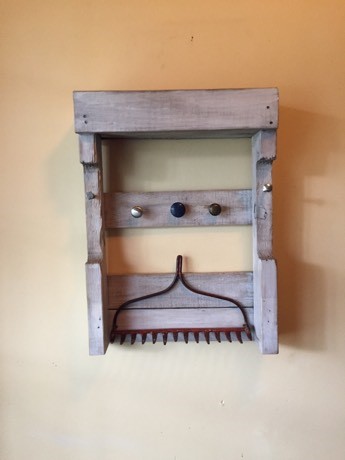
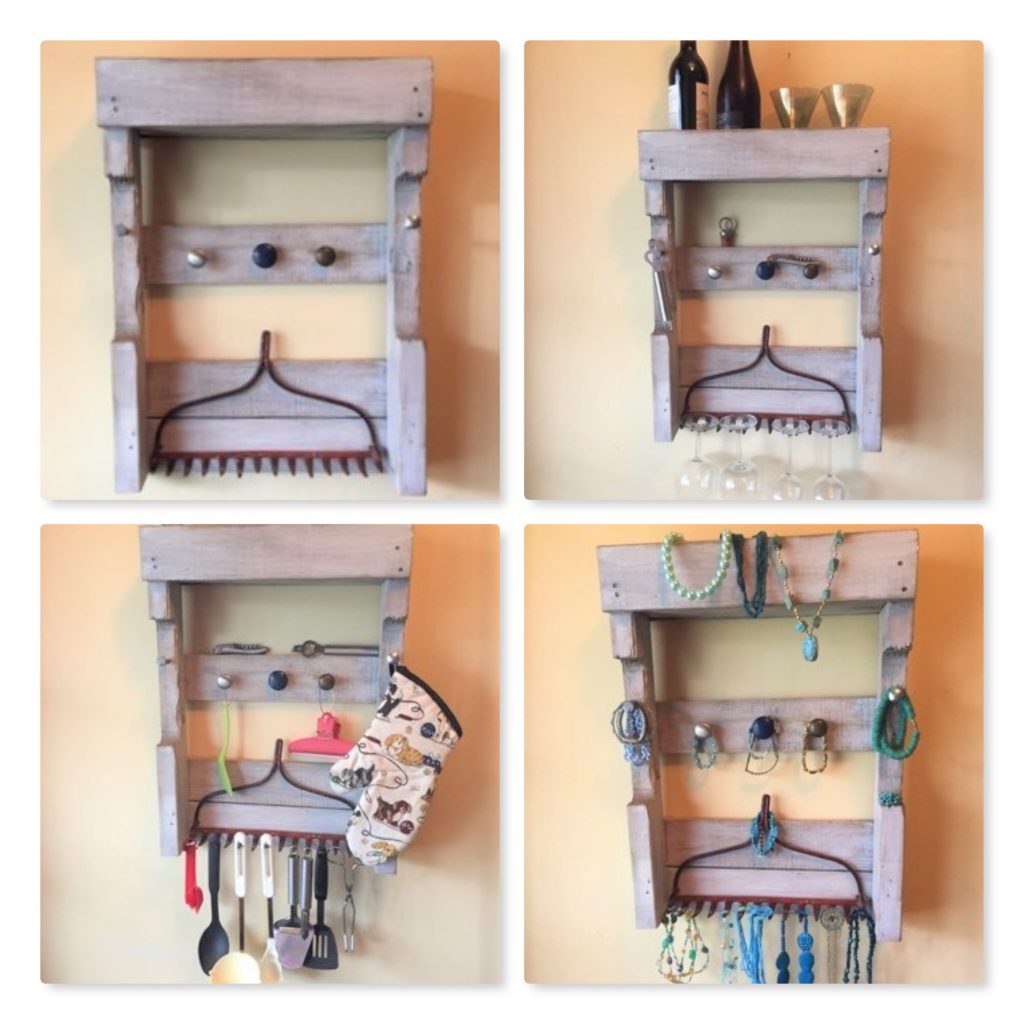
Step 6: So many ways to use it!
You might need to create two of three of these as you will find lots of uses for a cool and funky rack like this one!
- Wine Station: Add glasses, bottles, cork screws, corks and other items to make this a centerpiece of your next party.
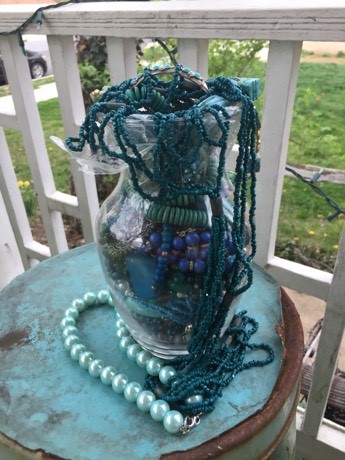
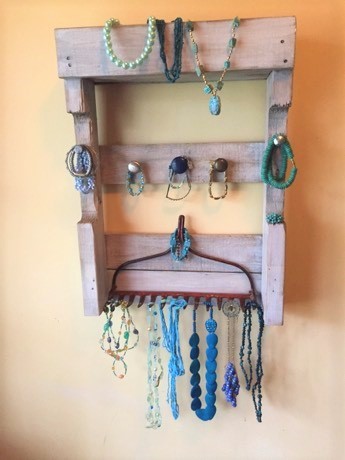
- Jewelry Holder: Don’t keep your bling hidden inside a box when they can be displayed like pieces of art! There is something very interesting when you pair the ruggedness of the rake, pallet and bolts with the delicate beauty of beads, pearls and other items.
- Kitchen Catch-All: Keep utensils, spices and other cooking items handy with this rack.
- Other Ideas: Use for art & crafts supplies, coffee mugs, gardening equipment…some many fun options!

After you make your own Rake Rack, share pictures so we may see how you use it. We’d love to see your spin on this project!


