Rewrite the story of a thrifted child’s book: transform it into a Christmas tree!
Write a new chapter in a Goodwill-found children’s book by transforming it into a charming holiday tree. This family-friendly DIY project is simple to create and so delightful to see. Children’s books are colorful and have happy images, which make for a cheery foundation as a holiday tree.


Add old buttons and thrifted jewelry as the icing on the cake! Actually, the star on top! And, you now have a decorative item sure to make folks of all ages smile for years to come!
Items Needed:
1. Children’s storybooks
2. Glue gun & glue sticks
3. Old buttons & costume jewelry
4. Decorative pillow
5. Other holiday-related accessories
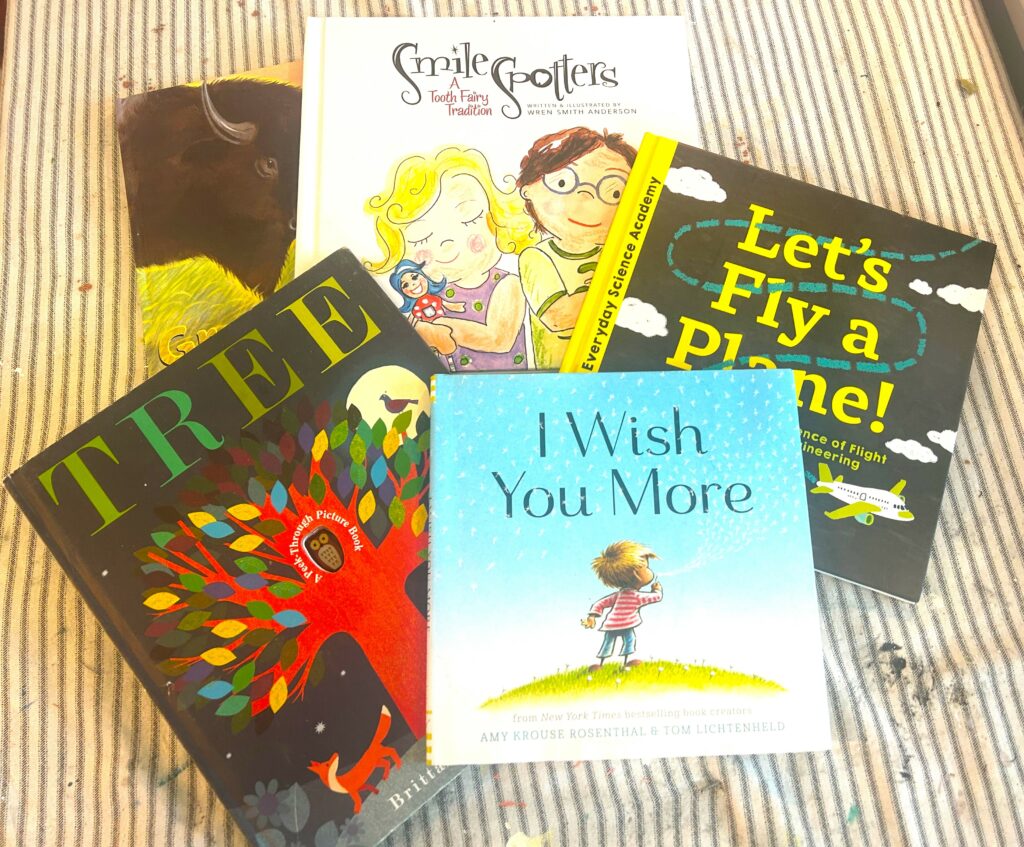
1. Find your good & pick up some children’s books at Goodwill today
With Thanksgiving behind us, those of us who celebrate or enjoy Christmas will start decorating our homes to reflect this special time of year. Goodwill is the perfect place to shop for gifts for those on your gift list because they always have unique, fun, and festive items for just a dollar or two. Goodwill is ideal for picking up holiday items, too, to make your own.
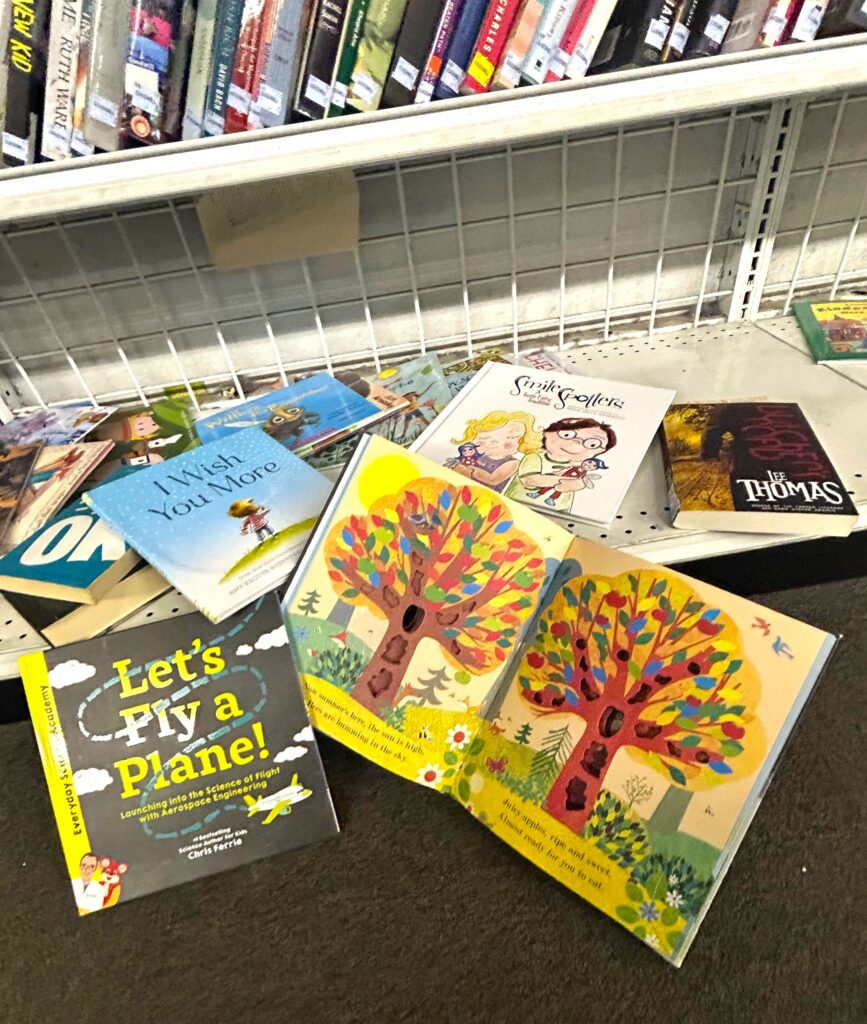
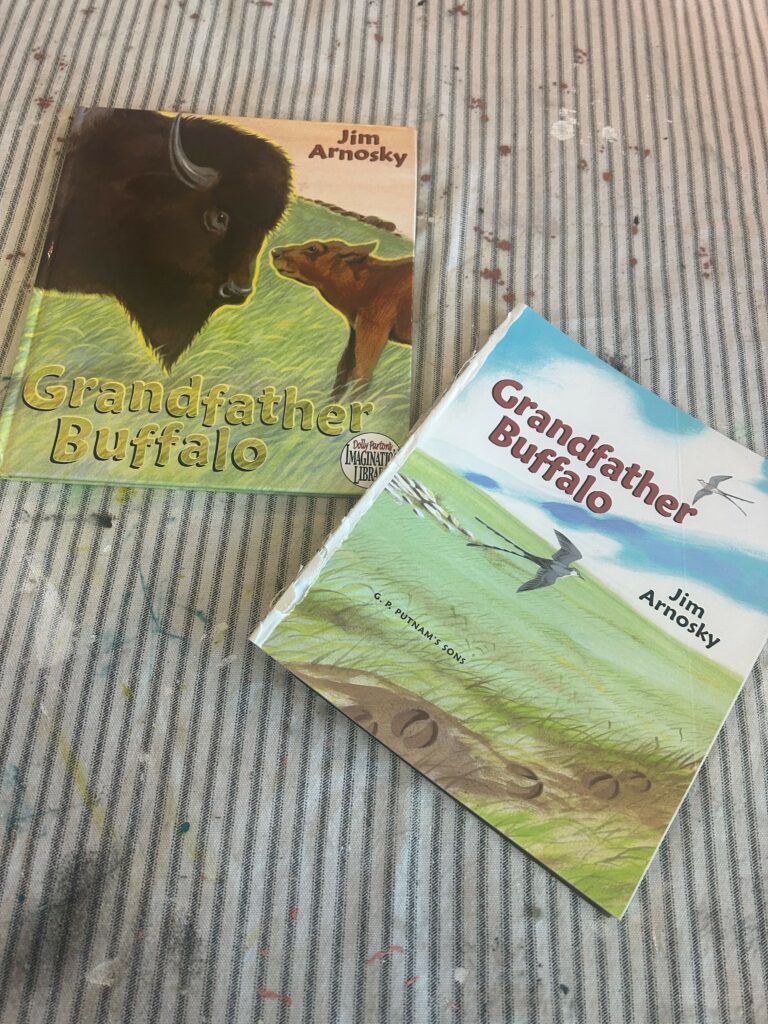
Visit the section of the store where books, CDs, and albums call home until they go home with you. Hunt for a handful or two of colorful children’s books to transform into totally delightful Christmas trees. The books featured in this blog cost $1.00 each; several had half-off sale tags, so they truly were pennies each—fifty, that is. What a deal! What a find!
Expert Tip #1:
Look for those books with hard covers and bound pages, as they will work best for this simple project.
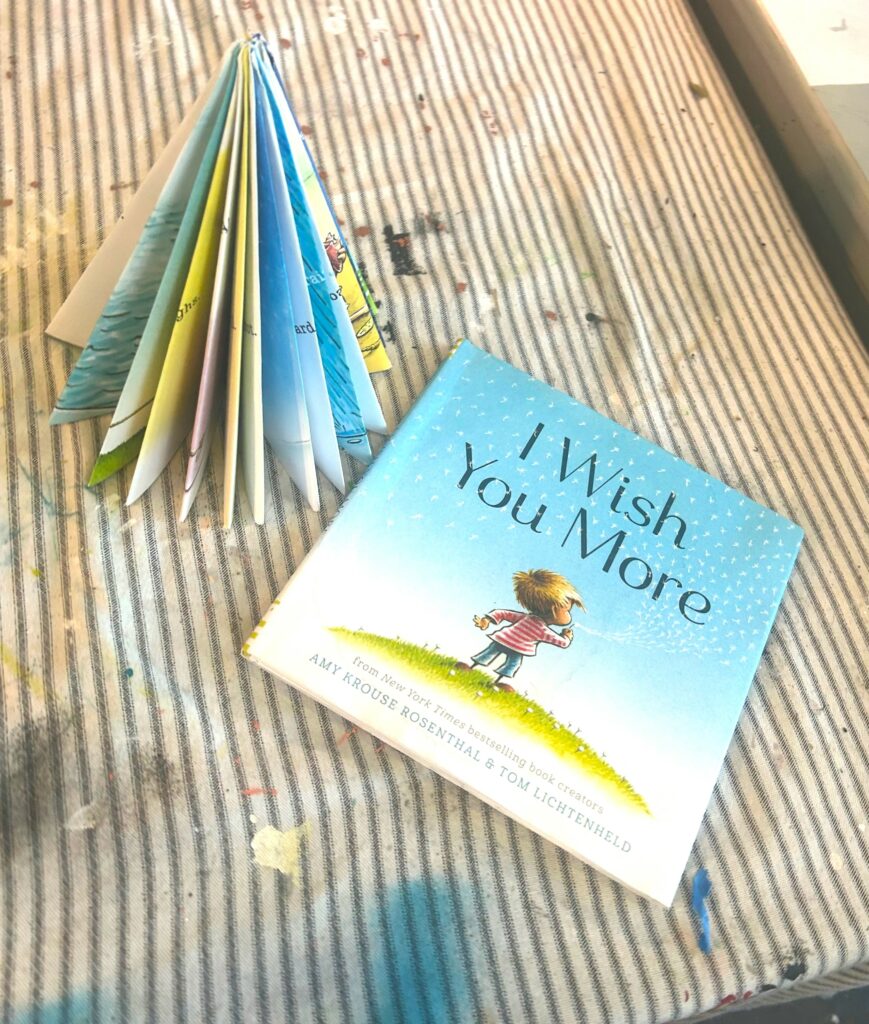
2. Remove the cover and let the folding begin
Carefully remove the internal pages from the book’s cover by holding them together and pulling them out, leaving the hard cover behind. Of course, add the leftover covers to your box of supplies for future DIY projects! To give the book its tree shape/branches, there are four folds to follow:
A. Fold the upper right-hand corner down so the page’s top edge now touches the book’s center. It will create a triangle shape.

B. Fold that page again so the triangle is folded again together.
C. Fold up the page part, which now sticks out at the bottom.
D. Turn over the double-folded page and flip over/fold along the same fold you just made, but fold it internally.
Repeat this step over and over until all pages have received this special four-fold process.
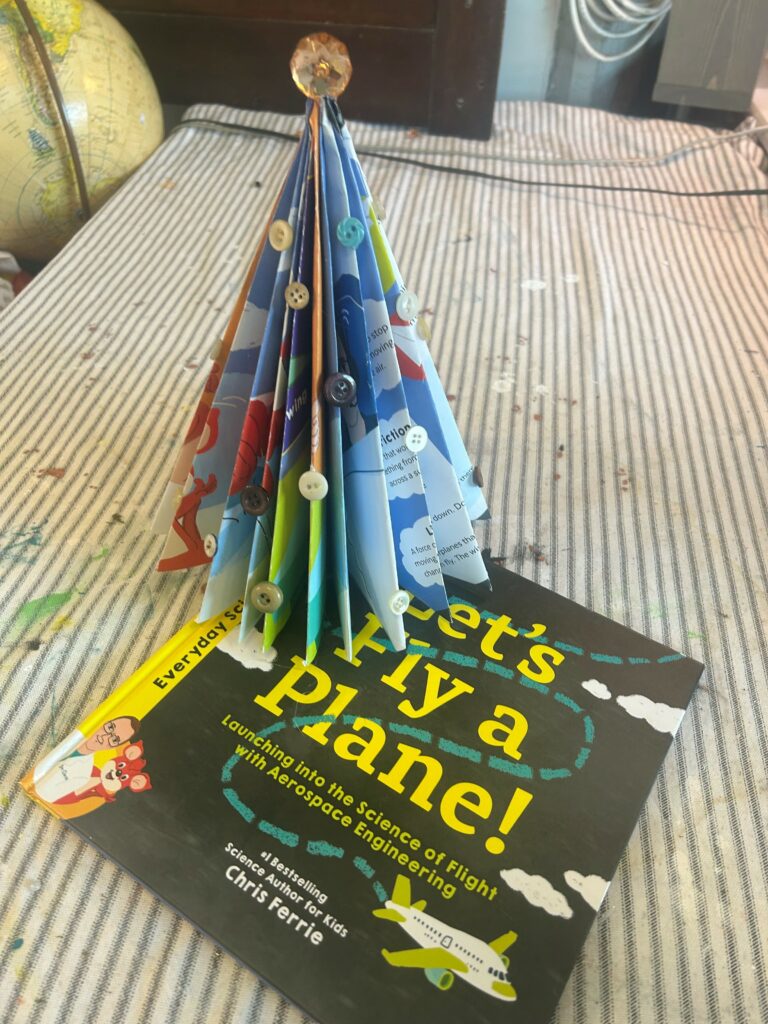
3. Turn your tree upright and fluff its branches
Place your book tree upright with the pointy part of the triangle shape upward. You may need to re-tuck some of the folded pages inside again for a clean look. Spread the pages evenly apart, too, so the circle they create/lower edge is balanced.
Expert Tip #2
At this step, it is recommended to use your glue gun to help hold the various folds in place. Position your book tree on its side and carefully open up each page and fold, add a dot of hot glue, and refold. As always, be careful with the hot glue, especially if younger “elves” are helping!
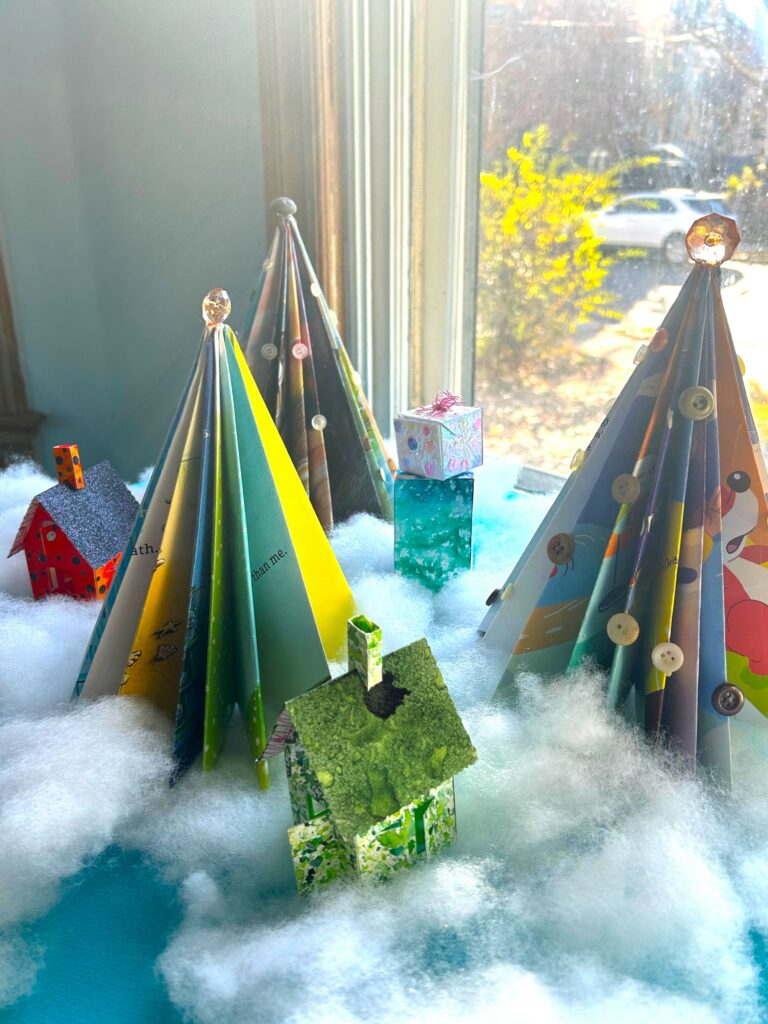
4. Decorate your tree with buttons, jewelry parts
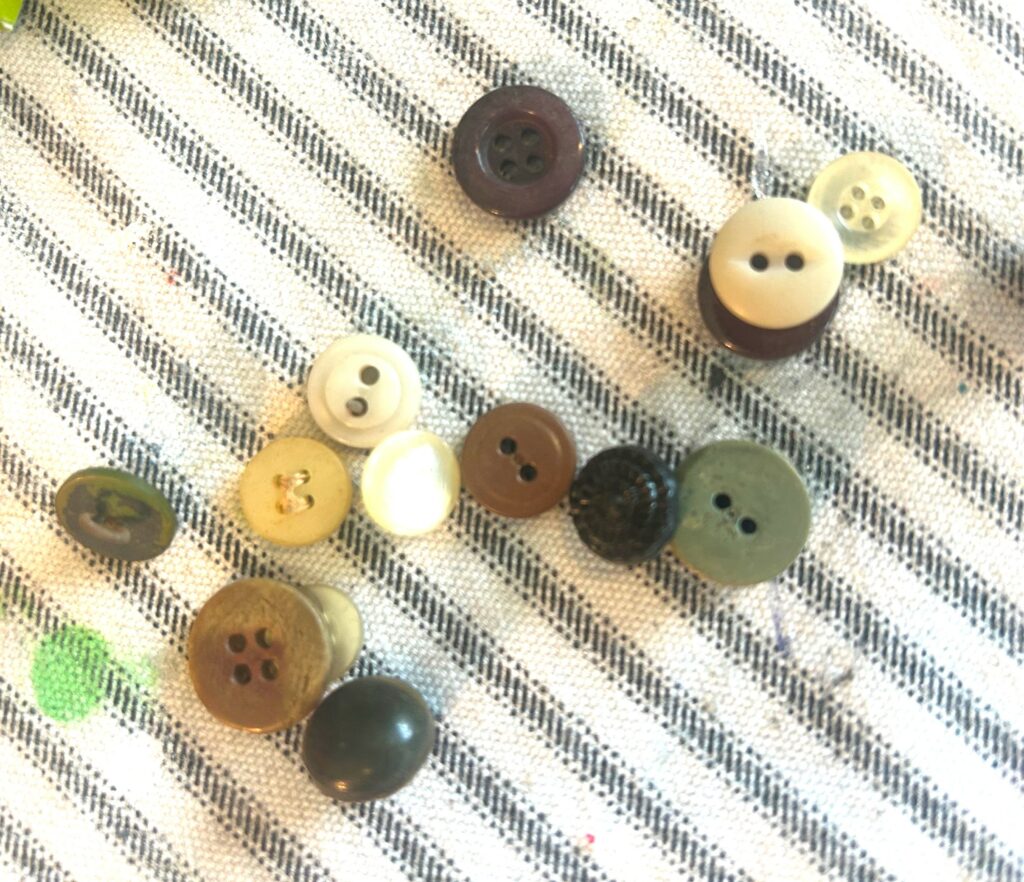
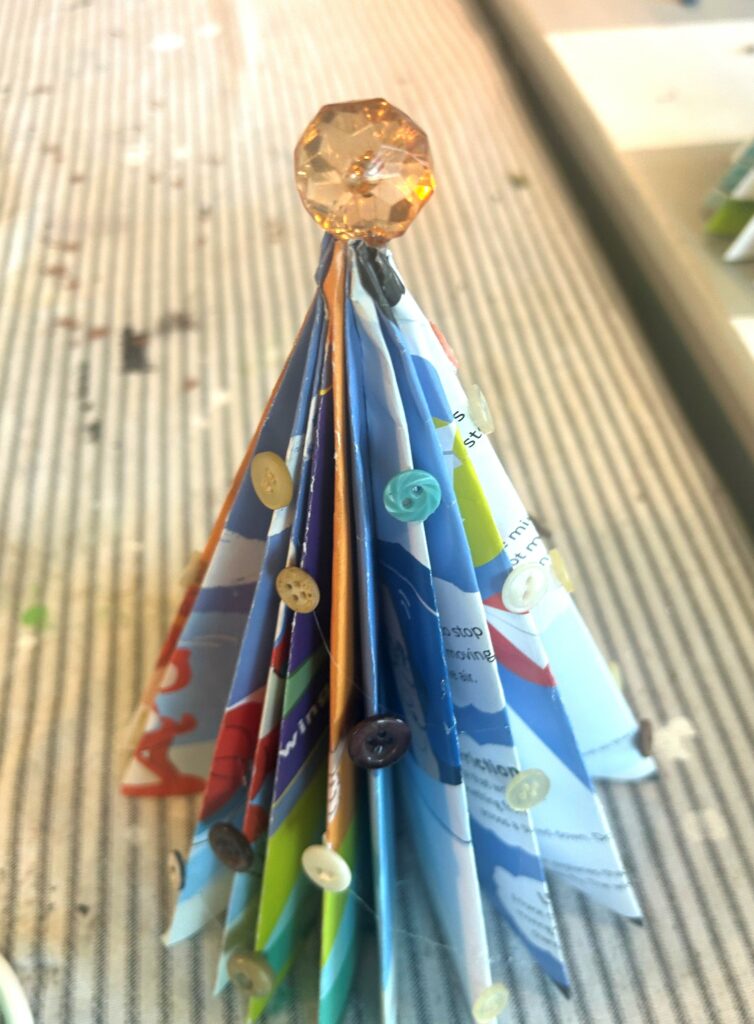
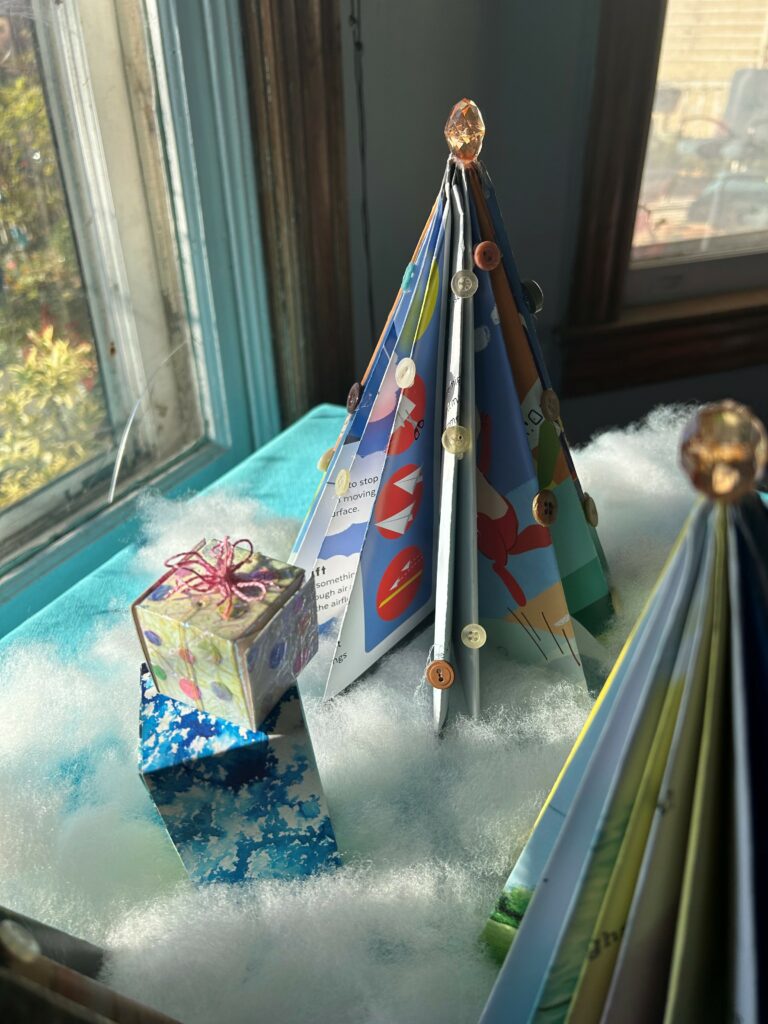
If you have them on hand, consider using old buttons as ornaments for your book tree. Carefully add a dab of hot glue to the back of the button and place it along the angled edge/outer tree branch. Fortunately, I have a tin of old buttons gifted to me by a friend, so there are a lot of great options. You could cut buttons from an old shirt or other clothing piece, too, as an option.
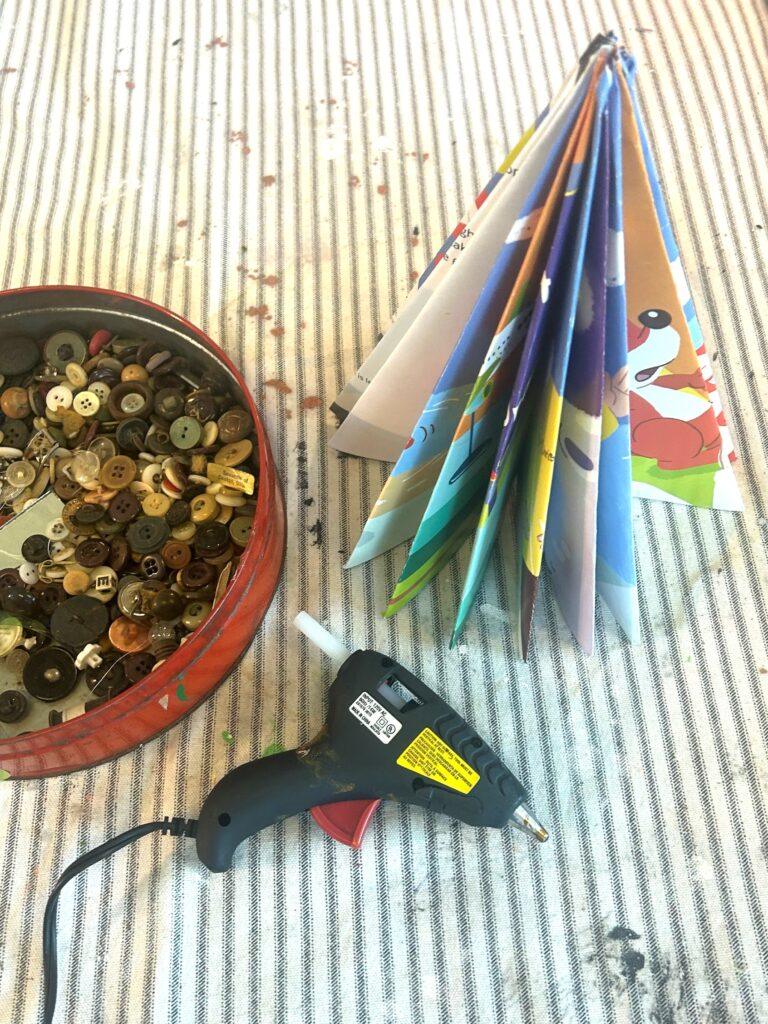
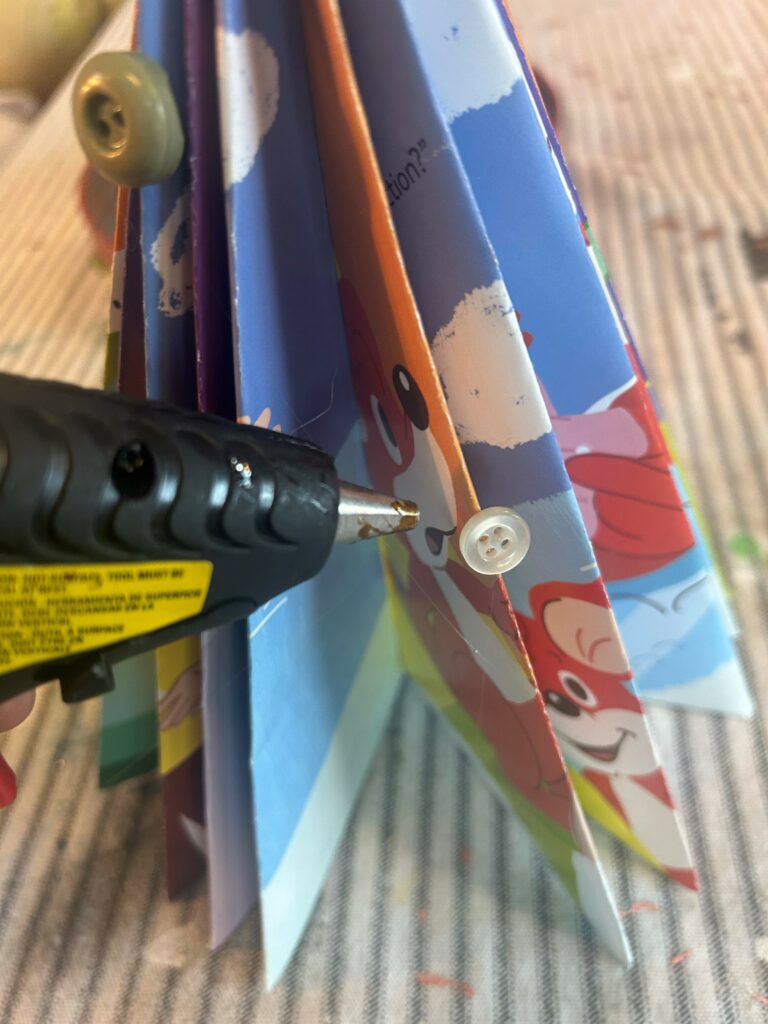
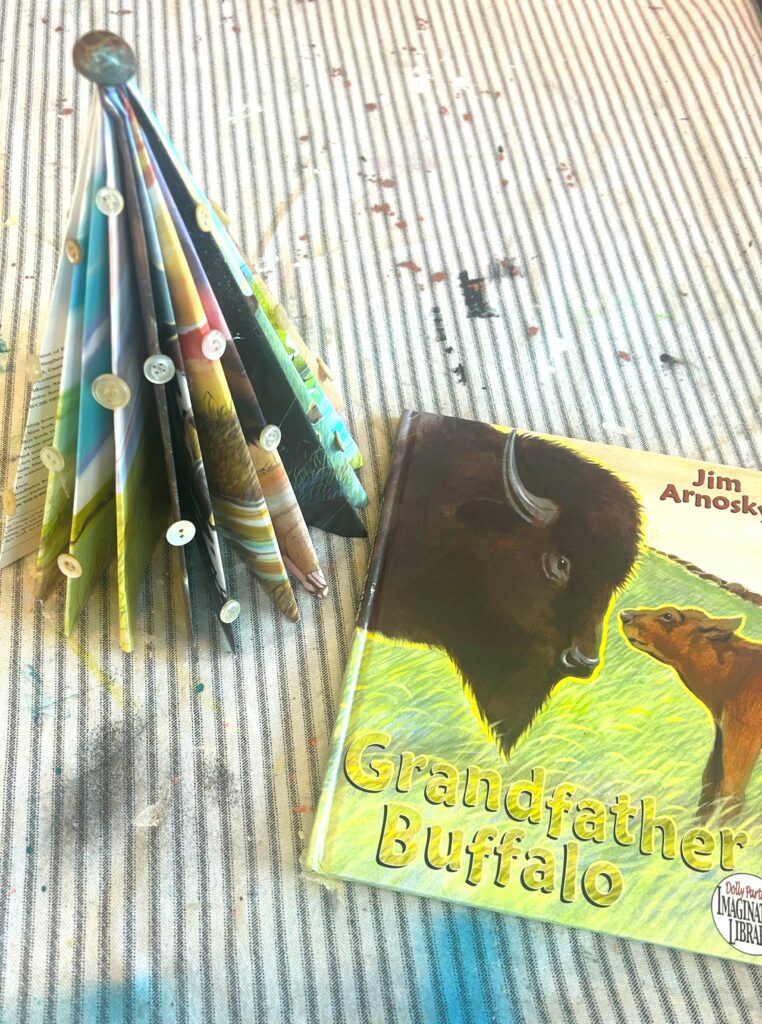
Each Christmas tree deserves to have a star on top, so glue on a shiny button or sparkling bead from a thrifted necklace. Add some hot glue to the tree’s top/point and add the button/bead on top. Instant holiday charm!


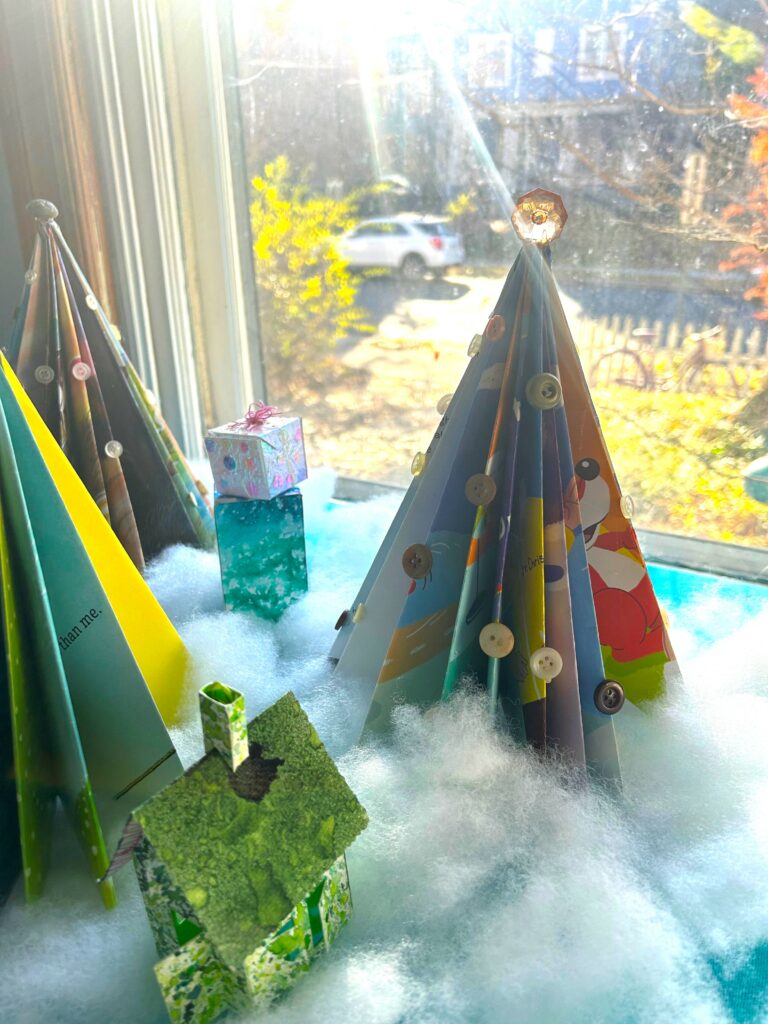
5. Create a snow vignette with “snow” from a Goodwill pillow, add accessories
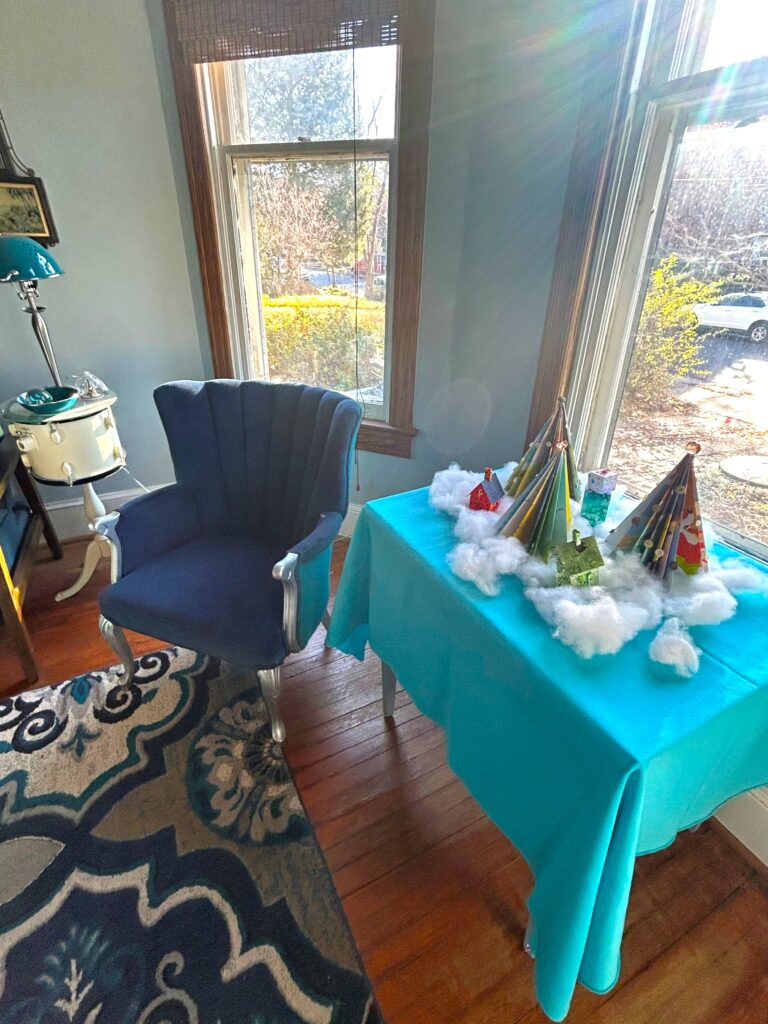
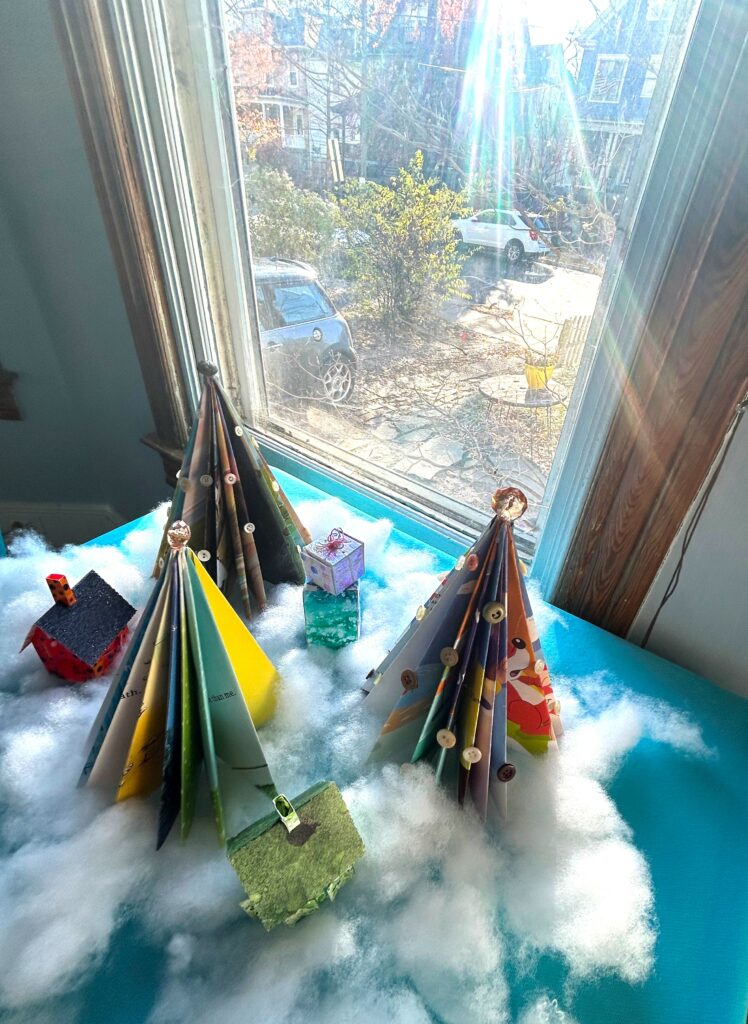
These charming book trees look great when positioned as a group or even solo, especially when placed on a snowy landscape.
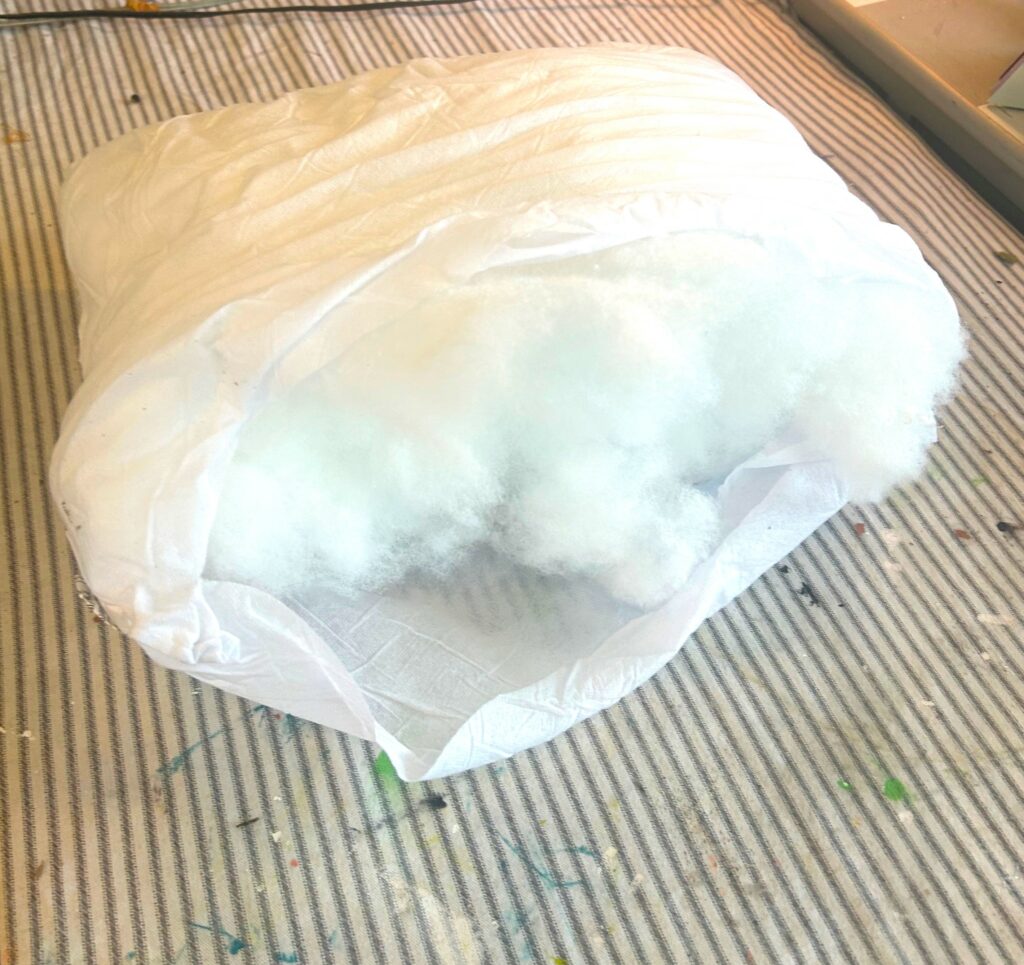
A decorative pillow also picked up at Goodwill, was cut apart, and the white stuffing was spread out like snow. After you make it snow on your tabletop/mantle/countertop, then put your book trees on top. Add small ornaments, statues/figurines, and other colorful items to make your vignette a true winter wonderland!

All the items used in this week’s DIY project were picked up at Goodwill and repurposed, so you are creating special decorations for just a few dollars and ones that also honor Mother Nature by keeping items out of landfills. All the ingredients for a totally happy holiday season!
Similar Reads:
- A Sweet Holiday DIY Project: Transform Cookie Cutters Into Unique Ornaments
- How to DRESS Up Your Front Door with Thrifted Fabric

Tim Kime
Artist, Motivational Speaker, Life Coach


