As 2021 Concludes, Take Time to Reflect on a Great Year: 4 Upcycled Mirror Ideas
As this year comes quickly to a close, many of us will take time to pause and reflect on 2021 and all that happened. Here’s a literal way to reflect back and ensure what you see is exciting and vibrant! Transform a second-hand mirror into a first-class masterpiece so you will see beauty every time you stand in front of it or walk by it.
When I consider 2021, one thing I am so proud of is that I turned to Goodwill to find great deals on amazing items. My sage DIY advice to you? Go to Goodwill first when you are looking for a mirror for your home, office, or as a gift. They always, always, always have a unique and interesting collection of them for such low prices that you will have to put your glasses on to sure you read them properly! Here are four of my favorite mirror transformations for your inspiration!
And as we think about all that unfolded this year, we extend a huge and heartfelt thanks to all our blog readers and followers for your support, ideas and inspiration, too. We love to show ways for you to turn the everyday into extraordinary. Our wishes to you and yours is a fantastic and abundant 2022, one full of finding your good, expressing your joy, and creating opportunities to upcycle, repurpose and transform!
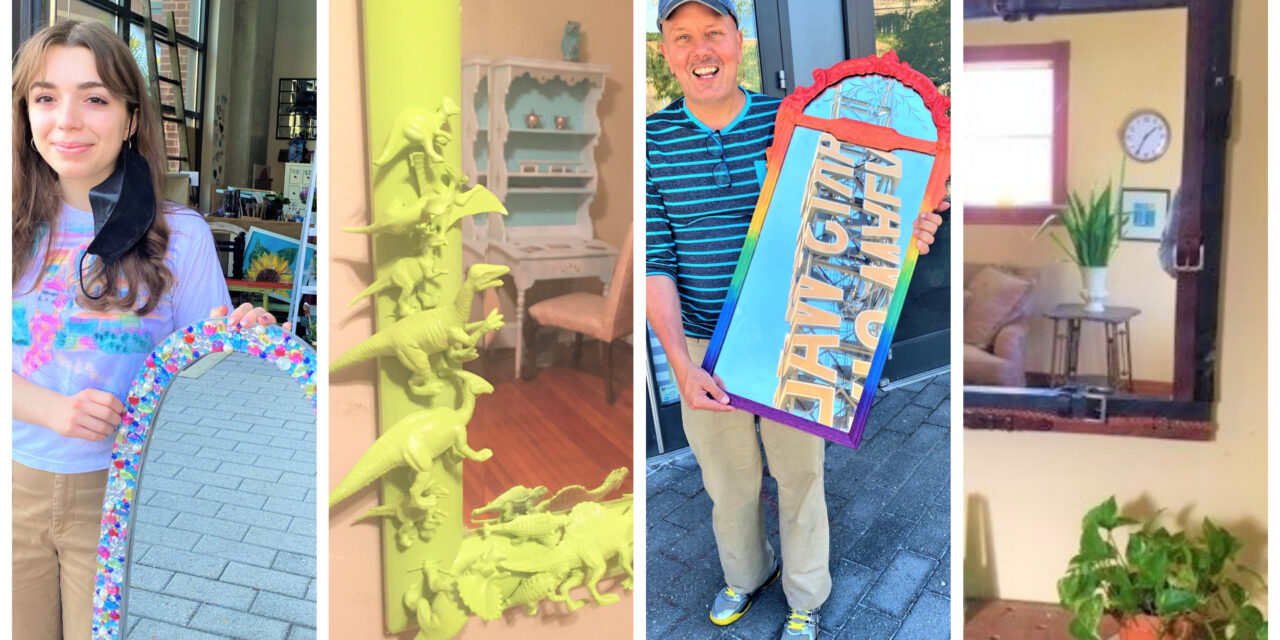
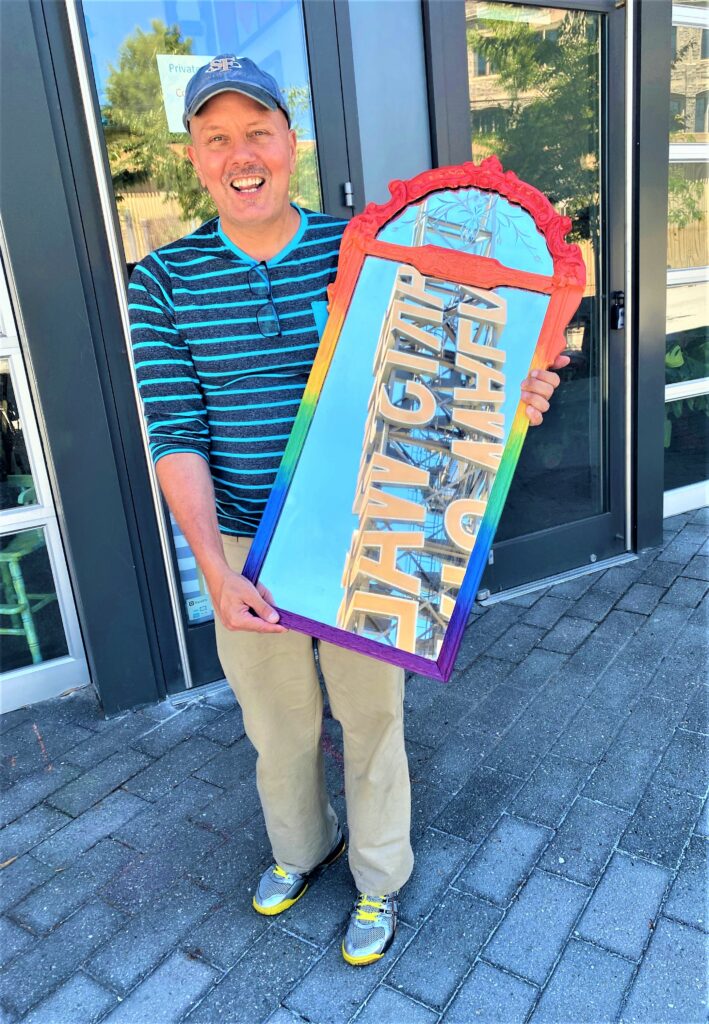
1. Show Your Pride
Here’s How:
This easy approach will give instant “pow” to any ho-hum mirror and make it stand up and out to say, “I am what I am!” All it takes is small amounts of paint in rainbow colors—red, orange, yellow, green, blue, and purple.
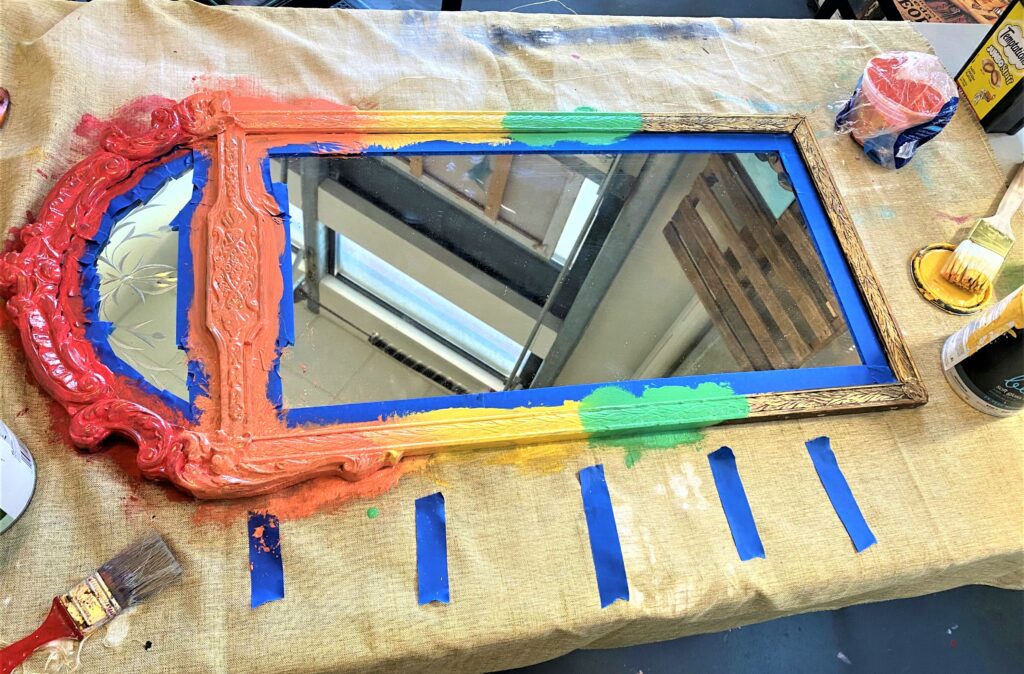
- To start, place your mirror on your work surface and add a strip of painter’s tape around the outer edge of the mirror along the frame to keep it clean.
- To ensure each color has equal balance, add a small piece of tape in the center of the mirror or along your work surface next to it, so you know where each color goes.
- With six colors, you want to ensure you have six sections marked off; this is just a guide as you want the colors to be organic and flow from one to the next.
- Simply start at the top and brush on red in the first section; move to the next session and add orange paint. Continue until all colors are represented. As you add a second layer, be sure to allow your wet paint between colors to overlap so it softly blends together.
- Let dry, remove the tape and you are ready to go!
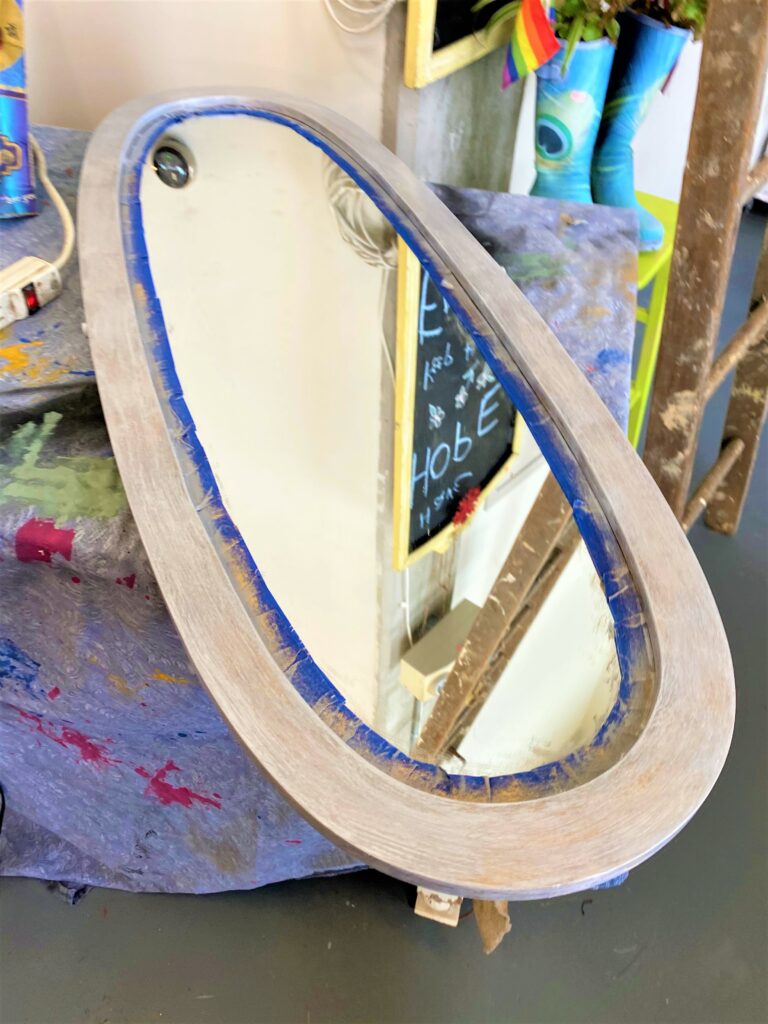
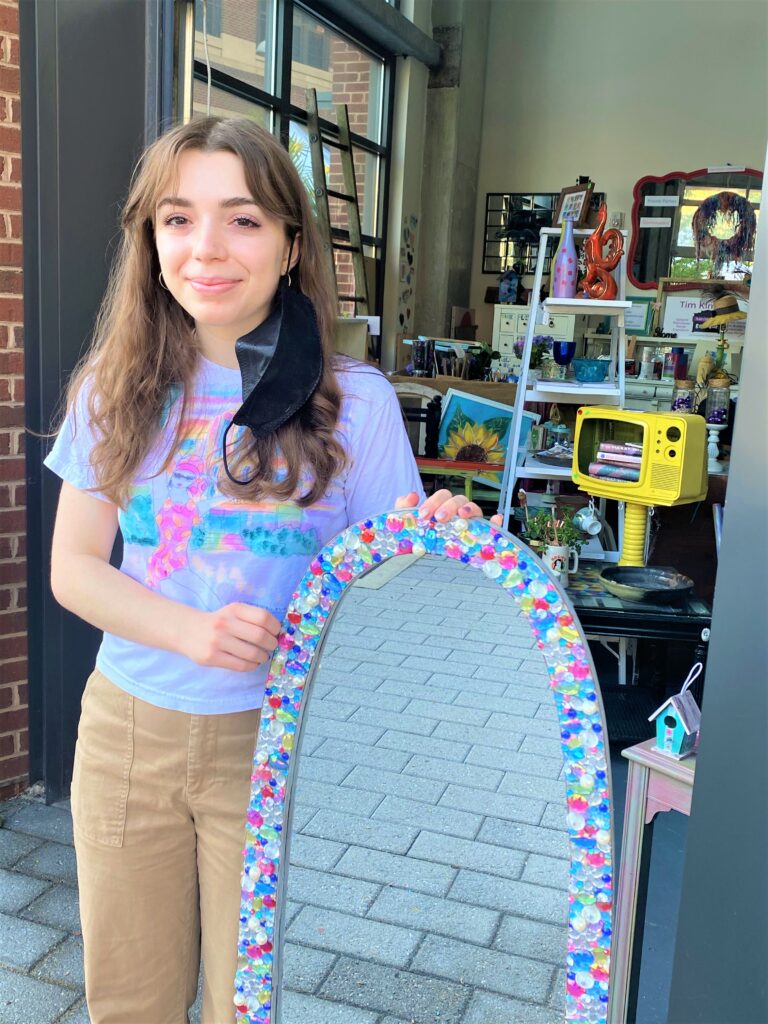
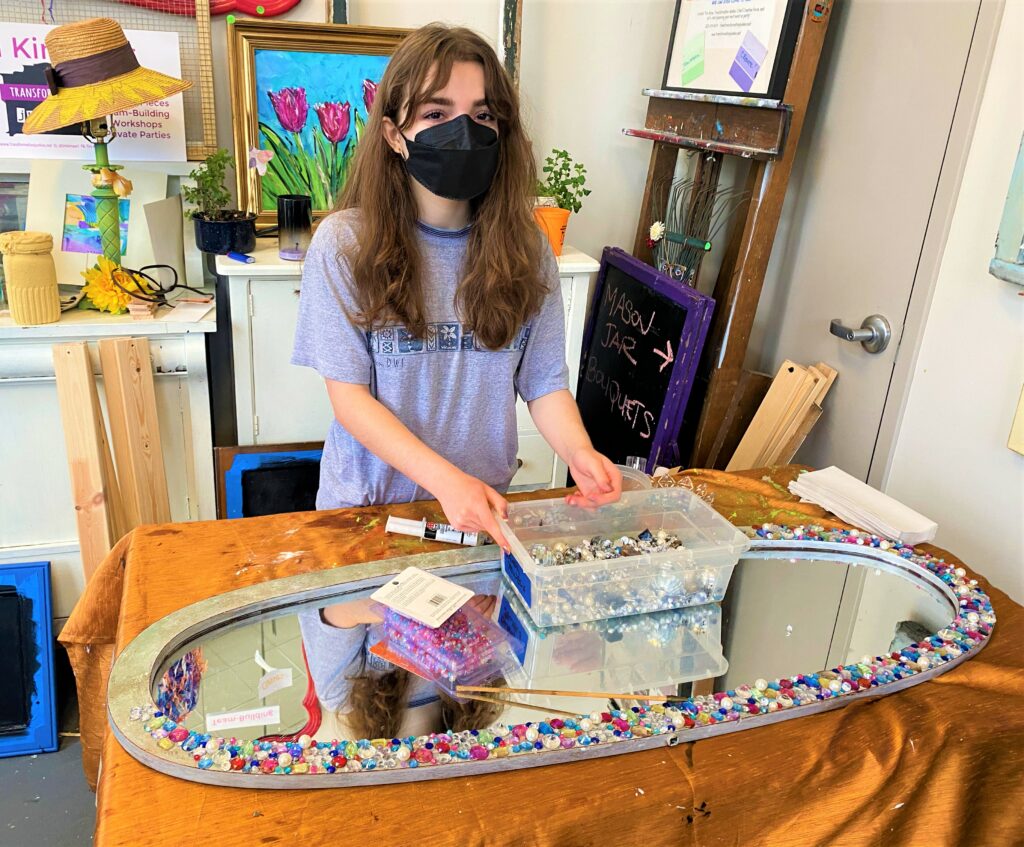
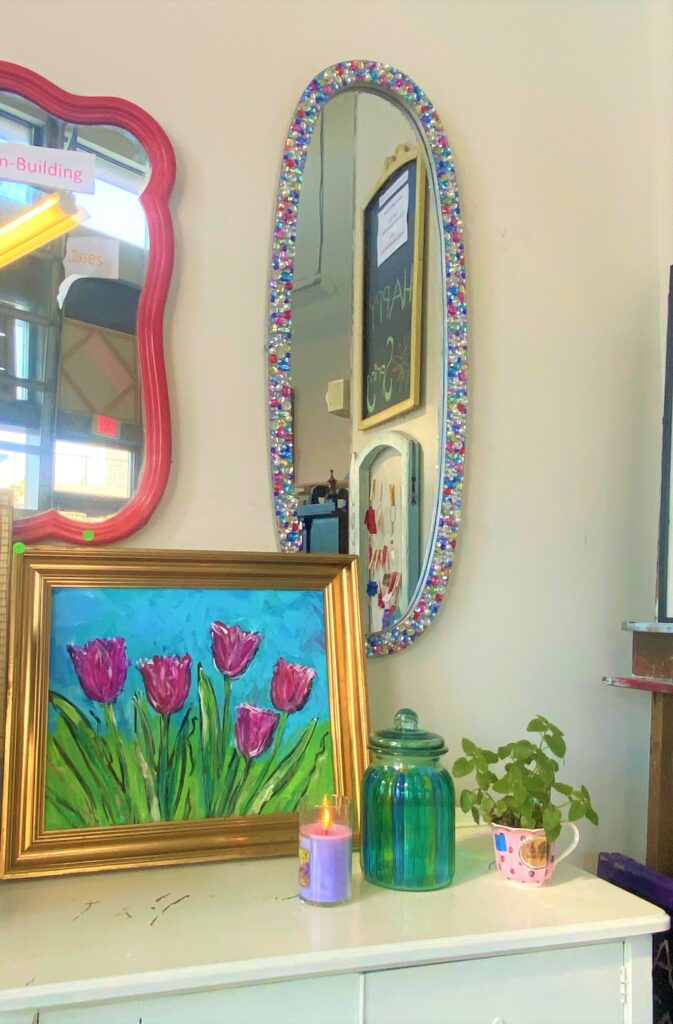
2. Bling it On!
Here’s How:
- Pick a mirror with a flat frame. Depending on the color of your mirror, you might want to add a neutral, light color as your foundation. Therefore, begin by adding painter’s tape along the edge of mirror glass that touches up against the frame.
- Brush on a couple of layers of white, cream, gray, yellow or light green paint (whatever leftover paint you have handy) and let it dry.
- Remove the painter’s tape.
- Now is the time to make it sparkle and shimmer. Use plastic bling—diamonds, gems, beads and other reflective materials picked up or ordered from an arts & crafts store.
- Based on the size of your mirror, you could also use parts of jewelry items picked up at Goodwill, too.
- Carefully attached each item using epoxy glue for a super strong, secure fit.
- This is the most tedious of the ideas highlighted here because it just takes time to add glue and secure your bling to your mirror frame. To make the time go quickly, you could do this project with a friend or while watching TV. The mirror featured here was transformed from ugly duckling into a sparkly swan thanks to my summer intern Allie Gibbs; see her blog on this piece here.
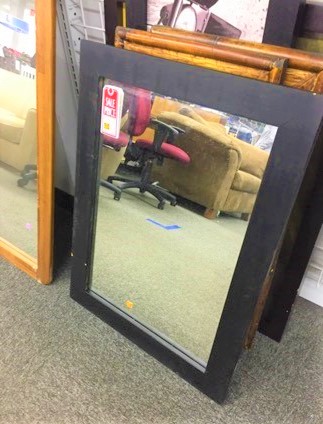
3. Belt Me Up
Here’s How:
This idea combines several items for sale at Goodwill: mirrors and leather belts. You will be looking for a mirror with a frame that is flat and is square or rectangular in shape. Explore belt options in both the Men’s and Women’s Sections so that you have a variety of widths and looks with which to work.
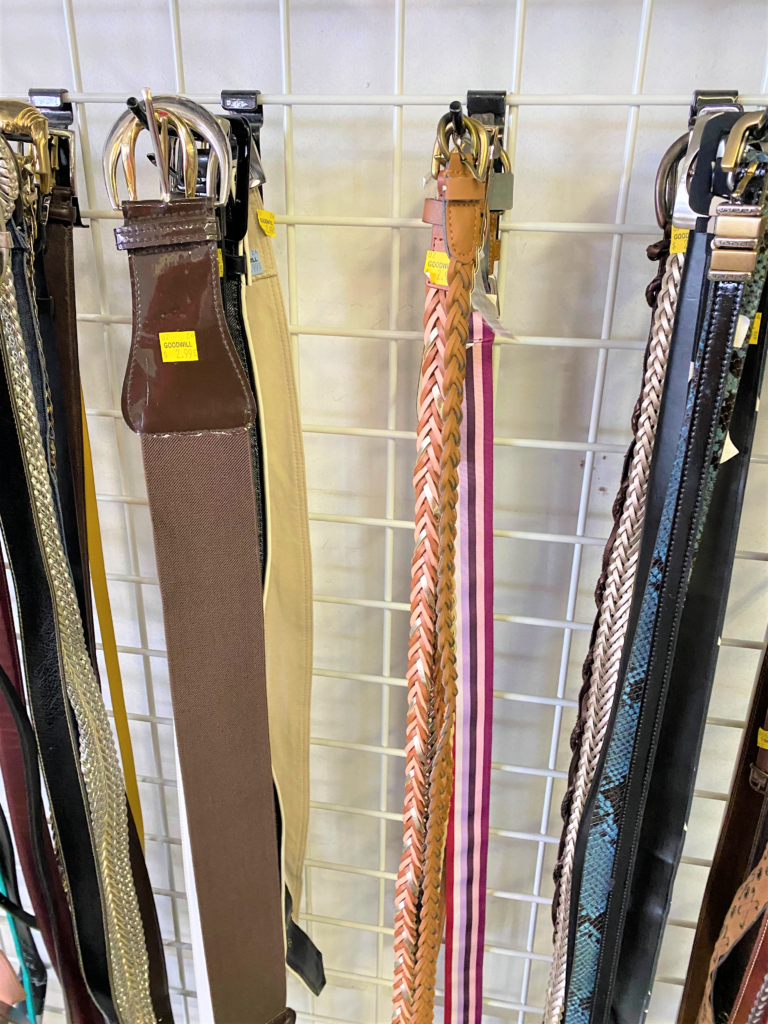
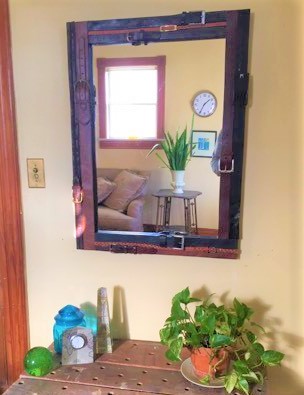
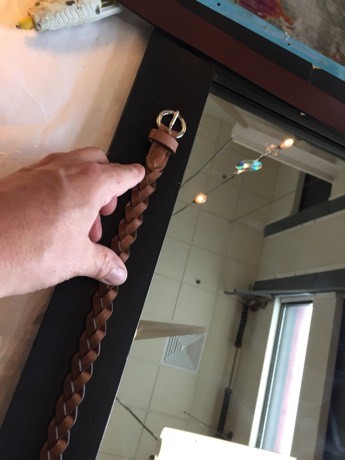
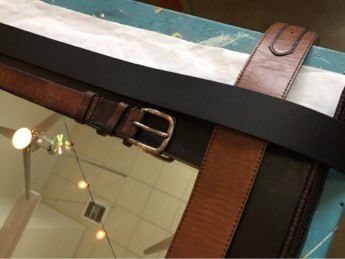
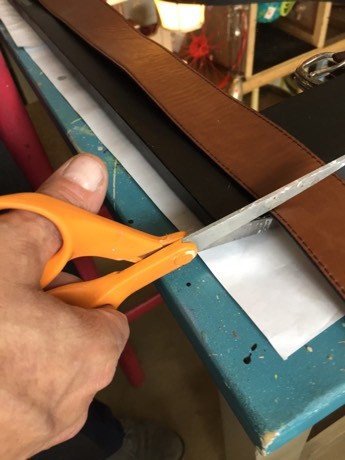
- Place your mirror on your work surface and position your belts to determine which one might go. Do this before cutting them, so you can see how they might look in different places on the frame. Also, consider ensuring each side of the frame gets a belt buckle part on it for visual interest. There will be various color shades of the leather so mix and match as you go.
- As you are able to see in the mirror featured here and modeled by fellow local artist Dwayne Martin (IG: demartkin7980 or demartinart.com), the final look also combined flat belts with braided ones. After you determine where each belt goes, cut it and secure it with epoxy glue to hold it in place well.
- When I created this one, it felt like I was putting together a puzzle and it was truly fun to pull it all together. No tightening need at all! And you, too, will get loopy (another belt pun!) with excitement at how sharp it looks!
4. Dino Delight
Here’s How:
Transform a blah mirror into one that will make you roar with glee! Add a herd of dinosaurs to a frame to make it the Jurassic Park of mirrors and one that will never be extinct!


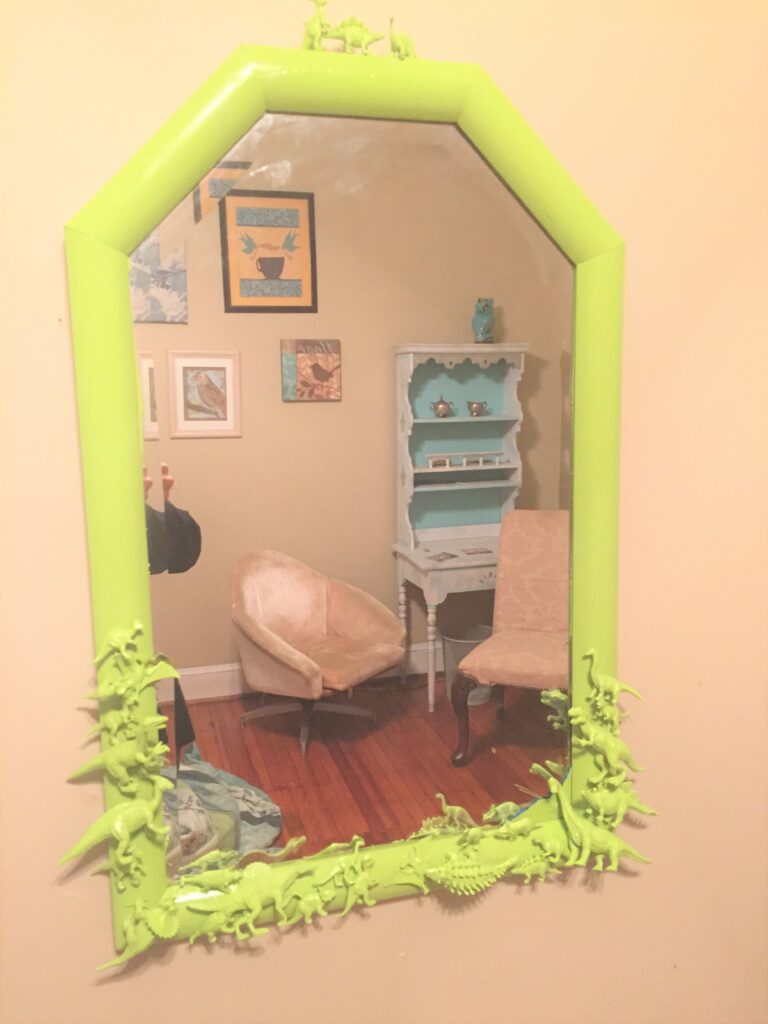
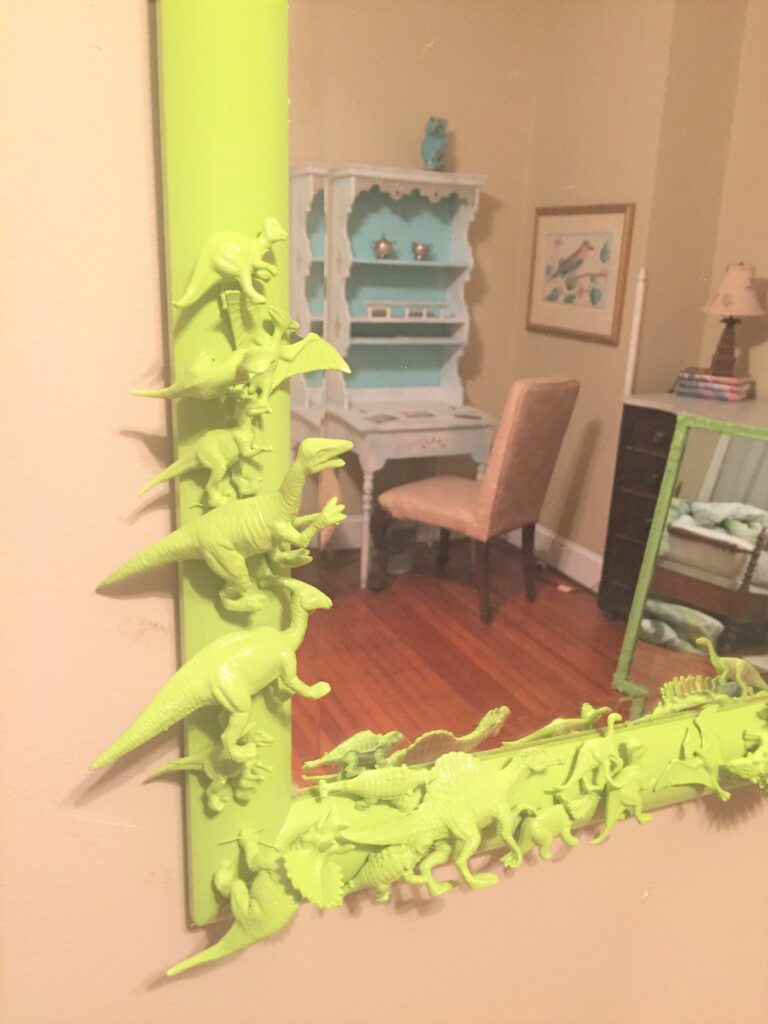
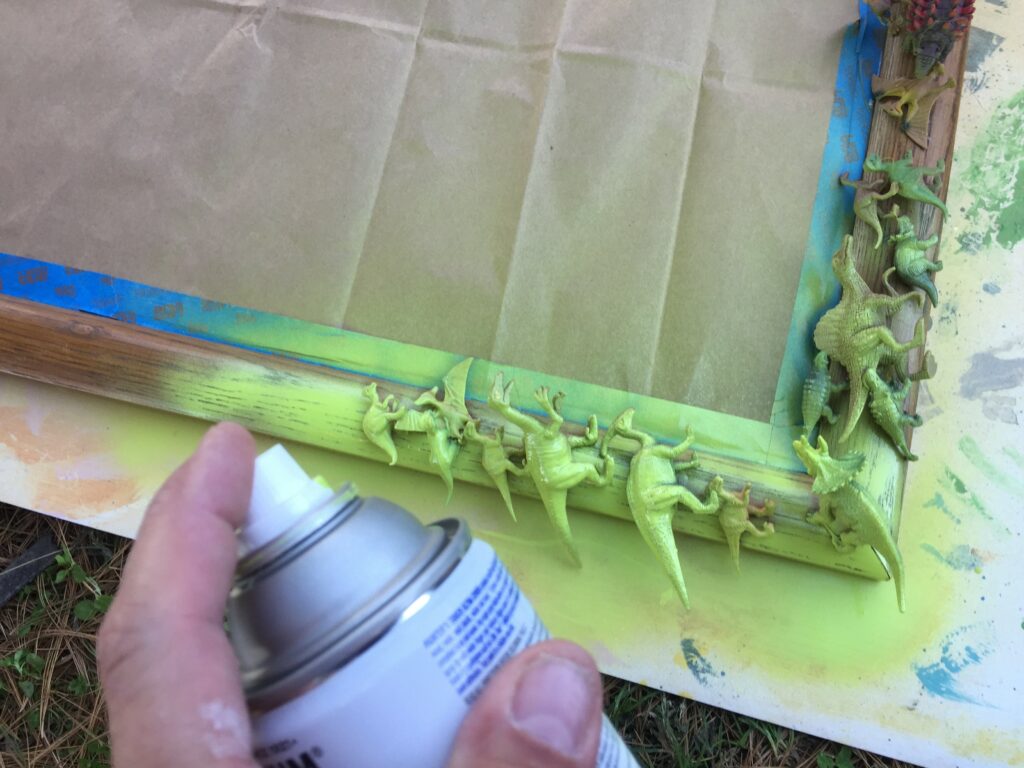
- Pick up a collection of plastic toy dinosaurs from the dollar store and glue them in place on your mirror frame with epoxy glue so they won’t run away.
- On your work space, determine which end is the top then adhere your mini Tyrannosaurus Rexes, Brachiosauruses, Velociraptors, and more so their heads face the top. You want them all to stand upright when you hang up your final transformed mirror.
- Once in place and solid and secure, add newspaper over the entire mirror glass and secure with your painter’s tape.
- In a well-ventilated area or outdoors, if possible, carefully place your dino-encrusted mirror on your drop cloth with the little guys and gals facing up of course.
- Spray on several light coats of your semi-gloss paint. I suggest a bright color choice to make it jump off the wall at you.
- To ensure each part of each dinosaur is covered, you will want to get at the mirror at a variety of angles. You will likely want to carefully prop up the mirror, too, to allow you to get every nook, cranny, leg, and arm covered well. Again, several light layers are best, so you avoid any drips or runs.
- When dry, hang it up and you will quiver in delight at how cool this mirror is—truly a perfect gift for kids of any age!
What ideas do you have to give a thrift store mirror a royal makeover? Please share your ideas and results to inspire everyone’s DIY efforts. And in the process, make it your New Year’s resolution to help save the planet by shopping at Goodwill to keep things out of landfills and to give items a new purpose. Happy Holidays to you and yours!

Tim Kime
Artist, Motivational Speaker, Life Coach
