It’s a Blockbuster! Give Cast-Aside Chairs a Sequel with a “Hollywood Glam” Look
You’ll join the fan club when you transform wooden chairs with paint and paper into your décor’s starring role!
Fred and Ginger would be proud with this easy DIY project that celebrates Hollywood’s golden era.
Age level: Teens and adults
Ability level: So simple it’s a smash hit
Items needed:
1. Pair of wooden chairs
2. Spray paint, glossy black and gold
3. Old Hollywood posters, images
4. Mod podge
5. Paint brush
6. Spray polyurethane
Time requirement: Two hours per chair, not including paint and Mod Podge drying time
Cost: $35
- $10 for wooden chair pair
- $4 for glossy black spray paint
- $4 for gold spray paint
- $6 for spray poly
- $5 for Mod Podge (with oodles left over)
- $5 for paper with images
1. Discover your star at Goodwill
The stars of this upcycle project are wooden side chairs. Thankfully, Goodwill will ensure you come under budget when creating this transformation because they always have great options and remarkable prices.
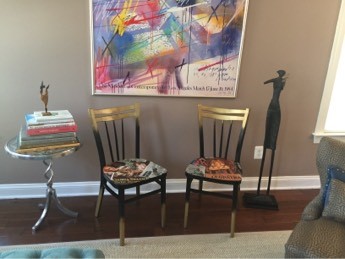
Look for a pair with simple lines so the colors and papers take the leading role. The pair used for this project had an art décor feel with their sleek lines and slightly curving sides.
2. Get ready for your close-up, Mr. DeMille: prep for paint
With sandpaper or a sanding block, buff up your entire chair to make its current finish more paint friendly.
The sanding will allow the paint to adhere more securely to the piece.
Don’t worry about removing an entire layer, just give it a once over with the sandpaper.
Brush off any dust then wipe down with a damp rag.
You are now ready for the first act–paint!
3. Spray on the opening scene: Glossy black
- Place your pair of chairs outside or in a well-ventilated area and on top of a drop cloth. To protect your hands from getting painted, too, put on plastic, disposal gloves if you have them.
- Shake your can of glossy black spray paint well, then add a light layer on each one of your chairs.
- As with any painted project, spray on a light coat and don’t worry about perfect coverage. You will come back several times with light layers to avoid drips or smears.
- Let dry for several hours between coats and don’t touch it until then to avoid fingerprints which stand out due to the glossy paint finish.
- Place the chairs on their sides and backs then add another layer of paint so you are sure to get all edges and sides. This step will give you solid coverage.
4. Time for the second act: “Spritz” on gold glamour
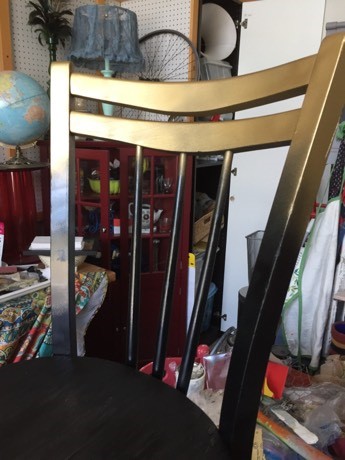
- With your can of gold spray paint, add a light layer to the top of the chairs’ backs, only covering a slim portion along the top.
- With care and with a light touch, spray the gold tone partially down from the top along the back toward the seat.
- You want to create a look so the gold fades into the black and is not a solid line where it begins and ends.
- Following the same process, do the same along the bottom of the chair legs so the bottoms are solid gold which fades as you go up the legs. Be sure to get all sides of the legs and at the same height so they almost look dipped in gold. Remember, a light touch will go a long way here! When you get it to the look you like, let it dry overnight.
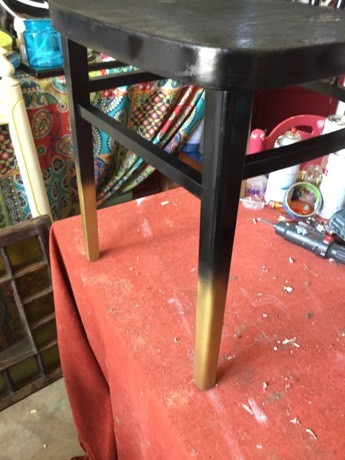
Expert Tip: If you go a little too far up the legs or down the back, you can always return to the glossy black paint and spray over some of the gold. Let it dry then repeat the gold step so it goes from solid gold to a “dusting” of it. Part of the appeal of this look is the fading of the gold over the black. Remember, you really can’t go wrong so have fun!
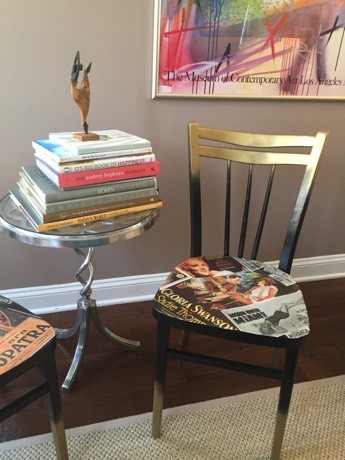
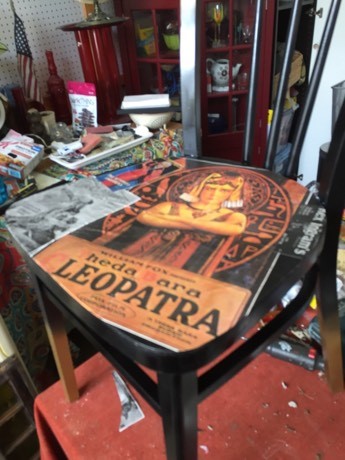
5. Decoupage on the drama
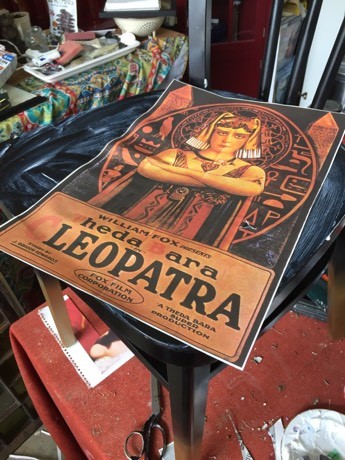
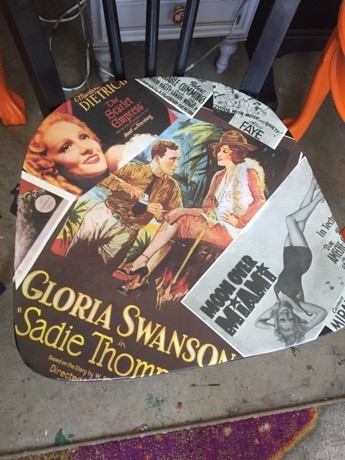
To tie the look all together, you will be adding your paper images to the chair’s seat. (The process of gluing paper to things is called “decoupage” and can easily give a new look to an old item.)
If you want to model the look of these chairs, you can find images online, print them out and cut them a part.
I scored by getting my images from an old book of movie posters that inspired this transformation.
- Once you have your paper images, brush on a light layer of Mod Podge on one of the chair’s seats.
- Place the paper, smooth it out with your fingers and add another light layer of Mod Podge on top.
- Trim the extra paper.
- Place another image on top and repeat the same steps. Let this dry overnight, too.
- While the first chair seat is drying, turn to the other one and repeat the same steps. It was so exciting to see the seats finished and how this step added such visual interest to this DIY project.
- After your chairs dry overnight, you may need to add some additional Mod Podge to the seats’ edges to ensure a solid seal.
6. Protect your production with poly
To make these chairs paparazzi-ready, it is time to spray on the poly to protect your hard work.
- Focusing primarily on the chair’s seats and your decoupage masterpiece, spray on several light layers of semi-gloss or gloss poly.
- You can spray on a layer or two over the whole piece, but you will want to make sure the seats are well-covered and well-protected.
- Let dry overnight before touching or moving.
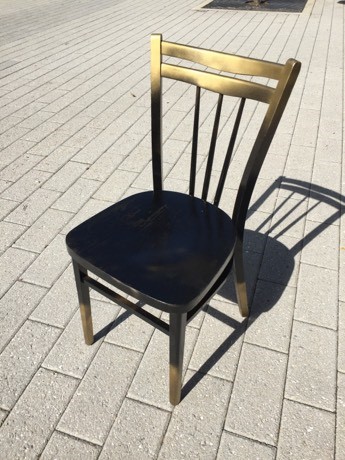
7. Give this pair a starring role in your décor
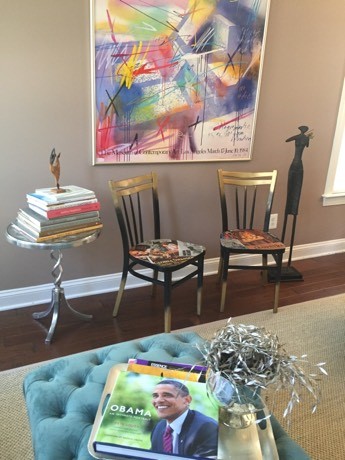
Given how eye-catching these chairs are, you will want to find a starring role in your home (or office) for them.
Get ready to have lots of pictures taken of them and get ready for the sequel—as you are sure to get requests for another pair for your family and friends to have all their own!
