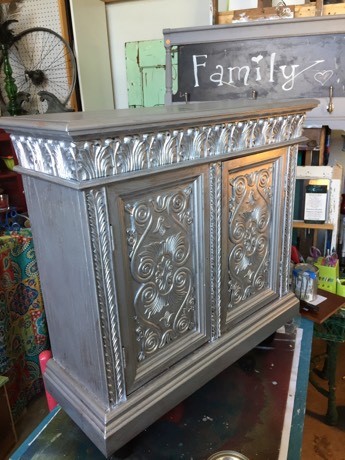
You’ll laugh yourself all the way to the bank after upcycling a boring brown piece into a shimmering silver bar or foyer cabinet.
You’ll feel like a million bucks when you follow this layered paint technique to make your piece stand out with an elegant, timeless style!
Level:Older teens and adults
Items needed:
1. Wooden cabinet
2. Silver paint
3. Black paint
4. Blue paint (or another accent color)
5. Short wooden legs
6. Two by four scrap wood
7. Electric drill
8. Wood glue
9. Paint brushes
10. Rags
11. Screw driver
Time requirement: 5 hours (not including paint drying time)
Cost: $30
- $10 for cabinet
- $20 for silver paint (with lots left over for other projects)
- $10 for black paint (more for your next upcycled piece!)
- $10 for short legs with screws
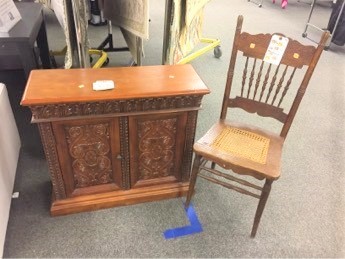
Step 1: Shopping at Goodwill is like finding a silver mine!
You’ll feel like you won the lottery when you find your good—and a slim cabinet—at Goodwill for this beautiful DIY project.
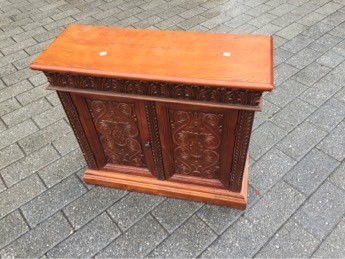
Check out the furniture section at your local Goodwill for an item for this transformation.
A solid wood cabinet works well, especially if it has interesting lines or details to highlight. A short bookcase or small dresser could be repurposed, too, for this project.
Step 2: Raise it up
There is something special that happens when you add a little bit of height to a piece and raise it off the floor.
For this project, use short legs with screws in them to add more “umph” to your cabinet or shelf. The legs that were enlisted for this upcycled piece were unscrewed from an old couch being tossed out. You might find such legs at a larger hardware store or on-line but expect to pay a pretty penny or two.
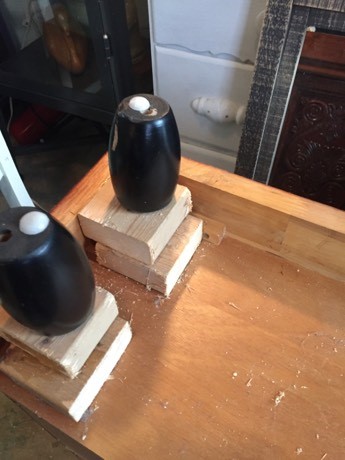
Flip your piece over to see what its underside looks like. My piece didn’t have a solid bottom but an edge of trim so it required me to glue several pieces of two by fours in place in which to hold the legs.
Wood glue was used to secure it before the legs were added so I needed to let it dry overnight. Drill a hole where you want each to go then screw them in place.
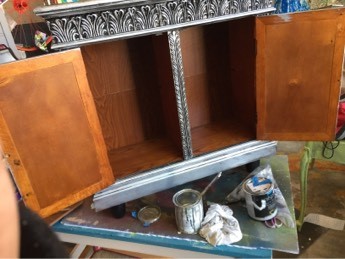
Step 3: Prepare to paint
With a fine-grained sandpaper or sanding block, gently buff the entire piece to make its surface more friendly for painting; this will help the paint to adhere better. Wipe it down with a damp rag to remove any dust or debris.
Step 4: Add paint layer 1–Silver
Brush on a layer of silver paint over the outside of your entire piece.
Take time to ensure good, solid coverage and give it plenty of time to dry. You might want to place your piece on its back or side to allow you to see all edges and ensure they are covered.
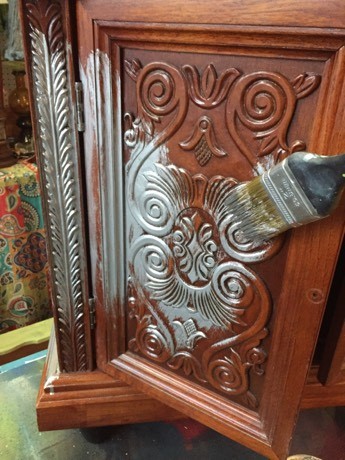
While I didn’t initially do it, you might want to remove the cabinet doors or any drawers. I did so later to make solid paint coverage easier. You may need to add another layer of paint. Let it dry.
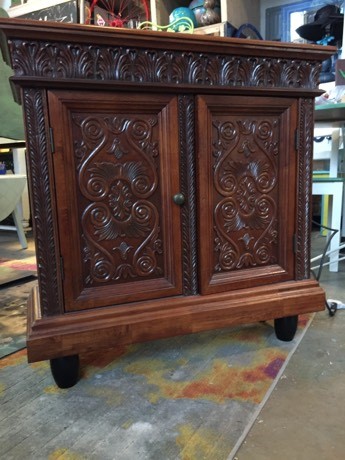
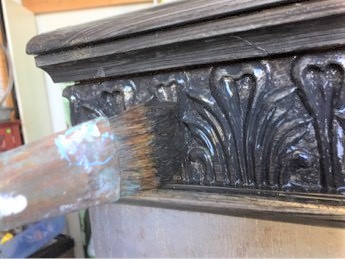
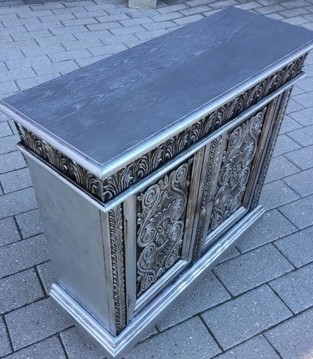
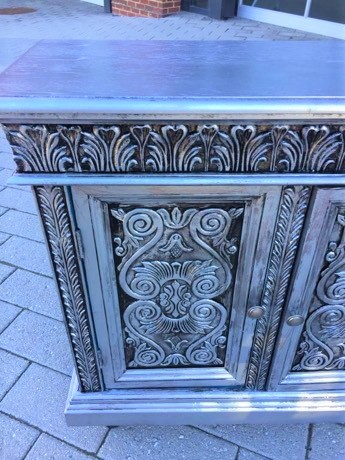
Step 5: Add paint layer 2—Black and get ready to wipe it off!
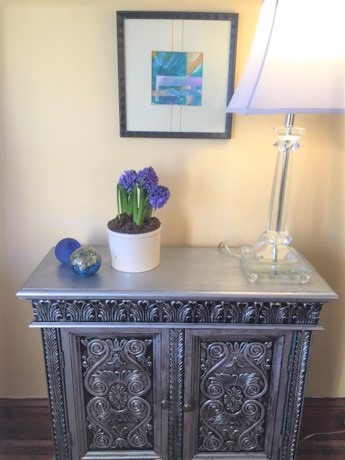
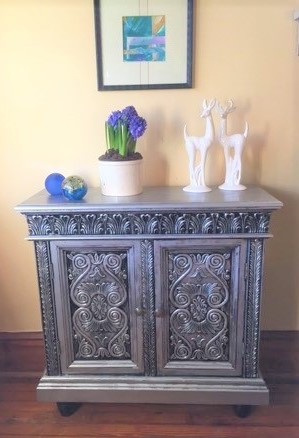
With a smaller bush, paint on a layer of black paint over part of your piece. With a dry rag, immediately remove the black paint leaving it only in the nooks and crannies. My piece was perfect for this painting technique because of all the carved details. Ideally, the black will remain in and around the areas you want to highlight. After you to do this process over your entire piece, you may need to take a lightly damp rag to remove more of the black paint to ensure the silver paint shines through it. This will give your piece dimension and visual interest.
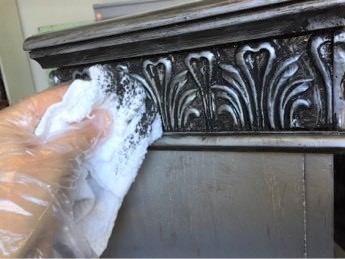
Expert tip: Once you have removed the black paint leaving it behind in the carved areas, you may want to return to the silver paint and lightly touch up the parts you want to stand out. The side and top of my cabinet had more black paint left over on it than I wanted so I gently brushed on more silver to bump up that tone.
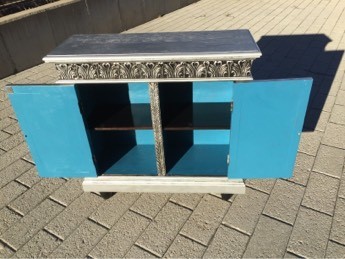
Step 6: Add a surprise inside with a pop of color
While your silver and black coats of paint are drying, you will want to paint the cabinet’s inside.
Rather than continuing the silver or black tones, a bright blue was selected. This might require two coats and is well worth the additional time. So often, the makers of furniture pieces focus all their time and attention to the outsides so that the inside of a drawer or cabinet might be unfinished or flat in color.

I guarantee that you will love seeing a bright hue when you open your piece to stash and store items.
Step 7: Match the knobs
You’ll want to ensure your knobs match too.
You could paint the current knobs or buy inexpensive ones that blend in. For fun, you might want to consider purchasing knobs that are an interesting shape or cut glass to add some bling! Screw the knobs back into place.
Step 8: Place your piece and applause please!
Given the look, style and functionality of your transformed piece, you could use it as bar so add wine glasses, an ice bucket and bottles of your favorite beverages. In your entry way, this piece will become the place to drop off mail and your keys while holding hats and gloves inside.
You will certainly feel prosperous and smart knowing that you only spent a few dollars for this piece that, with its silver and black tones, looks like a million bucks!


