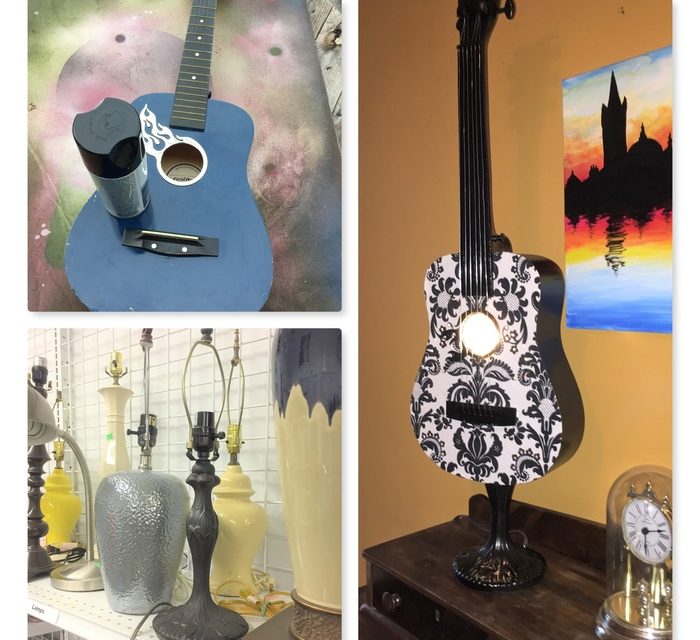
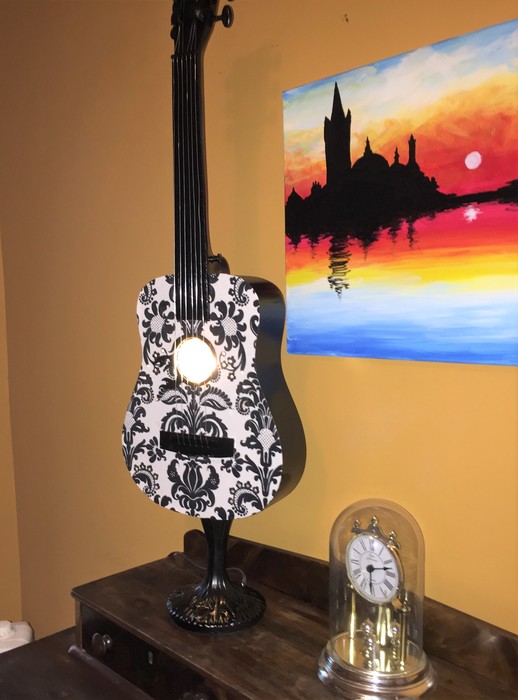
Make a new kind of music by combining an old guitar and blah light base into a Grammy Award-worthy and song-starter (or at least a conversation starter!) lamp. This memorable transformation will gain rave reviews by musicians and musical lovers of all kinds!
Age Level: Older teens and adults
Items needed:
- Guitar
- Lamp base with harp
- LED, Edison-style light bulb
- Glossy black spray paint
- Drill
- Jigsaw
- Painter’s tape
- Sandpaper
- Wire
- Pliers
- Scissors (optional)
- Fun art paper (optional)
- Modge podge (optional)
- Small paint brush (optional)
- Sharpie (optional)
Time requirement: 3 hours (not including paint and decoupage drying time)
Cost: Approximately $35
- $15 for guitar
- $4 for light base
- $5 for LED Edison light bulb
- $4 for spray paint
- $3 for wire (lots left over)
- $4 for art paper
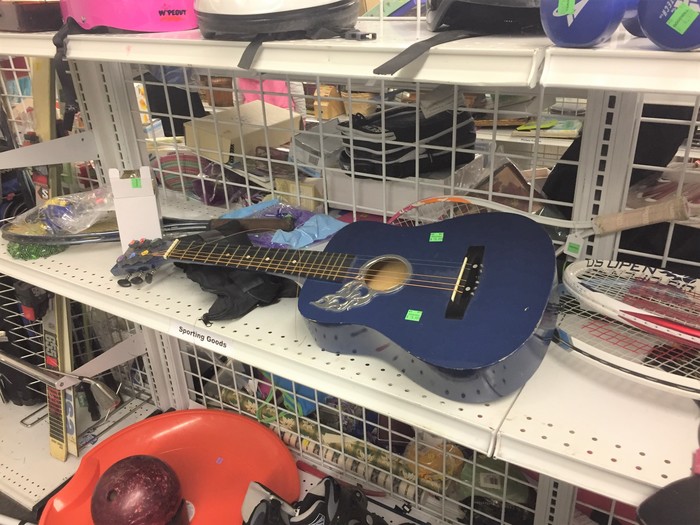
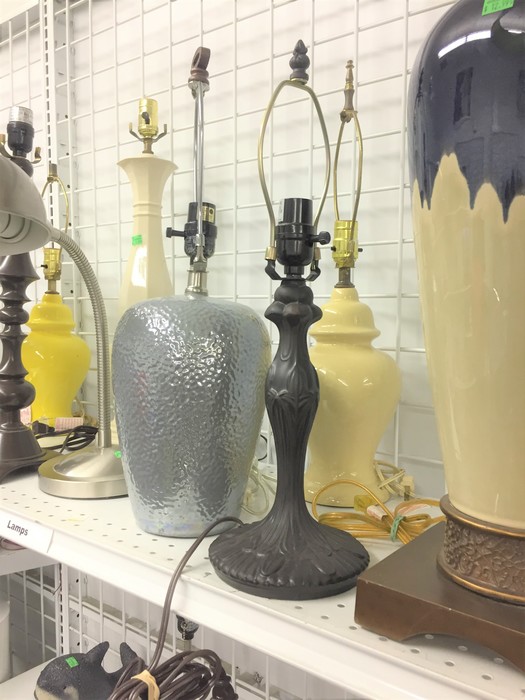
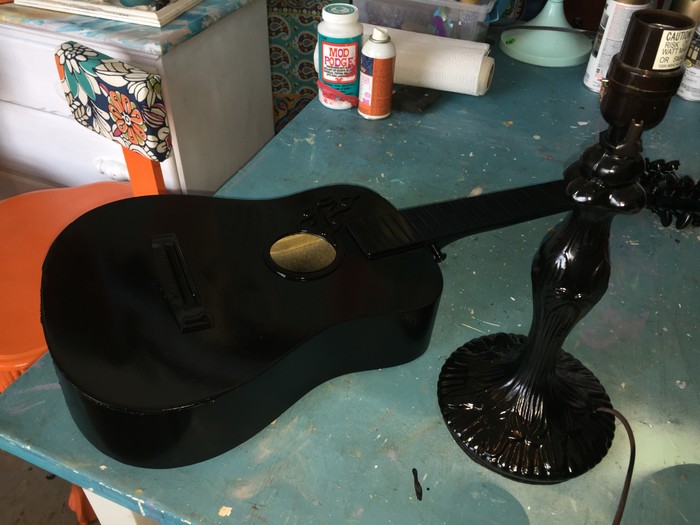
Step 1: Find your good (and a guitar!) at Goodwill
While every Goodwill always has certain items in the store every time you go hunting there—like clothes, dishes, and household items. Sometimes you can strike a chord by finding musical instruments waiting to play a new tune. This smaller-sized, wooden guitar was perfect to be transformed into a note-worthy accent lamp. You will also likely find a lamp base to pair with it for a wonderful duo. Select a lamp base with a harp on it, the part that holds the lamp on it.
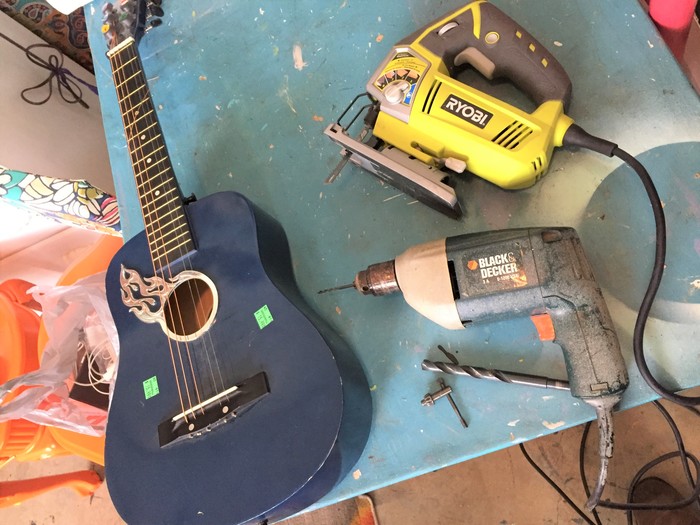
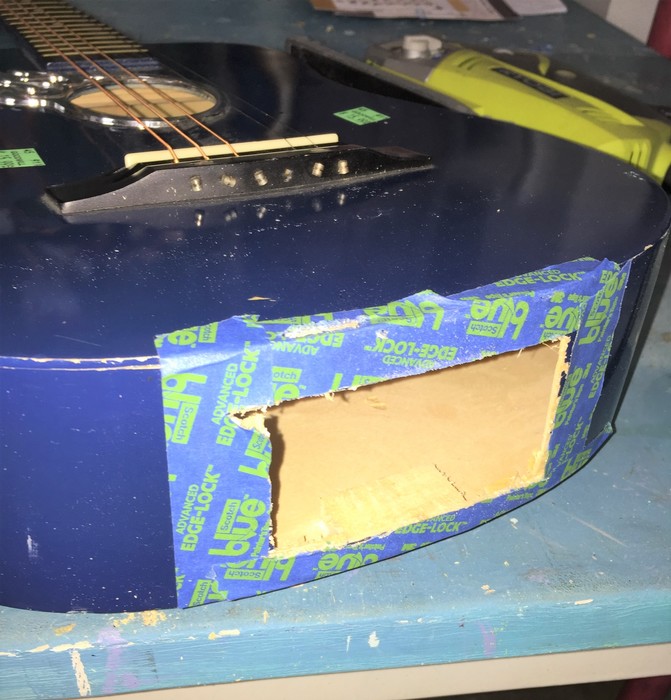
Step 2: Cut out an access slot
Given that a guitar is relatively lightweight, approach this project with the perspective that this musical instrument is a unique lampshade. With that said, this first step is to cut out a small section of the guitar’s bottom side in which the lamp will be inserted. Use painter’s tape to outline the portion to be removed; this will serve as a drilling and sawing guide. Add a large bit to the drip and drill a hole on the side corners of the section outlined by the painter’s tape. Starting in one of the holes, place your jigsaw blade then start cutting from one corner to the next. Do so on all four sides. Cut very gently and slowly. The piece to be removed should either fall out or can be easily taken out. Use sandpaper to smooth the edges.
Step 3: Drill a hole to hold the lamp finial
Turn the guitar over and drill a hole on the back side of the handle; the place where it connects to the body/base of the instrument. Be sure your hole goes all the way through into the inside of the guitar. The finial, on the top of the lamp’s harp, will be inserted here. Lightly sand the edges of the hole.
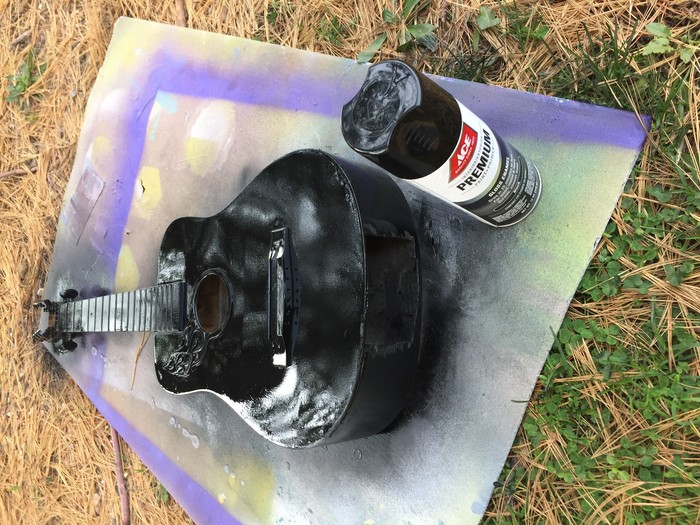
Step 4: Create your own melody with spray paint
To freshen up the look of the guitar and lamp base and to connect these items, spray on a glossy coat of paint. Black was selected for this accent piece to provide an elegant and bold look. However, you might select your favorite color or one that compliments the room in which this piece will call home. Apply several light coats to both and turn the guitar over to ensure all sides and parts of covered. Let dry for several hours between coats; if you handle it too soon, you may leave fingerprints on the smooth surface. After several coats are applied, let dry overnight.
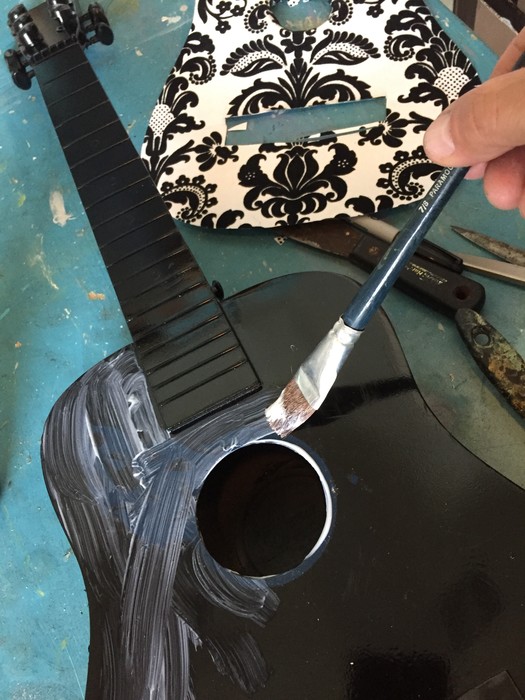
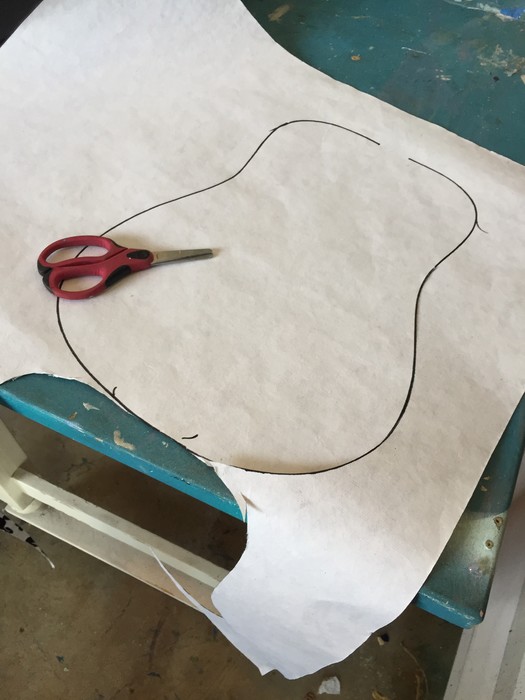
Step 5: Decoupage on drama (optional step)
To make this accent lamp truly a work of art, consider selecting a piece of eye-catching paper picked up at your local arts and craft store. You could also use sheet music, maps or other paper to make this truly one-of-a-kind. This step will require additional time, care and patience AND is so worth it!
Place the guitar on the paper, trace it and cut it out. Put the cut-out paper in place and use painter’s tape to hold it there. You will want to use your scissors to cut out the handle where it connects to the front, the center hole, and place with the strings attached. Use your fingers to create edges that will serve as a cutting guide. Gently gut, placing it back in place to ensure it all aligns. This can be tedious, so keep breathing!
Brush on a light coat of Modge Podge on the entire top surface of the guitar, place the paper on top and maneuver it into position. Work to adhere the paper to the guitar by pressing it into place and using your fingers to push out any bubbles. Let this dry for several hours, too.
Expert Suggestion: In place of the decoupaging, you could use color paints to add visual interest and dimension to the front of the guitar. With craft paints, you could add stripes, musical notes, song lyrics or even a person’s name. Consider the guitar’s front a blank canvas on which to express yourself! You could even use a glue gun to affix small tiles, cut glass, puzzle pieces and more.
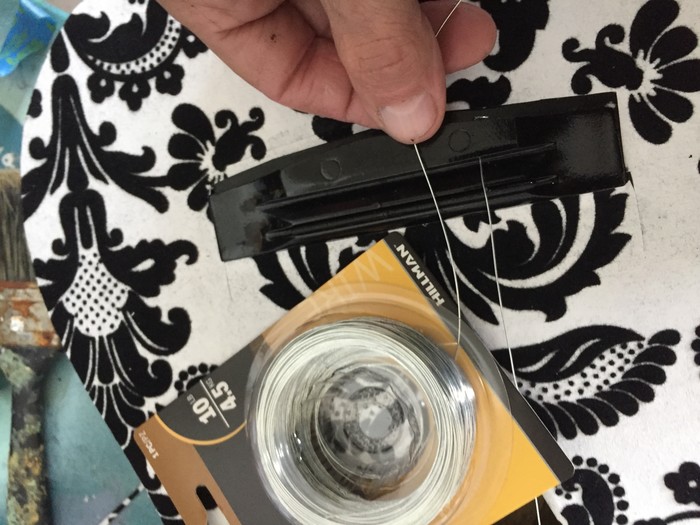
Step 6: Use wire if needed for strings
You may get lucky and find a guitar with all its strings in place and ready to go. The one for this project was missing several strings so they were all cut away at the start of its transformation, which made the decoupaging step easier. The strings were replaced with very thin silver wire (a color selected intentionally) that were thread through the bottom, knotted then looped through the top parts and tighten into place. The silver adds a shimmery look to it.
Step 7: Add a light bulb and insert base
Screw in your small, LED light (that will be cool even when turned on) into the base then gently insert it into the open section in the bottom. Guide the long, thin finial into place peaking into the round front hole to ensure it goes into the hole you drilled early into the handle. It should fit snugly into place, something you tried as you drilled the hole.
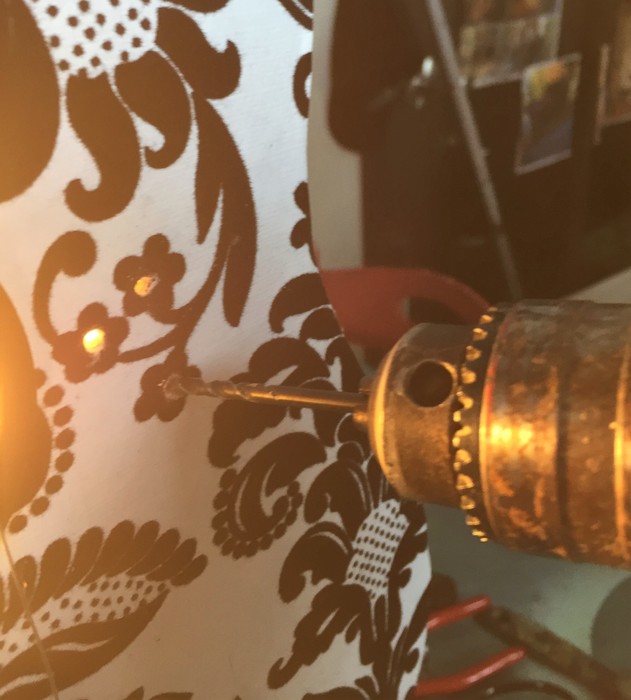
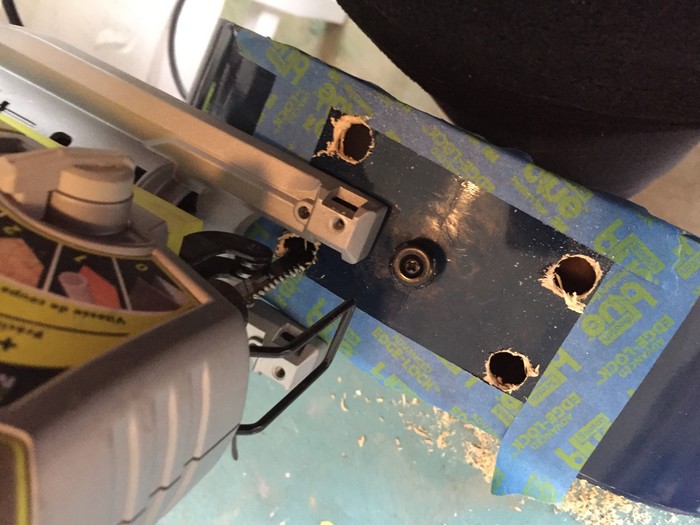
Step 8: Drill in holes to let the light shine
Use your drill to add holes which will allow more light to shine from the piece. Your paper or design might help you decide where to drill the holes or you might want to create a pattern.
Step 9: Put this accent lamp in its place, turn it on and hear the music!
There are so many places this song-inspiring piece could go! On a side table, in the foyer, next to your media center, beside your couch. Whether you decide its new home will be, you’ll want to sing a song about how charming it is!


