A New Way to Decorate a Pumpkin: Reuse, Repurpose Items to Give it a Personality Plus
Break tradition and leave pumpkin carving behind. Welcome in a new, funky and fun way to celebrate Halloween and Fall. How? With repurposed household items to give your pumpkin a look that is truly one of a kind. And continue to think outside the box by painting your pumpkin in bronze and copper tones. Orange is not the new black!

Items needed:
· Pumpkins
· Bronze, Copper spray paints
· Painter’s tape
· Glue gun
· Household items from your junk drawer, craft box and/or purchased at Goodwill
· Black plastic “Googly Wiggle” eyes
1. Pick up a pair of pumpkins—or more!
For just a few dollars, stop by your local hardware store, grocer, or garden center to pick up several pumpkins for this super easy Halloween-related DIY project. I scored and got three for $10 (and each rang up for $3.33 apiece!). Don’t worry about selecting one that is perfectly shaped and flaw-free. Personally, ones with interesting bumps, curvy handles, and funny shapes are always going to be more fun!
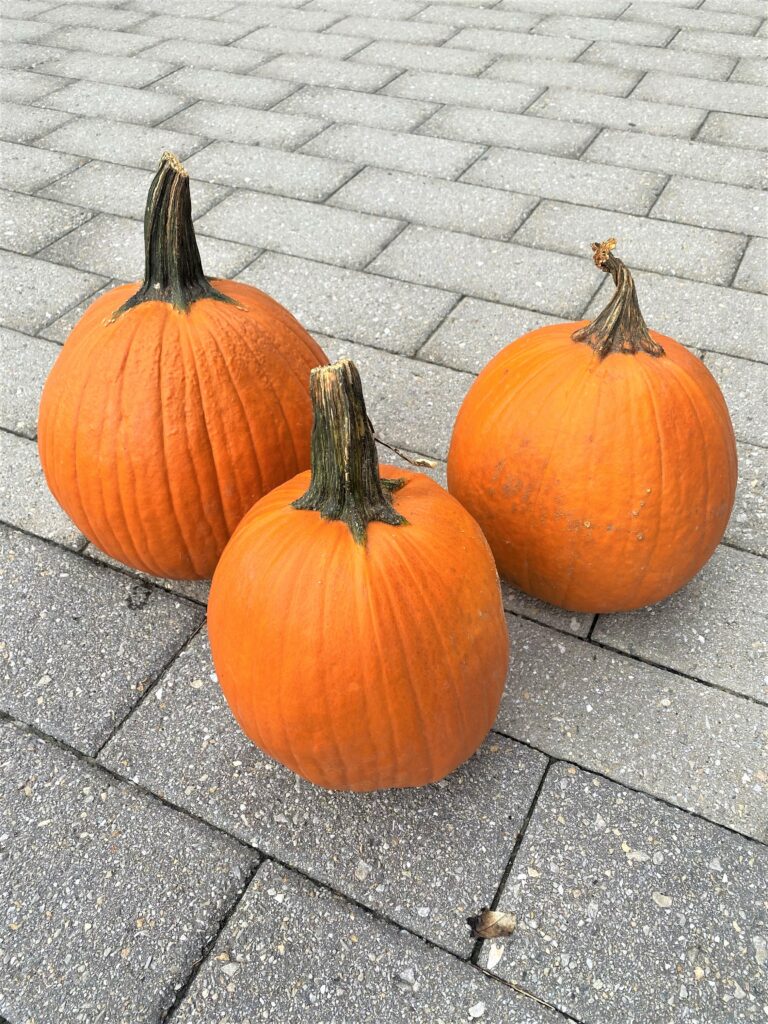
When you get your collection home, wipe each pumpkin with a damp rag to remove any dust or dirt. Ta-dah—you now have a round, three-dimensional canvas on which to be creative!
2. Don’t go for the gold, but rather bronze or copper
Orange pumpkins are pretty predictable this time of year, so step out and give these guys or gals a look that will make them stand out from the crowd, or in this case from the pumpkin patch. Select spray paints in bronze and copper finishes which will reflect light as well as pick up some fall colors out there.
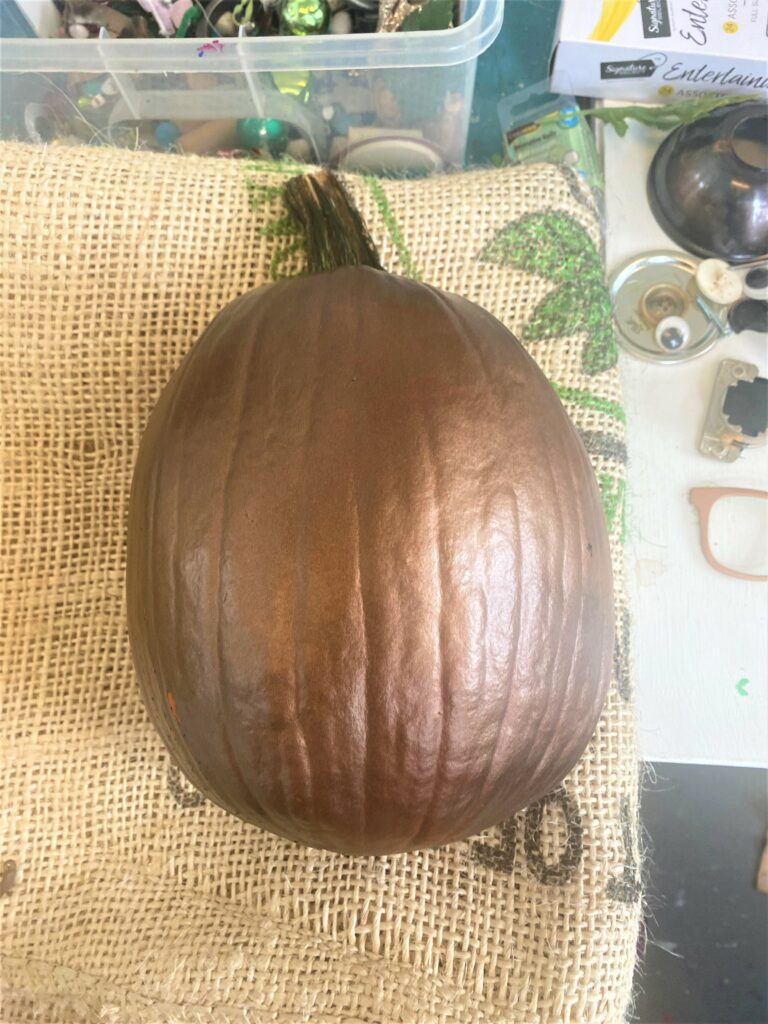

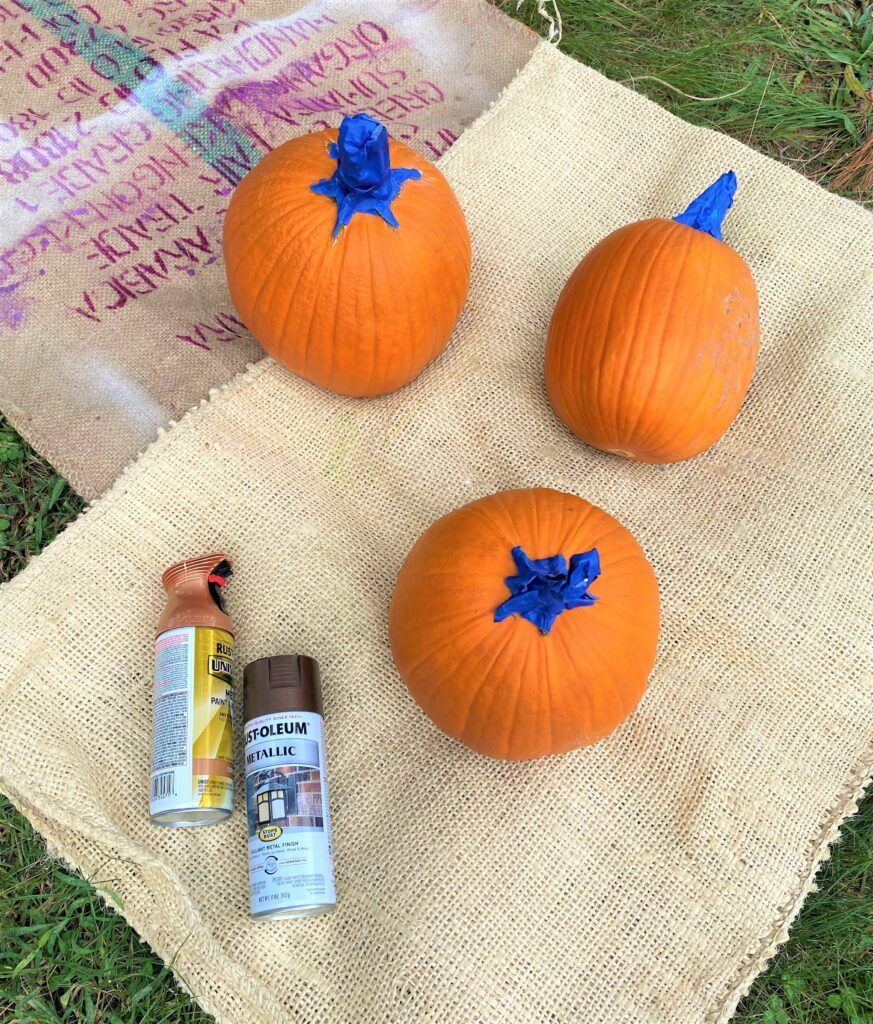
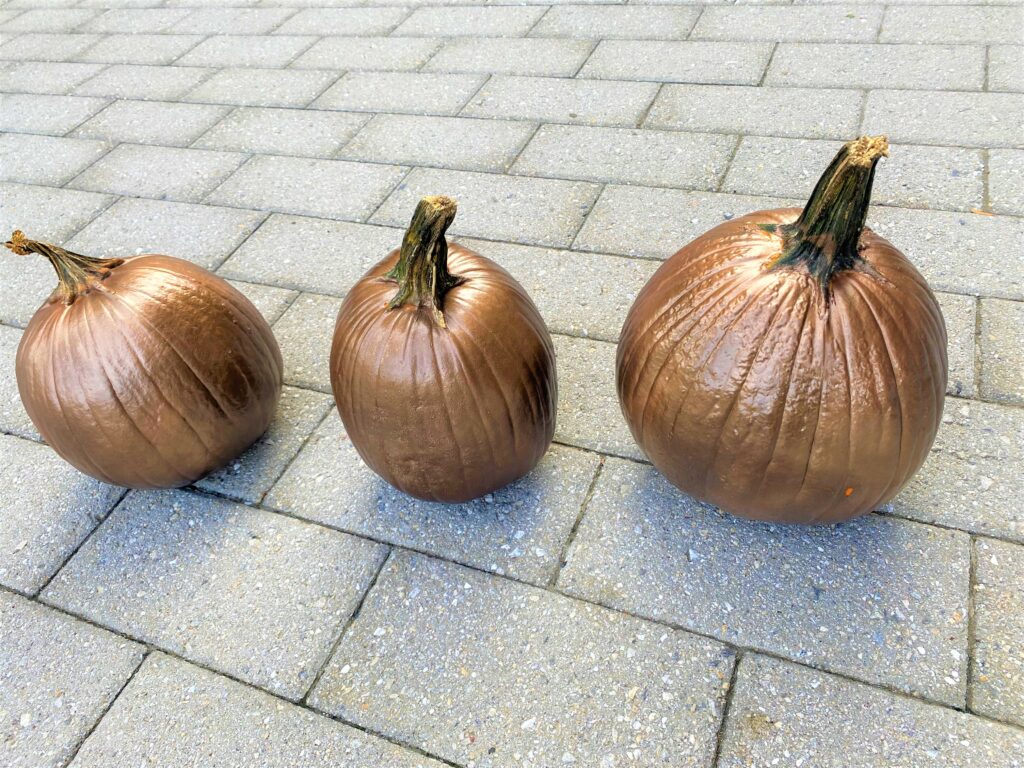
- Protect its stem by covering it carefully with painter’s tape, then place them on a drop cloth outside or in a well-ventilated space. I chose to spray on a layer of the bronze then the copper to add more visual interest and dimension to each one of these “heads.” After one layer dries, turn your pumpkin over and on its side to add another layer and ensure solid coverage.
- Allow time to dry before handling.
- Remove the painter’s tape from the stem/handle.
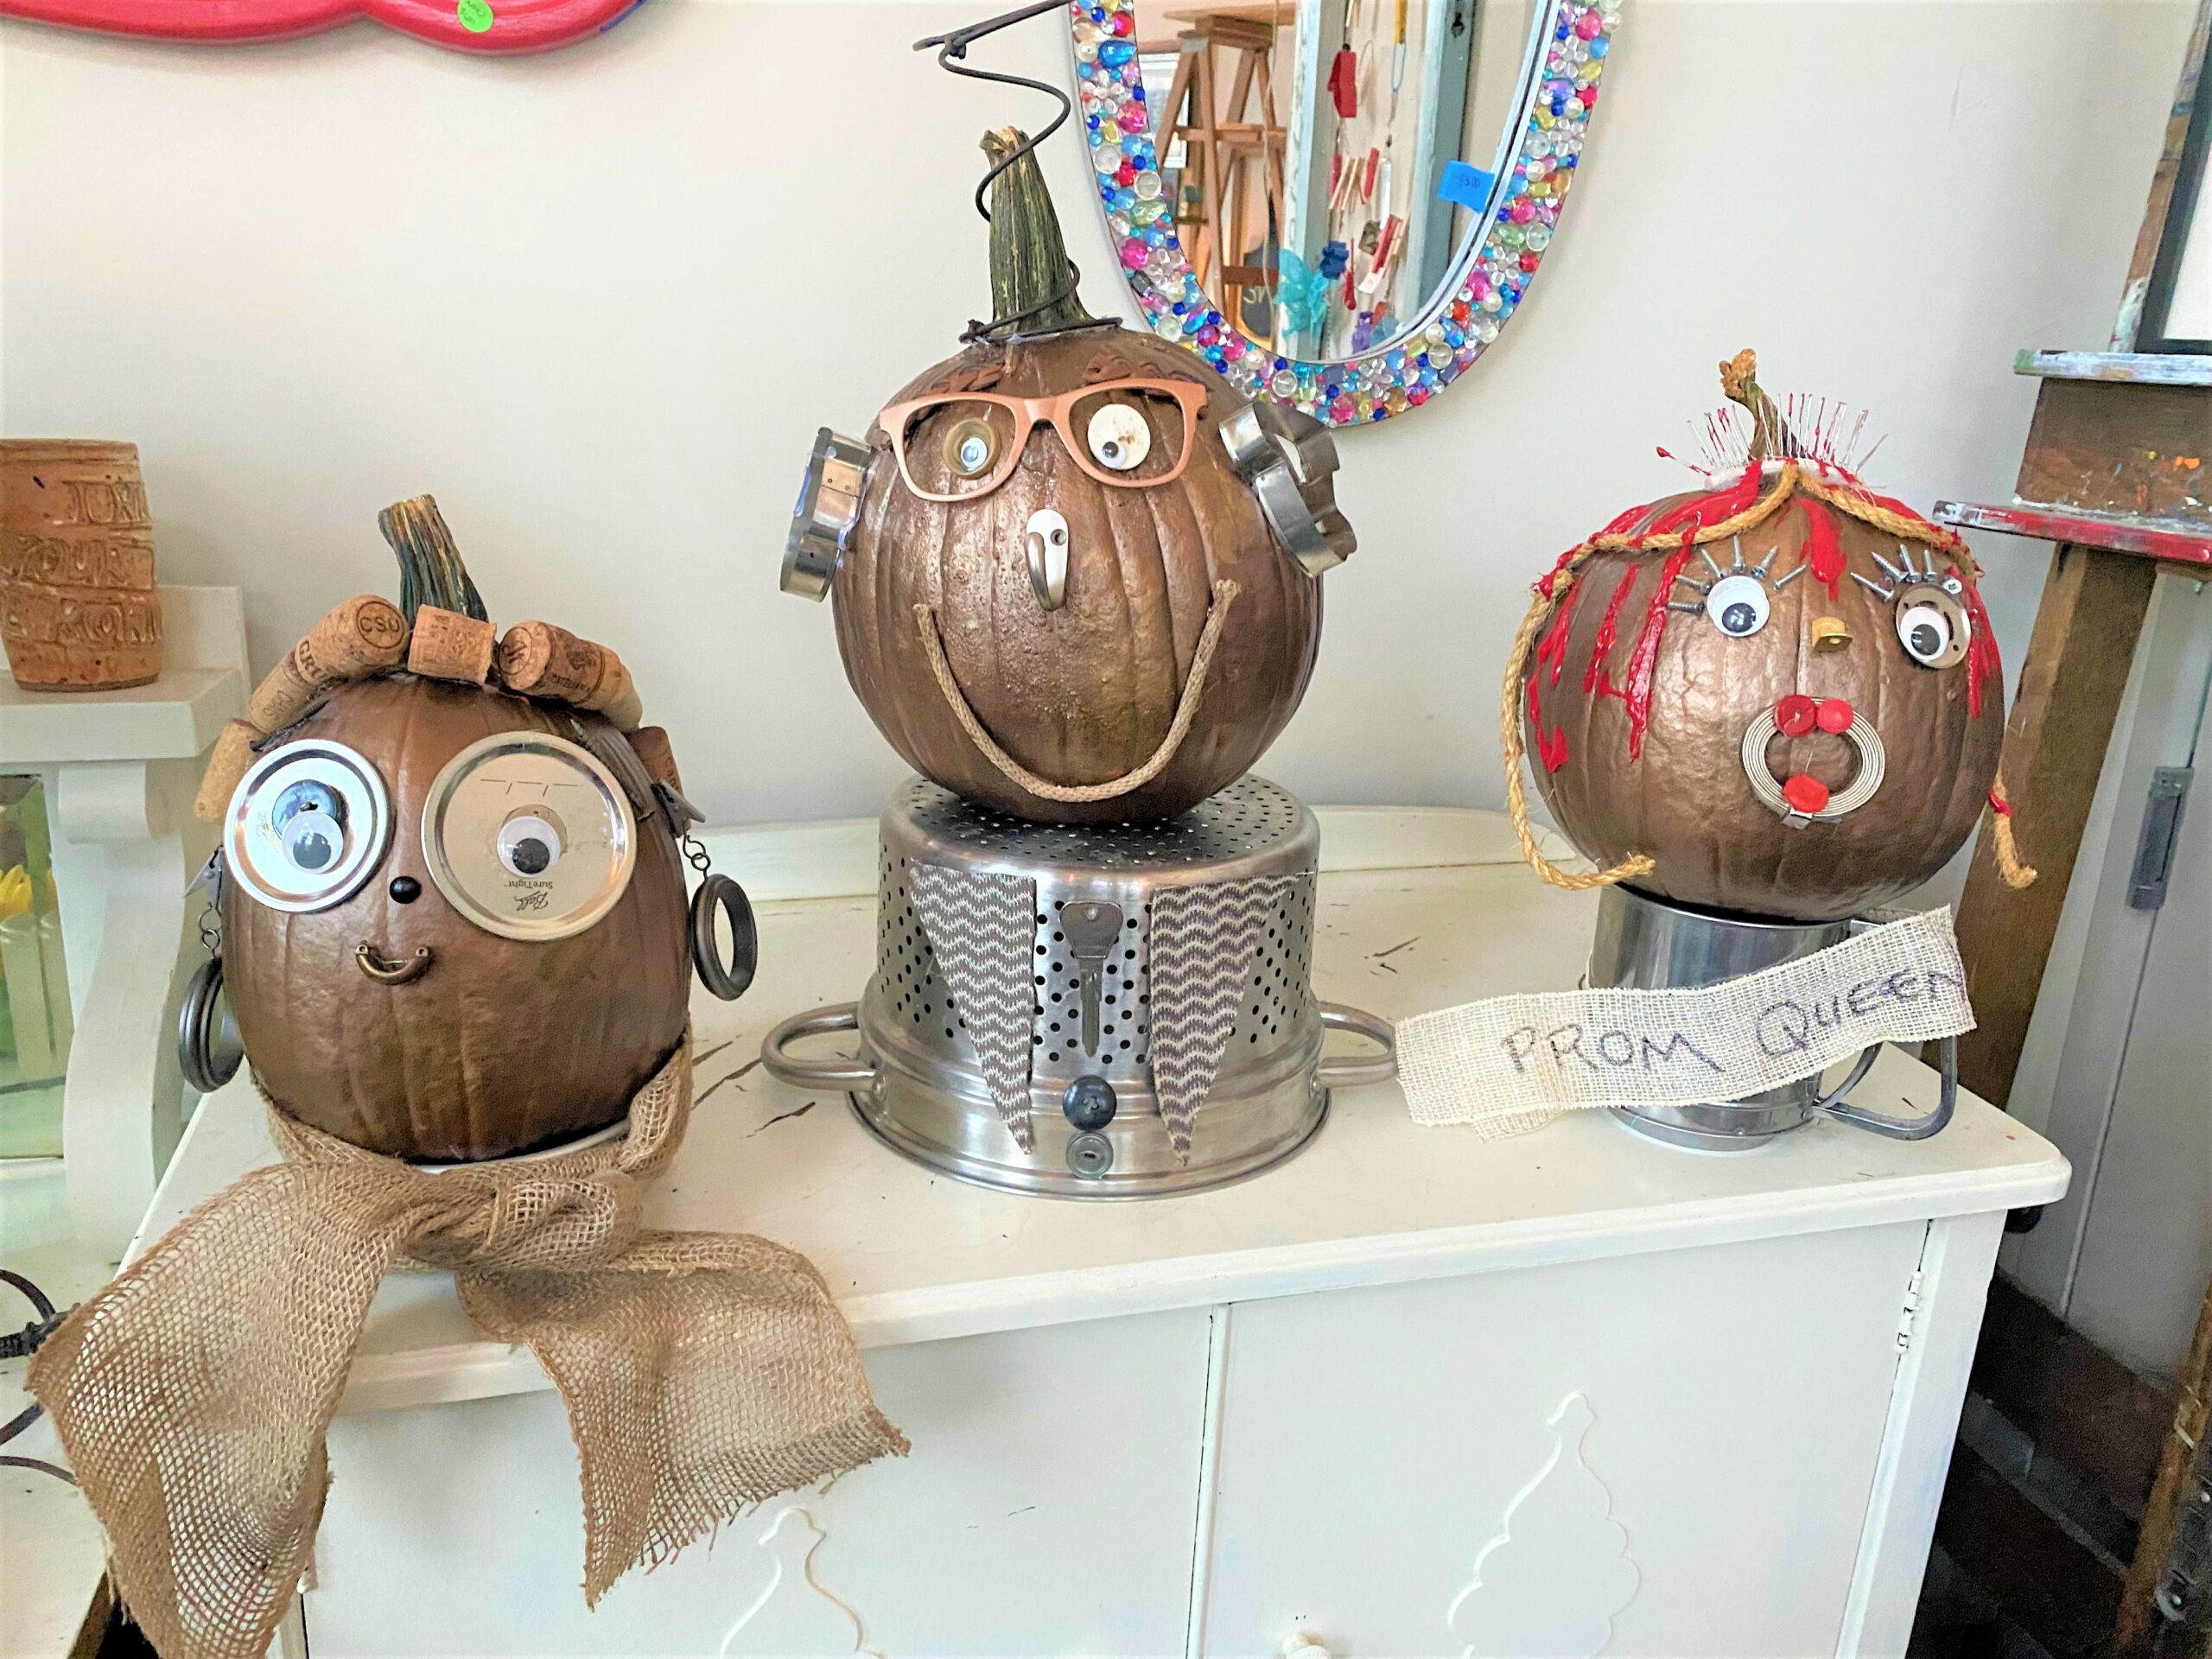
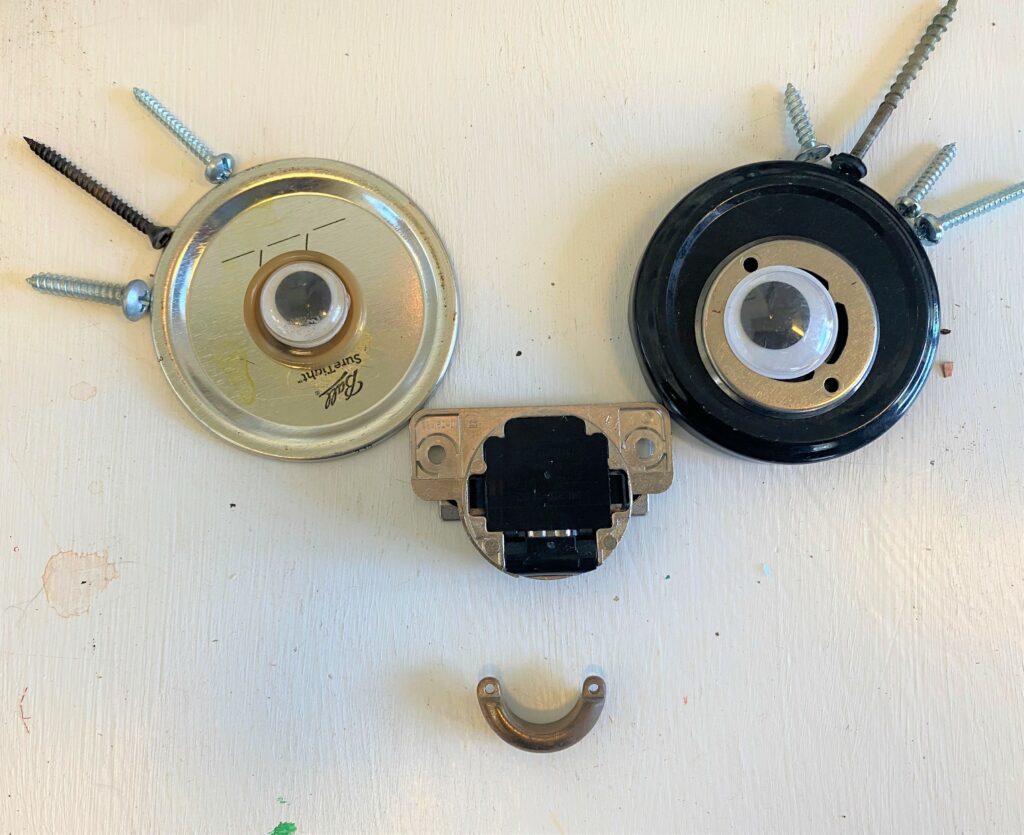
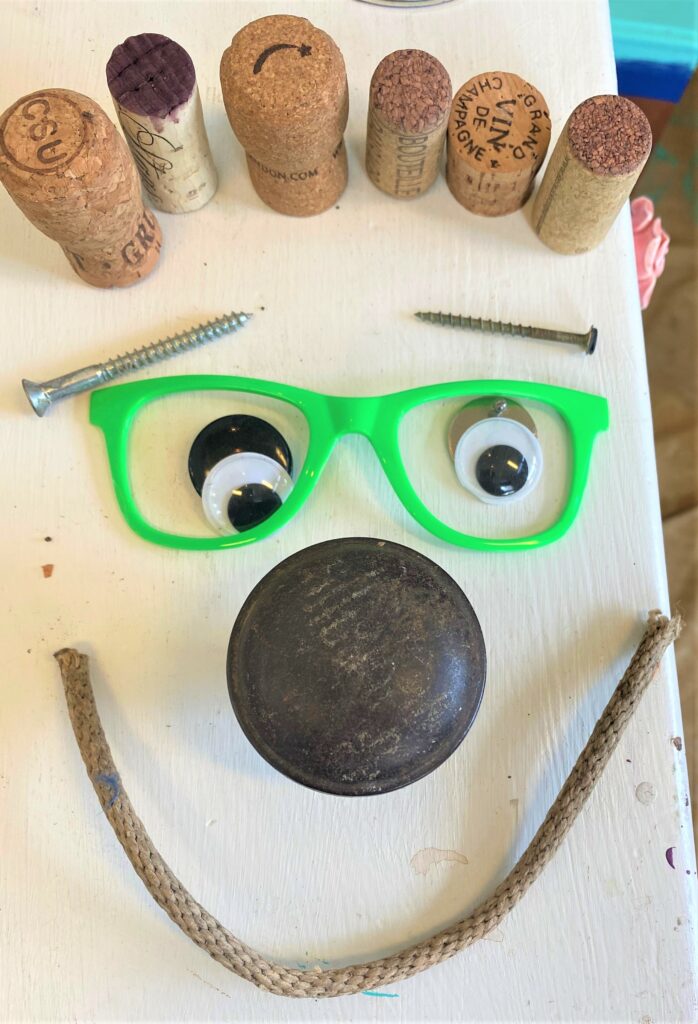
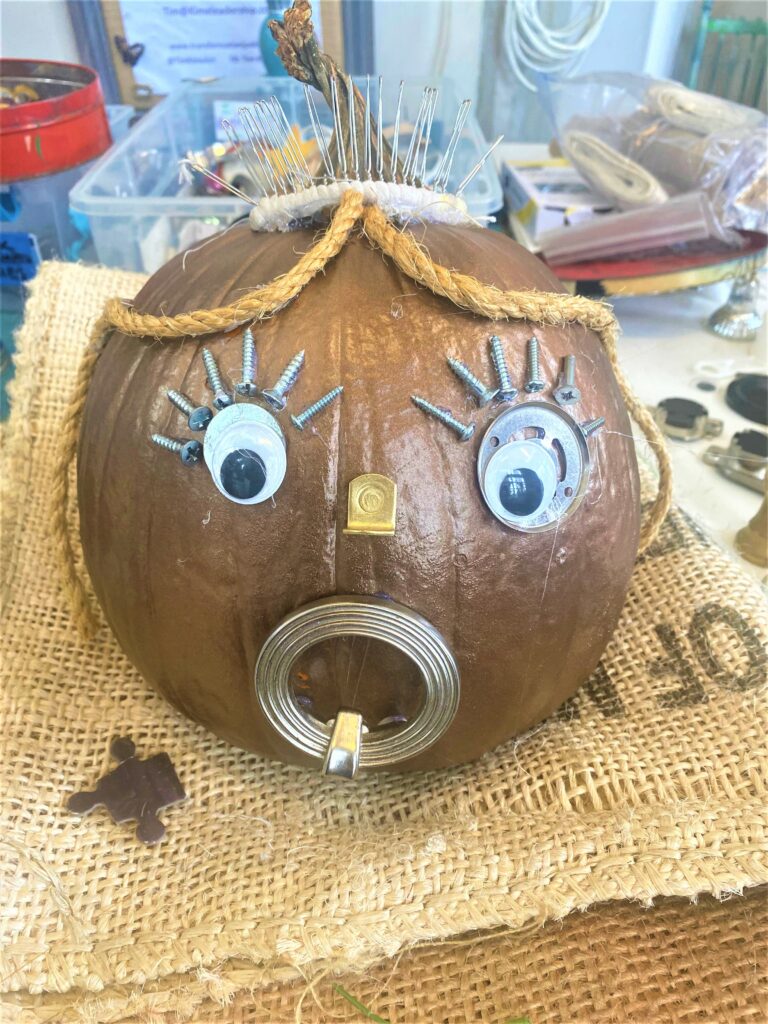
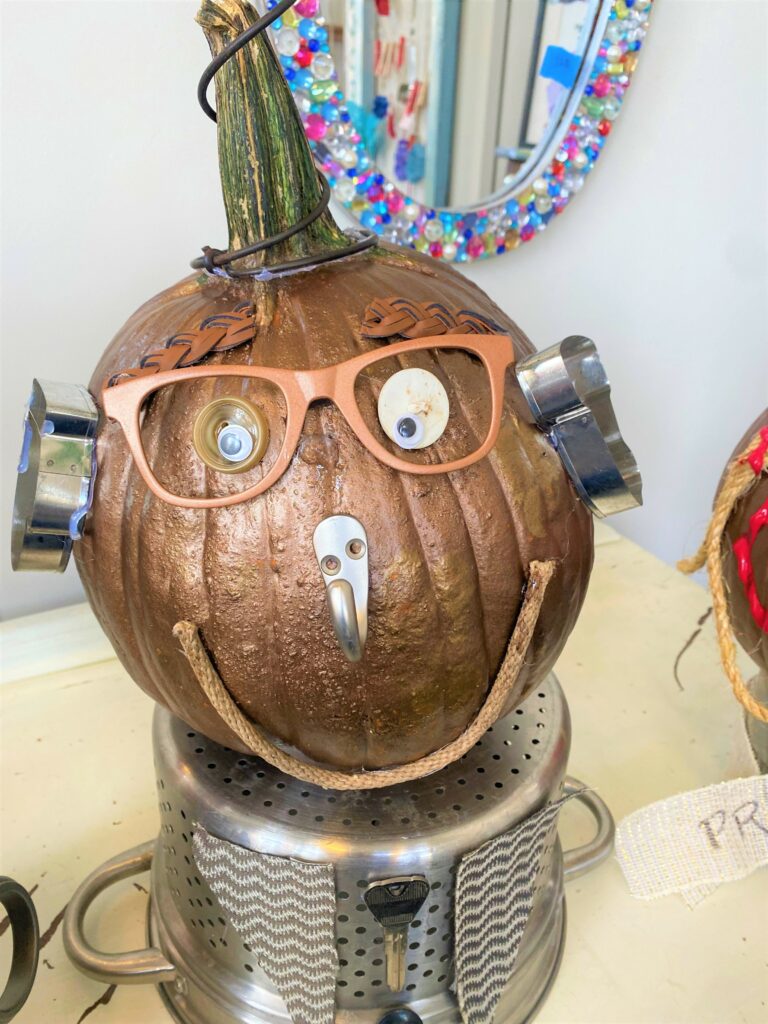
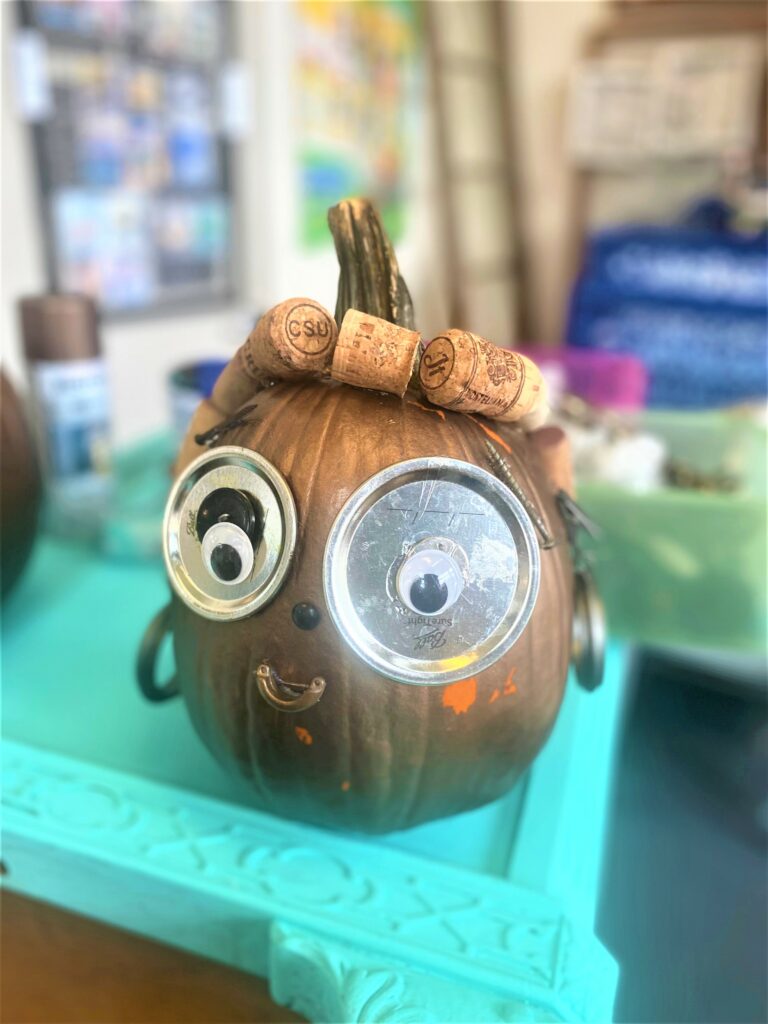
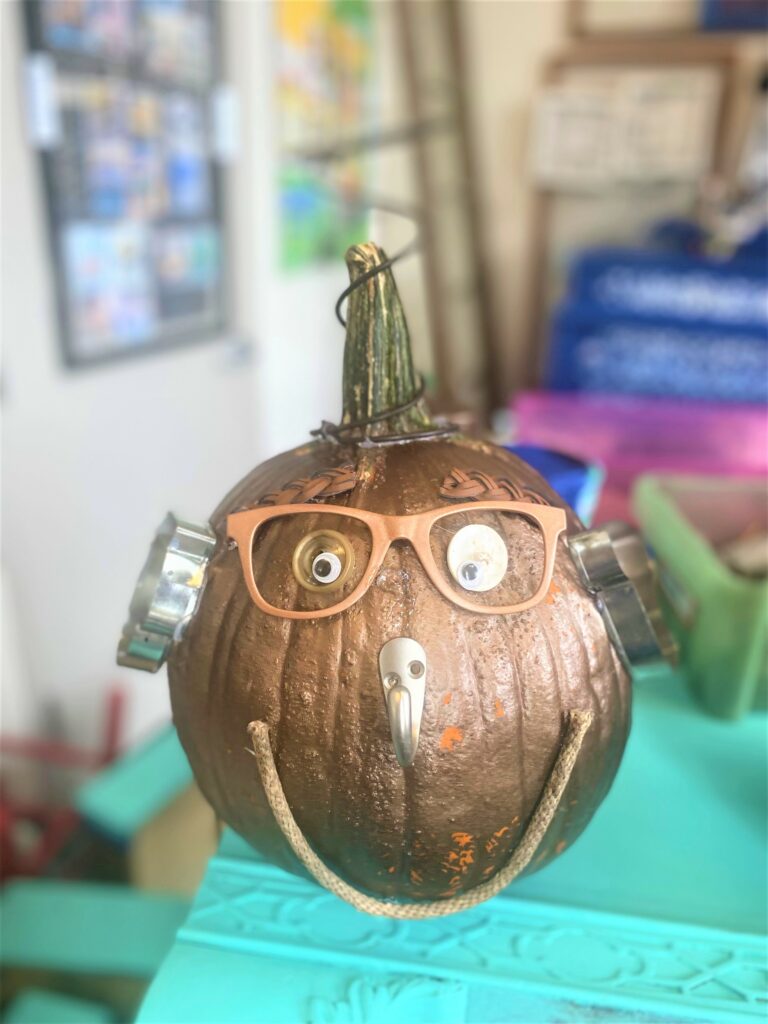
3. Repurpose items for your pumpkin’s face
Go to your collection of random knick-knacks and left-over household items (like keys or jar lids) to find your face. What could be transformed into a pair of eyes? What resembles the shape of a nose? How can you turn the ordinary into an extraordinary mouth?
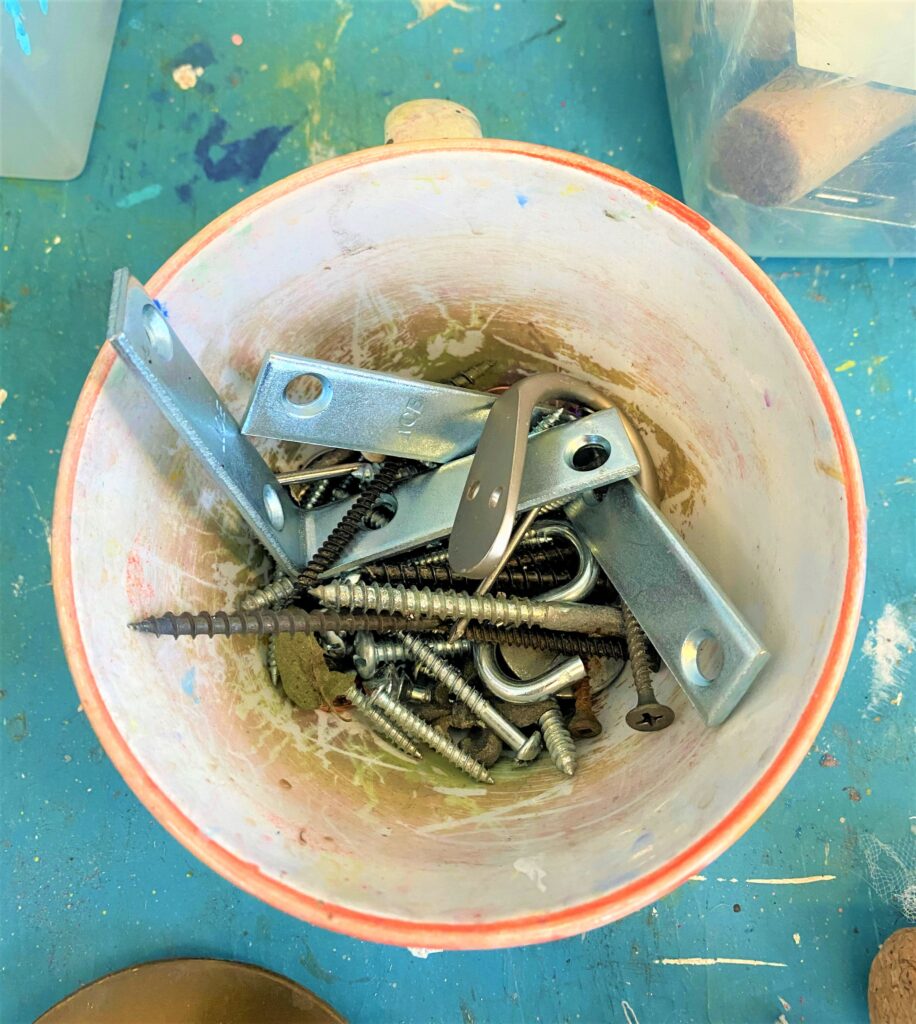
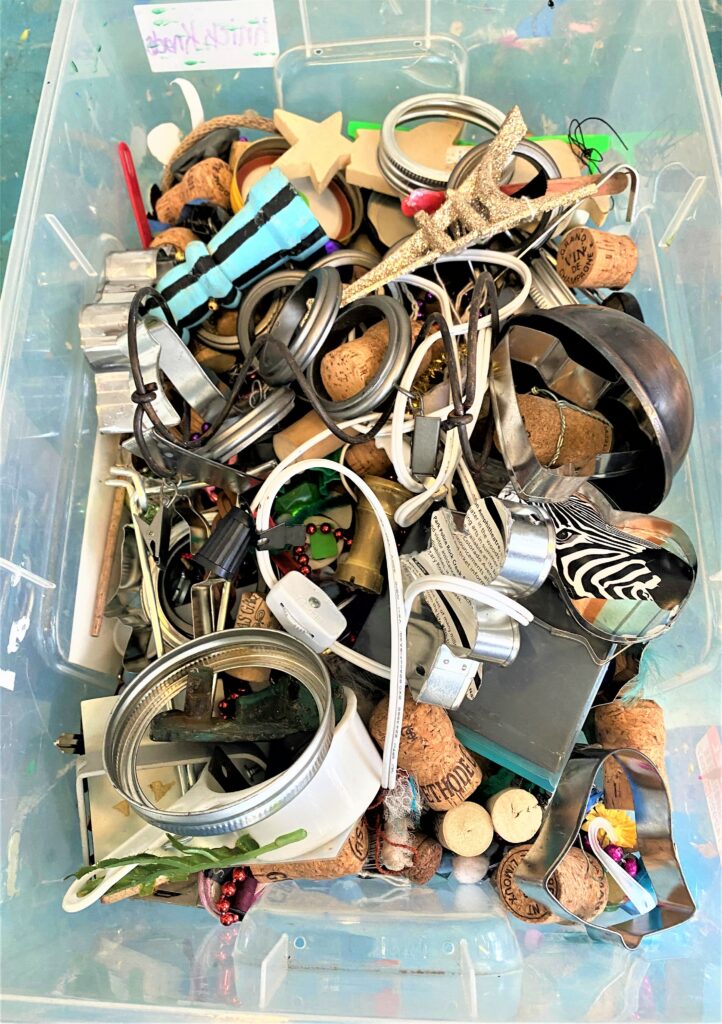
This part is so much fun and makes this project perfect for kids of all ages. As you are able to see, some old hardware parts were paired with buttons and the Googly Wiggle eyes. A mouth for one was created using an oval-shaped handle. And check out what got used as noses—a black thumbtack, a small hook, and a bronze shelf bracket!
This is when you will be glad you saved these weird yet wonderful items!
4. Secure your smile (eyes, nose, and ears, too!) with glue
- Place your pumpkin on its backside with the face looking up at you.
- With your hot glue gun, very carefully adhere your various pieces and parts to create your funky and fabulous face.
- When done, reposition it so it stands up vertically to allow you to add hair, a hat or, in one pumpkin’s case, a tiara.
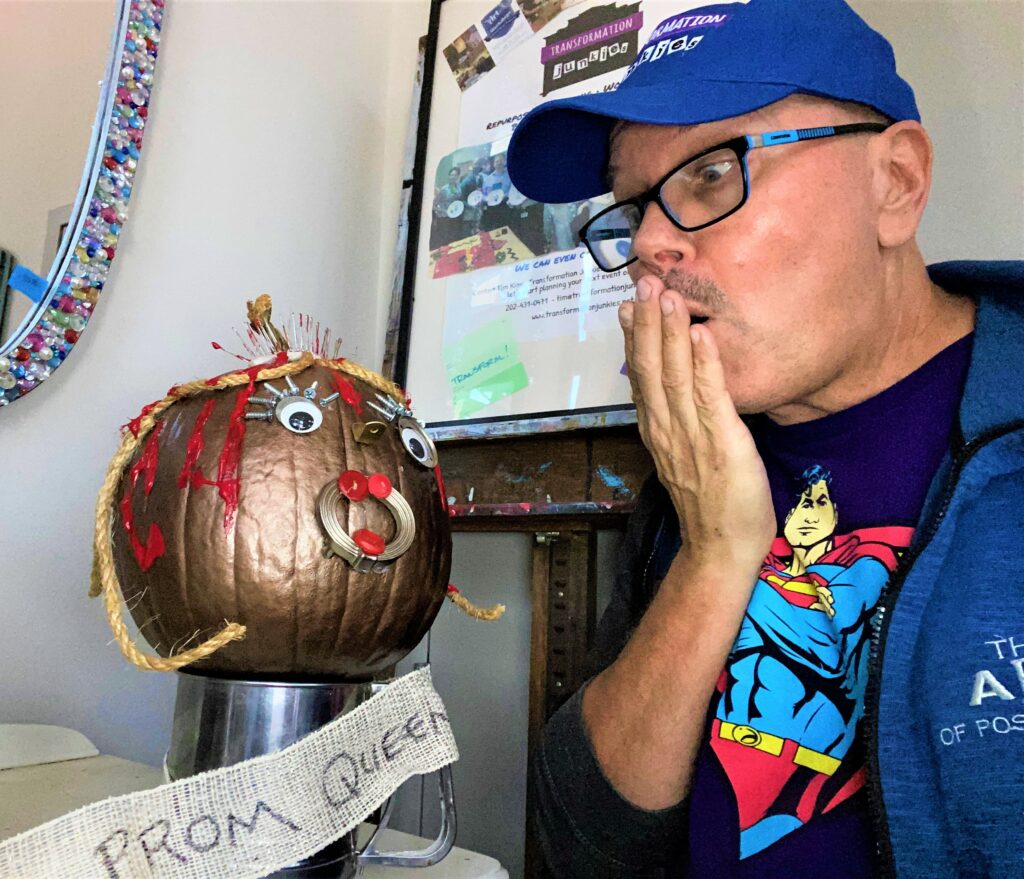
Design Idea:
Speaking of tiaras, who is the most famous prom queen of all, especially this time of year? Well Carrie White, of course! We all have seen at least one of those Carrie films when she is crowned prom queen, only to have this joyful moment transformed into pure horror when the class bullies and mean girls drenched her with blood.
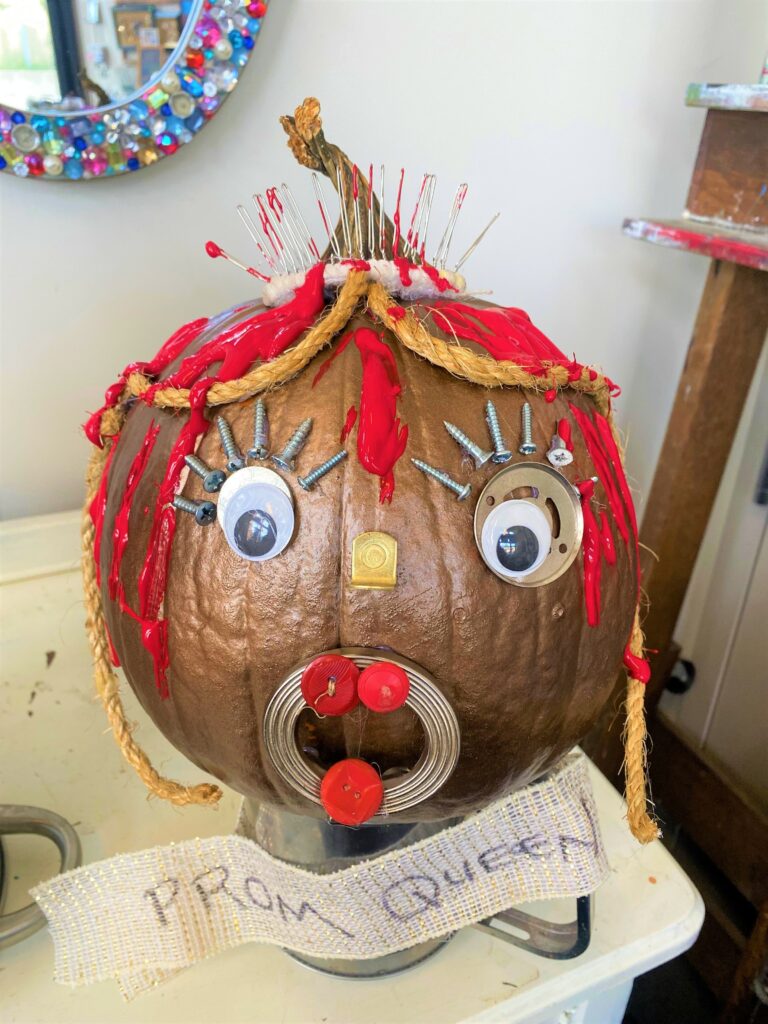
As you are able to see, my version of Carrie was ready for the prom with her long hair from rope, eyelashes from screws, and red lips from buttons. And her tiara was a hair comb/decoration in its previous life. The final step, when she was all put together, was to drip red paint over her. (Maybe I am a little twisted as this was my favorite part of this project!)
5. Raise up your pumpkin head with a repurposed neck
When your pumpkin faces are done and ready to be shown to trick or treaters, consider raising it up to allow the face to be seen better and to give you a chance to do even more repurposing.
A silver colander was flipped over and a pumpkin was placed on top. Old keys, buttons, and fabric scraps were glued on to make it look like his coat. Another one was placed on top of a small, round cake mold then wrapped with burlap to create a scarf. And our Carrie pumpkin got the special treatment when it was placed on a silver flour sifter; of course, she received her prom queen banner made from leftover ribbon. Many of these items came from Goodwill, too, and for just a few bucks!
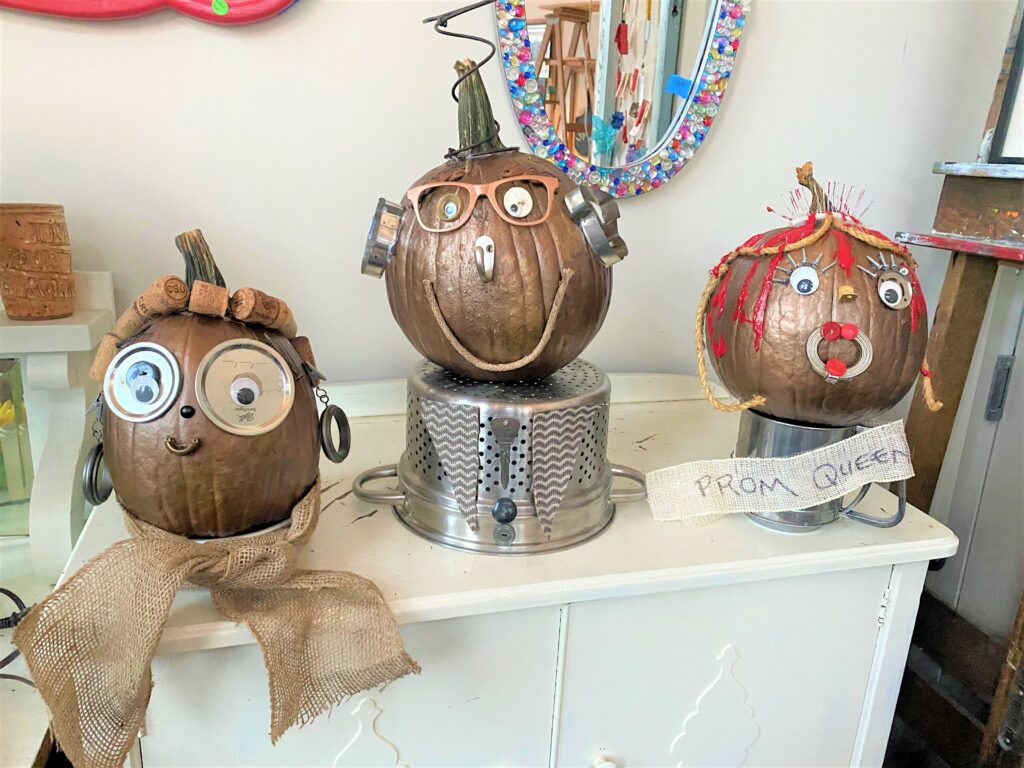
What do you already have on-hand or could you pick up at Goodwill? A metal bucket could be flipped over to make a neck/body. A tin funnel would make a totally festive hat. Large wooden serving spoons could be enlisted as arms and hands.

This project will get you truly looking at everyday items in a whole new way….in a kooky way, and certainly not a spooky one!

Tim Kime
Artist, Motivational Speaker, Life Coach
