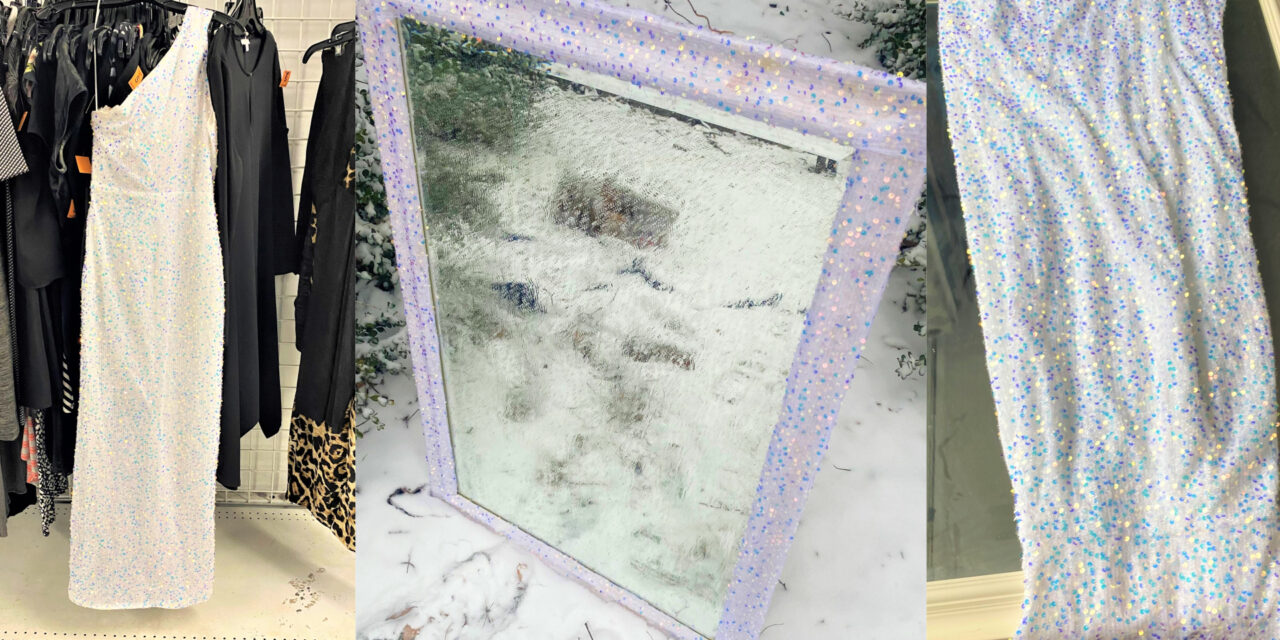
Inspired by the Disney character Elsa from the Frozen movie as well as by the recent beautiful snowfall, give a plain Jane mirror a winter-themed royal treatment. Using a thrift store evening gown covered in a blizzard of sparkles in whites, blues, purples, and golds, you can create a mirror that any little one—or grown-up —will love.
Following the lead of Elsa who sang, “Let it go, Let it go. Can’t hold back anymore!” You, too, will sing with delight and won’t hold back your excitement with the way this easy DIY project shimmers up your space.
Items needed:
· Mirror with a flat or smooth frame
· Sequined-covered or beaded evening gown
· Glue gun & lots of glue sticks
· Scissors
· Painter’s tape
1. No chills at Goodwill: shopping there will melt your heart
When you arrive at any Goodwill, you’ll be greeted warmly by its amazing staff who are ready to help you find your good. Be open to exploring each and every aisle or section to see what unique items are there, waiting to be transformed in a royal way.
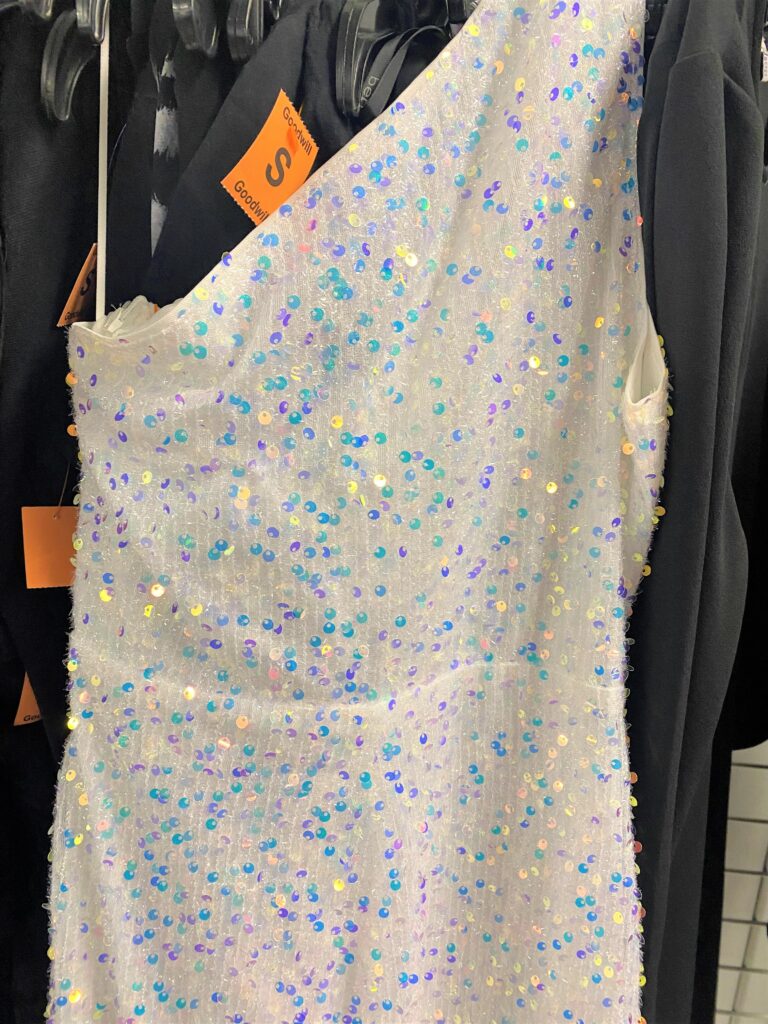
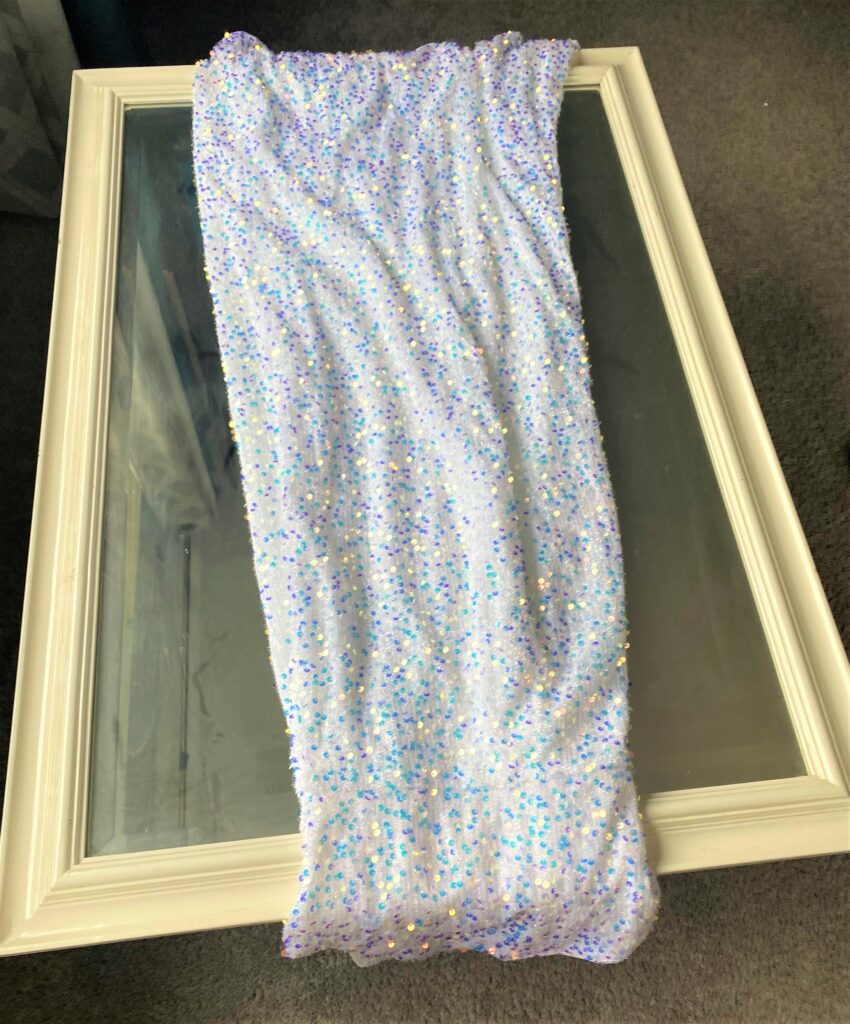
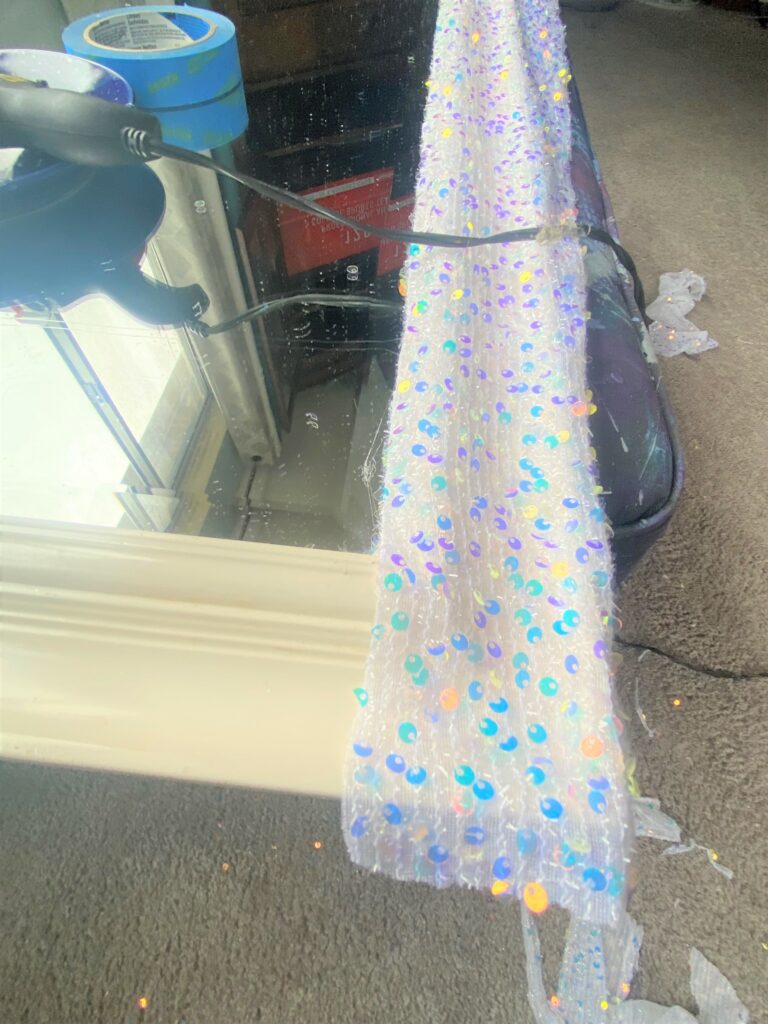
While looking browsing, a bunch of shiny objects caught my attention. It was a rack of long dresses – one immediately stood out. The white material was covered with sequins in whites, blues, purples, and golds; these made me think of all the falling snow we’ve had recently. Inspired by a recent mirror transformation using a child’s coat with bling on it, this piece of clothing went home with me to serve a new purpose too.

What items have great fabric or parts that you might be able to use in a whole new way? Don’t let your creative ideas get chilled; be sure to think outside the box. While I haven’t seen the movie, I was familiar enough with Frozen and thought this might be a transformation fitting a queen, princess, king, or prince, like the ones living in your home!
2. Cut away & keep the fabric you want
The beautiful thing about using a long dress for an upcycle project is that you have lots of material, literally and figuratively, with which to work.
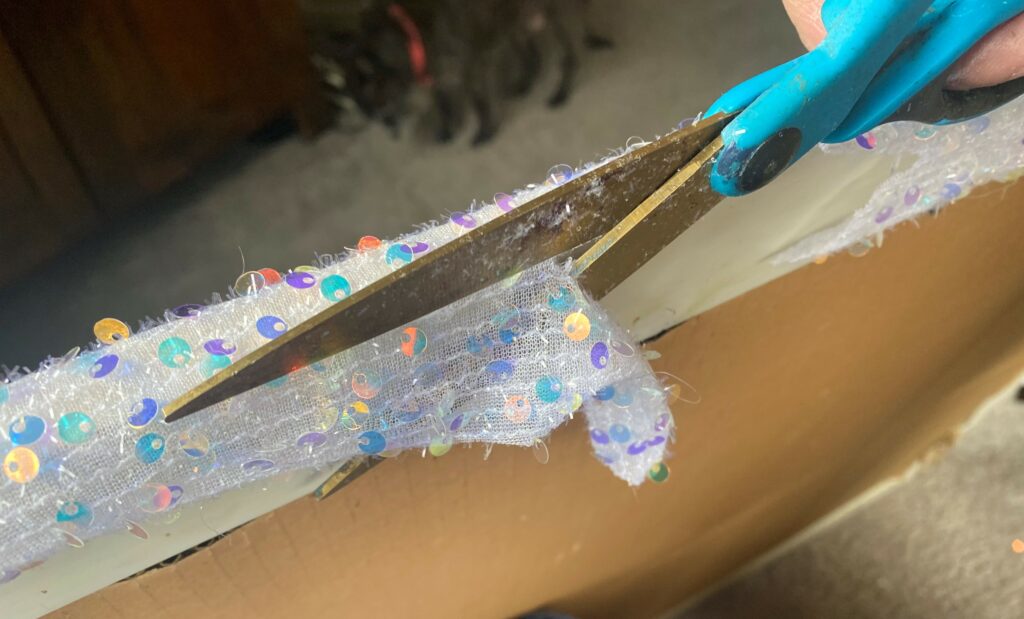
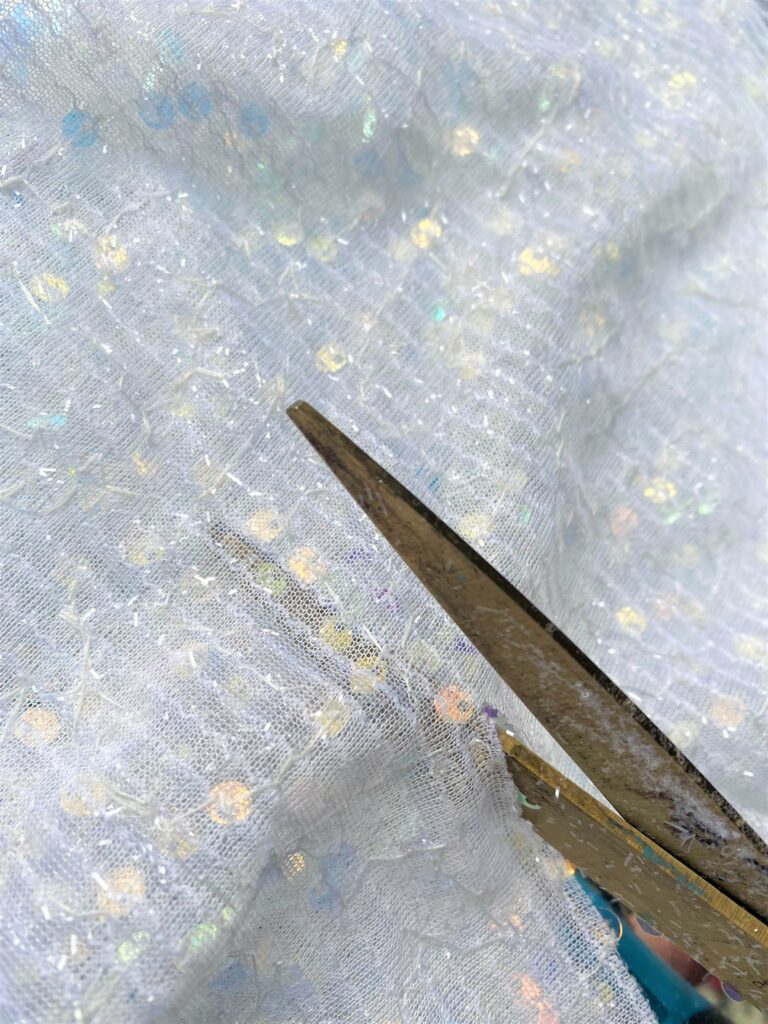
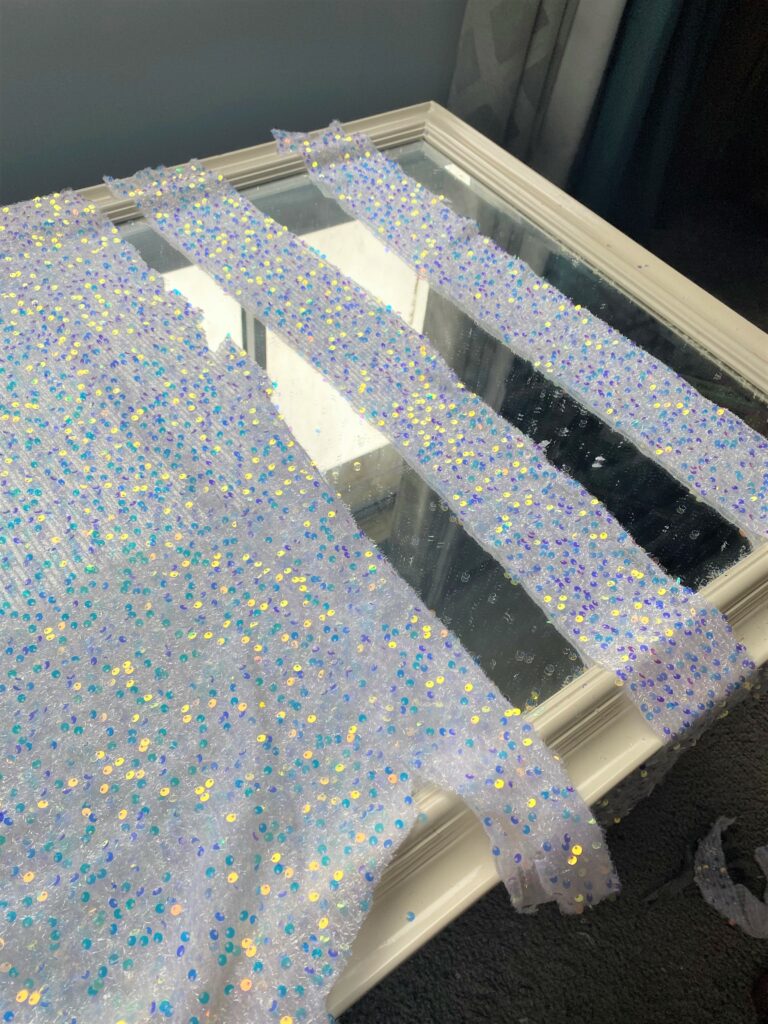
- On your workspace, layout your dress and cut it in pieces at the seams.
- As I deconstructed this piece, there were two layers: a thin, top layer with the sequins on it and a white back layer.
How might the silky, white layer be used for another project? Share your ideas, please!
3. Does your mirror need a paint transformation first?
The mirror featured here was the ideal color on which to create its transformation. The white frame looked clean and nice as it was; given the translucent nature of the fabric, the color would show through so it would be part of its final, transformed look.
Based on the mirror you use (and be sure to check out Goodwill for many great, inexpensive options), you might want to paint on a layer or two of white paint. Simple steps for this process include using painter’s tape to protect the mirror glass, brushing on a few layers to ensure it is covered well, then letting it dry.
4. Layout your look
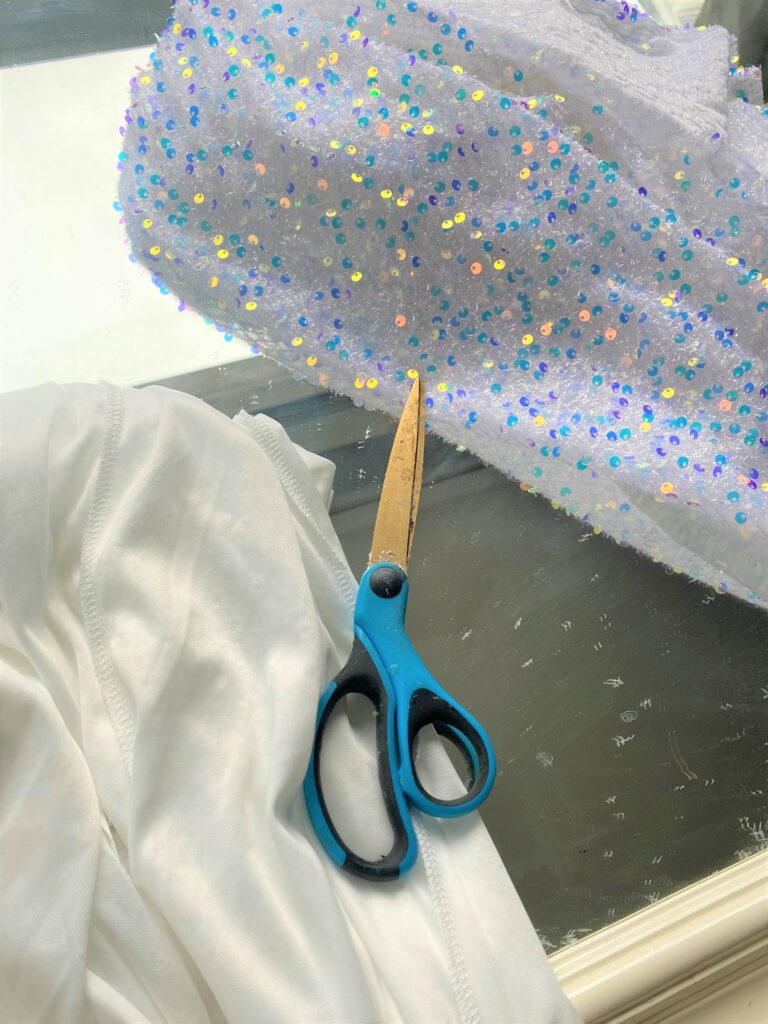
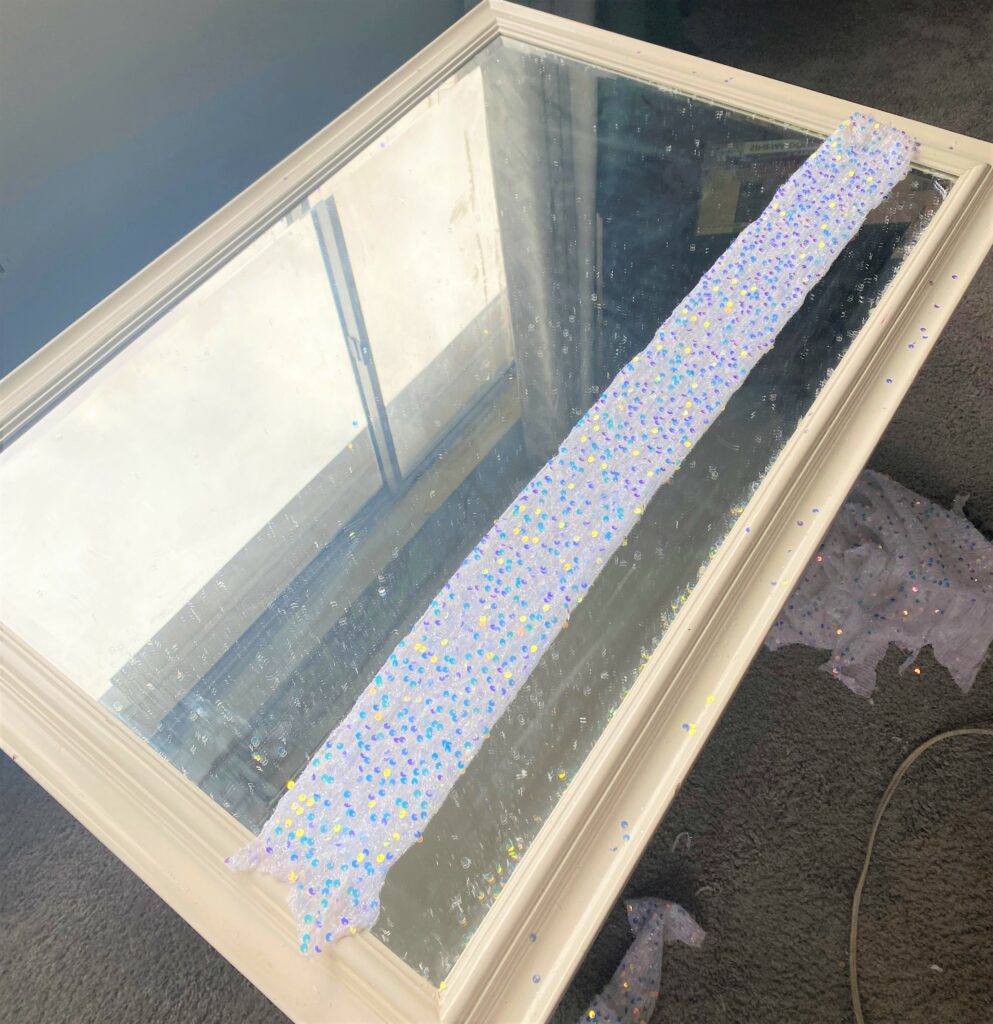
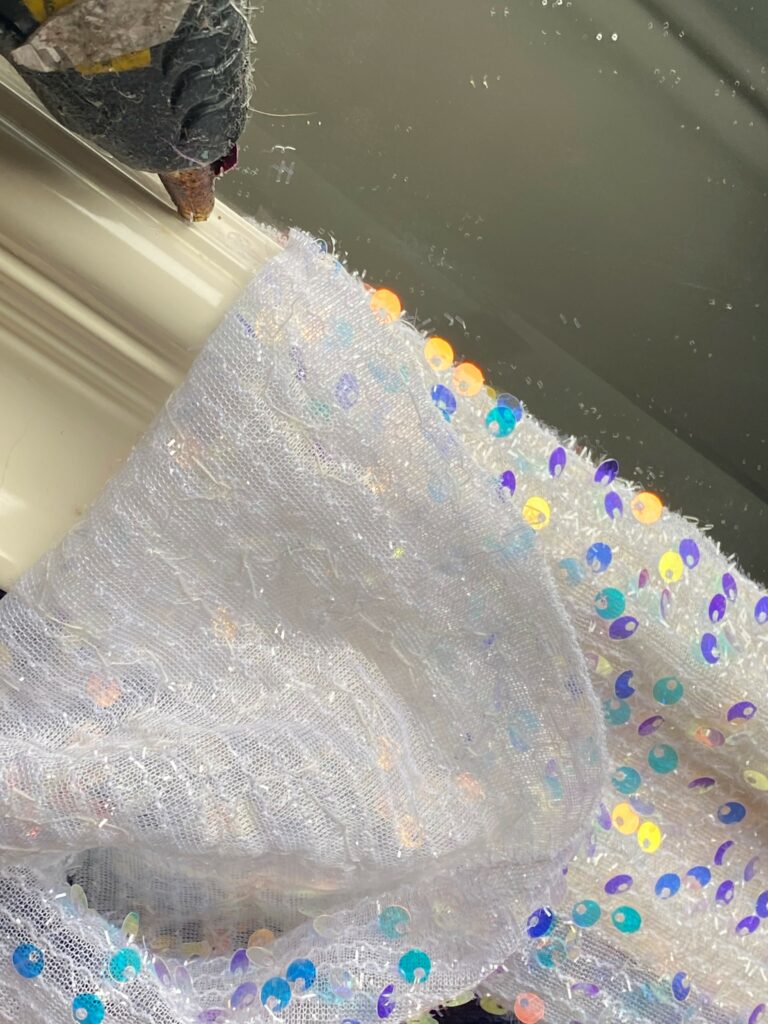
- With your mirror placed face-up on your workspace, position your fabric pieces along the frame to determine which part goes where on it. If you look very closely, the fabric here had very thin lines from top to bottom which gave an easy way to trim each piece. I simply followed the lines as a guide.
- Given the size and shape of the mirror, I decided to layout out the material from corner to corner, so the lines in the material lined up with each edge of the frame.
- Be sure to cut your fabric so you have a straight edge.
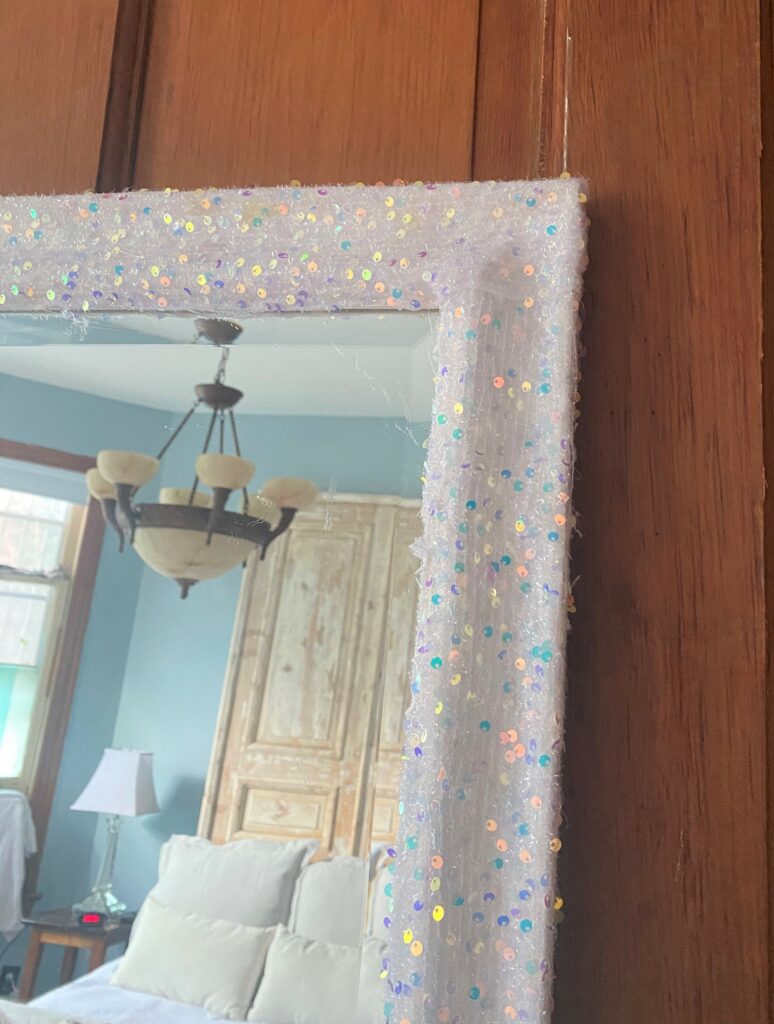
5. Hot glue time
- Line up your fabric piece so that the straight edge of it goes along the inside of the mirror frame.
- To hold it in place, use some painter’s tape.
- Starting at one corner’s edge, add glue with your glue gun, being very careful as the glue will be hot.
- Going in segments of three to four inches, add glue along the inside edge of the frame, place your fabric carefully on top and secure it in place.
- Repeat this step as you go along one edge from top to bottom.
- Now that your inside edge is secure, pull the fabric back, add more glue along the other parts of the mirror frame, and carefully fold the fabric back into place.
- Repeat these steps along each side of your mirror, again, starting with the inner edge them returning to secure the other parts of your fabric.
- Carefully stand your mirror upright and place it against something secure so it won’t tip or fall over.
- Along the top outer edge, add more glue to ensure the fabric is secured tightly along that side.
- Use your scissors to cut away any excess material.
- Gently pick up and place your mirror on another side so you can continue this step of gluing and trimming.
- Repeat this step so that each mirror side has its fabric secured well along the outside edge and is trimmed nicely.


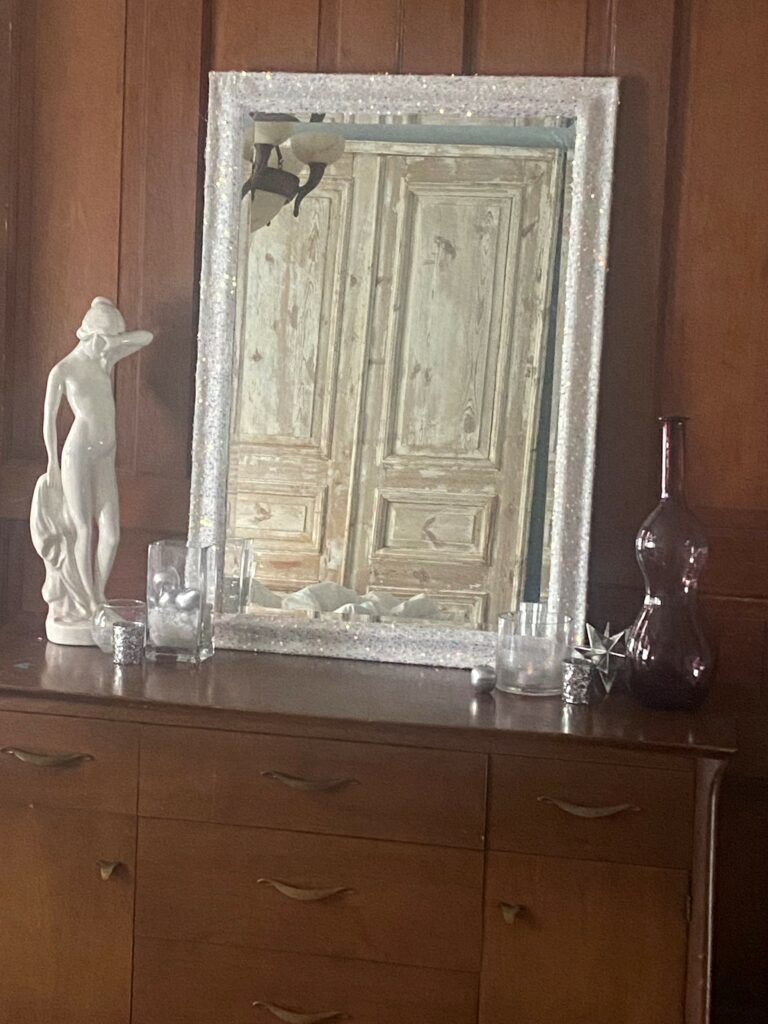
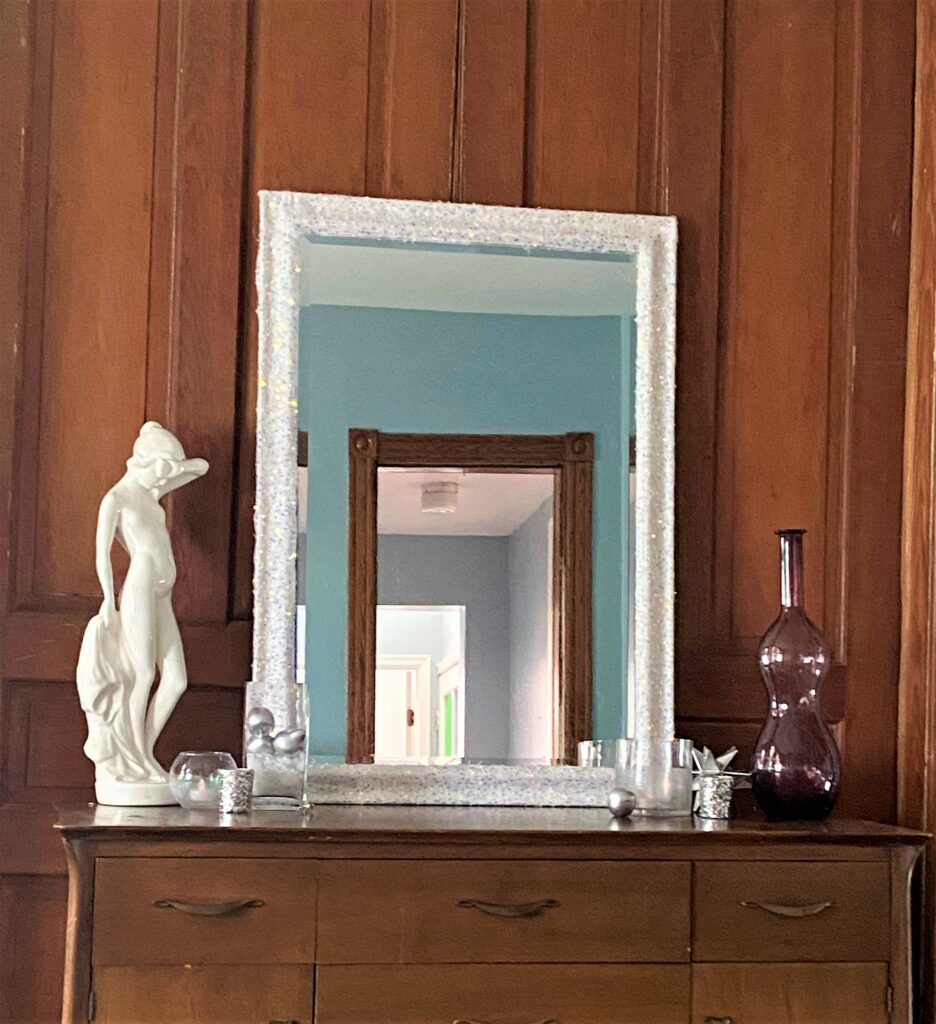
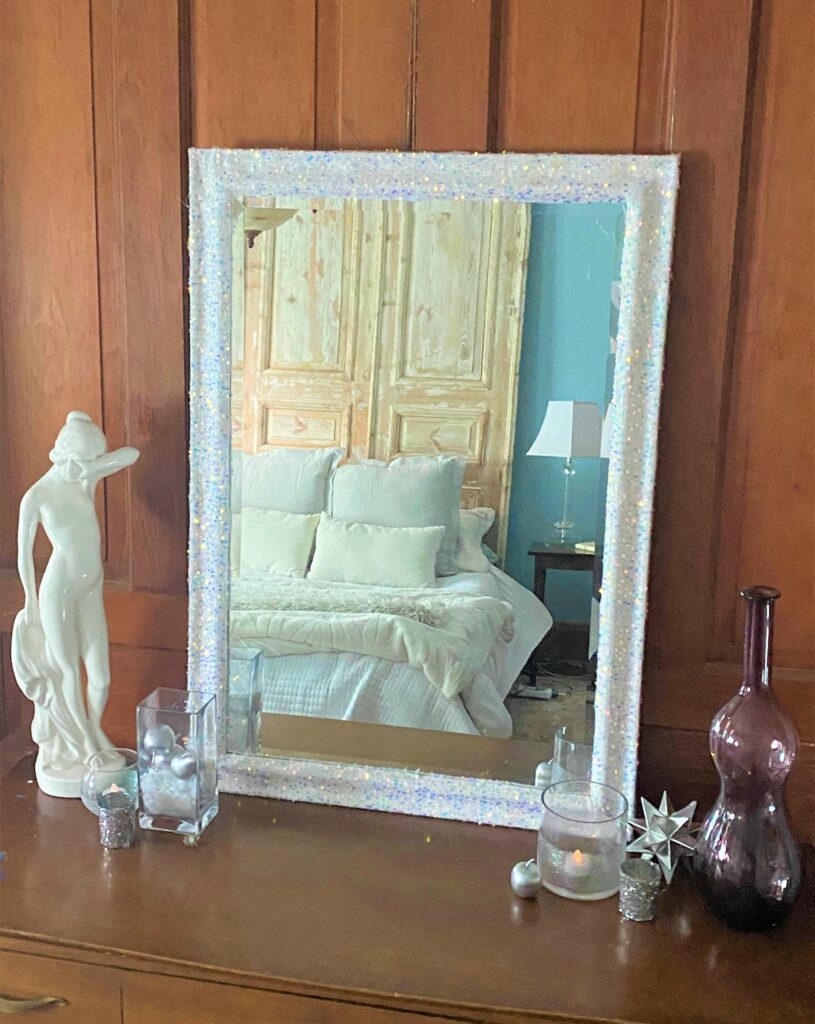
6. Hang it up, check your reflection and do a spin
Scrape away any access glue then use glass cleaner and a paper towel to make the mirror glass shine to the nines.
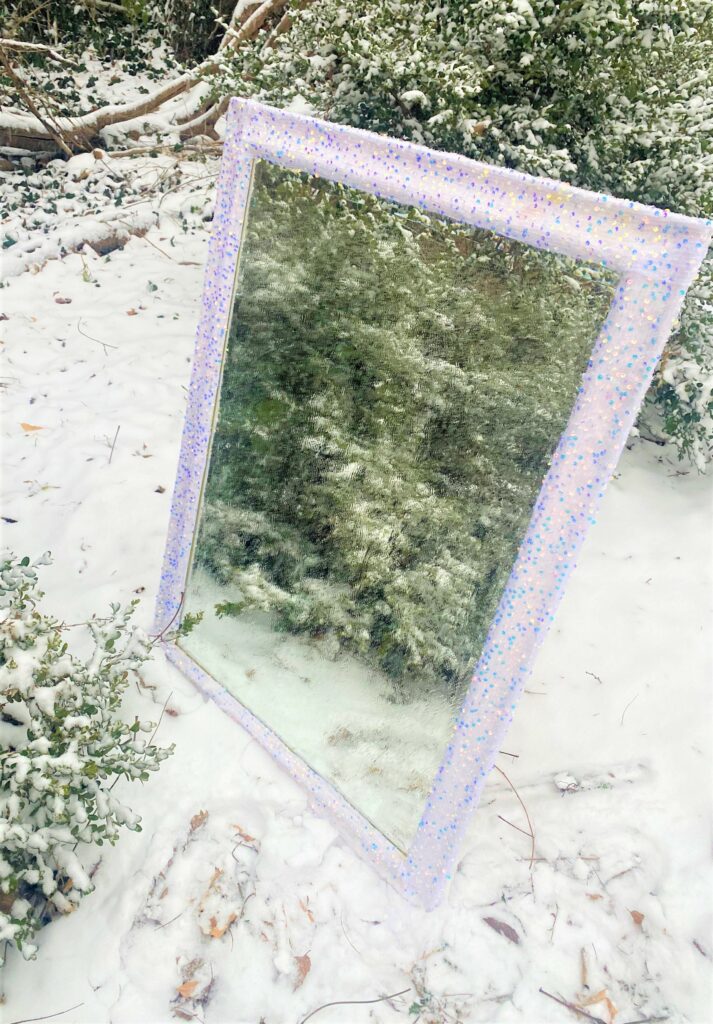
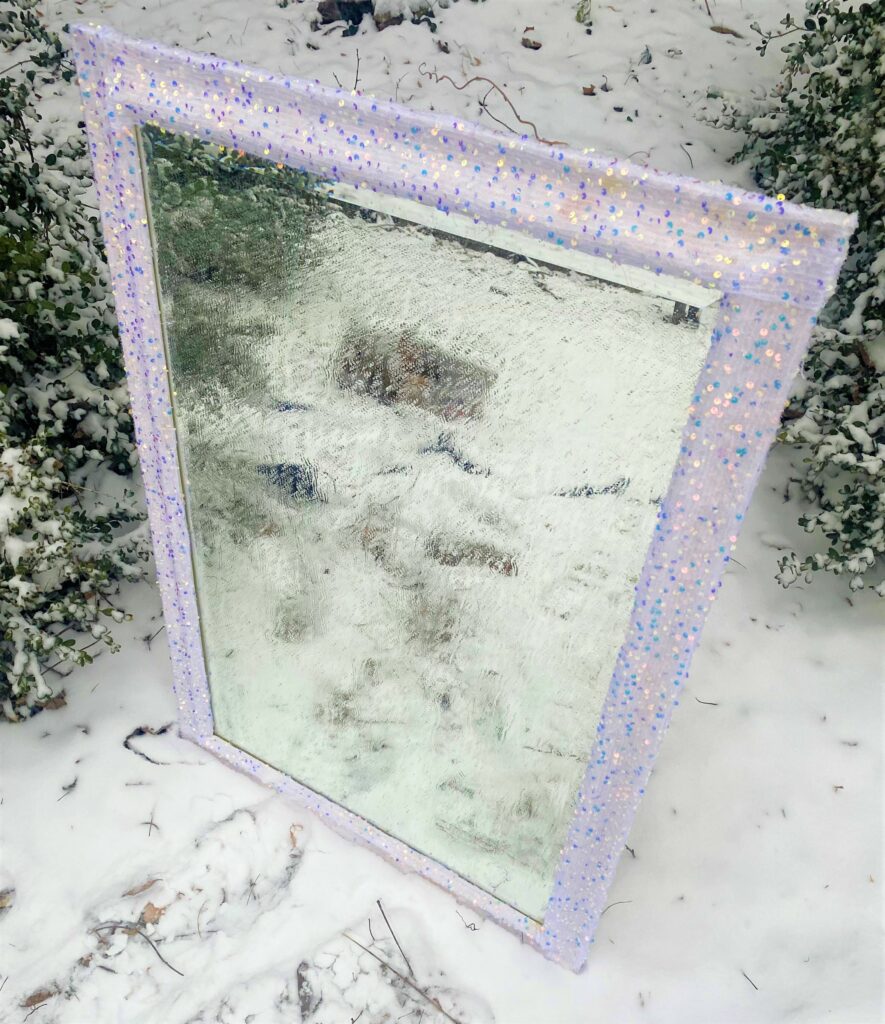
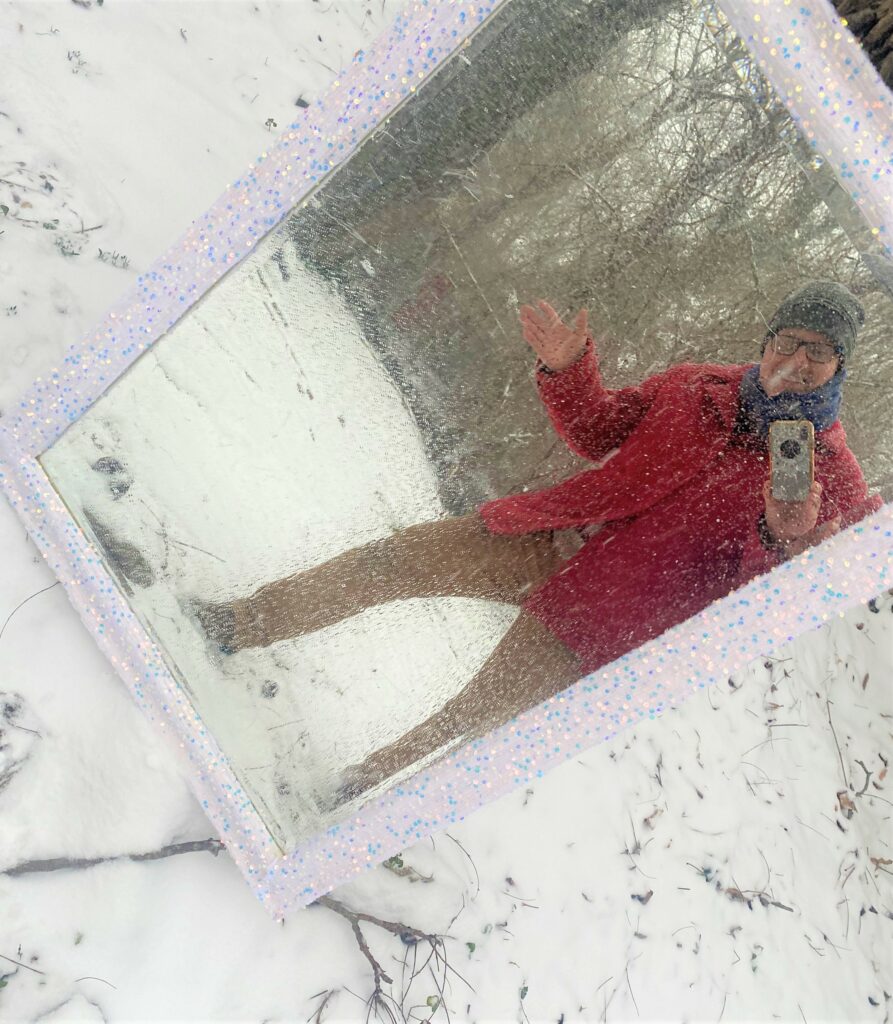
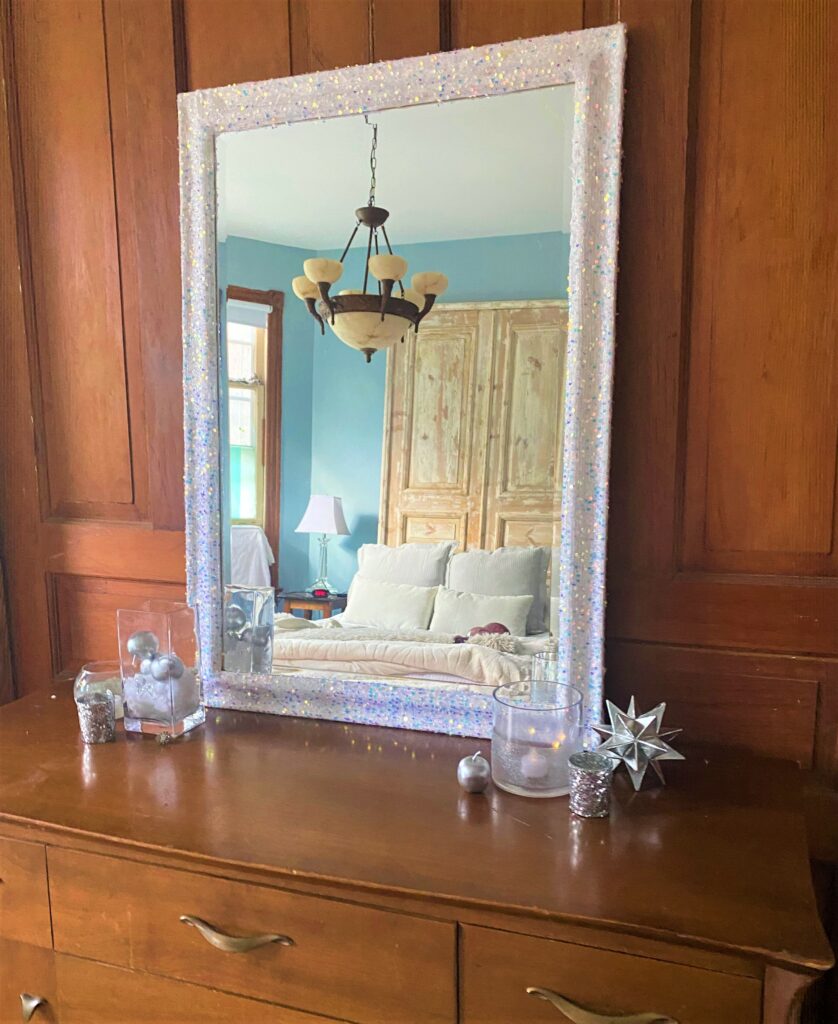
Hang this sparkling piece on the wall in any room you want to add a special touch. Or prop it on top of a dresser or desk.
Add matching accessories and items, fit for a queen or king, which can be found at Goodwill, too, for magically low prices.
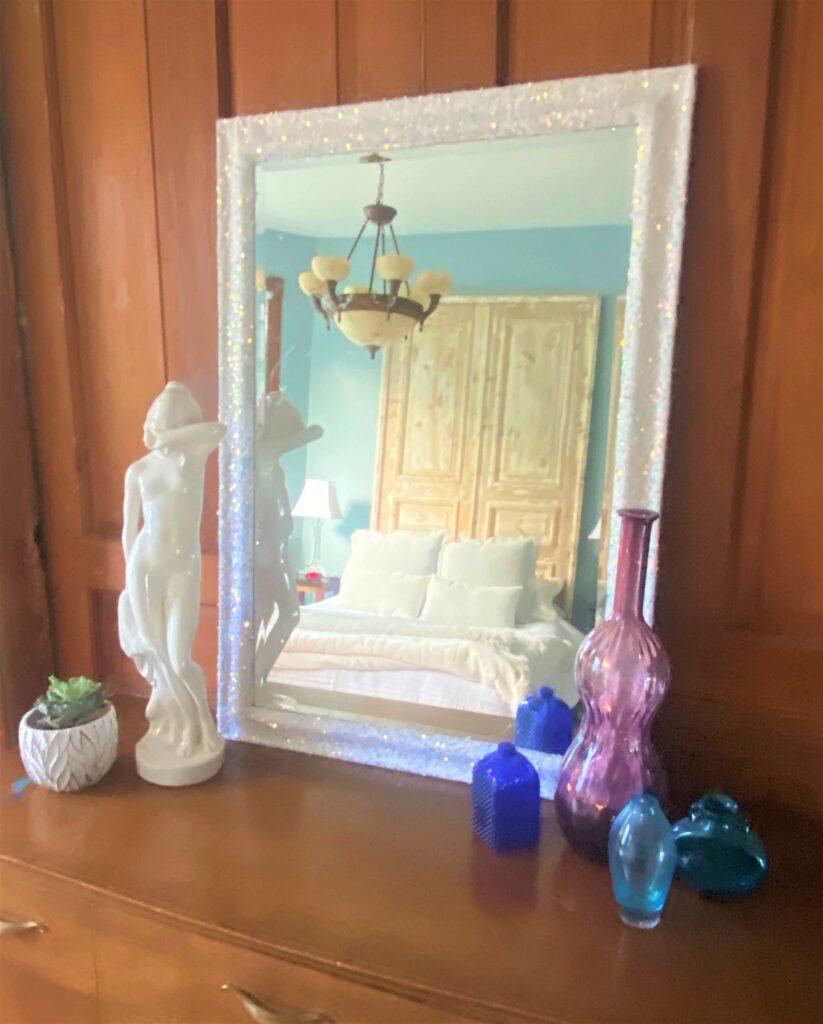
It will melt the heart of anyone who sees their reflection in it.
Use the character Elsa as inspiration as you explore and try new DIY projects. Her quote is rather fitting for this creation and others you may be considering. “Show yourself. Step into your power. Grow yourself into something new!” We wholeheartedly agree!

Tim Kime
Artist, Motivational Speaker, Life Coach


