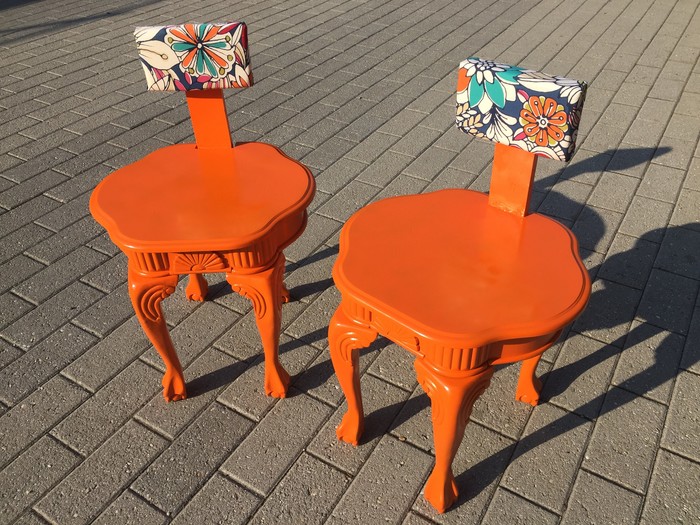
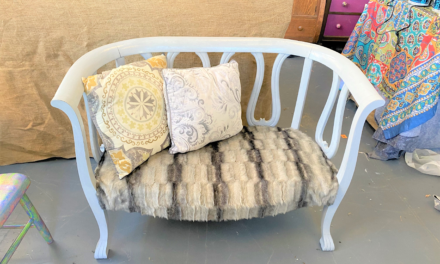
Turn boring and blah end tables into cool and chic chairs that will make a statement in any space. These eye-catching, transformed pieces will be the talk of the town or at least will create a buzz among your friends and family!
Ability level: Advanced
Age Level: Adults or teens with adult supervision and support
Items needed:
- A pair of matching, wooden end tables
- Spray paint
- Sandpaper
- Foam padding
- Fabric
- Wood screws and bolts
- Wood hole filler
- Staple gun and staples
- Fabric or Elmer’s glue
- Iron
- Drill
- Jigsaw
- Screwdriver
- Scissors
Time requirement: 8 hours
Cost: Approximately $50 for the pair
- $15 for end tables
- $15 for 3 cans of spray paint
- $5 for wood screws and bolts
- $5 for foam
- $3 for fabric
- $5 for wood
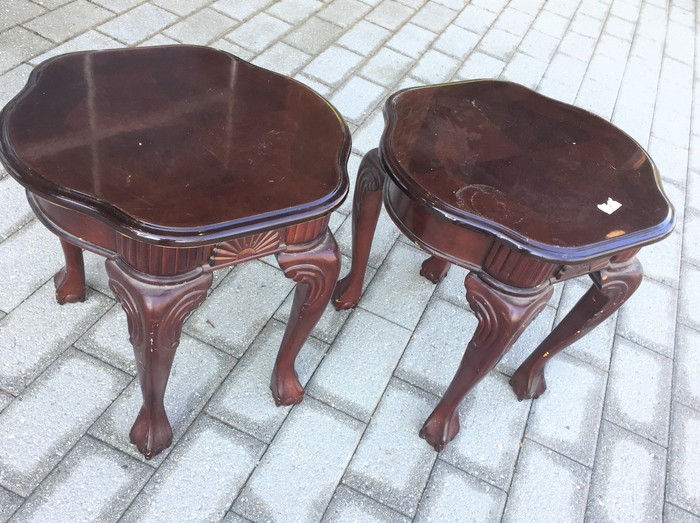
Step 1: The Hunt is on for the Perfect Pair
Your nearest Goodwill store always has lots of interesting furniture pieces donated by caring people in support of its important mission. Your mission? Find a pair of matching end tables that are solid and made of wood. Look for ones that are 16 to 18 inches tall (or less) so they are comfortable for sitting. Be sure to select solidly built tables so they can easily support a person’s weight. The ones I selected didn’t have drawers but consider ones that do have them for bonus storage space.
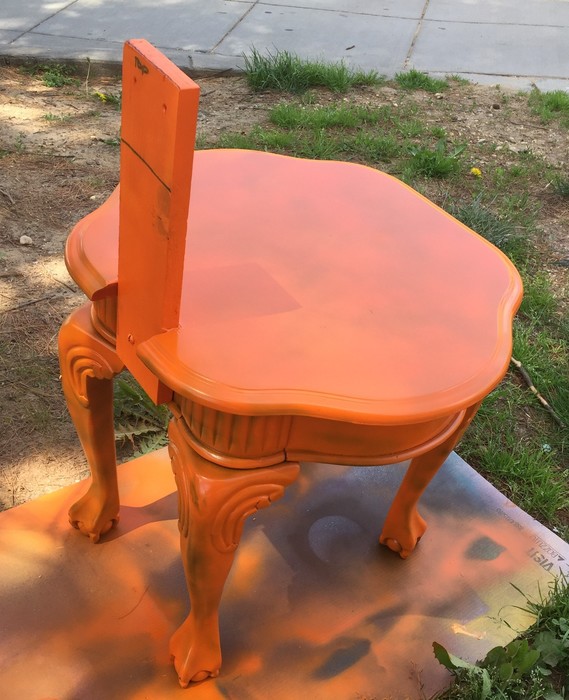
Step 2: Create a Notch for Back Support
For the chair back, I selected a 1 by 5 piece of wood. On the side of the table (which will become the back) either trace the piece of wood or use a tape measure to outline a notch on the top of the table. Use your jigsaw to make a series of cuts along the wood so that when you use your hammer to remove the parts between the cuts, it lines up with the frame that supports the top. After you have knocked out the cut parts, use your jigsaw to smooth out the edges to help ensure a tight fit.
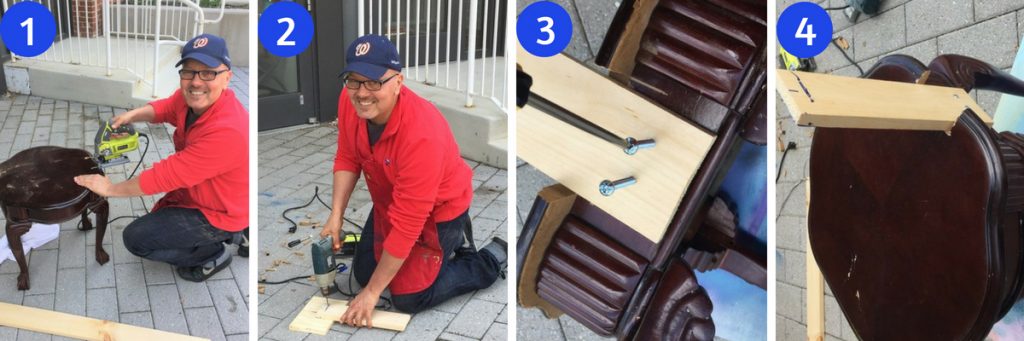
Step 3: Sand, Drill then Bolt
With the piece of wood that will become the back of the chair, measure how high you want your padded back to be and cut this piece accordingly. Sand this piece of wood as well as the sides of the notch you just cut out. Turn your table on its side and add the chair back piece of wood in place. Use your drill to create two holes that go through the chair back and the frame which supports the table top. Screw the bolt through the chair back and wood frame; add the nuts on the inside. This will make the piece very sturdy. For a smooth finish, fill the gap between the chair back and notch with wood filler.
Step 4: Painting Time!
Use your sandpaper or sanding block to lightly buff the entire piece. Sand over the wood filler to smooth it out. Use a damp rag or paper towel to remove all dust and debris caused by the cutting and drilling. Move your piece outside on a drop cloth and lightly spray your piece with a vibrant color of spray paint. Your first coat does not have to be perfect as you will follow with several more layers of paint. In between coats, turn your table on its side and back to ensure all parts are covered well.
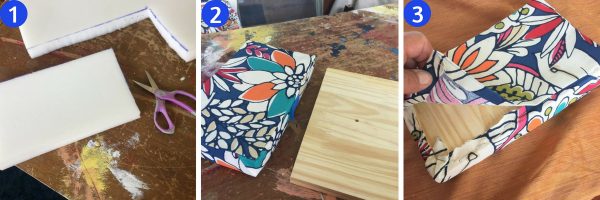
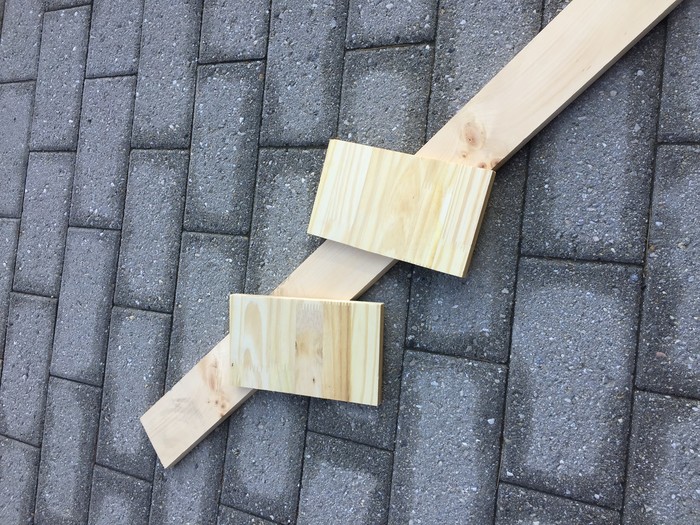
Step 5: Create a Chair Back Pad
While your piece is drying, turn your attention to creating the pad that will go on the back of the chair. For my piece, I measured the width of the table’s back and cut it to match. Part of the funkiness is the padded chair back is smaller than the entire width (from side to side) of the table. Cut two pieces of wood for the padded backrest. Next, place the wood atop your foam padding then trace it and cut. Then grab your fun fabric and place the foam padding and wooden backing on. Trace and cut the material and give yourself plenty of space to staple it to the wooden backing. With your staple gun, secure the material in place so that it covers all the sides and is stapled to the back of the wood. Cut away the access fabric. To make this part look finished, trace around the now covered padded piece then cut out the fabric. Fold over the edges and use your iron to give it a crisp crease. With your fabric glue or Elmer’s glue, cover the padded back as well as along the creases in the piece to be placed on the back. Put this piece on the back and ensure it covers all staples. Let this dry.

Step 6: Secure Padded Seat Back
If possible, get someone to help you with this step. Place the covered, padded seat back on your work table with the front side down. Lift and position the table so the chair back piece of wood is in the center of the padded seat back. Use your measuring tape to ensure it is centered properly. Grab your drill and make holes that go through the back piece of wood into the back of your padded seat back. Blow away any sawdust and use your wood screws to secure it in place.
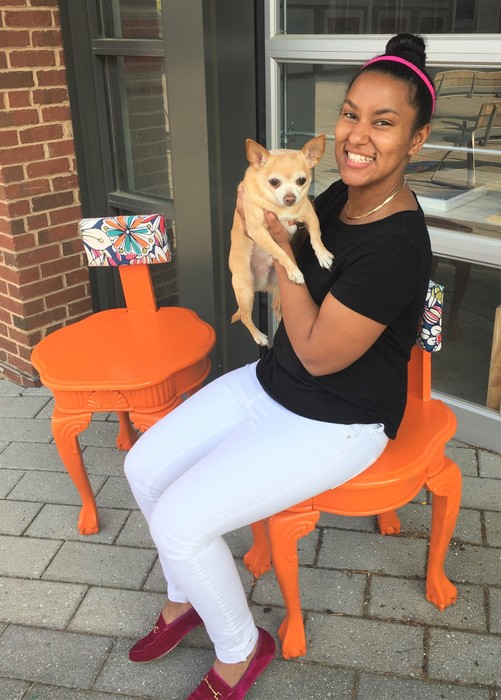
Step 7: Sit Back and Enjoy
Once your new pair of chairs is all done and looking fabulous, have fun finding the perfect place for them. Finally, grab a cup of tea or a glass of wine and invite your favorite person over to enjoy this new, welcoming place to sit while toasting your creation.
