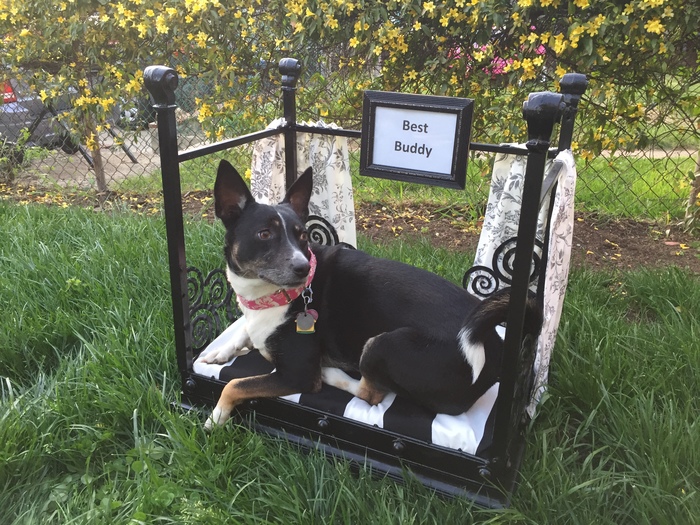
Your pet will flip for this end table turned bed!
With all the unconditional love our four-legged family members give us, they deserve to have a chic and unique bed to call their very own. Give your fabulous feline or cool canine his or her own place to sleep by turning a ho-hum end table into a fun four-poster bed. Expect to see wagging tails or hear purring when your furry best friend sees this cool transformation created just for them!
Ability level: Moderate
Age Level: Teens and adults
Items needed:
- End table, wooden (or metal with a wooden top)
- Spray paint
- Sandpaper
- Foam padding
- Fabrics
- Small picture frame
- Four wheels on casters
- Hemming tape
- Glue gun & glue sticks
- Iron
- Drill
- Screwdriver
- Scissors
Time requirement: 4 hours
Cost: Approximately $35 to $40
- $10 for table
- $4 per can of spray paint
- $10 for wheels
- $10 for foam
- $3 for fabric
- $1 for a picture frame
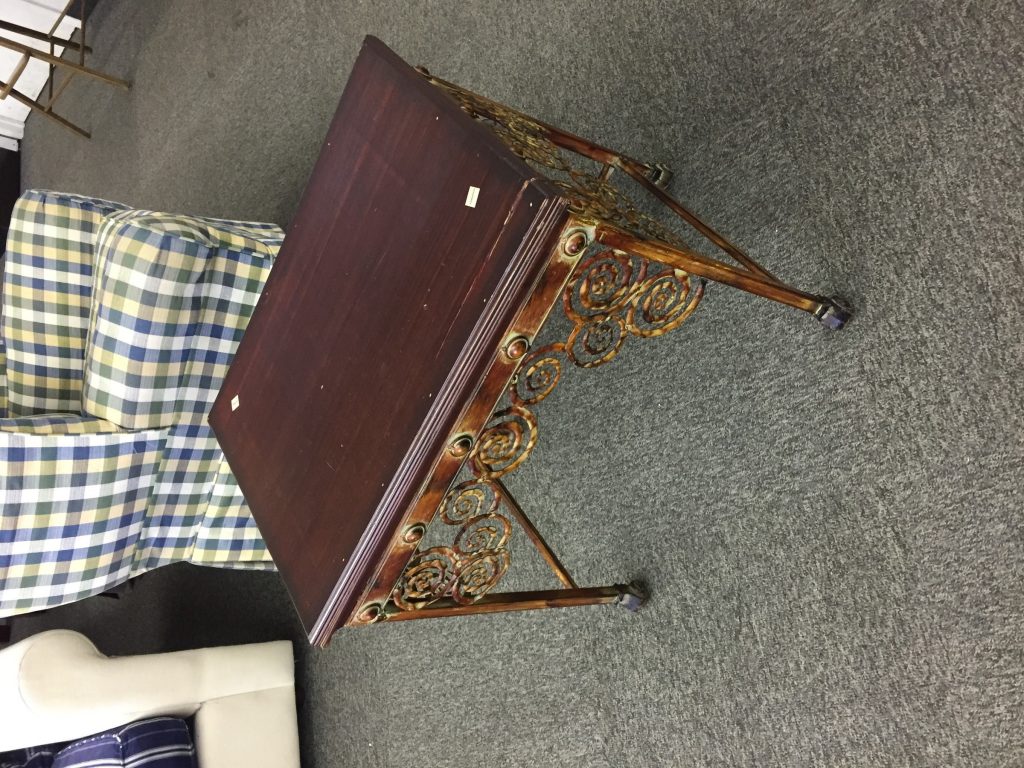
Step 1: Trolling for a Table
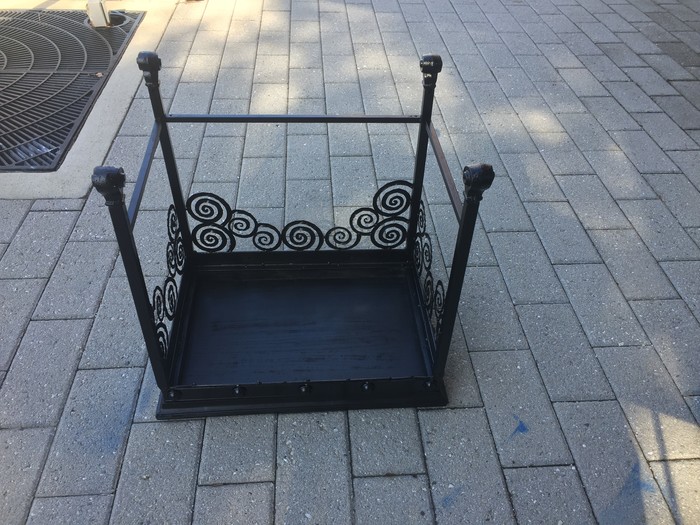
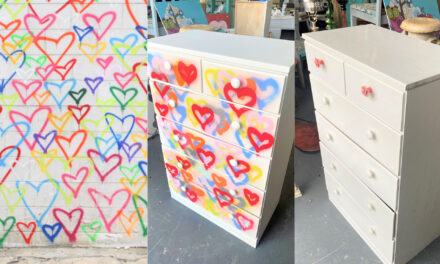
In the furniture section of your favorite Goodwill store awaits the perfect end table to flip for this fun and easy project. Look for a wooden one or a metal one with a wood top, taking into consideration the size of your pet. Steer away from ones with drawers to keep this project as simple as possible. While at the store, turn the table over to see how it will look with legs facing up, which will become the posts of the four-poster bed. For my project, I found a great option with circular borders that added extra visual interest.
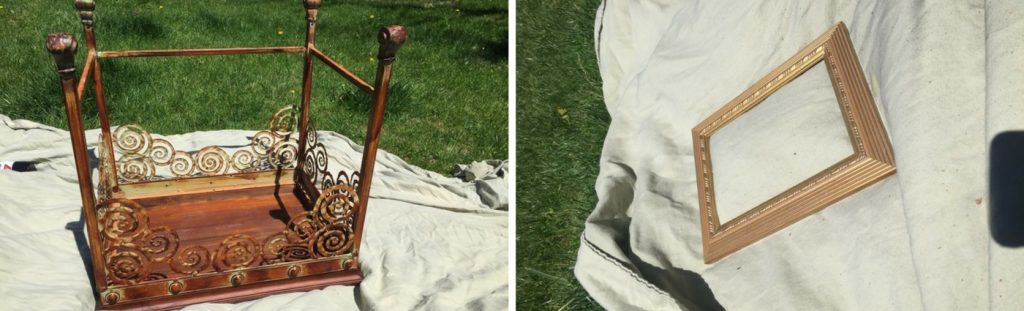
Step 2: Prep Your Piece for Painting
Tighten any screws to ensure the legs are on tight. Remove any unwanted hardware or other details. I used a hammer to remove one section of the border to allow easy access for the furry friend. Take a piece of fine sandpaper or a sandpaper block and gently buff the entire piece. This will help to make the paint adhere well. Wipe it down with a damp rag or paper towel to remove the dust from sanding and any dirt.
Step 3: Spray on Style
With so many color options, it might be difficult to decide which to choose. I wanted my pet bed to be elegant and timeless so I selected a glossy black to match the bold striped fabric. You can choose your favorite color or one that matches the tones of the room where your friend sleeps. Spray on a light layer and don’t worry about putting on a perfect coat. You will turn your piece on its various sides and add several more light layers to ensure you have covered it completely. Let your pet bed dry in between it coats. While your table is drying, remove the glass and back from the picture frame and spray paint it, too, also doing in several light coats.
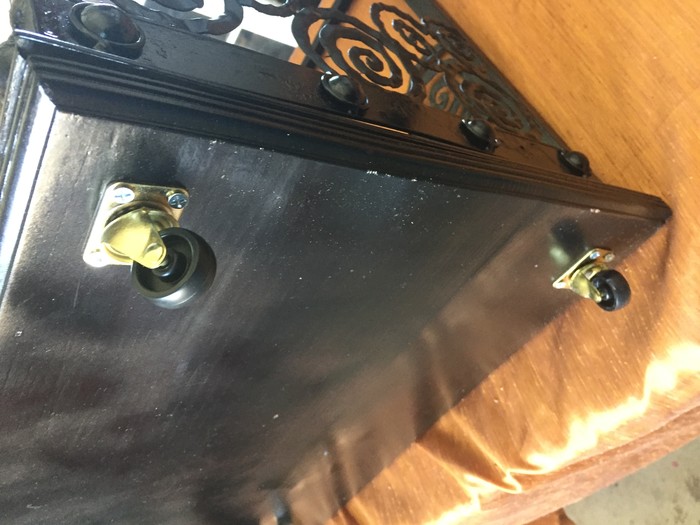
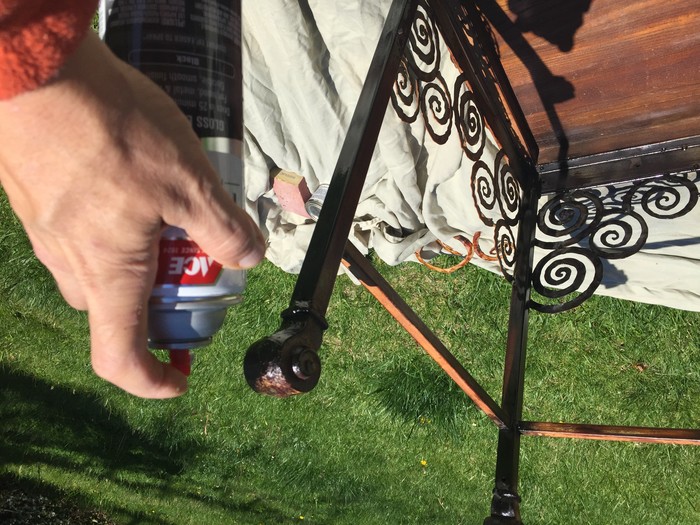
Step 3: Screw on Wheels
To raise your pet bed up off the floor and to make it easily moveable, add wheels with casters to the bottom (original tabletop). Use a sharpie to indicate where you will drill, then use your drill to create starter holes. Securing the wheels with screws. (Adults only for drilling and ironing, please!)
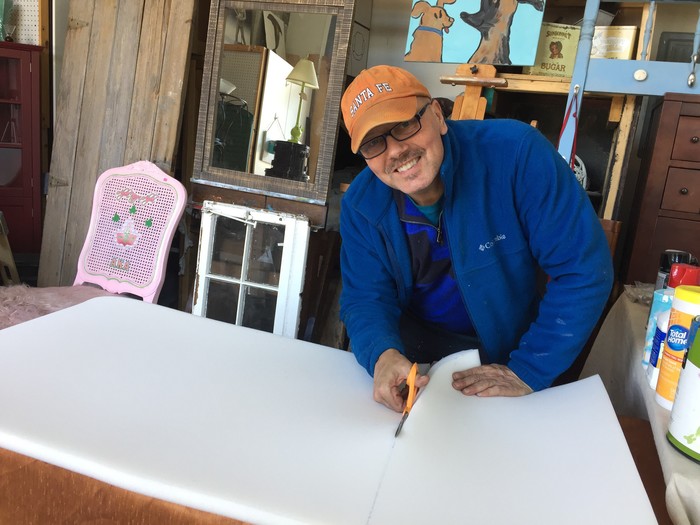
Step 4: Cut Foam Padding to Fit
Turn your pet bed over so the wheels and former top are facing down and the legs are pointing up. Measure the space between the four legs where your padding will go. You may want to add several layers of foam to ensure your pet is very comfortable. Use your scissors to cut it then place it in the space to ensure it fits well. You might have to slightly trim it.
Step 5: Fun Fabric
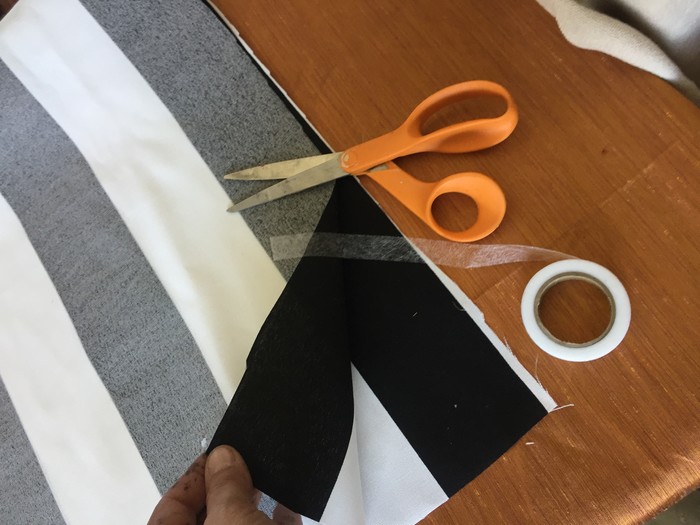
There are so many fabric options out there with many soft textures. I wanted a black and white themed piece so I chose two fabrics in that scheme.
Step 4: Cover the Padding
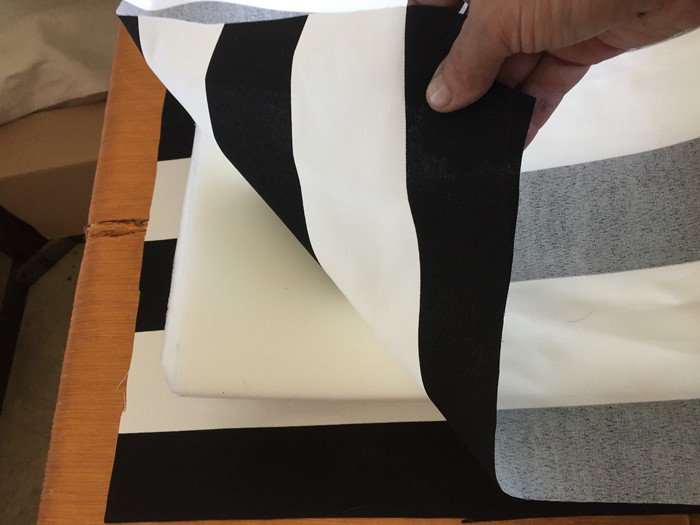
If you don’t know how to sew (like me!), then a great option is iron-on hemming tape. Fold your fabric in half and lay it on your working surface or kitchen table. Place the foam padding on top and leave two inches of the fabric further than the edge. Remove the foam padding then cut the fabric. Refold your fabric so that the “right” side or color side is now on the inside. Along the side open edges, place a strip of the iron-on hemming tape then use your iron to heat and adhere fabric. Do this on the parallel or opposite side too.
After one edge has been folded over and two sides have been tape, reach in gently to grab the fabric and turn it inside out so that the “right” side is now outside. Carefully insert the padding into the open edge reaching in to ensure the padding fills the entire fabric pocket you created. Place another piece of the iron-on hemming table along the inside of the open edge and use your iron to seal it.
Once your foam padding is covered, place it in the space between the legs where your pet will soon be sleeping.
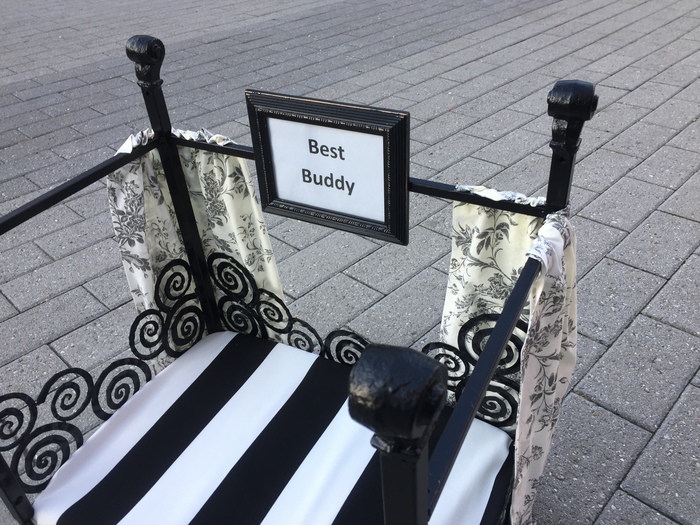

Step 6: Personalize: Add Picture Frame and Accessories
To take your pet bed from fine to fabulous, add their name to the frame and adhere it somewhere on the piece; mine had a perfect bar along the back on which to hang it. You could place it on the front or on one of the legs. Add other fabrics to mimic curtains or consider adding other embellishments like fake jewels, plastic bones or use contrasting craft paints to pull out details. Once you are done and you place your pet bed on the floor in your home, watch out! Your dog or cat might want to spend all their time on it since it will make them look even more adorable!
Tim Kime is an artist, life coach, connector. He is President of Kime Leadership Associates offering executive coaching, meeting facilitating and motivational speaking. He is also Chief Creative Force of Transformation Junkies which upcycles furniture and other household items into functional works of art. He combined his two passions—unleashing the potential in people and transforming items with the launch of the Art of Possibilities Workshops. These workshops are part upcycling, part dreaming, part goal setting.
