Show Your Love with a Sign Reusing Household Items!
For Valentine’s Day (or any time, love has no holiday!), express your love and your creativity by making a sign from items you have around the house.
Many of these items can be found at Goodwill…or at least they are part of pieces bought there! Today’s project is an upcycled love letter that will last longer than flowers or chocolates. It will be sure to receive a sweet reception, too!
Level: Kids of all ages with adult supervision
Items needed:
1. Household items to upcycle (clothes pins, small picture frames, knobs)
2. Scrap wood
3. Left over craft or house paint
4. Left over spray paint
5. Glue gun & glue sticks
6. Picture hangers
Time requirement:
- 30 minutes not including paint drying time
Cost: $4
- $1 for picture hangers (if not reused)
- $1 for glue sticks
- $1 for paint (if not using leftover)
- $1 for wood (if no scraps available)
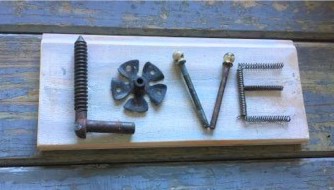
Step 1: Look for G-O-O-D at Goodwill
This is a really fun and creative project when you think about the various items in your home that are in the shape of letters.
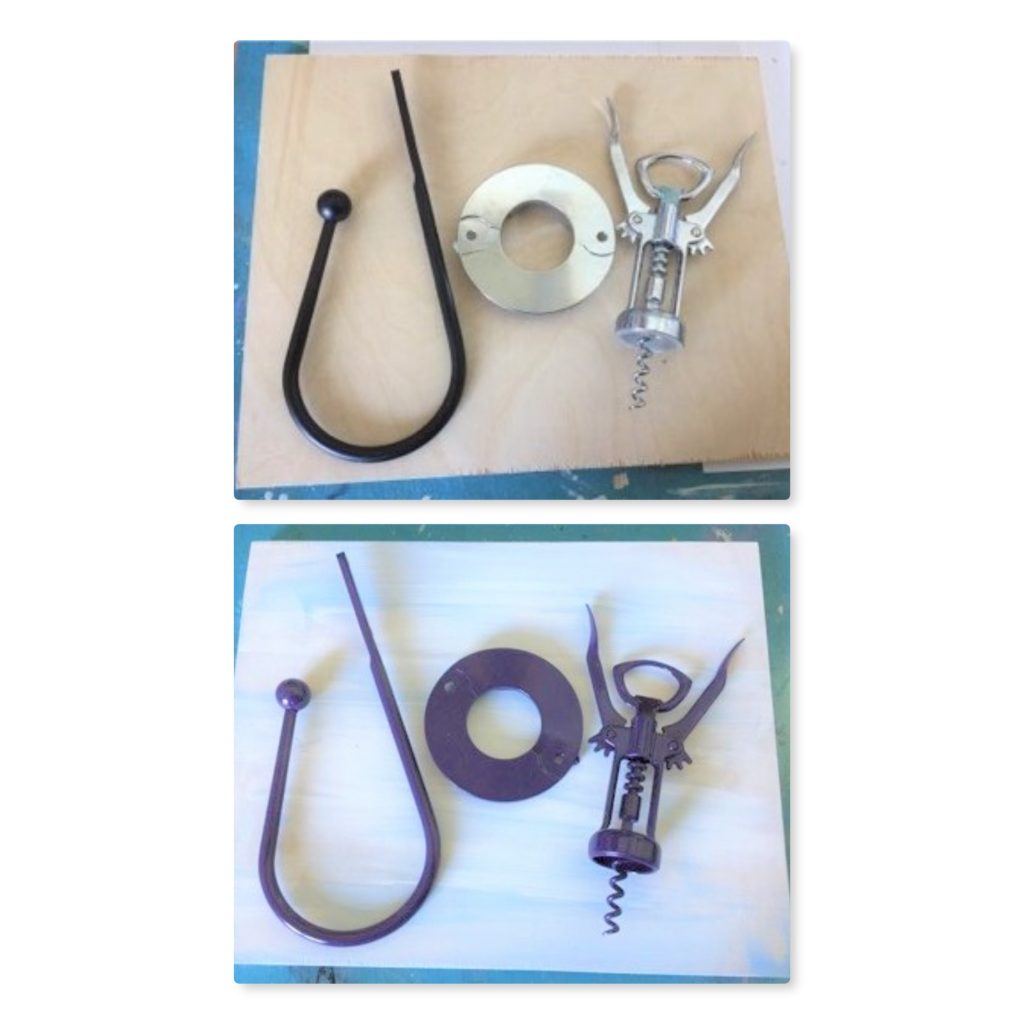
At Goodwill, look for parts of items purchased there for this project. The corner of a small picture frame can become the letter “L” or a knob can be an “O.” I found a cork remover that became a “Y” and a compass that became a “V.”
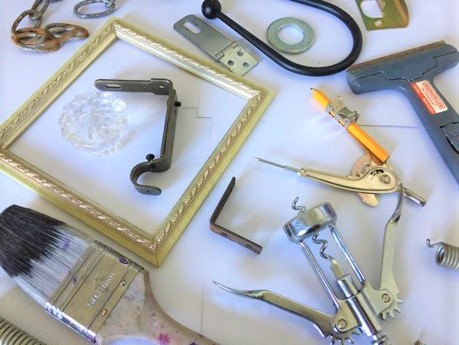
While scrap wood is perfect for this DIY, if you don’t have any on hand, look for wooden boxes to take a part or consider enlisting a cutting board, too.
The main reason why I love this project is because it gets you to look at every day items in a special way!
Step 2: Create your canvas
Prepare a scrap piece of wood to use as a canvas for this DIY. You can use a small cutting board, drawer front, or section of a wooden box for your backdrop.
Add a layer or two of light-colored paint to this “canvas.” Craft paint will work, too. Consider going for a weathered, shabby chic look rather than a perfect coat of paint to add to the whimsical look of your sign.
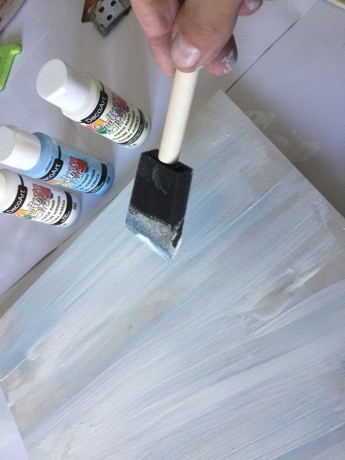
After the paint has dried, use sand paper to lightly buff the edges to bring out the wood below and to give it a distressed feel. Brush or blow of the dust created.
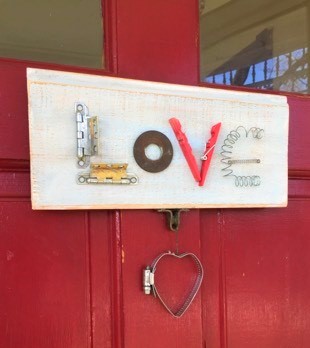
Design Tip: Once you have your letters selected, you might consider spray painting them all one color so they look connected and cohesive. For several of the signs I created, the shapes of the items were the most interesting part so spray painting them focuses attention on that.
Step 3: Glue on the love
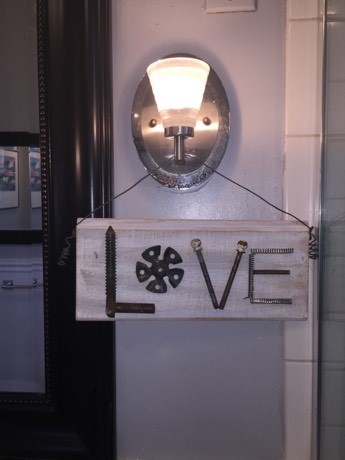
Arrange the various items you have collected to spell the word “Love,” on your canvas so that it looks spaced out and balanced. Given the pieces will be different sizes, have fun with how you arrange them. After you have a design that makes you smile, then grab your handy glue gun and go to town carefully placing each in place.
Expert Suggestion: You don’t have to limit yourself to the word “love” for this project. Consider other timeless and short words like, “home,” “joy” and “hello.” They all will make welcoming signs to be displayed all year.
Step 4: Add picture hangers
If you pick up a frame at Goodwill, you can reuse the picture hanger on the back for this project or pick one up at your local hardware store.
Nail it in the center of the back being careful not to bump the letters on the front when you turn it over to attach it. You could also drill screw on the upper end of the two sides and add wire. I did so with one of the signs and reused wire from an old frame.
Step 5: Give to someone you love…or keep for yourself!
This project won’t take you long or cost much money. However, it will be a one-of-a-kind piece that your sweetie will keep displayed all year. And if you create one for yourself, you will be reminded of the love used to give old pieces a wonderful new life!

