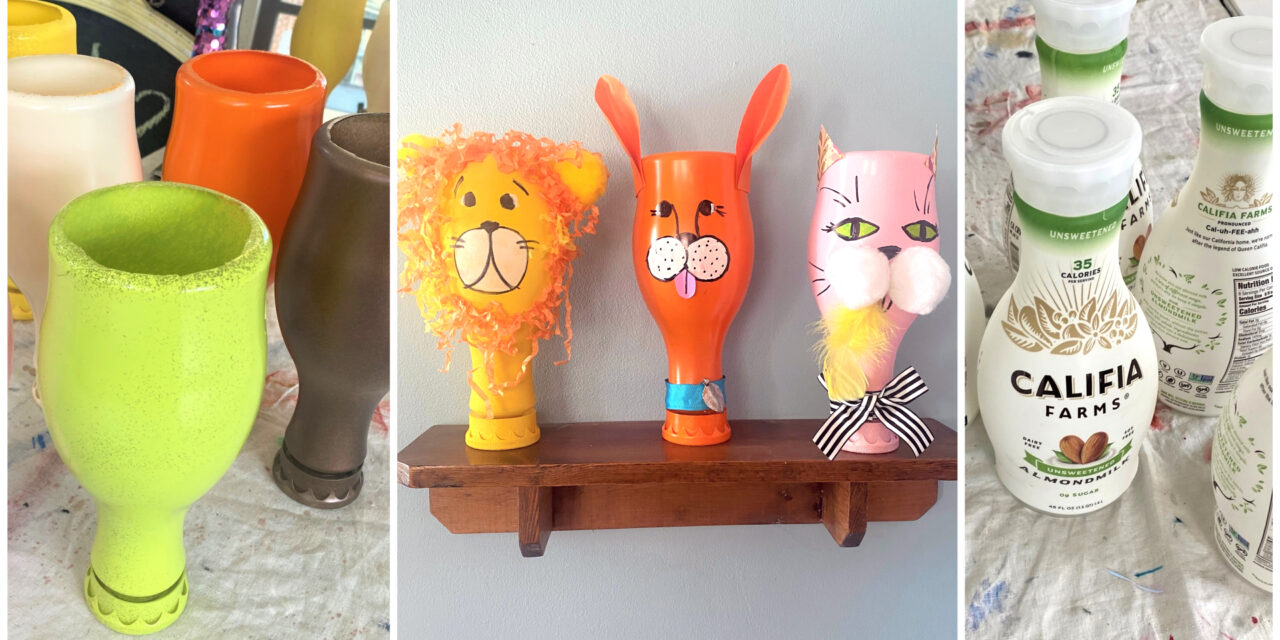
Transform a curvy almond milk container into a charming and whimsical vase/art piece. This Earth-friendly upcycle is a great project for you, your family, and your friends to do together.
Supplies Needed:
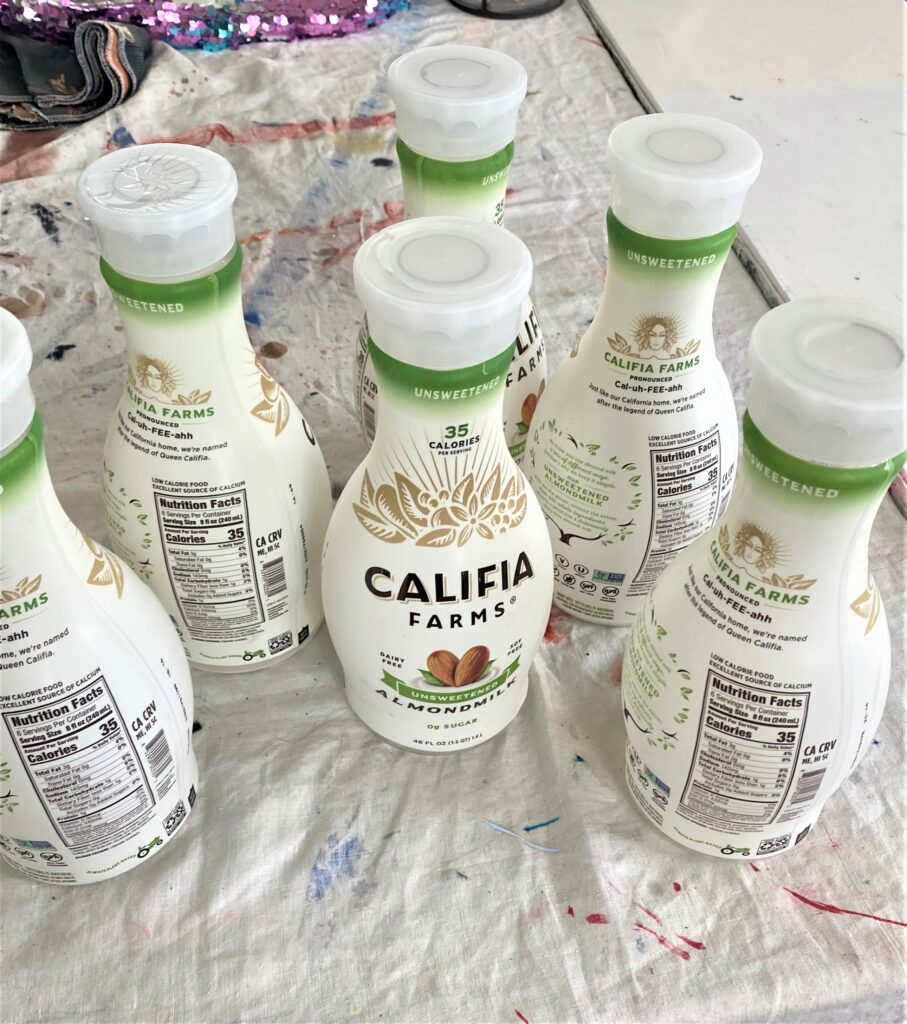
1. Plastic almond milk containers/cartons
2. Spray paints in various colors and hues
3. Thick black marker/Sharpie
4. Craft paints
5. Small paintbrushes
6. Items to embellish (art paper, plastic jewels, ribbon, etc.)
7. Exacto knife
8. Glue gun & glue sticks
Step 1: Set aside empty containers
Start saving your almond milk or other beverage containers that are made of plastic and curved in shape. Rinse them out and set them aside until you have a small collection. This makes a perfect group activity because it involves lots of creativity while protecting Mother Earth.
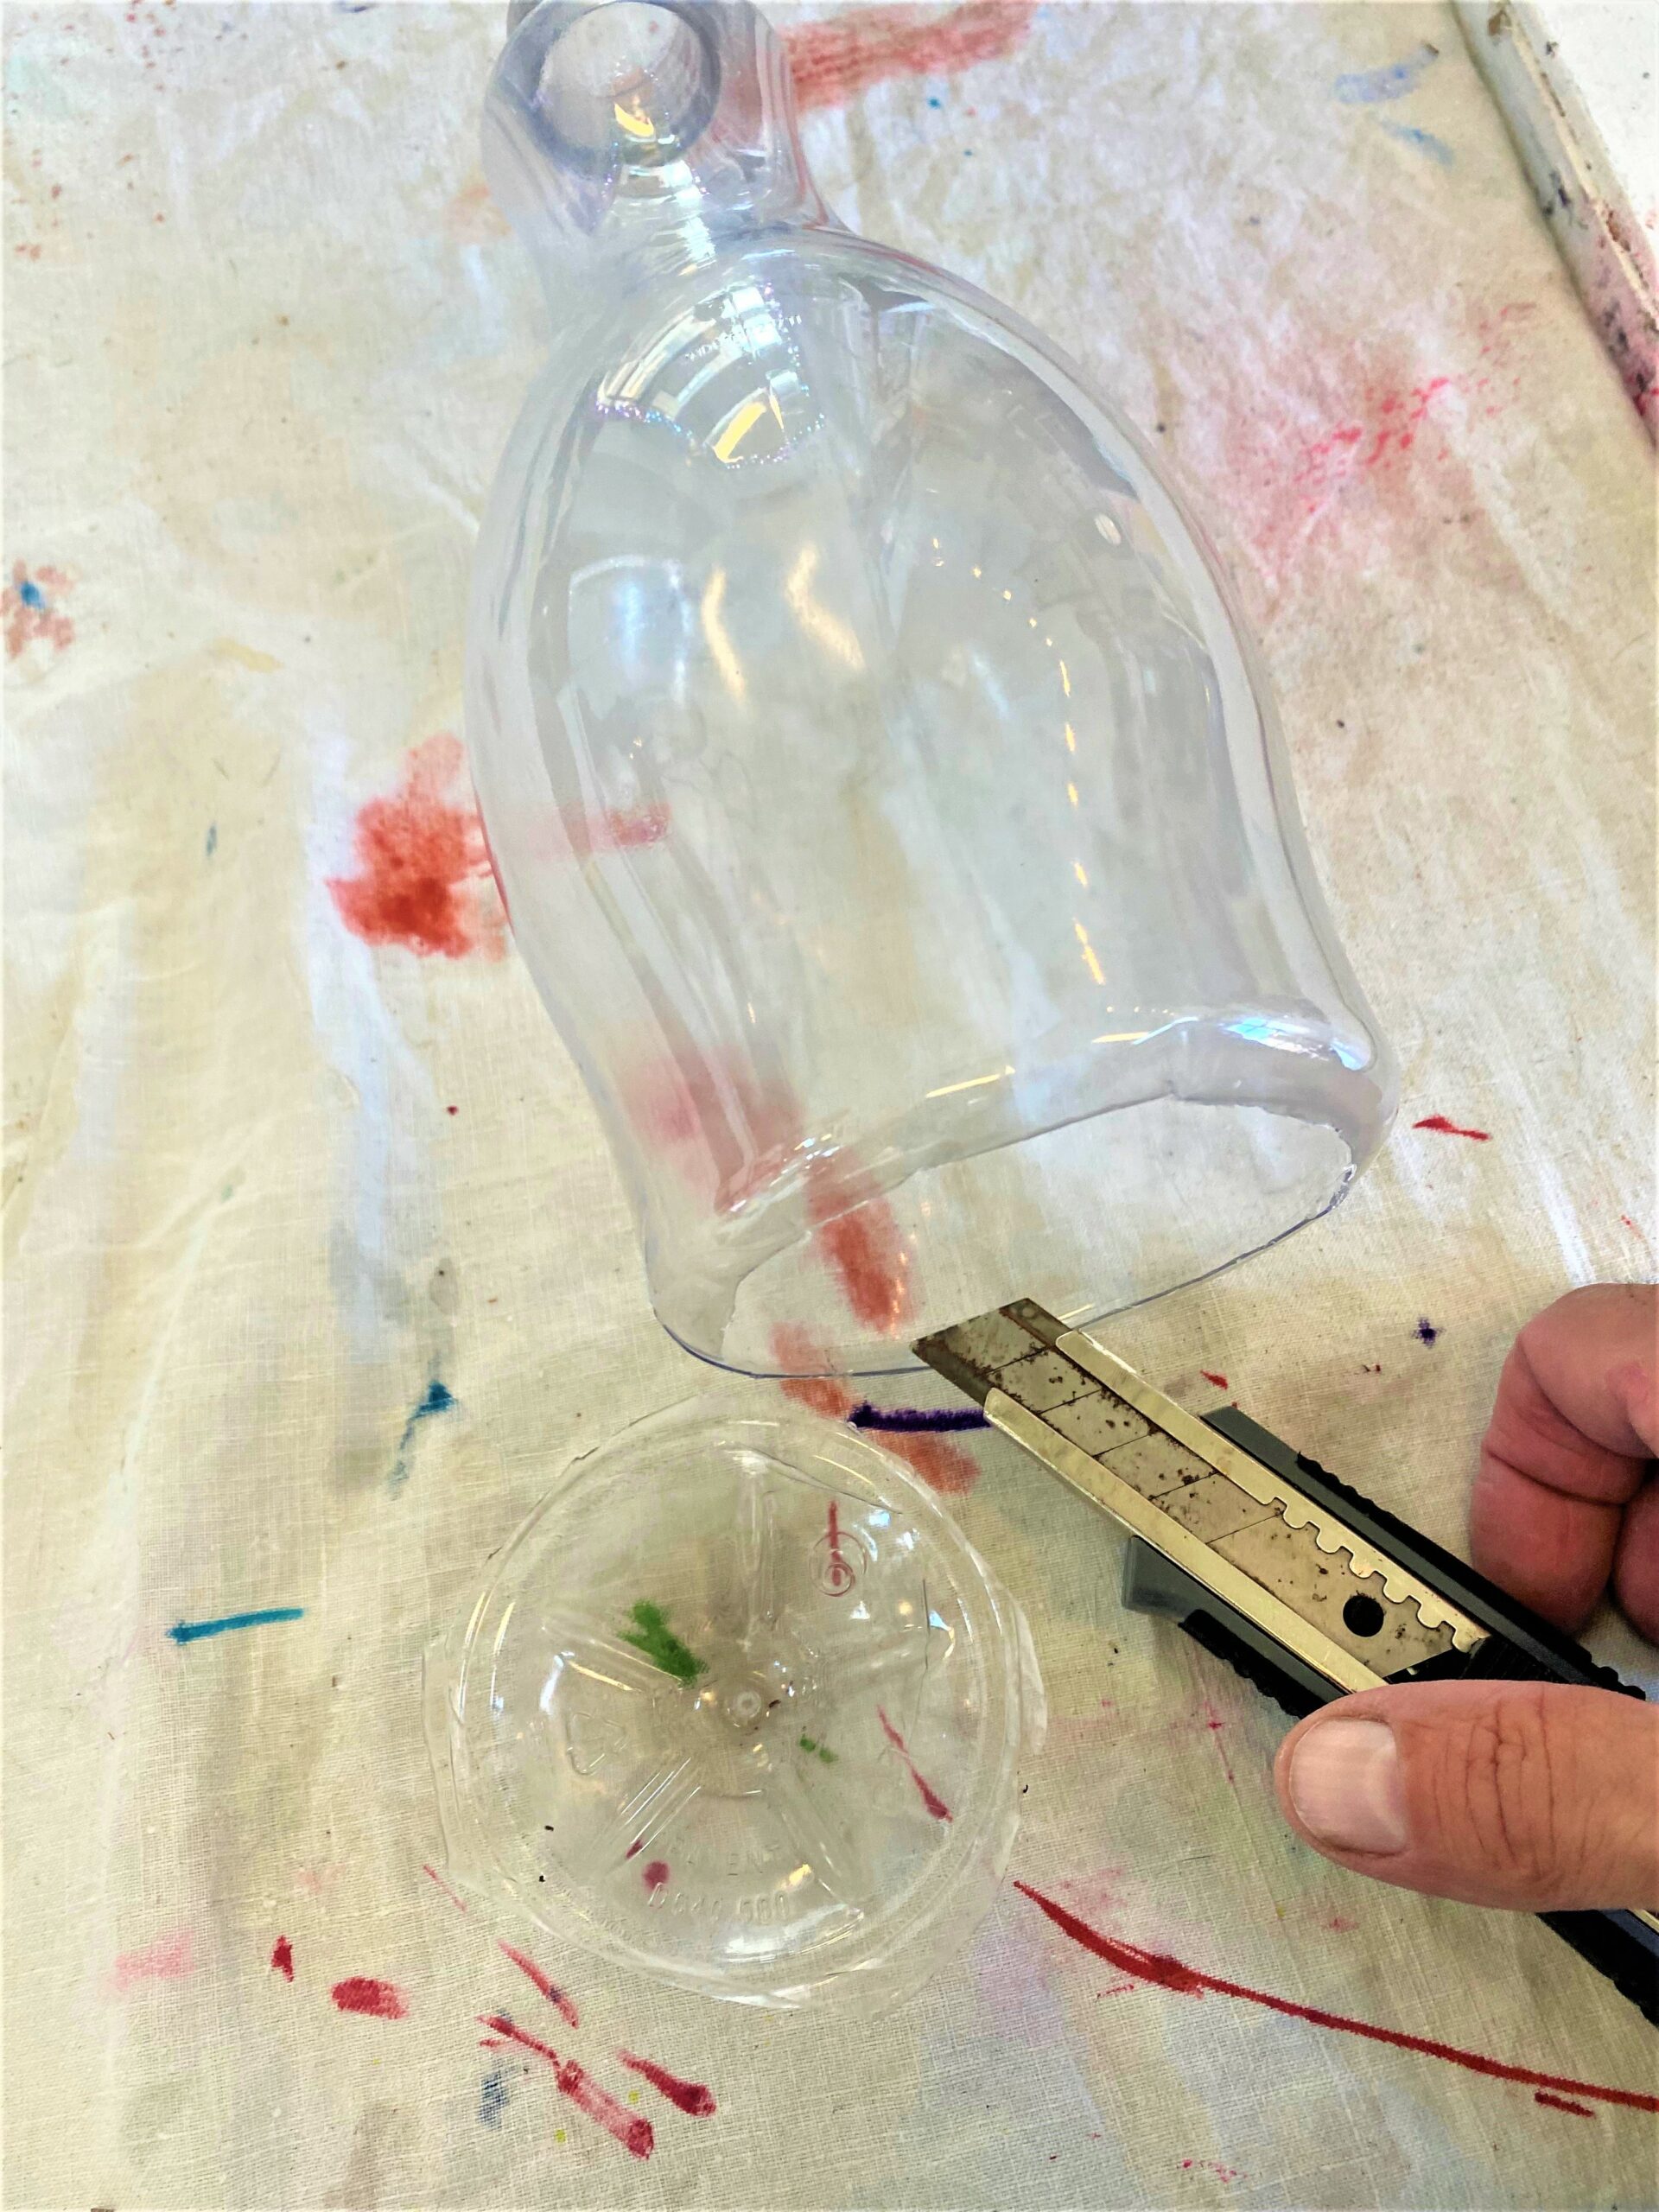
Step 2: Carefully cut off the bottom
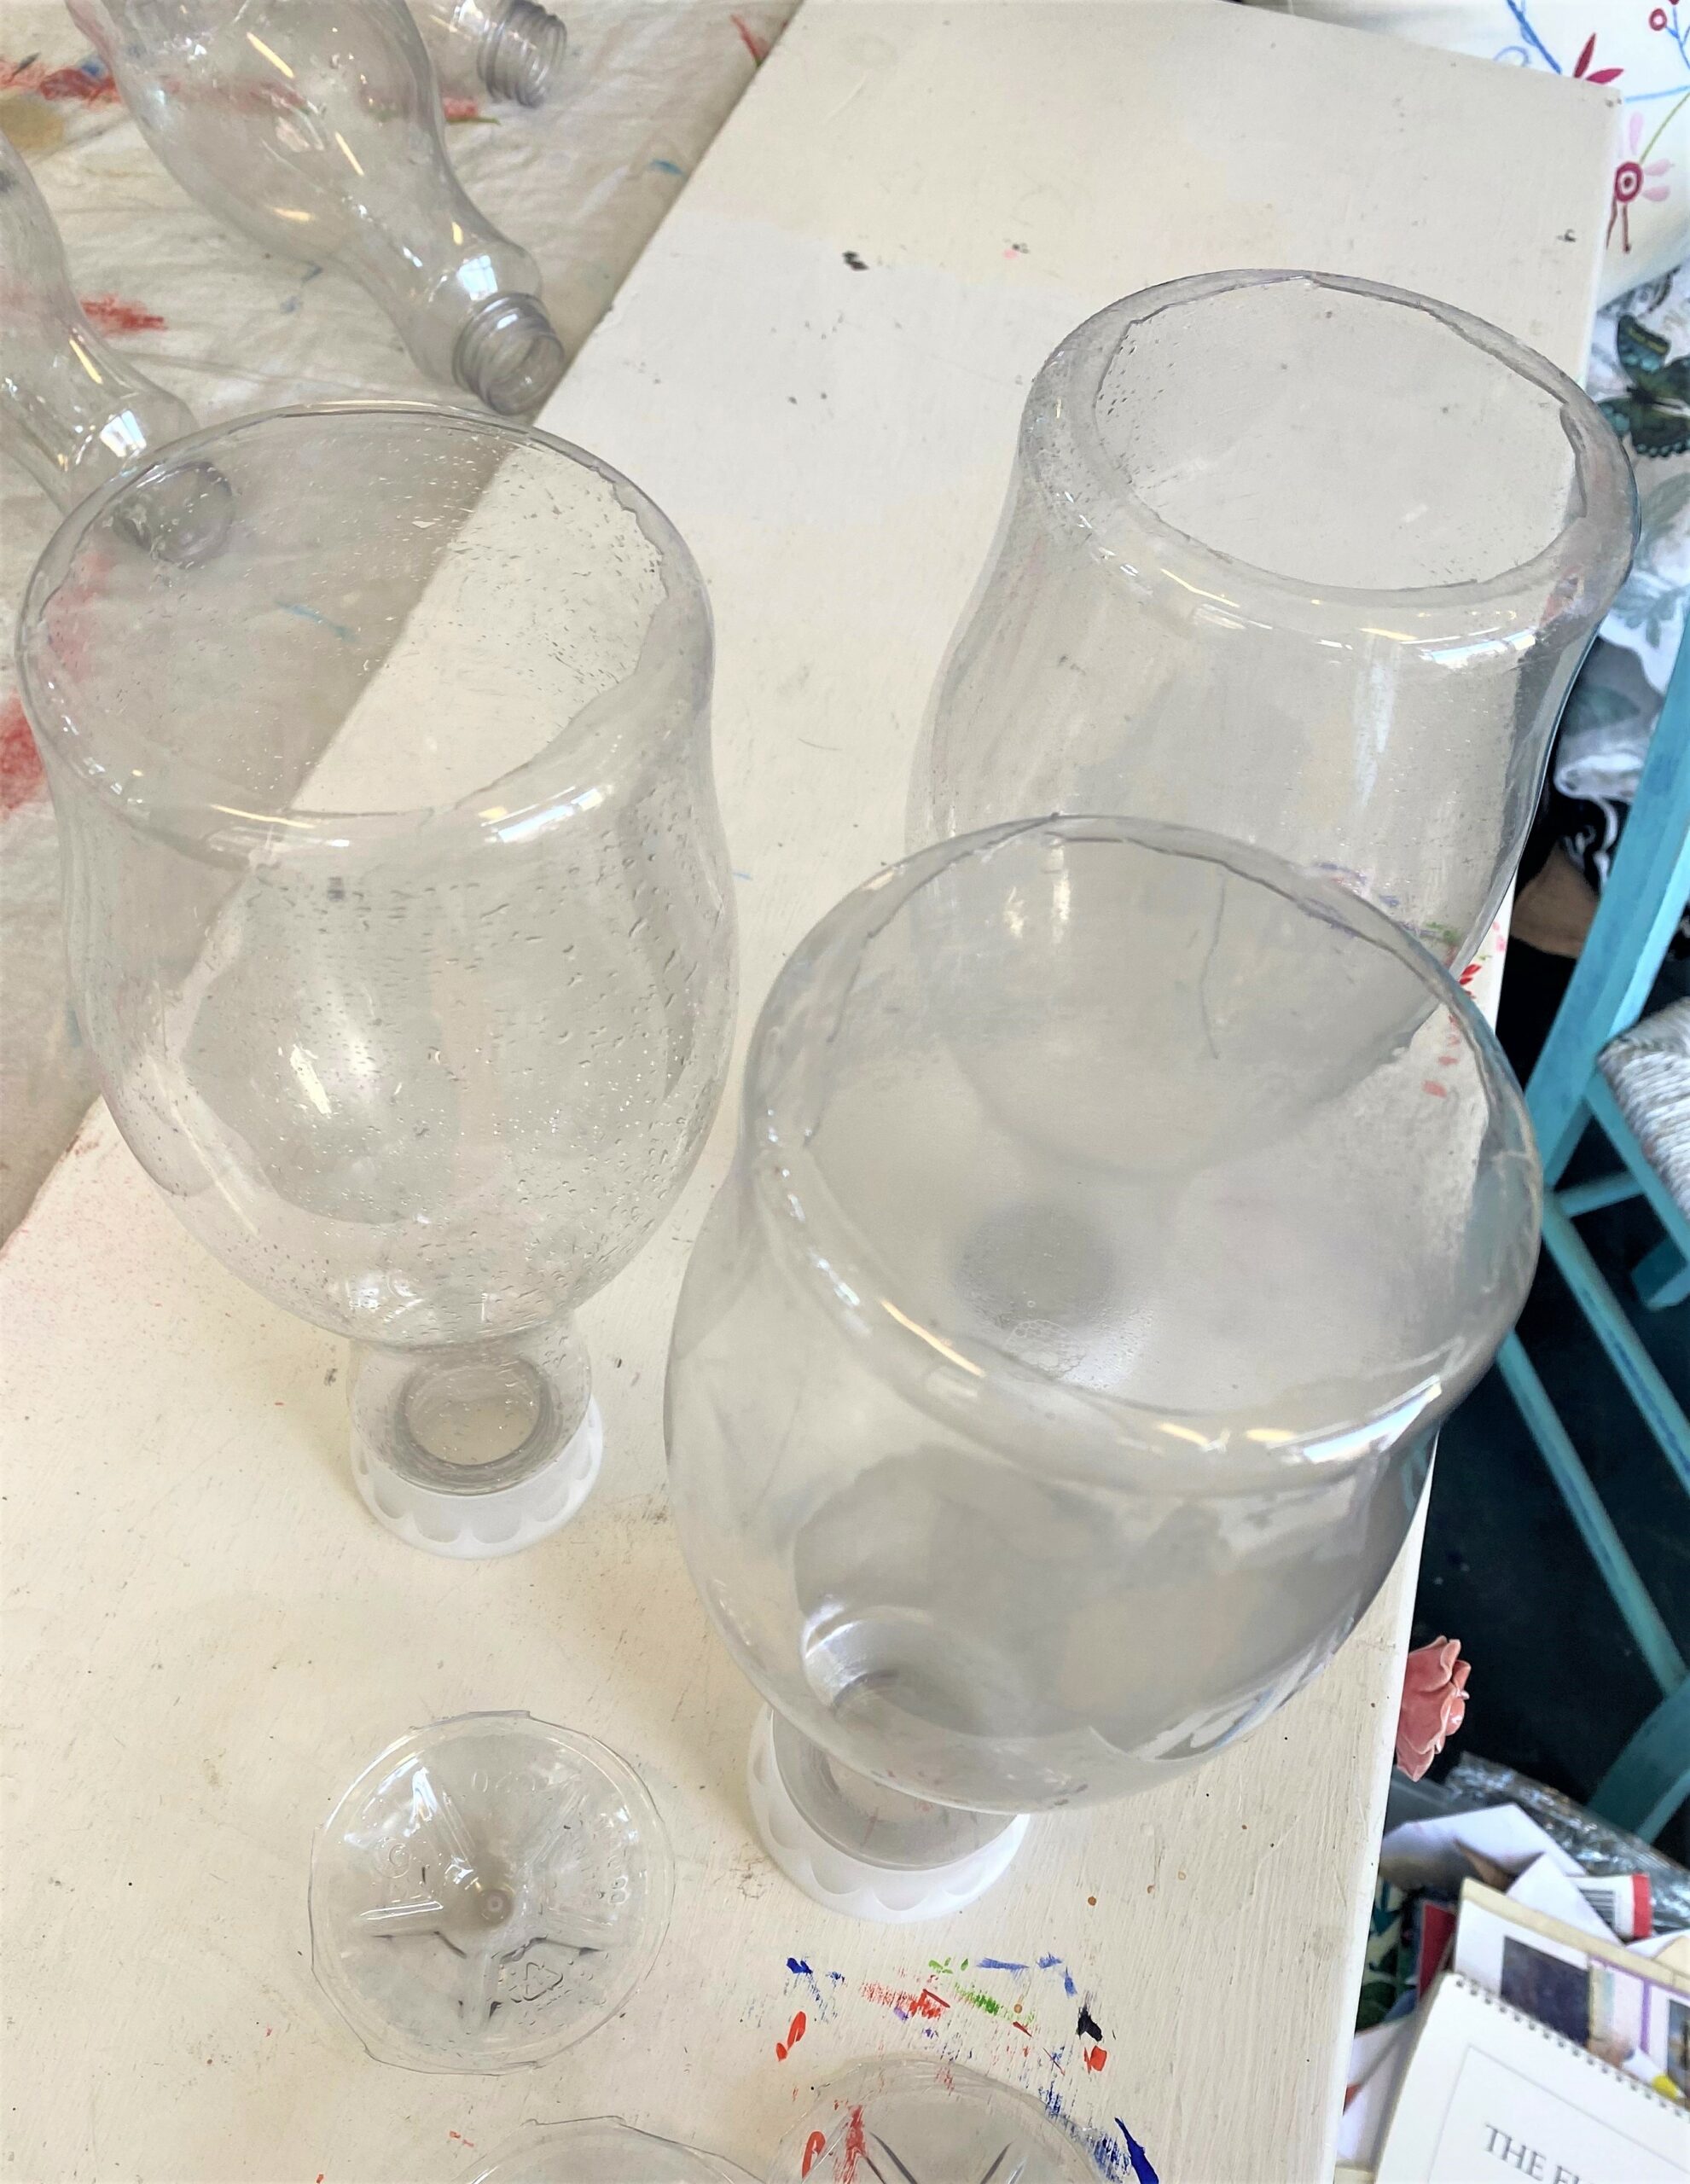
- With an Exacto knife, very carefully cut away the container’s bottom. Do this to allow a little bit of a lip along the edge so when flipped over, the new top side (formerly the bottom) looks nice.
- If doing this project with little kids, please complete this step yourself to ensure everyone stays safe and the fun continues unimpeded.
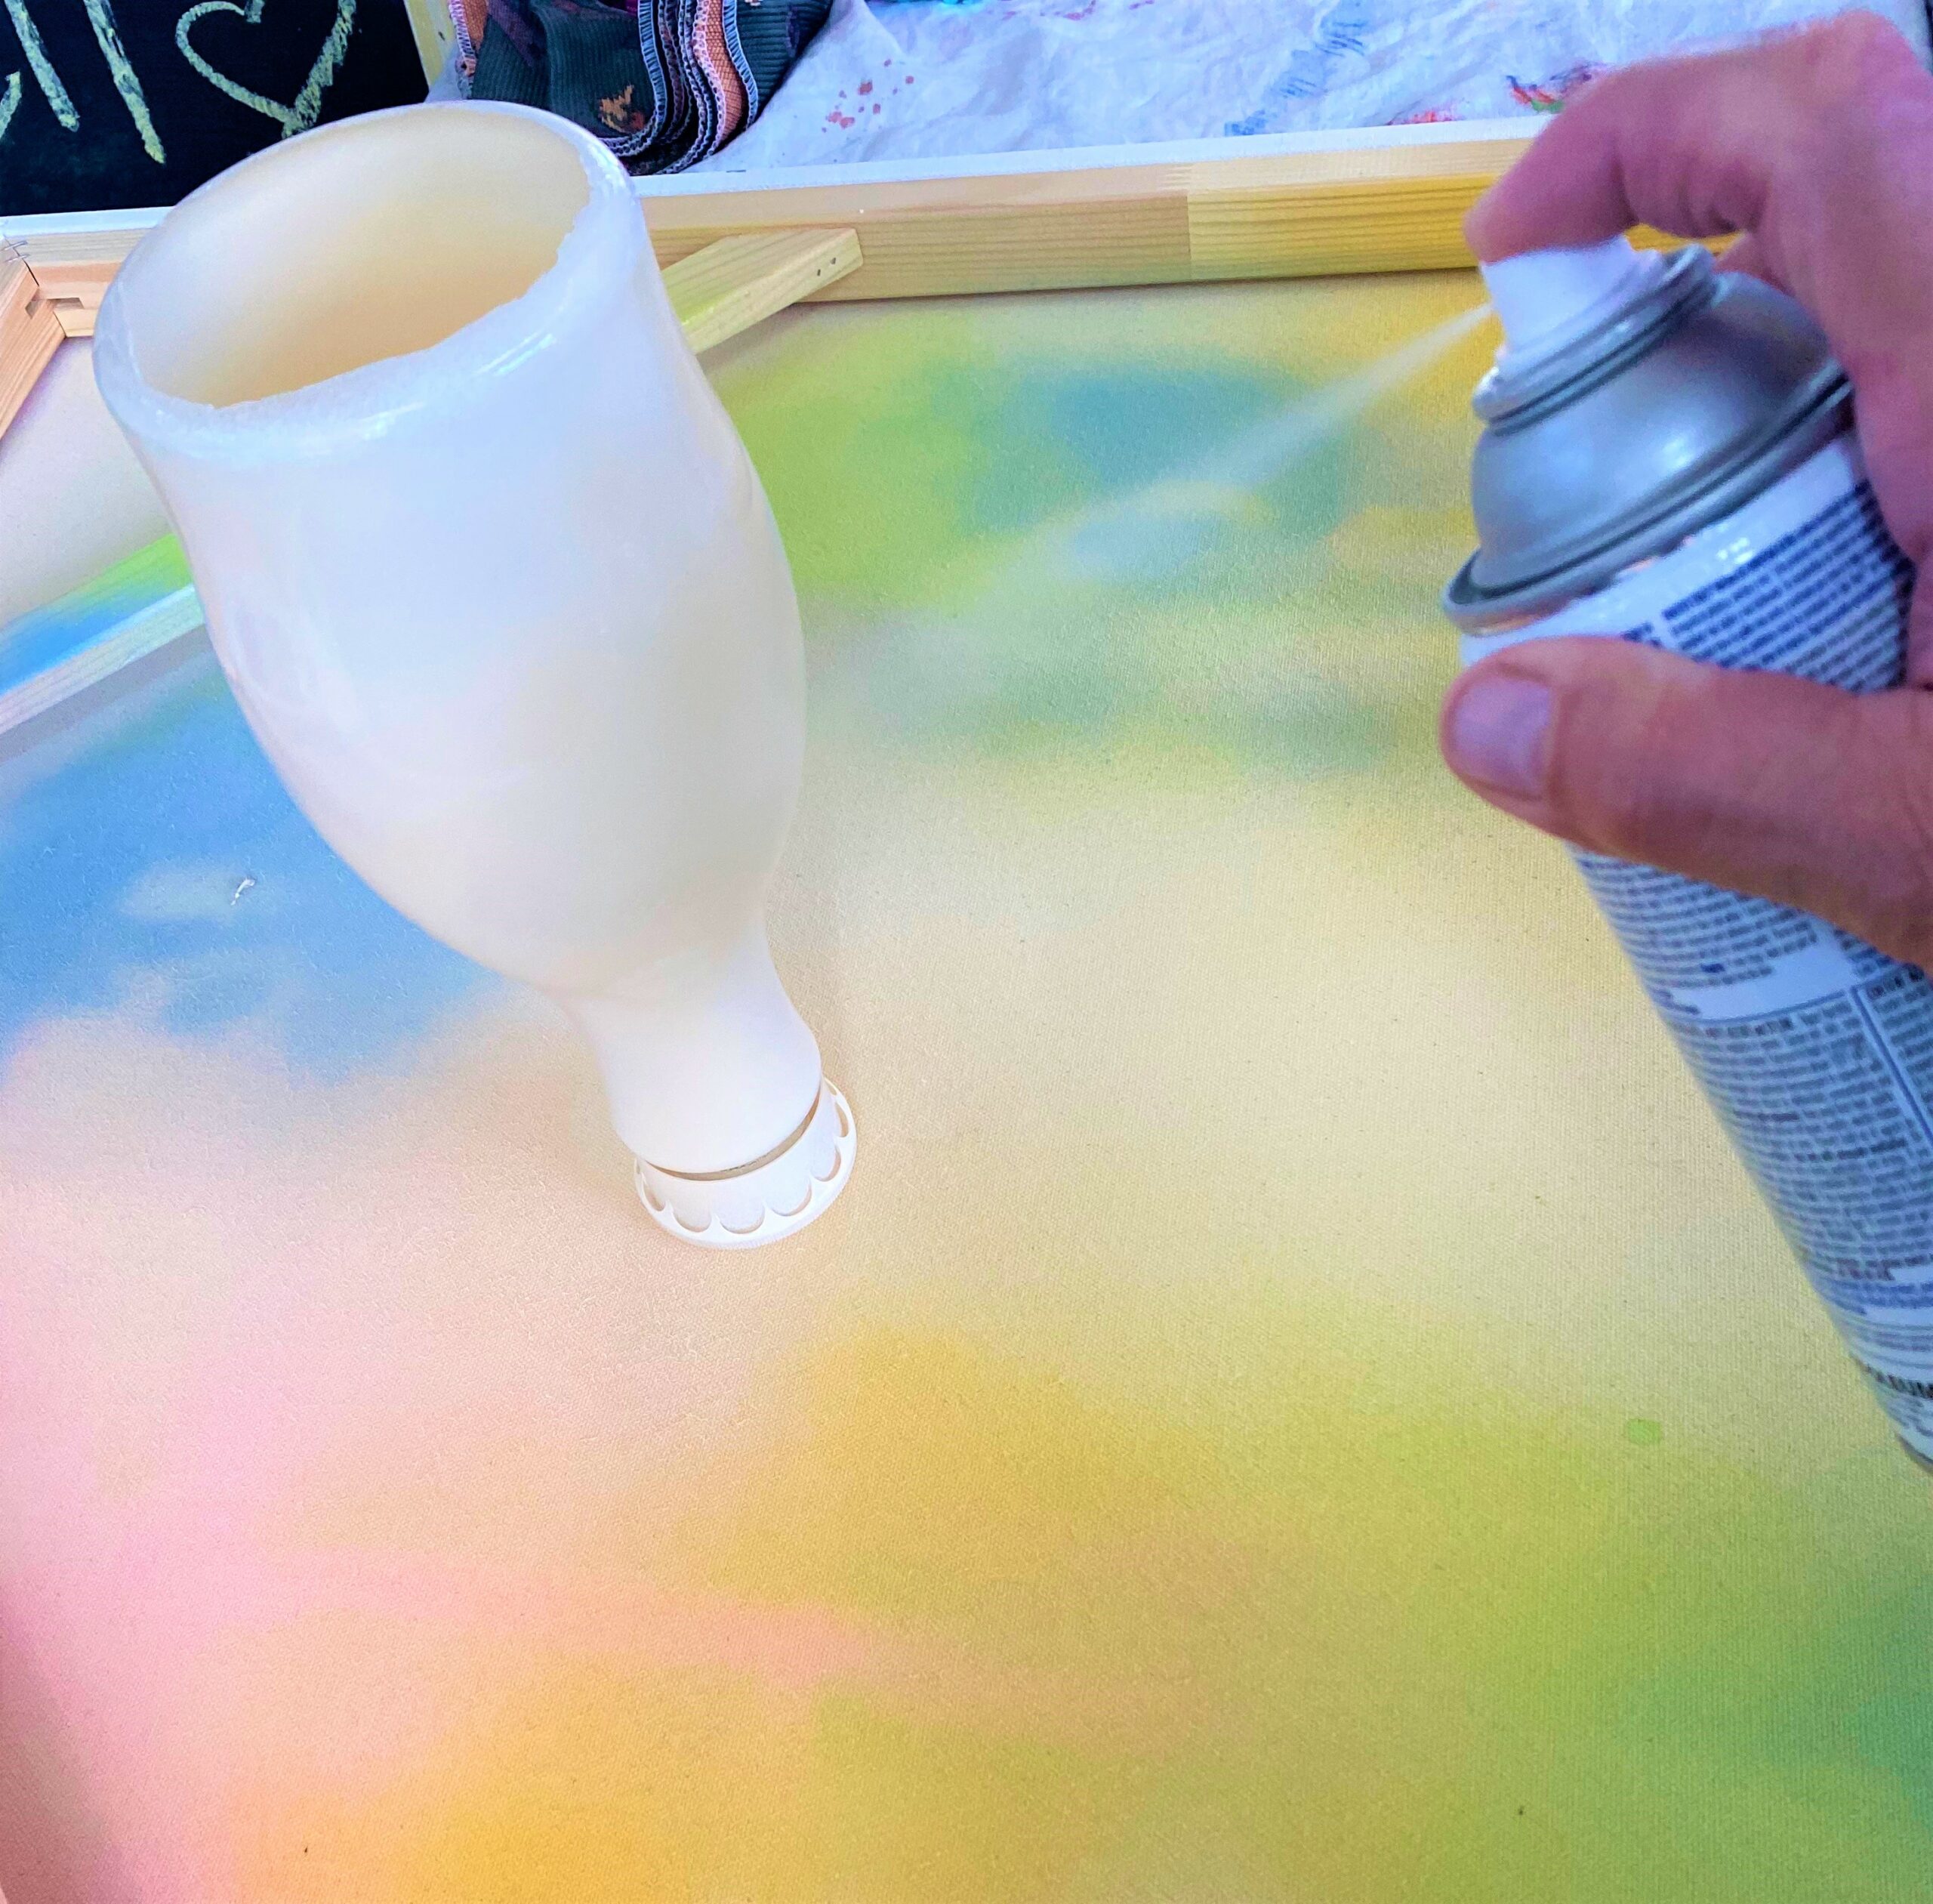
Step 3: Give it a base color
- Place your containers with their lids on (after the bottoms are cut off) on a drop cloth.
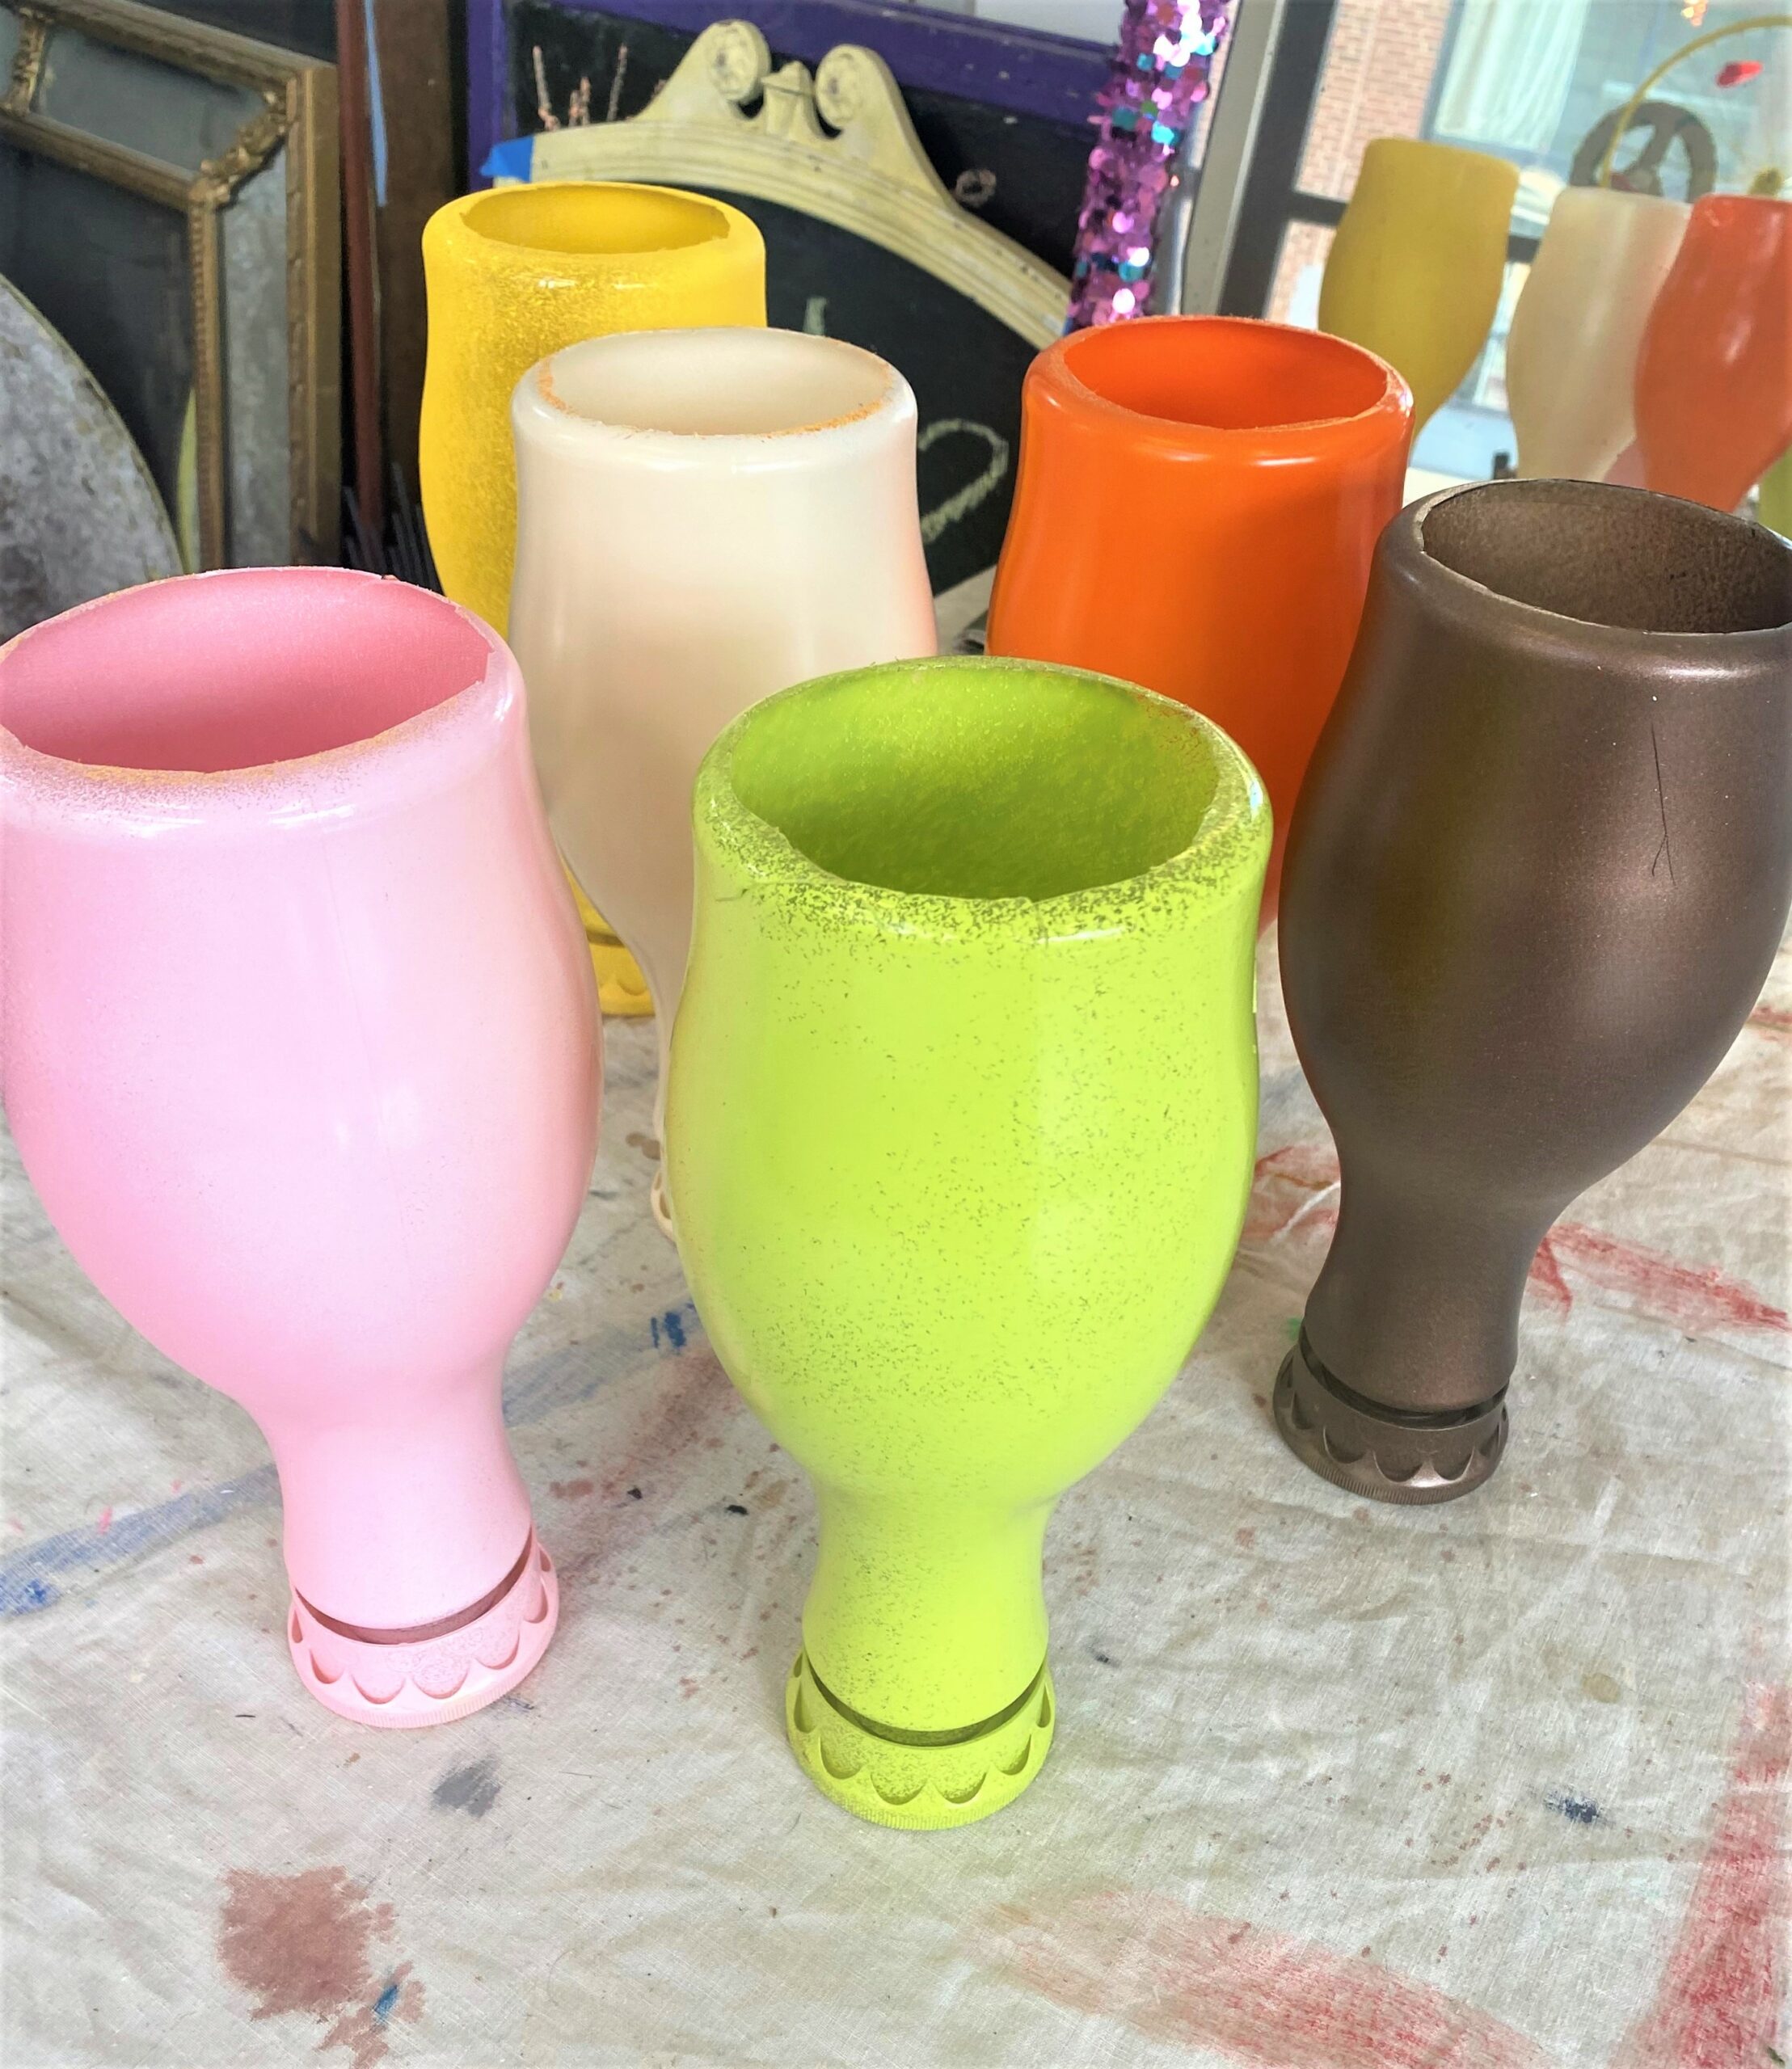
- Spray your containers with a solid but light coat of spray paint. Various skin tones are great as are bright colors so you really can’t go wrong.
- After your first paint coat dries completely, flip over your containers and give them each another light coat.
- Let them dry well before moving forward.
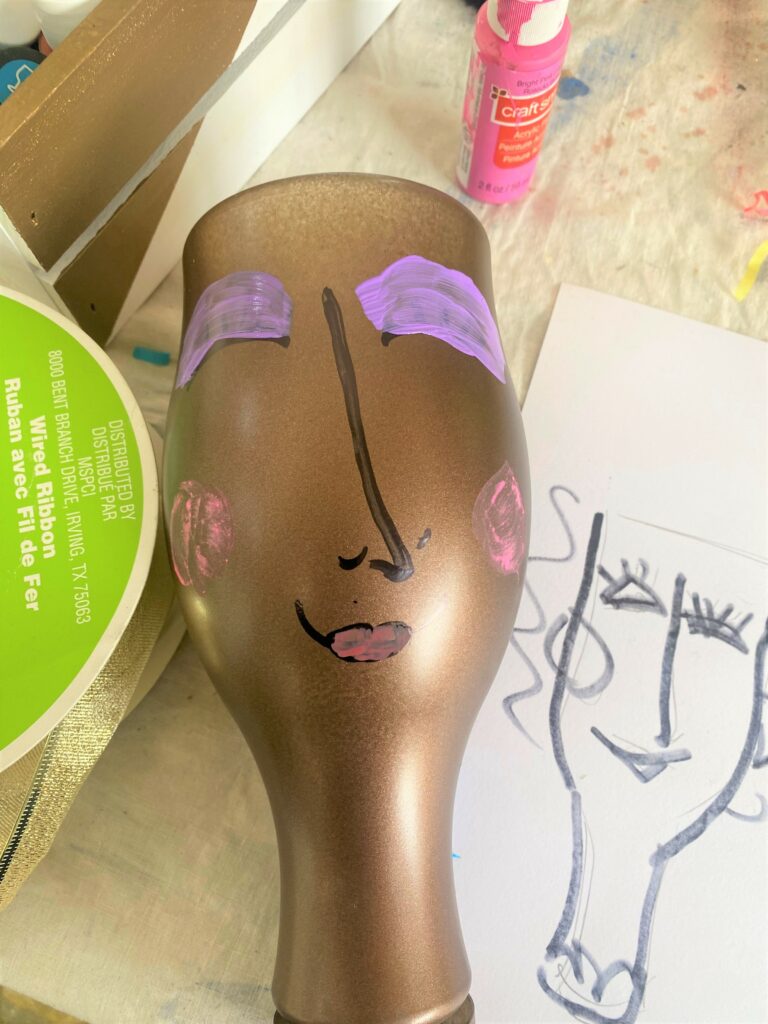
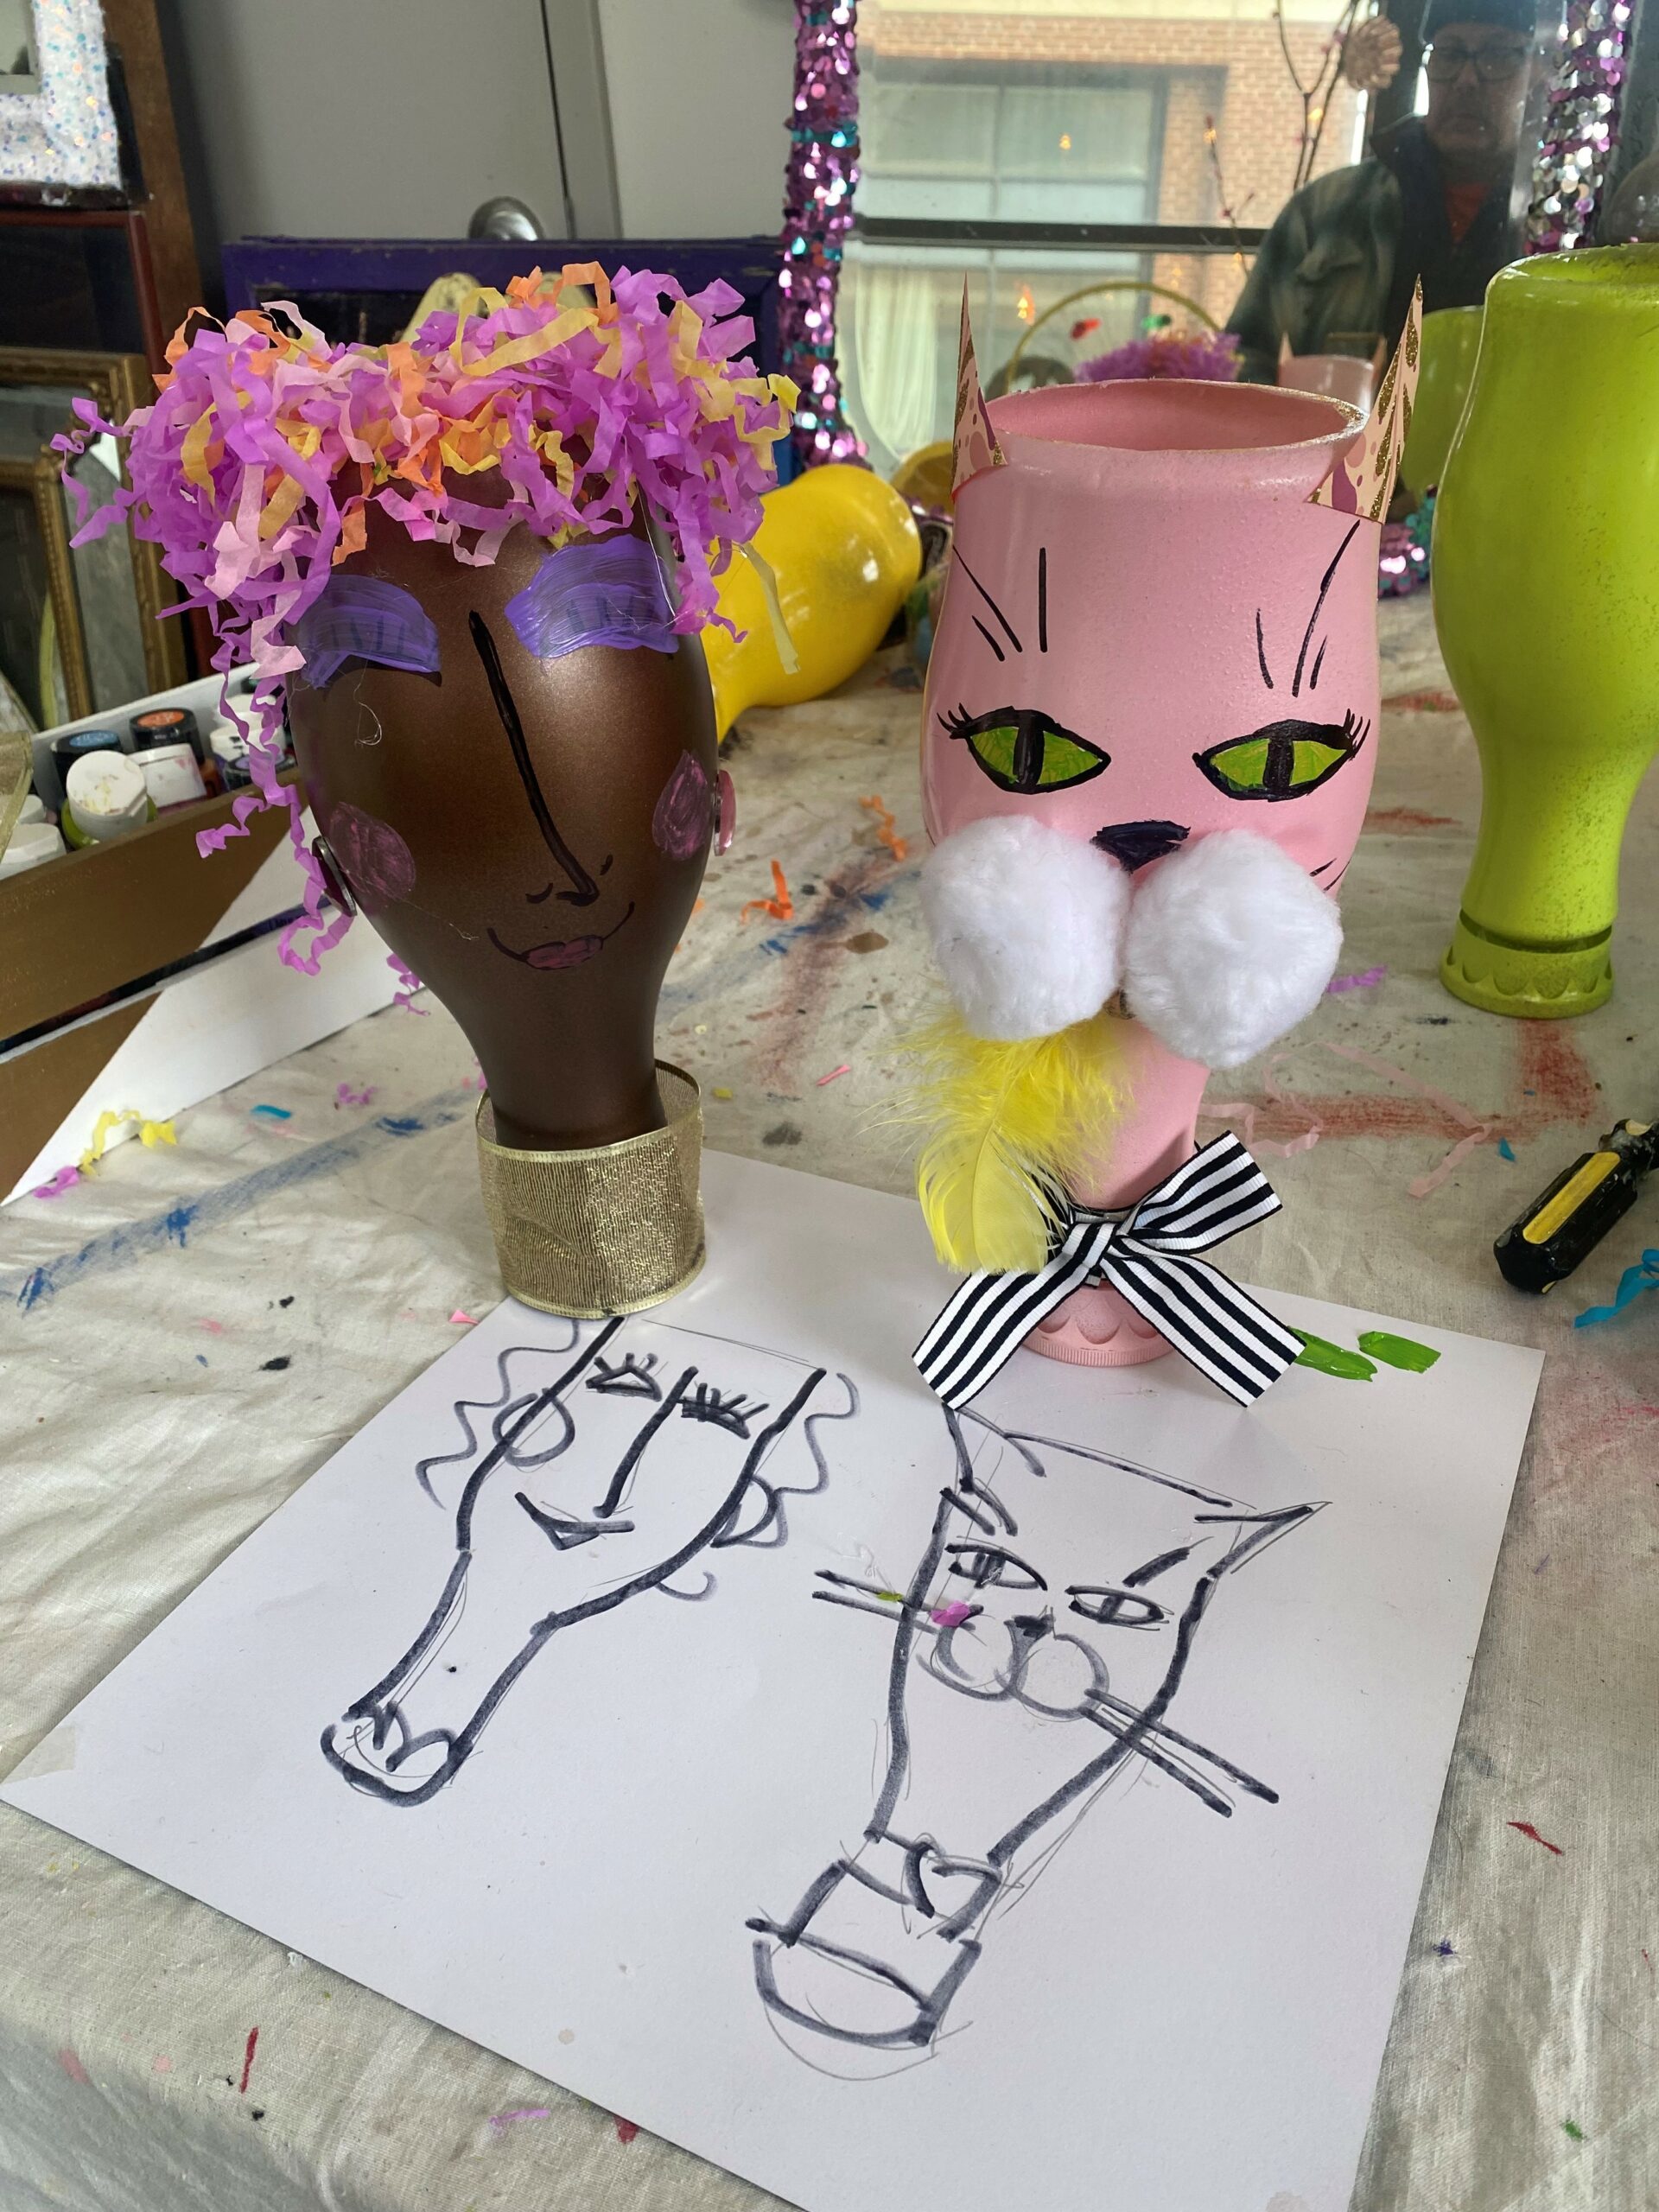
Step 4: Sketch out your designs, then Sharpie it on
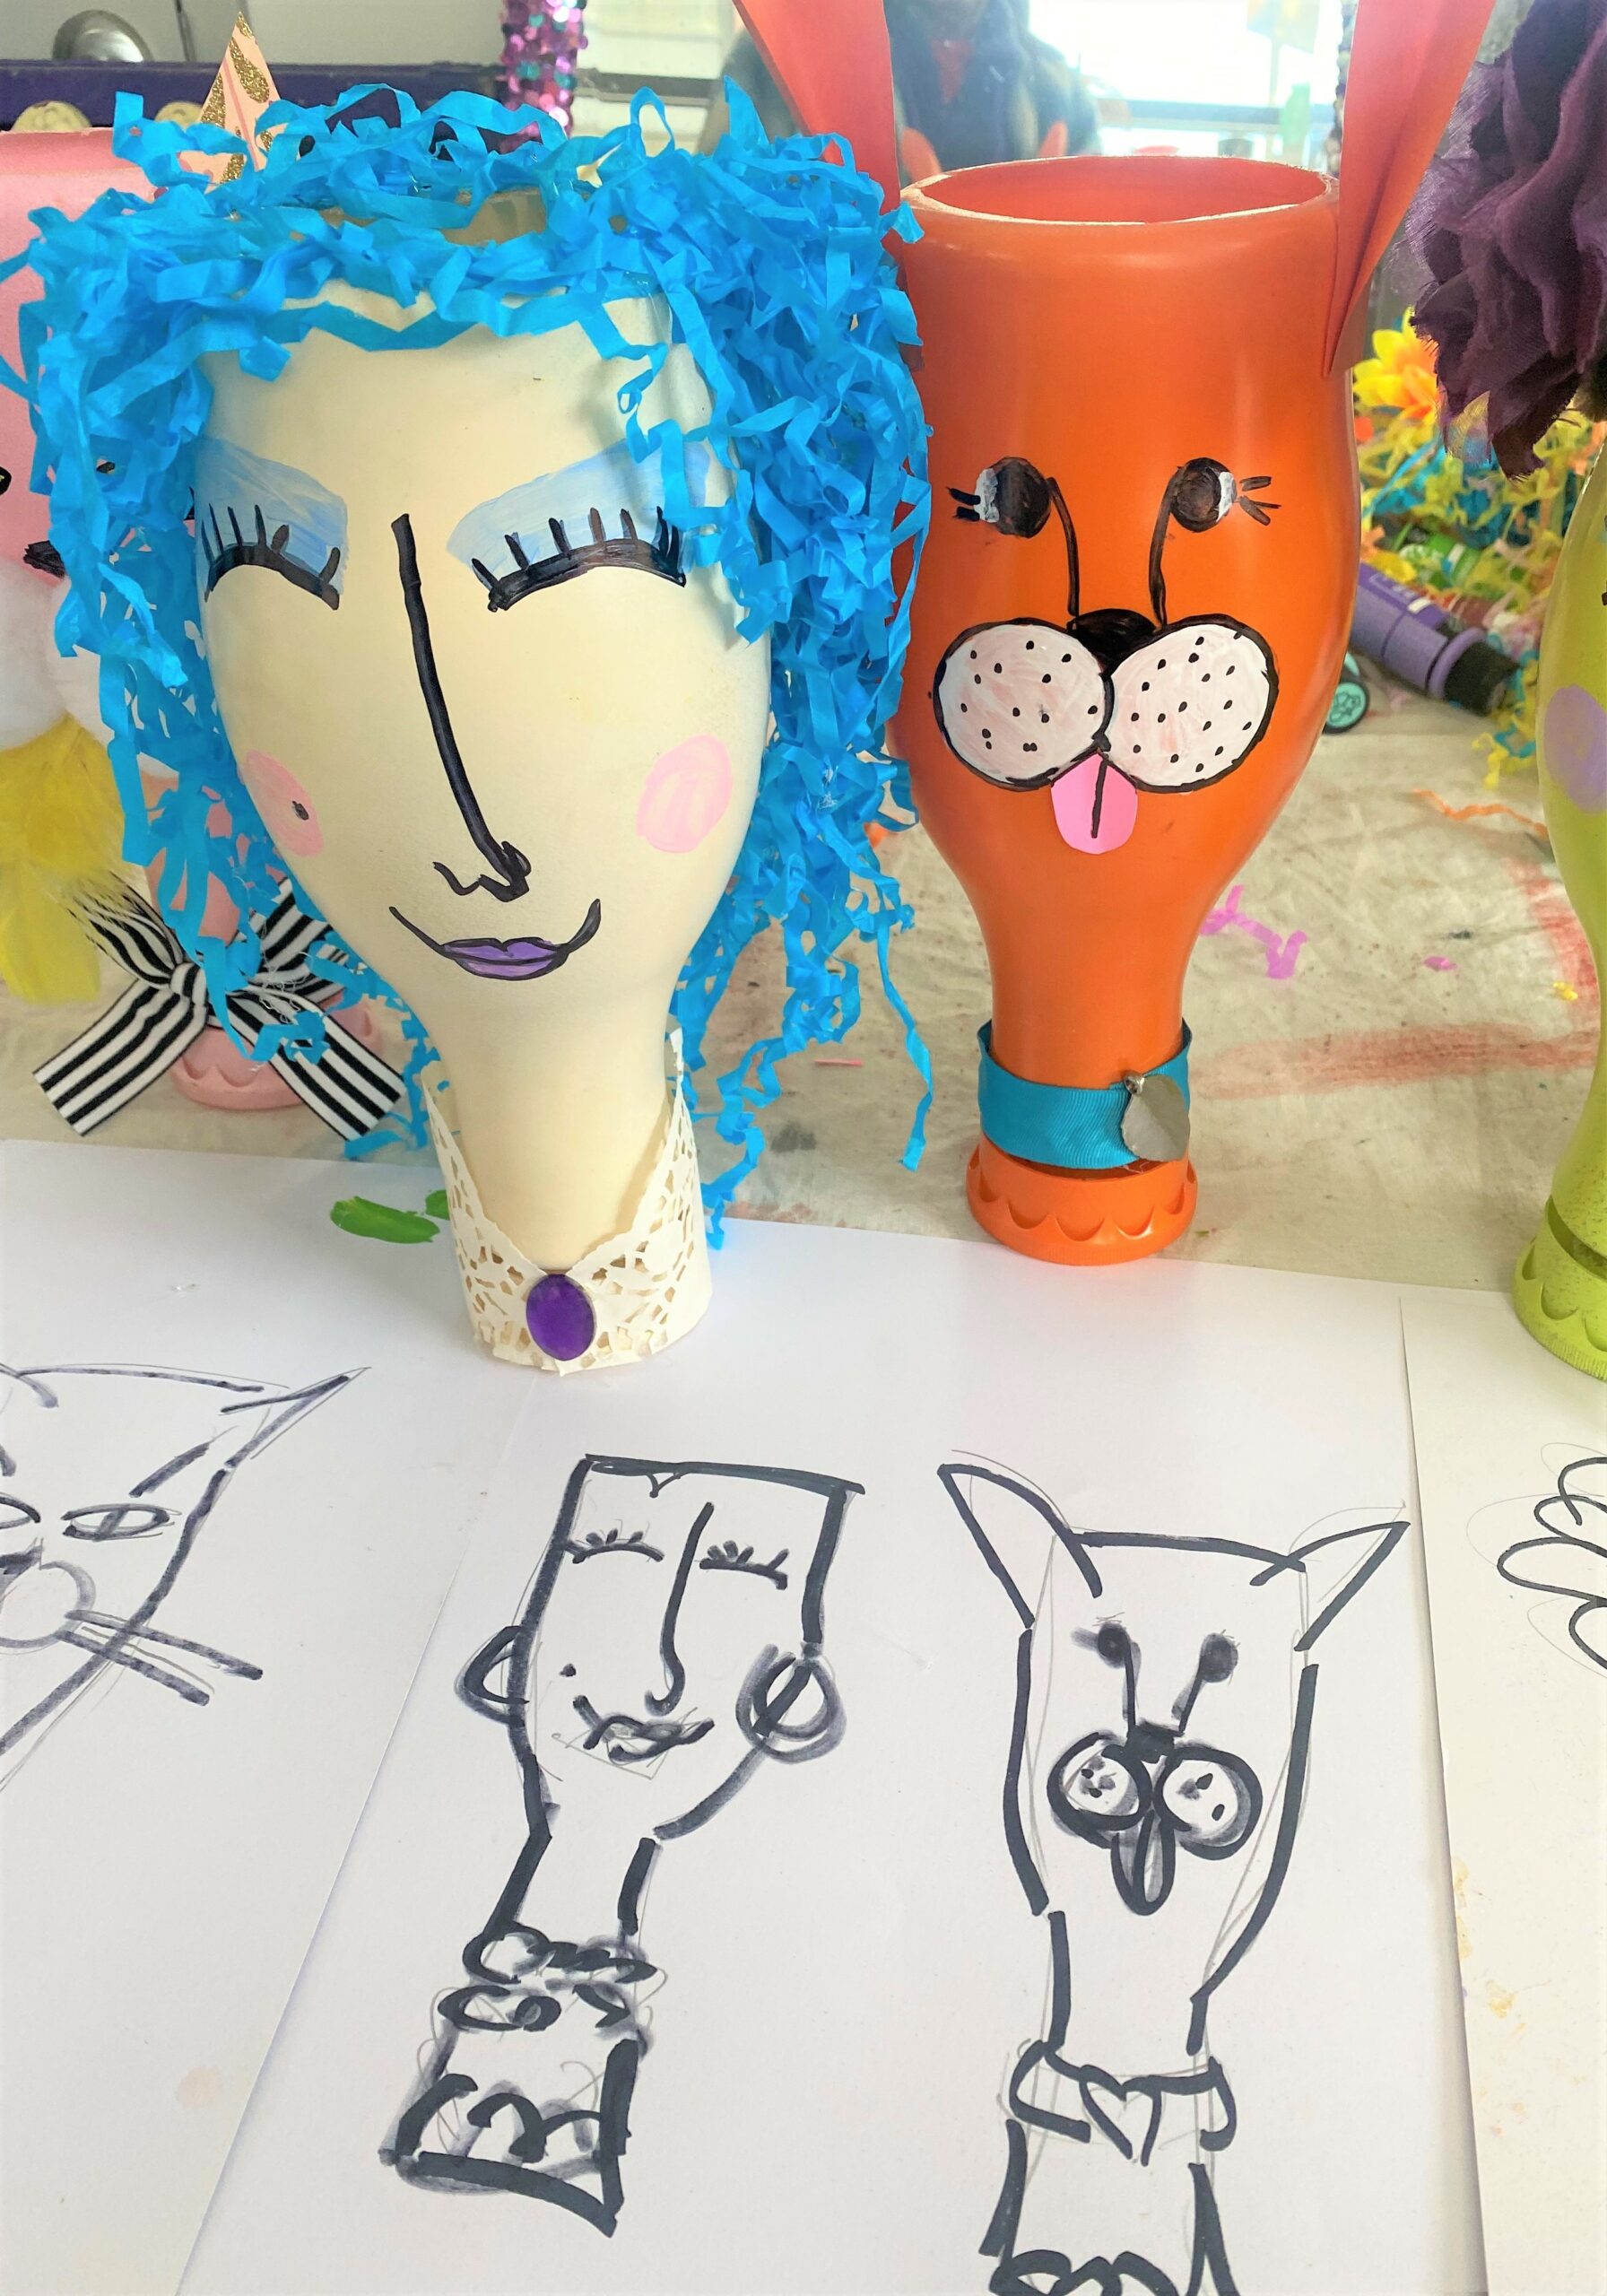
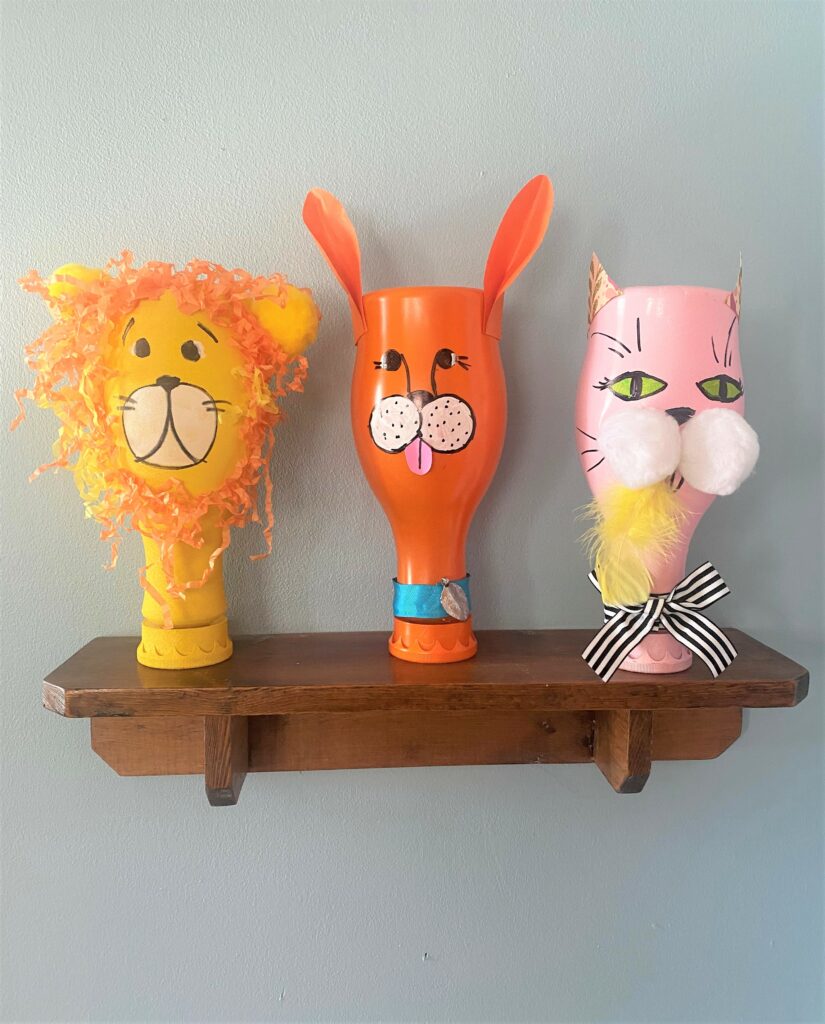
- When flipped over, the milk containers look like a head and a neck so human faces are an ideal design option. Cat, dog and other animal faces are super choices, too, and one that will be loved by the younger ones involved in this project.
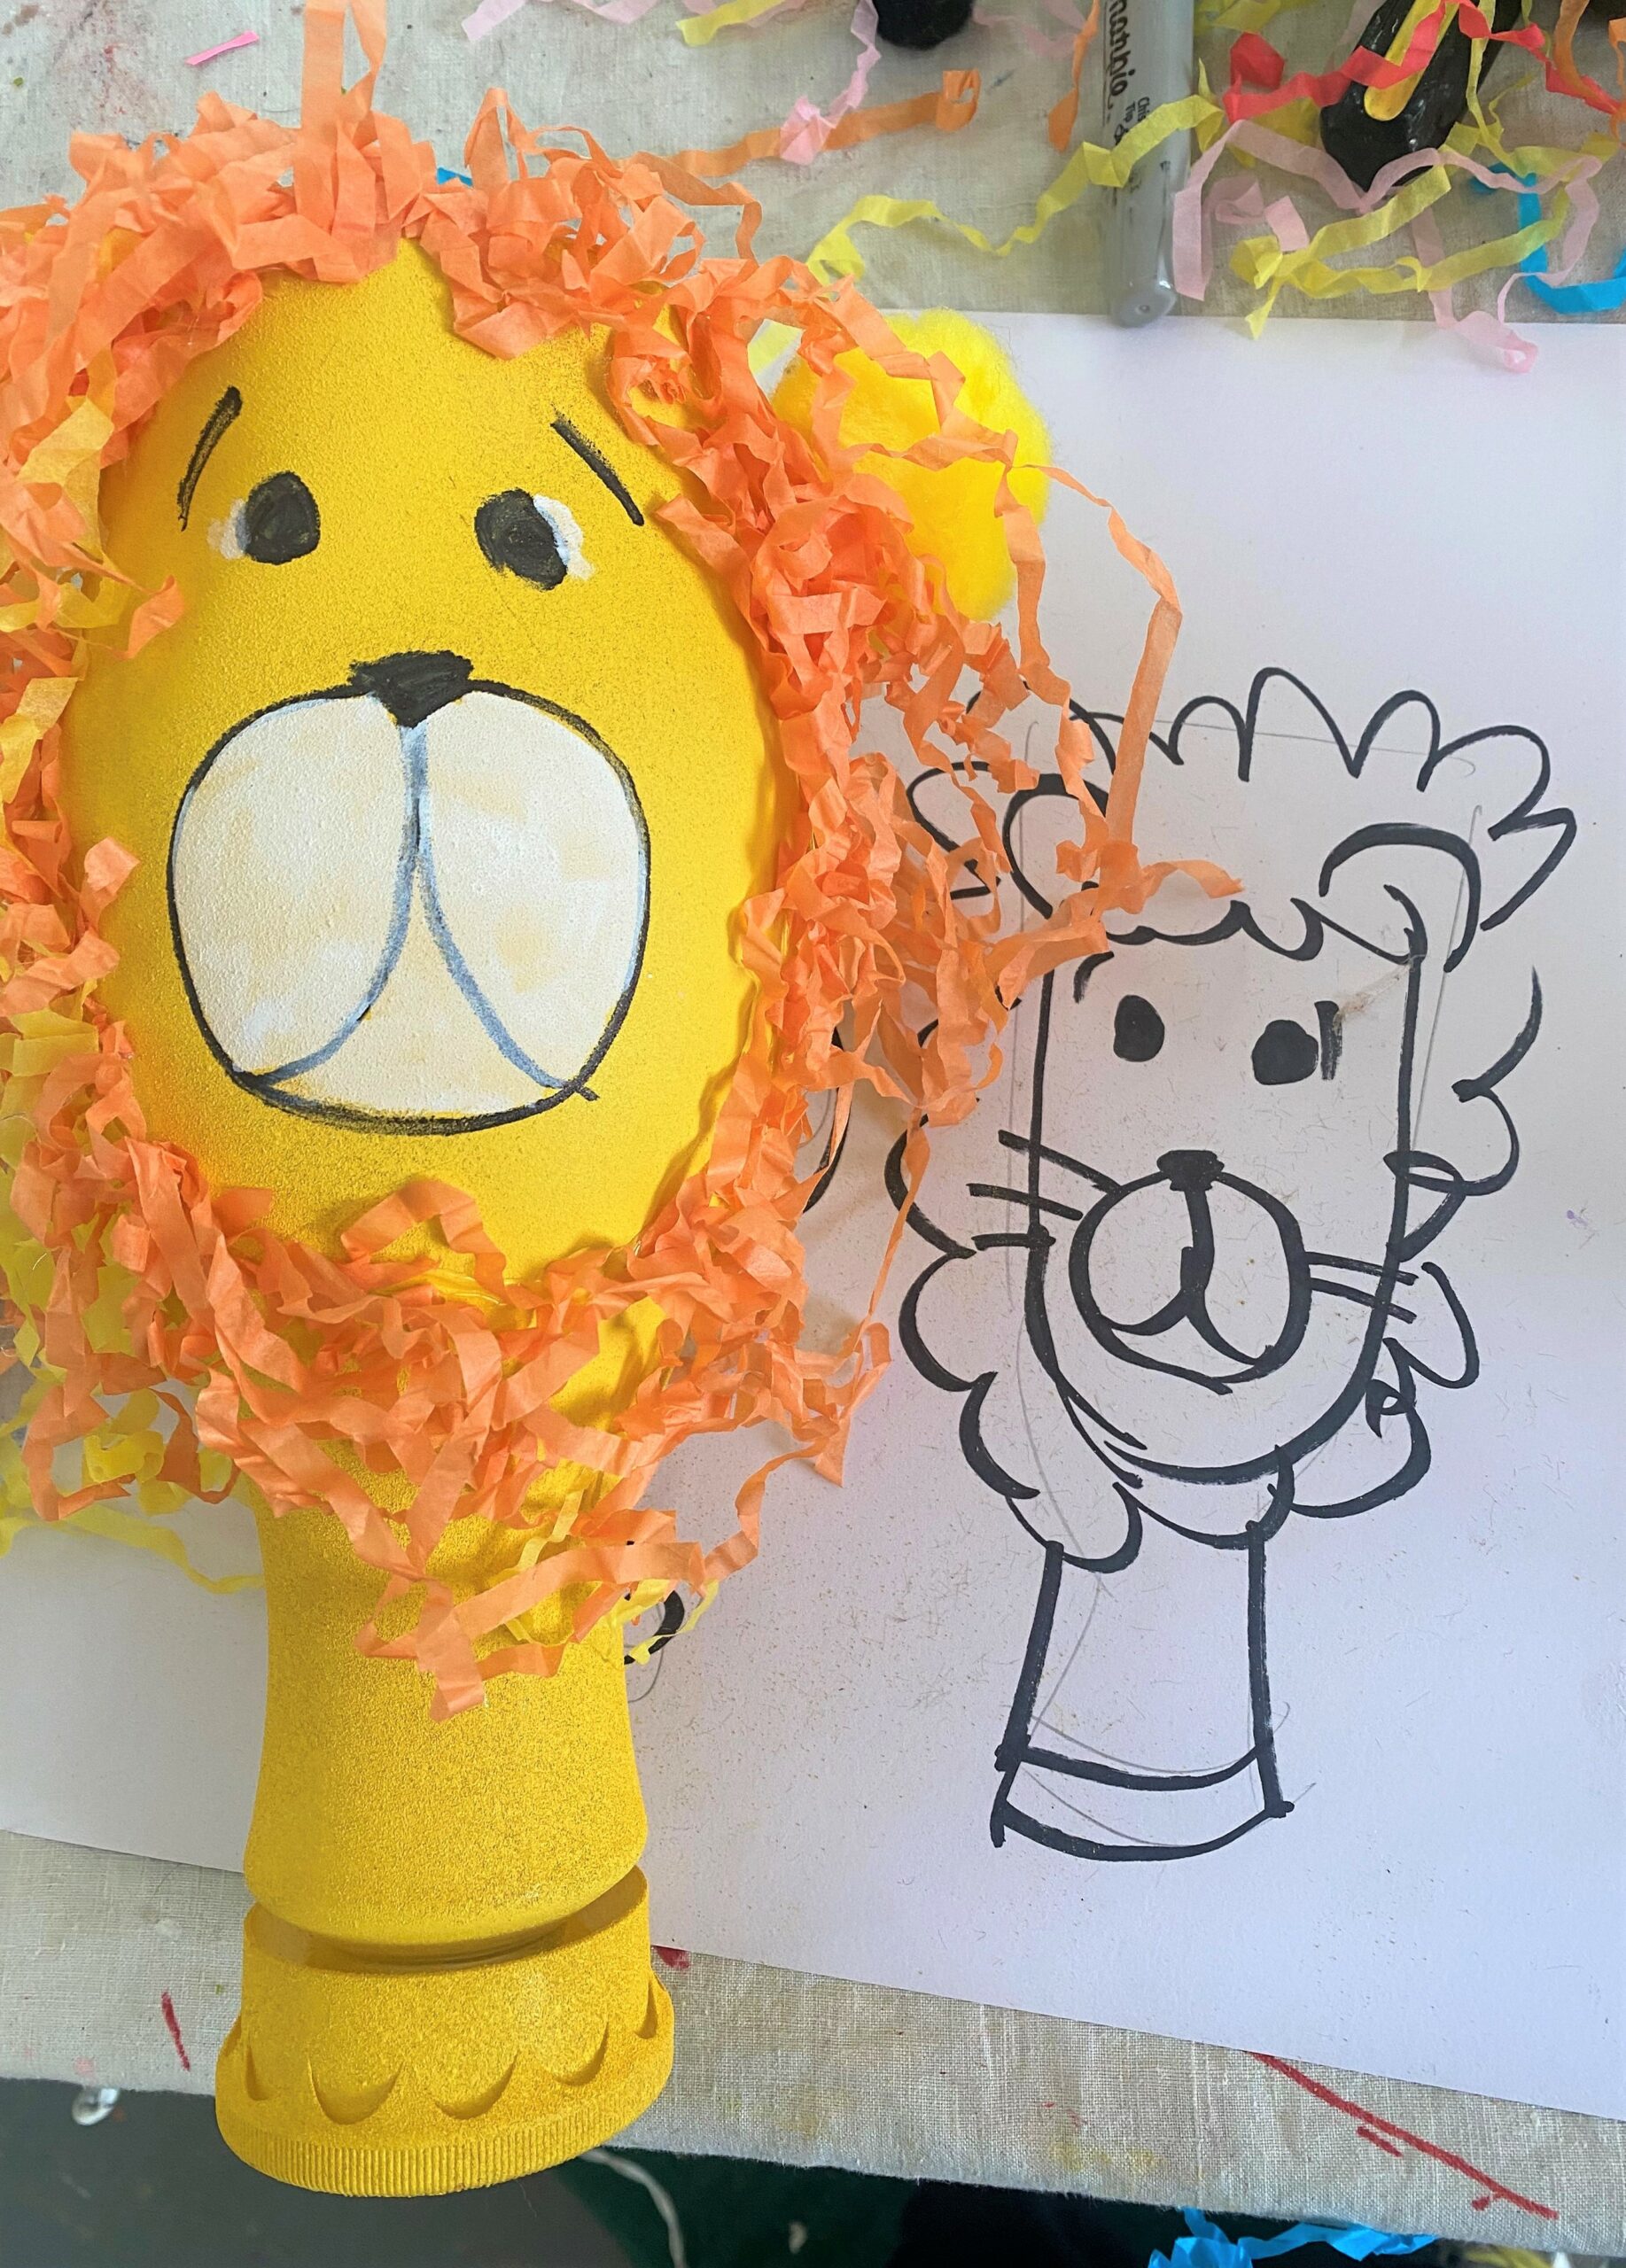
- On a scrap piece of paper, sketch out your design.
- Once you have a sense of how it will look, carefully draw it on your spray-painted container with a black marker/Sharpie.
- Add a nose, eyes, mouth and other details.

Step 5: Brush on highlights
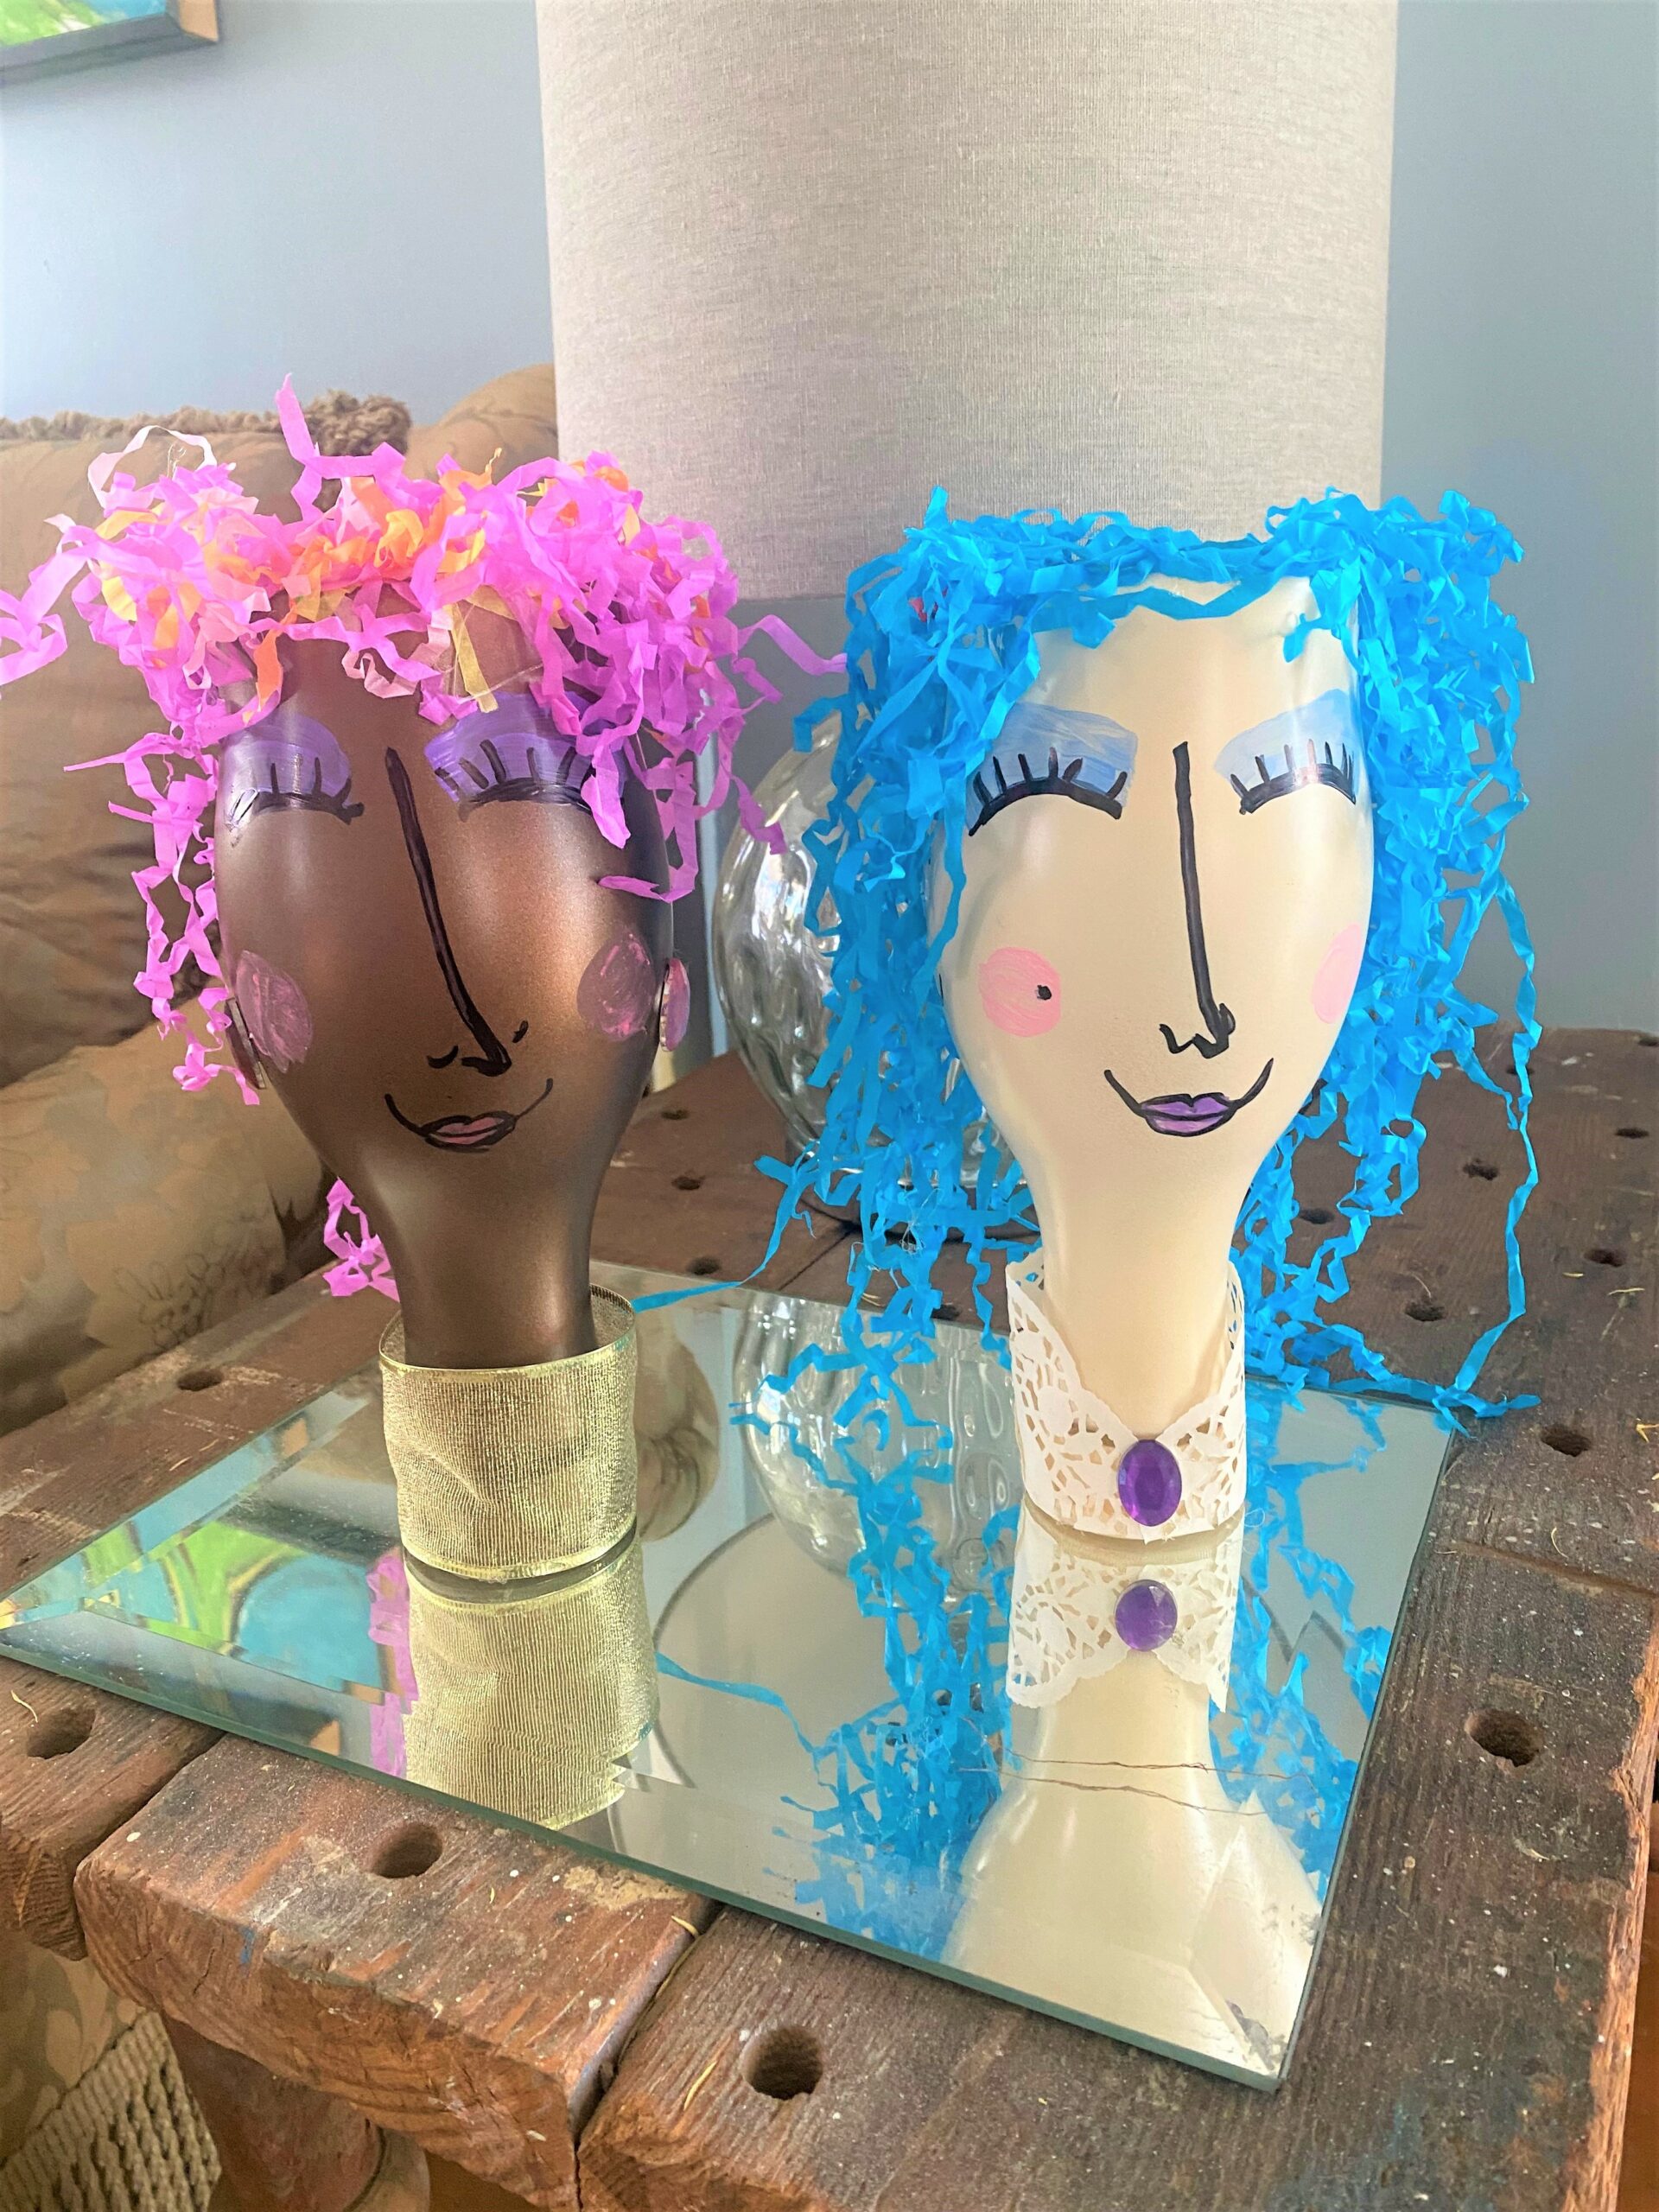
- Apply craft paint with a small art brush to fill in lips, cheeks, eye shadow and more. You may need to add a couple of layers to ensure solid coverage and so that the color pops.
- Once it dries, you might need to go over some of your lines again. Eye lashes were re-drawn in; dots were added to the dog’s cheeks where their whiskers would be.
Step 6: Glue gun on embellishments, personality
This is a really fun step because it gives your vase/art piece lots of personality and flair.
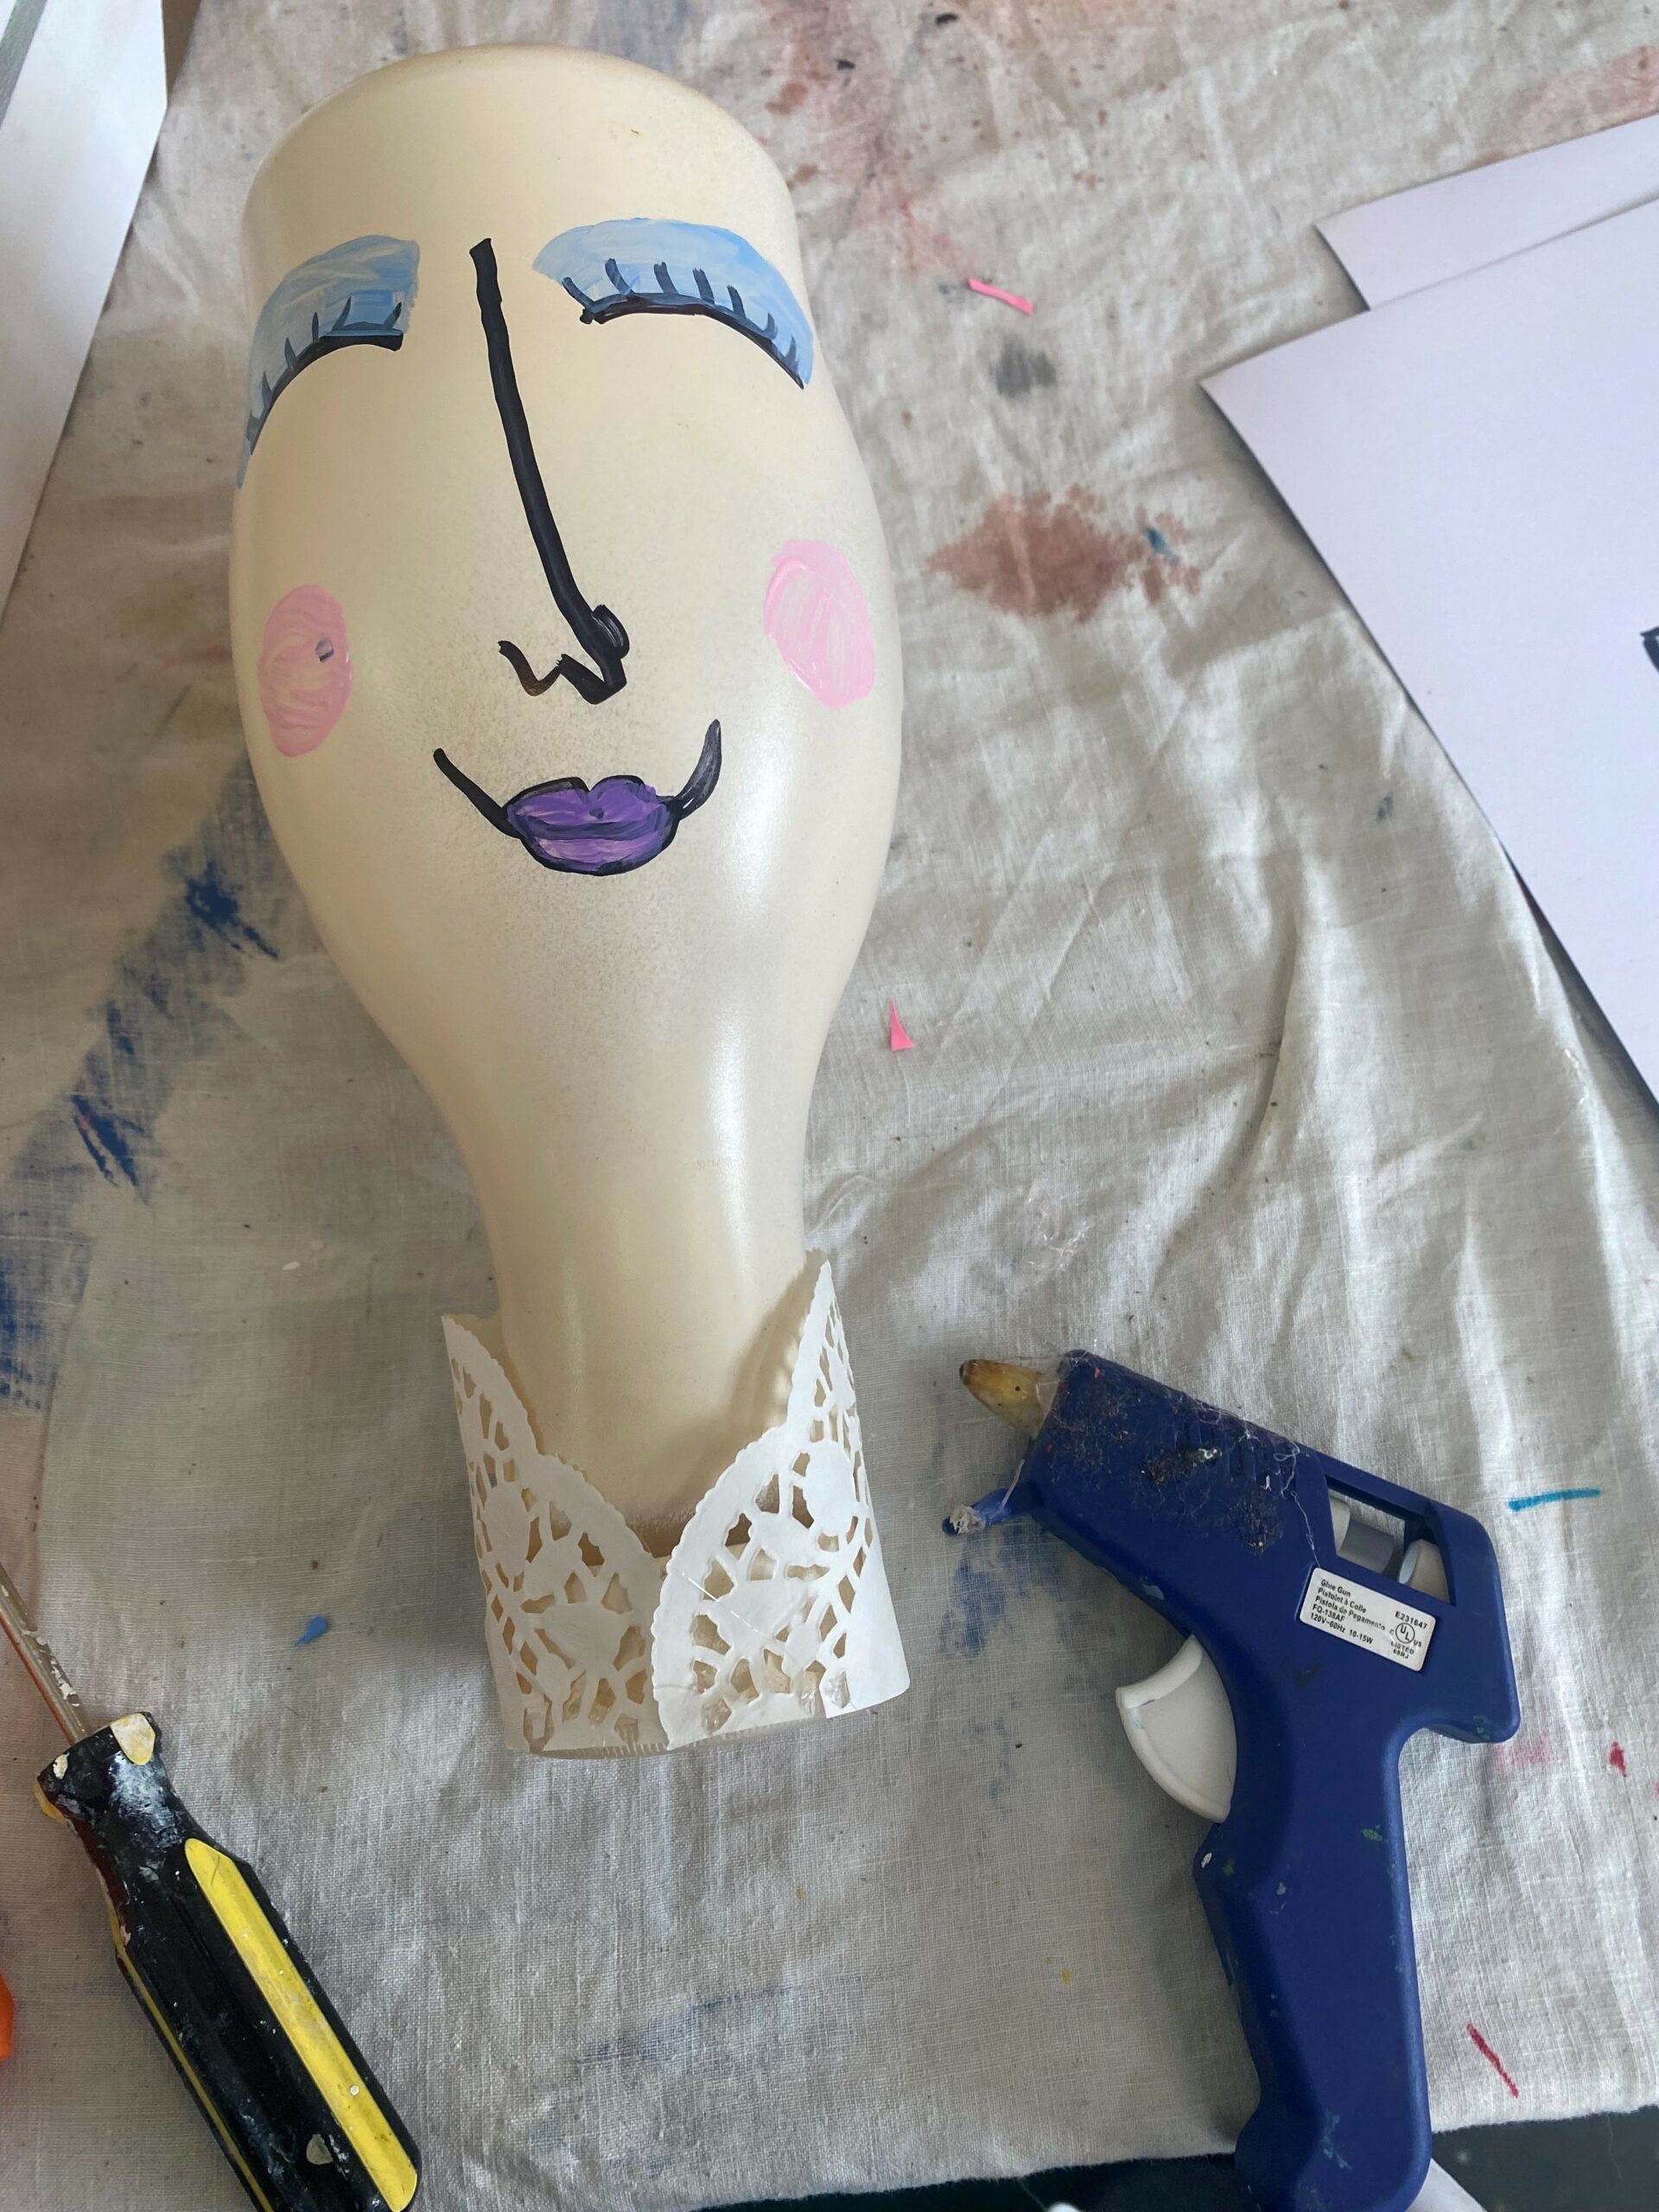
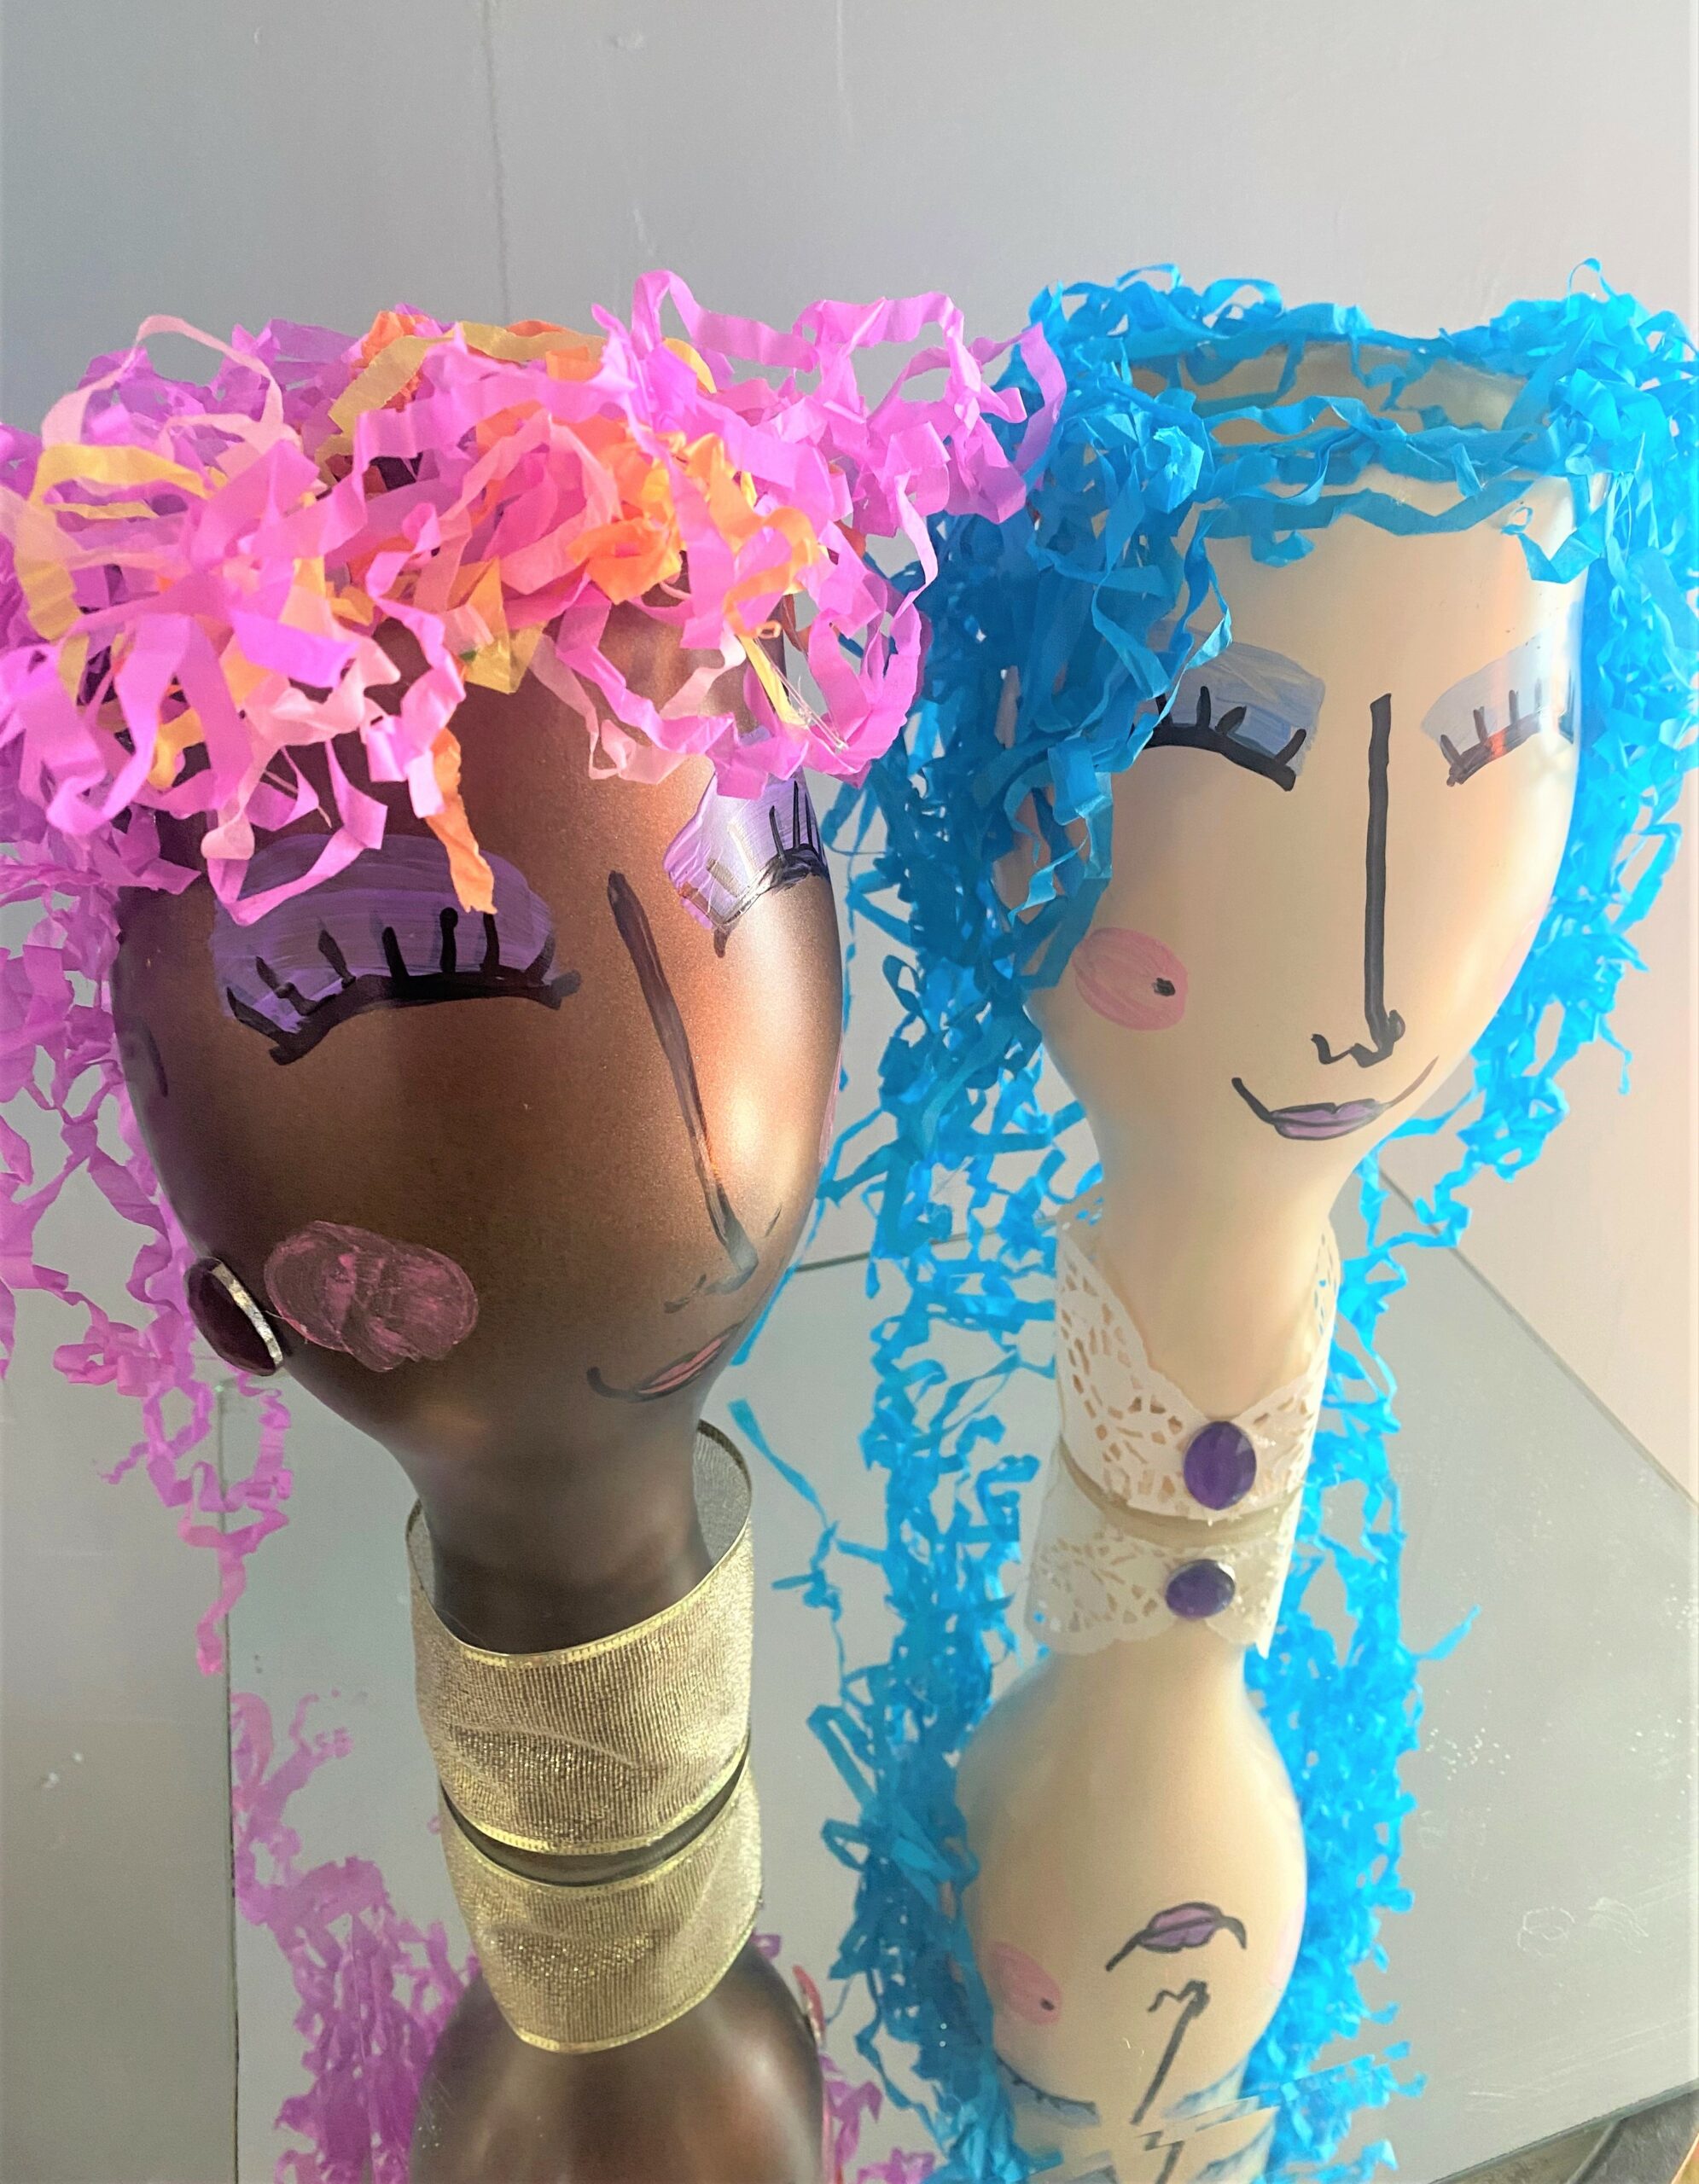
- For the containers with faces, a piece of ribbon and paper doily were cut and glued into place as dress collars. Plastic jewels were secured as earrings. Shredded confetti paper was adhered in place as hair. For another lady, she received two silk flowers for her special look, one in her hair and one on her neck.
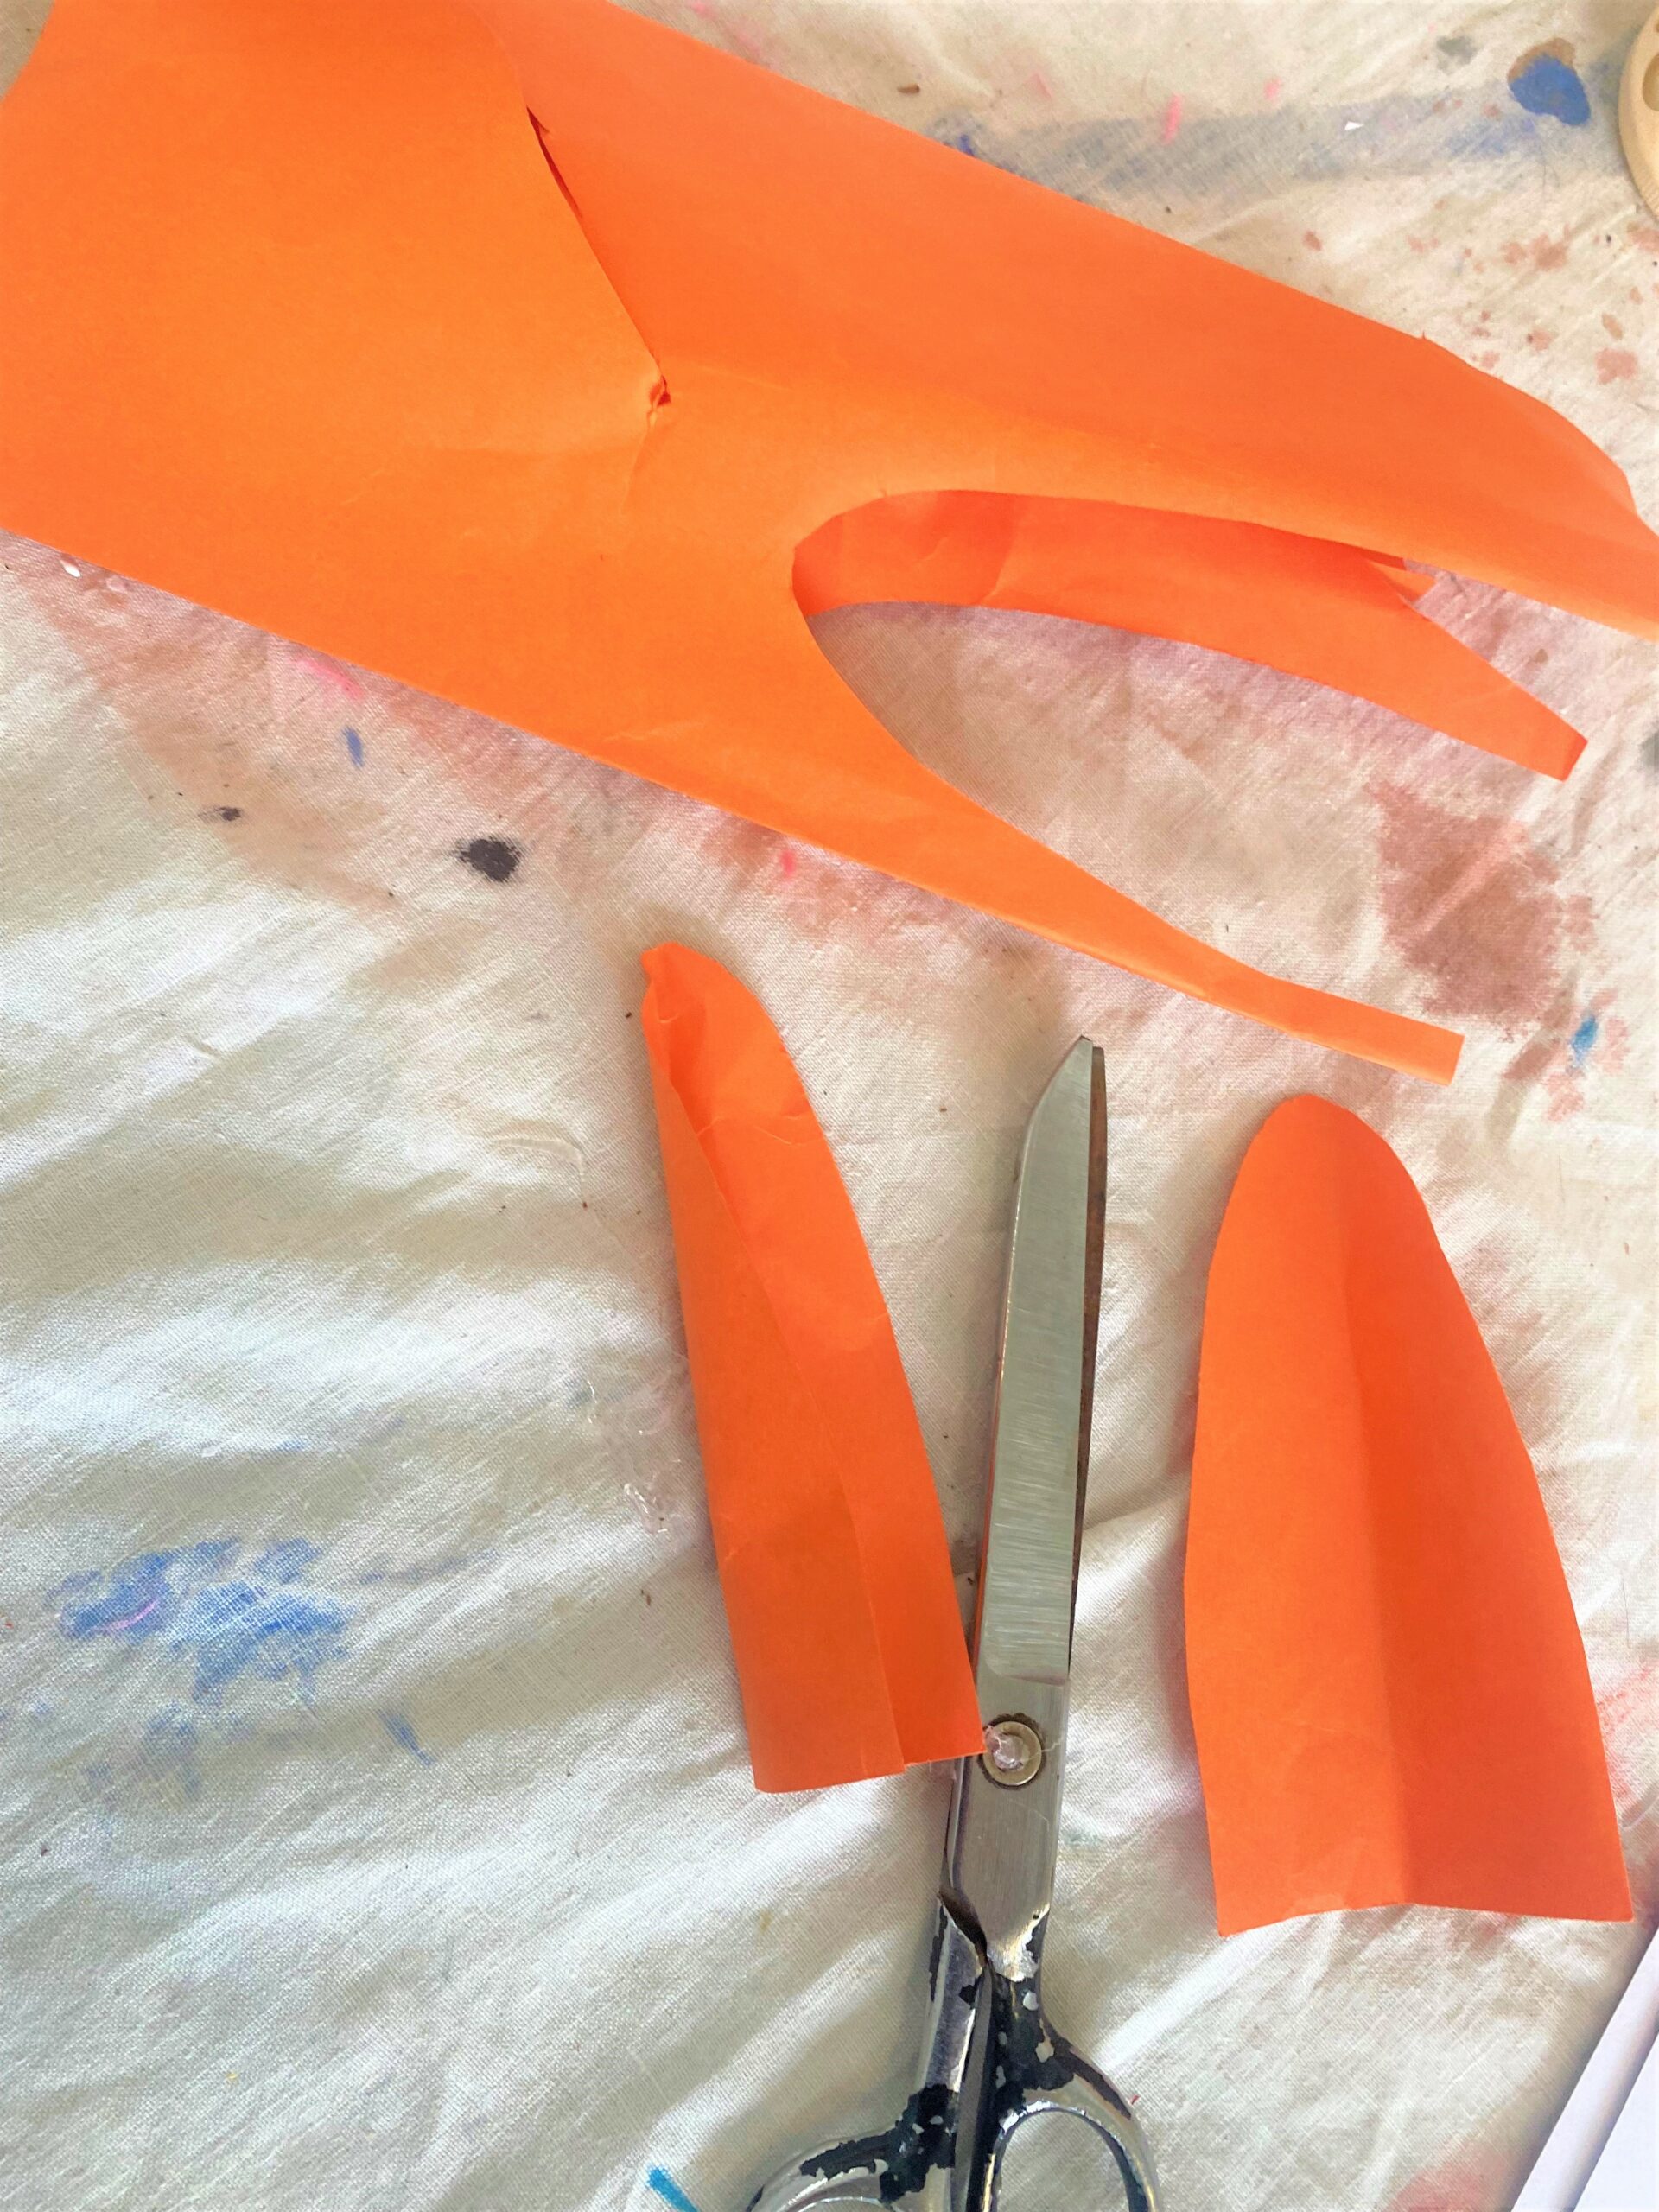
- For the cool cat, two white pom-poms were added as cheeks, and pieces of paper were cut into triangles for ears.
- A yellow feather was glued by the mouth so it looks like “the cat ate the canary.”
- Paper ears were added to the dog face along with a piece of ribbon as a collar and a repurposed pendant as a dog tag.
- The lion got yellow pom-pom ears and a mane made of orange and yellow confetti paper, glued into place.
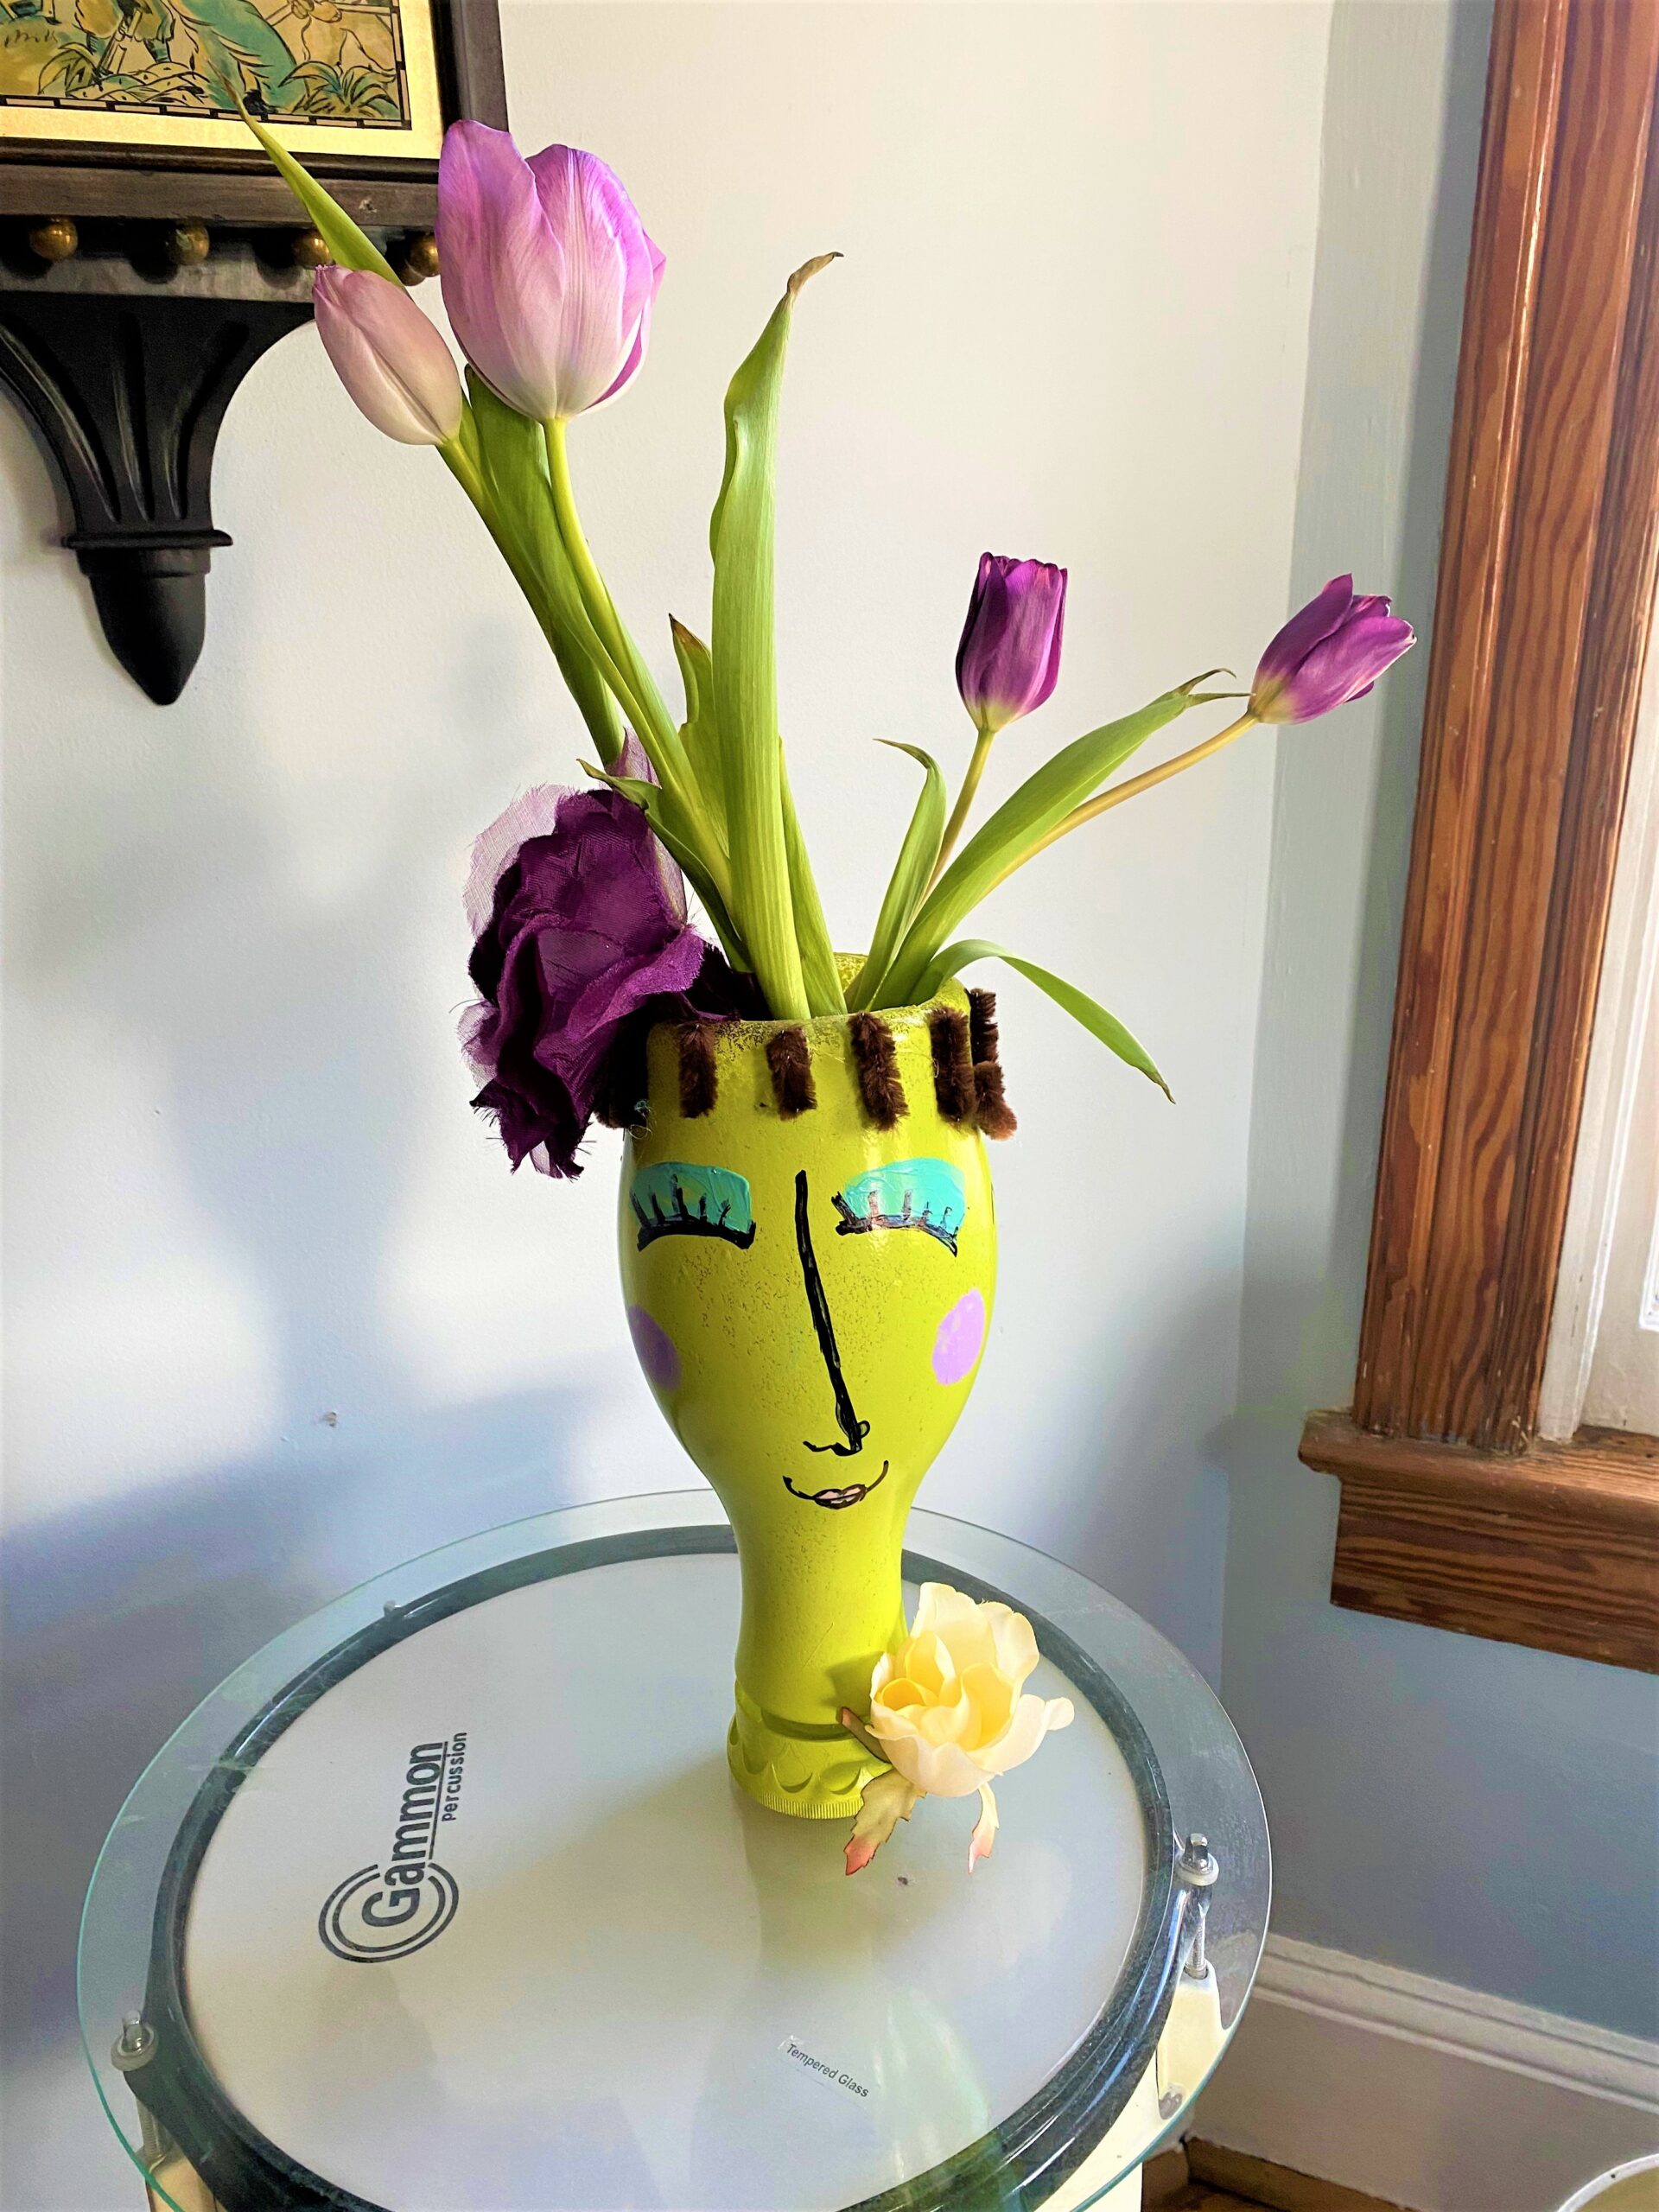
Step 7: Fill with flowers
All these containers make excellent vases because they are watertight.
Carefully pour in water so you don’t get the paper parts wet. Place in tulips and other tall flowers from your garden or the store.
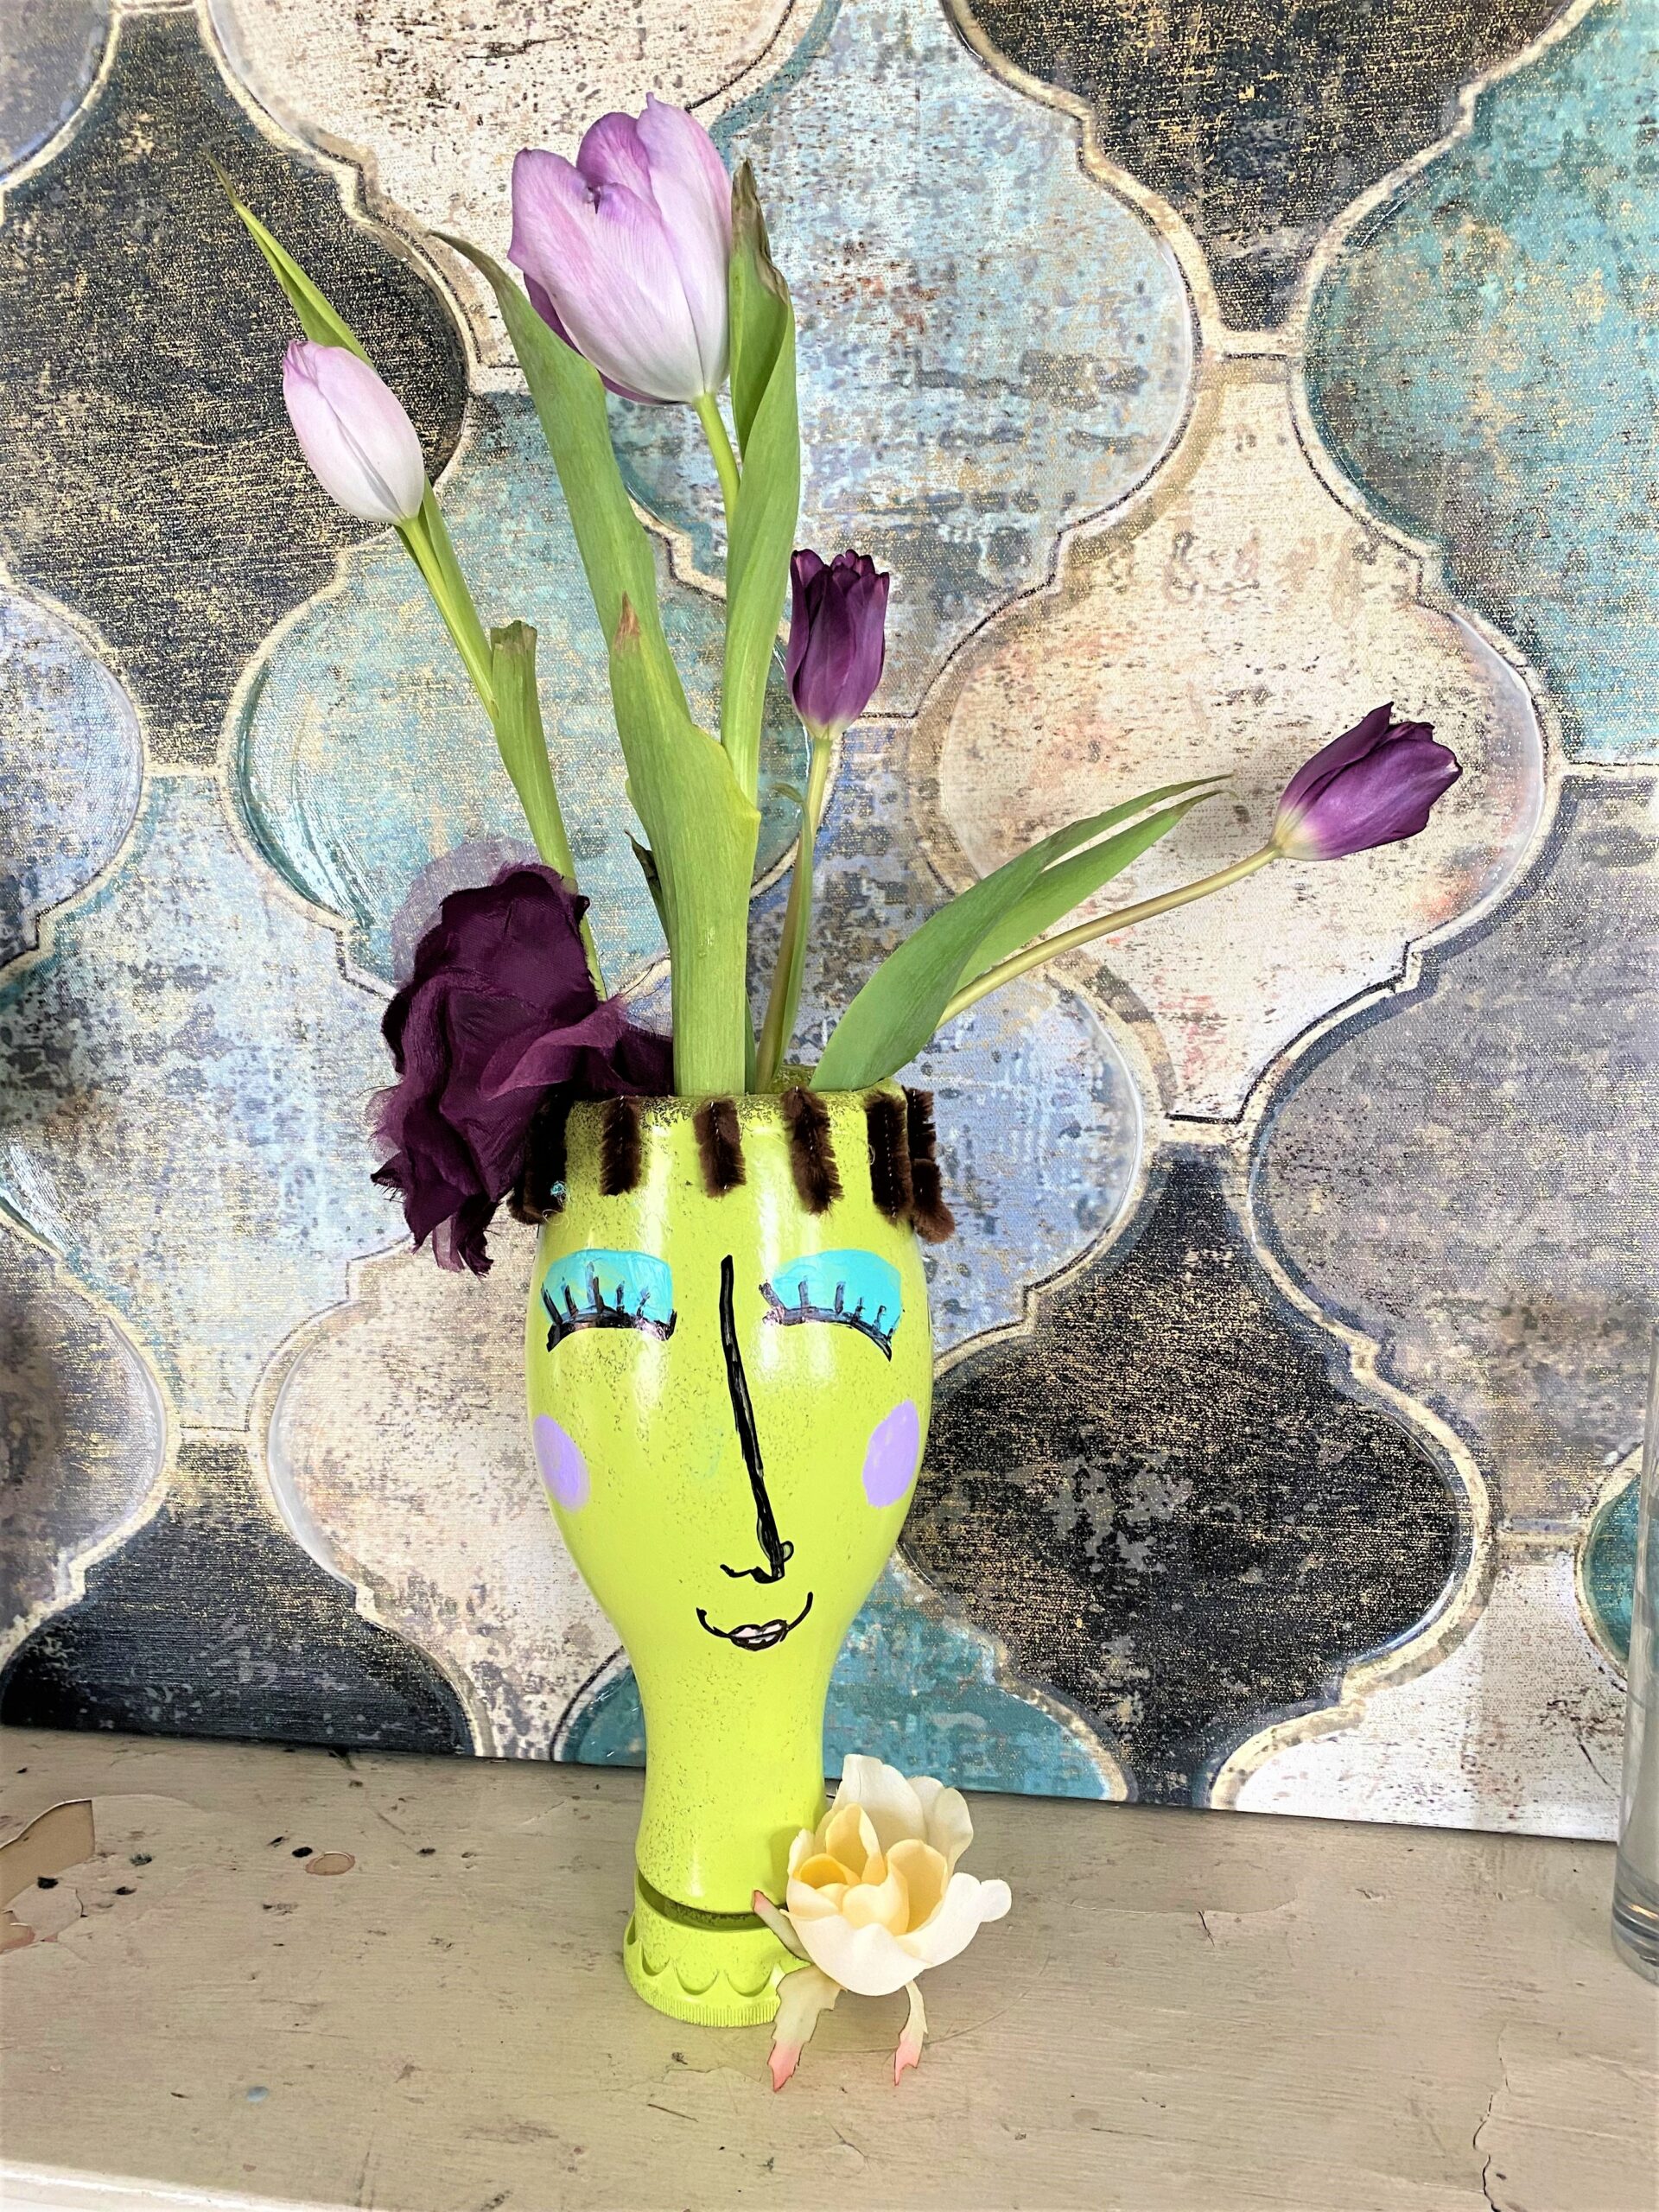
You can skip the flowers and simply position them on a shelf or side table as a totally eye-catching and fun accent.
Do you think I should offer this as a class sometime? It would be so much to do together!

Tim Kime
Artist, Motivational Speaker, Life Coach

