This time of year is great for outside gatherings on your porch, balcony, deck, or yard. Create a bar cart from a side table that will become the home base for all fun gatherings. Small and compact, this bar cart will fit in any space while providing a place to serve drinks, hold glasses and stash other entertaining essentials.
Once you have upcycled your bar cart, accessorize it with fun and funky items picked up at Goodwill. You’ll be ready to celebrate your family and friends while toasting yourself for your DIY creativity and Earth and budget-friendly shopping talents.
Supplies needed:
· Wooden side table with shelf
· Spray paints in blues, gray, white
· Wheels
· Hooks
· Metal spice rack or bathroom caddy
· Drill
· Hammer
· Screwdriver
· Screws
· Sanding block
· Paint scraper
· Damp cloths
1. Find your good & a reprieve from the heat at Goodwill
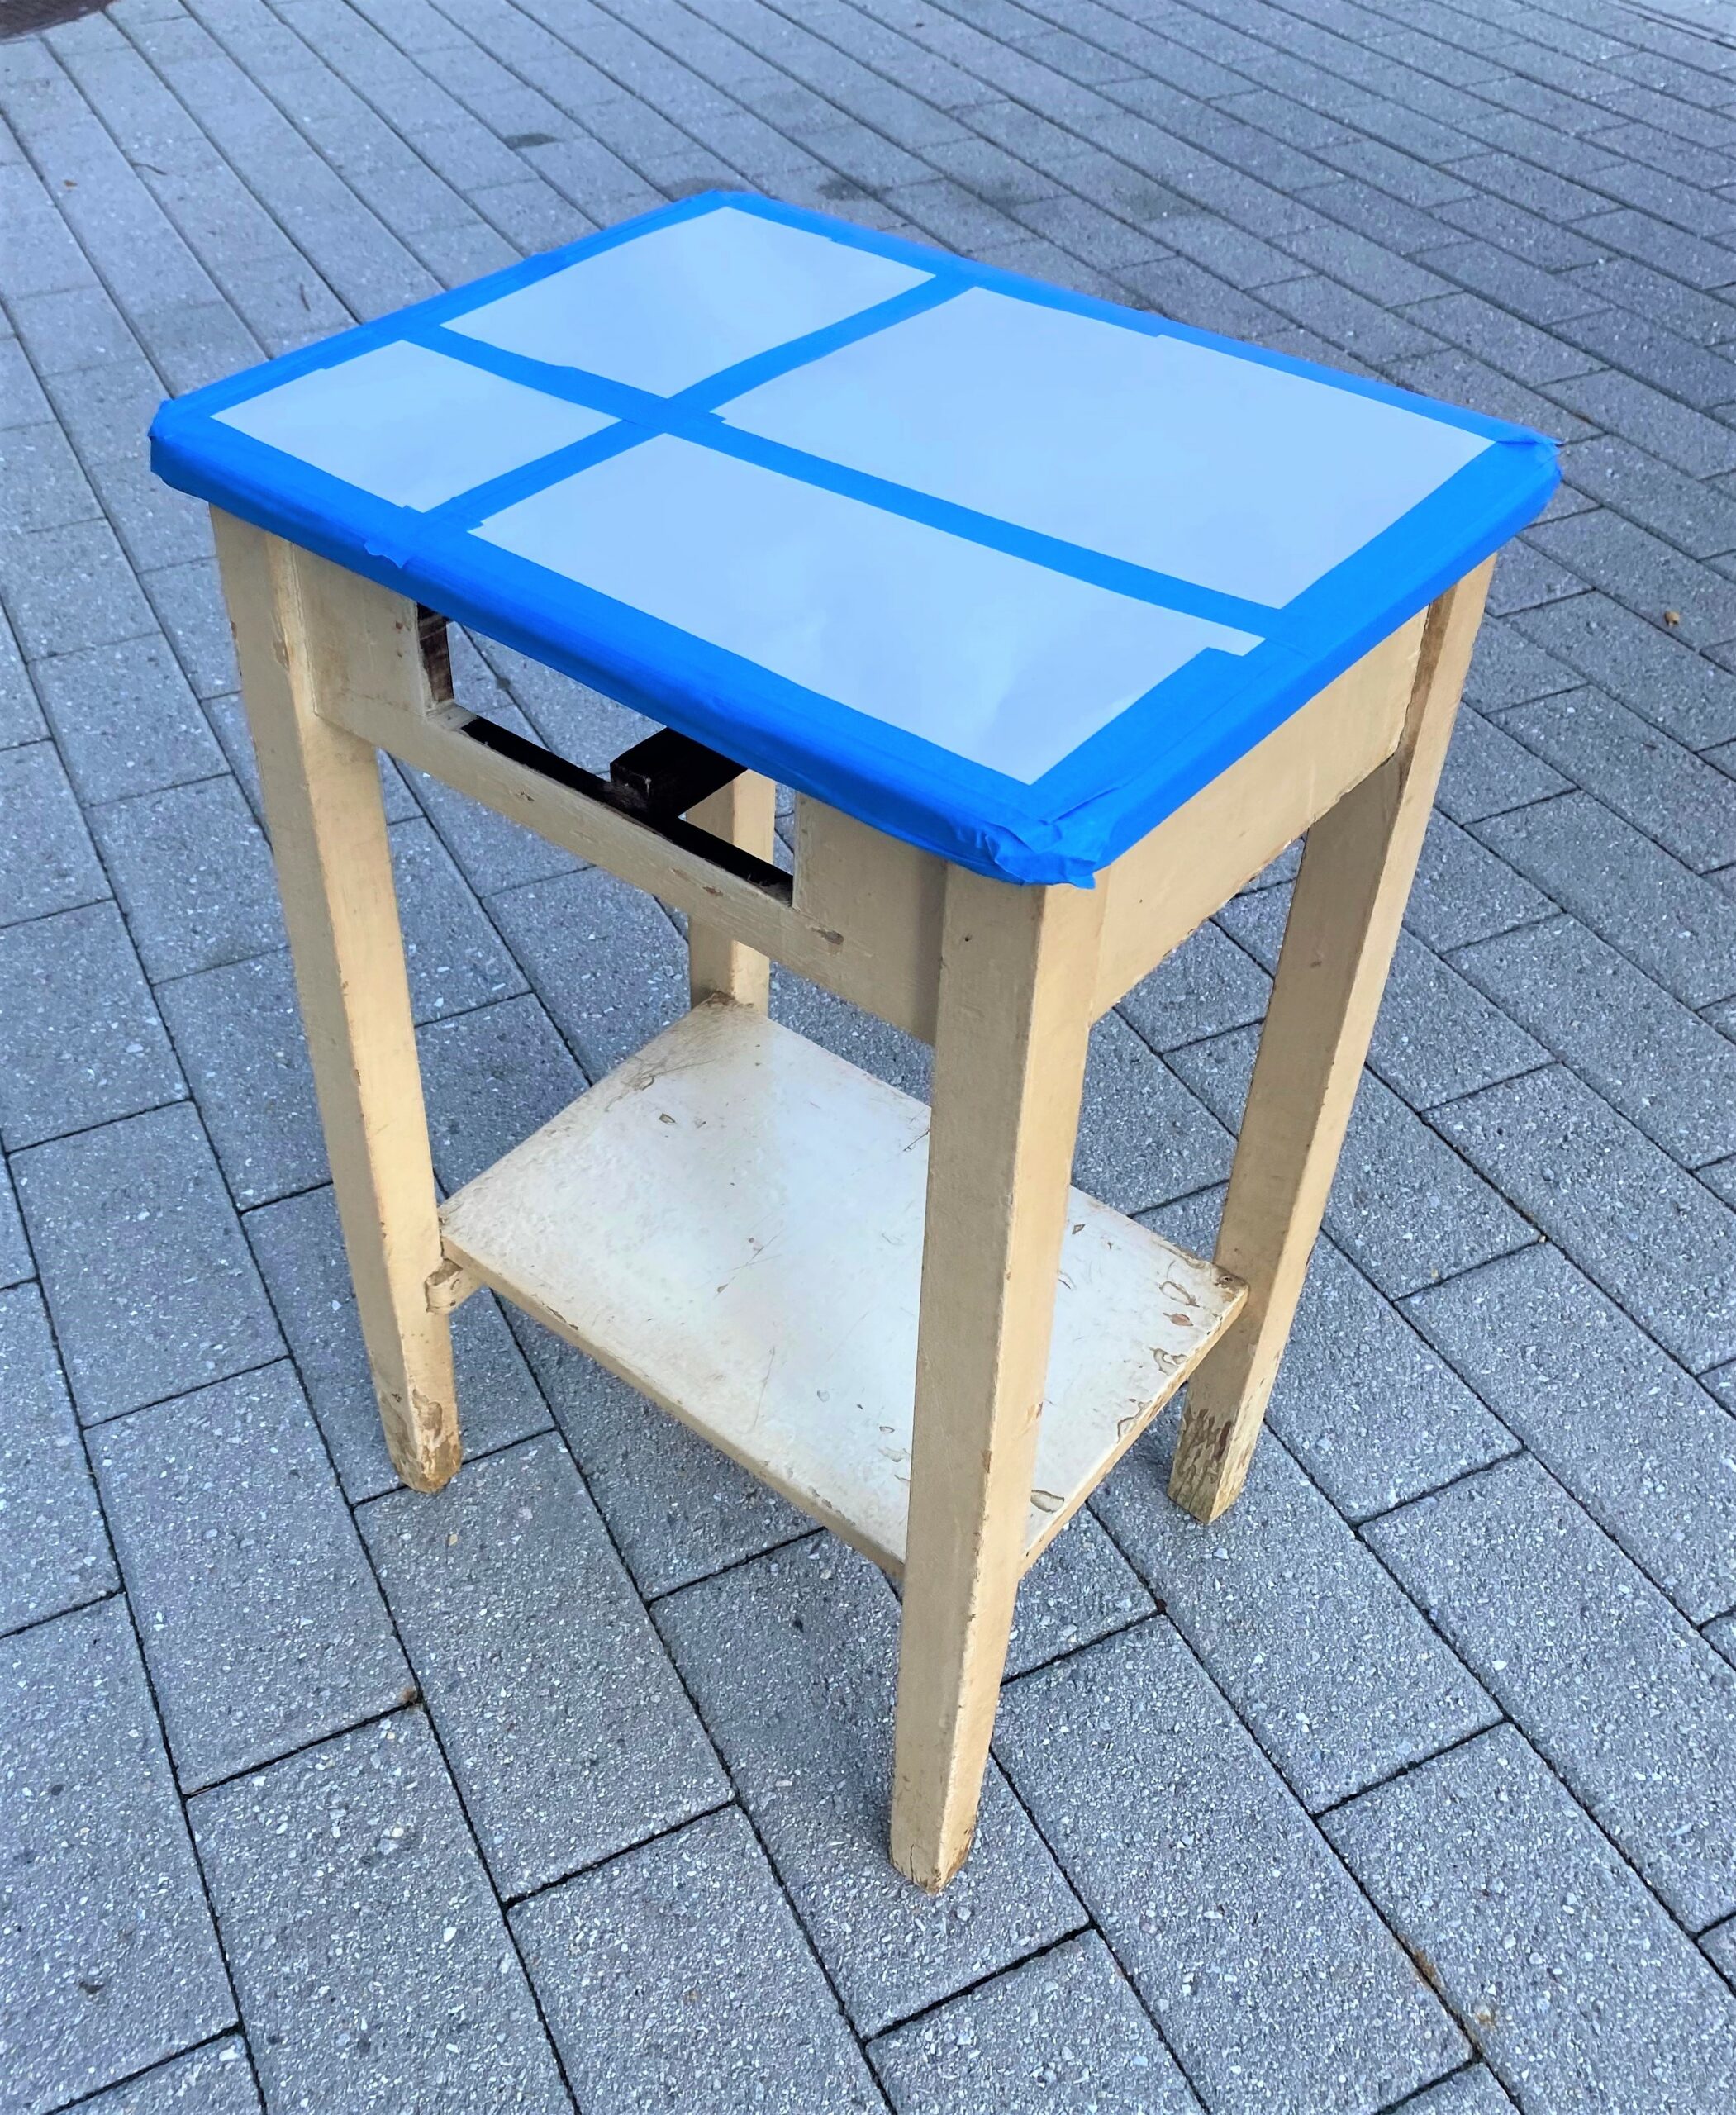
Goodwill stores are always cool, clean, and cared for, so take a mini-vacation to explore what items await you. For this project, be on the hunt there for a small yet sturdy side table that is waist high with wooden legs. The table featured here was super solid and surprisingly heavy because its top is actually glazed metal.

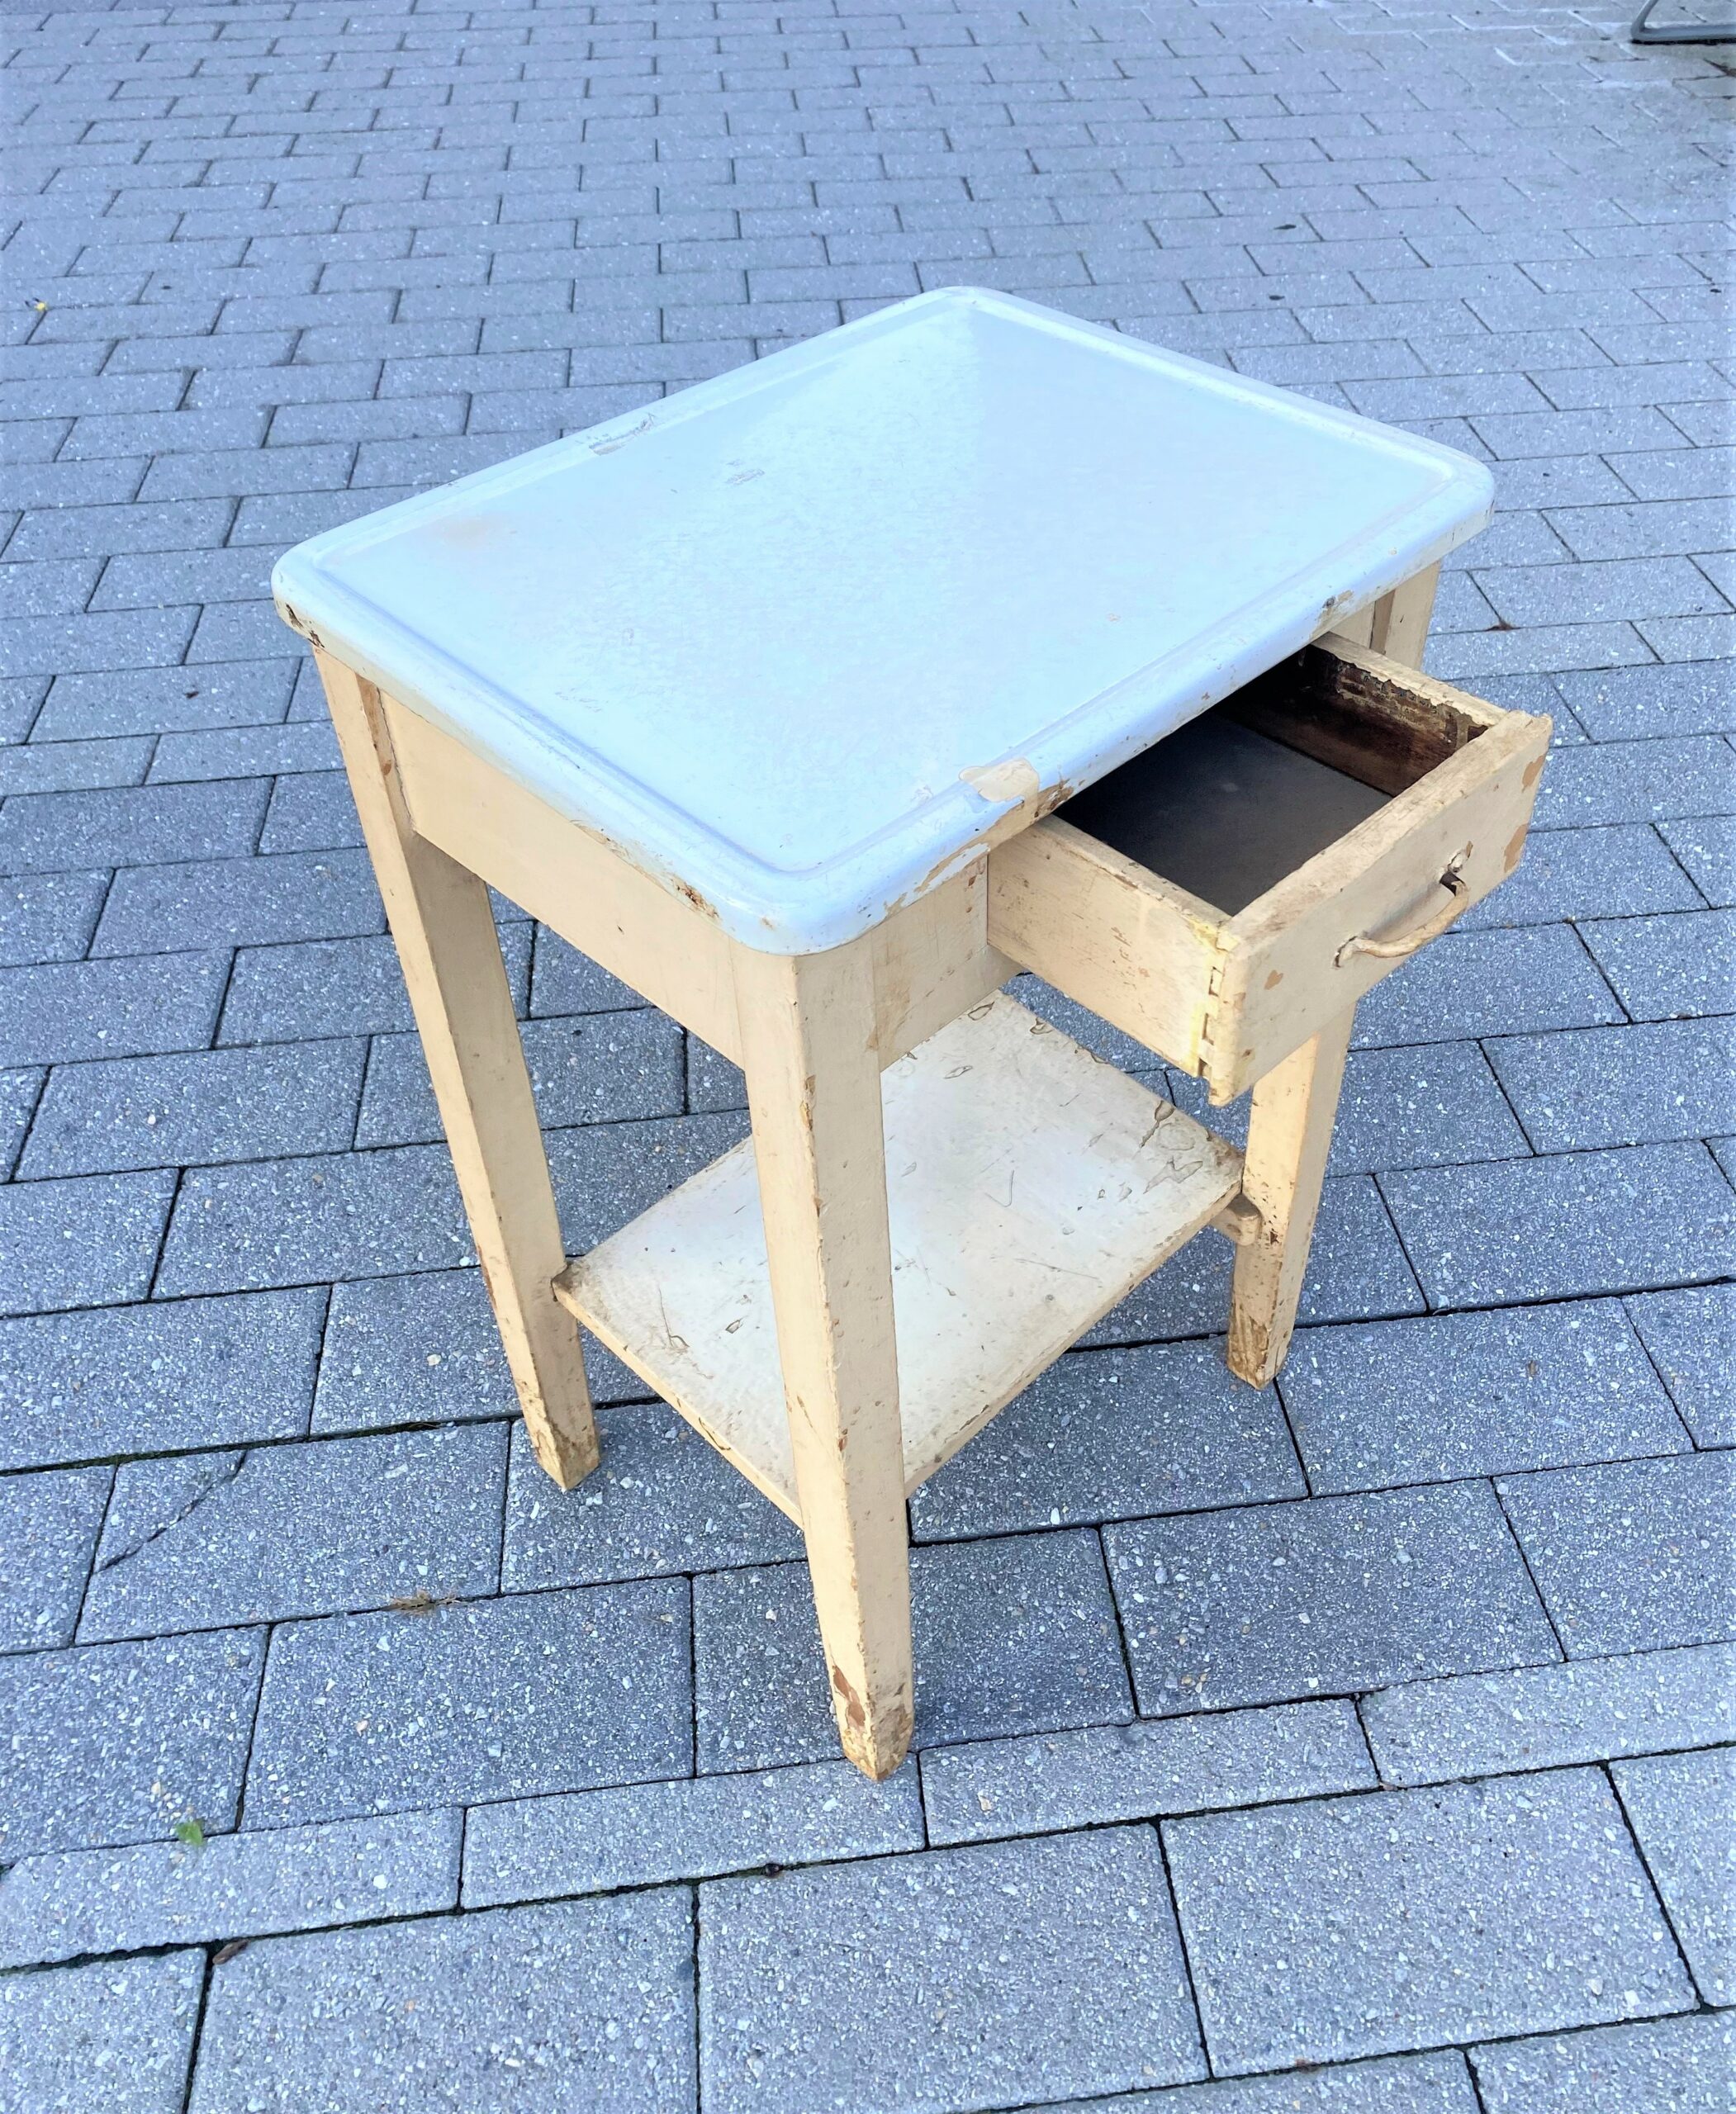
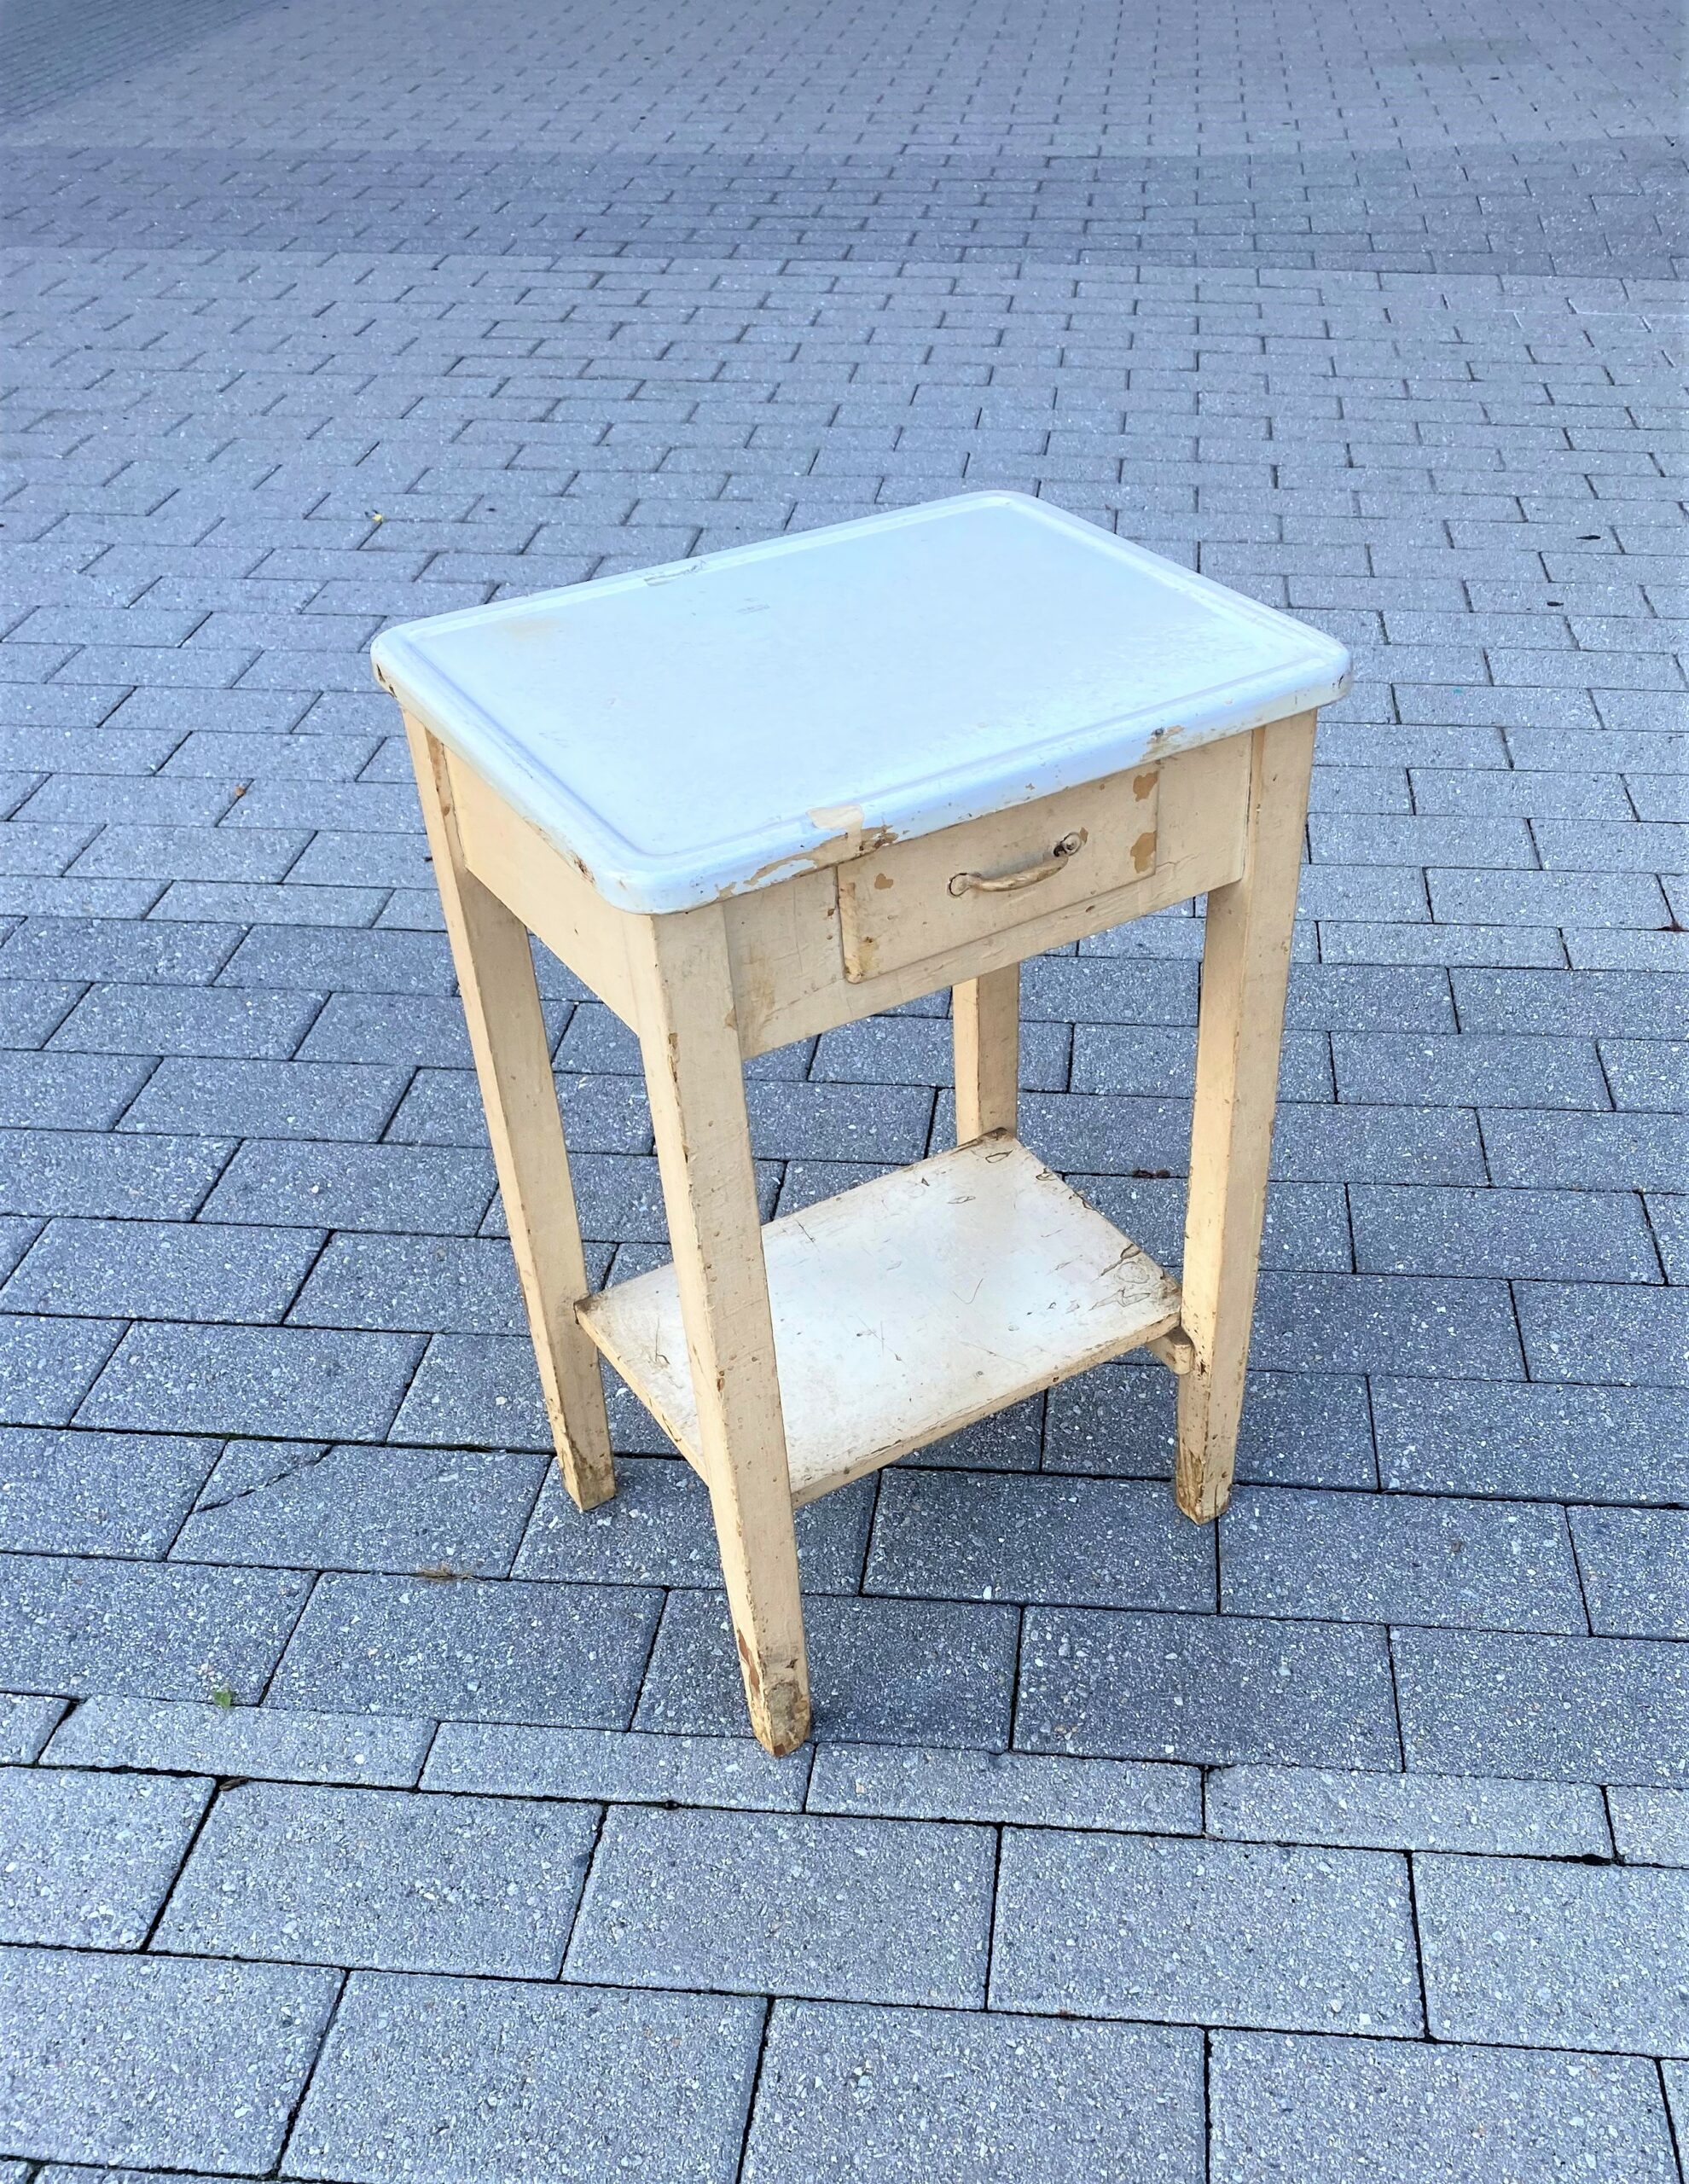
This “Depression Era” table was likely made during the 1930s when the style was streamlined, simple and functional. Its little drawer and small shelf were ideal for its new life as a bar cart.
2. Start its transformation with a cleaning up and sanding down
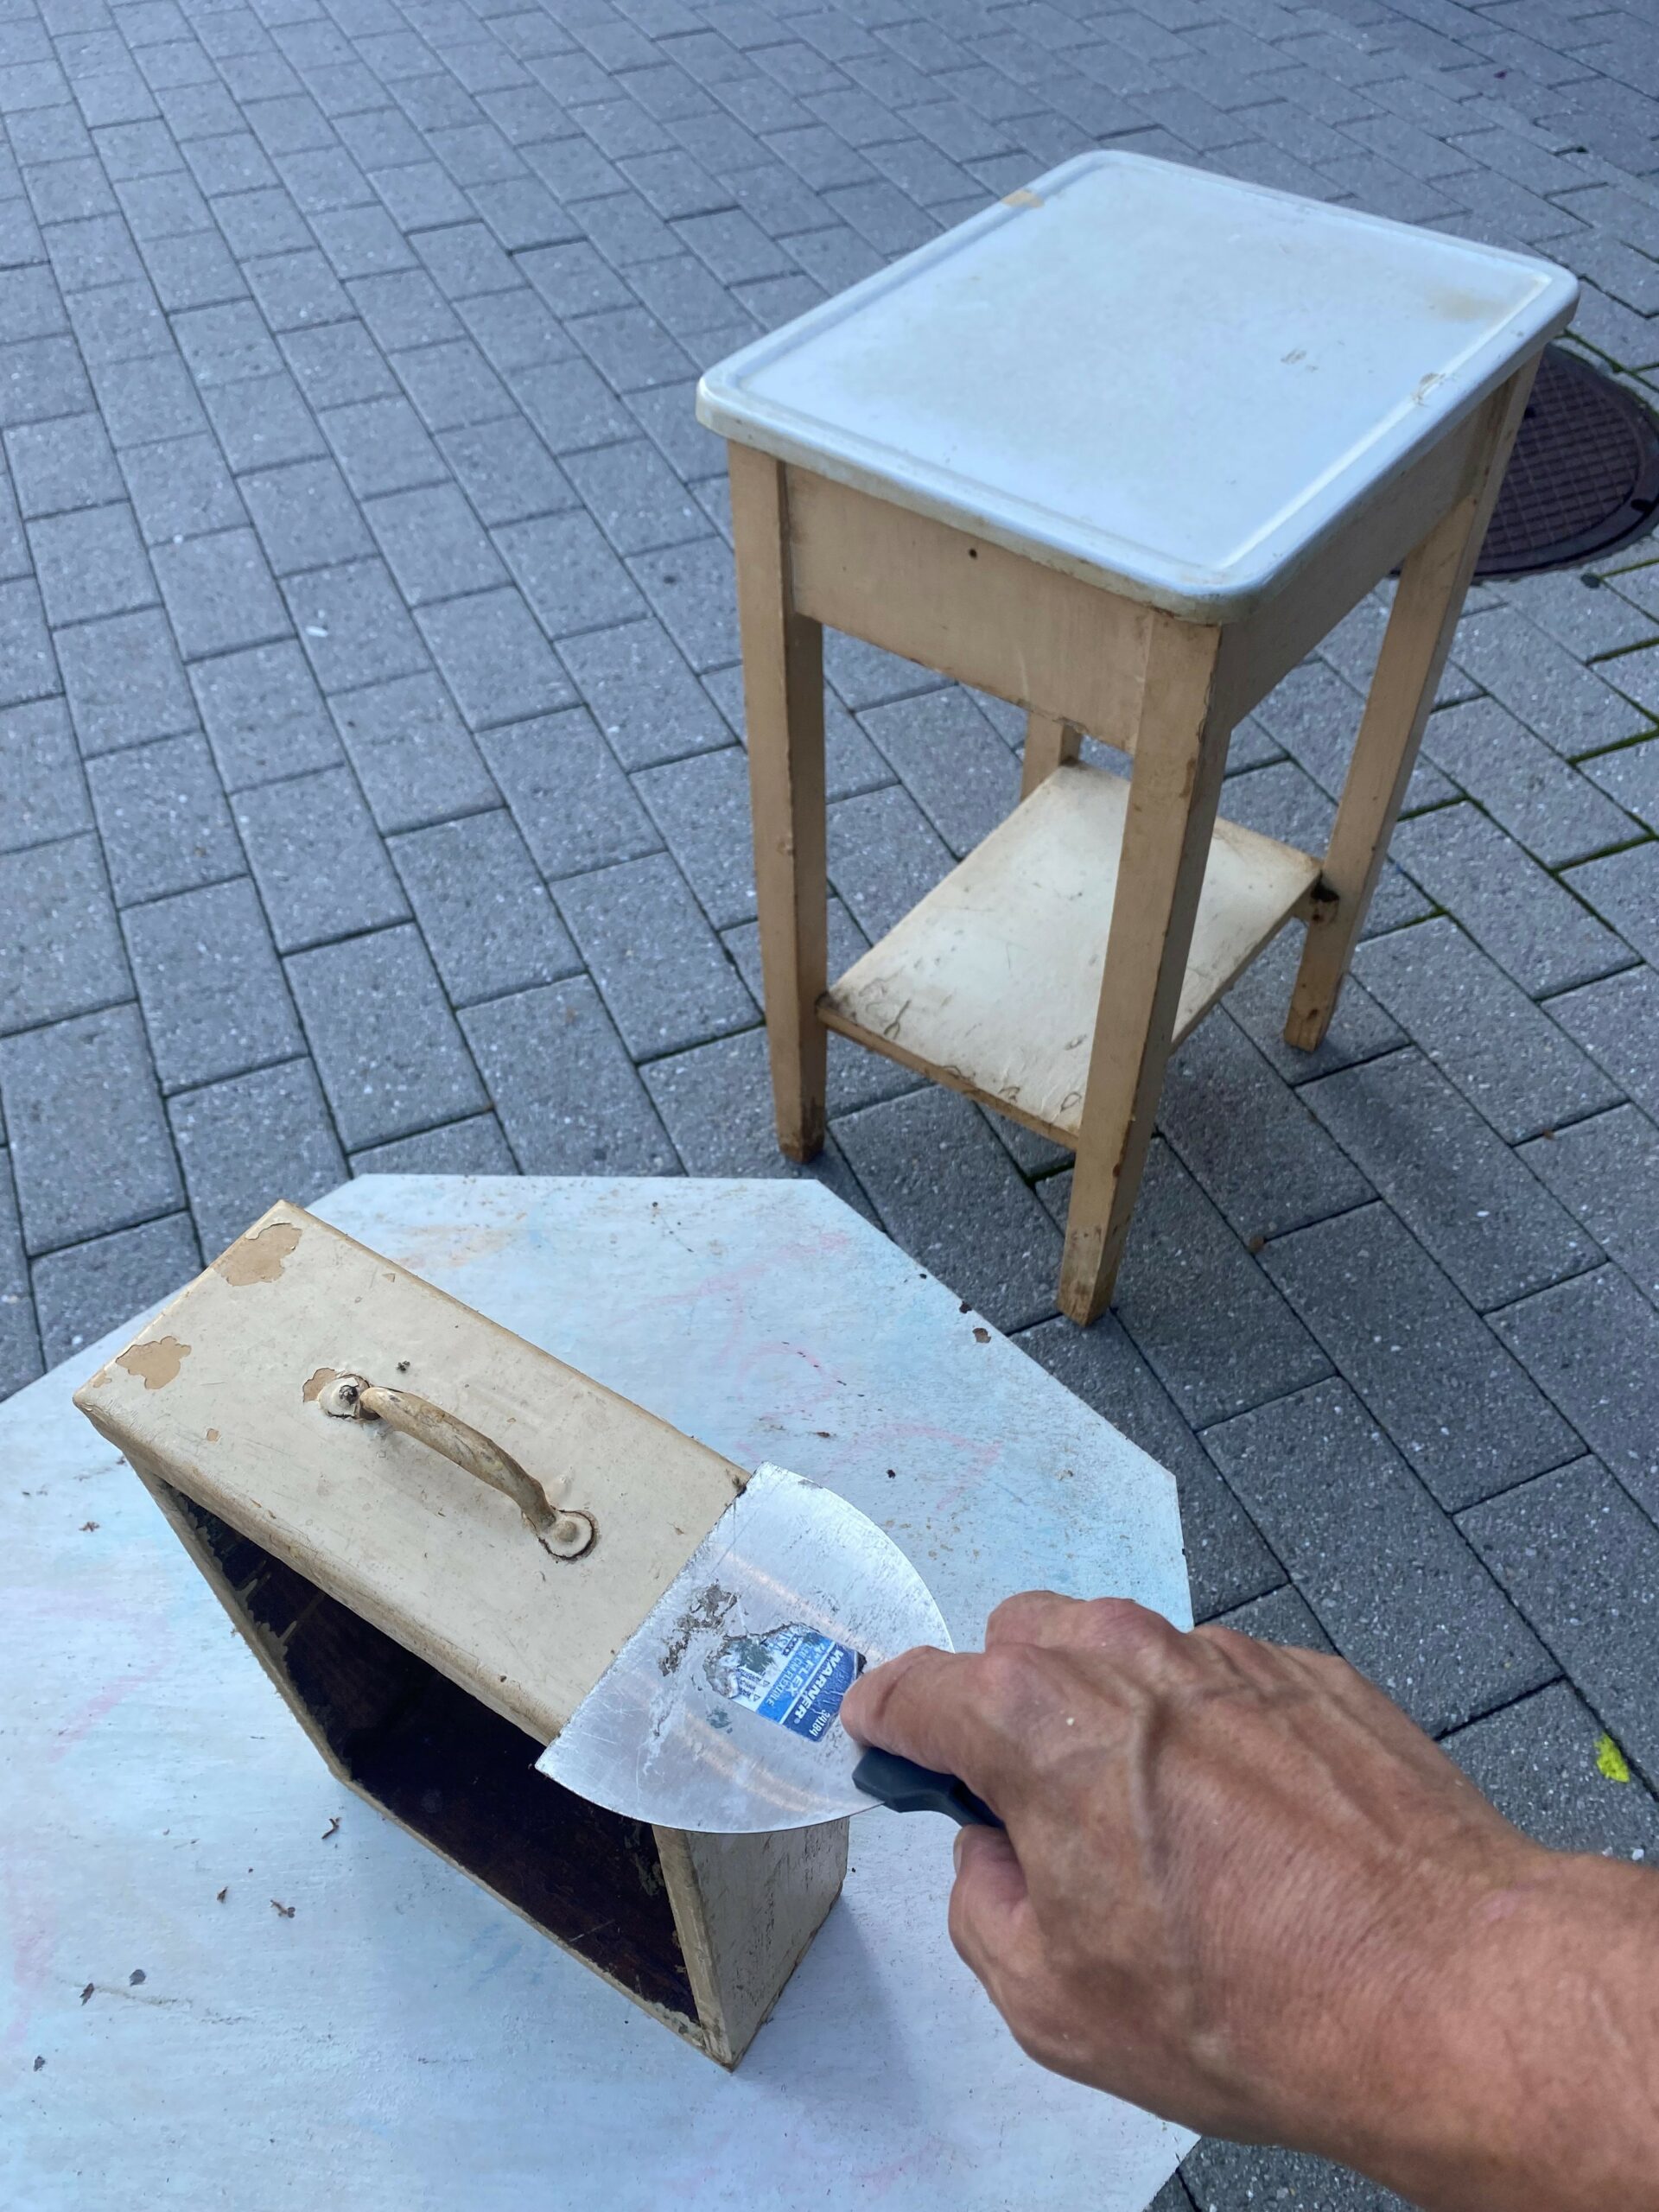
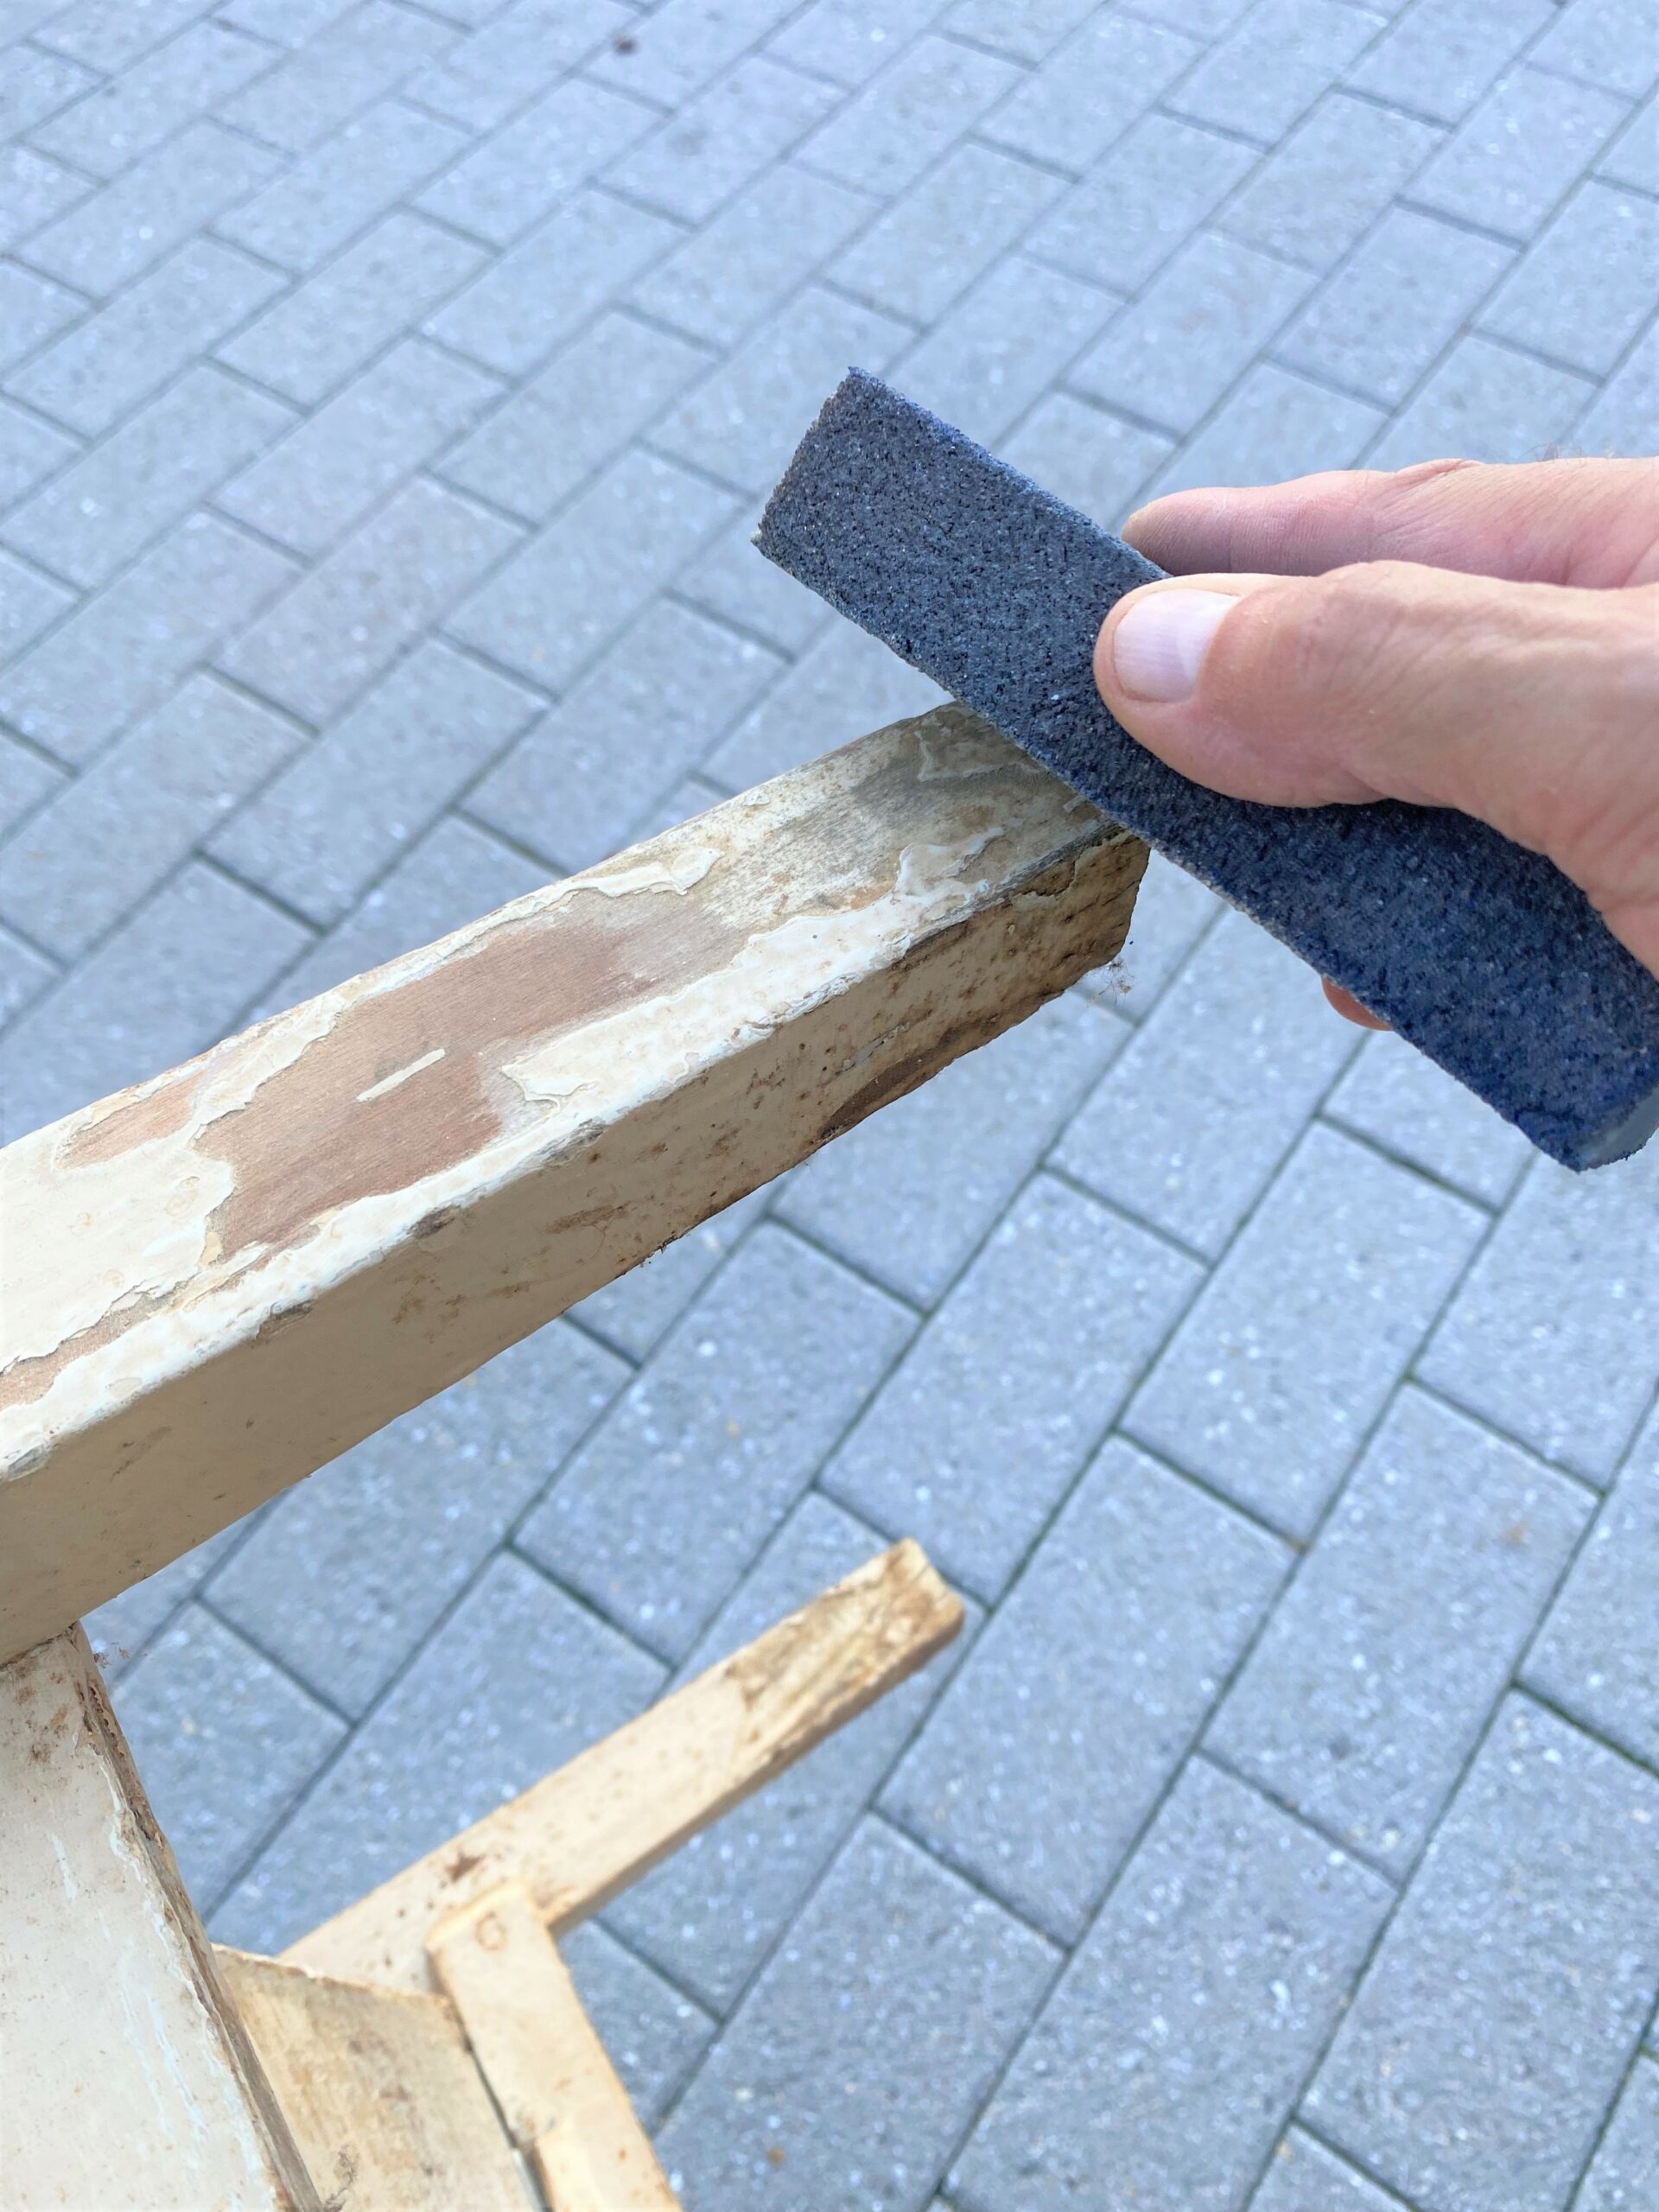
- This little table looked like it had been in someone’s basement for many years, so a paint scraper and sanding block were used to tackle chipped and peeling paint.
- Once that was done, a damp cloth helped to remove the dirt and debris. Based on the condition of your table, it will likely need a good rub down to ruff up its existing surface and get ready for painting.
- Use a medium to coarse-grained sanding block and go over your entire table.
- The top of this table was metal with a white glazed finish, so there was no need to sand it as I wanted the smooth finish to stay that way.
- To protect it while painting, scrap paper was secured with painter’s tape.

Design suggestion:
The white-glazed tabletop was slightly nicked and had paint on it from years ago. A good scrubbing was given to it. Rather than spray painting the top over with white, I thought these elements are a part of its history, so they remain as part of its final look.
Does your table have any interesting things to keep? What about an old paper label? Included it. Maybe a child’s doodle? Protect it.
Part of the beauty of upcycling is that the piece has had a previous life which adds to its overall charm and appeal. Celebrate these items and any “flaws” because they tell a story.
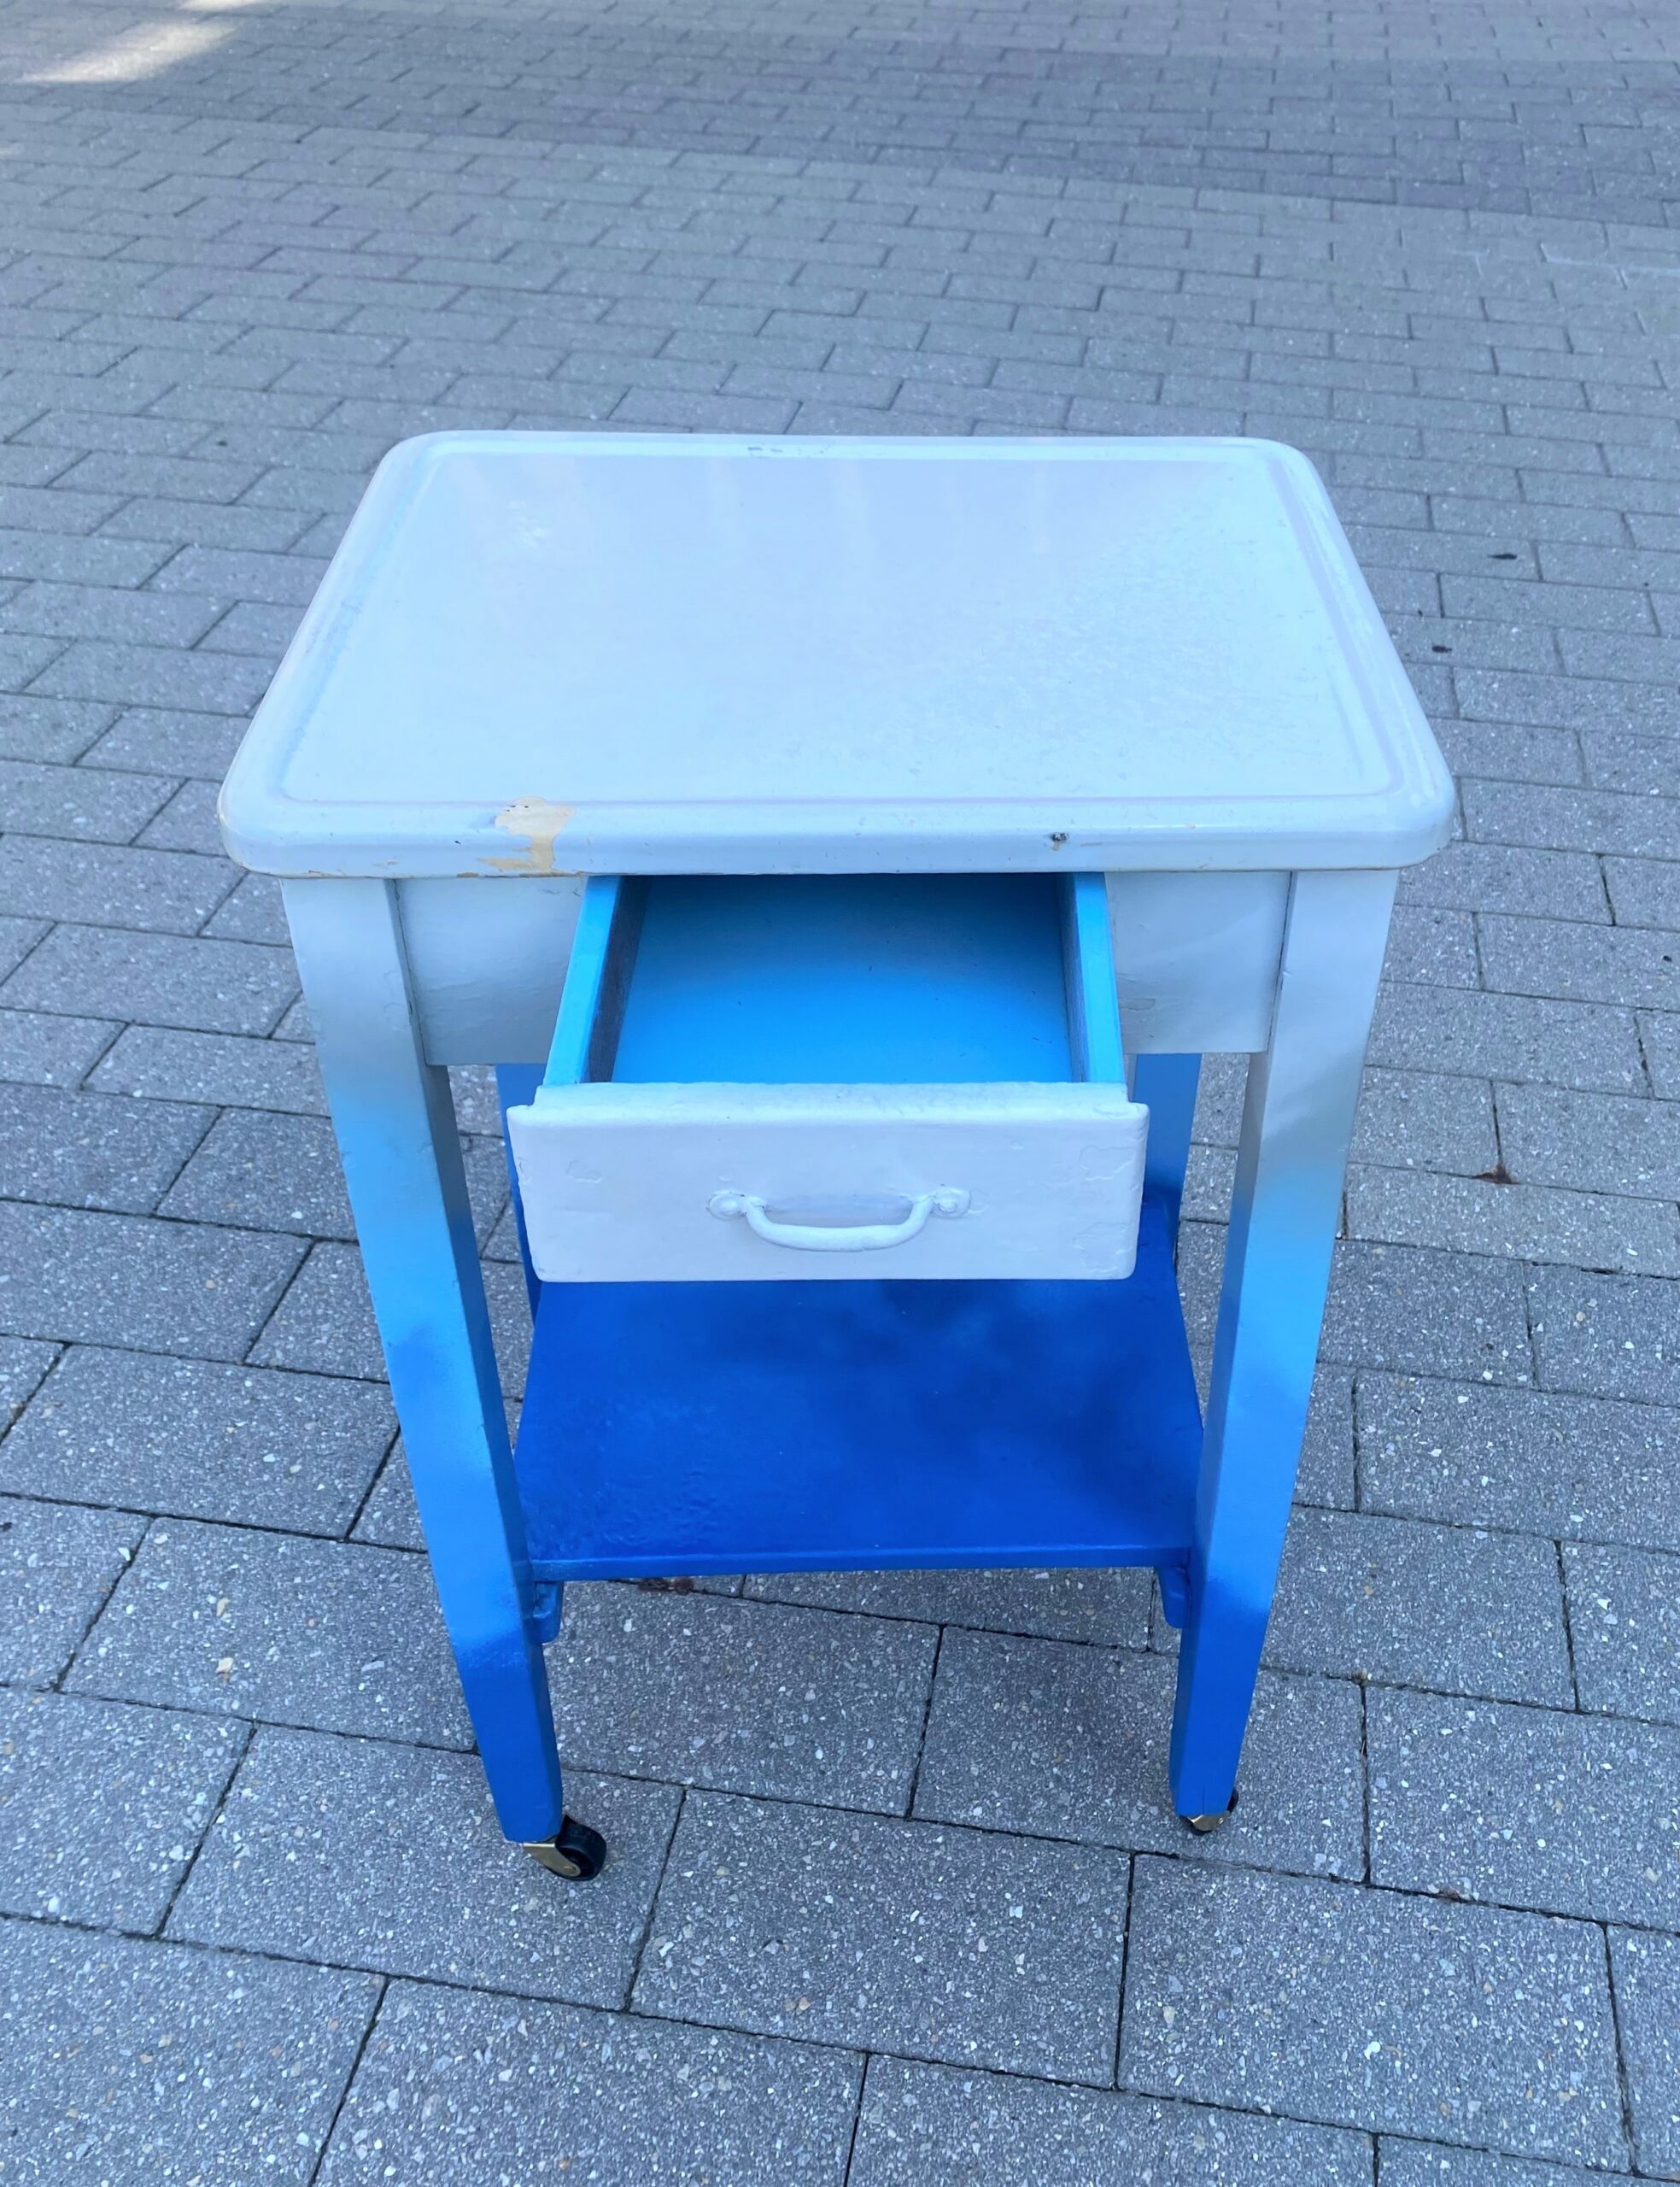
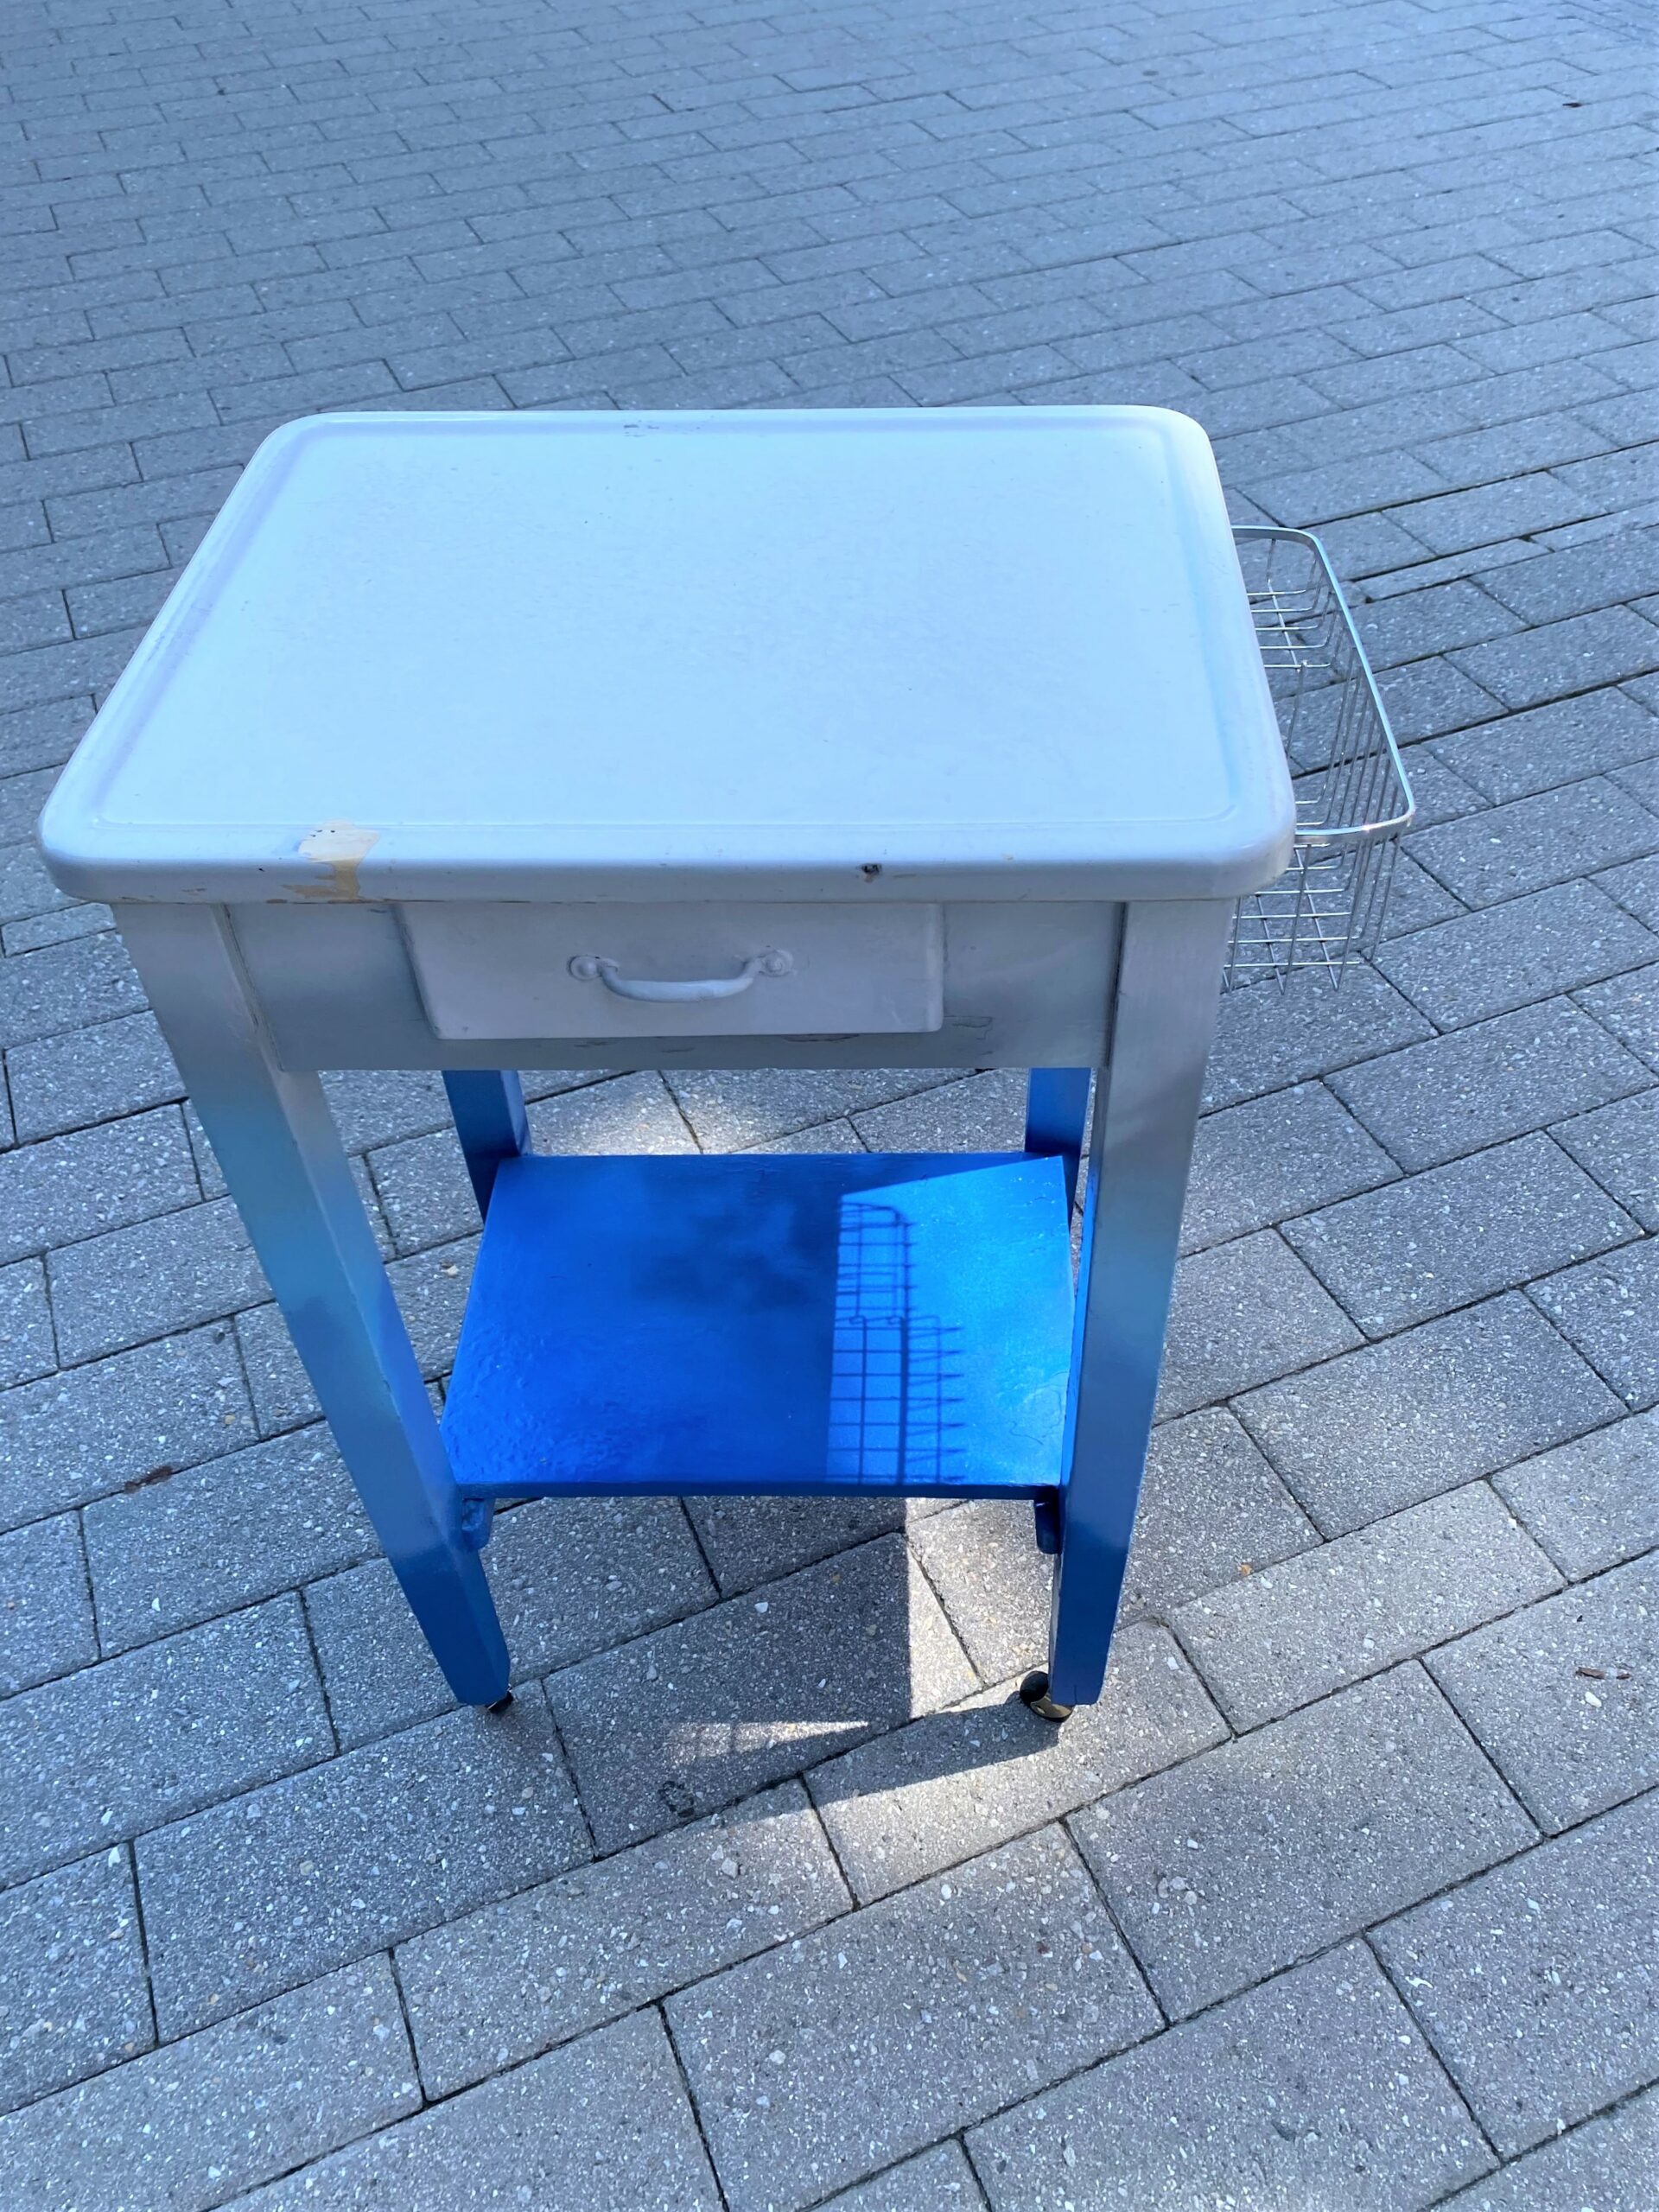
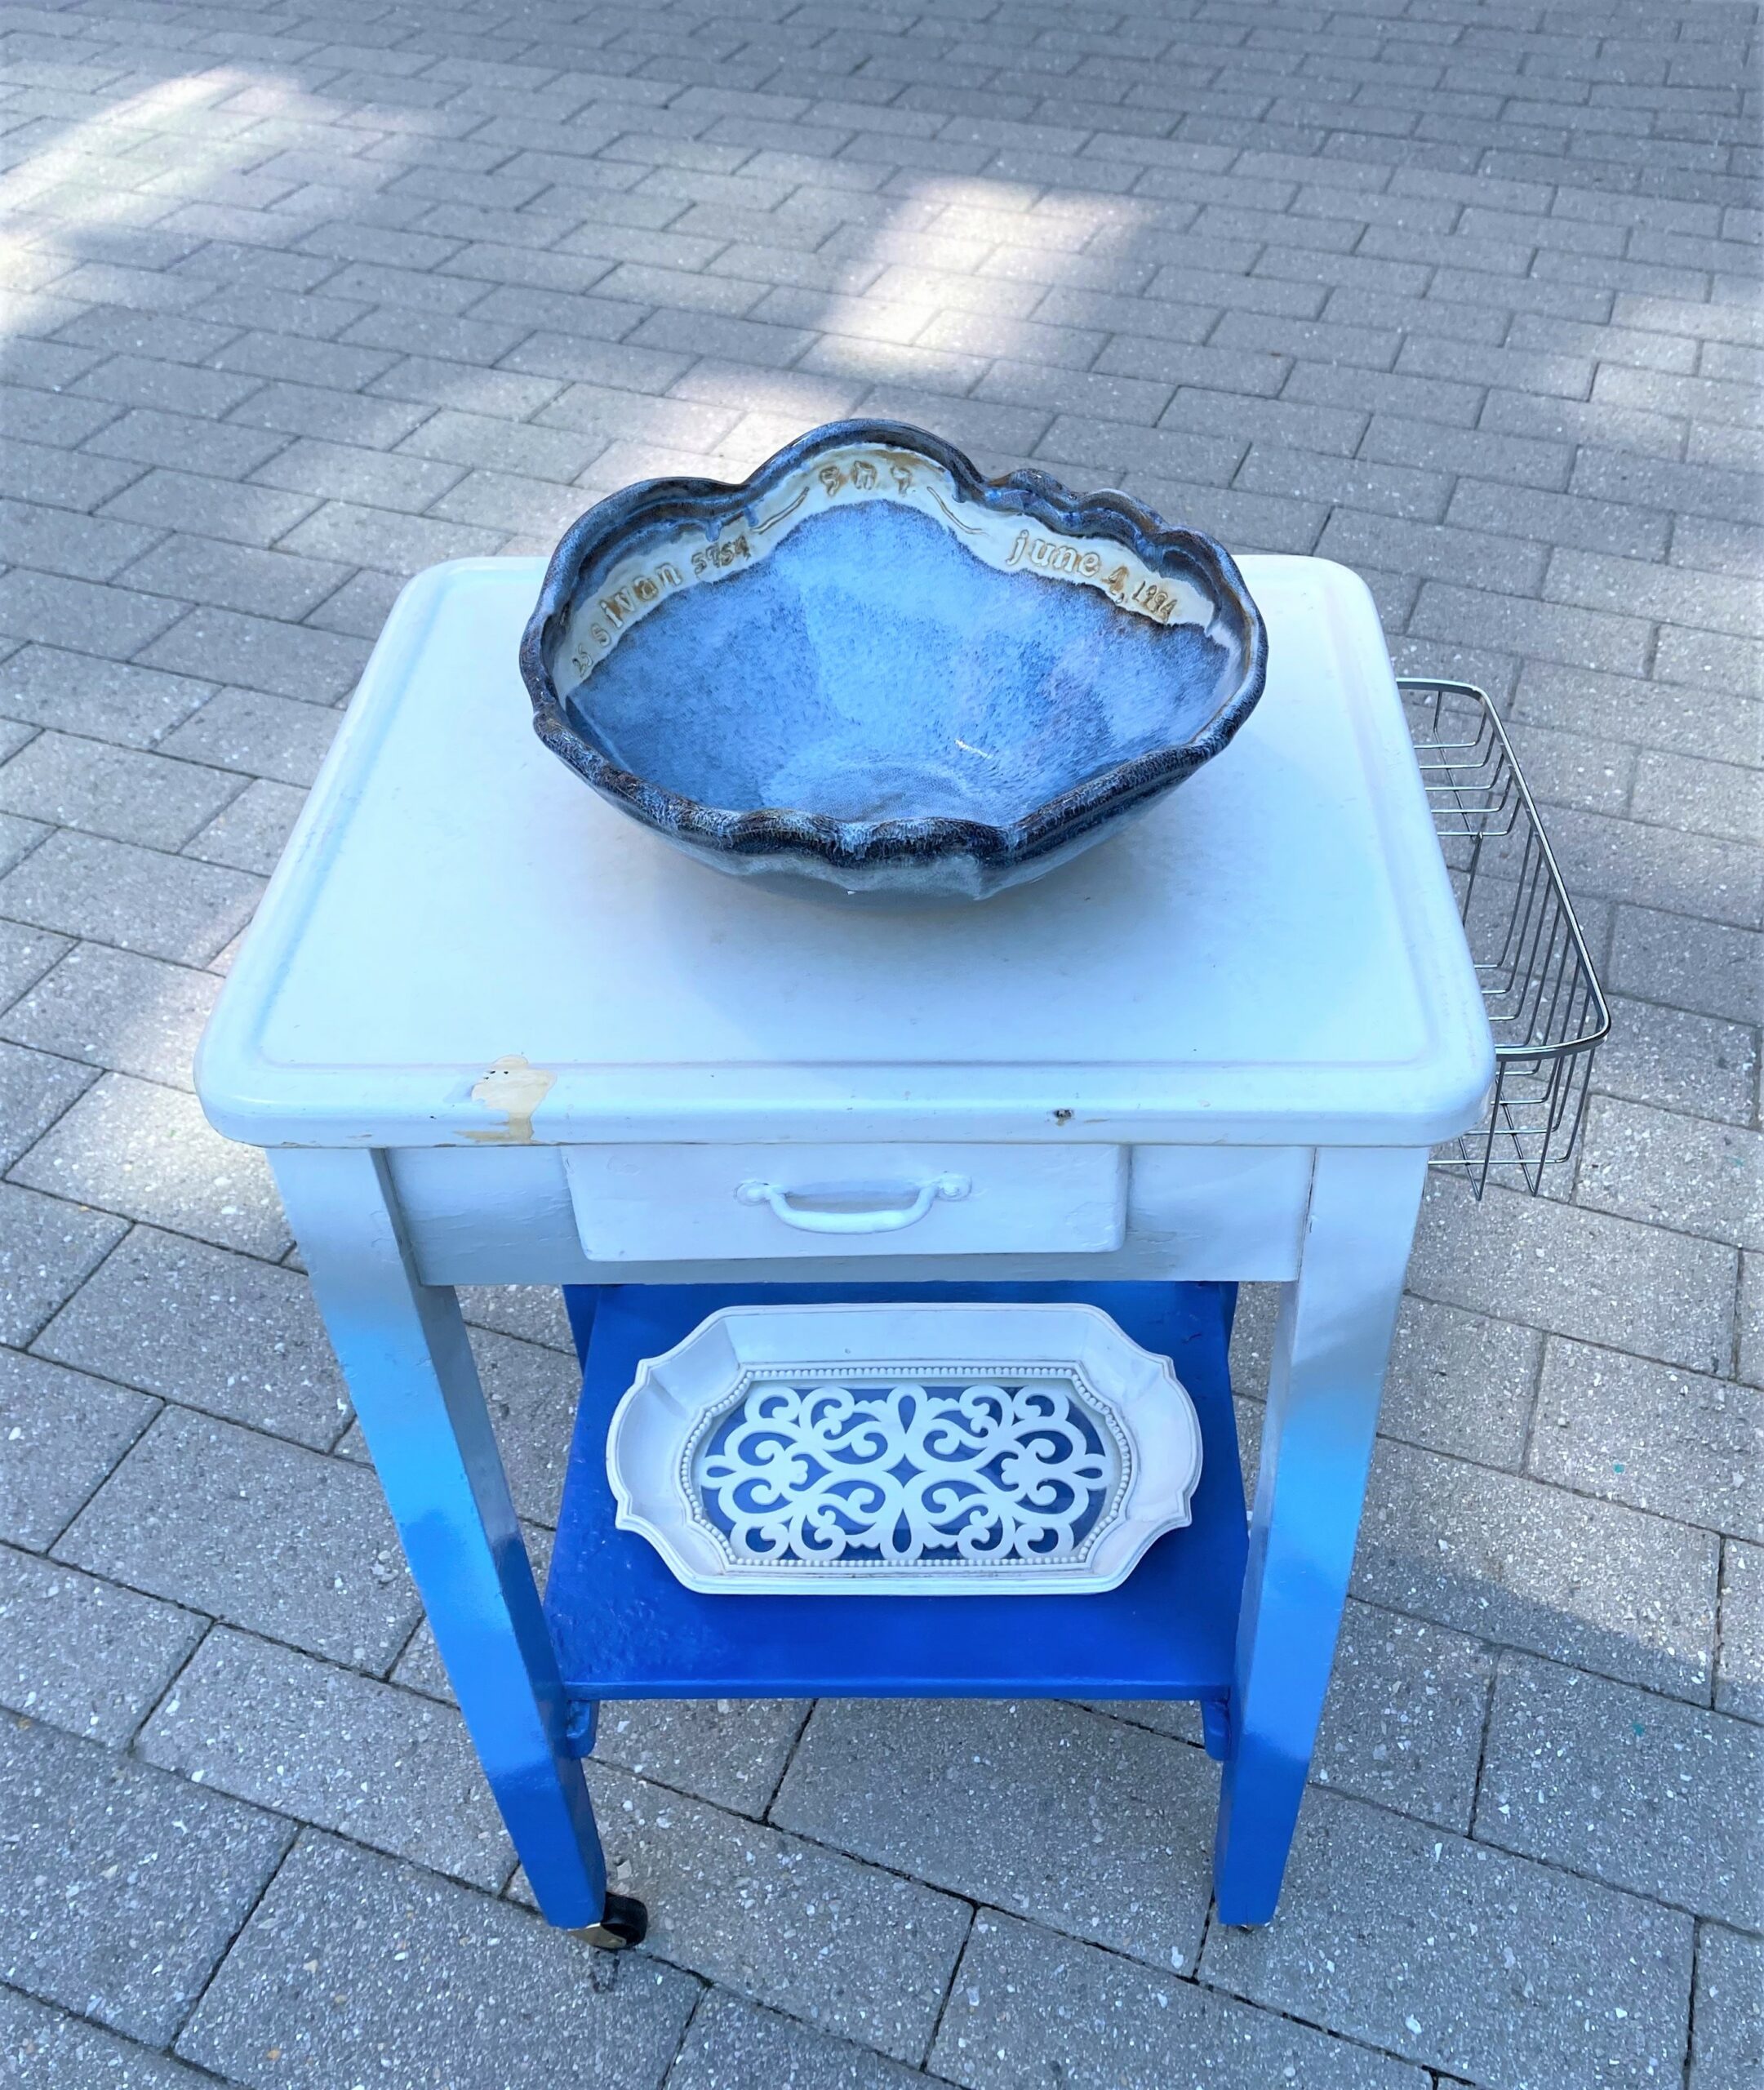
3. In honor of summer, spray on an “ombre” finish
To make this old piece look contemporary and special, an ombre approach to painting it was used. Ombre is the gradual shading of color from dark to light. Since your bar cart will be used often in summer, consider selecting paints in shades of blues, gray, and white to mimic the sky or ocean.
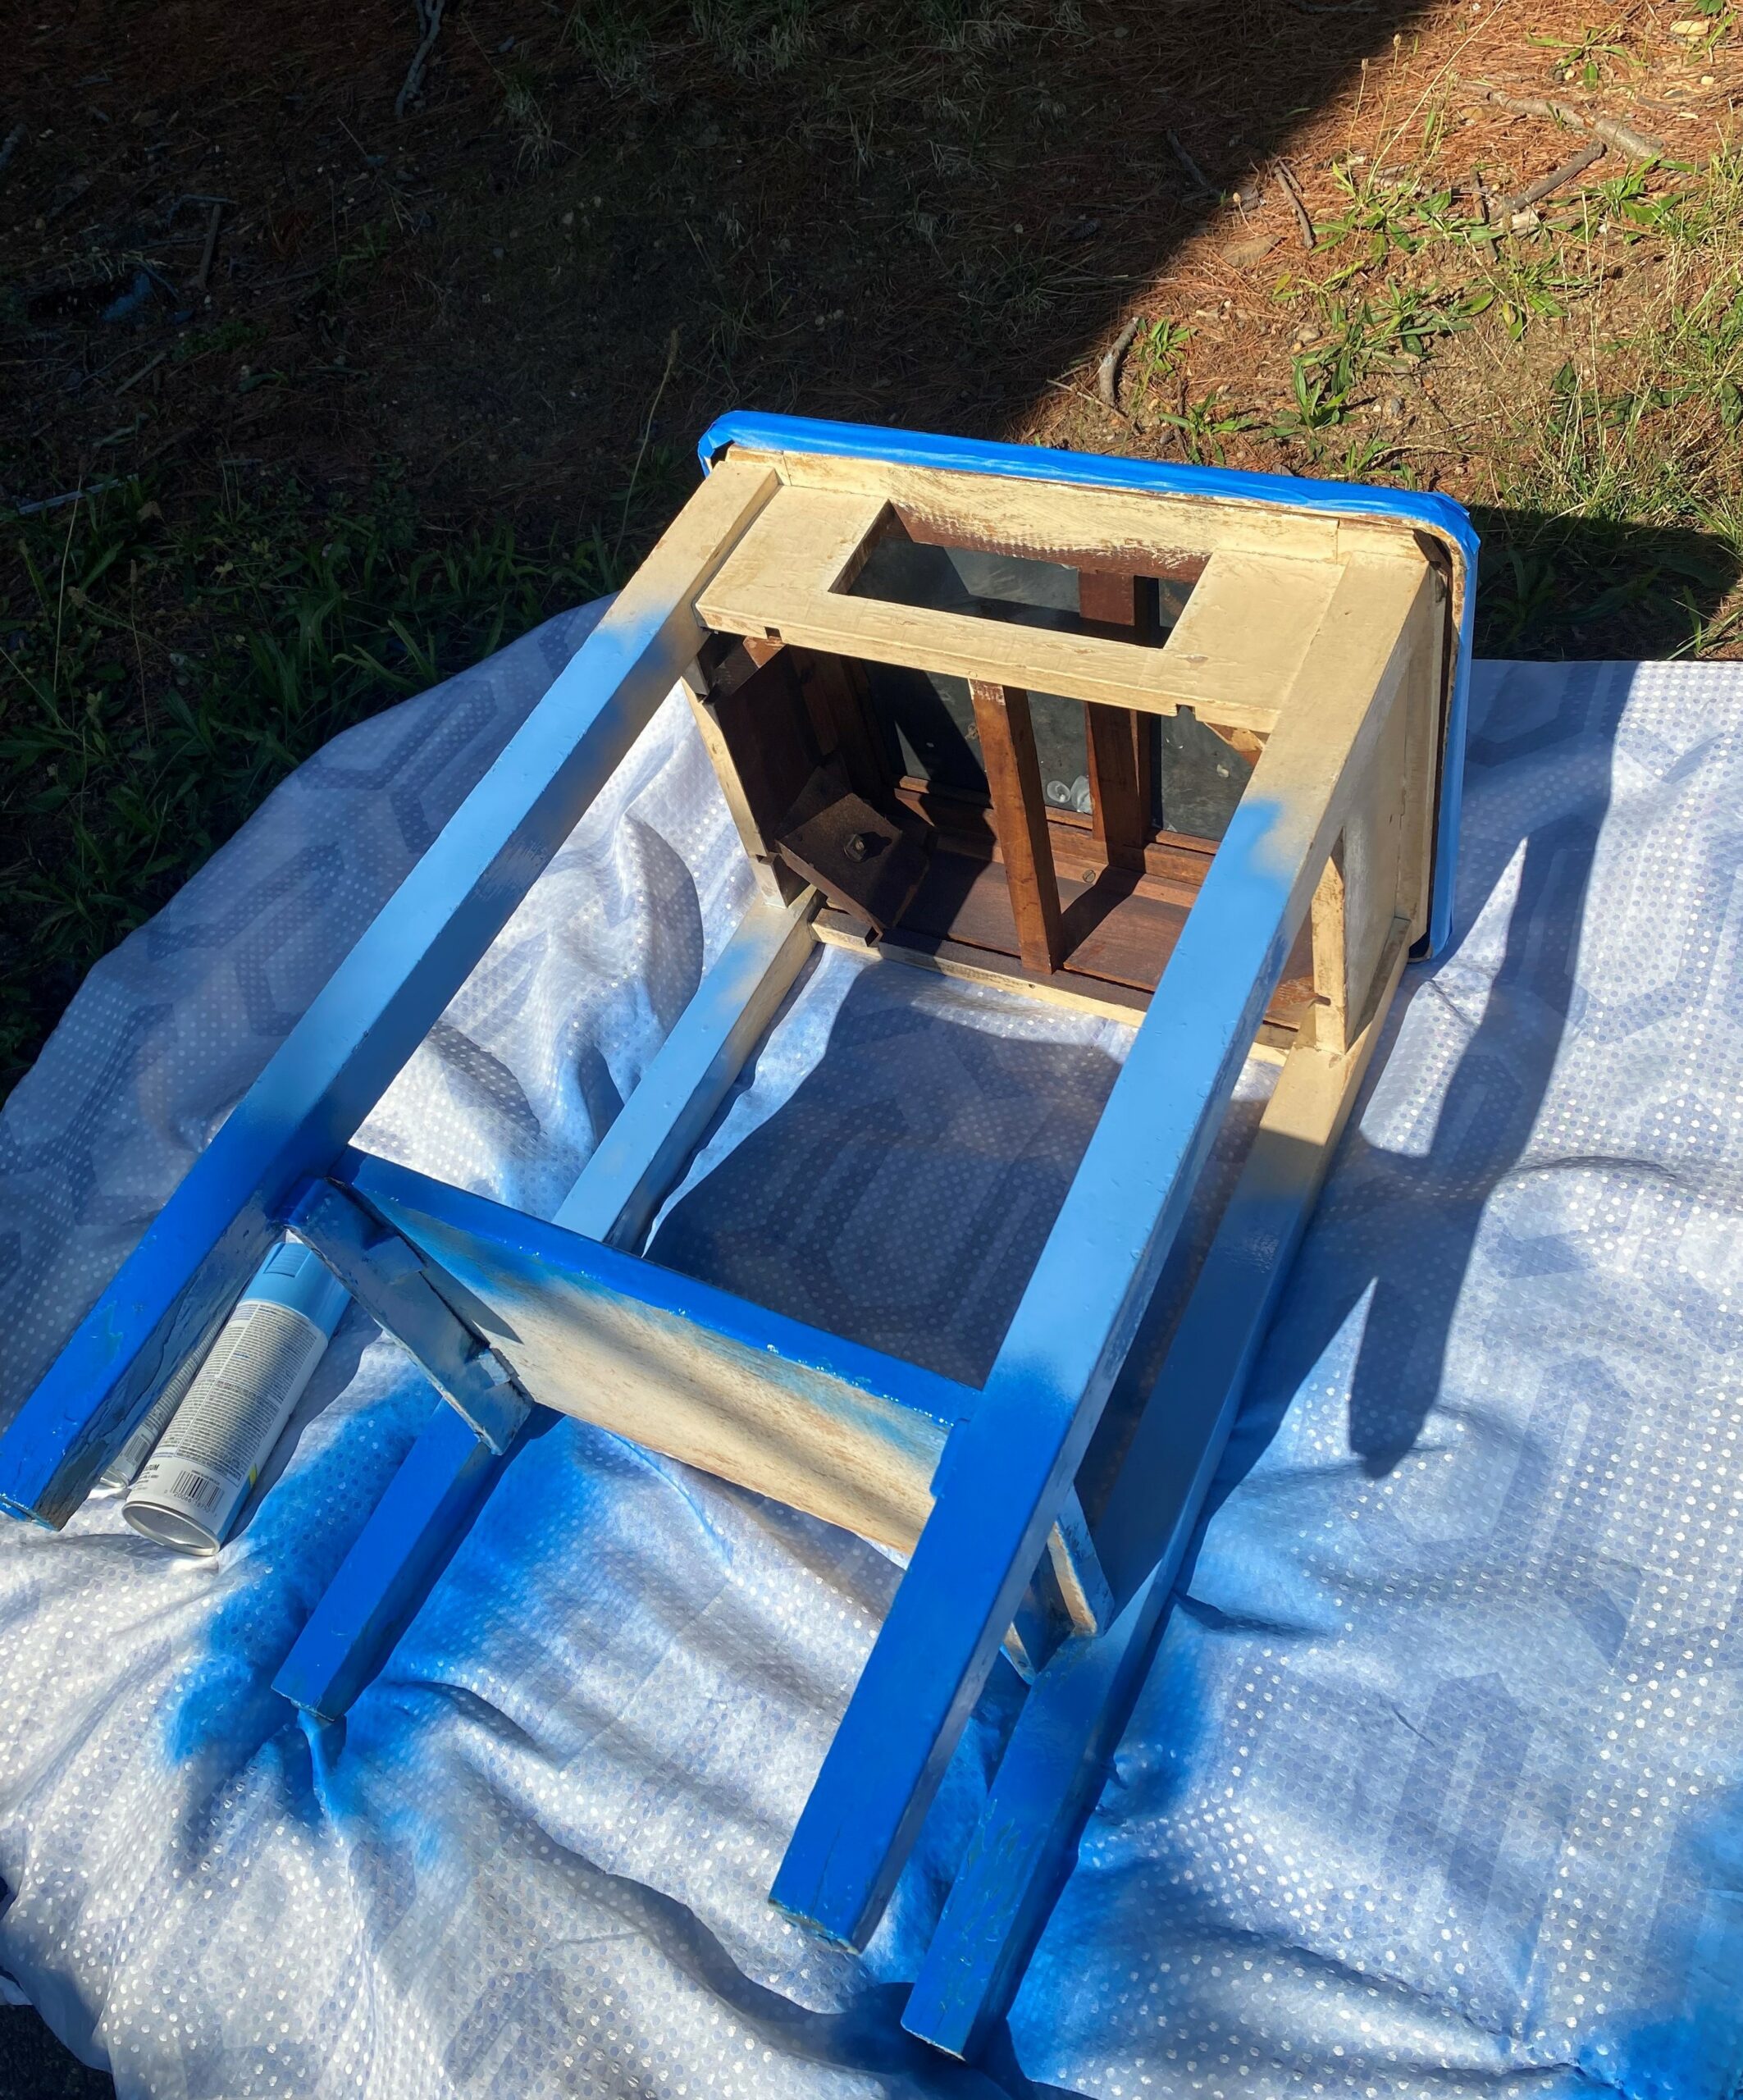
- Place your table on a drop cloth and pick up your darkest blue tone.
- Spray on a light layer on the bottom of your table, ensuring you get each side and edge.
- Grab the next lightest blue tone and repeat this step on the next fourth of your table and allow the second tone to overlap the first so you don’t see any of your table’s original paint color.
- Continue this step with your next lightest blue, then to gray, and finally with white. Again, light layers are best as you return to your piece several times to ensure solid coverage.
- After your first coat of paint has dried, place your table on its side and spray on more paint, following the same dark to light steps. Give this step time to dry, then turn it over to another side and spray on more paints. As you paint, move around your piece so you can see it from all sides and angles.
- Don’t forget to paint your drawer’s inside, too. While its front face was painted white, a bright blue was added inside for a fun pop of color when it was opened. Love, love, love it!

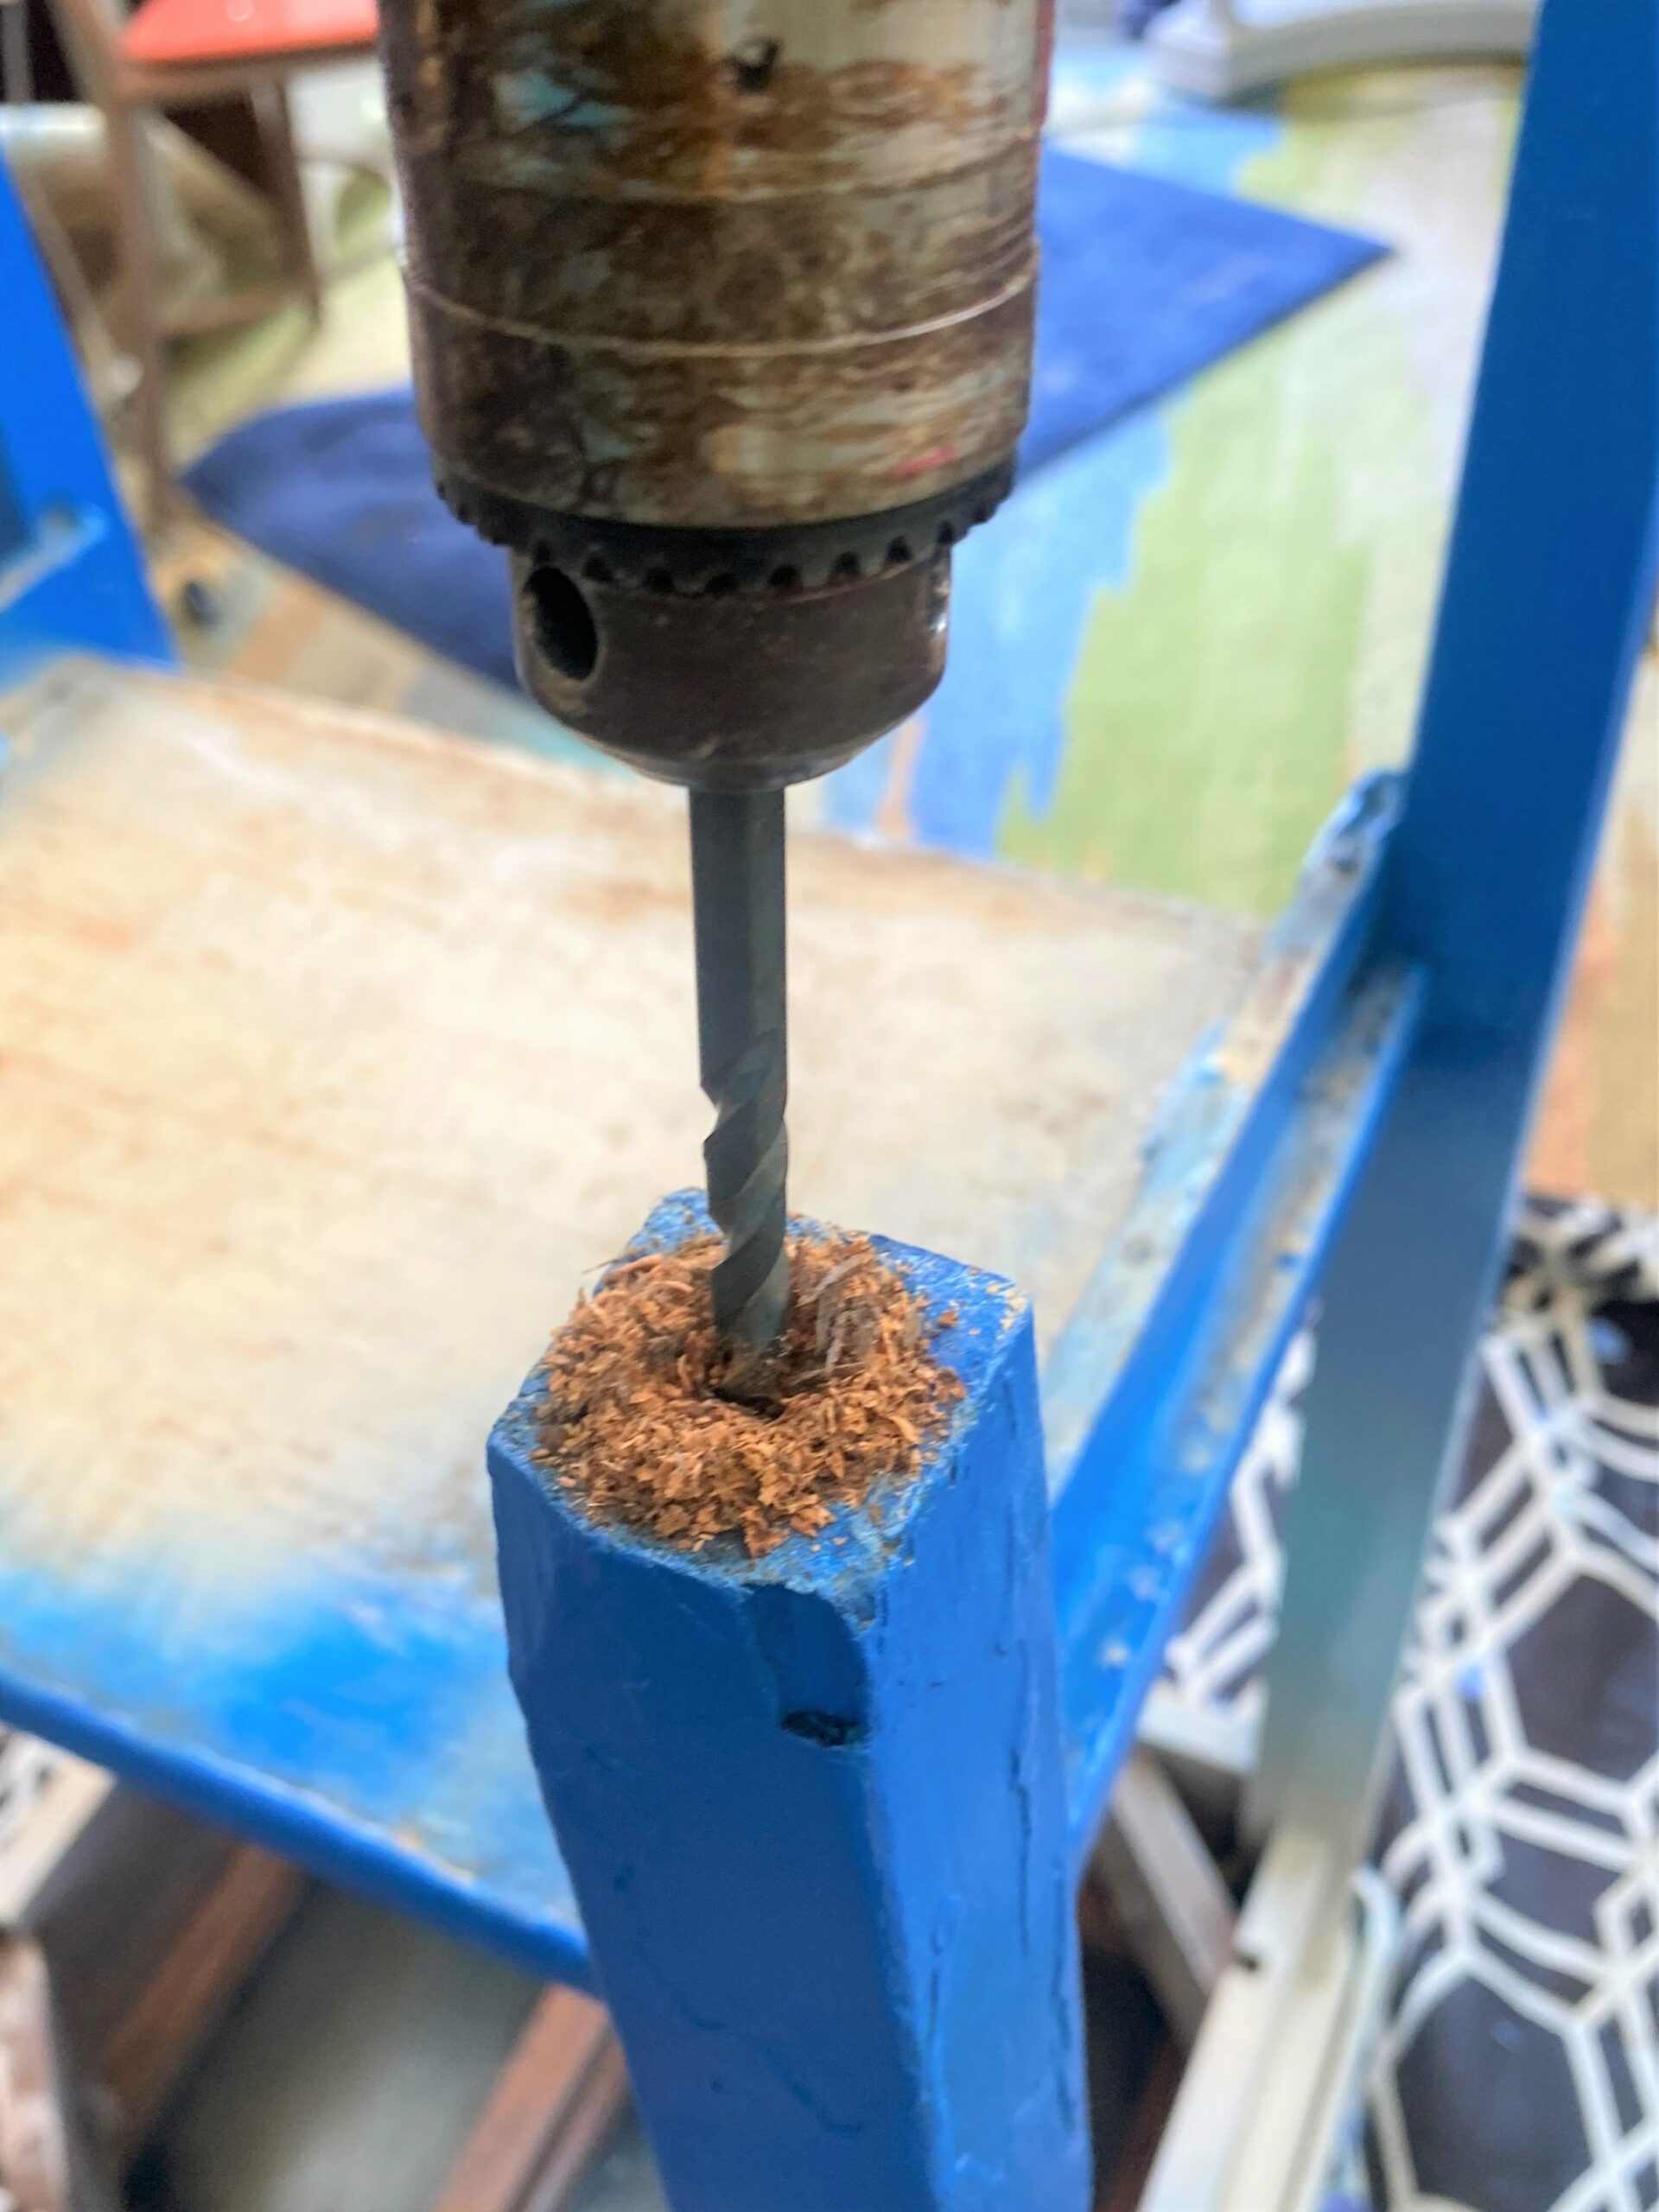
4. You will flip when you add wheels
- Turn your table upside down, truly flip it, so its top surface is down and its legs are up and facing you.
- Place it on a drop cloth to protect its top.
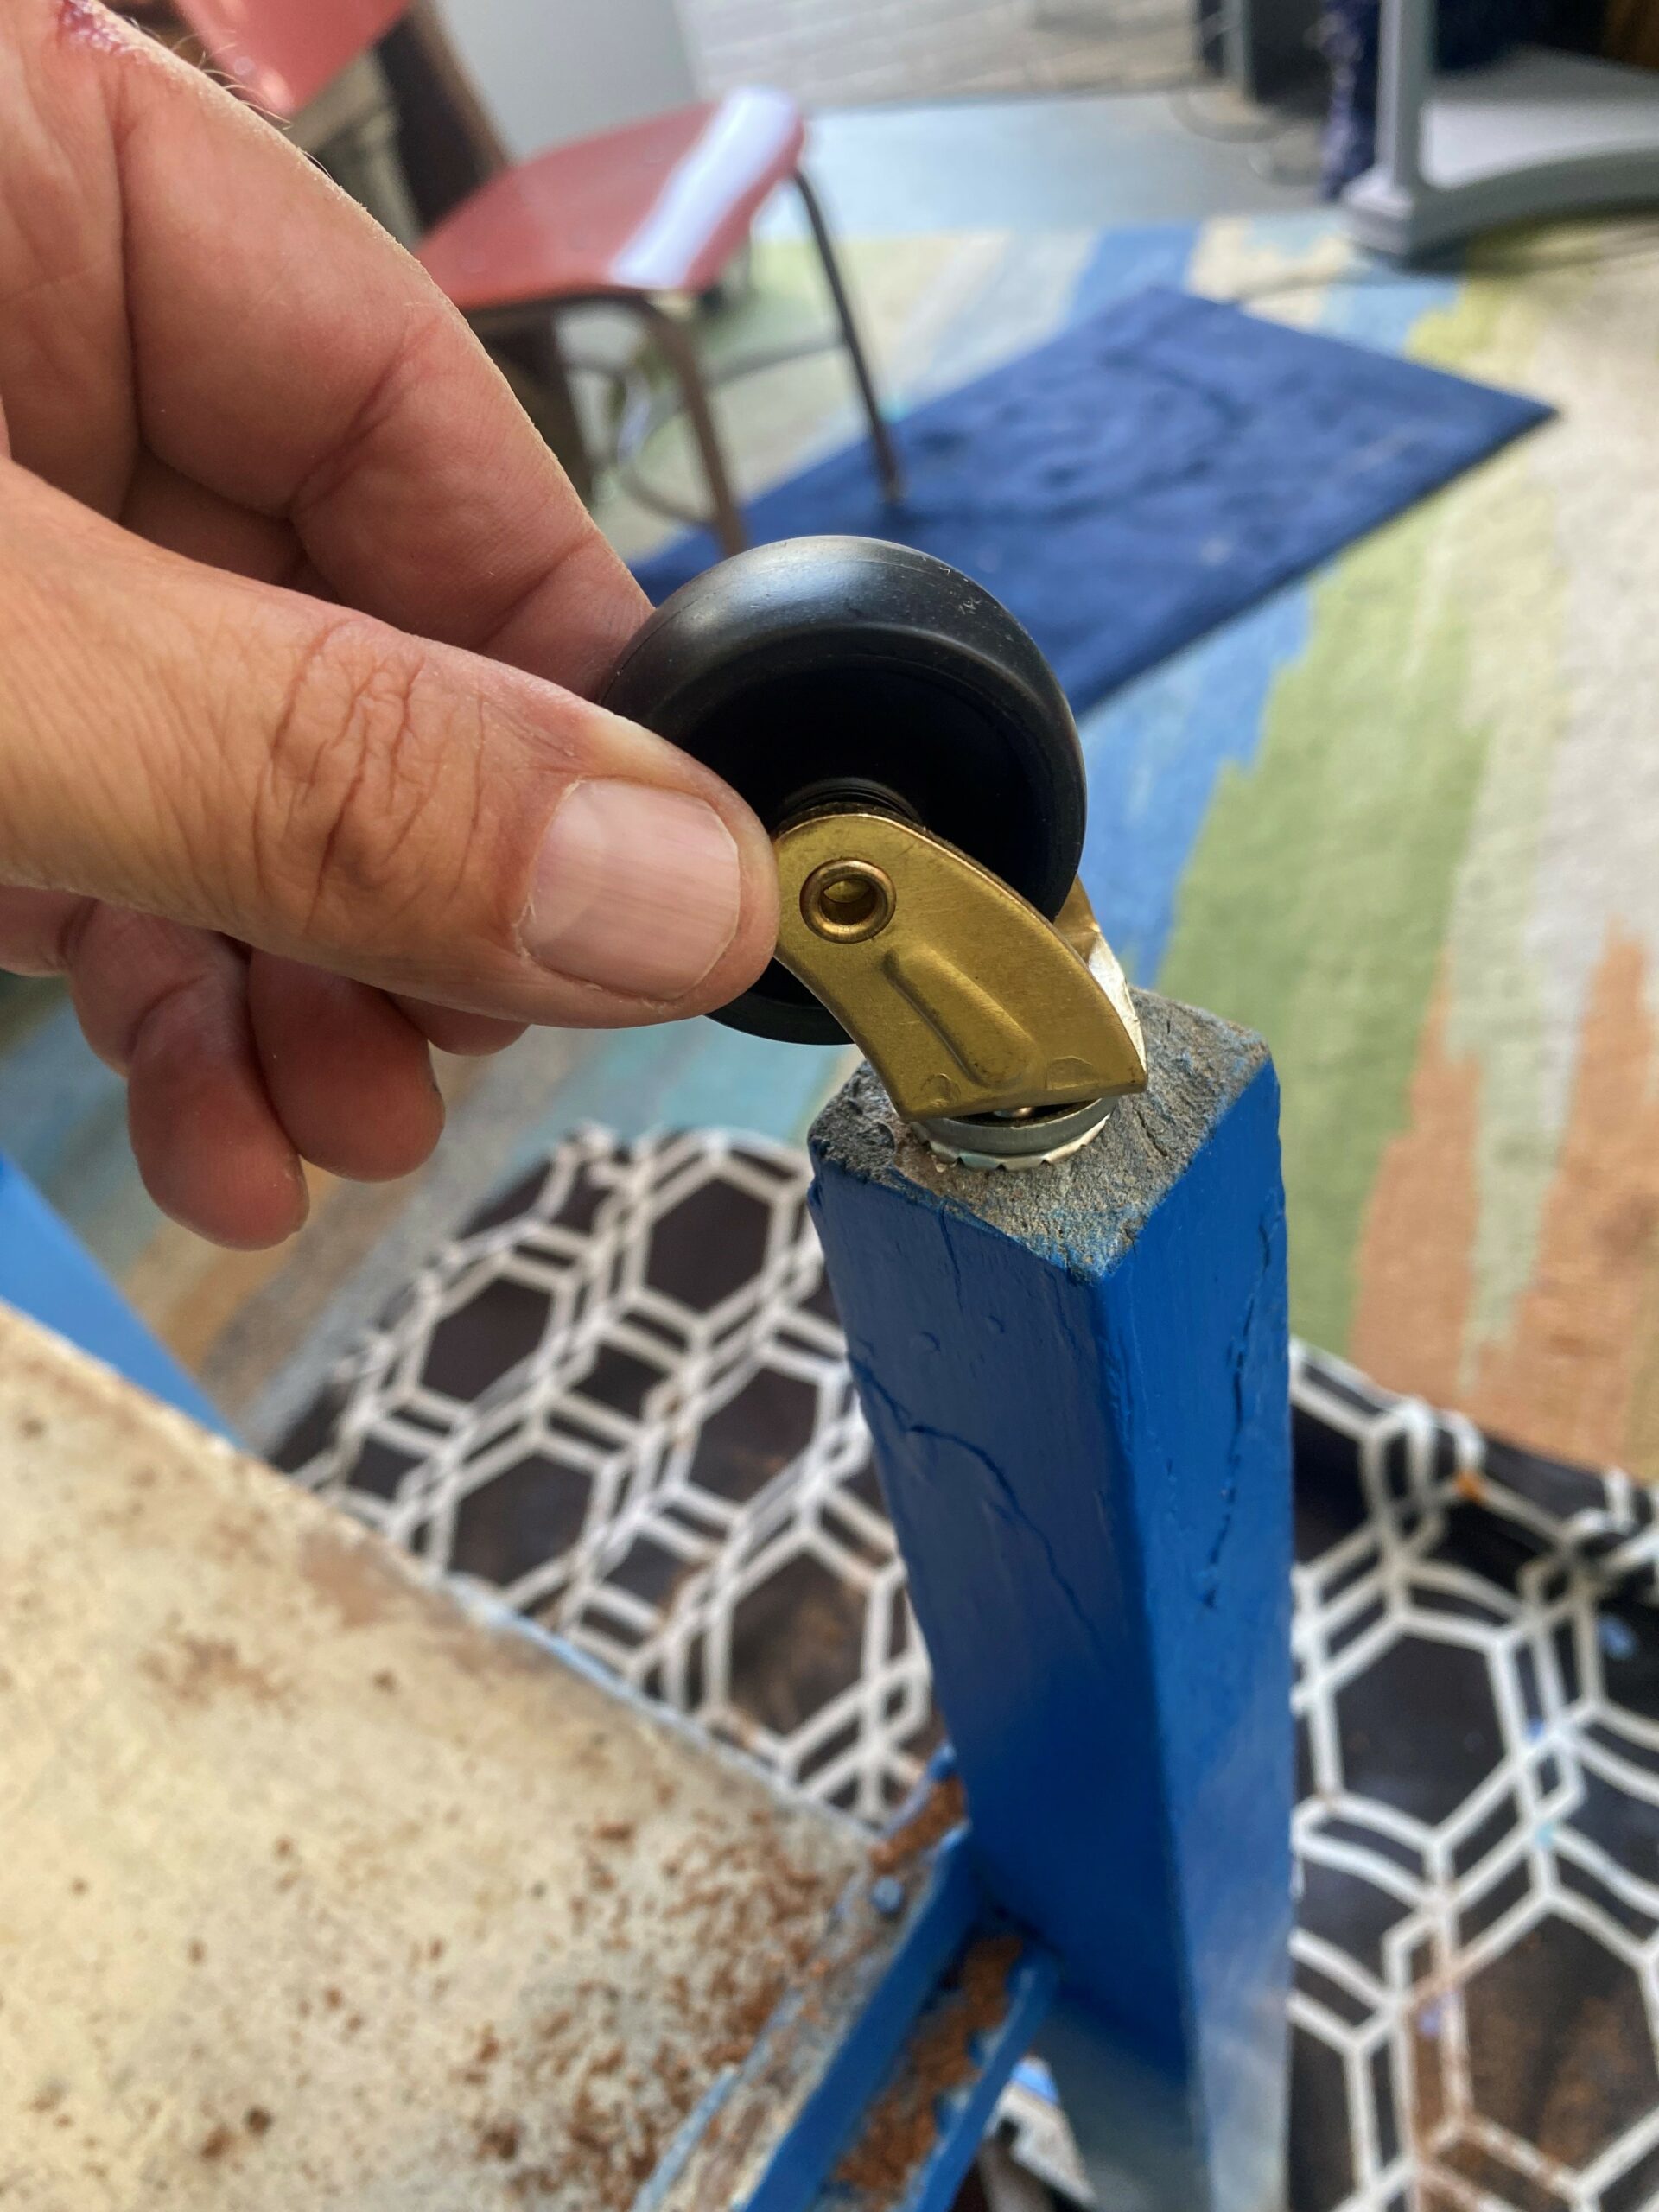
- Drill holes in each leg and add each caster wheel following the directions.
- A hammer was used to add the fastener to the leg and then the wheel stem was inserted.
- Flip your table back over, brush away any sawdust created by drilling and, “Ta-Da!”—your side table truly just became a cart!
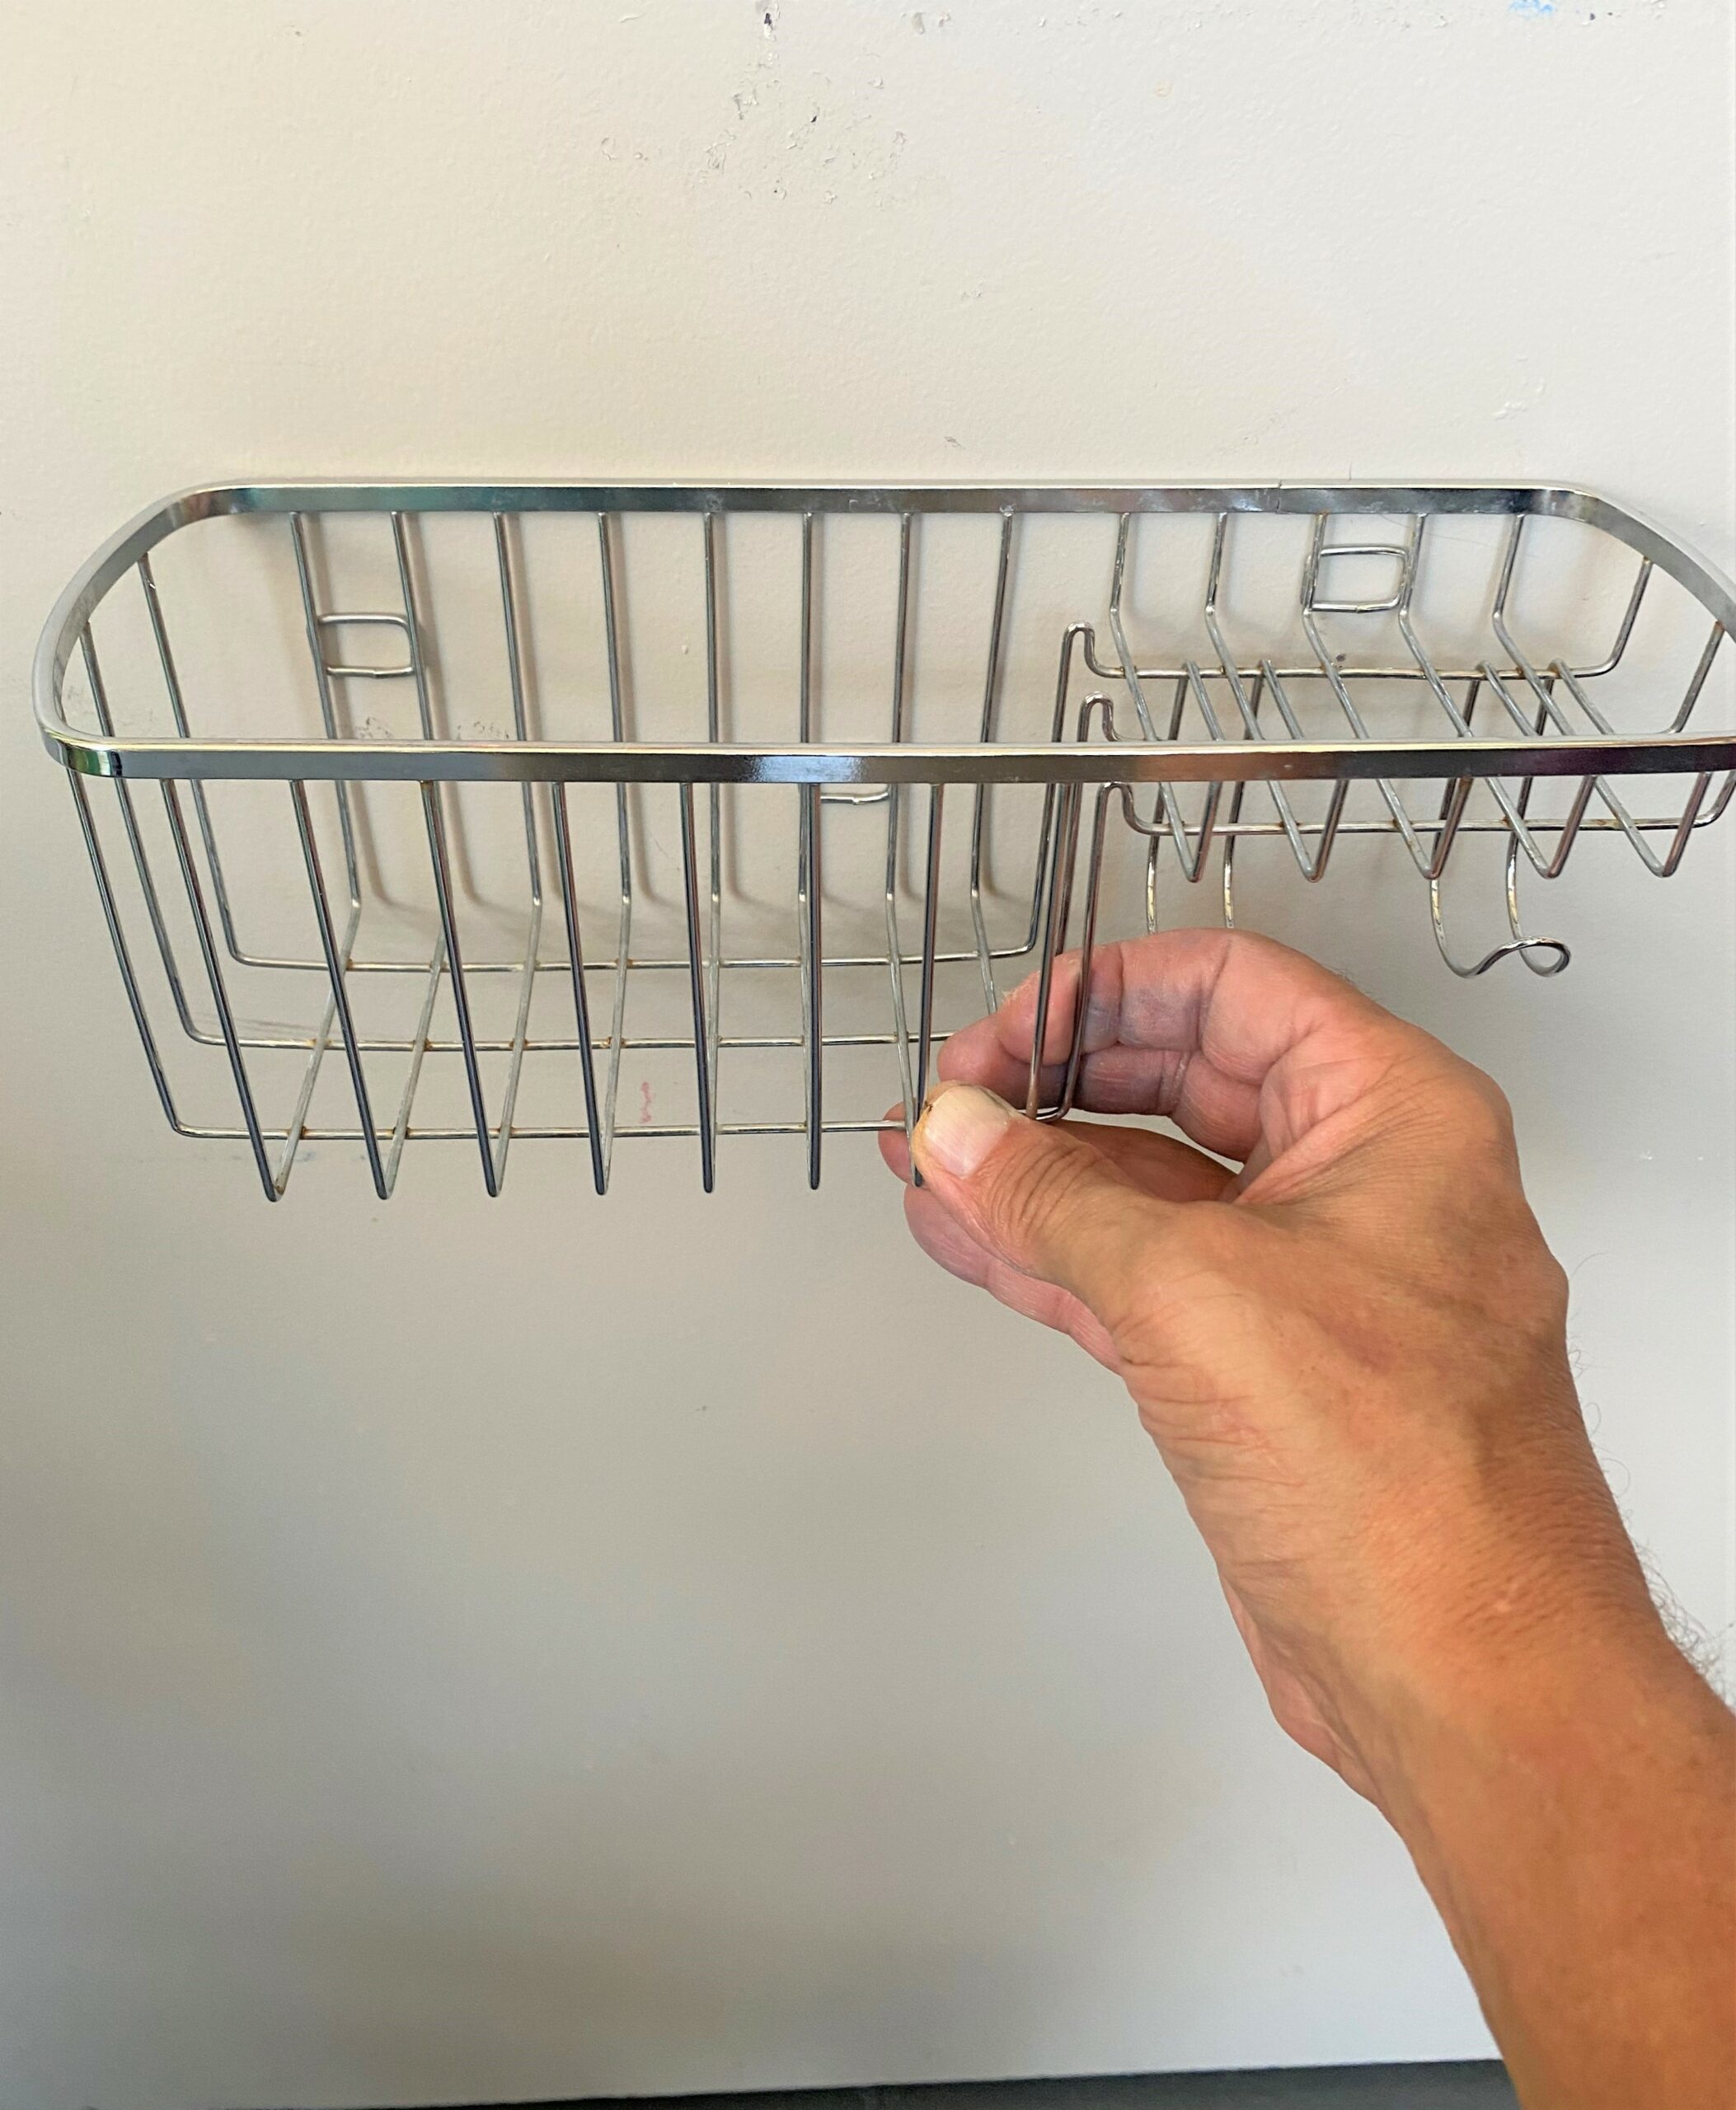
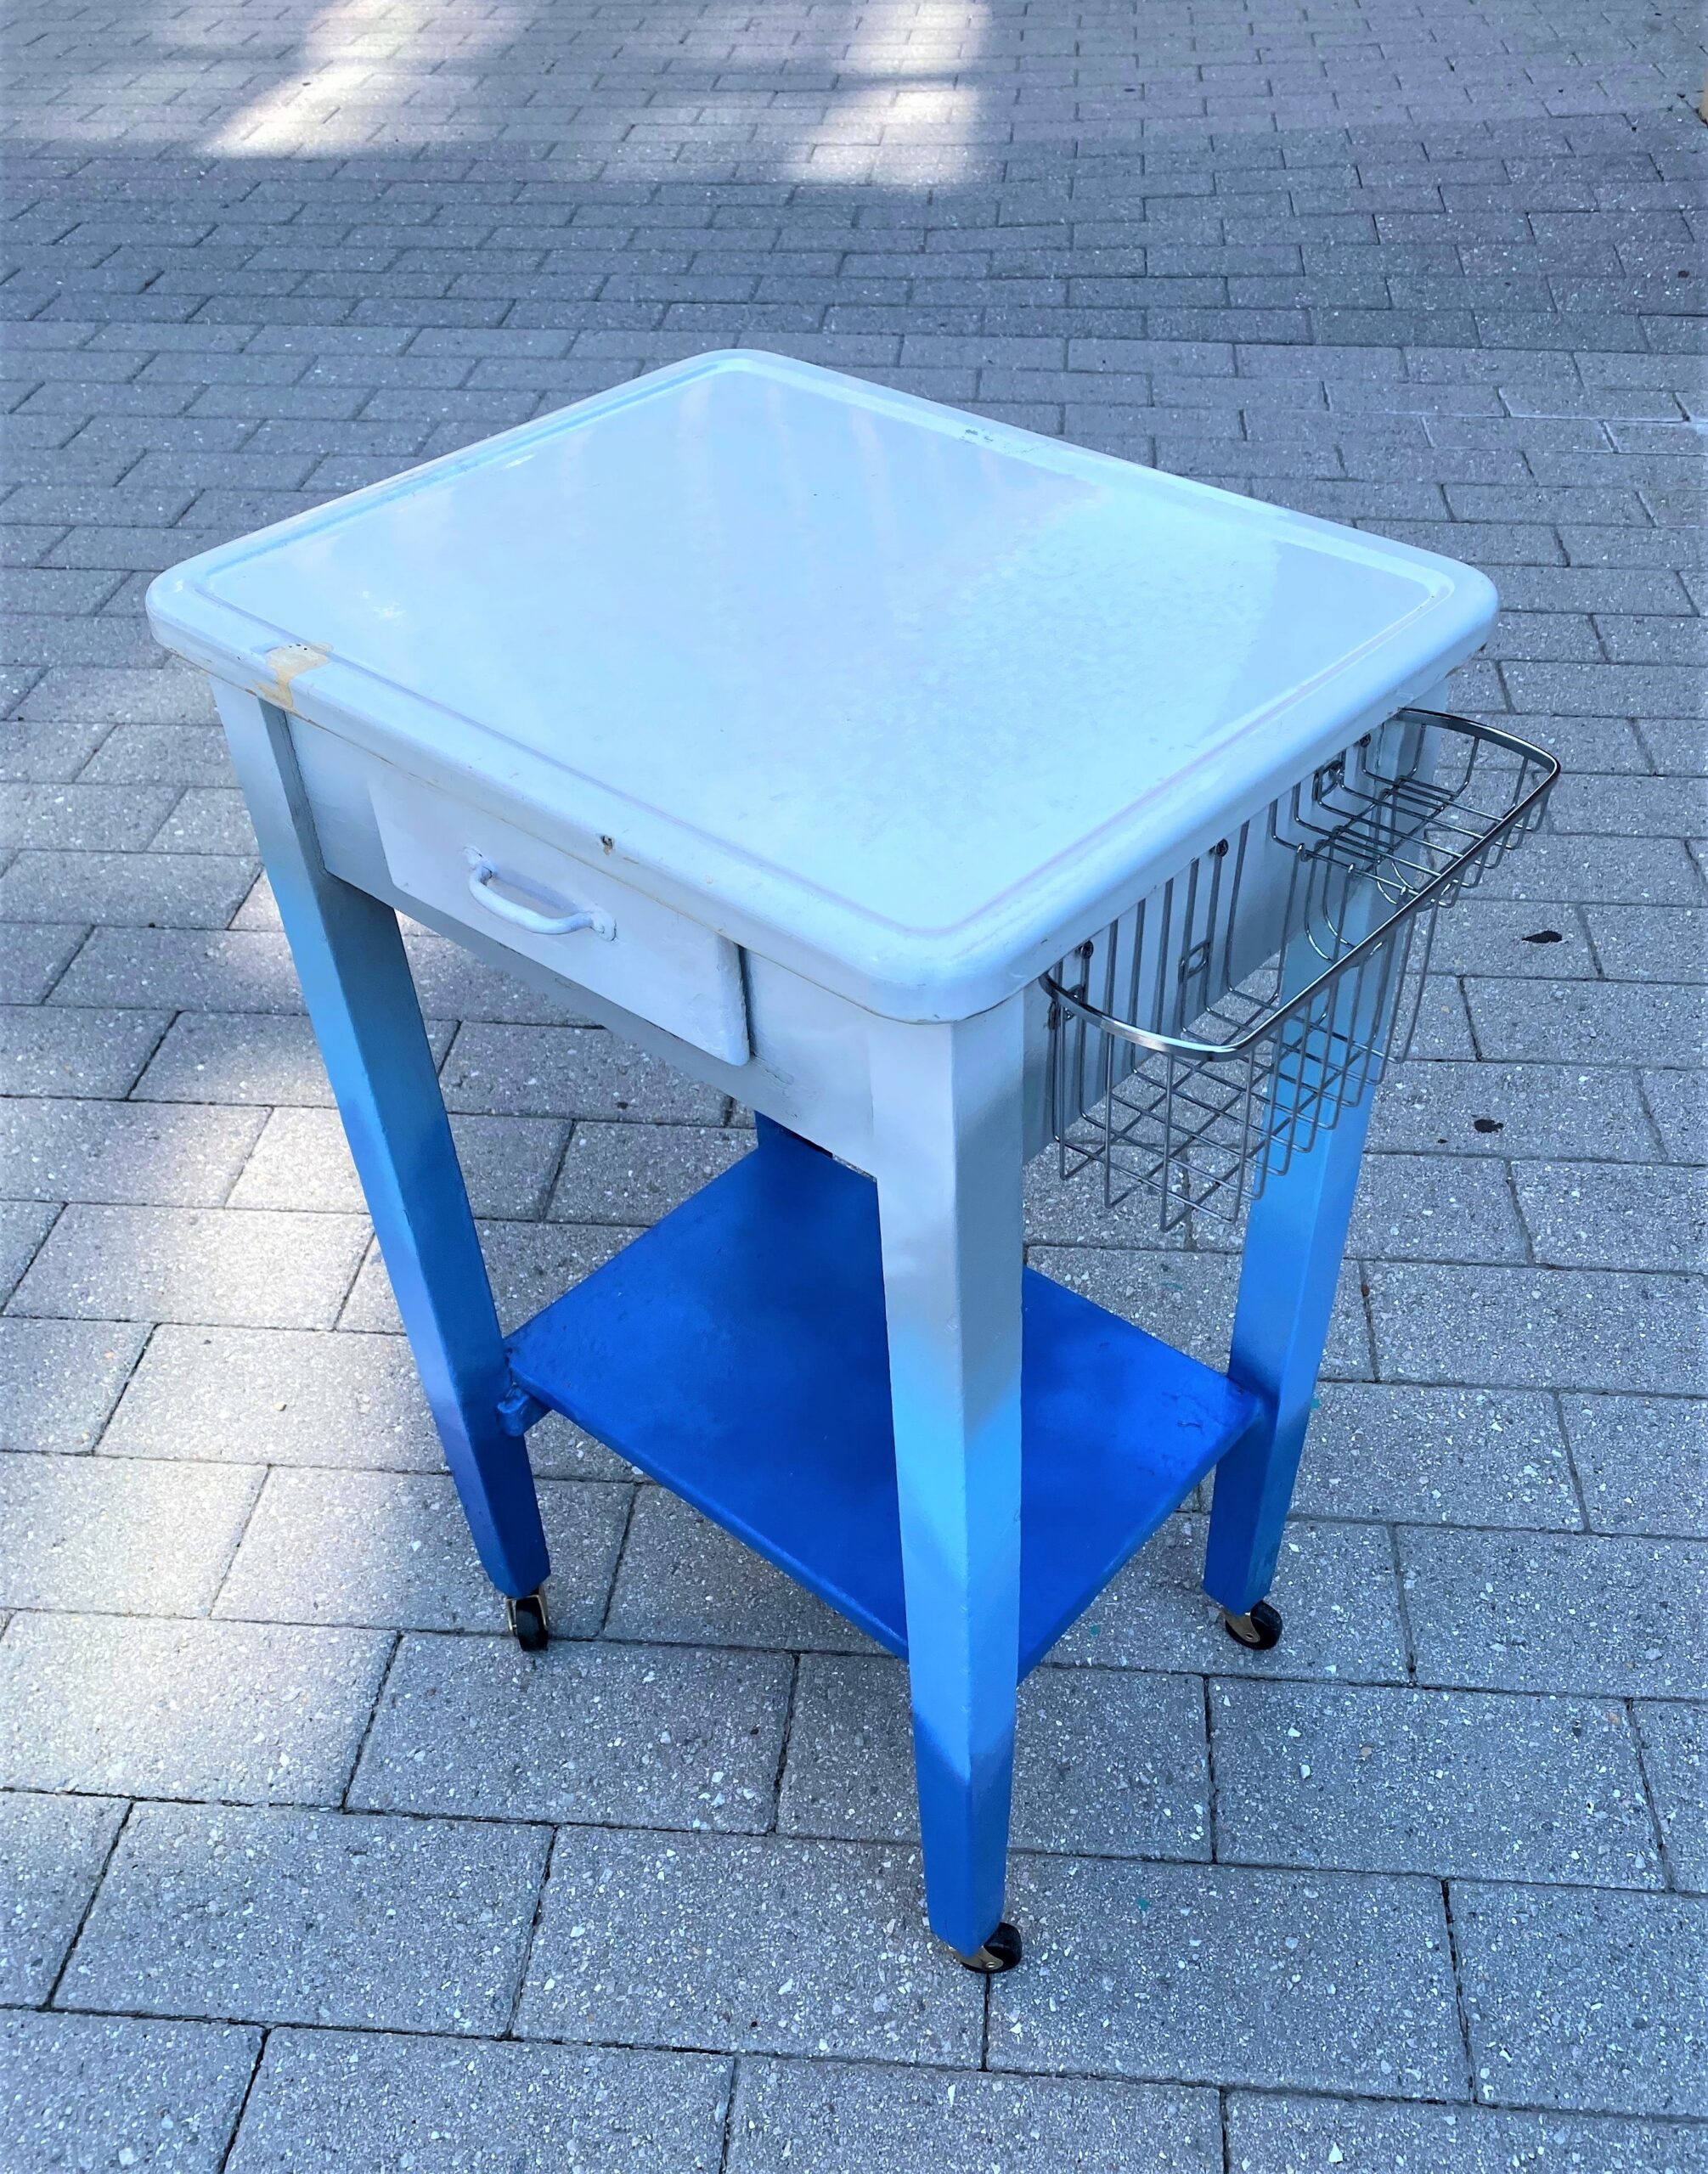
5. Secure a spice rack or shower caddy & hooks, too
To make your table-turned-cart function well as a bar cart, you will want to screw a metal spice rack or shower caddy to its side. Add hooks, too.These will give you places to hold glasses, water bottles, towels, corkscrews and more. And I love that we are repurposing other items to add to our upcycled piece!
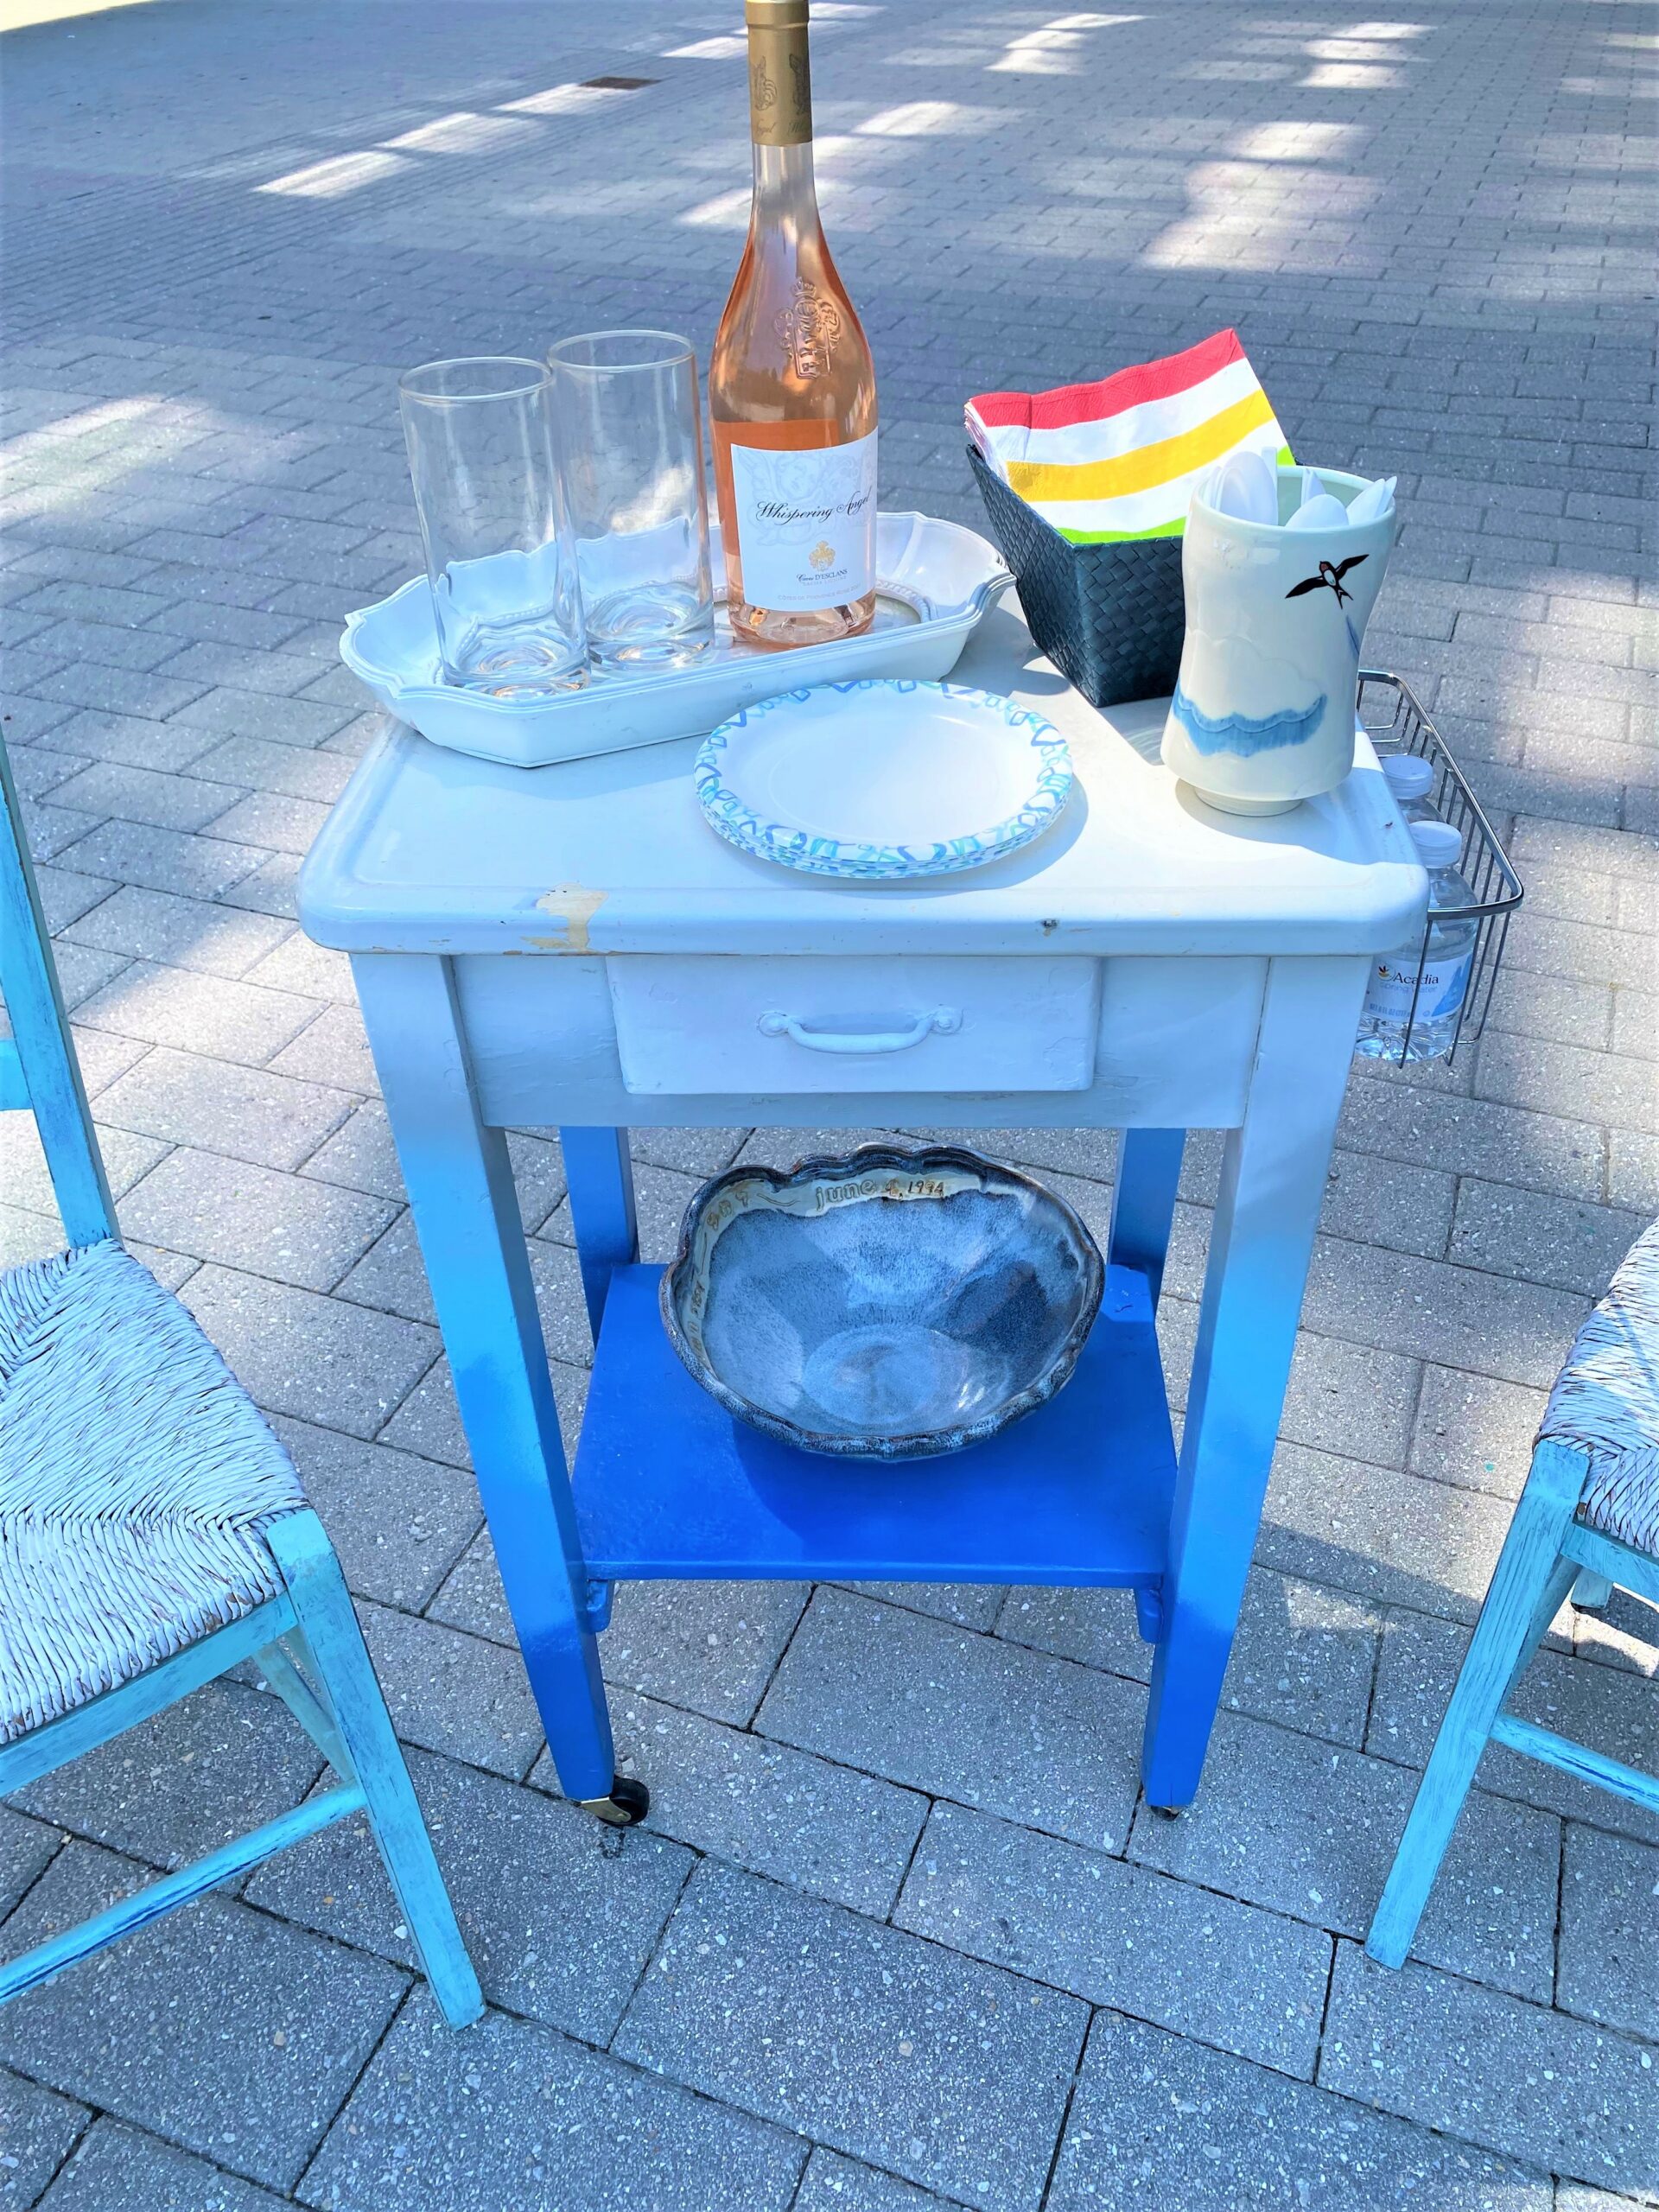
6. Put in place, add accessories & welcome friends
Put your summery-looking bar cart in a place where you will be entertaining.
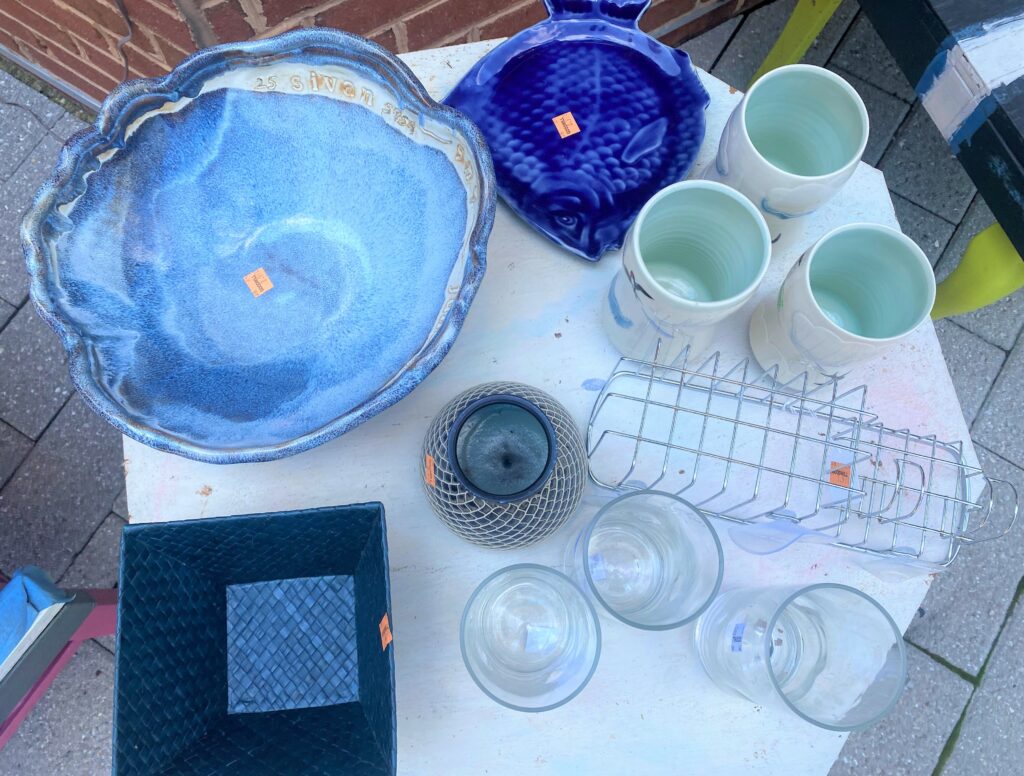
Add small trays, glasses, bowls, and baskets—all picked up at Goodwill too. Include refreshments and food!
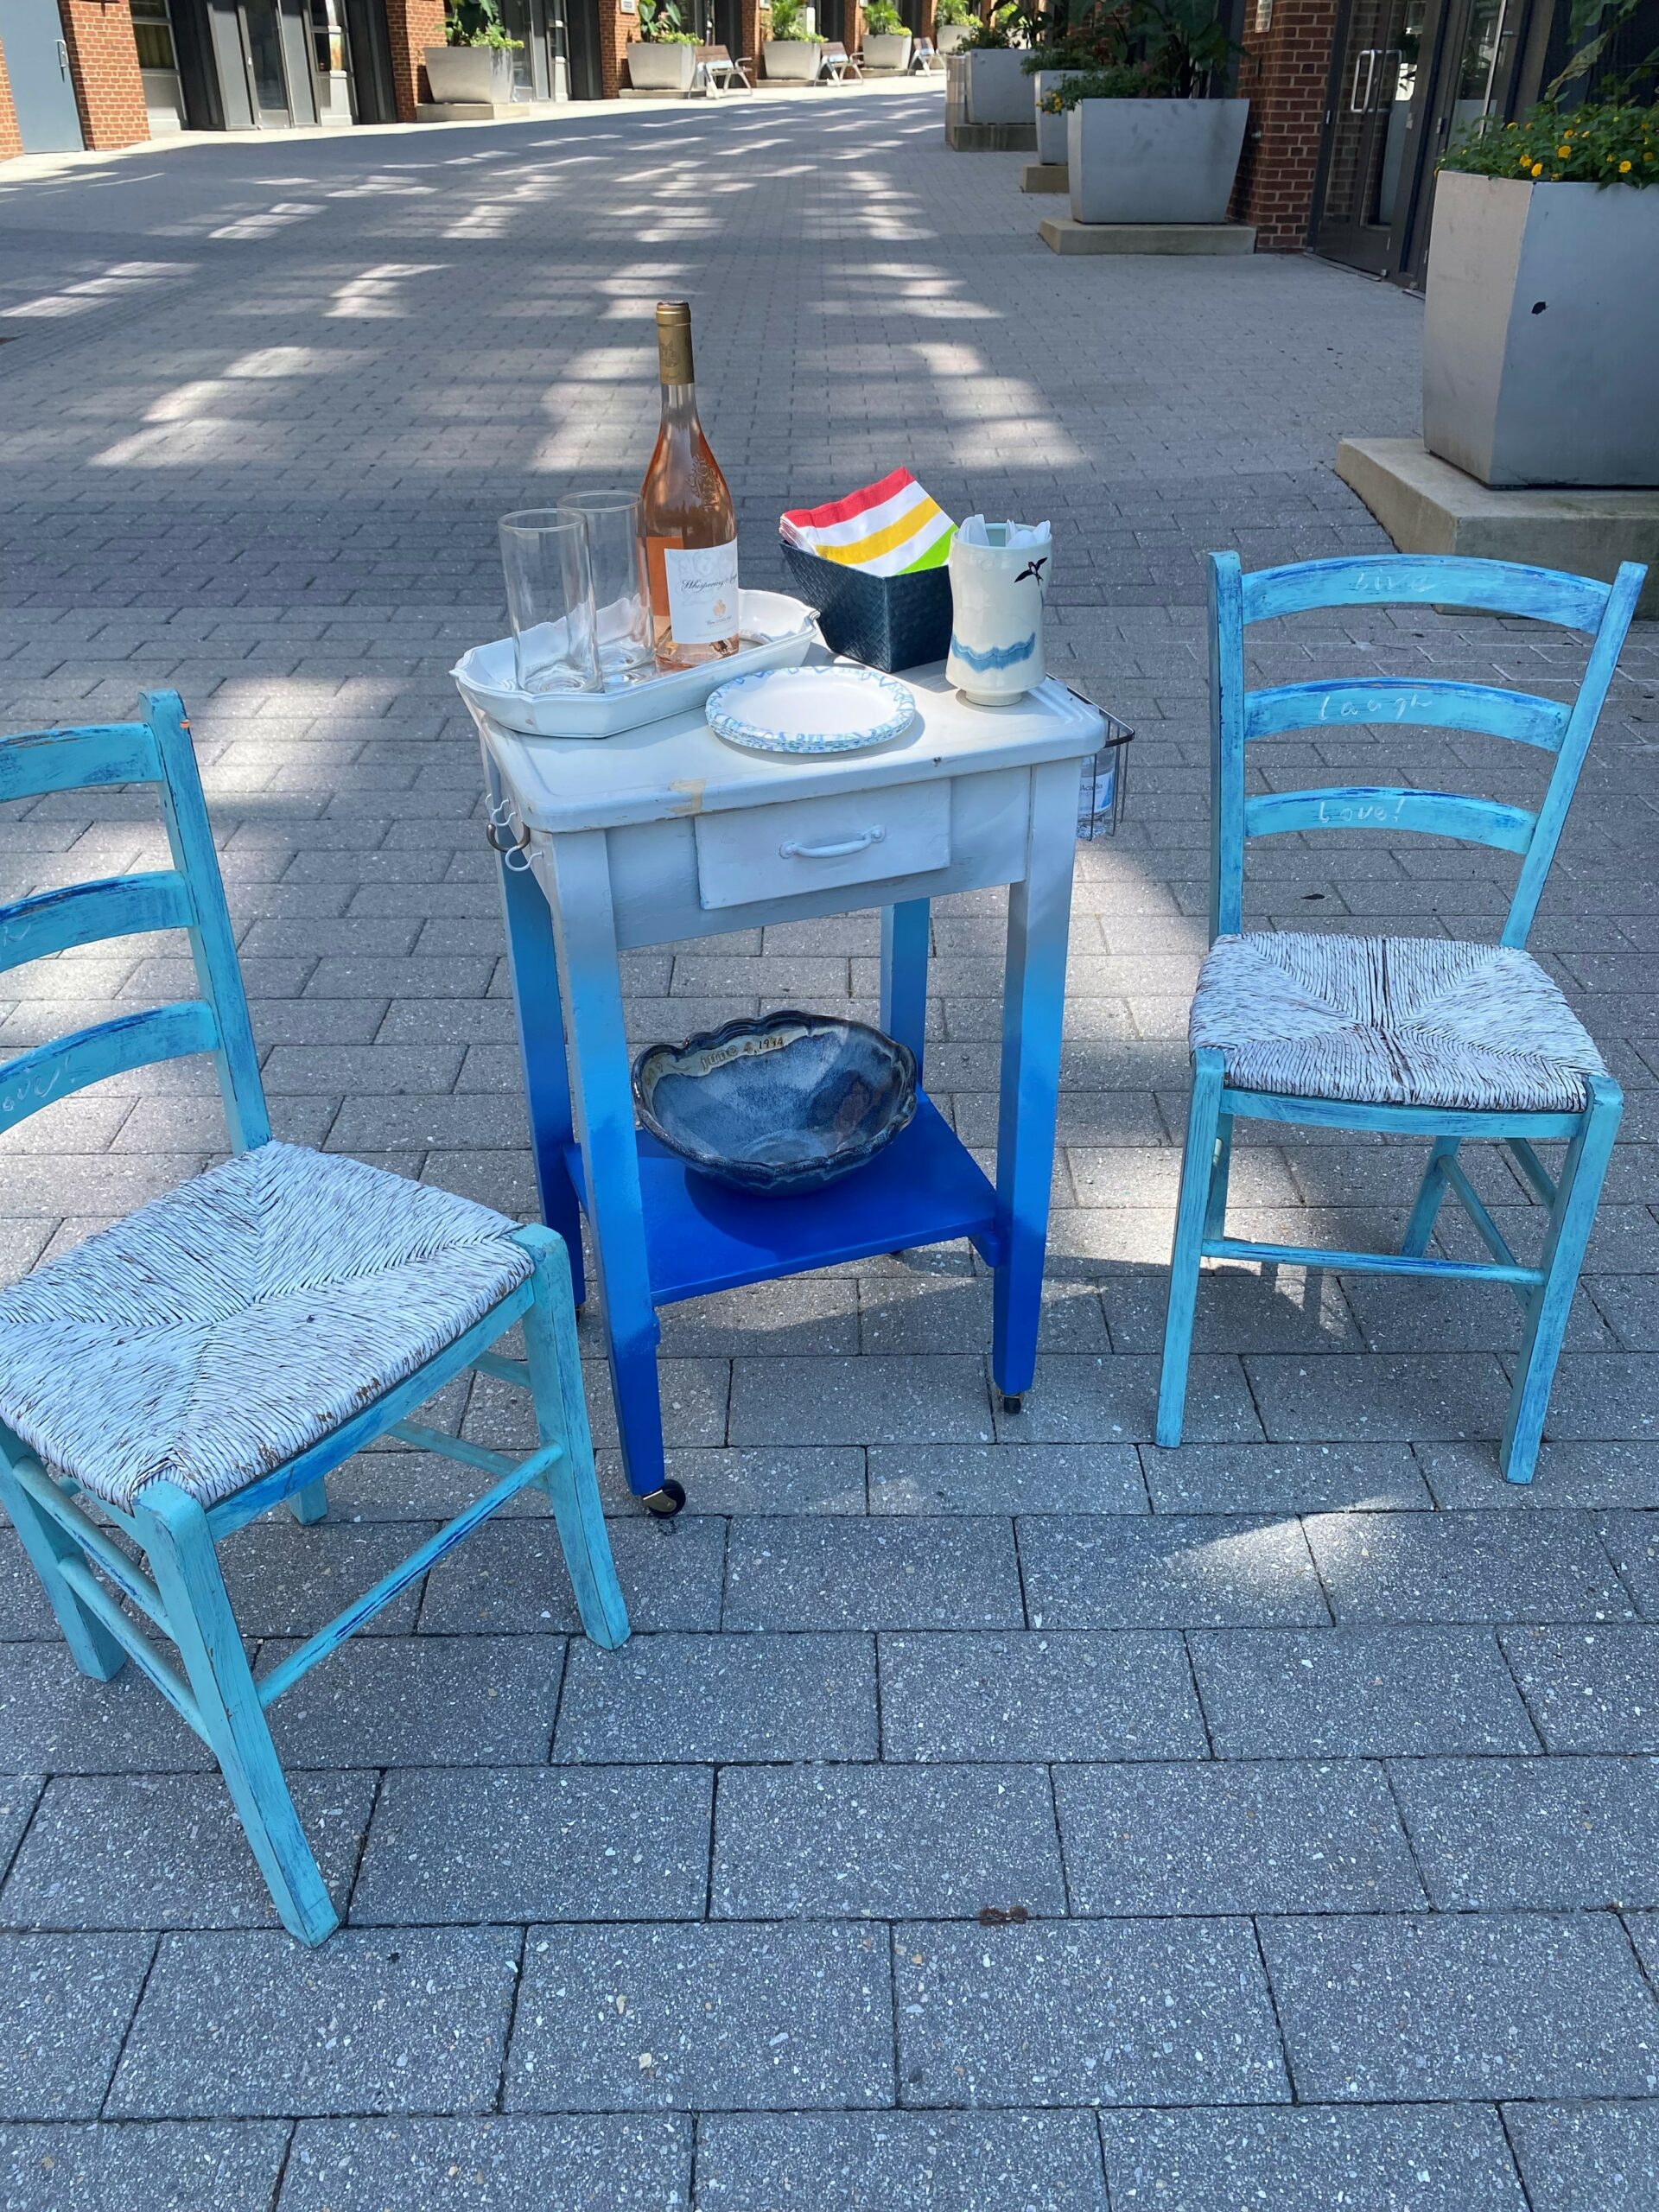
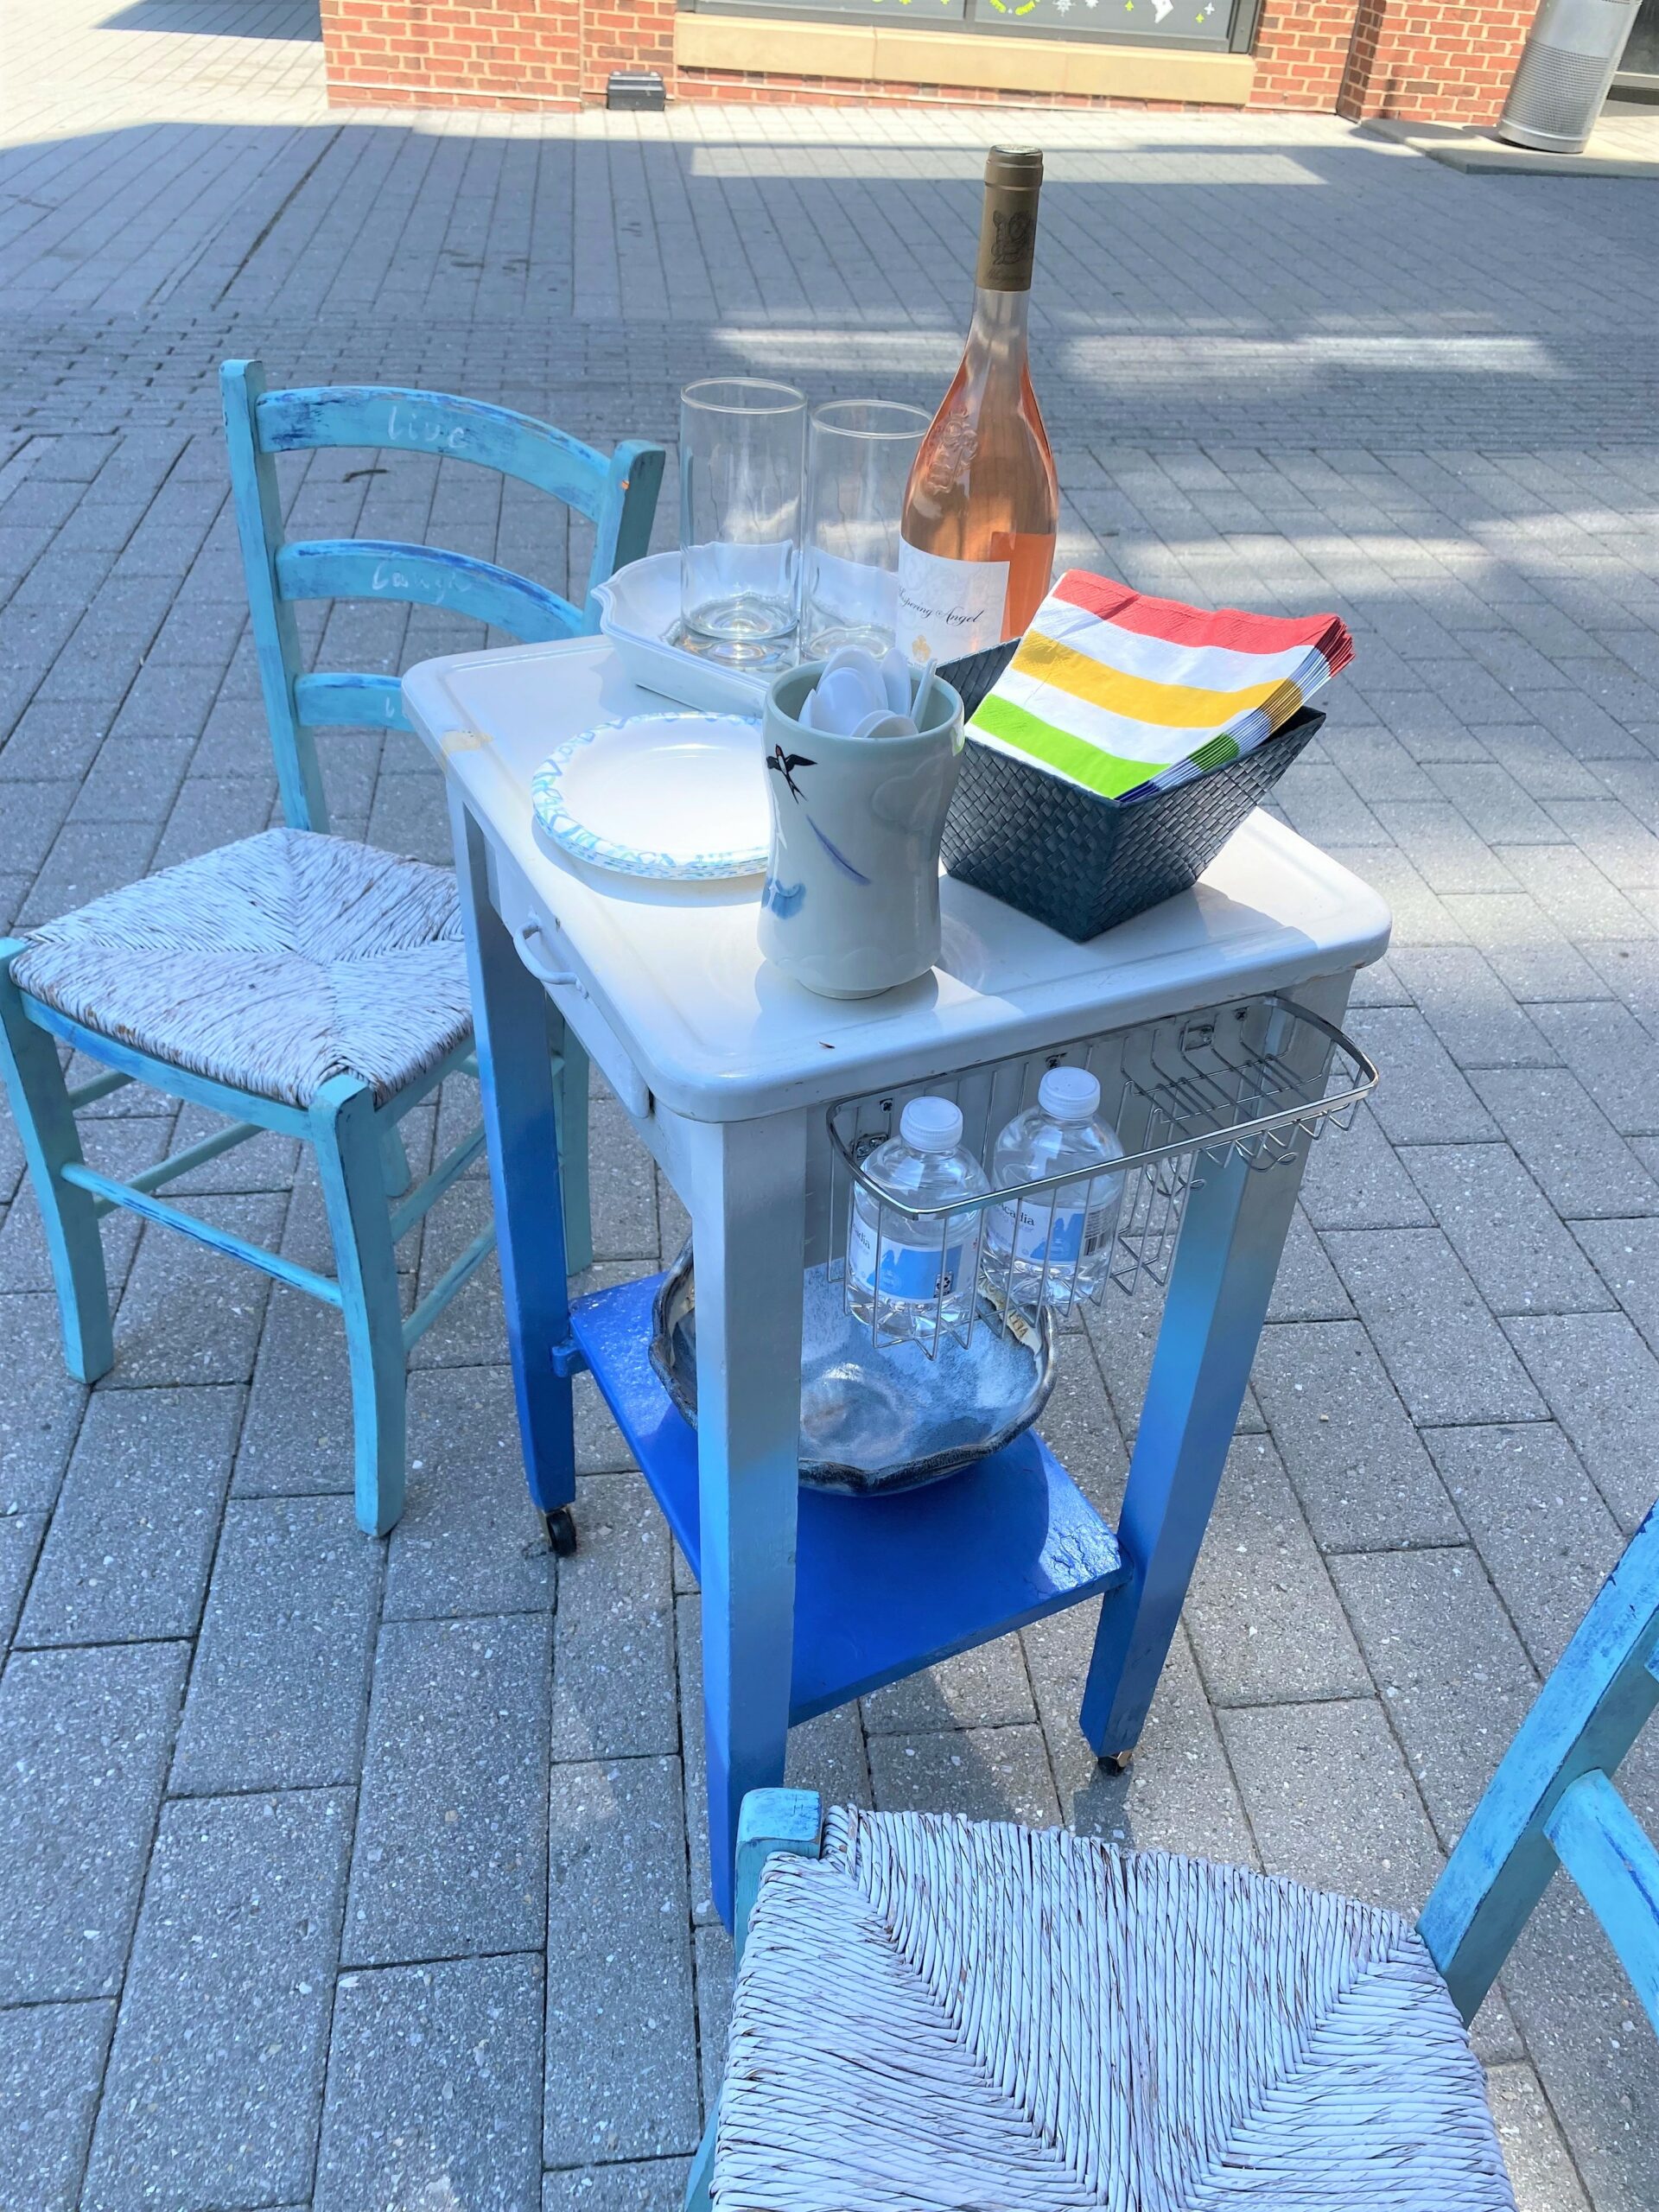
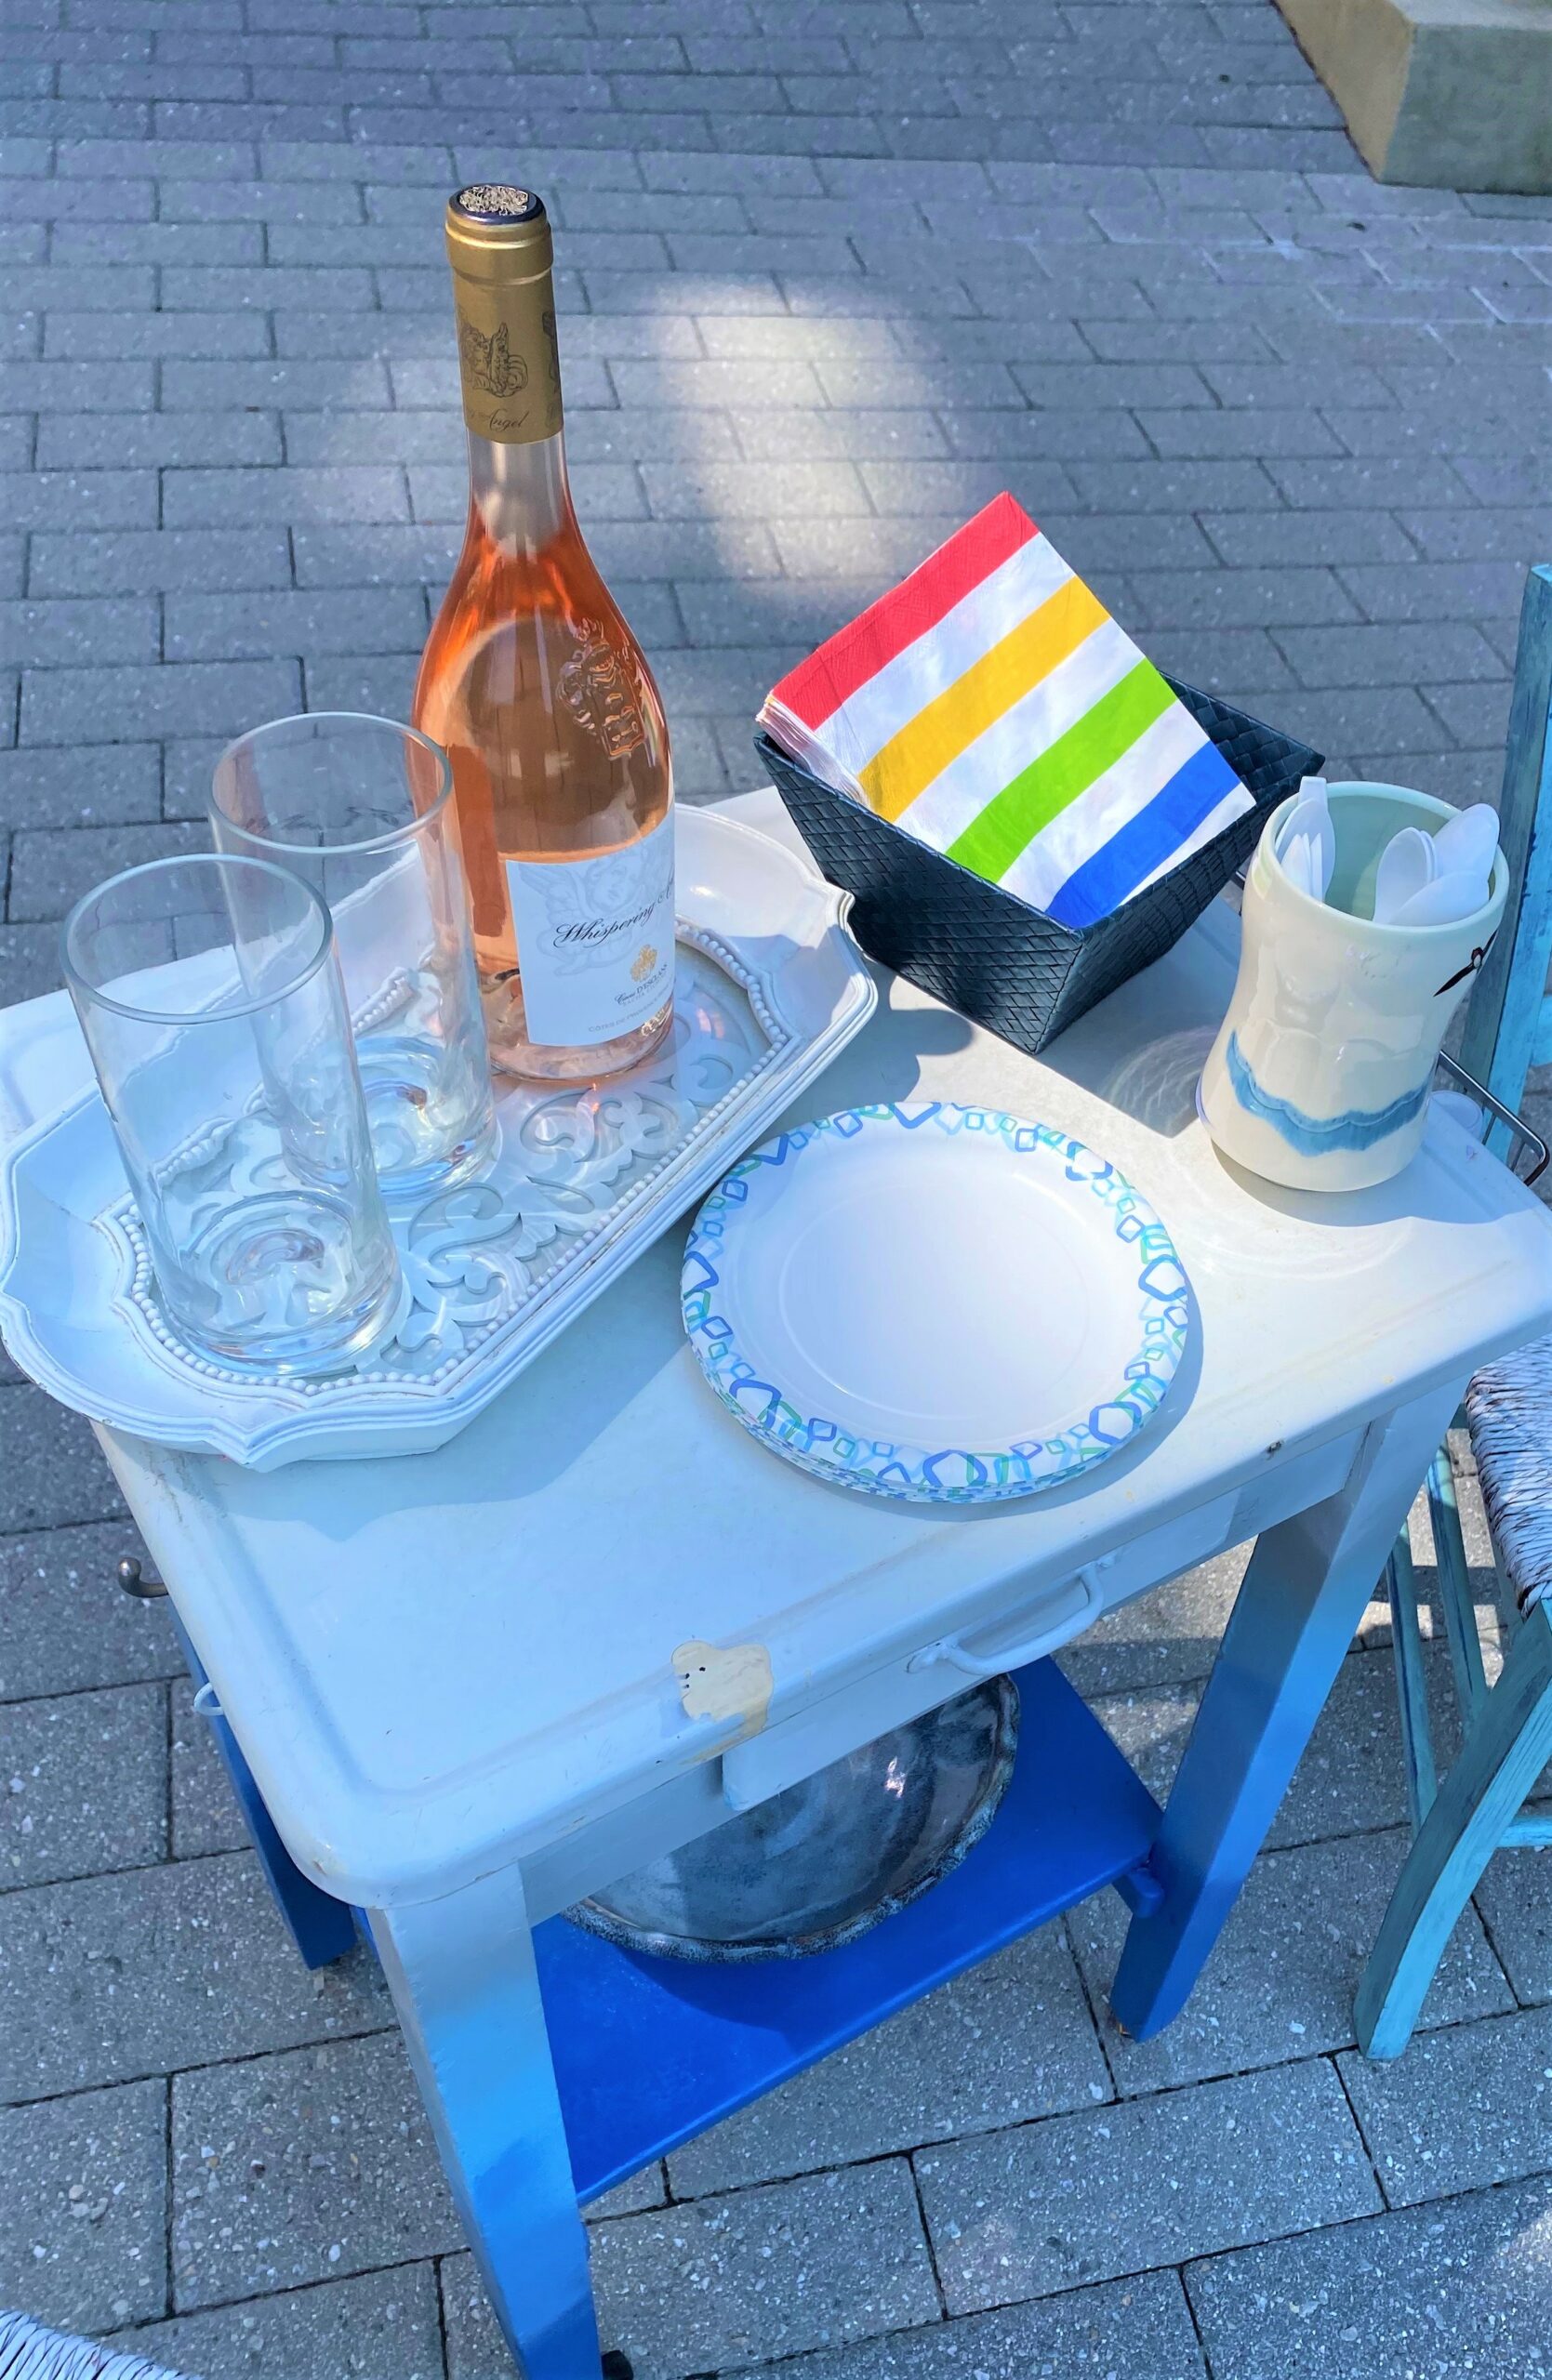
You now have a great station that folks will want to gather around to make new memories and celebrate the summer fun!

Tim Kime
Artist, Motivational Speaker, Life Coach
