Here’s a one-of-a-kind project that is right on time! Transform an old Grandfather clock into a new shelfing unit that will make your heart race. Father Time will appreciate your creativity by reusing this tall time piece in such a unique way. You’ll be counting the minutes between compliments when you place this piece in your foyer, living room or wherever you see fit.
Thanks to Annie’s Ace Hardware in Brookland! The paint featured here was left over from the September 2020 mural project and the shelves were made from scrap wood cut for me by their amazing team. I guess it does take a village, at times, to transform things including the clock featured here!


Supplies:
1. Grandfather clock
2. Scrap wood
3. Two colors of paint (dark blue and light yellow here)
4. Paint brushes
5. Painter’s tape
6. Screwdriver
7. Epoxy glue
8. Leveler
1. Invest some time to shop at Goodwill
Honestly, your nearby Goodwill store has just about everything you need for your home DIY projects. It is truly amazing what people donate – which is part of the fun of stopping by there on a regular basis to see what treasures await you. And to be super safe, you can shop online, too, at www.shop.dcgoodwill.org right from your home and find great deals on pieces for sale.
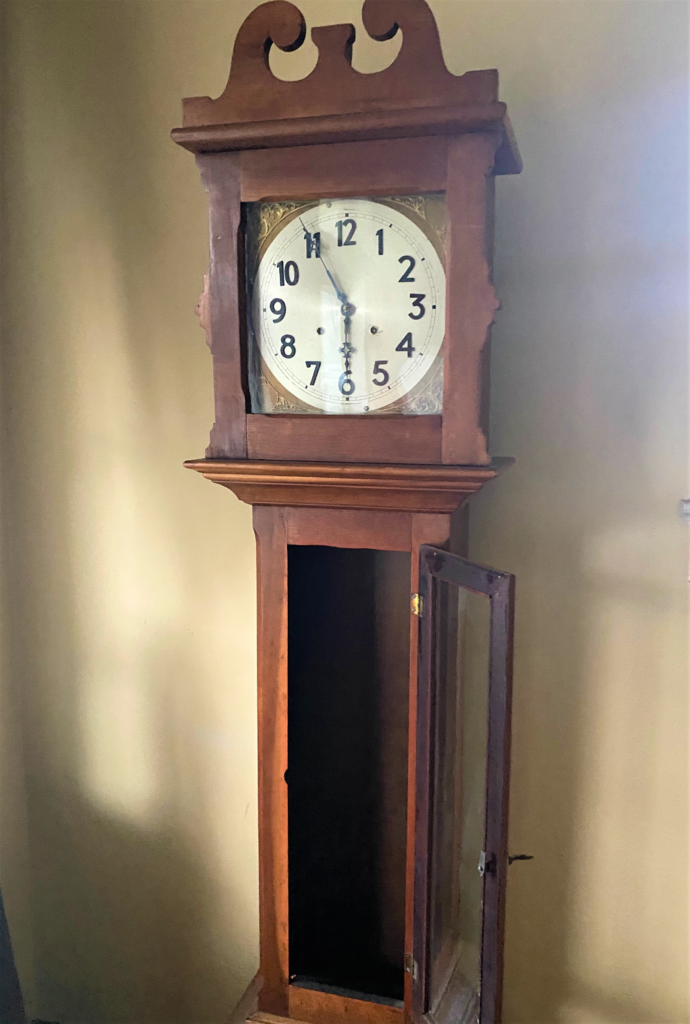
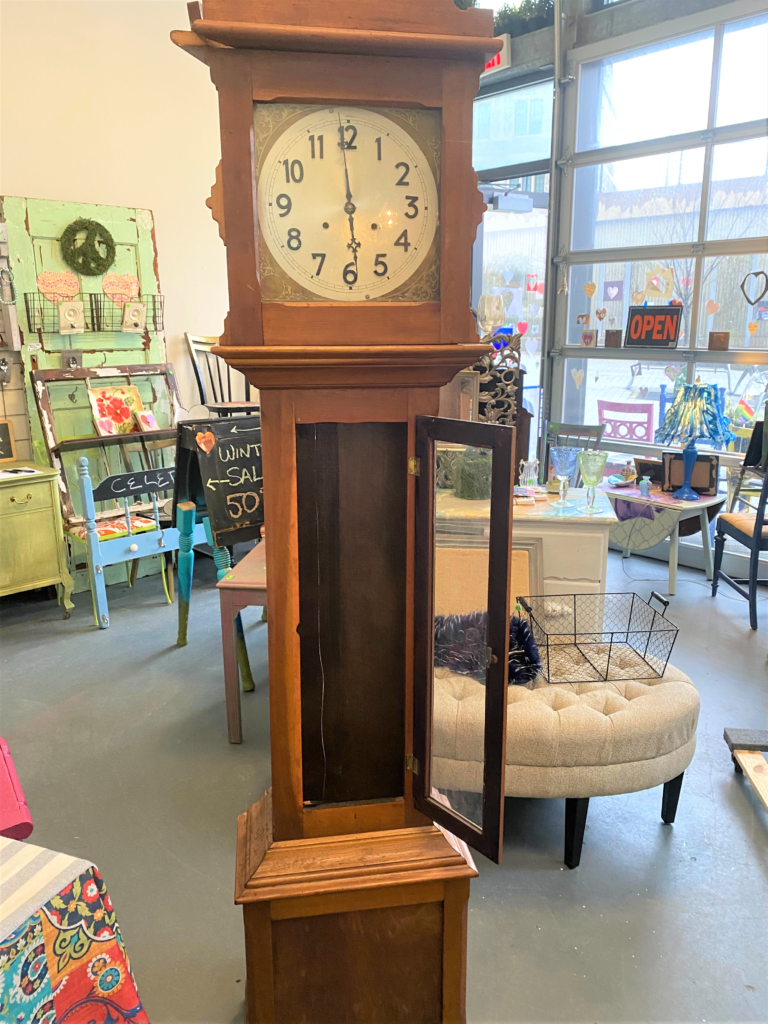
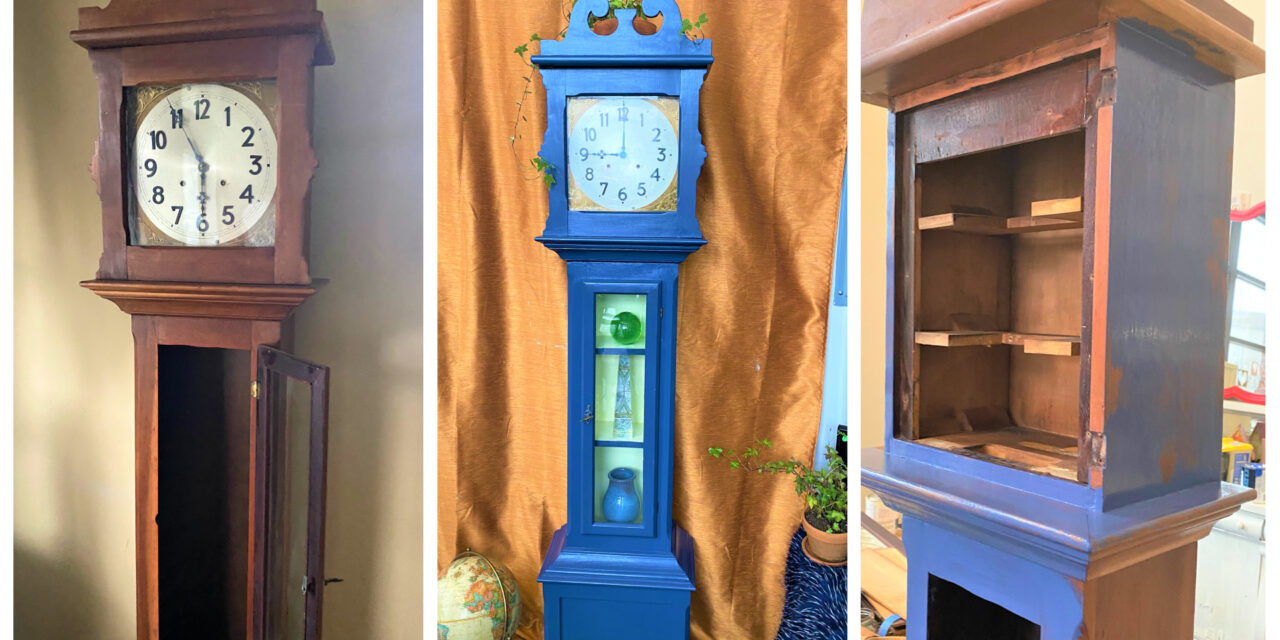
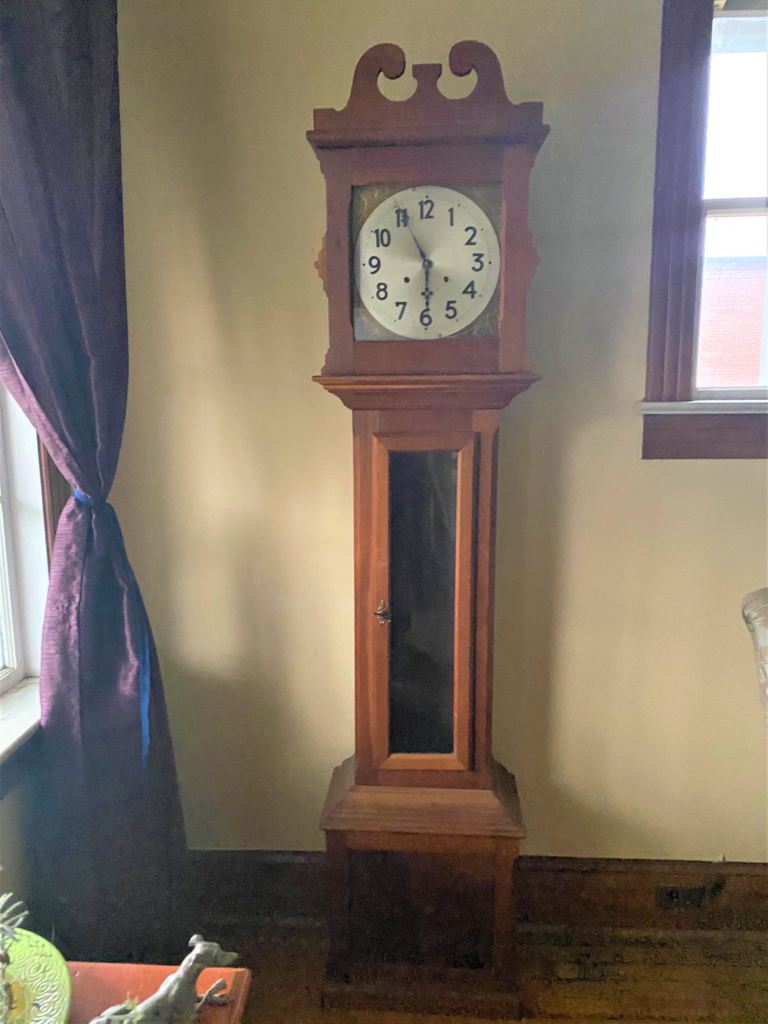
You might score and find something like this old Grandfather clock that you could upcycle. Candidly, this clock would not have made it to the sales floor at Goodwill because the timing elements of the clock were broken so it no longer did its job. I am grateful for the neighbor who thought of me before tossing this handsome piece out. We saved it from a landfill, like so many items donated to Goodwill, and gave it a new purpose and life.
What’s the most unusual thing you bought at Goodwill?
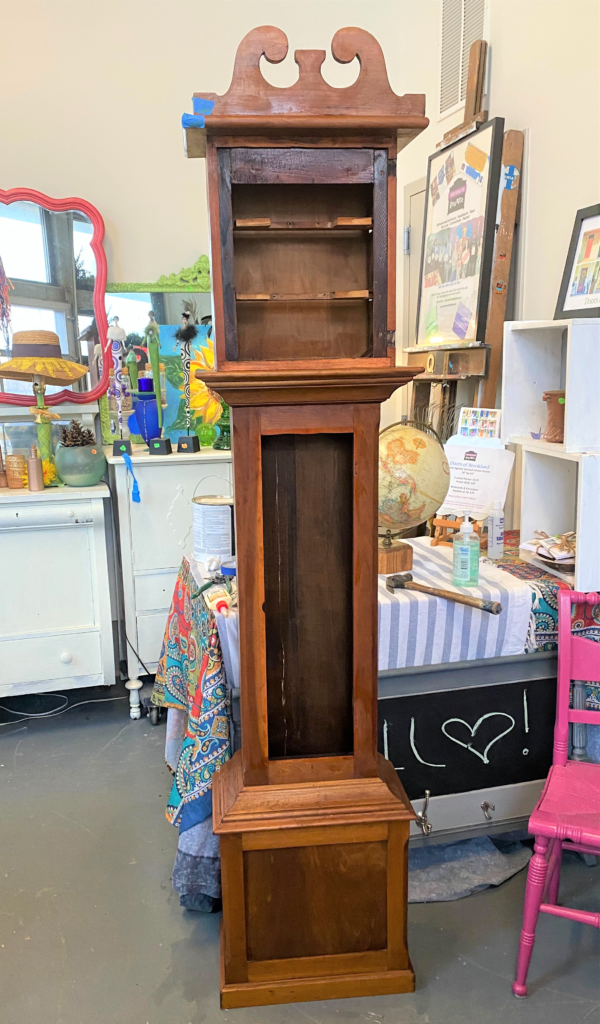
2. Take it apart to starts its transformation
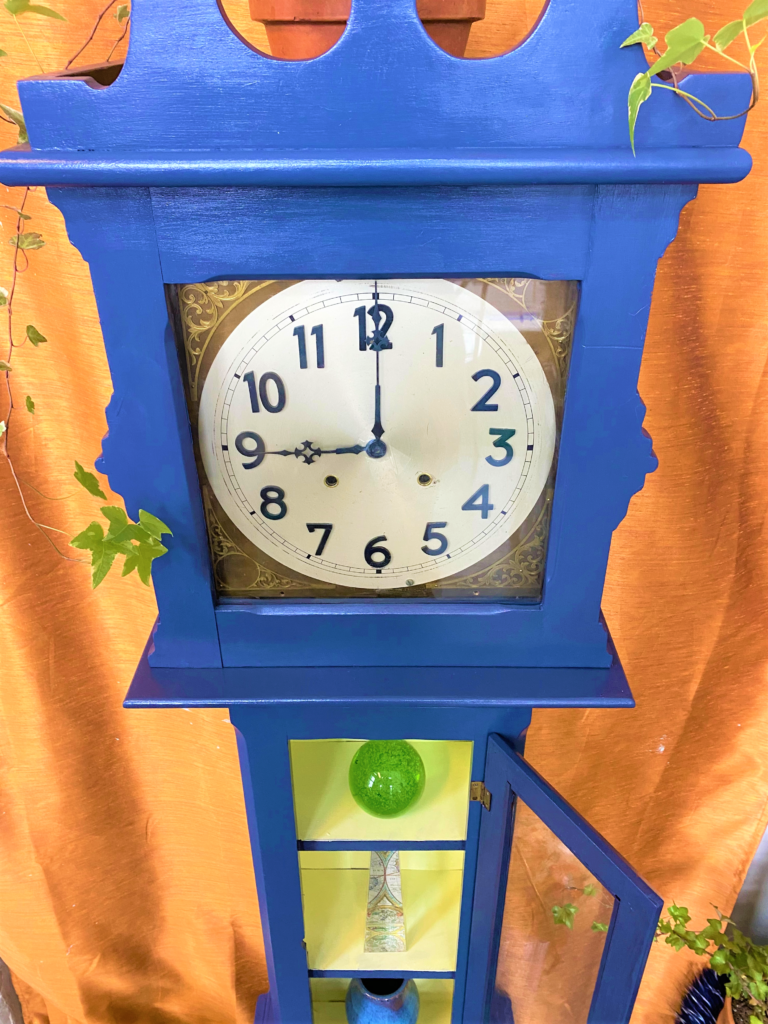
Thankfully, the only tool needed to take apart the pieces of this clock was a screwdriver for very small screws. The glass doors came off first, then the clock face, and lastly, all the internal workings of the time piece. It truly is amazing that someone designed such a machine that would tell time, look so nice, chime on the hour, and all do so by just winding it. No electricity used or needed at all!
As you remove parts, be sure to keep all the hinges and screws together and remember which ones held the clock face in place to allow its reconstruction as easy as possible.
The internal parts were so cool looking that I plan to keep them to reuse for some other project. What might they be repurposed as?
3. Prep your piece
- Lightly sand any parts to be painted, focusing on the outside sections.
- Buff them up, then wipe them down to make a clean slate for painting.
4. Brush on a color transformation
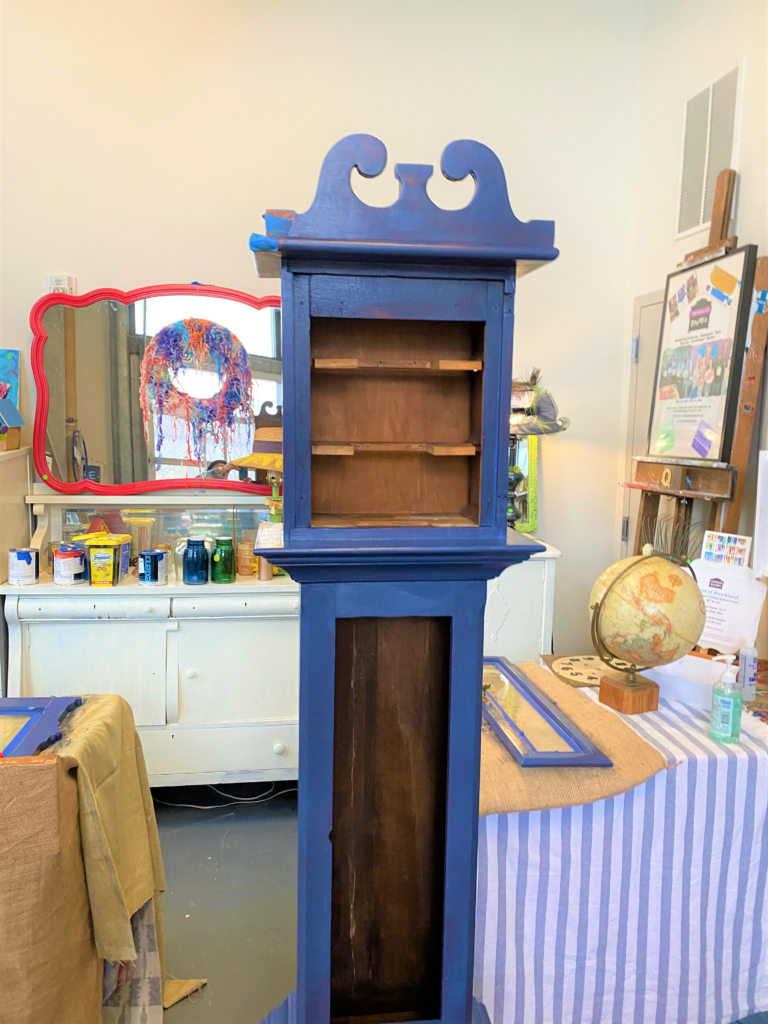
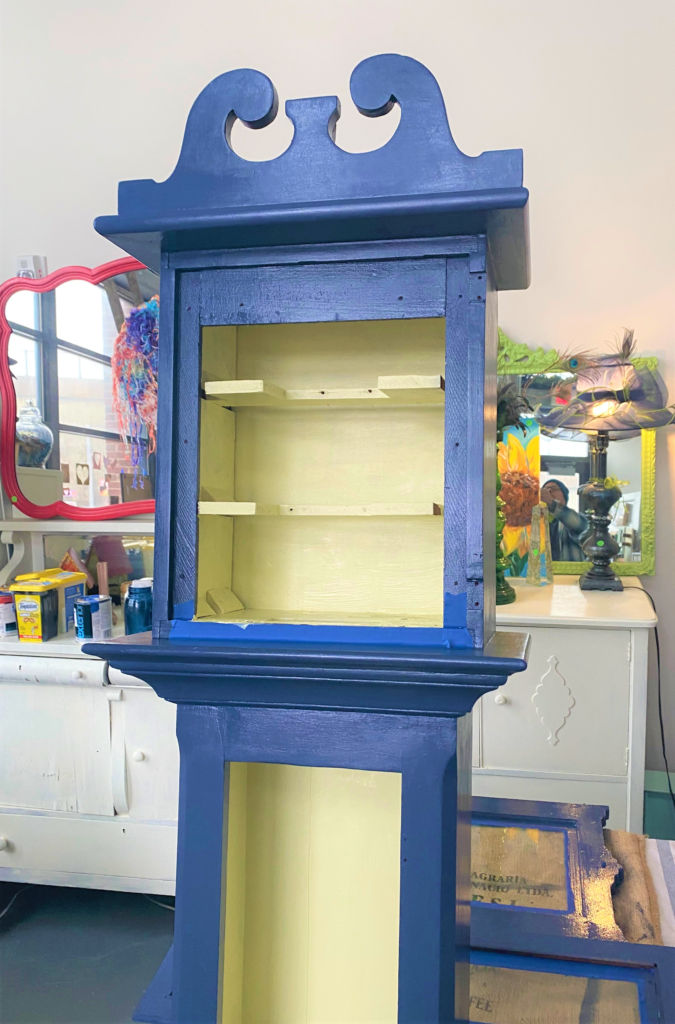
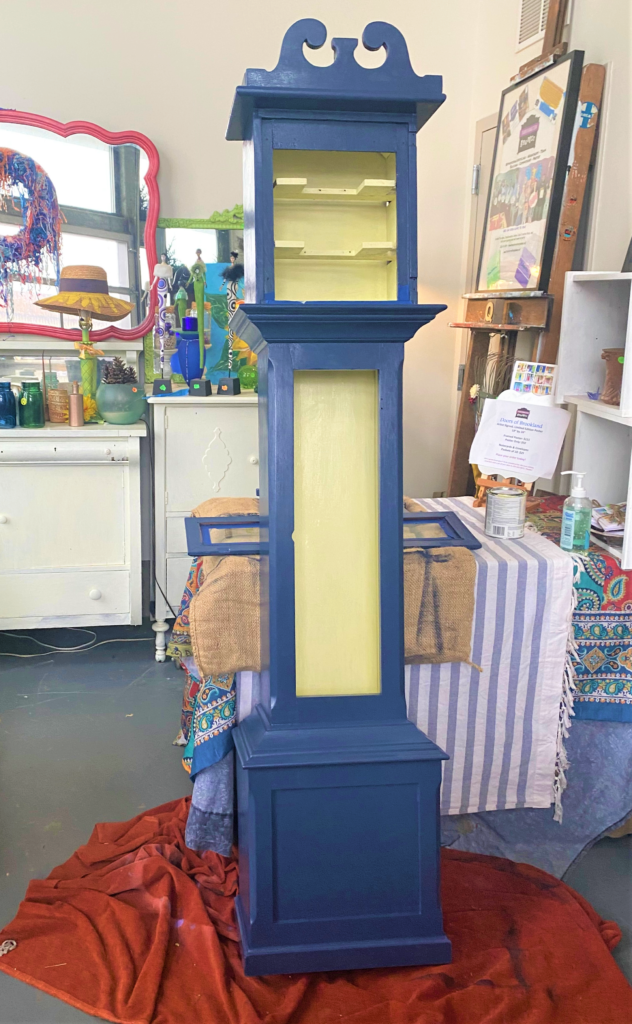
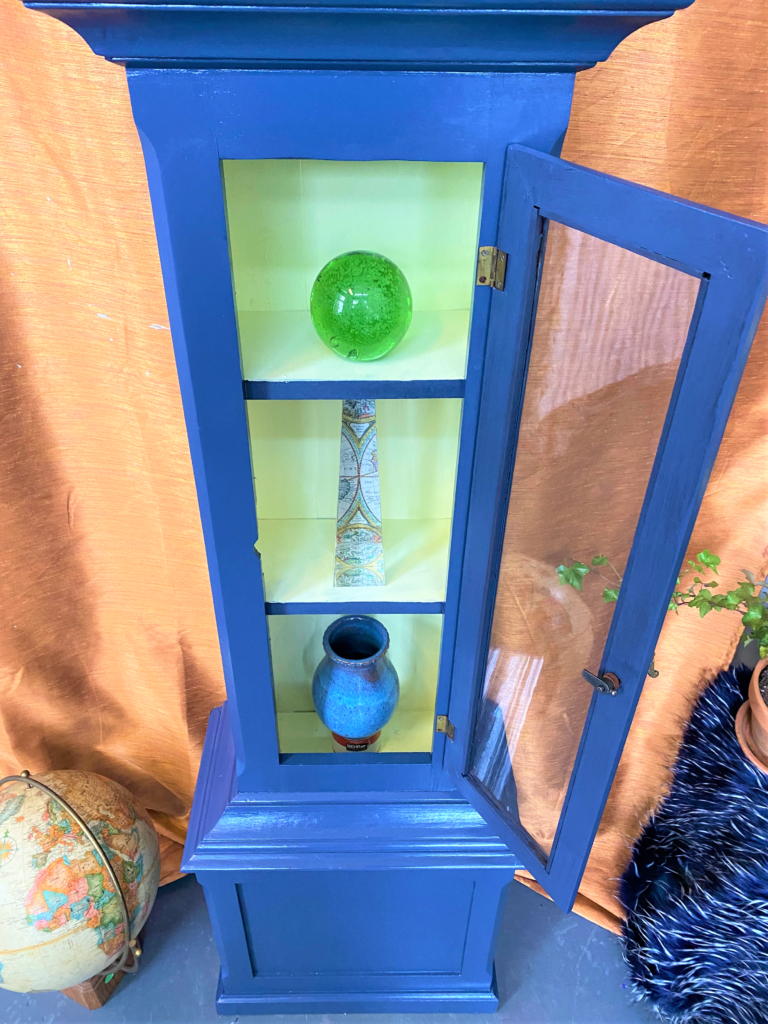
To make your upcycled Grandfather clock look up-to-date, eye-catching and make a statement, select a vibrant color for the outside and its insides, too, since they will be visible and usable.
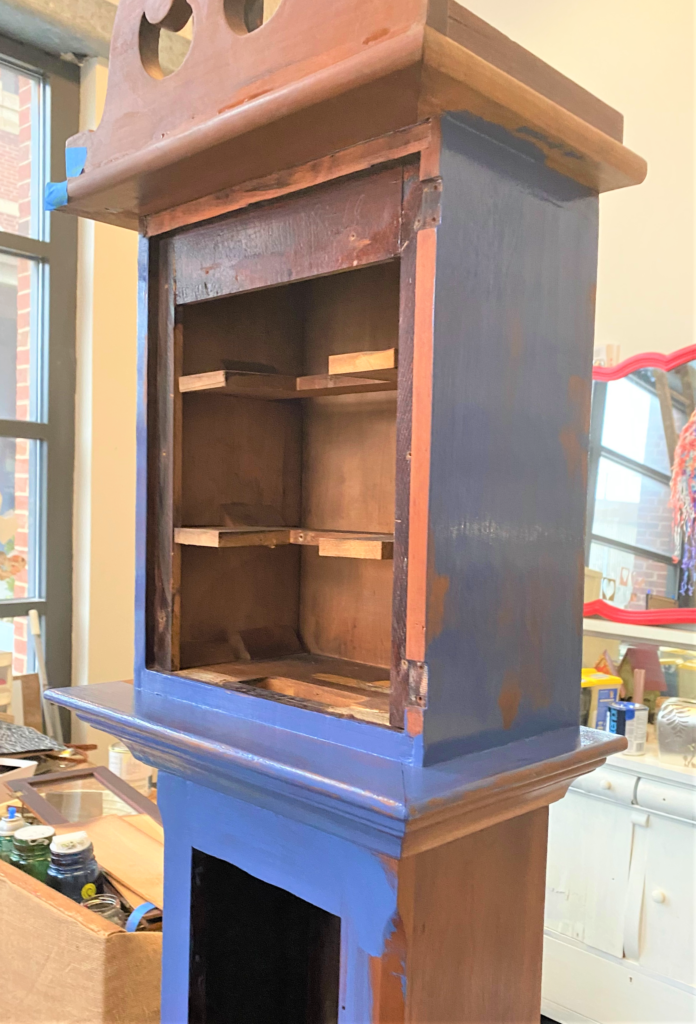
The deep blue was such a handsome color and I wanted it to look more “masculine,” so the choice was easy. And to call attention to the items to be displayed on the shelves, once added, a lighter color as chosen to reflect light. A very light yellow was used that was a perfect compliment to the blue tone.
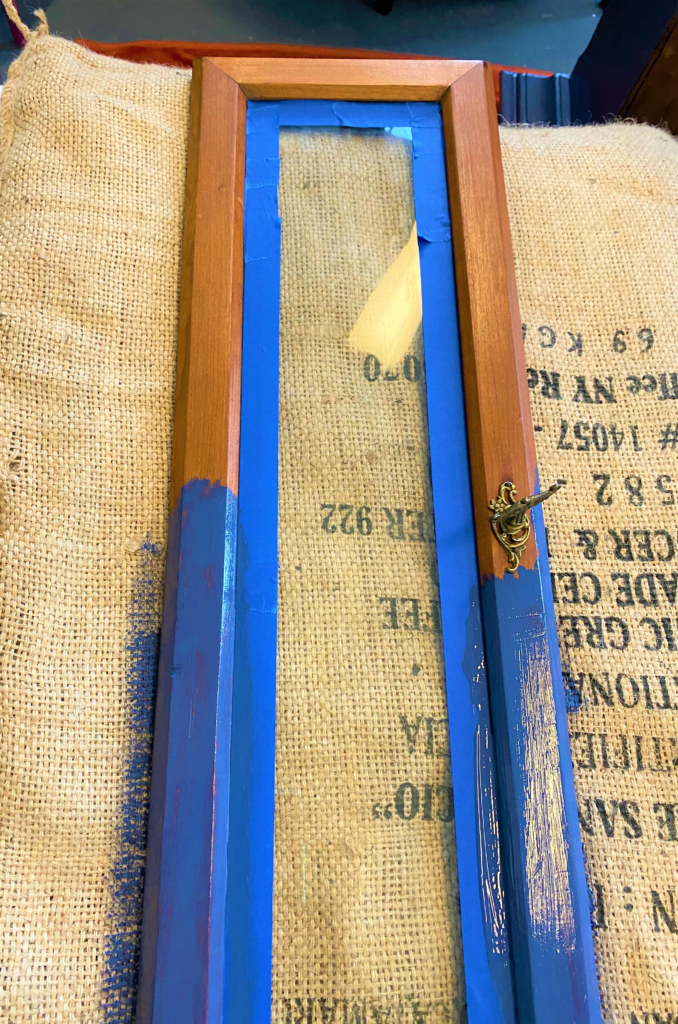
- As with any painting project, use your painter’s tape to protect areas like glass or hardware.
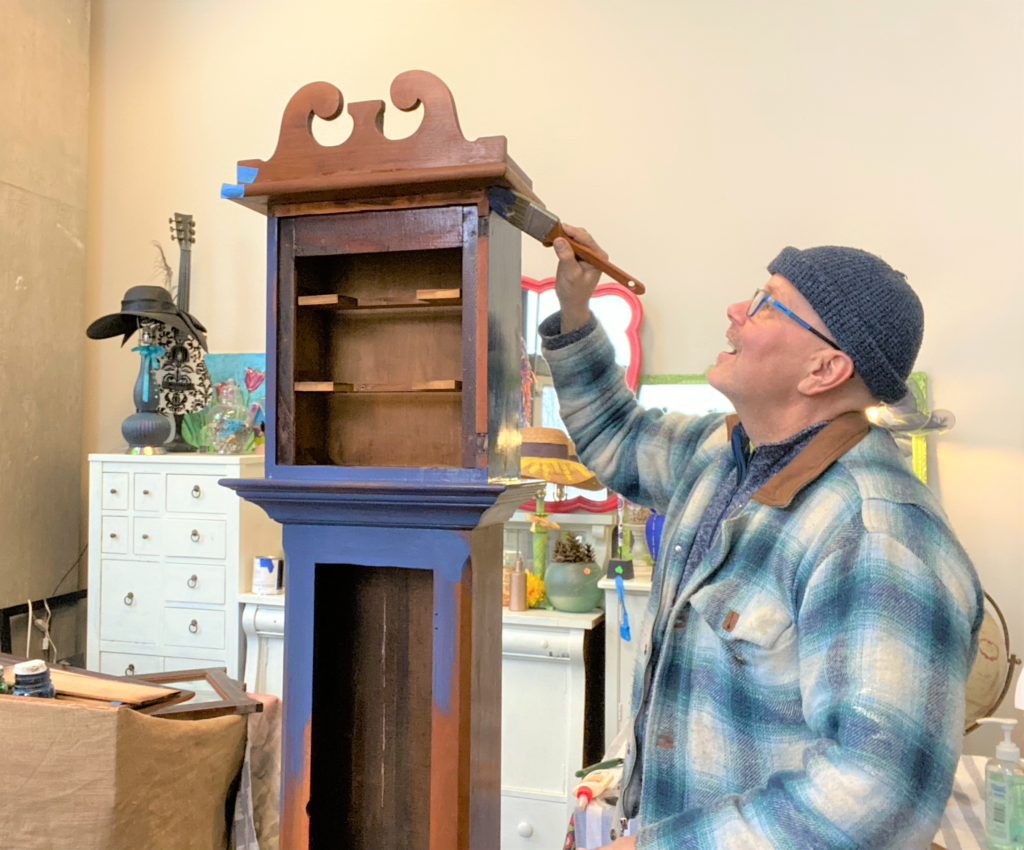
- Brush on a light coat of paint then let dry.
- Give your piece another coat or two, again, leaning to the lighter side and giving it lots of drying time.
- While the outside color is drying, you can then give the inside parts, soon to be your shelves, a coat.
- With a person to assist you, if possible, lay the clock horizontally on your workspace or the floor to make it easier to see and paint all edges, nooks and crannies.
5. Create, paint & hang your shelves
To provide a place to show meaningful items and to make the clock’s cabinet functional in its new life, you’ll want to cut wood to make shelves. Again, kudos to Annie’s Ace Hardware for the scrap wood and great help!
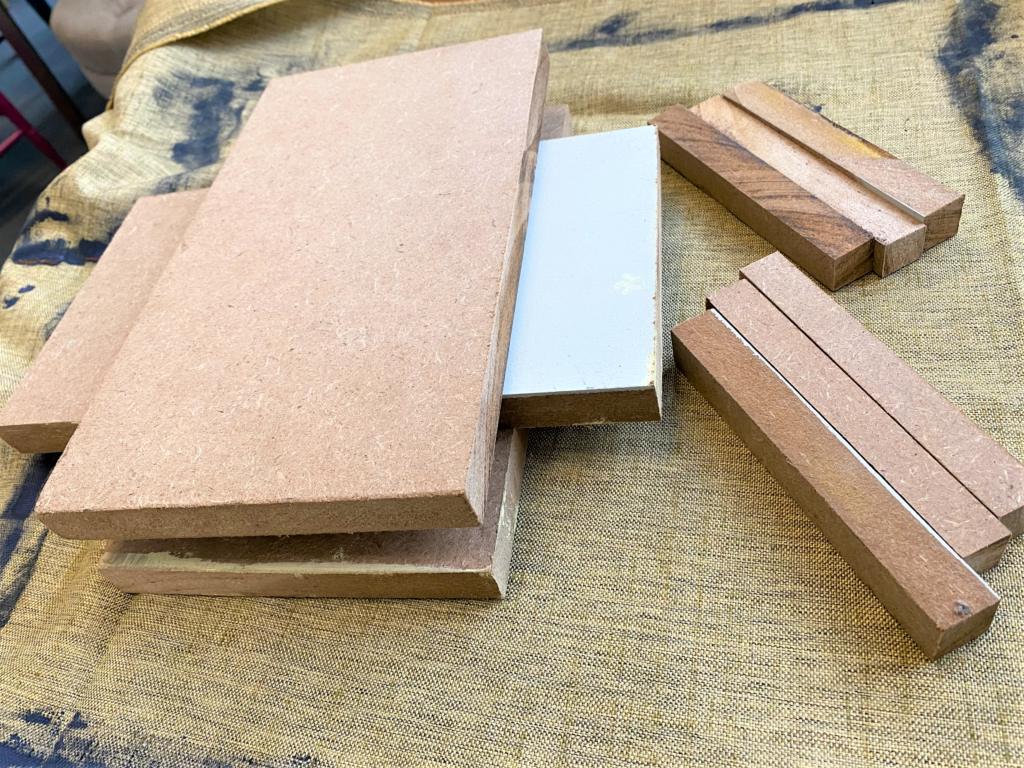
- Measure the dimensions and cut a pattern out of cardboard to make it simple to cut shelves. Use smaller scrap pieces, too, which will add extra support under the shelf pieces.
- Paint these shelving pieces the lighter paint shade, following the steps above of sanding, wiping and adding several light layers.
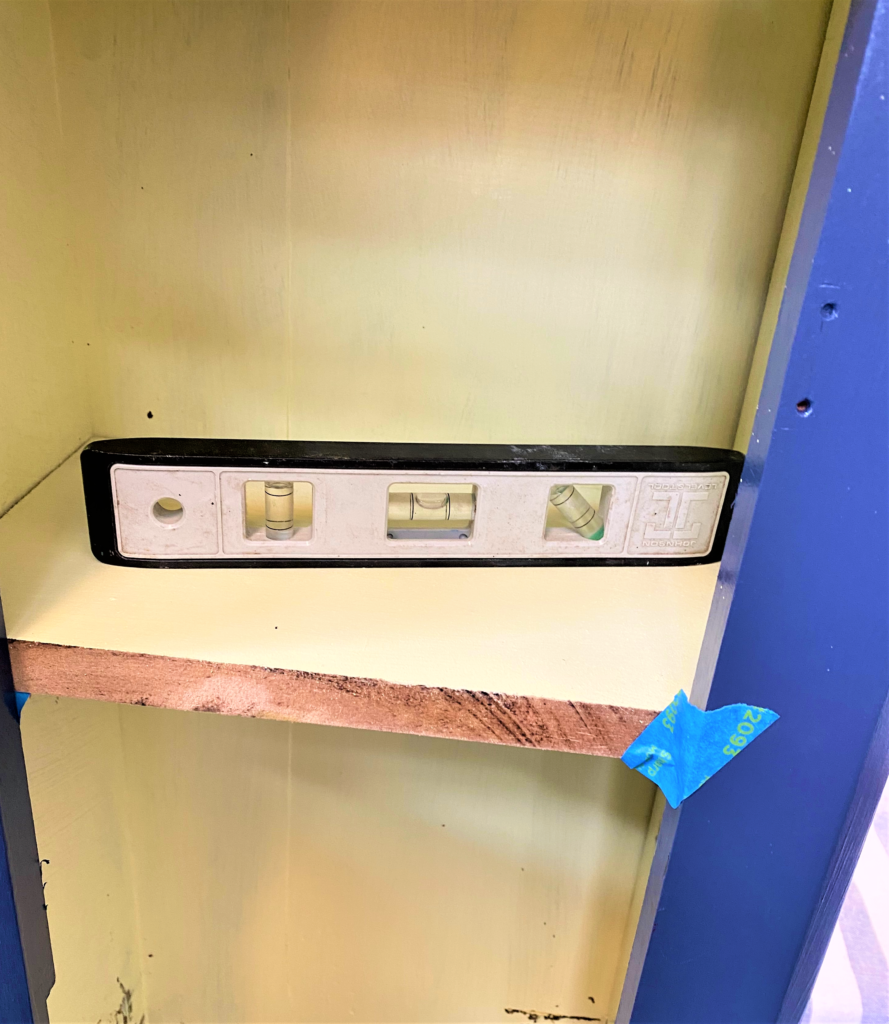
- Once dry, measure and secure the smaller support pieces by using quick drying epoxy glue.
- Use your leveler now to ensure they are positioned correctly and straightly.
- Add the shelves on top, adding more glue to hold them in place.
As you are able to see by the photos here, the very front edge of the shelf was painted blue to connect it to the outer parts and to call attention to the shelves making them look intentional.


Design Tip: You can look online for other Grandfather clocks that have been upcycled into shelves. Those with lighter colored insides look much better to me. Also, rather than painting the shelves blue, I thought the lighter tone would be brighter and show off displayed items better.
6. Reassemble your new shelving unit
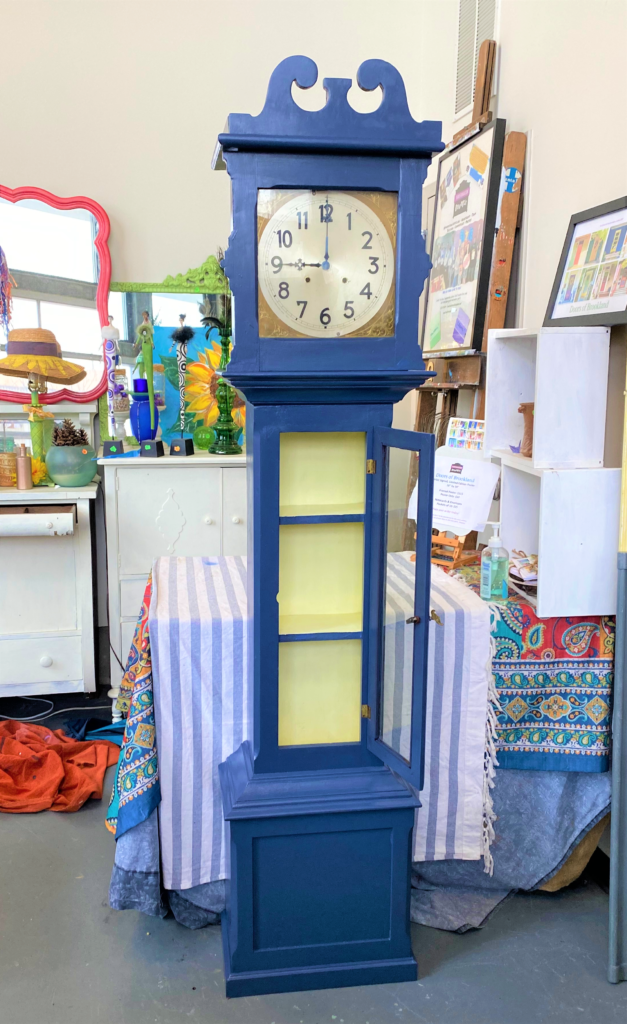
Carefully remove all painter’s tape and screw the doors, clock and other parts in place.
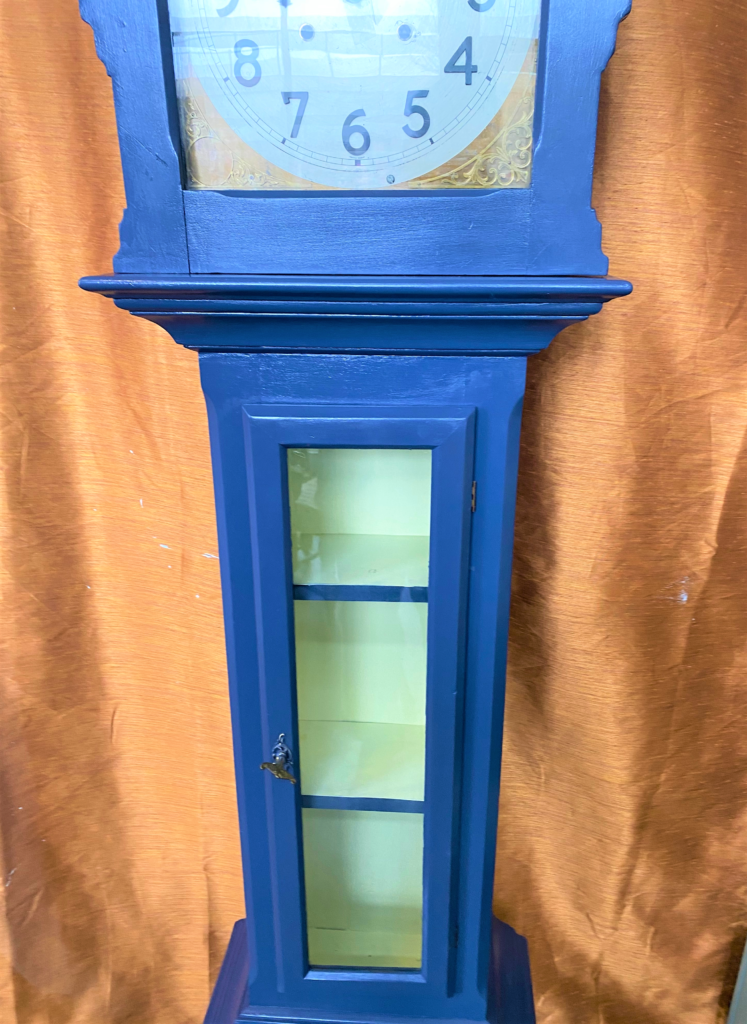
Design Idea: The space behind the clock face also provides a storage option. Same with the very bottom panel. If you are feeling industrious, those could be transformed, too, for additional places to stash items. Remove the parts, add hinges and a knob to utilize the lower section. With my piece here, I could have secured the clock face to the upper cabinet door so that when it opened, you would have more storage.
7. Time to celebrate!
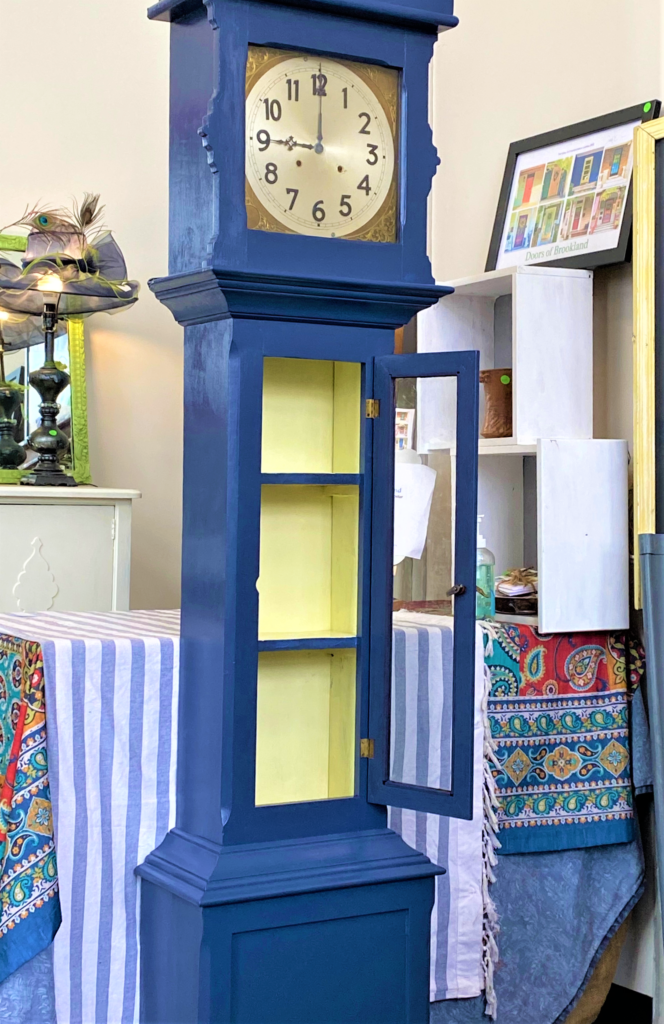
Given the tall silhouette of the piece and its small footprint, it won’t take up much space and could go in lots of places. My upcycled Grandfather clock shelving unit holds several very special glass pieces given to me by my dear friend, Dianne, along with a handmade blue vase.


What will you put in your new shelving unit?
Put it in your kitchen and add cookbooks. Place it in your foyer to hold sunglasses, keys and more. Add it to your bathroom to hold perfume bottles and special toiletries. Tick, tock, tick, tock….it is time for you to get creative, too!
.

Tim Kime
Artist, Motivational Speaker, Life Coach

