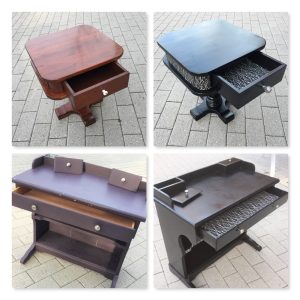
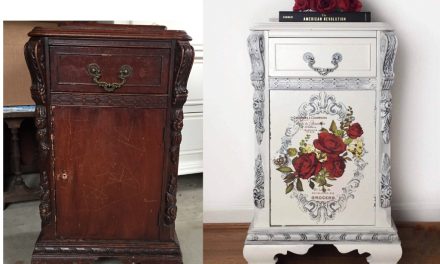
Once drab and destined for the basement, Granny’s old desk and an end table are now ready to add style to anyone’s space!
Age Level:Teens and adults
Items Needed:
1. Solid wooden furniture piece
2. Glossy black spray paint
3. Eye-catching art paper
4. Scissors
5. Pencil
6. Tape measure
7. Modge Podge
8. Paint brush
Time Requirement: 2 hours (this does not include drying time)
Cost: Approximately $25
- $14 Furniture
- $4 Art Paper
- $4 Spray Paint
- $2 Modge Podge
Step 1: Find your good – and a great deal – on Goodwill’s donated furniture
Keeping an eye out for solid pieces with unusual lines or details, you can find lots of ideal options at any DC Goodwill location.
As a frequent shopper, I’m always amazed at the great pieces that someone gave away rather than transforming it themselves. No complaints here as it means more fun for me and my fellow DIYers!
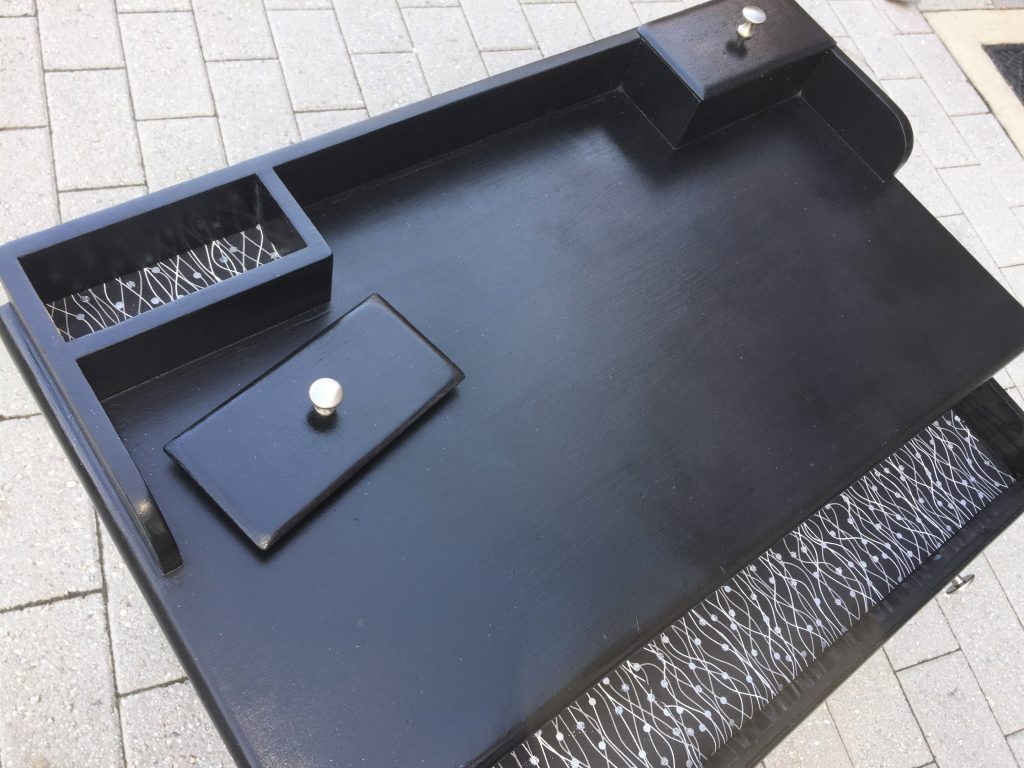
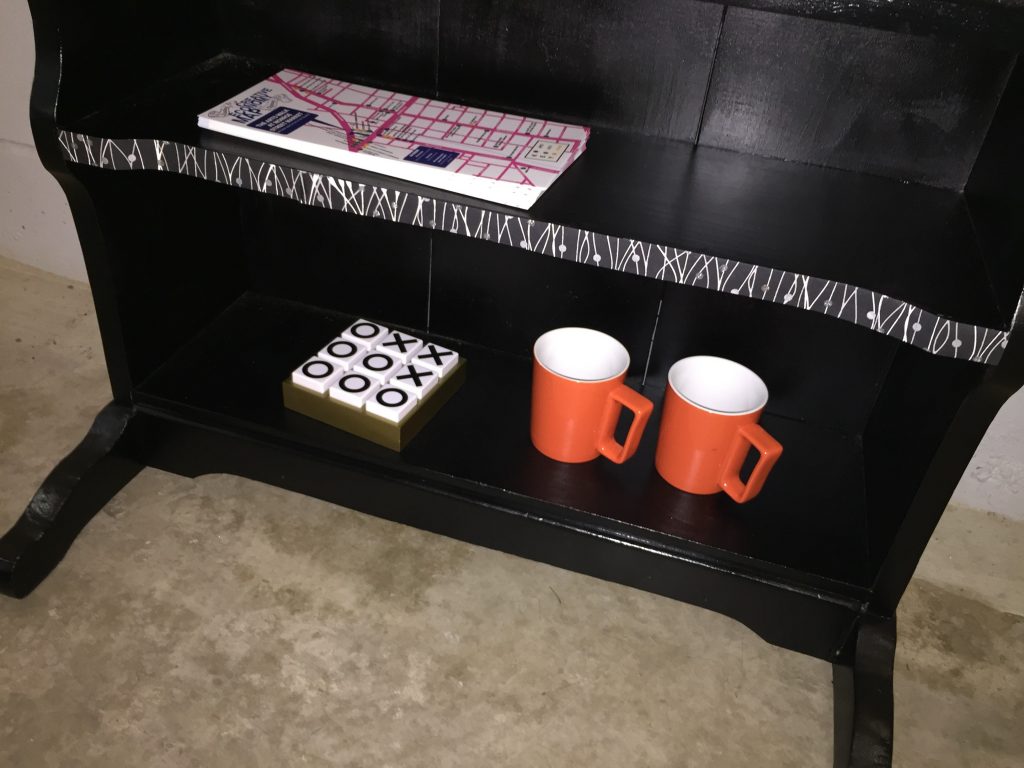
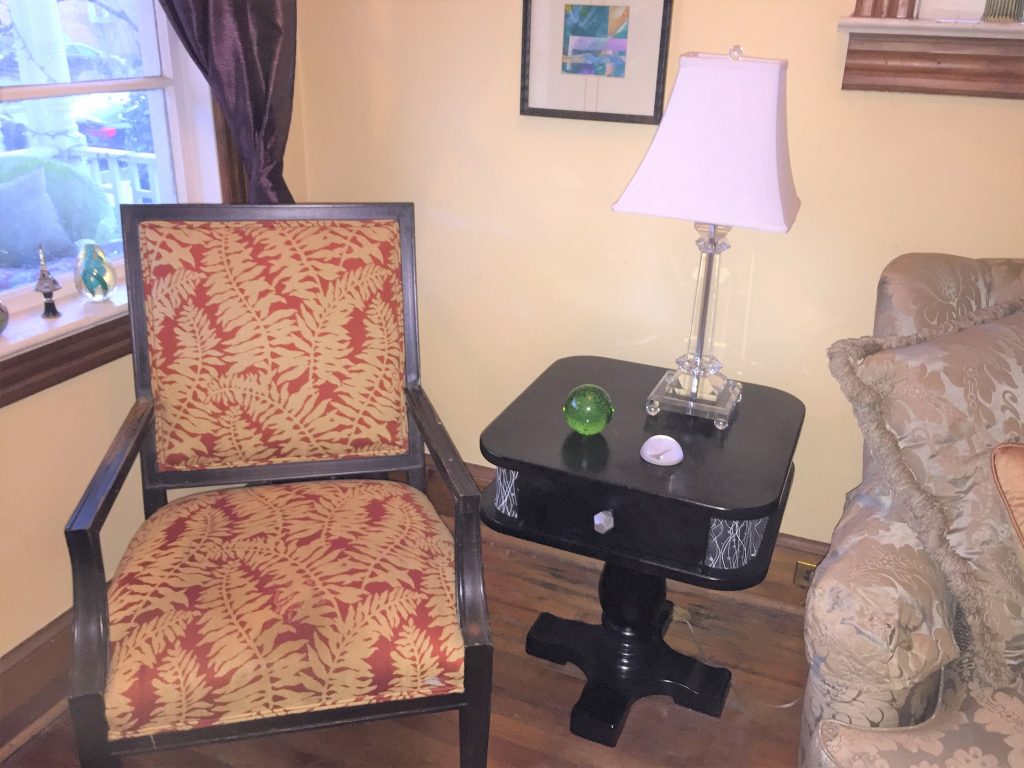
The end table attracted my attention because of its thick pedestal leg and bonus big drawer. The desk was small enough to fit in many spaces, had a wide drawer, two covered storage places on top and a shelf, too. And the curvy lines were appealing.
Step 2: Prep & paint
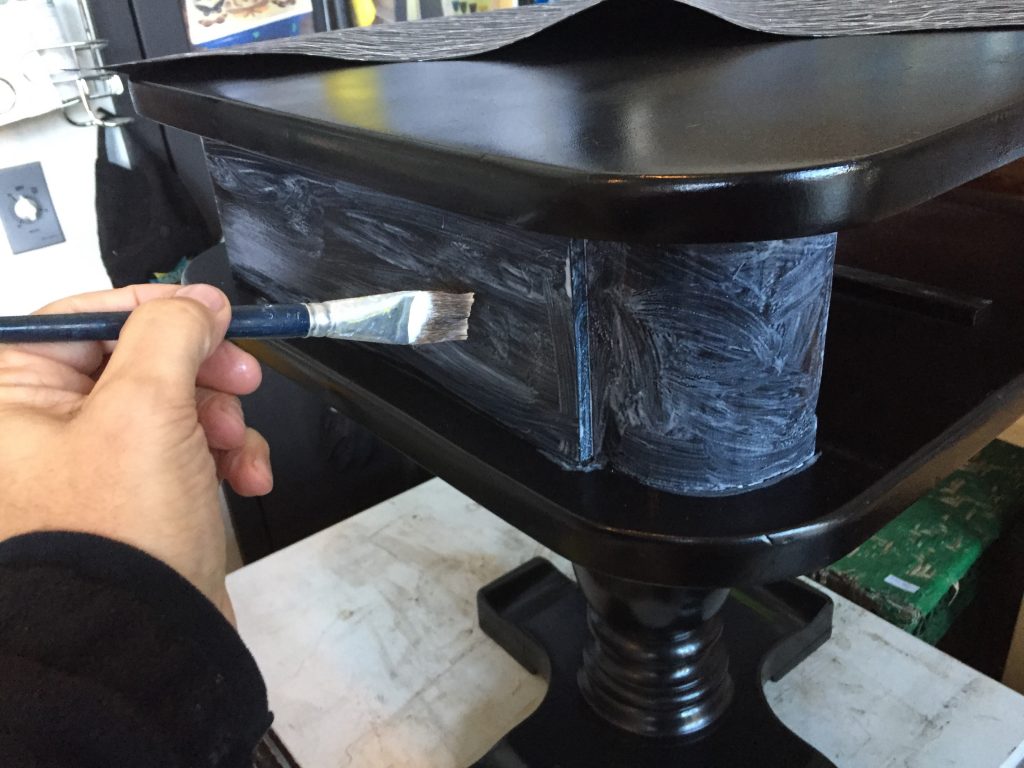
Remove any hardware and put it aside. With a fine piece of sandpaper or sanding block, lightly buff up your piece to provide a good base on which the paint will adhere. Wipe it down with a damp brush to remove the dust caused by the sanding as well as any other debris. (Another great reason to shop at Goodwill is that all the pieces are inspected, cleaned and ready for immediate use.)
Place outside, if possible, on a tarp or drop cloth and go to town! Spray painting an old piece is so much fun because in an instant, you can see the transformation. Lightly spray on a coat over the entire piece and let dry. Place the piece on its side and give it another coat, dry and repeat. By tipping it over, you are able to ensure you get every edge and part of your piece with good, solid coverage. Let your piece dry overnight after all coats are on it.
Expert Tip: While there are countless colors available (and I love bright hues!), glossy black makes any item look contemporary and elegant.
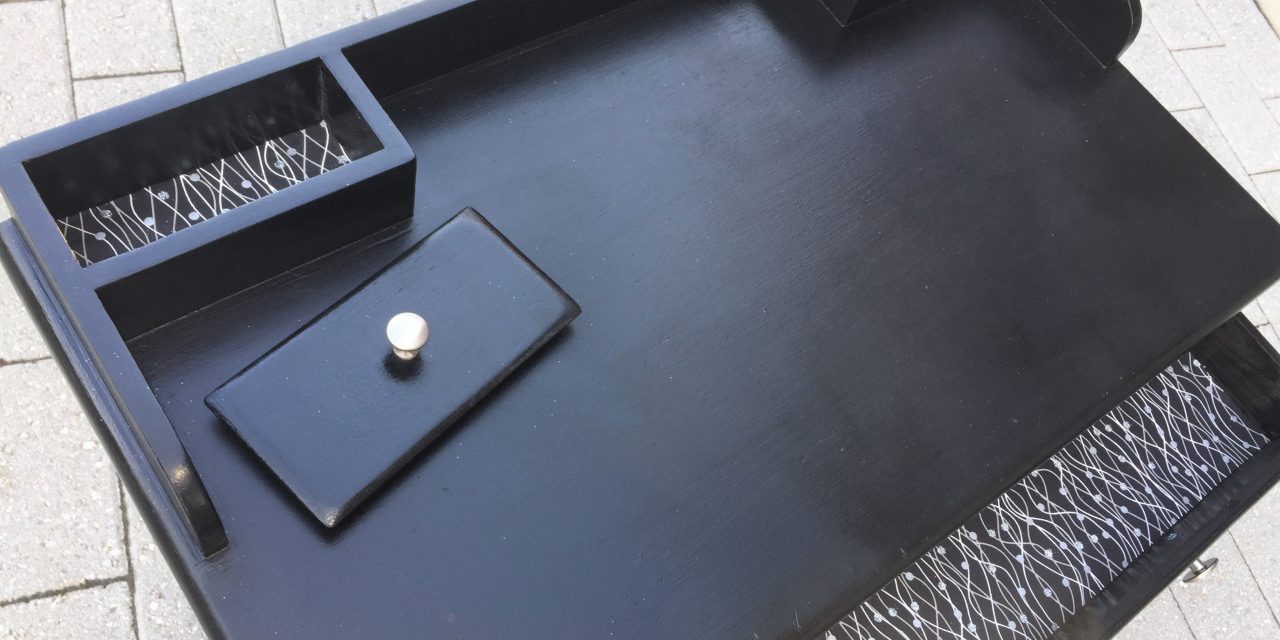
Step 3: Punch up the look with paper
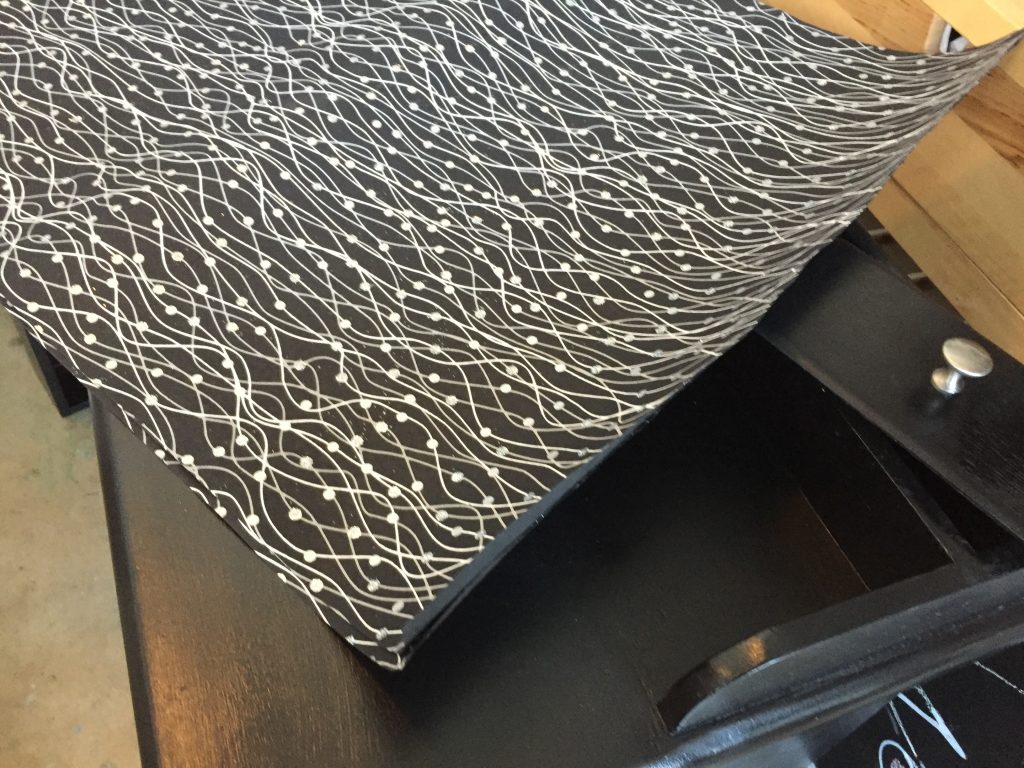
While the transformed pieces looked wonderful in solid black, visual interest and uniqueness were added by decoupaging some eye-catching paper to parts of them. At most arts and crafts stores, you will find a great selection of colorful art paper for this project. Black and silver look so good together so a paper choce was made with one that had thin, swirly lines and glittery silver dots all over it.
The end table had a perfect space to add paper along the side and just under its top. It also added to the desk’s shelf edge to call attention to this curvy detail. Paper was used on the inside of the drawers so that every time they are opened there is fun pop of color.
To decoupage, which is the process of gluing paper to items, you will need to determine where the paper will go, measure, trace and cut it out. With a small paint brush or foam brush, apply a thin coat of Modge Podge to that area ensuring you cover it well all the way to the edges. Place the paper in place and use your fingers to smooth it out so there are not bubbles and a tight fit. Modge Podge does dry clearly but you will want to use a damp paper towel or rag to gently remove any access. Let this dry overnight too.
Step 4: Bling it up
You might get lucky and find pieces that have handles or knobs that will work as is. Luckily, the desk had silver ones so they were used again. Hardware stores and many craft stores also have fun and interesting knobs to add additional interest and sparkle to the piece. A modern, sphere looking one was added to the end table.
Expert Tip: If you don’t like the look ,consider spray painting your knobs and other hardware to bring it up to date. It is so easy and makes such a difference—and will save you money!
5: Place in their new space and give them applause (and yourself, too!)
Maybe the upcycled end table will sit next to your bed or maybe it will live next to a chair in your living room. Maybe the elegant desk is used in your home office, kitchen or foyer.
![]()
I am confident that, by following these four simple steps, you will be so happy you rescued your piece from a drab life and gave it a glamorous one!

Tim Kime
Artist/Life Coach/Connector