
Win big with tennis racquet rack!
It’s the match point! You’ll be on the right court and say 40-Love with this sporty upcycle.
Transform a wooden tennis racquet into a rack to hold and display items all while winning fans. Whether your tennis abilities are amateur or pro, you’ll score big with this clever, vintage feeling, DIY project.
Here are two ways to use this crowd favorite upcycle!
Age level: Older teens and adults
Ability level: Moderate do to drilling and sawing
Items needed:
1. Wooden tennis racquet
2. Drill
3. Jig saw
4. Metal cup hooks
5. Wooden knobs/drawer pulls
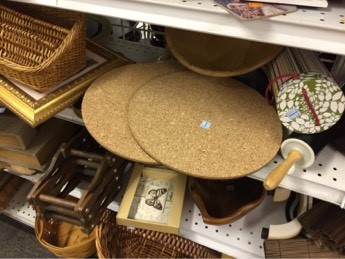
6. Cork board
7. Glue gun and glue sticks
8. Picture frame hooks
9. Sharpie
10. Tracing paper
11. Scrap fabric (optional)
Time requirement: 30 minutes each
Cost: $14 each
- $5 for wooden tennis racquet
- $3 for cup hooks
- $3 for wooden knobs
- $3 for frame hooks
1. It’s “game on” at Goodwill
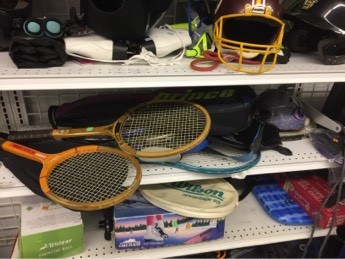
Did you know that Goodwill has sporting equipment and supplies for purchase at great prices?
You will lead a cheer when you shop there and find a wooden tennis racket for this easy and whimsical project.
From golf clubs to bike helmets to even snow skis, Goodwill truly has it all for those wanting to find ways to support their continuing or new athletic endeavor.
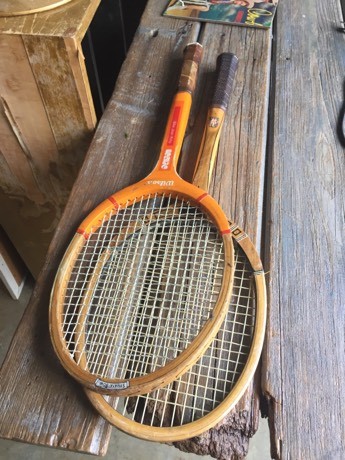
Be on the hunt for wooden tennis racquets for this vintage transformation.
2. Drill on the difference
Your drill will become the tool to turn a racquet into functional, fun and useful place to hold or show off items.
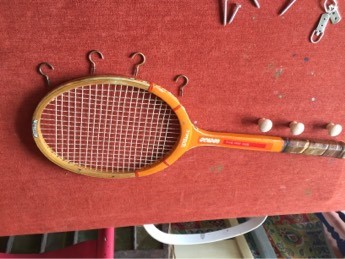
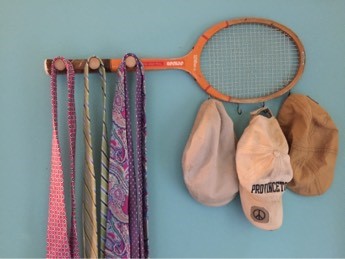
Option 1: Hat/Tie Rack
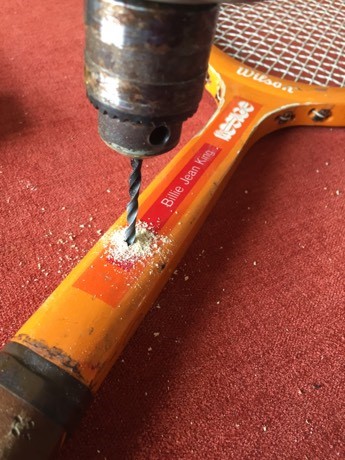
A.) Add knobs
Lay your tennis racquet horizontally and space out three wood knobs along the handle. Use pencil to mark the spot to drill holes then set aside the knobs. Holding your racquet tightly, drill holes all the way through the racquet’s shaft and handle. Flip it over to insert and screw in the screws all the way through so the ends come through the other side. Place the wooden knob on top and turn into place until it is tight against the shaft and handle. Repeat until all knobs are secured.
Design tip: Given the warm look of the wood used to create the tennis racquet, simple wooden knobs are recommended. You could stain or pain them for additional pops of color. For this project, they were kept as it to allow the “natural” look and tones to come through. Also, as the knobs get handled during use, they will get aged nicely for a warmer look!
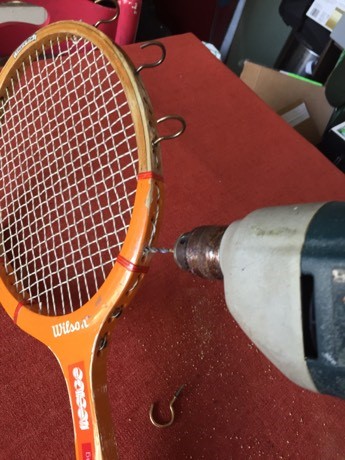
B.) Secure hooks
Now with the knobs secured, lay your tennis racquet again horizontally with the knobs facing up. Along the bottom of the racquet’s face or top part (the bottom is the side now because you turned it sideways), position; your cup hooks along the edge spacing them out evenly. Given that the strings are located in this area, you will want to make sure you are placing the hooks in a spot where you can drill into the wood and not the strings. With your pencil or Sharpie, mark where the holes will go.
You will need to select a smaller drill bit for this step. Very carefully drill holes so they go part way through the racquet’s edge. Drill all holes. Place and secure the cup hooks by turning them into the wood. You will want to do so at an angle so they are perpendicular. You might need to bend some of them slightly to accomplish this step.
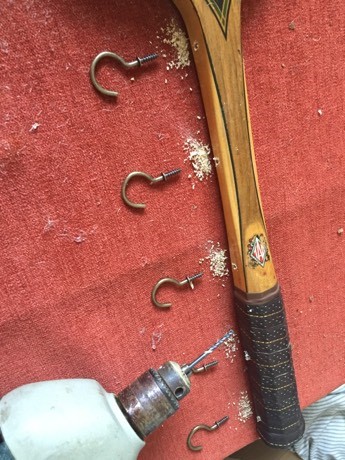
C.) Screw on frame hooks
Turn your racquet rack over so the knobs are on the bottom, again position it horizontally. Place your picture frame hooks in place, use a marker to indicate where the hole should go then drill away! Screw the picture frame hooks in place and your racket rack is now ready for its first match as a unique place to hang ties, hats, and more!
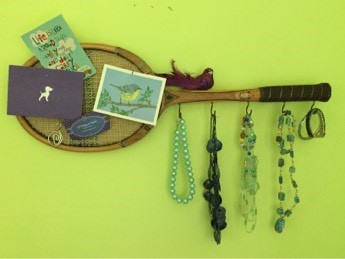
Option 2: Bulletin/Message Board/Key Station
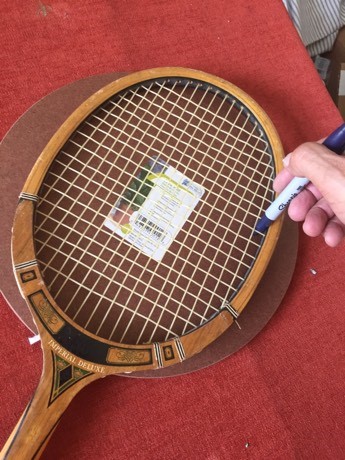
A.) Create a pattern
Place your tennis racquet on top of a piece of scrap paper, ensuring it is larger than the racquet’s head/top part. Insert the end of your marker or pen between two of the strings, make a mark then move to the next space between the strings. Continue this process all the way around so you create a dotted line of the shape and size of the head area. Remove the racquet then draw a line to connect the smaller ones. Use scissors to cut along the line; this piece of paper will be your pattern for the cork board cut out.
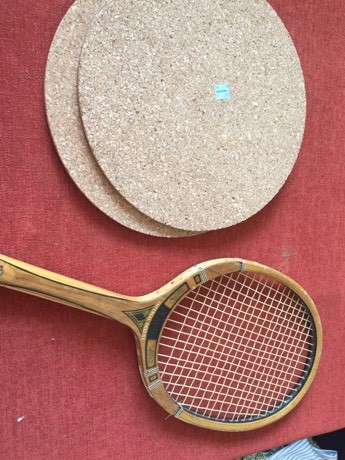
B.) Trace your circle
On the back side of your cork board piece, trace around the circular pattern you made from your tennis racquet’s head. With your jig saw, slowly and carefully cut around it to get the shape of the inside of the racquet head to make the piece to be your bulletin/message board. After you cut the initial shape, see if it will fit securely in the inside frame of the racquet’s head. You may need to trim off edges to make sure it fits in tightly and flatly.
Design tip: You hide any imperfections in the shape of your cork board when inserted in the head, you may consider gluing on a piece of fabric on top of it. This will give a chance to add some color and visual interest to your rack. A piece of burlap was used for the one featured here to match the colors and look of the wood. You could select a color to match the décor of the room where it will hang or pick up one of the colors of the knobs or lettering on the racquet. Simply cut to fit then glue in place!
C.) Insert and glue
Place the back side of the racquet facing up. With you glue gun, add glue along the edge of the cork board piece you cut out and covered with fabric. Quickly place it in the head section and push into place so that it is tight along the strings. You may want to add some extra glue along the back edge, too, for a tight and secure fit.
D.) Add cup hooks & picture frame hooks
Following the previously mentioned steps and use your drill to add cup hooks along the side of the shaft/handle of the racquet.
Screw into place.
Flip the rack over, add picture frame hooks.
3. Hang it up and take center court!
Voila! Now it’s time to hang this into place on your wall!
Based on the option you select, add items like hats or ties and light weight clothing items.
Make it a jewelry station or place to hang your keys and post important messages.
Kids of all ages and athletes of all levels will appreciate this sporty way to hold and display items.
Everyone wins with this DIY project!


