
Add Design, Detail to Drawers for Drama and Delight!
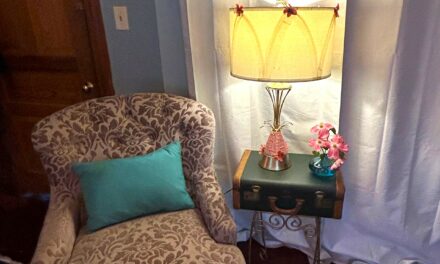
When upcycling a furniture piece with paint, pull out this idea to add to your transformation list: “do the drawers.” If your piece has a drawer, look it as another place to add color, texture, pop and even a bit of surprise!
Give some drawer love by using paper, paint, fabric and more to add visual interest and a bit of whimsy when you open the drawer. Take your item to the next level by ensuring you’ve got this detail covered, too!
Age level: Kids of all ages
Ability level: Easy as pie!
Items needed (will vary based on option chosen):
1. Paint or spray paint
2. Papers, fabric or contact paper
3. Cut outs
4. Paint brushes
5. Painter’s tape
6. Scissors
7. Mod Podge
8. Spray polyurethane
Time requirement: 30 minutes each
Cost: $5 per drawer, based on size
- $5 for art paper
- $1 for scrap fabric
- $4 for contact paper
- $1 for paint
- $5 for spray paint
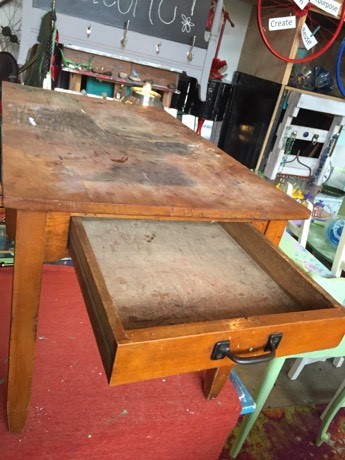
1. Goodwill to the rescue!
Whatever your home décor need might be, Goodwill is likely have it and at an awesomely, amazing price!
Many of the furniture pieces—whose drawers are featured in this special blog—were purchased there for a steal.
As your DIY coach, always look beyond the surface (I guess that goes for furniture and people!) for solid construction, real wood components and interesting details.
Some of my favorite pieces went from ugly duckling to sparkling swan because I didn’t let their previous state of affairs stop me from seeing what they could be.
And use this approach for pieces with drawers…transforming the inside of a drawer is another way to make your item truly one-of-a-kind!
2. Consider these 3 options to add pop and pizazz
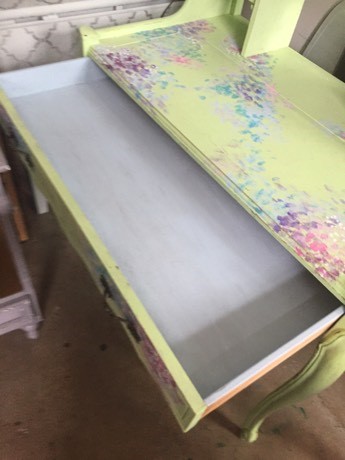
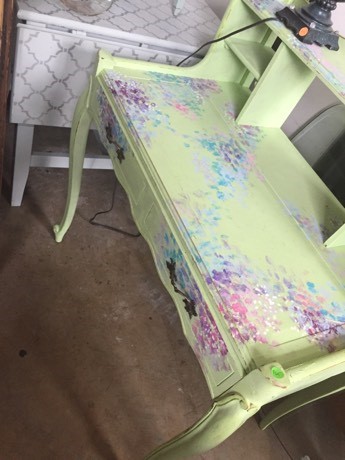
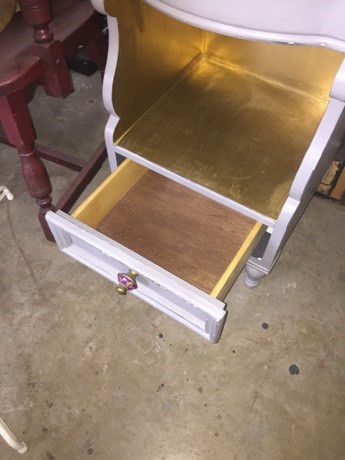
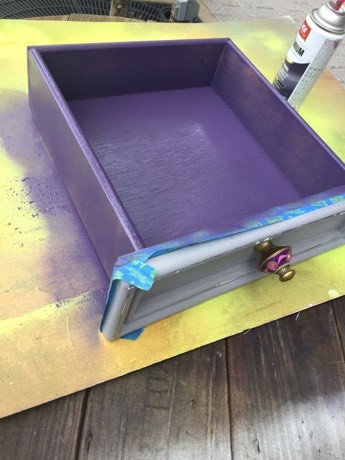
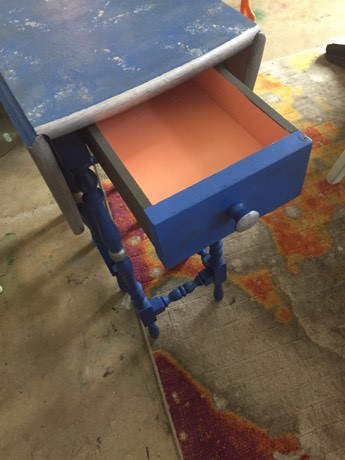
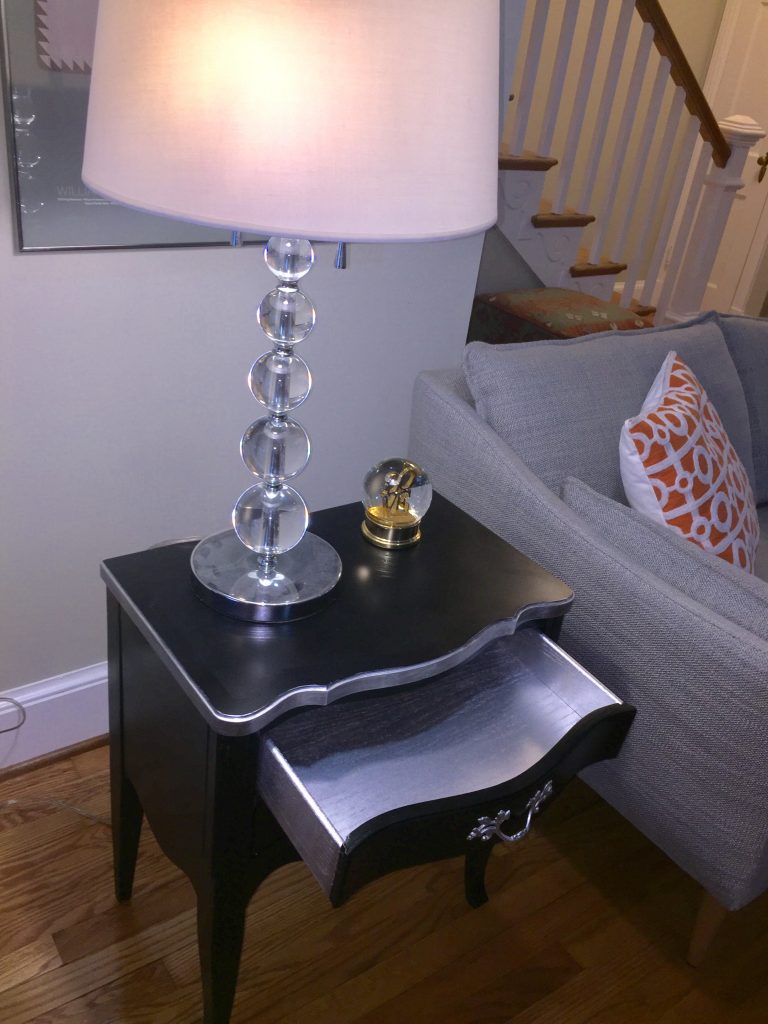
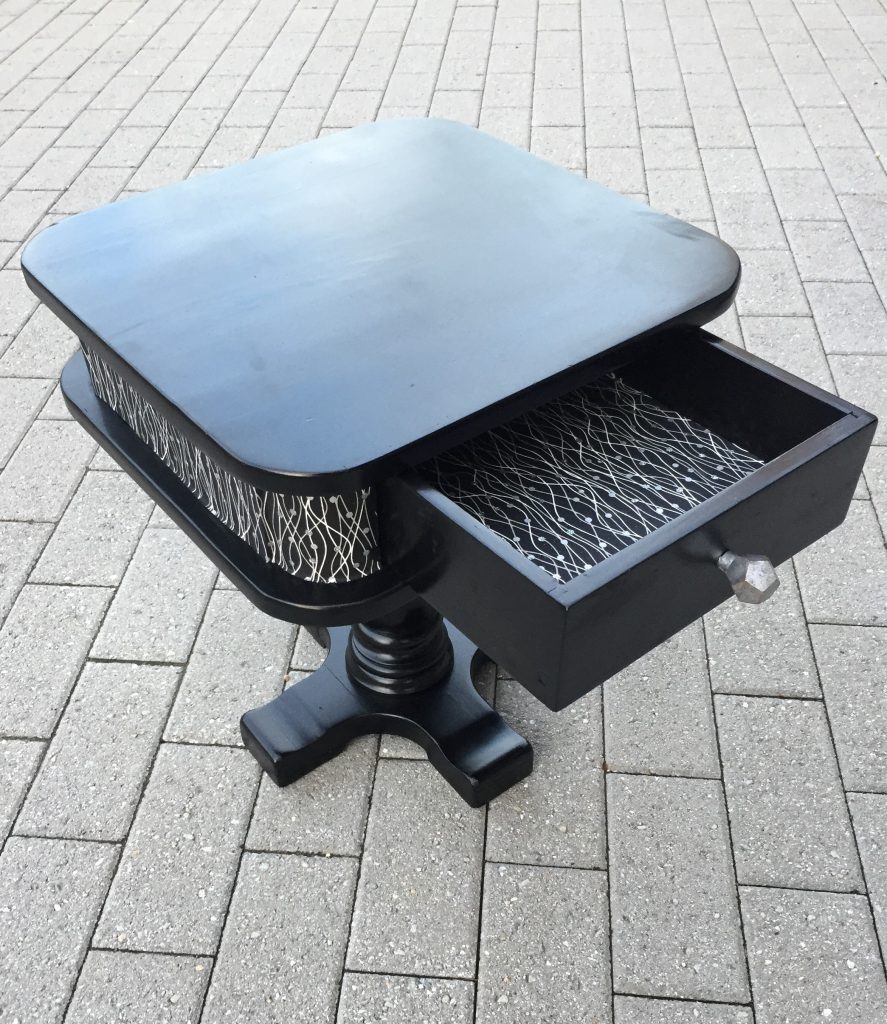
Option 1: Paint promises POW!
A. Prep time pays off
- Remove the drawer and wipe down with a damp cloth to remove any dirt or debris.
- Given that you have already transformed the piece from which this drawer came, the front of it should be painted and looking fresh.
- With painter’s tape, cover the front edges to prevent it from getting additional paint on it.
B. Place outside if spraying
- If using spray paint, place your drawer face up outside in a well-ventilated area. When I say face up, I mean place it so that the interior part is upward.
- Give this area several light coats of spray paint, allowing time to dry in between. Always add a light layer rather than a thick layer which might run or drip. Given today’s spray paints, the drying time is pretty quick.
- Paint the inside and outside edges.
If using a regular can of paint and brush, follow the same process of adding several thin layers. Let time to dry, too.
When your paint layers have dried completely, remove the painter’s tape, return the drawer back to the future piece and enjoy each time you open it up!
Design idea: For the most impact, select a color that stands out yet compliments the overall look and design. For one piece, it had a funky looking knob with purples, golds and pinks in it. I selected purple so when you open it up, it catches your eye right away. And who doesn’t love that color, right?
Option 2: Decoupage dreams—add paper for pop
A. Glue with Mod Podge
Paper is such an easy way to add instant color and visual interest to the inside of your drawers.
Wrapping paper, maps, art paper, posters…all are great options which can be personalized for your piece to make it really special.
- Measure and cut your paper then place it in the drawer to ensure it lays flatly on the bottom. You would also use several small pieces of paper for good coverage, too.
- Add a thin layer of Mod Podge to your drawer’s inside bottom then place the paper on top.
- Add another thin layer on top to ensure it is covered completely. You may need to use your fingers to smooth out any bubbles caught between the drawer bottom and paper.
- Wipe away any excess and let your drawer dry overnight.
B. Protect with poly
- With a can of spray polyurethane, add a couple of thin layers on top of your decoupaged drawer.
- This will help protect the paper and keep it looking clean. Also, if you need to wipe out the drawer in the future, this provides a protective layer to keep your piece looking good.
- After it dries, return your drawer back to its furniture piece and get ready to receive compliments!
Option 3: Be a material girl or guy
A. Create a pattern
Fabric is another great option for adding design delight to drawers.
- Measure your drawer’s bottom.
- On a piece of scrap paper or news paper (I love keeping old flip chart paper for opportunities like this!), mark out your measurements then cut away the extra paper.
- Place inside your drawer to see if your pattern needs additional trimming.
B. Cut your fabric
- Pin or clip the pattern to your fabric piece.
- With sharp scissors (you will want to do this step if a child is helping with this project), carefully cut the material to size.
- Remove the pattern and place inside the drawer, again determining if any extra trimming is needed.
C. Secure in place
There are several ways to adhere your fabric to the drawer bottom.
- You could add a layer of Mod Podge to the bottom then place the fabric piece in place on top.
- You could use a glue stick, school glue or even spray adhesive to do the trick.
- Double sided tape is another option.
- If you are like me and are looking at ways to save money, then consider what you have on hand. Given my huge supply of Mod Podge, this option worked best.
- Let the drawer dry overnight before returning it back to its furniture “home.”

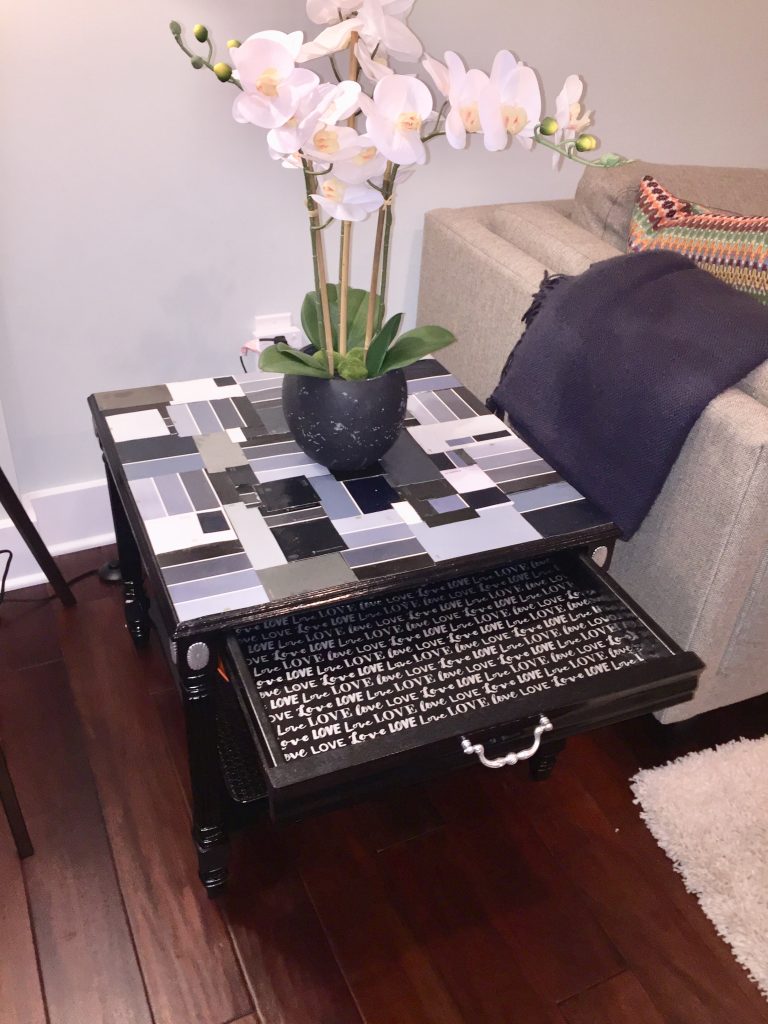
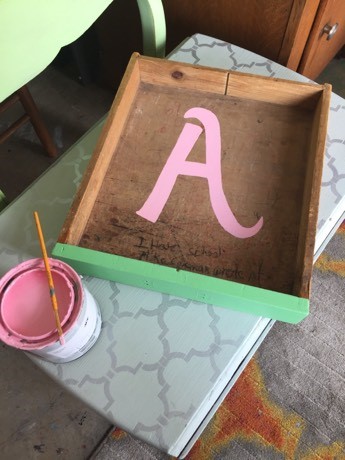
Design idea: Work around its history
For one of the projects here, the inside of the drawer had child’s writing that said, “I hate school!” Given that this piece had been in the family for a while, I couldn’t paint over that endearingly candid message.
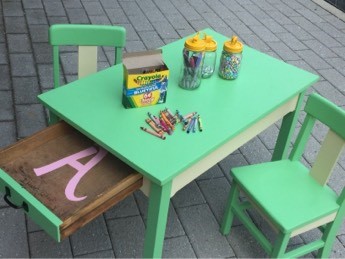
I got creative and painted a big pink “A” for the initial of the little girl who know uses this table. Found in the drawer was an old flash card, too, which was decoupaged to it so it will always be a part of the drawer.
Now each time the drawer is opened, a little family history comes to mind!
What color will you add to your drawer? How will you add pop to your piece? Whatever you choose, your drawers give you another fun way to be creative and express yourself!

