Celebrate the holiday season by creating a unique and eye-catching wreath!
Upcycle everyday household items to make a wreath that is truly one-of-a-kind and sure to make your family and guests feel welcomed when they see it on your front door. This also makes a great gift when you tailor it for the person who receives it and sees the benefits of your transformative efforts.
Here are two approaches for this simple DIY project that is truly fun for all!
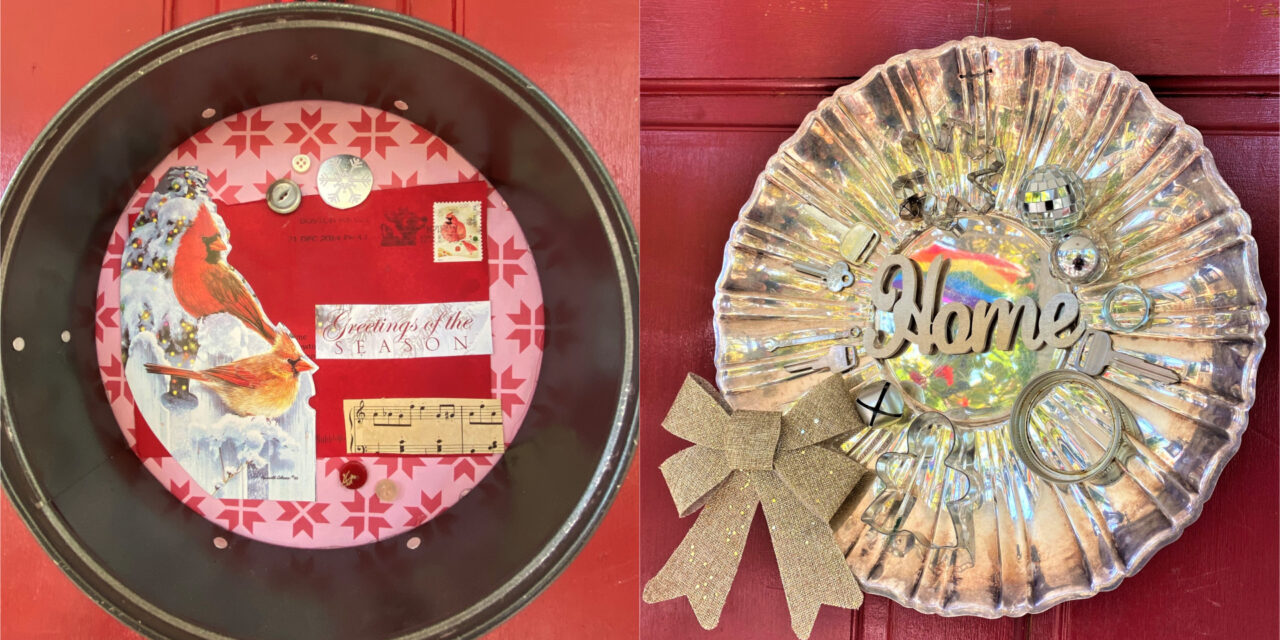
Cardinal Card Collage Wreath
Items needed:
· Cake ring
· Glue gun
· Adhesive spray
· Painter’s tape
· Scissors
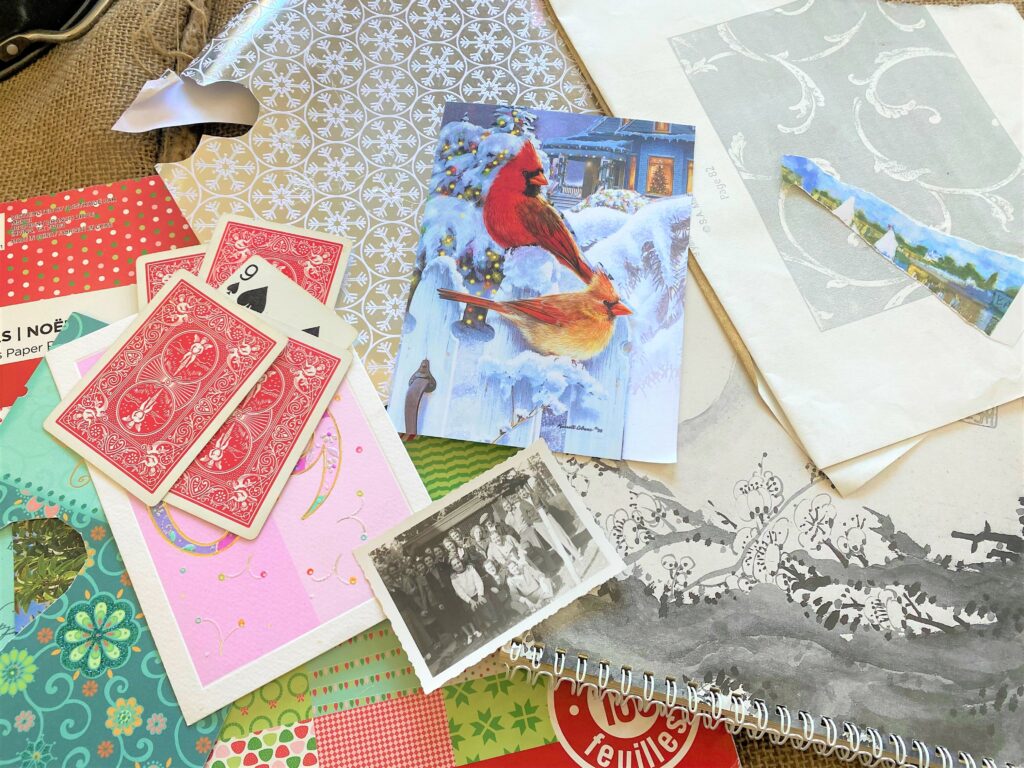
· Old cards, craft paper, sheet music
· Buttons
· Pencil
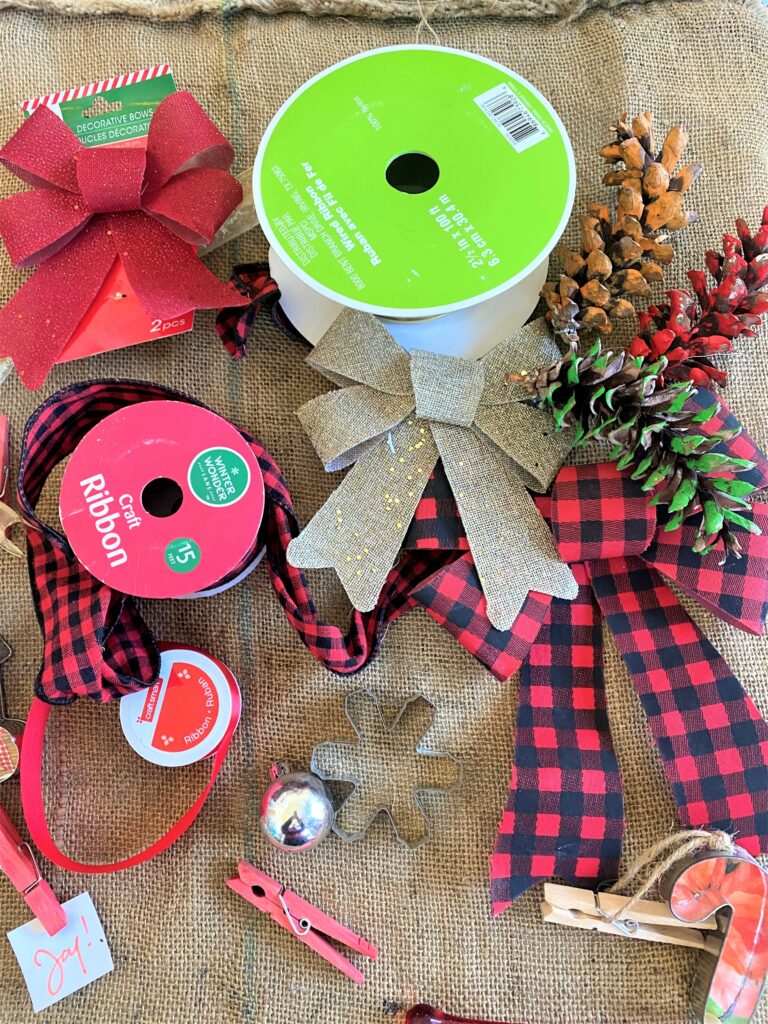
· Ribbon
1. Find your “wreath” shape in Goodwill’s Housewares section
Part of the charm of this easy DIY project is to turn an everyday item into festive holiday décor. Look in the Housewares section for something that can be upcycled into a wreath.
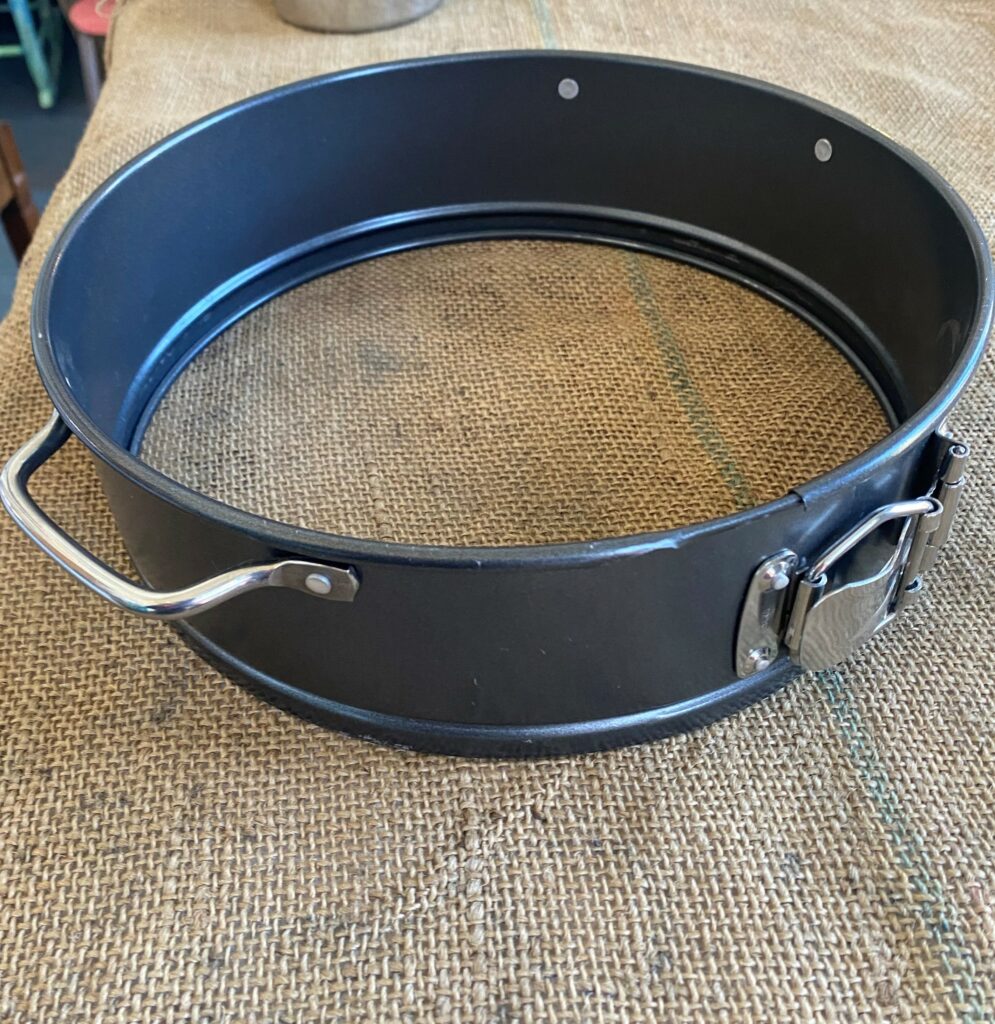
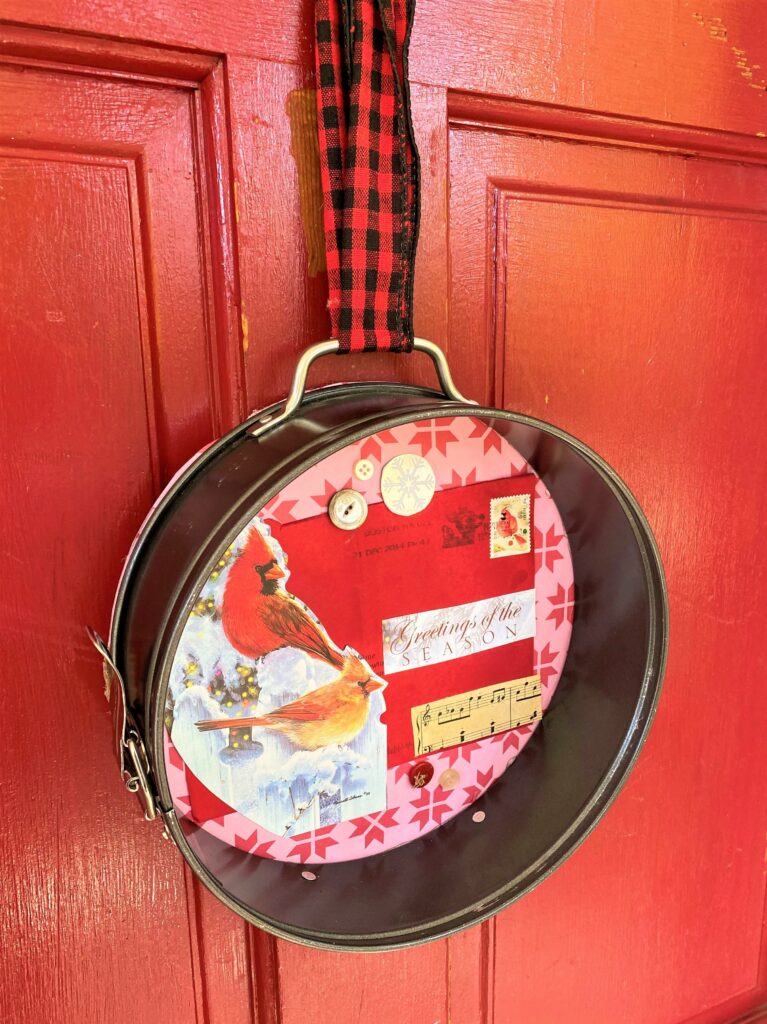
A round cake ring seems perfect because of its shape and size—as well as its handles which make hanging it very easy!
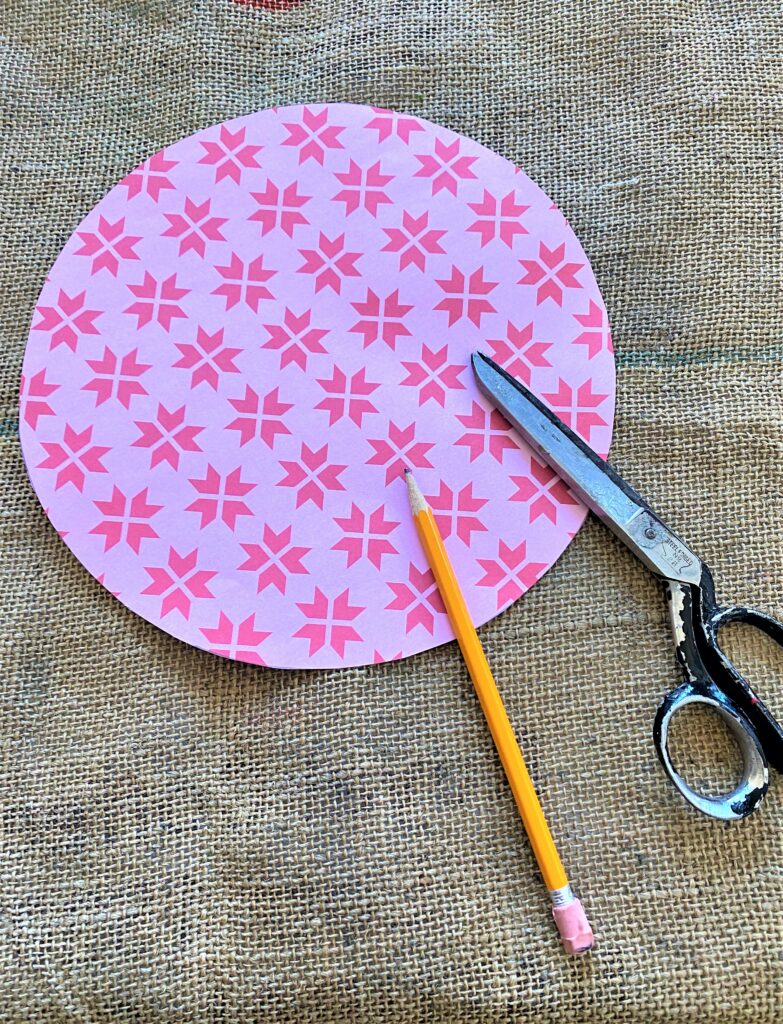
2. Trace, cut, and glue your wreath’s background
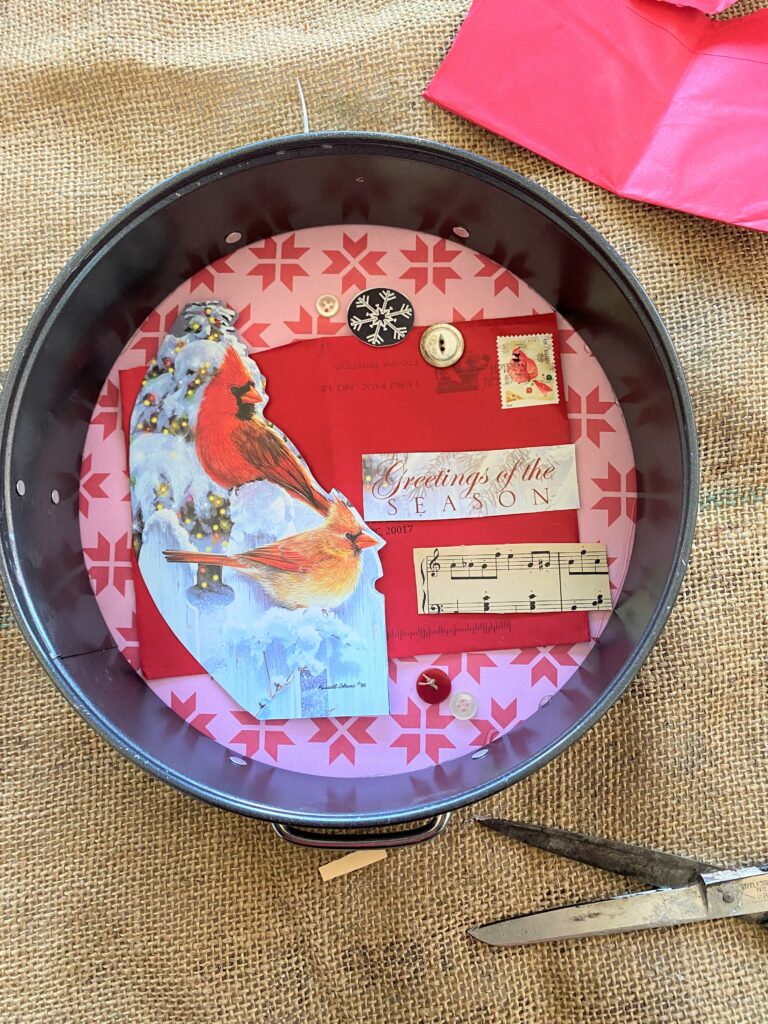
- Using colorful craft or wrapping paper, trace around the outside of the cake ring. With your scissors, cut out the circle and you are ready to start! The paper used for this was a little heavier which I thought would be good on which to build the collage; also, the star shapes reminded me a quilt, so it added to its country charm tone.
- Place the cut-out circle right side up and add your ring on top and in position.
- Use some painter’s tape to secure the paper to the ring, then gently raise the ring and add glue to the paper’s edge.
- Repeat so that every edge of the paper circle is secured to the ring.
- As always, be careful with your hot glue gun and the glue!
3. Create your collage
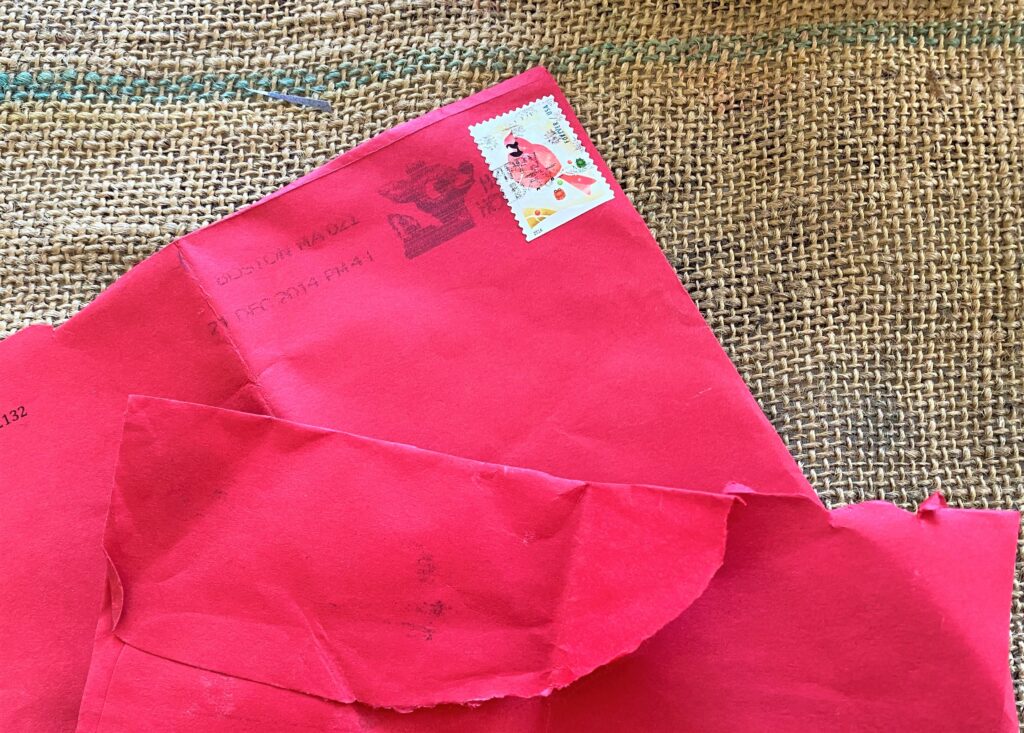
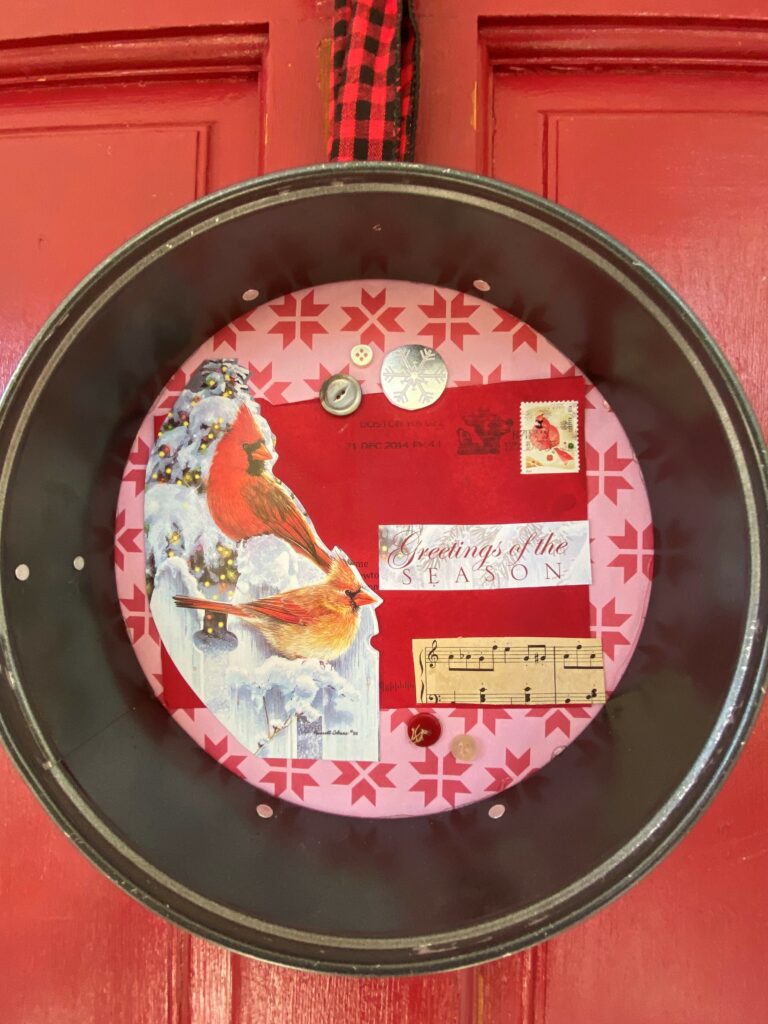
Using a holiday card with cardinals and snow, I cut and trimmed it to fit nicely in the cake ring circle. I reused a red envelope that had a cardinal stamp on it which linked it to the card.
A seasonal message was cut from another card and a piece of sheet music was also cut and positioned.
Red and white buttons were added for visual interest and to add to the down-home feel.
All these items add to the overall reuse/repurpose theme which will make Mother Nature want to rejoice!
Once your cut pieces and accessories (like the buttons) are in place, before you start adhering them, take a photo on your camera as a reference.
4. Secure with adhesive spray, glue gun
- To give a tight and secure fit to your various paper items, spray their backsides with your adhesive craft spray and place them in position referring to the photo you took.
- Use your glue gun to adhere your buttons, small ornaments and other items.
5. Finish it off with a colorful ribbon
Tie a piece of ribbon on the top handle of your cake ring. A checkered red and black ribbon was used to connect it to the cardinal’s colors and the overall country charm feel of the piece.
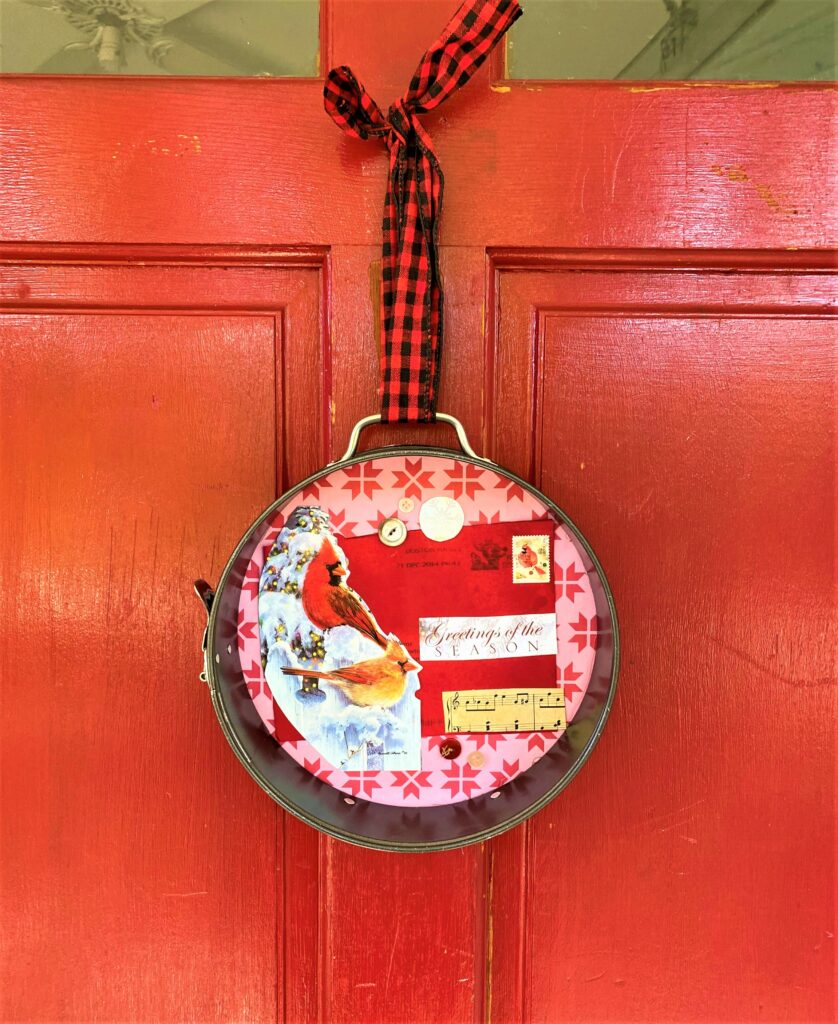
The ribbon will be used to hang your wreath on your front door or another place you want to give some festive flair. You are done now so time to celebrate!
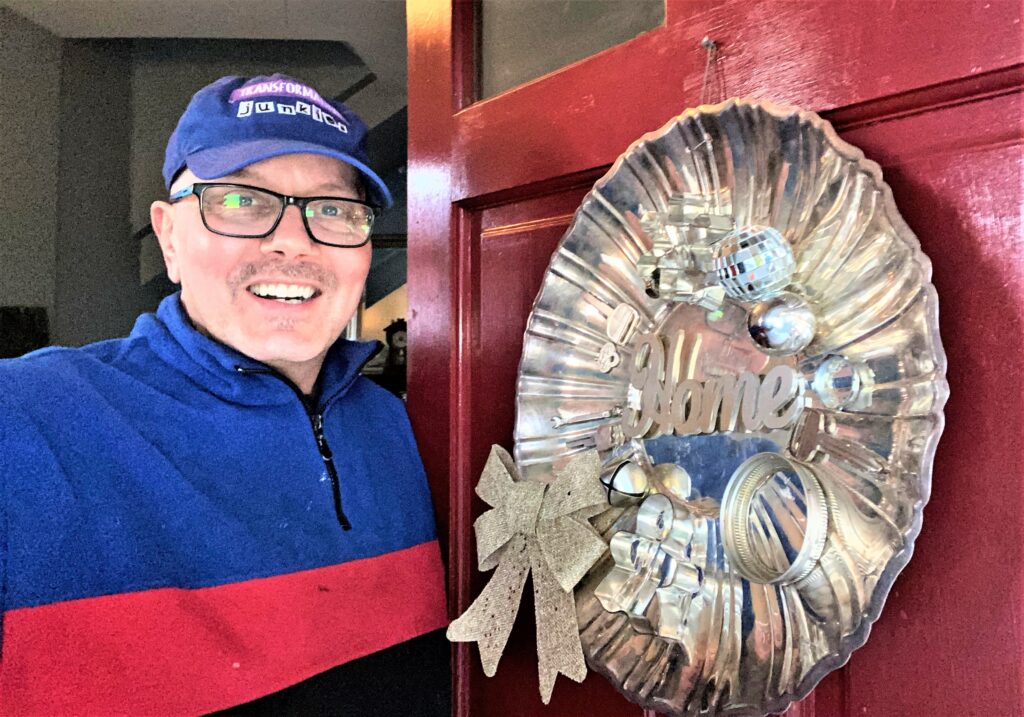
Shimmering Silver & Gold Wreath
Items needed:
· Silver serving tray
· Glue gun
· Hammer, nail
· Wire
· Silver, gold spray or craft paints
· Silver Christmas ornaments
· Cookie cutters
· Small wrench, keys, other small house items
· Gold or silver ribbon
· Wooden “Home” cut out
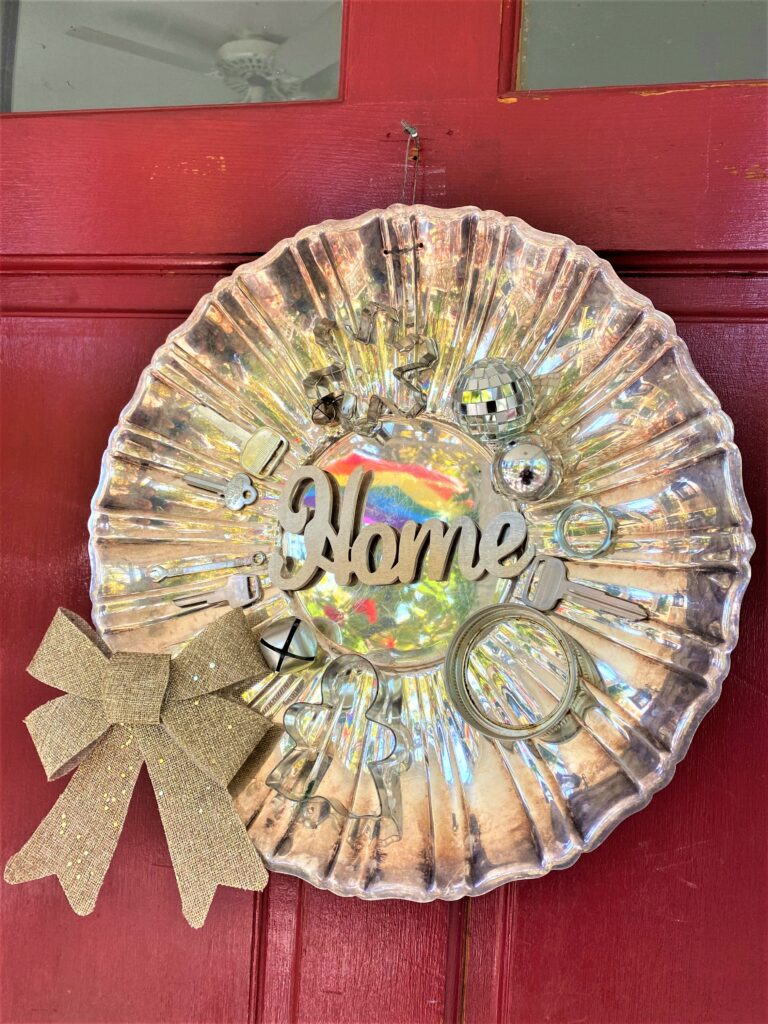
1. Mine for silver at Goodwill
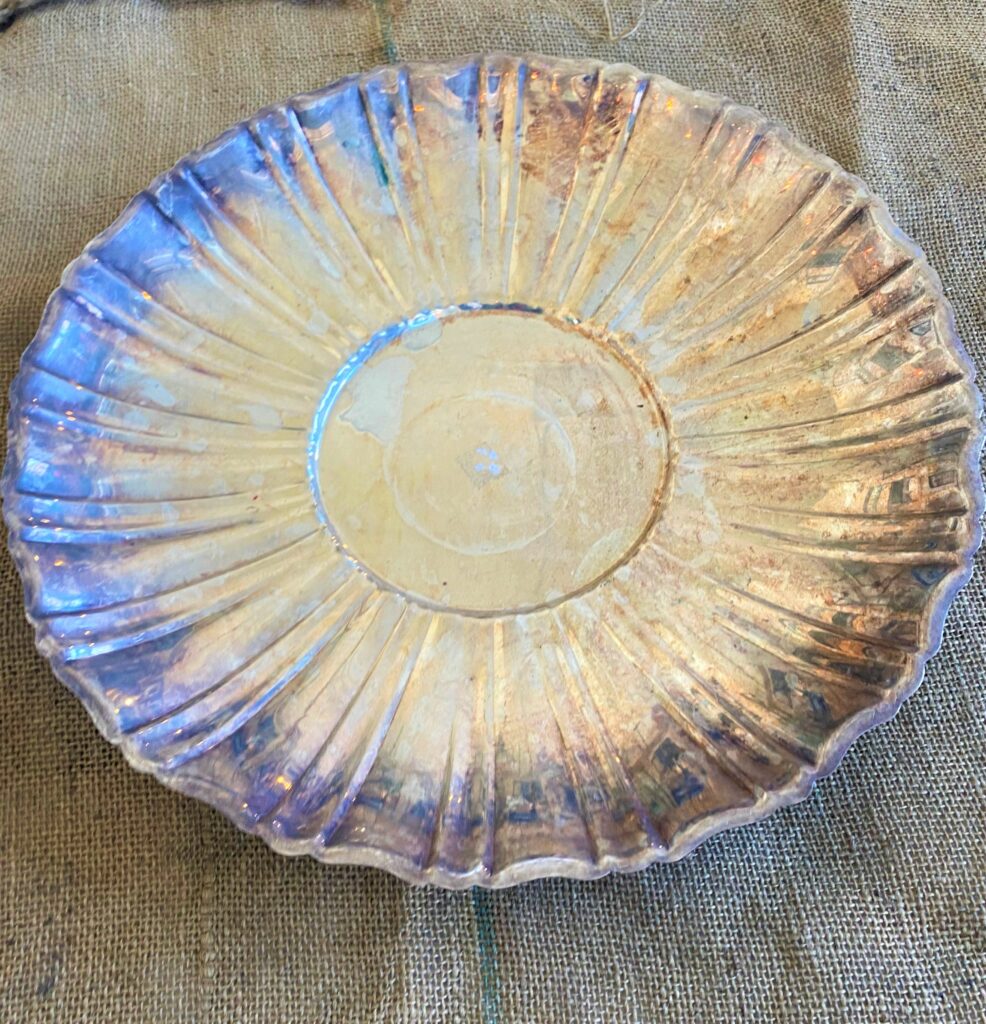
All Goodwill stores have a section where metal kitchen/dining items are available. Given the simpler, casual way most people entertain these days, you are very likely to find a silver serving platter to enlist for this project. The one featured here looks like a sun with rays coming from it or a flower with petals.
Design Idea
I love this tray, not only for its shape but because it is tarnished. This adds warmth and gives it dimension. When looking for your good at Goodwill—and a silver tray—search for a piece that might have some “life” to it like the tarnishing or other weathered/worn areas. Just like a person, an item’s so-called “flaws” can be its best parts!
2. Create holes, add a wire to hang it
With a nail and a hammer, add two holes next to each other along the edge; this will become your wreath’s top part.
Thread wire through the holes, looping in though and knotting it on the back; this is what will be used to hang your wreath.
3. Add a word/message to its center
Many craft stores sell small wooden words cut out of wood. I have seen them at Goodwill too, so you might score again while shopping there.
I had one that said, “Home,” which I thought was perfect for this wreath project.
Other words that are fitting include Joy, Love, and Peace.
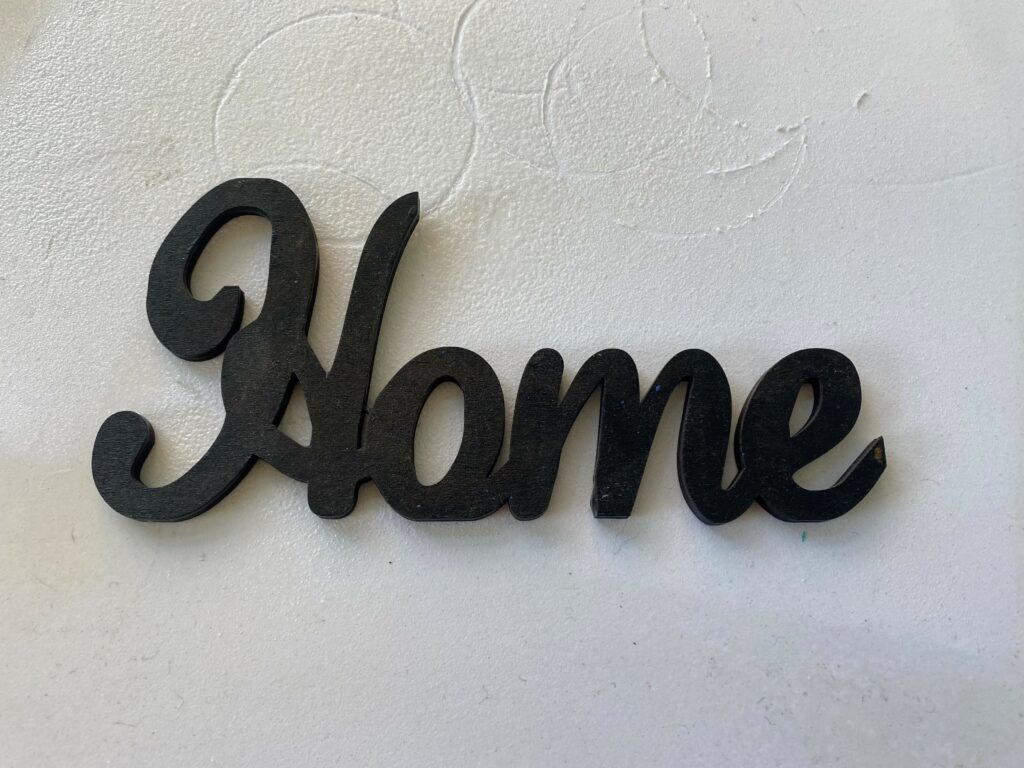

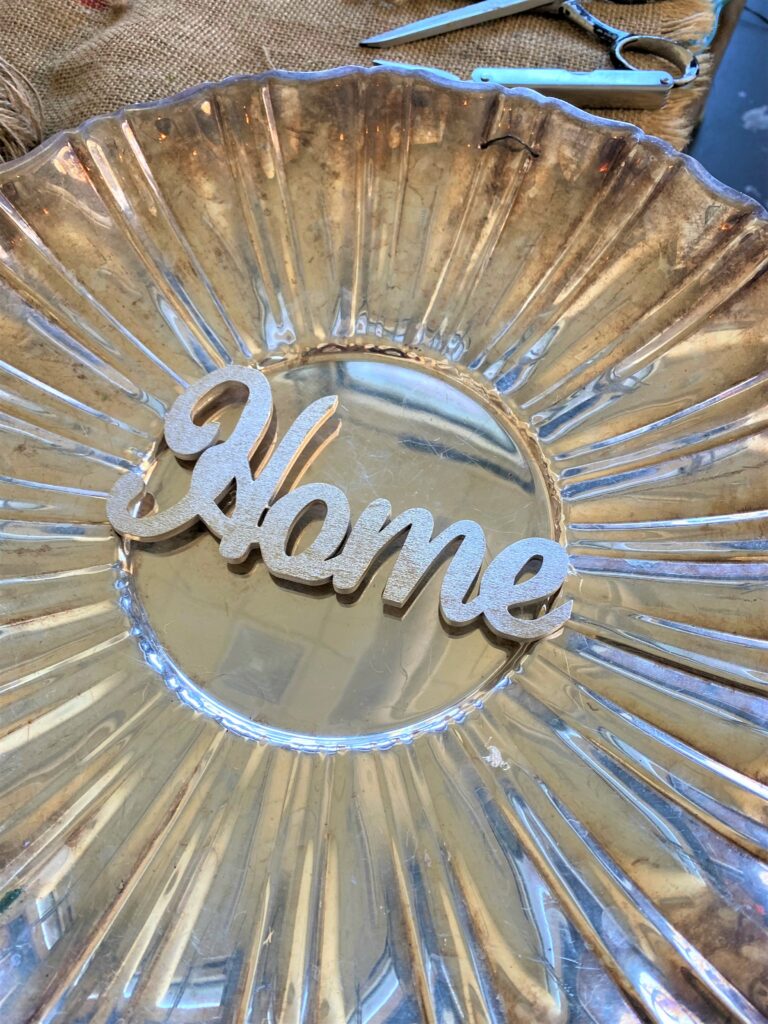
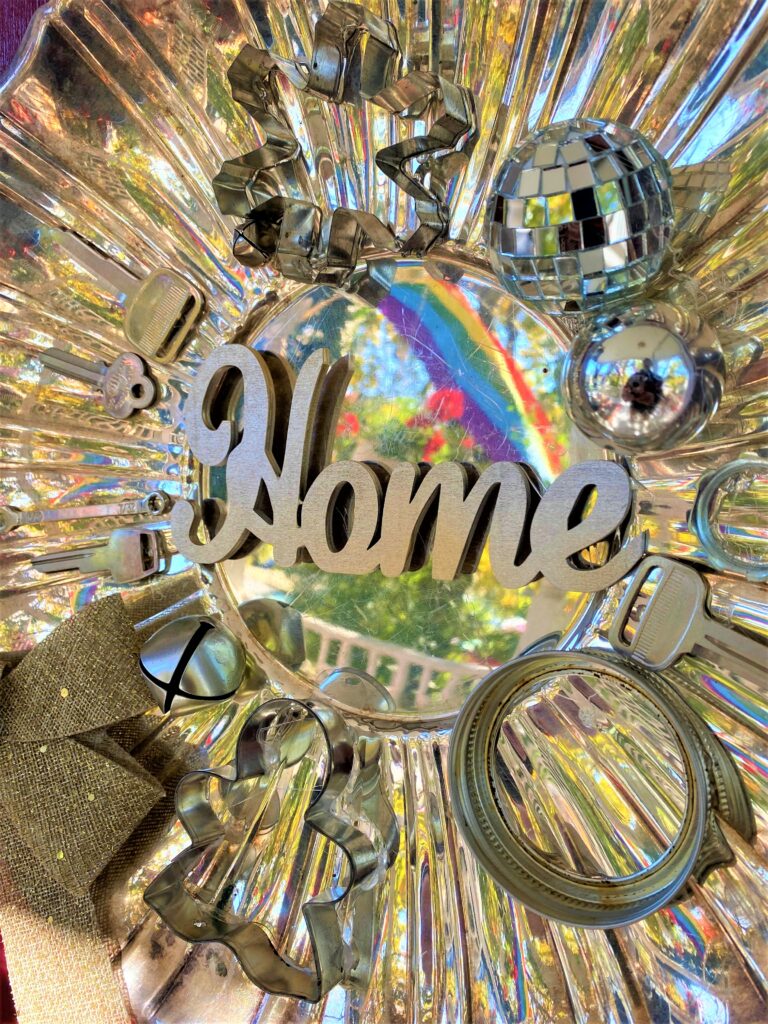
The Home cut-out came in black, so I spray-painted it with silver and gold tones to match the look and to add more reflectiveness. Use your glue gun to secure your word in the center.
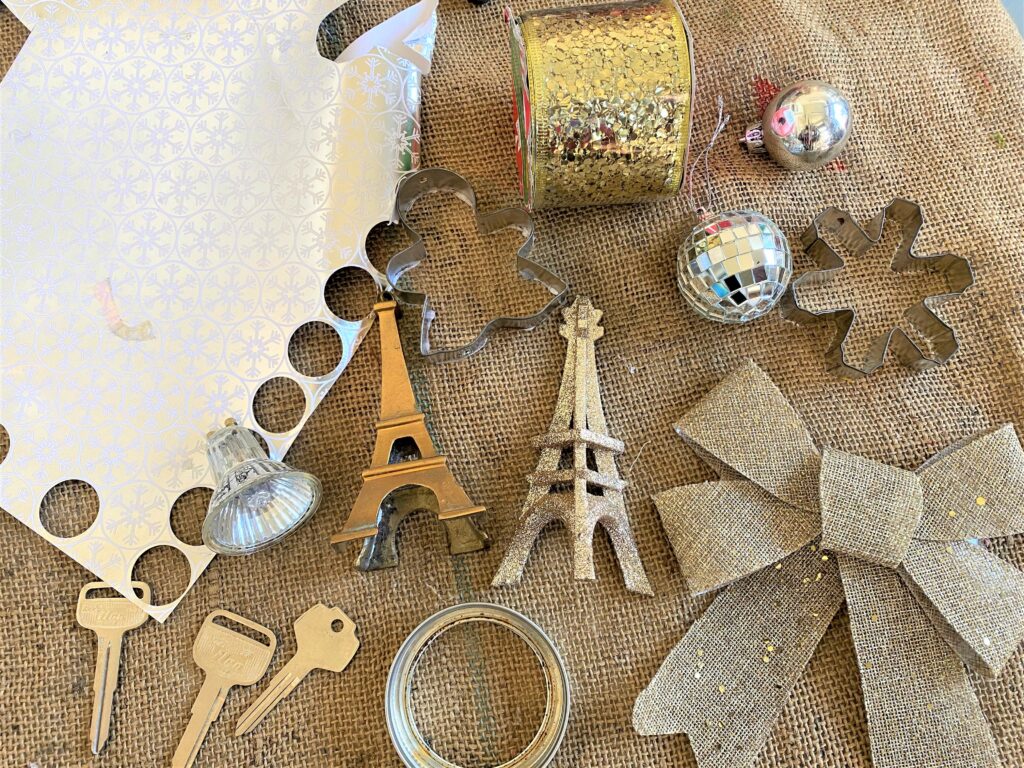
4. Add reflective items to add sparkle
What items do you have on hand that are silver and/or gold?
Keys, cookie cutters, ornaments, jingle bells, a jar lid, and even a small wrench were added to this wreath to add more bling and visual interest. Use your handy-dandy glue gun to secure your items.
5. Top of with a shiny bow
Using ribbon in gold or silver tones, create a bow then glue in place. There is something about adding a bow that helps to declare your creation as a wreath.
Now, your shiny, upcycled front door decoration is ready to offer a sparkling welcome to all who visit you!


Tim Kime
Artist, Motivational Speaker, Life Coach