Don’t Tighten Your Belt: Use it to Transform an Item!
Belts are a great fashion accent—and not limited to clothes.
Here are five creative and easy DIY projects that repurpose old belts. Don’t drop your drawers, rather head to Goodwill for great options.
But before, we review all five options – you need to snag a belt (or two!).
No need to tighten your belt with all the great deals at Goodwill.
Shopping at Goodwill is always fun because you are certain to find your good there—good as in good deals, good items and good service.
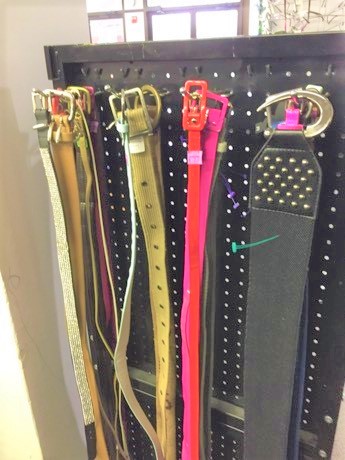
You have two great places to pick out belts: both the Men’s AND Women’s Sections at any Goodwill Retail Store.
Four of these five DIY projects used leather belts; while the fifth transformed a canvas one. I discovered that the Women’s Section had lots of skinny belts with accents on them that helped to add personality to the pieces.
After selecting your belts, head over to the Home Section to grab a mirror with a flat frame and then to the Housewares Aisle to pick up a glass vase, clock, pie tin and coasters. The more you shop, the more items you will find that could be transformed with a belt or two to make really unique items for your home or for gift-giving.
Level: Teens and adults
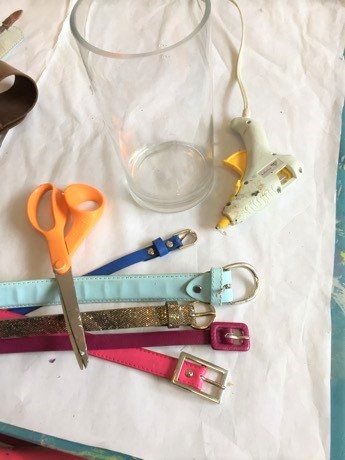
Items needed:
1. Various leather belts
2. Mirror
3. Clock
4. Coasters
5. Vase
6. Pie tin
7. Buttons
8. Scissors
9. Glue gun & glue sticks
10. Spray paint
11. Chalk board paint
Time requirement: 30 to 60 minutes each, depending on project
Cost: $5 to $30 based on project
$7 for mirror
$5 for clock
$3 for vase
$1 for pin tie
$2 for coasters
$2 to $5 per belt
$5 for chalk board paint or spray paint (lots left over for more projects!)
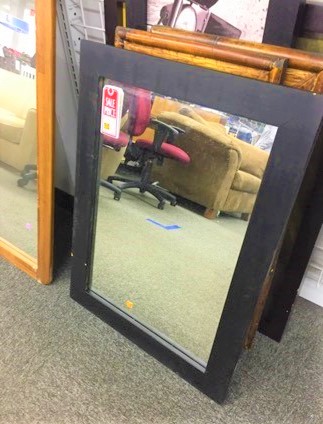
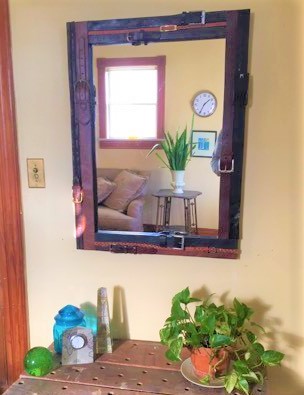
Option A: Black belt mirror (with brown, too).
A flat frame mirror is ideal for this upcycle project.
I lucked out by finding a mirror than had a black frame so the edges blended in with the belts’ darker tones. You may want to paint your frame a dark tone, too, so it “disappears” into the background.
Step 1: Layout your belts
Arrange your collection of belts around the mirror frame to ensure the front side is covered by the belts. The leather used for the belts was in various shades of brown and black.
The final design chosen had a black belt and a brown belt next to each other along the top, bottom and both sides.
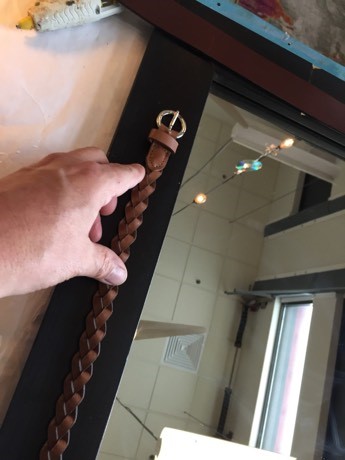

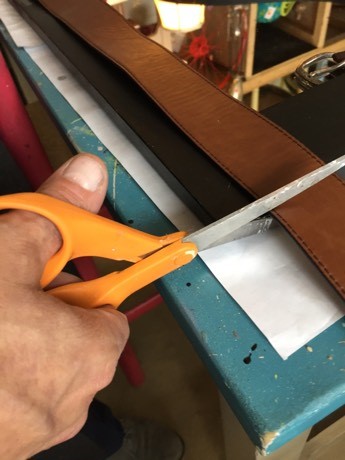
Step 2: Trim to fit and glue in place
The jewels of your transformed mirror will be the belt buckles.
After placing the buckle where you want it to go, cut off the belt where it lines up with the frame’s edge.
With your glue gun, secure this part in place. Using the belt part that was cut off, insert it into the buckle as though it was around your waist so it fastens and lays flat.
Glue this in place, along with the buckle then cut off any access belt from the other end at the edge of the opposite frame’s side. Line up the next belt and repeat this step until your mirror is completely covered.
Design Tip: For visual interest, I placed the belt buckle’s opening facing opposite directions along the same side. This allowed the belt end inserted into the buckle to point in opposing directions.
Step 3: Fill in the gaps
Given the width of the belt, you may want to use a third, thin belt in between.
Again, glue in place, trim the edge, fasten the belt, glue in place then trim again. Think of this part of the project as putting together a puzzle.
Step 4: Hang and smile
There are some many places to display this funky transformation.
An entry way is wonderful and a mirror is always welcome there so you may check yourself out as you leave your place.
Given the look of this project with its brown and black tones and leather textures, I thought it looked more masculine so this makes a memorable gift for Father’s Day or birthday gift for the man in your family.
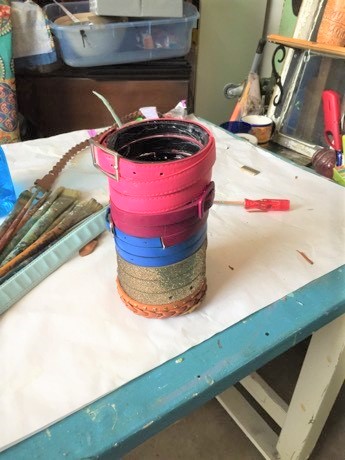
Option B: Stylish Vase/Container
This DIY project works best with a round, tall vase that is straight up from top to bottom and with a flat surface. Also, thin belts are good options for it to allow more material to wrap around the vase.
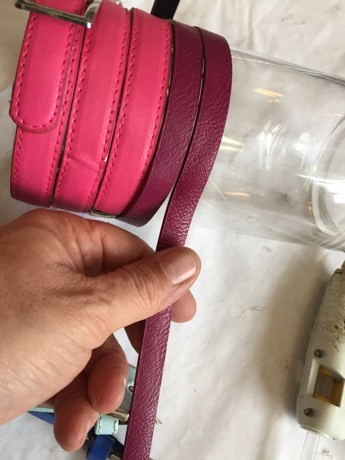
Step 1: Start at the top
- Cut off the end of your belt where the holes are.
- Insert this piece into the buckle.
- Starting at the top, use your glue gun to secure into place along the top edge and slowly wrap it around the vase.
- Glue as you go until you come to the end.
- Repeat with the same steps of cutting the belt and inserting the end into the buckle and glue in place.
- Do so until the entire vase is covered.
Step 2: Button up the ends
As you wrap the vase with the belts, there may be places where two belt ends come together. To hide these, glue on a button.
Step 3: Spray paint (optional)
The belts used for this project were various colors. When it was done, the multiple tones together was not as charming as I preferred so I sprayed on a coat of crisp white paint. The paint made all the belts match so that your eyes focus on the shapes of the buckles and buttons, the belts’ textures and the lines.
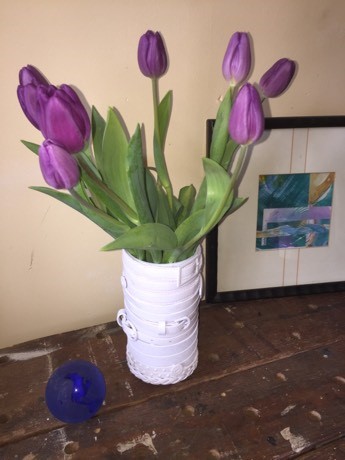
Step 4: Add flowers, utensils
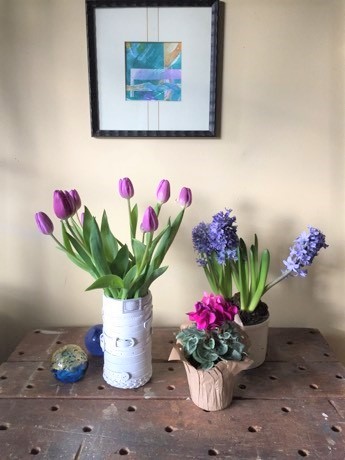
Your belt vase is now ready to serve its role as a stylish container! Add your favorite fresh flowers. Or what about adding cooking utensils then place it on your kitchen counter?
It is great at holding paint brushes, scissors and other arts & crafts tools.
Option C: Cool coasters
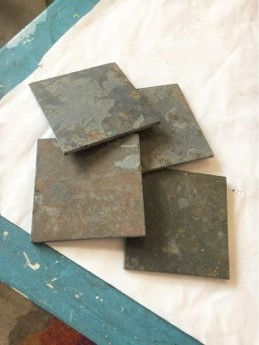
Pick up square-shaped coasters for this next project. Don’t worry about the color as you they will be covered by belt pieces. A set of four was created as it seems that most coaster sets come in fours.
Expert tip: If you don’t find square coasters, you could use square bathroom tiles for this project, too.
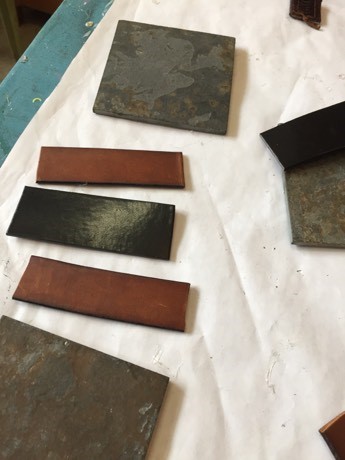
Step 1: Pick your pieces
What is great about this upcycle is that it uses some of the leftover belt pieces from other projects.
With a sharpie, trace the coaster on the pieces to be used then cut them with your scissors.
Step 2: Determine your design
- Place your cut pieces on each of your four coasters.
- To ensure they all match and look cohesive, move around the various pieces so that parts of one belt are on each of the coasters.
- When I laid my pieces out, I wanted a pop of color so cut a bright blue belt then added a pieces so all the coasters had part of it.
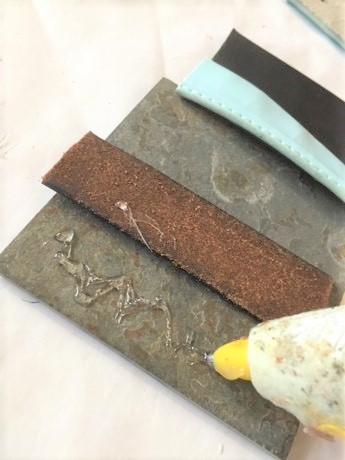
Step 3: Glue into place
With your handy glue gun, adhere your various belt pieces in place on the coasters.

Step 4: Pour your coffee and enjoy!
That’s it…it is that easy. These make the perfect house warming or hostess gift because everyone uses coasters and will love these eye-catching, funky ones!

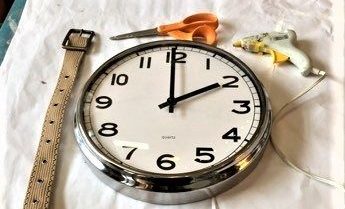
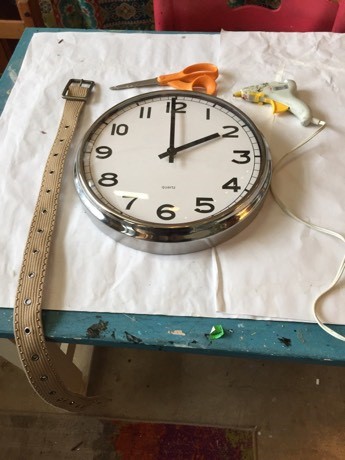
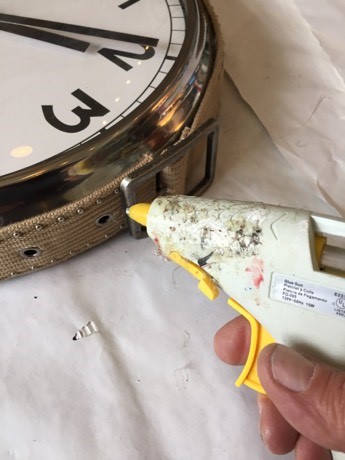
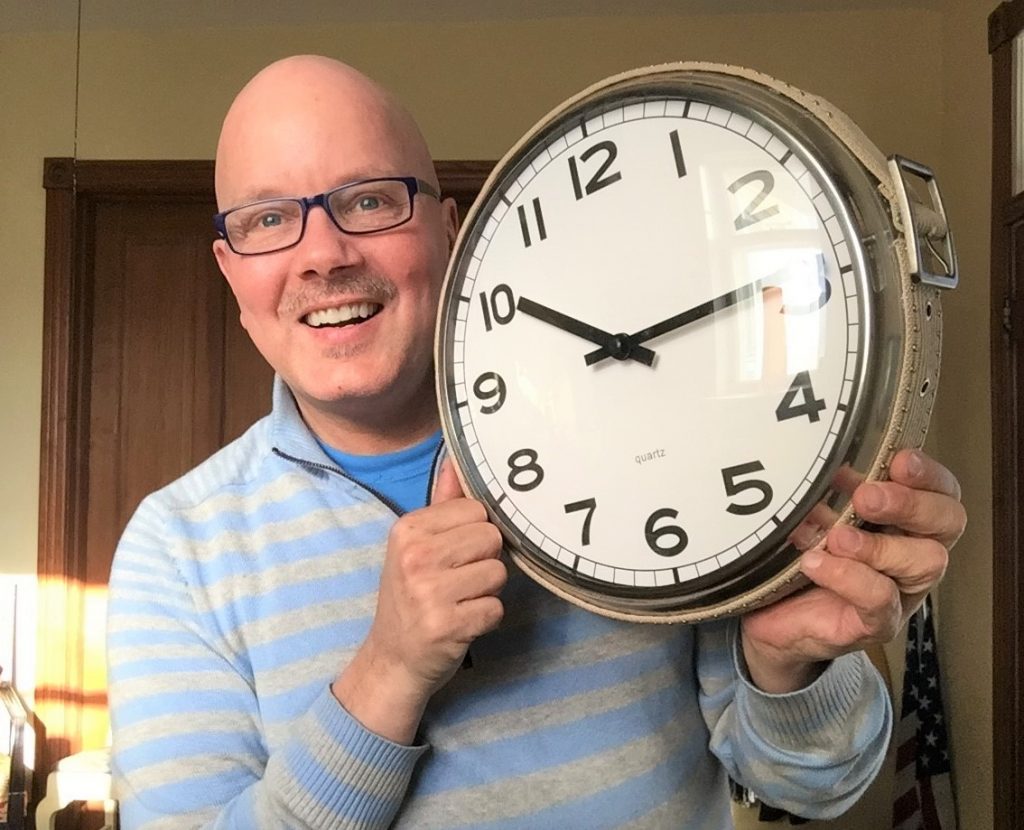
Option D: A tight time piece
Select a circle-shaped clock with a flat edge to pair with a cool belt.
Step 1: Wrap the clock
- Place the clock in the center of the belt.
- Ensure the belt touches all edges.
- Ideally, you will be able to buckle the belt and the clock will fit inside. If not, unbuckle the belt and wrap it around clock.
- Place the buckle at either the three o’clock or nine o’clock position so that you are able to see it when it hangs on the wall.
Step 2: Glue as you go
- Starting with the buckle, glue it into place then move around the clock, securing the belt as you go.
- Once your have the entire clock edge covered, you may need to trim off the belt’s end so it hides under the buckle.
Step 3: Hang ‘er up!
Using a nail or picture hanger, proudly display your fashion-forward clock. If it has an alarm, be sure to set it for more DIY time!
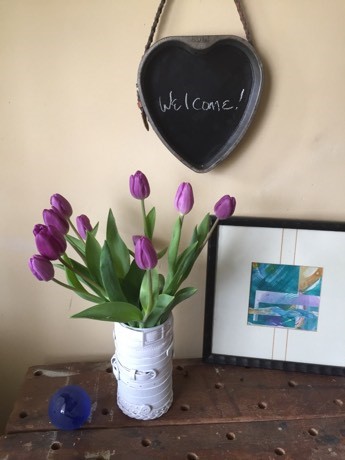
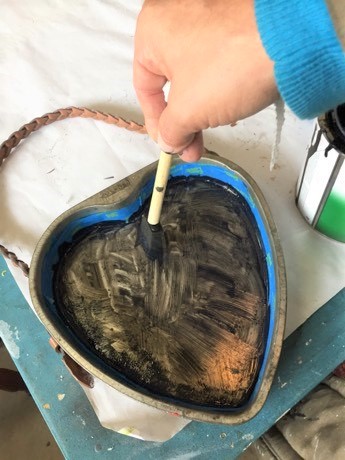
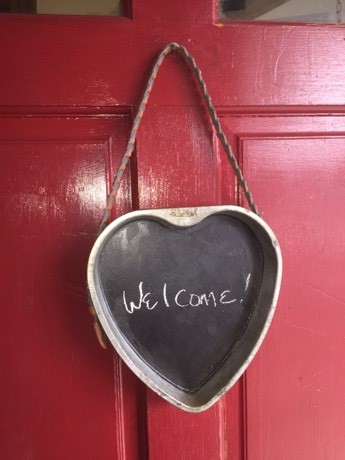
Option E: Country chalk board
Make sure your message gets read with this whimsical transformation. Pie tins have universal appeal and remind us of Grandma’s kitchen. I struck gold by finding a heart-shaped one.
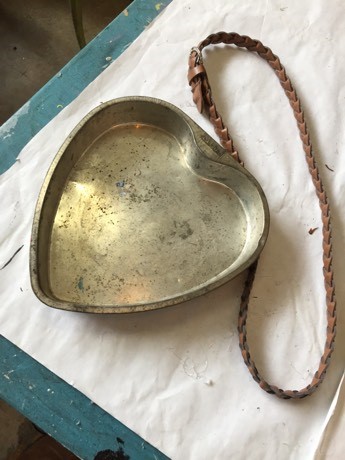
Step 1: Belt one on
- With a thin belt, place your pie tin right side up and inside it to ensure the buckle will attached to one of its sides.
- Grab your ever-ready glue gun and secure the belt in place along three-quarters of your tin.
- Don’t attach it to the top quarter of it as this part of the belt will be used to hang your piece.
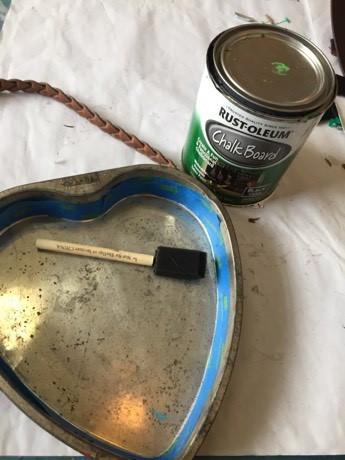
Step 2: Chalk paint to the rescue
- Place painter’s tape along the side edge of your tin to protect it from the paint.
- With a small foam brush, apply two to three coats of the chalk board paint ensuring solid coverage.
- Let dry for several hours or, ideally, overnight.
- Remove the tape.
Step 3: Write a message to display
With a piece of chalk, write a message to your family and friends.
I wanted to hang my transformed pie tin on my front door so added the word “welcome” to it.
This truly will make you smile as you come and go!
There are so many other ways to upcycle belts. What ideas do you have? Please share your transformed pieces with us as we’d love to see your creations and be further inspired!

