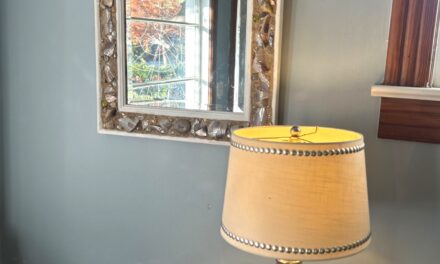
See the light by giving an old lampshade a new look with a scarf or blouse. So many great ways to transform it…here are three ideas resulting in totally different looks.
Ability level: Moderate to advanced
Age Level: Older teens and adults
Items needed:
- A lamp with shade
- A scarf or blouse
- 1 can of spray paint
- Painter’s tape
- Scissors
- Glue gun & glue sticks
- Clothespins
- Decoupage (optional)
Time requirement: 4 hours (not including paint drying time)
Cost: Approximately $22
- $10 for a lamp with shade
- $3 for scarf or blouse
- $5 for spray paint*
- $4 for painter’s tape*
*You’ll have lots left over for future transformations!
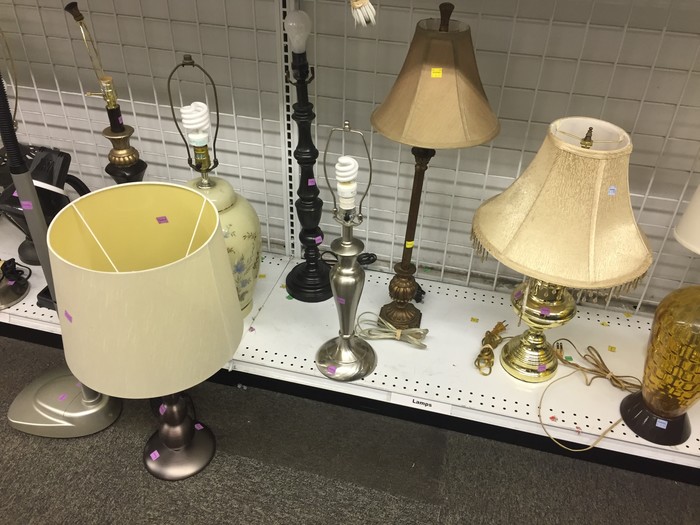
Step 1: Get to Goodwill: So many options (so little time)!
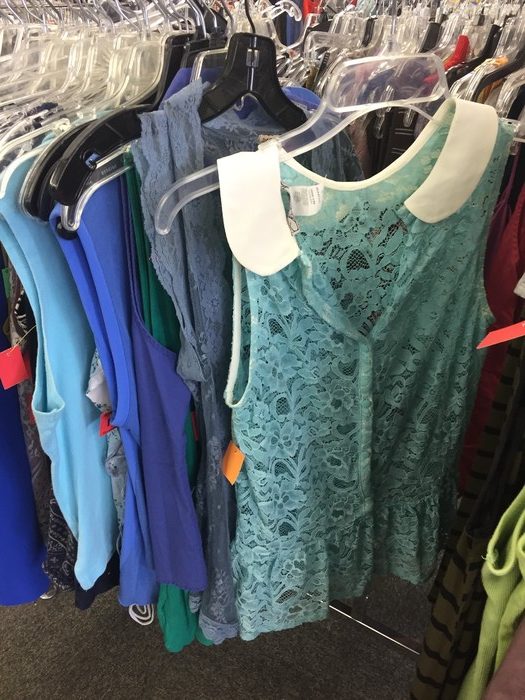
In the Housewares Section of any Goodwill retail store, you will find many interesting lamps and shades awaiting a new life. While sometimes sold separately, hunt for options that have both the lamp and a shade. This will save you some money on an already well-priced item.
The shade you select will need to have wires or framing along the top and bottom but also the sides so when the current material is removed, you have a frame on which to create. Also, choose a lamp base with an interesting shape or size, not worrying about its current color.
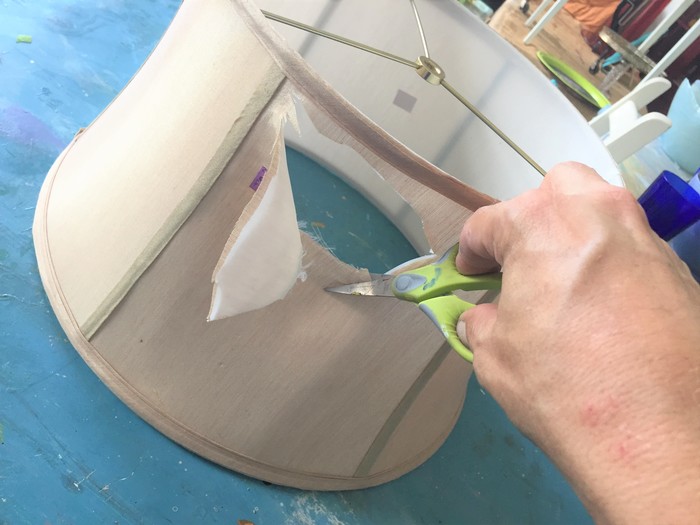
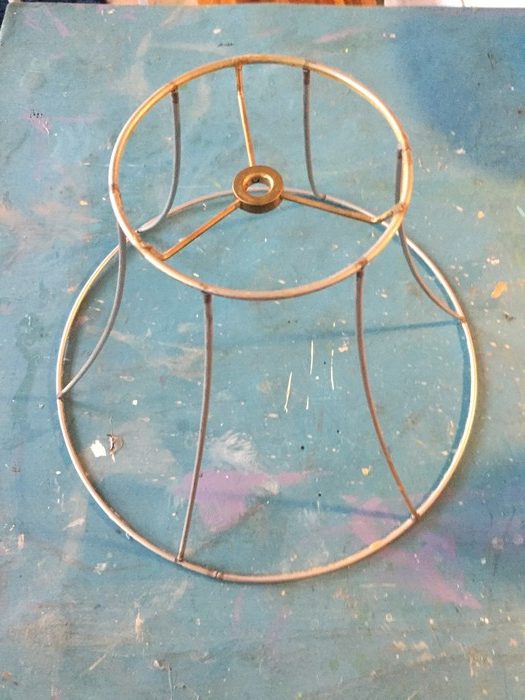
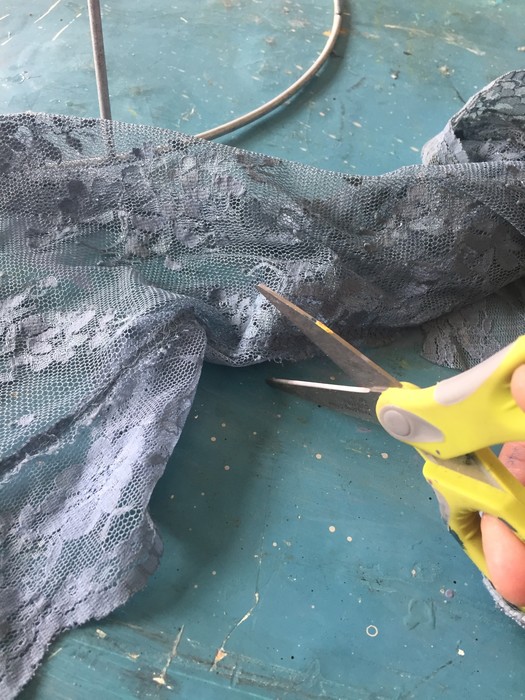
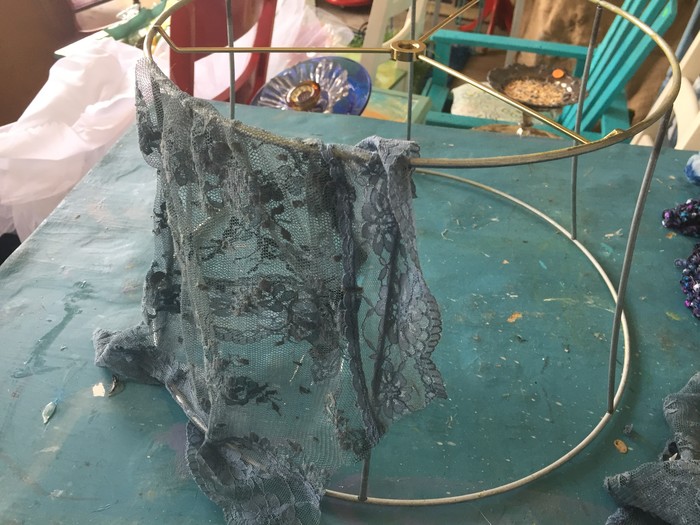
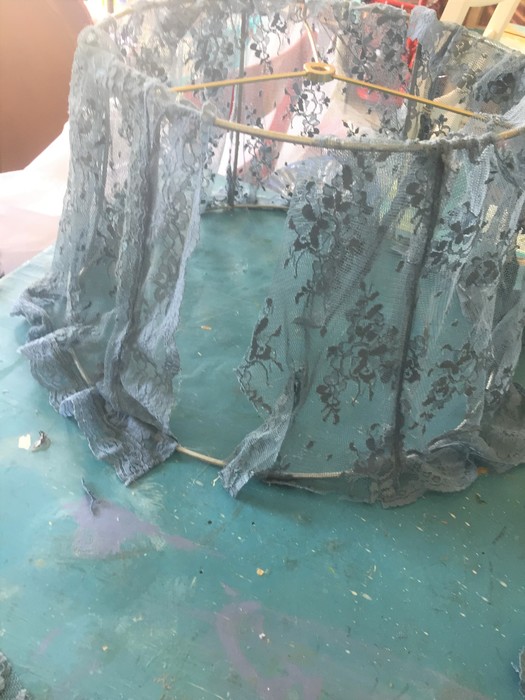
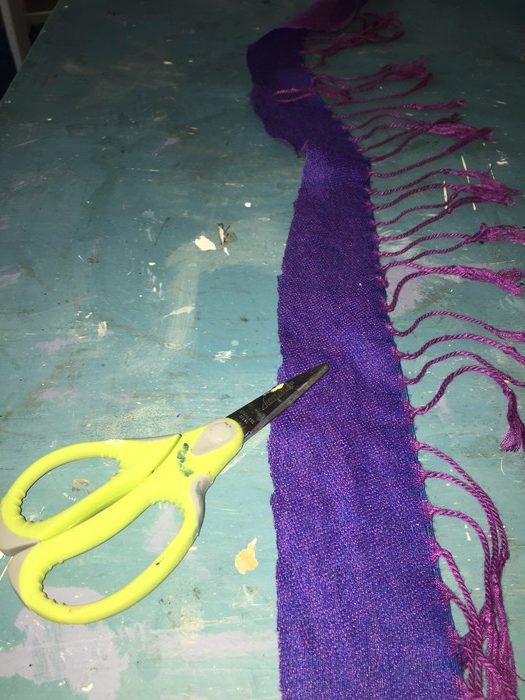
Step 2: Cut away the old
Use your scissors to cut the current fabric on your shade. Carefully remove all the material so only the frame or “skeleton” remains.
Step 3: Wrap up the reclaimed
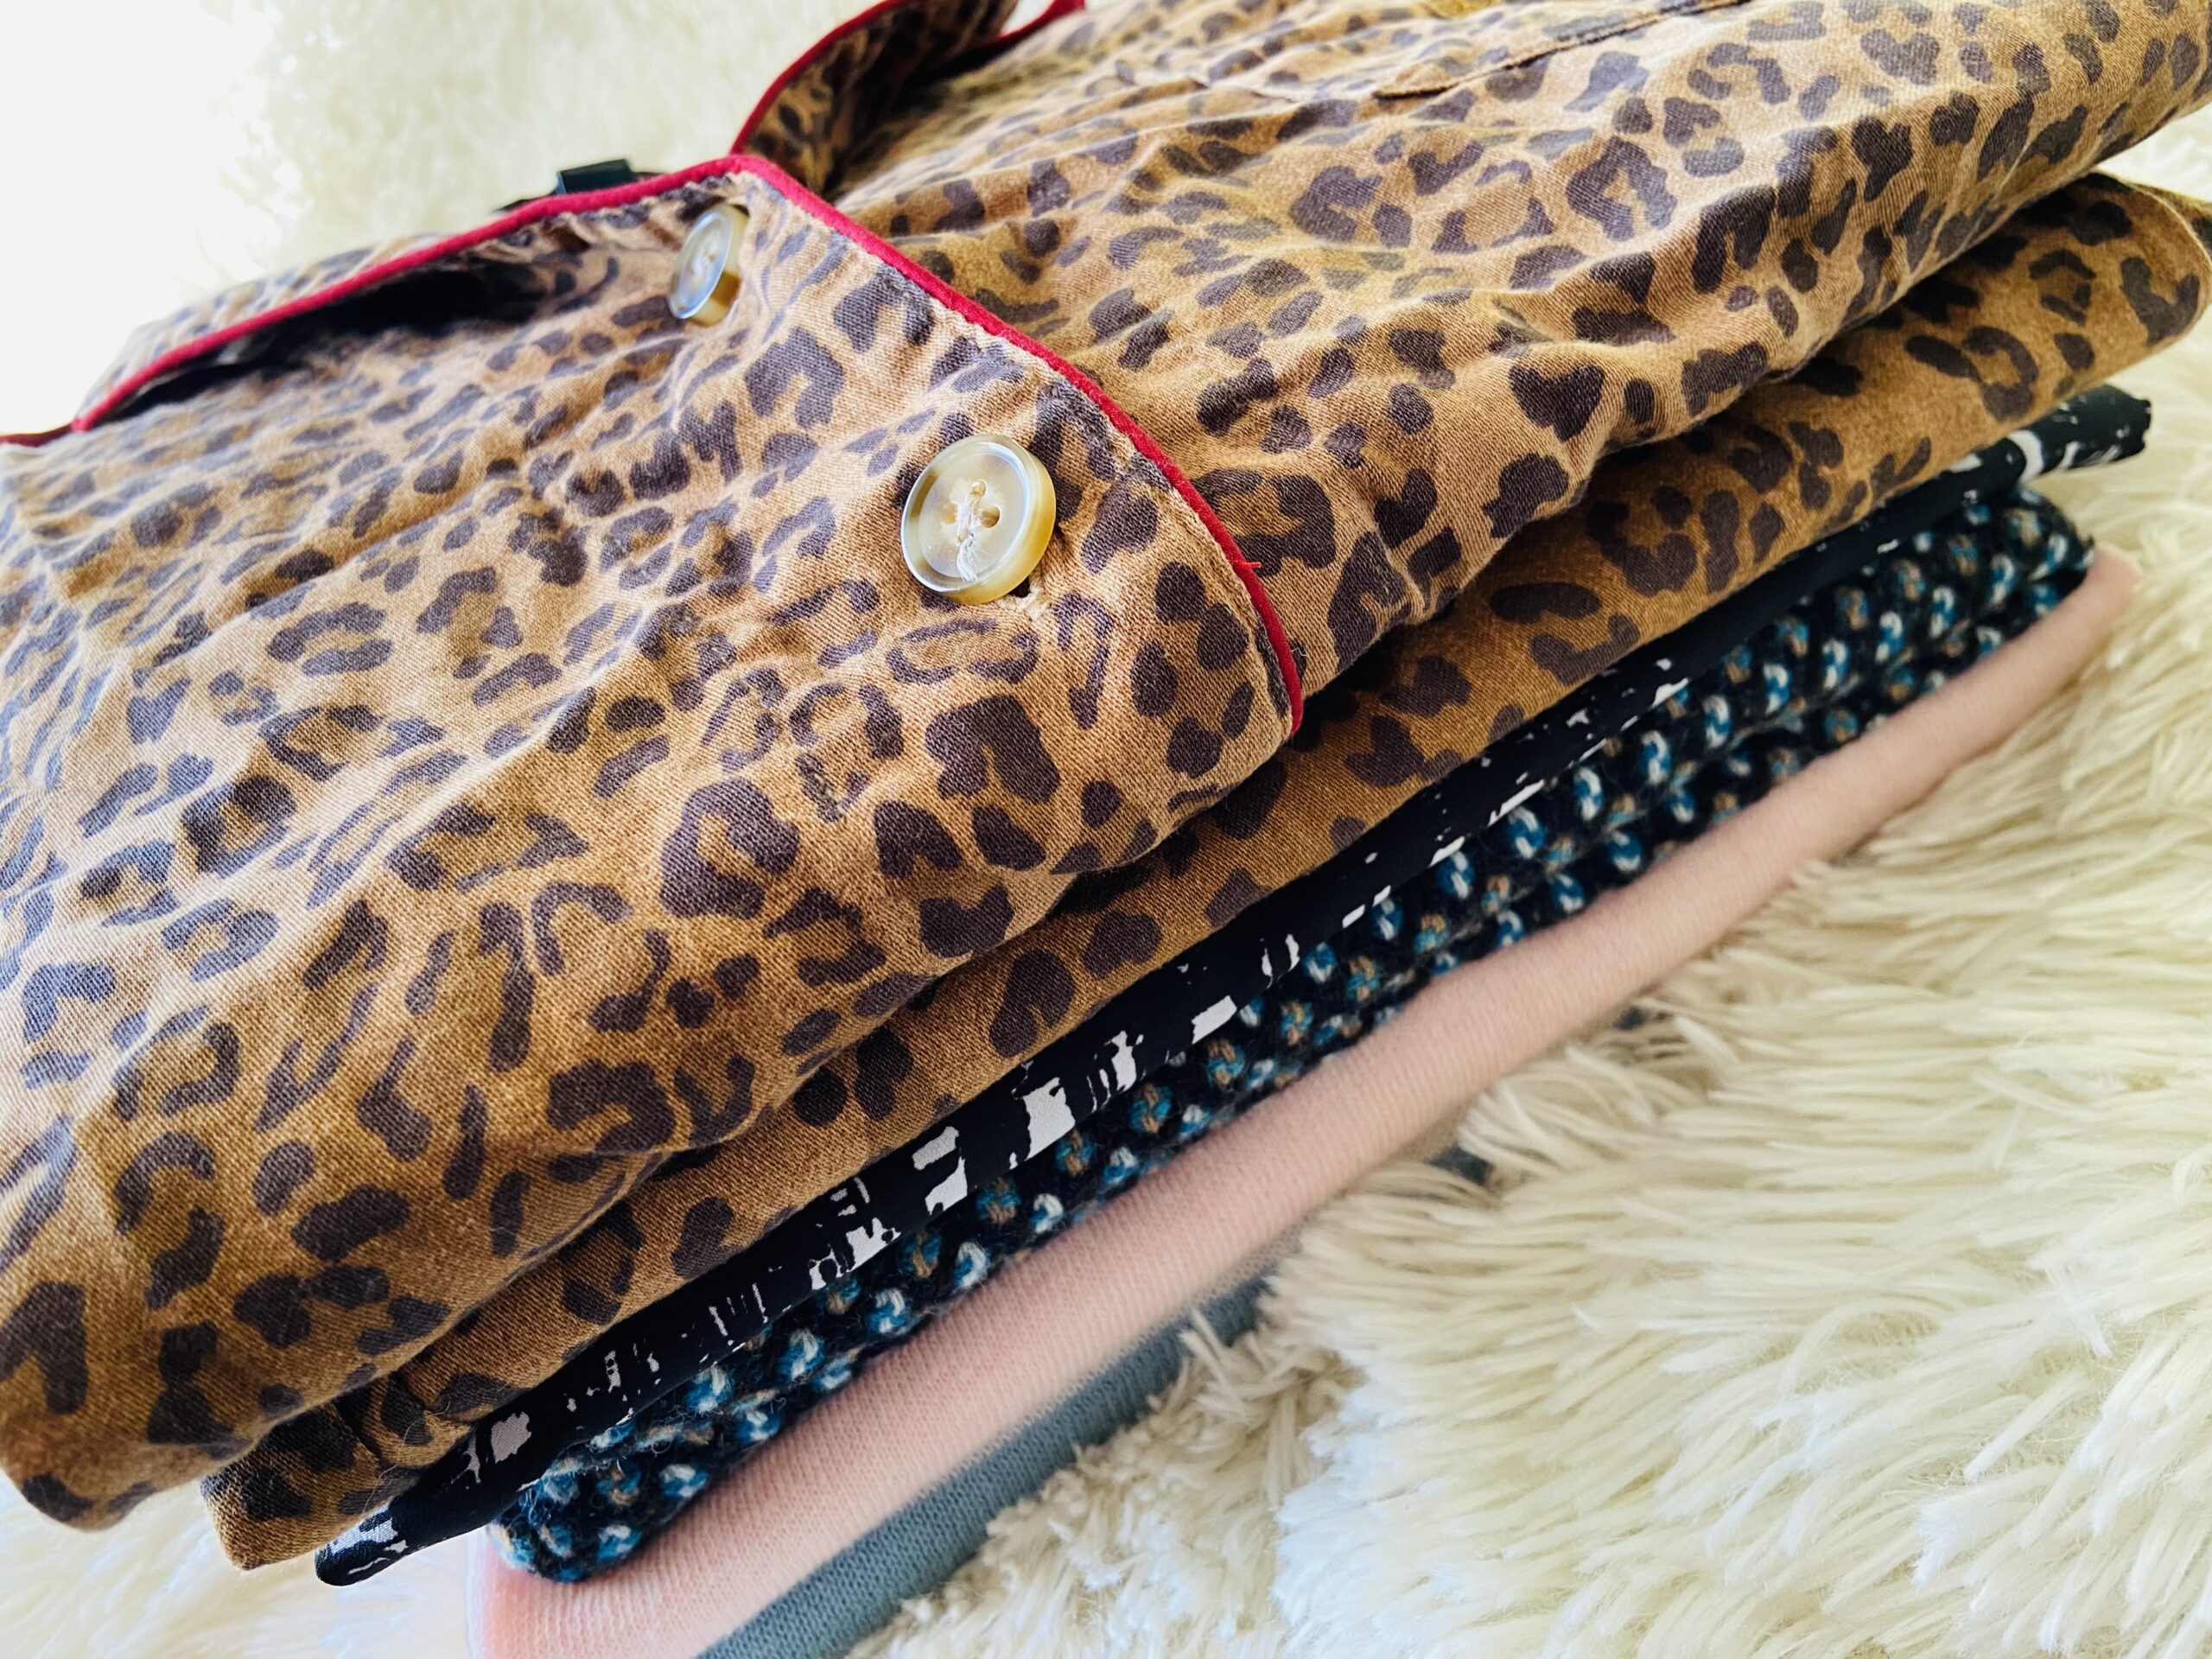
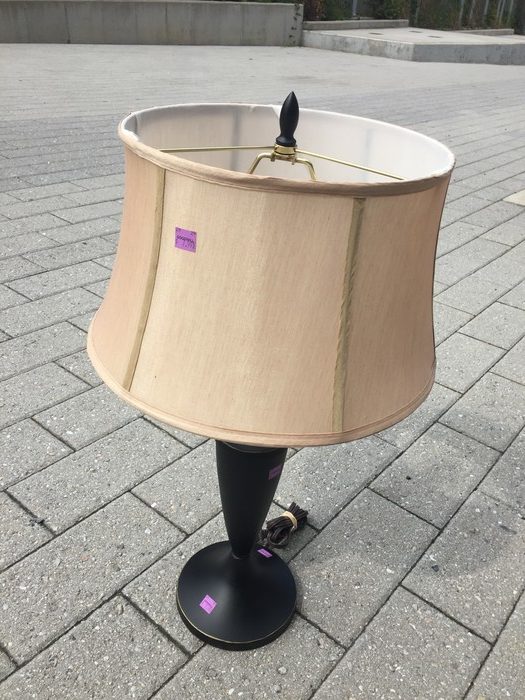
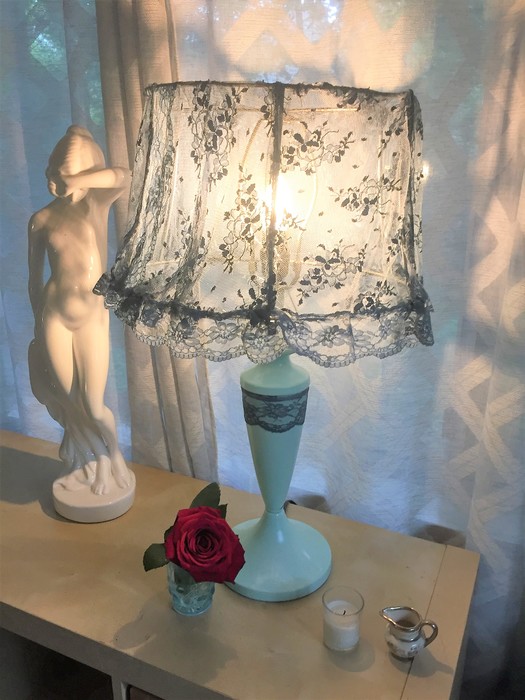
Option 1: Hopeful Romantic—Cut a Lace Blouse
Look in the Women’s Apparel section at your favorite Goodwill store for a lacey blouse for this option. Based on the item you find, you may need to cut off the sleeves and other pieces leaving behind the lacey fabric. Use your glue gun to adhere parts of the fabric so that the entire shade frame is covered.
With my project, the blouse I found had a nice edging that I used around the perimeter of the shade. The look for this option is truly “shabby chic,” so its imperfections add to its charm. I did my best to line up the blouse seams with the vertical parts of the shade frame. I also bunched the fabric to add texture and visual interest.
Consider saving borders or fabric pieces to add to the lamp base so the shade and base truly feel connected and cohesive.
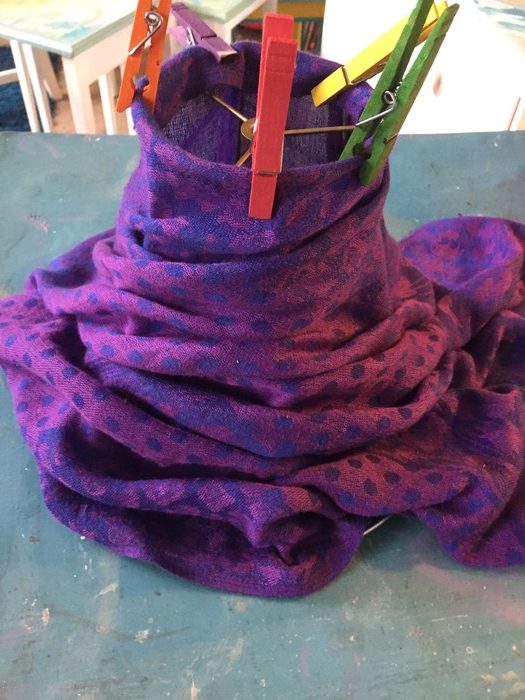
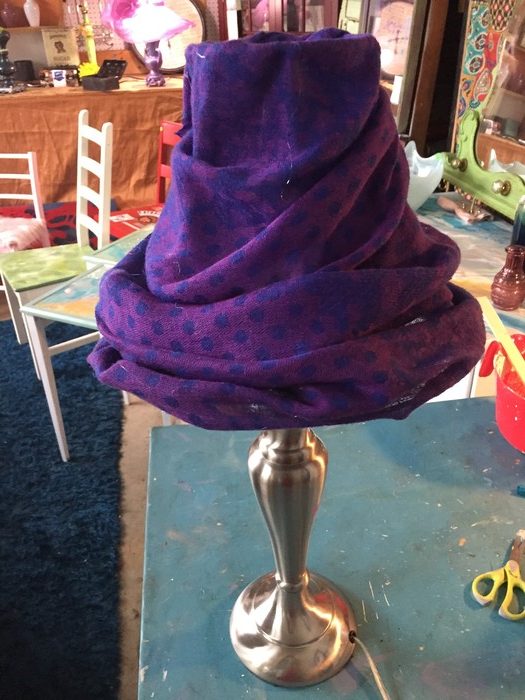
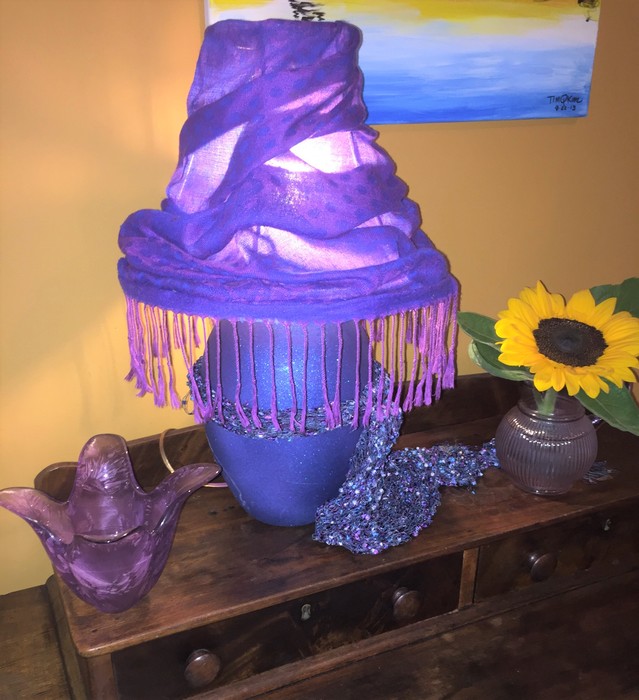
Option 2: Fabulous Folds—Wrap a Scarf
For this option, wrap your scarf around the lampshade using clothespins to hold in place as you go. Based on the size of your shade and the scarf, you will likely need to cut the scarf to remove excess material. However, part of its whimsical look is the layering of the fabric. Once you have the look you desire (with lots of draping and overlapping), then use your glue gun to secure along the top while removing the clothes pins as you go. Then turn your attention to the bottom, doing the same. To hold some of the layers/folds in place, you will need to secure the material to the frame by gluing from inside the frame.
When done with covering the shade, consider adding a border, ideally with tassels or scarf details, along the bottom border to give it a finished look. For my shade with this option, I cut all the tassels off first, leaving an inch or two of fabric. Again, use your glue gun to secure the border as you go.
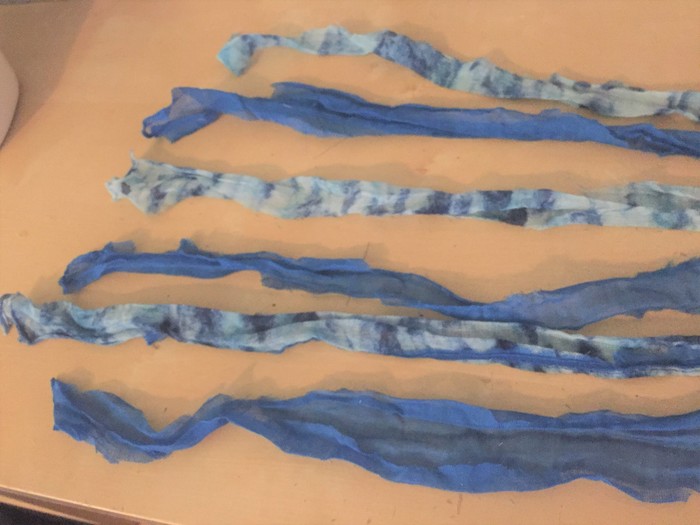
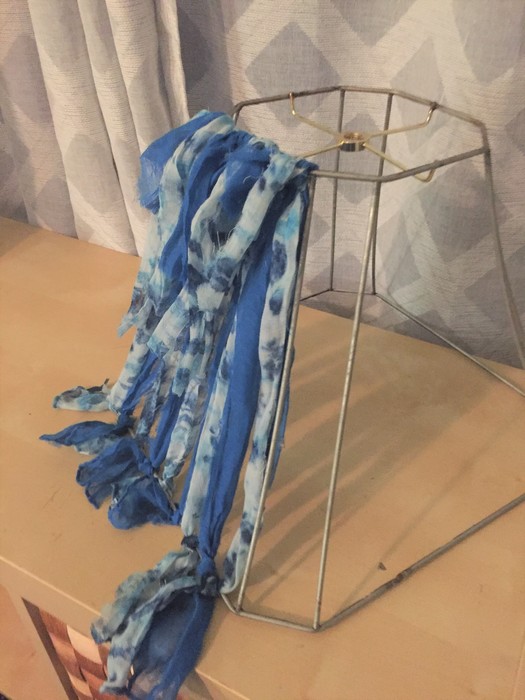
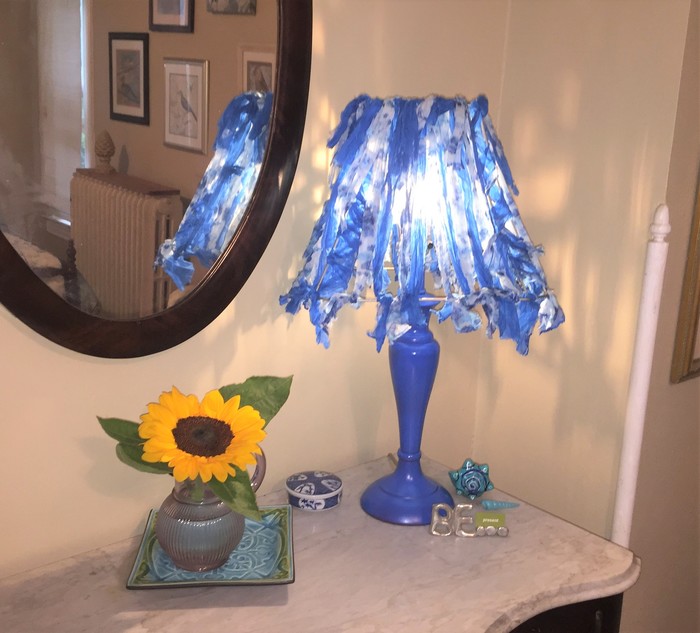
Option 3: Bohemian Rhapsody—Use Scarf Strips
Last but not least, consider cutting a scarf into strips. Ensure you measure the lampshade frame from top to bottom, and cut the fabric into strips at least five or six inches longer than the frame. After you have cut the fabric into the right-sized strips, of an inch wide, then start tying them to the frame with a knot at the top and bottom. Your top knots will fit more tightly given the angle and larger size of the frame bottom ring. You will need to adjust the spacing between fabric pieces to ensure they are even. This will be the most time consuming of the three options, however, it is truly so much fun with its bohemian look.
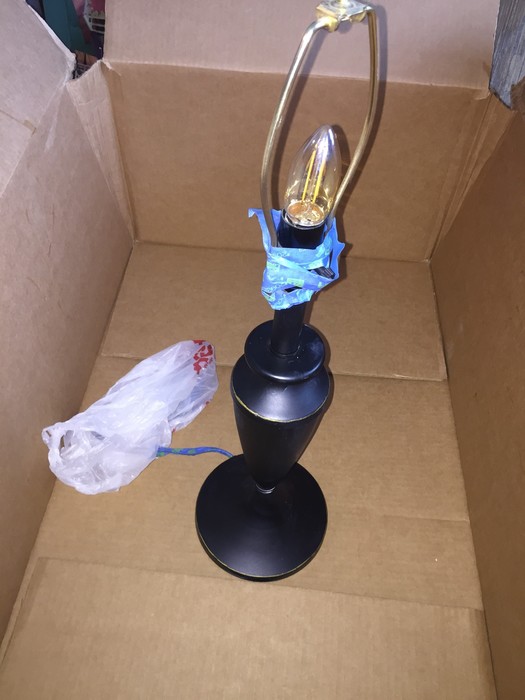
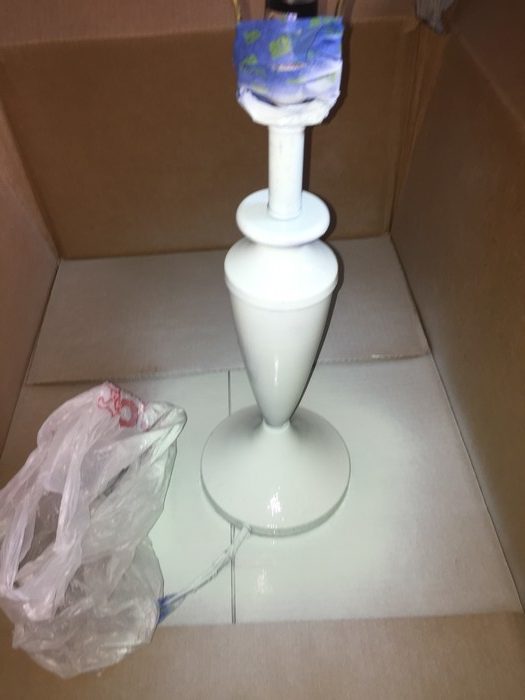
Step 4: Paint the lamp base
Now that your shade is complete, select a spray paint in a color that matches the hues of the blouse or scarf you used. There are so many options, so you may think about selecting ones in the same color family as the fabric covering the shade. However, you can go bold and pick a color on the “opposite” side of the color wheel for maximum pop. Before you paint, be sure to use the painter’s tape to cover the cord and light switch. You will want to paint on a couple of light layers, allowing time to dry in between. Remove the painter’s tape when completely dried.
Step 5: Think about embellishments
Based on the scarf or blouse used and considering the lamp base, you may want to add some embellishments to make your new lamp even more special. Save a piece of lace or fabric to add as a matching strip to the base. Or tie another matching scarf to the base for more texture and visual interest.
Step 6: Flip on the switch
Last step? Add a light bulb (consider a decorative one for a charming look), place your lamp in your favorite room then turn it on and receive many “oohs” and “aahs” for this one of a kind, decorative lighting piece. This makes a great and memorable gift, too!
Tim Kime is an artist, life coach, connector. He is President of Kime Leadership Associates offering executive coaching, meeting facilitating and motivational speaking. He is also Chief Creative Force of Transformation Junkies which upcycles furniture and other household items into functional works of art. He combined his two passions—unleashing the potential in people and transforming items with the launch of the Art of Possibilities Workshops. These workshops are part upcycling, part dreaming, part goal setting.