Give your feathered friends the first-class treatment with bird baths and feeders created from silver platters, dishes, and candle holders. This oh-so-easy project will add bling to your outdoor space and be sure to attract the attention of local bird flocks.
Ability level: Easy
Age Level: Kids of all ages
Items needed:
- Silver platters, silver candy dishes, and other items
- Silver candle holders
- Goop adhesive glue
- Painter’s tape
- Birdseed
Time requirement: 15 minutes (not including glue drying time)
Cost: Approximately $20
- $3-$5 per silver platter or candy dish
- $3 per silver candle holder
- $6 for glue*
- $4 for painter’s tape*
- $5 for bird seed *
*You will have lots of these items left over for more fun projects!
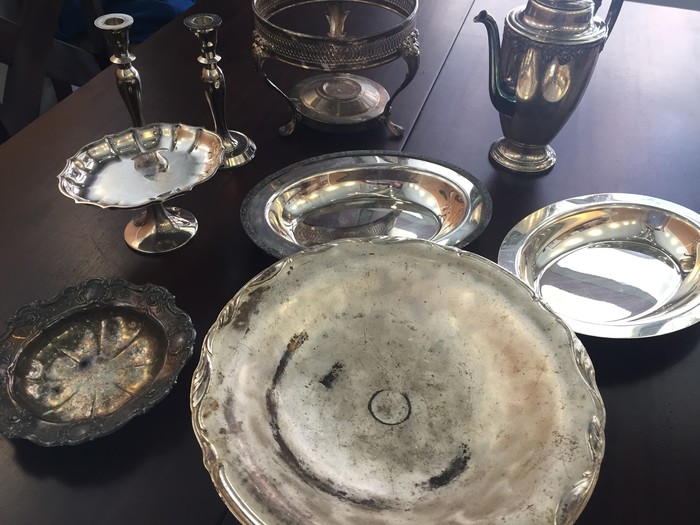
Step 1: Serve Up the Silver
Fly over (pardon the bird pun) to your nearby Goodwill store and head to the housewares aisle for this project. Look for silver platters, metal candy dishes and other “formal” serving trays from your grandmother’s era. Grab any and all silver candle holders to pair with them for this transformation so nice that you won’t have to wing it (okay that’s the last one).
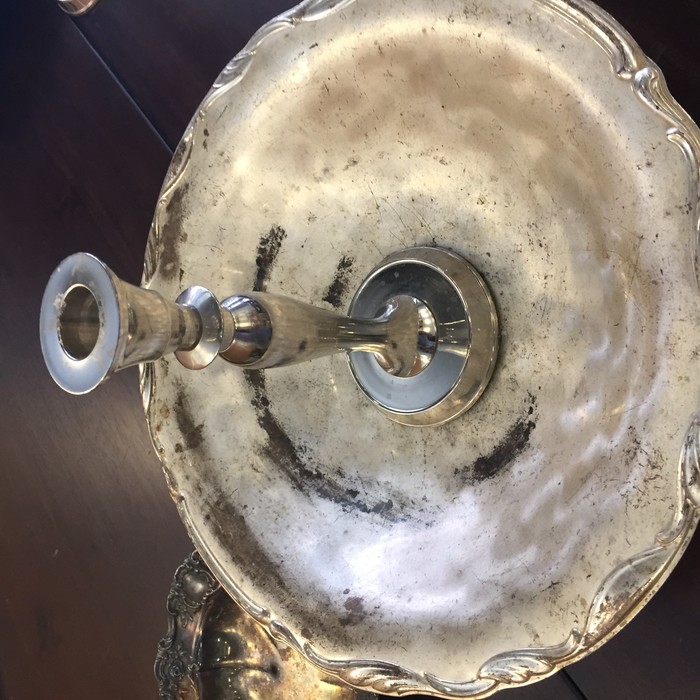
Step 2: Stack ‘Em Up
What makes this project so eye-catching are the beautiful tiered items. Don’t worry if your pieces are a little tarnished because that adds something special to the final look. Place a candle holder on a platter then top with a candy dish or combine several interesting pieces, in varying sizes, and give them height with the candle holders. Try various combinations until you achieve the desired look.
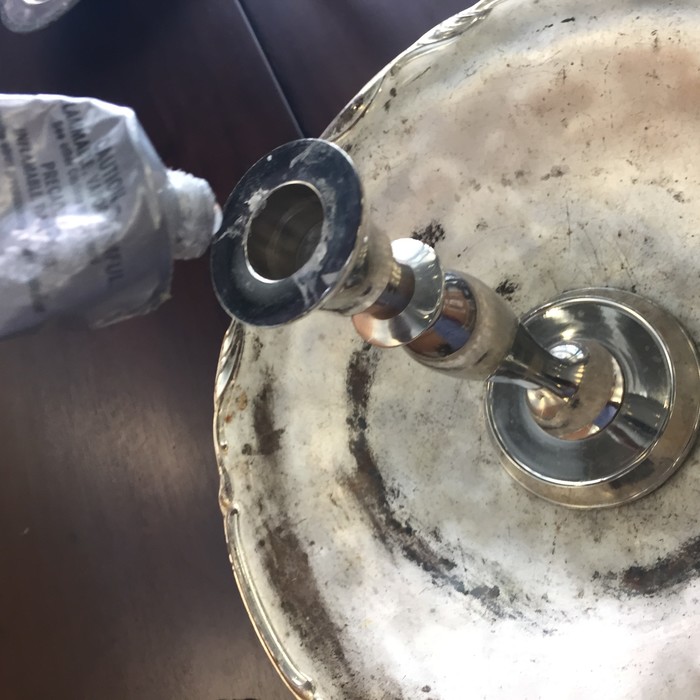
Step 3: Give It Glue
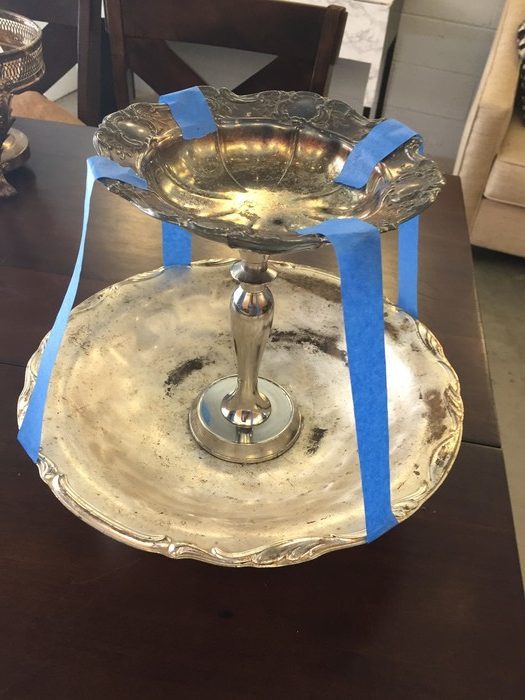
Once you create a staked design that you like, it is time to glue it all together. My preferred brand of adhesive for this project is “Goop” because it holds up so well when dried and is fine for outdoor projects. Add a good amount of it to the bottom of your candle holder then place it (the candle holder) in the center of your platter. Add glue to the top of your candle holder and place the next silver dish on top ensuring the candle holder is centered. For one of my pieces, I had a smaller but very sturdy raised candy dish so I build the piece from there with a larger platter on top.
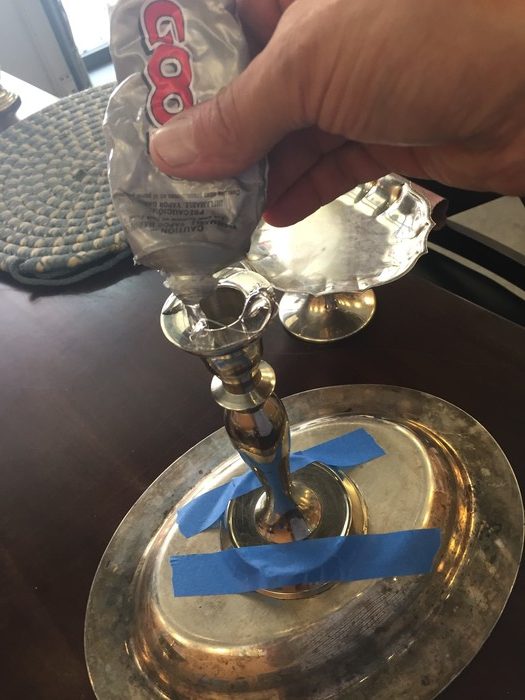
Step 4: Taping Time
Once you glue your selected pieces in place, you can slightly move them to ensure they are in perfect position. To prevent them from shifting while drying, use painter’s tape to secure them. Let this dry overnight, then remove the tape.
Step 5: Place in Your Garden to Welcome Friends—and Compliments
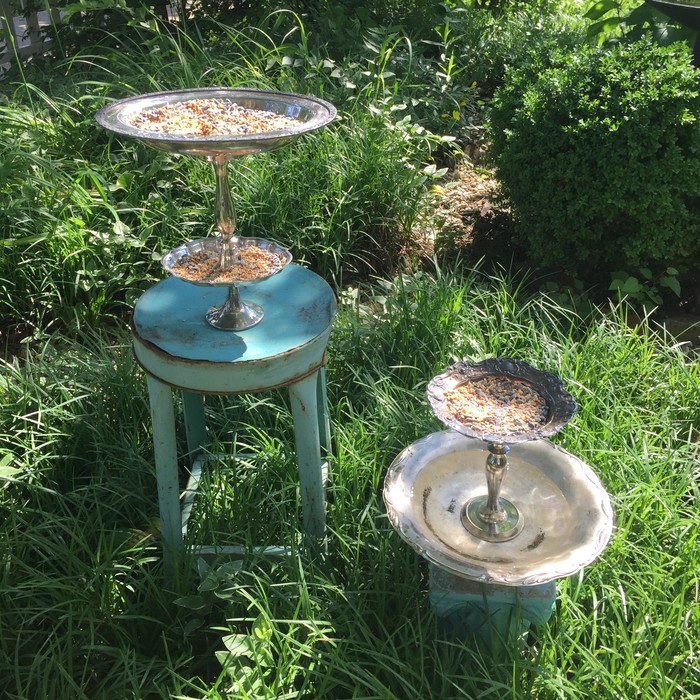
A random collection of silver pieces is now joined and ready to welcome feathered friends with elegance and style! Find the perfect spot in your outdoor space and add birdseed and/or water. To provide extra height, consider placing your beautiful bird feeder/bath on a ledge, cinder block or old stool or table. These shimmering and functional pieces are sure to make you chirp with delight, too!
Tim Kime is an artist, life coach, connector. He is President of Kime Leadership Associates offering executive coaching, meeting facilitating and motivational speaking. He is also Chief Creative Force of Transformation Junkies which upcycles furniture and other household items into functional works of art. He combined his two passions—unleashing the potential in people and transforming items with the launch of the Art of Possibilities Workshops. These workshops are part upcycling, part dreaming, part goal setting.


