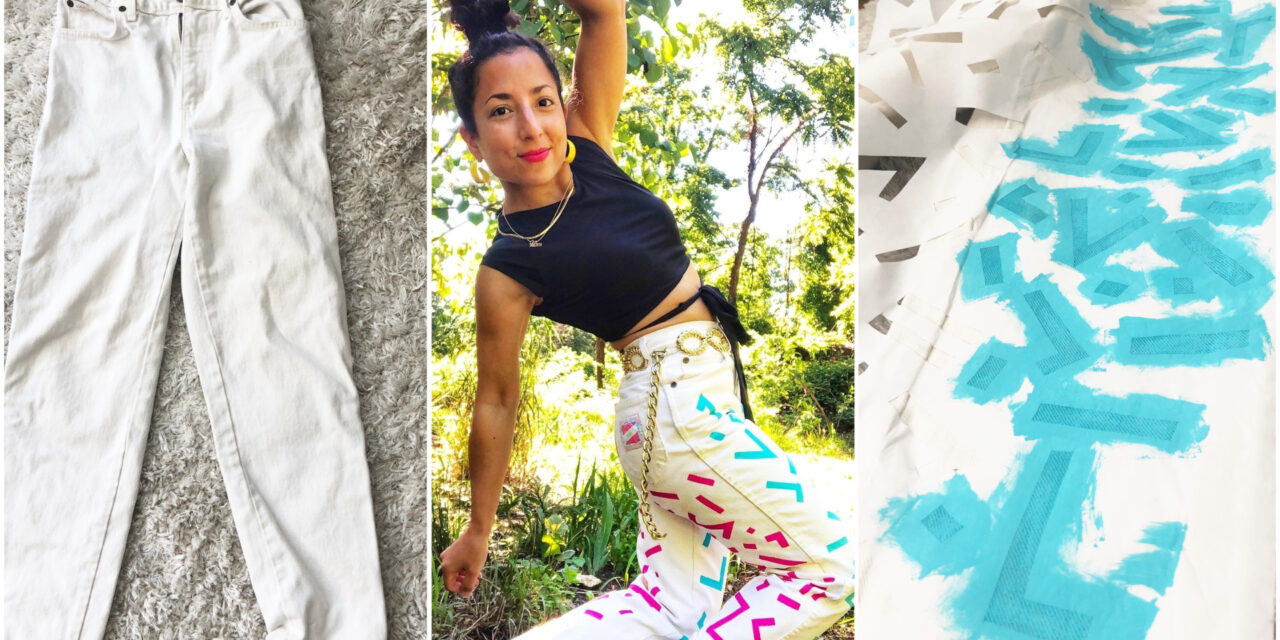
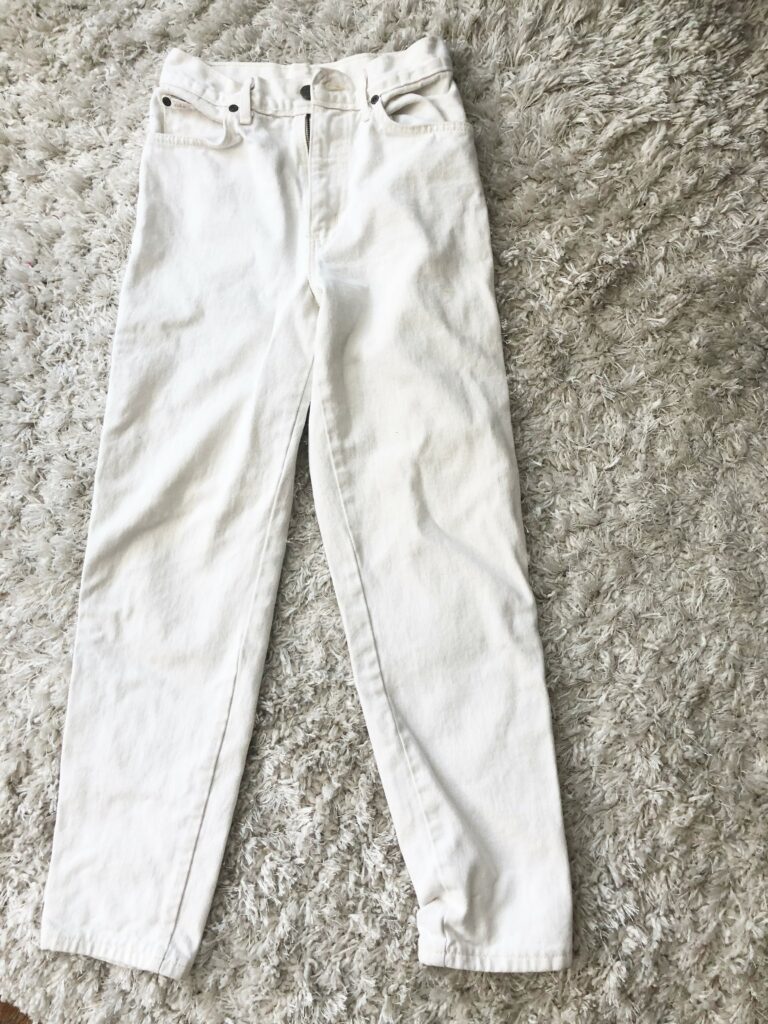
A few months ago, I thrifted the cutest vintage white pants in the kid’s section for under $5. Whenever I find vintage pants in my size, I snag them immediately, even if they’re damaged, because I wear a very unique size.

At the store, I did notice some yellow discoloring on one of the pant legs, but this didn’t deter me from making a purchase. To me, slightly damaged items still have lots of value. Any item can be cleaned, repaired, or transformed. All it takes is a little time and creativity.
Stains and clothing flaws have an unwarranted stigma. The fashion industry has taught us that only perfect, seemingly unworn items are of value and worth wearing. Damaged pieces, even barely stained ones, are somehow worthless. In my view, this could be far from the truth. Our clothing tells stories about ourselves and our lives. The wear and tear provide a glimpse of human history and experience. To me, stains and holes relay that story. The holes don’t make clothing trash – they provide clothing an opportunity to be transformed and live even longer lives.
Anywho – I digress.
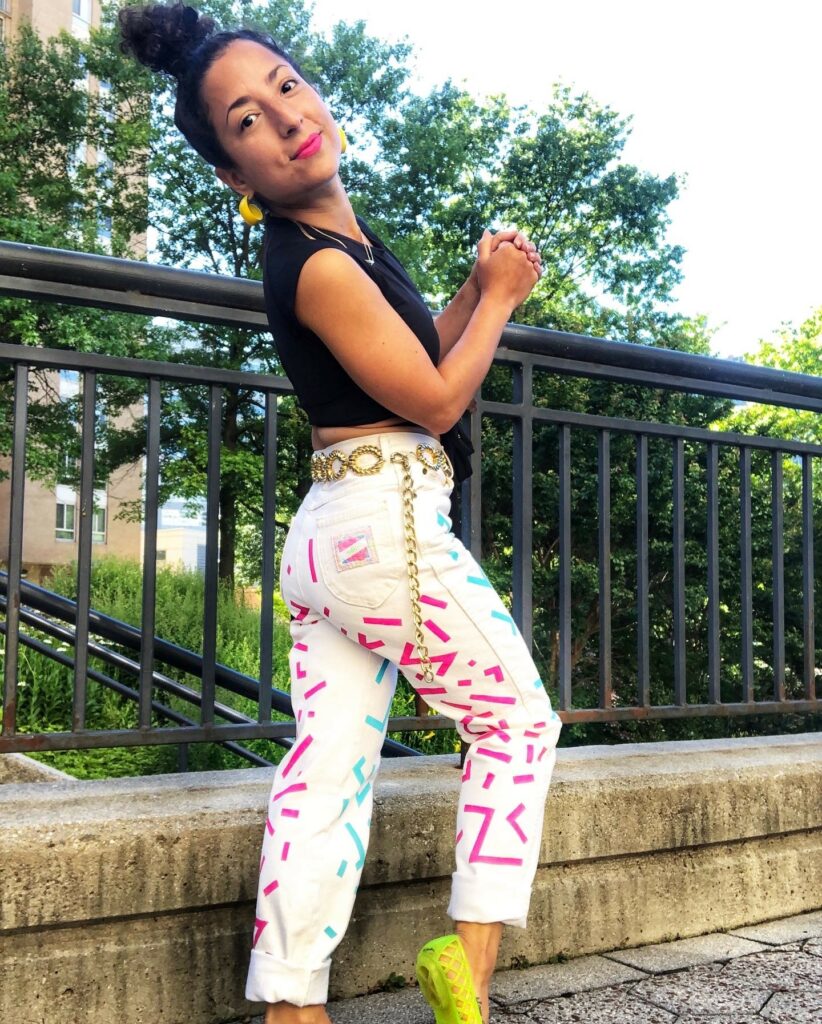
After careful brainstorming, I stenciled these pants with a vintage-inspired graphic pattern, harkening back to the show, Saved By The Bell. I love all things 1980s and 1990s, and found this DIY to be a perfect way to back tribute to that fashion history.
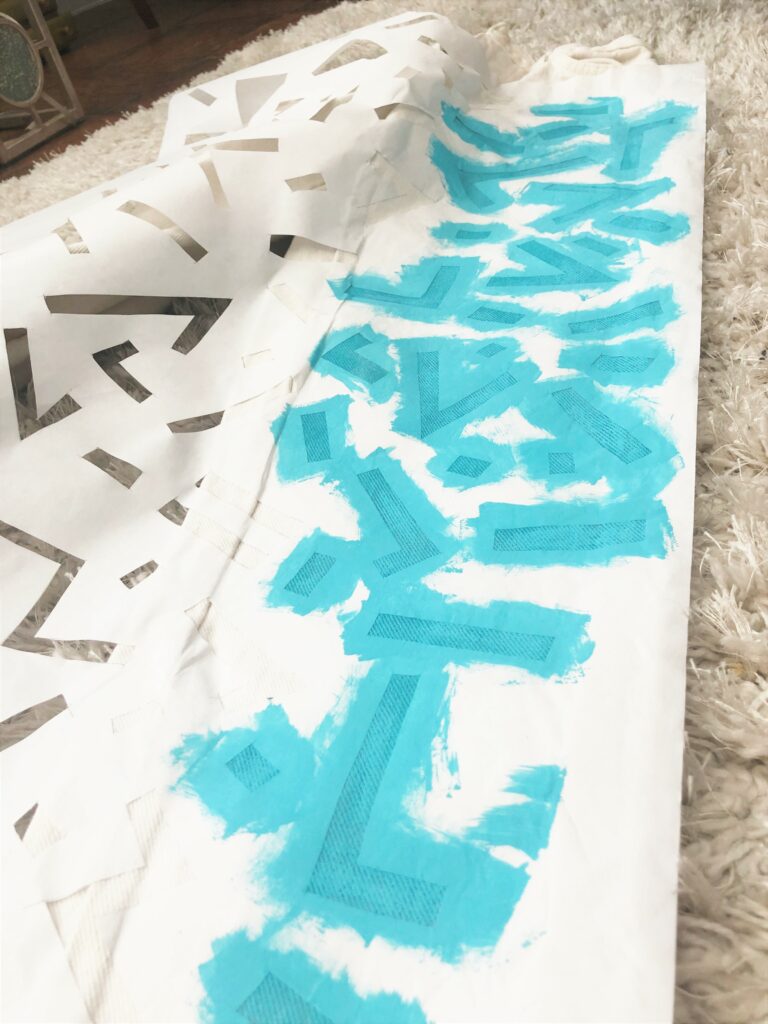
So I took a foam brush, paper, and craft paint, and painted away! To give this pair an even bolder pop, I opted to use both blue and pink paint for my stencils. Check out my Instagram at @petite_punk to see how they turned out. The front of the pants now has a blue pattern. The back is pink! Talk about a one-of-a-kind piece of clothing!

The next time you find stained pants that fit you like a glove at Goodwill. I urge you to take a moment to consider how you could transform them from just a perfect, although damaged, fit, to a showstopper that you made yourself.

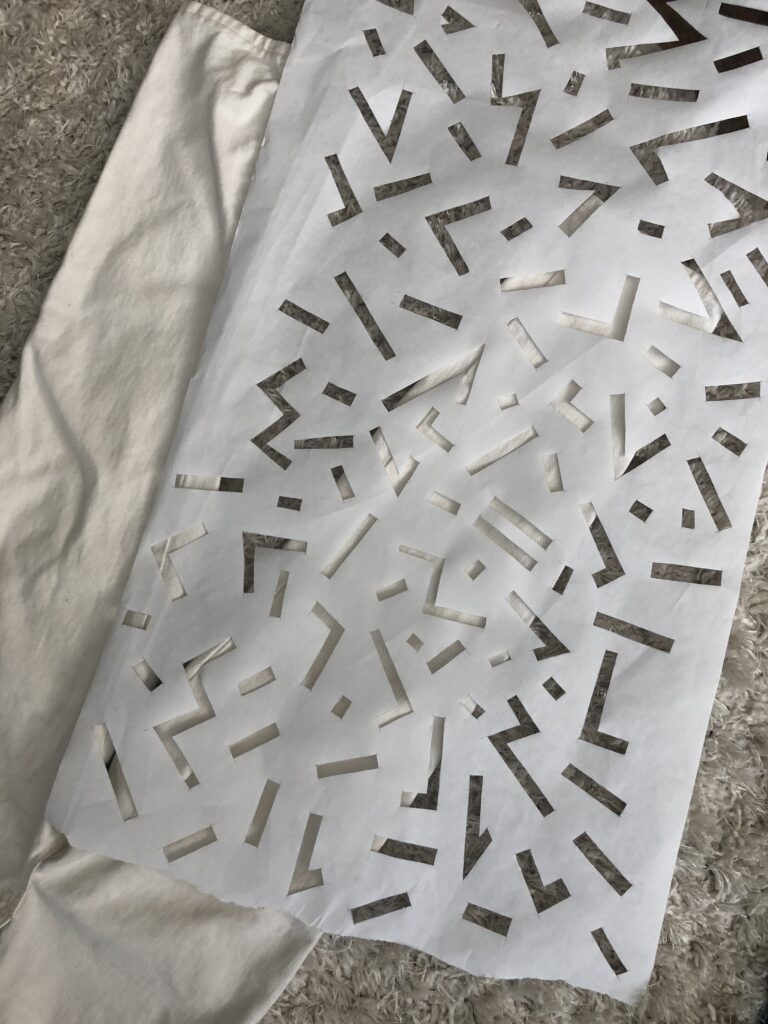
Stencil Method of Choice: The Freezer Paper Method
This is my frequently used way to create stencils. With this method, the design options are endless!
Warning: This is more of an advanced way of stencil design and application. It requires the ability to use a craft knife with precision. It also can become a multi-day process, that requires many steps that have to be done correctly for the stencil to turn out nicely. I used this method for my jacket showcased in this post. With this method, I also recommend using craft paint for opaque designs.
To learn more about this stencil process, visit this useful guide: https://www.instructables.com/id/Stencil-Painted-Denim-Jacket/

