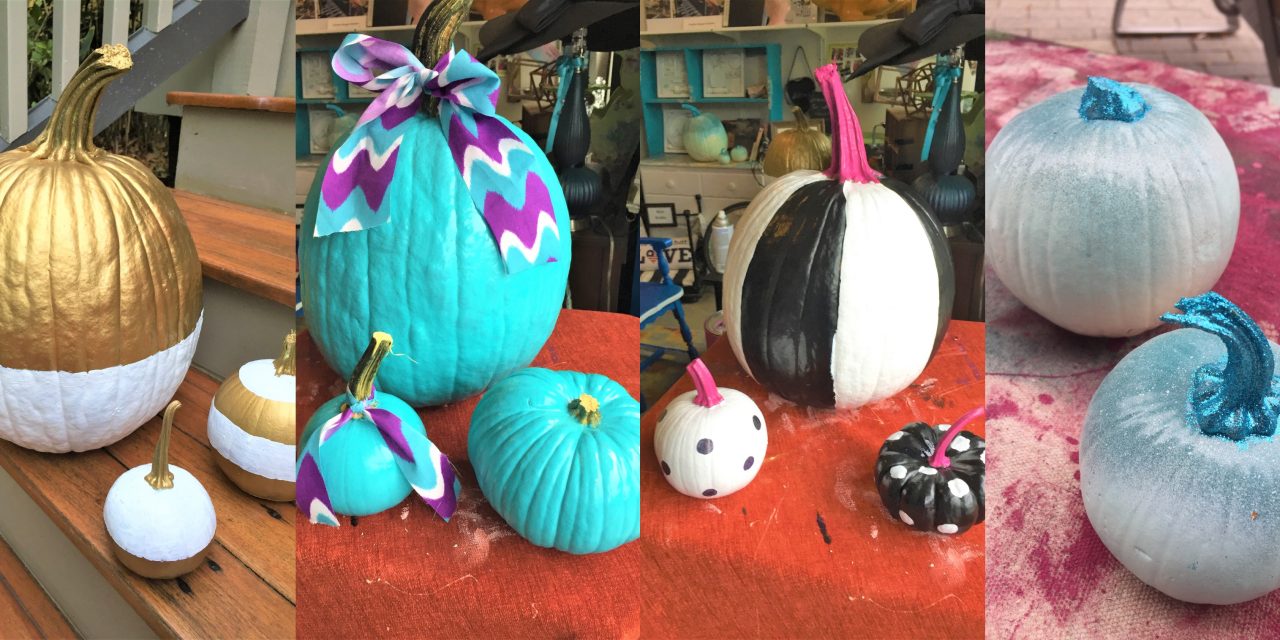
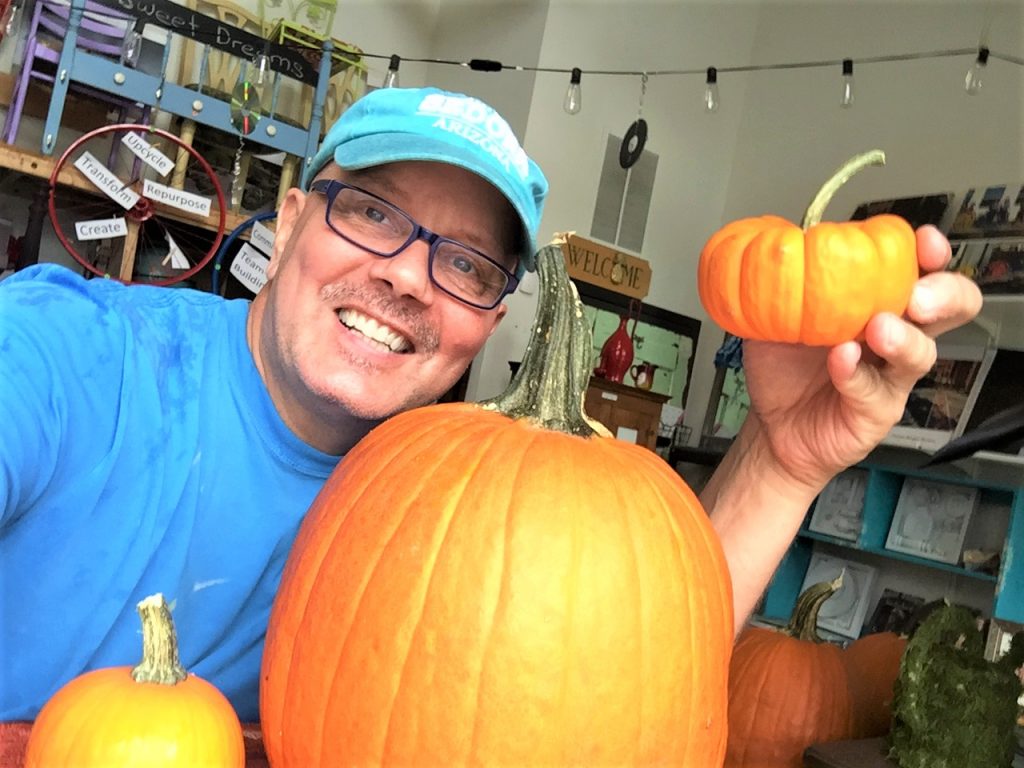
Who said pumpkins have to be orange? With some paint, a dash of creativity and lots of fun, here are four ways to give a trio pumpkins style and sizzle!
This DIY project was inspired by my recent blog about transforming your front stoop where I encouraged readers to look at these fall decorations in a new way.
Since I talked the talk, I had to walk the walk. Here are some of my ideas that will make you look at any pumpkin patch with excited eyes.
Age level: Older kids and adults
Ability level: Great for all DIYers, new and veteran
Items needed:
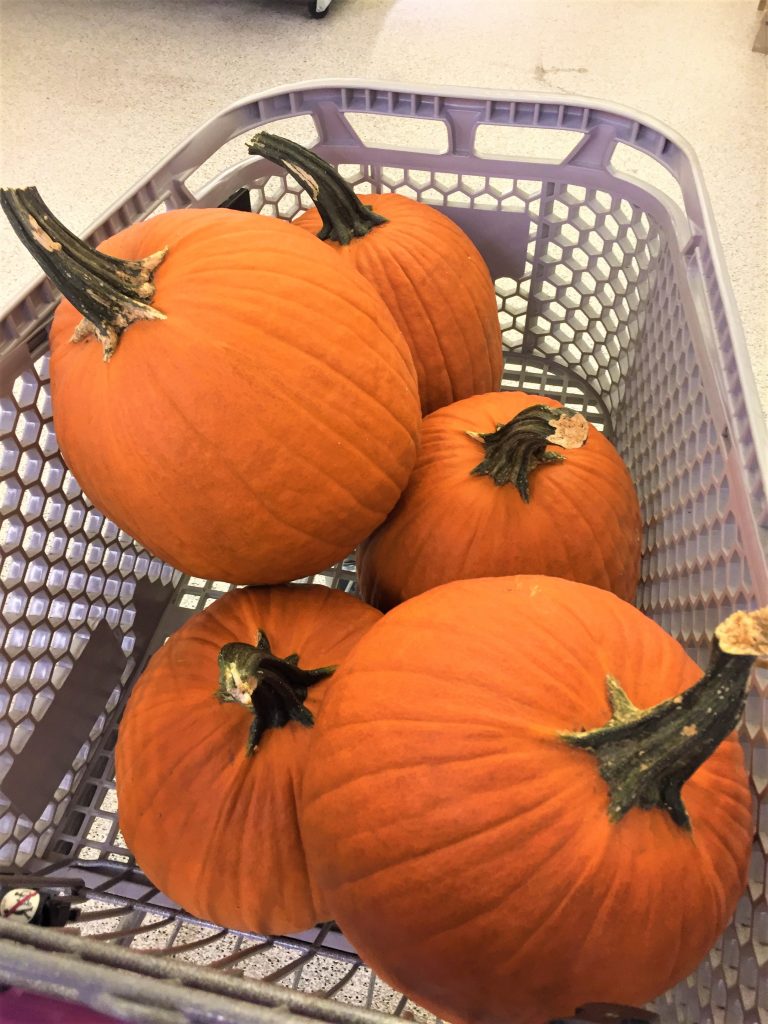
1. Three pumpkins, a large one & two small ones
2. Spray paints in various colors including gold, aqua
3. White and black paint
4. Glitter
5. Mod Podge
6. Paint brushes, various sizes
7. Black sharpie
8. Painter’s tape
9. Ribbon
10. Scissors
Time requirement: Two hours per trio, not including paint and Mod Podge drying time
Cost: $10 to $15 per group and based on design
- $5 per large pumpkin
- $1 per small pumpkin
- $5 per can of spray paint (with lots left over)
- $5 for Mod Podge (with lots more for future DIY projects!)
- $2 for glitter
- $1 for ribbon
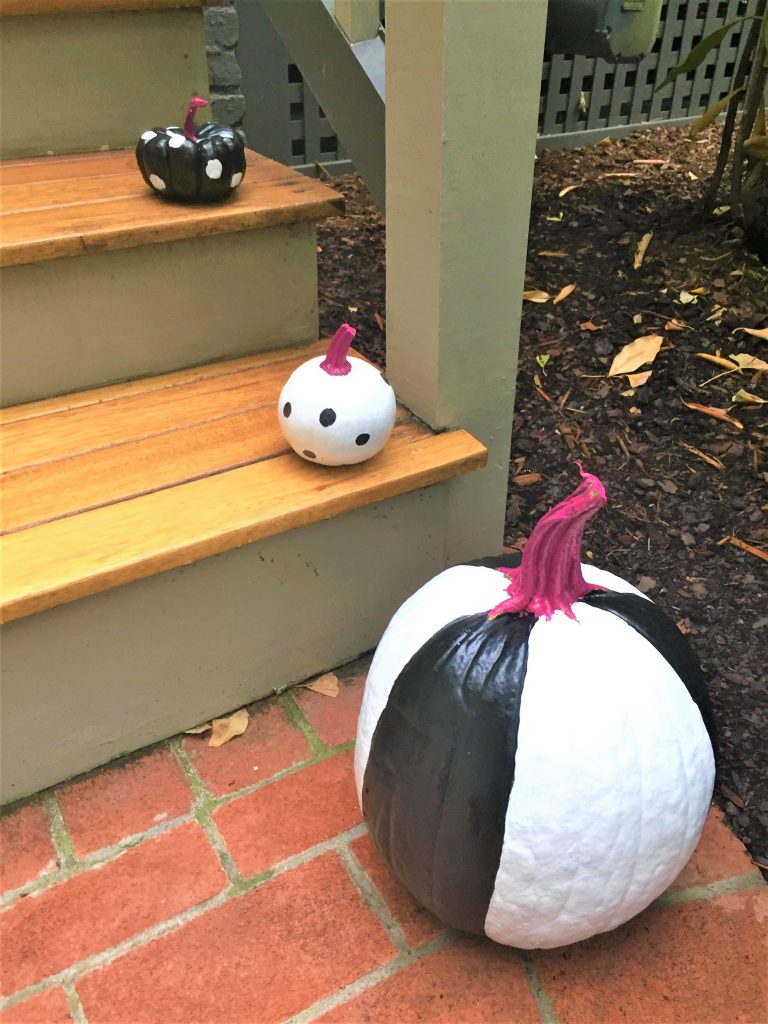
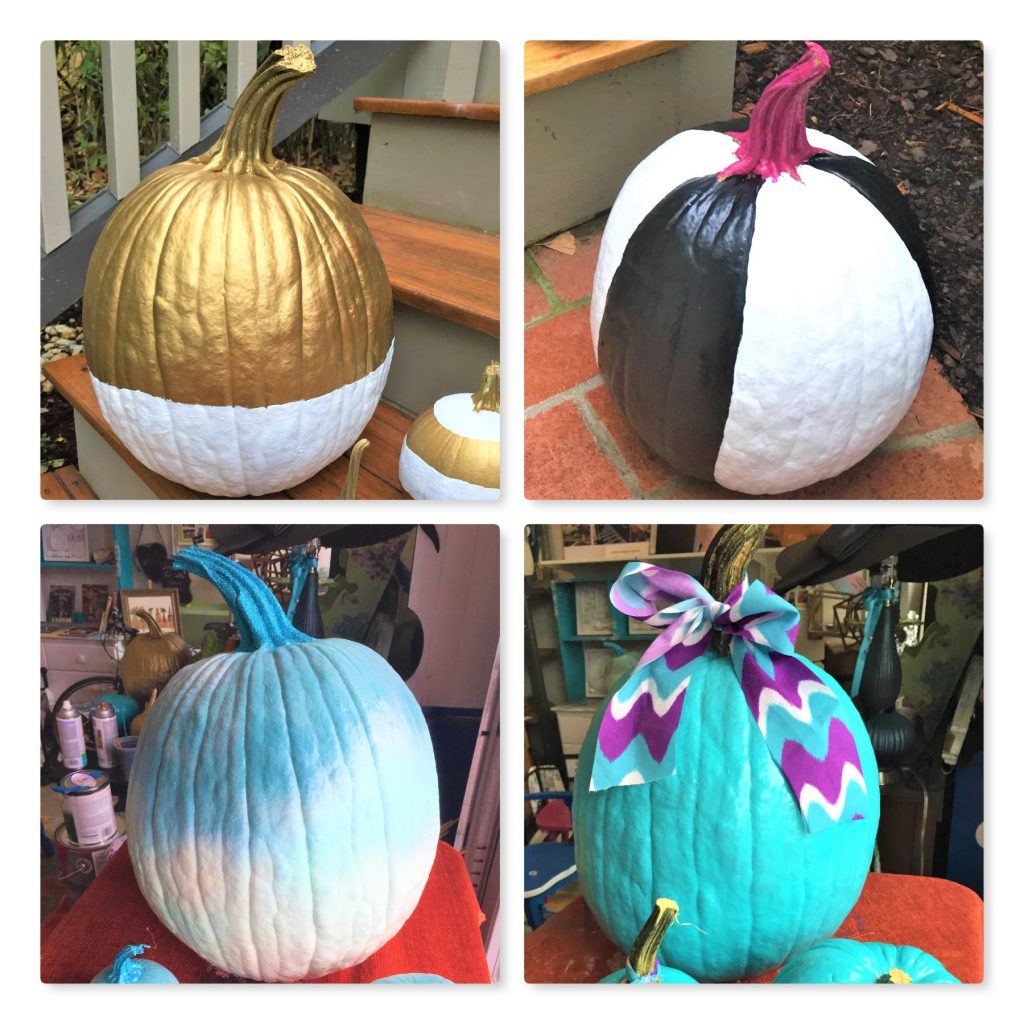
Idea 1: Black & white with twist
Yes, black and white are often used in Halloween décor but I wanted to use these colors with a hipper, funkier look.

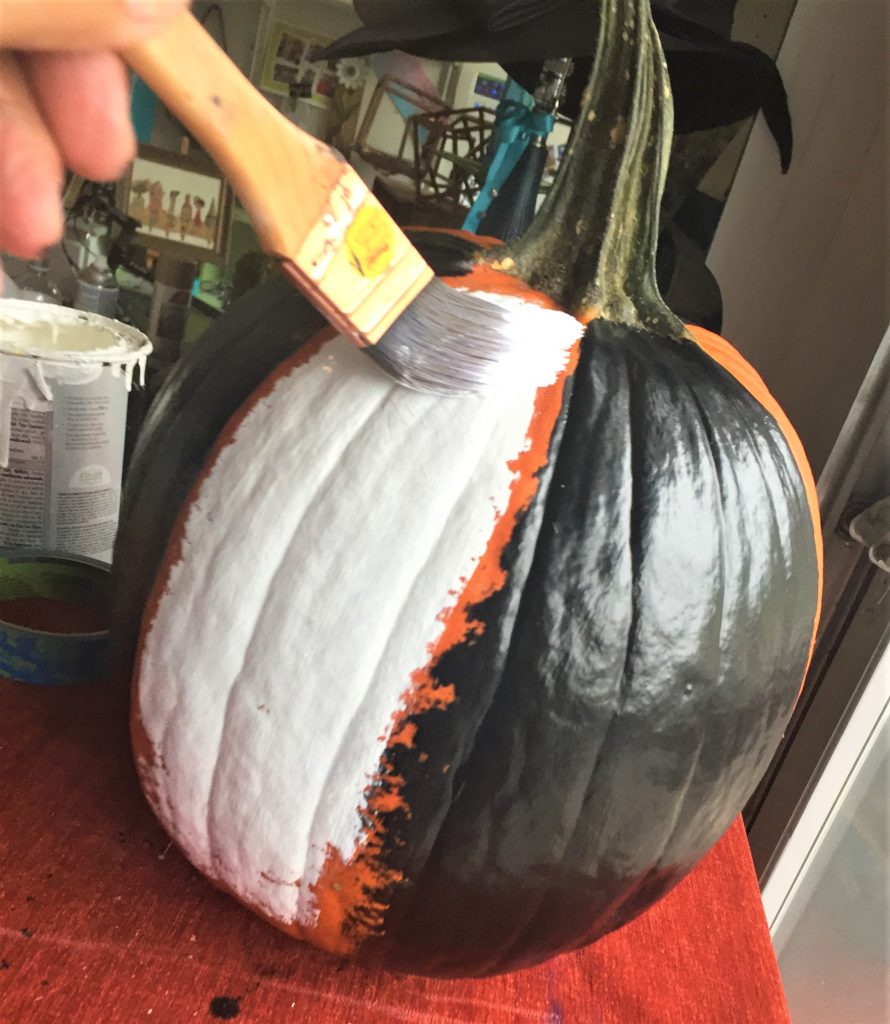
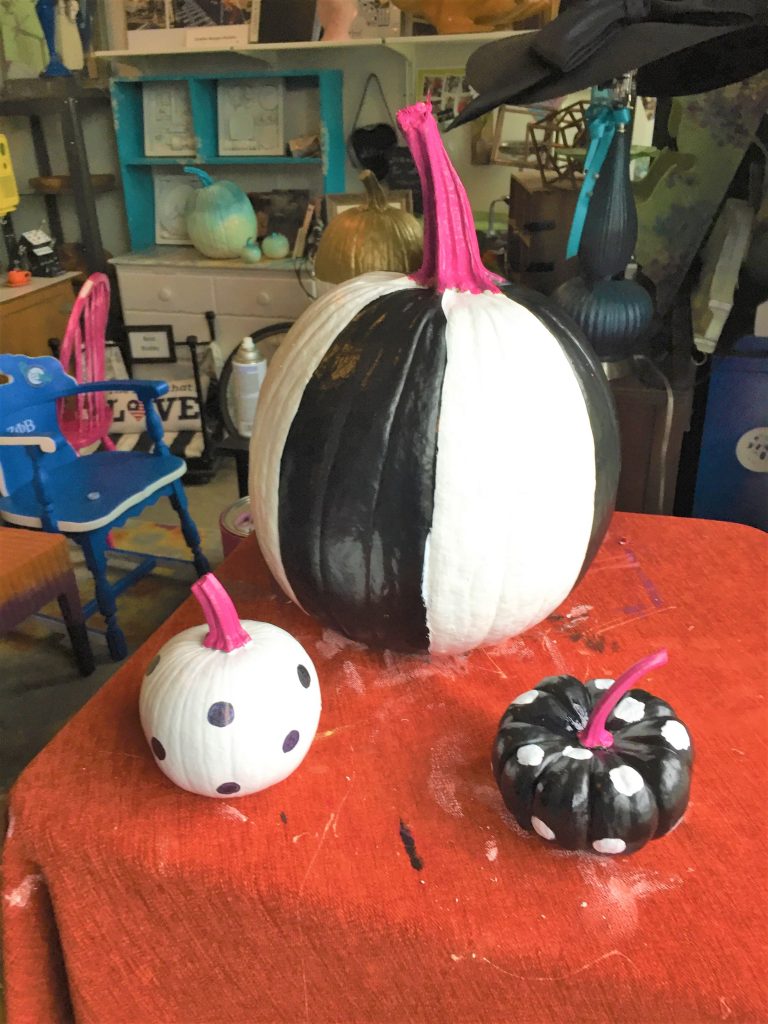
For the big pumpkin:
- Start by painting sections black, following the ridges and grooves that are part of the pumpkin’s texture. It is really easy to follow these “lines” from top to bottom.
- After the black paint dries, repeat the process with white. This bold contrast will make the pumpkin look so great and cool!
- When done, you will want to use a small detail brush to paint around the stem.
Small pumpkin #1:
- Paint one of the small pumpkins white, except for the stem.
- After it dries, consider using a black sharpie to draw on dots of all over it.
Small pumpkin #2:
- On the other small pumpkin, use your black paint from top to bottom, again ensuing the paint doesn’t go on the stem.
- When dry, brush on white dots.

Design suggestion: You might want to consider painting your stems. While I had thought their nature look would work, something was missing after the black and white tones were added. For whimsy, I carefully painted each one in hot pink and totally love the look. Lime green or yellow would be great options, too.
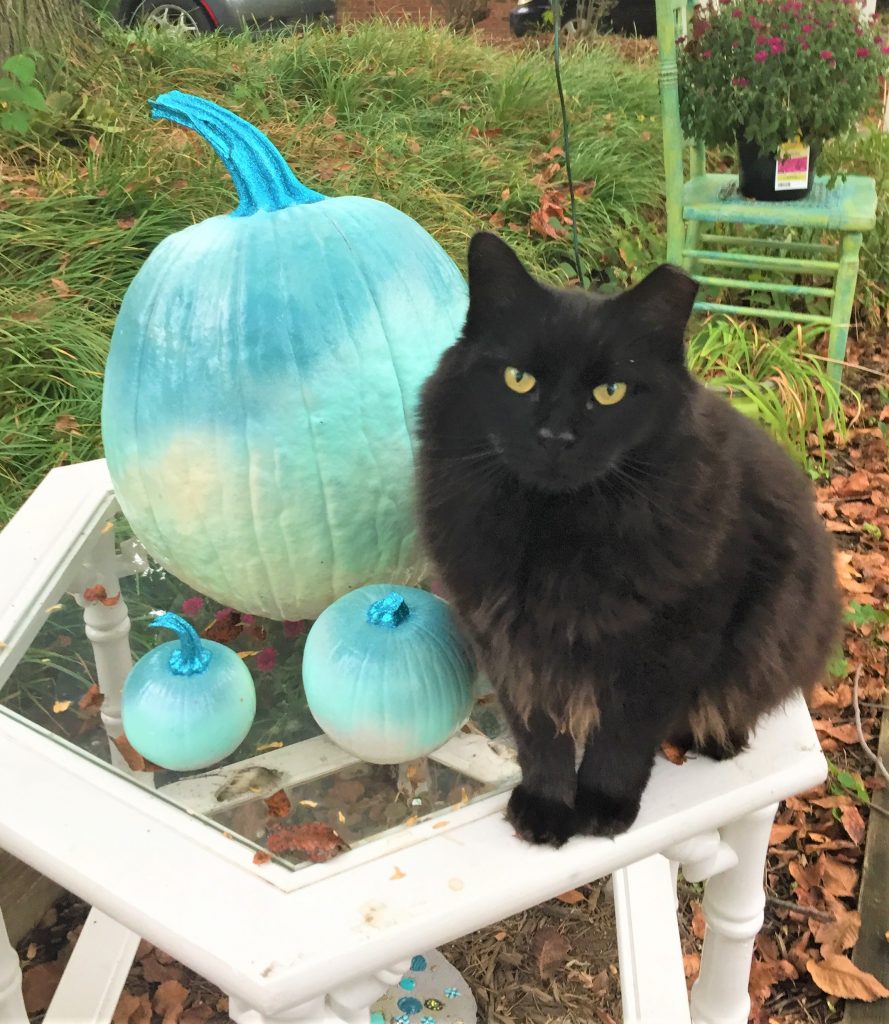
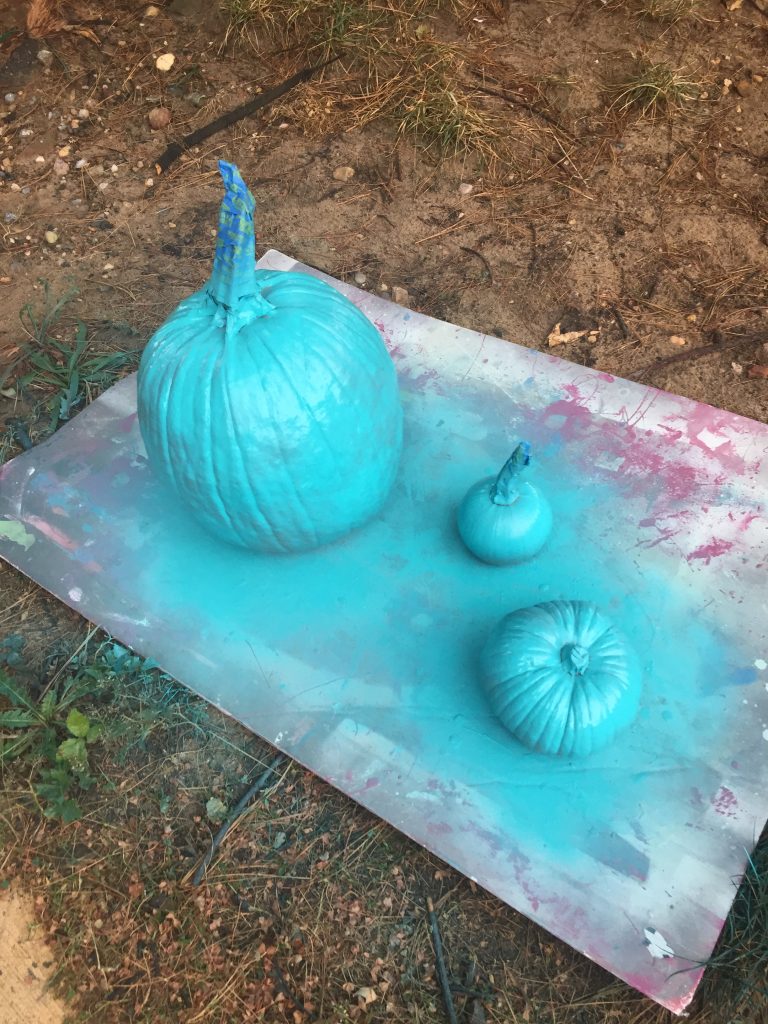
Idea 2: Sparkling blue “ombre”
Ombre is painting something so you have a darker tone that gets lighter as it goes.
Consider using spray paints that you already have on hand and arranging them from light to dark. Place your pumpkin trio on a drop cloth outside and have fun!
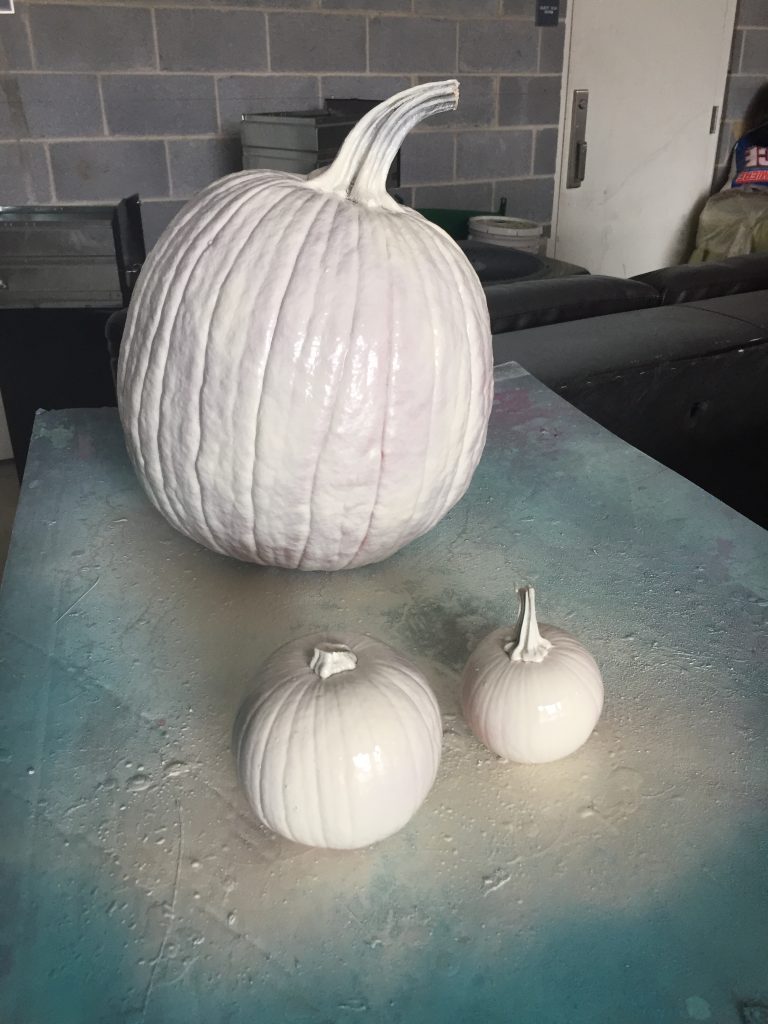
- Start with the lightest color and lightly spray each pumpkin from top to bottom. The first color I used was ivory which provided a great foundation on which to build the look.
- Next, I sprayed the top part of each pumpkin with a darker teal color, not waiting for the ivory coat to dry.
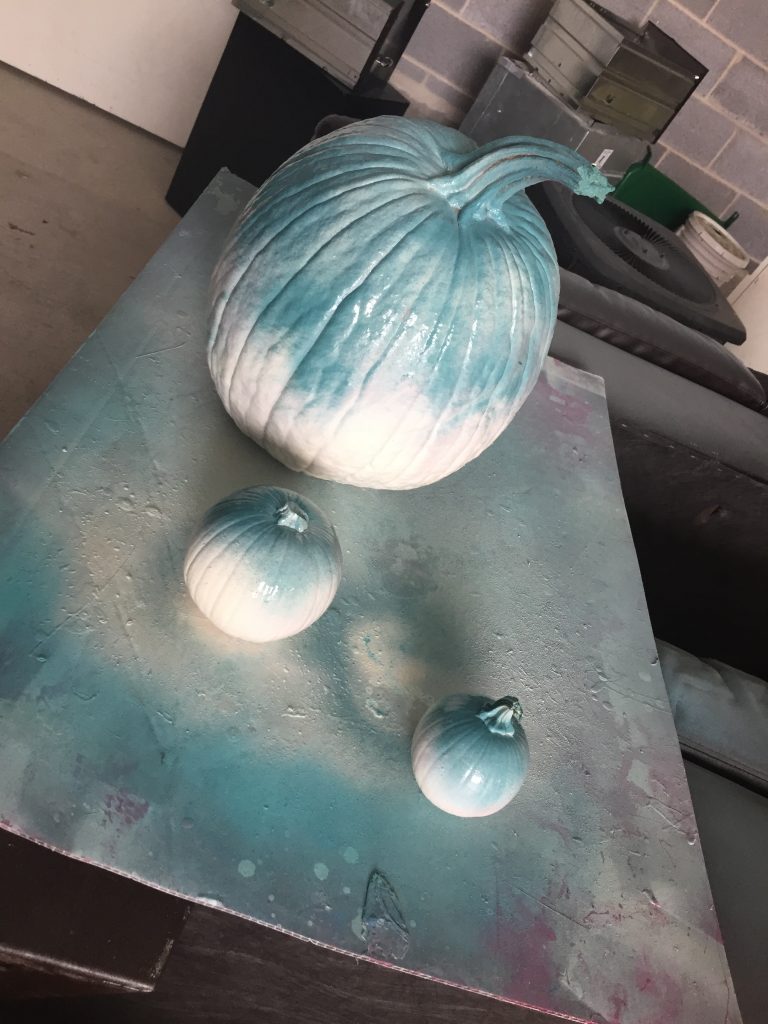
- Then I used a lighter teal and sprayed on a strip of that around each pumpkin, working to blend it in and not leave a hard, sharp line. With Ombre, you want the tones to flow together. A minty green color that was very subtle was sprayed on next.
- With this process, don’t worry about a perfect coat. Let tones organically blend from one to the next for best effect.
- Finally, let your pumpkins dry. Since you will want to cover the entire pumpkin, once the paint coats are dried, then turn the pumpkin over and use your lightest color, the one for your foundation, on the bottom of the pumpkin. You will want to let it dry on its side.
When picking out your pumpkins, look for ones that have stems still attached on top.
- Brush on your Mod Podge to the stem, then sprinkle on your glitter so the entire stem is covered well.

- To keep your clean up to the minimum, place a box or other solid container below your pumpkins. This will help to collect your glitter for more DIY projects.
- Carefully shake and tape your pumpkin to help remove access glitter.
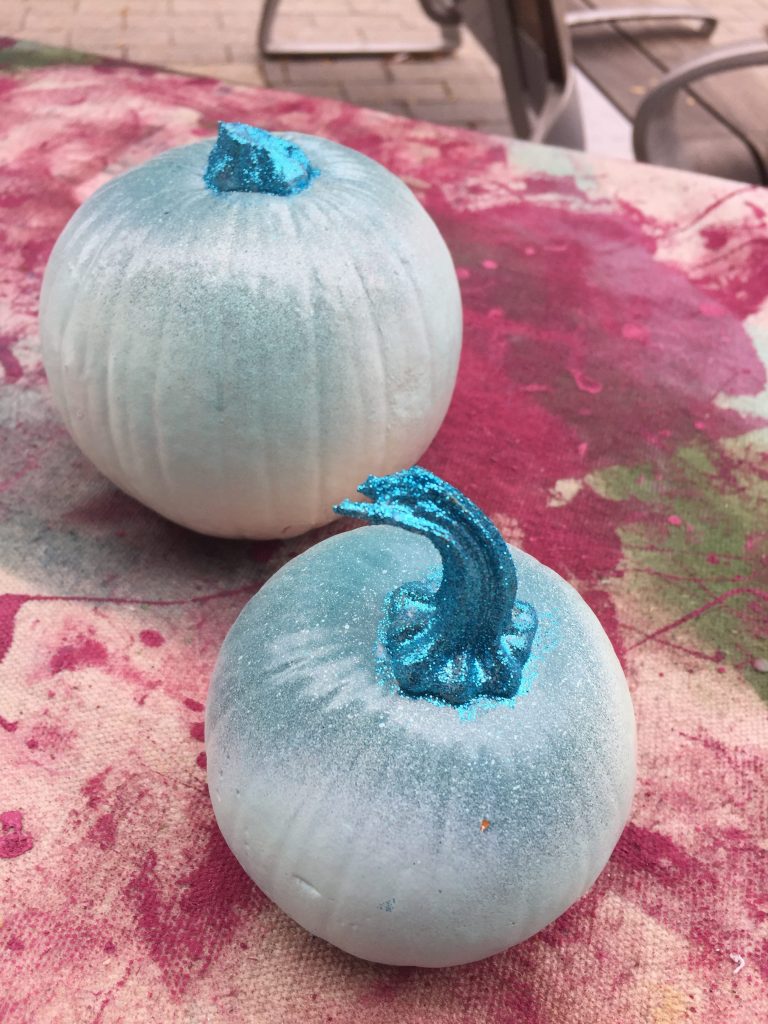
Given the blue paint tones, bright blue glitter was used. You will love the way the glitter makes the stem look like a jewel on top!
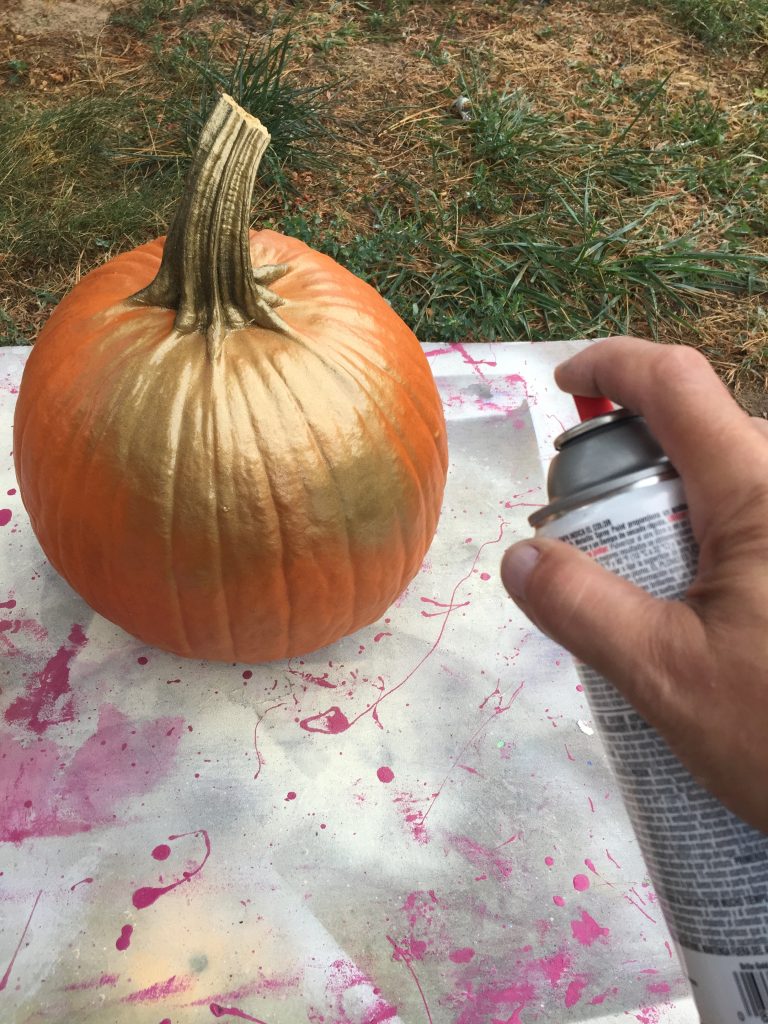
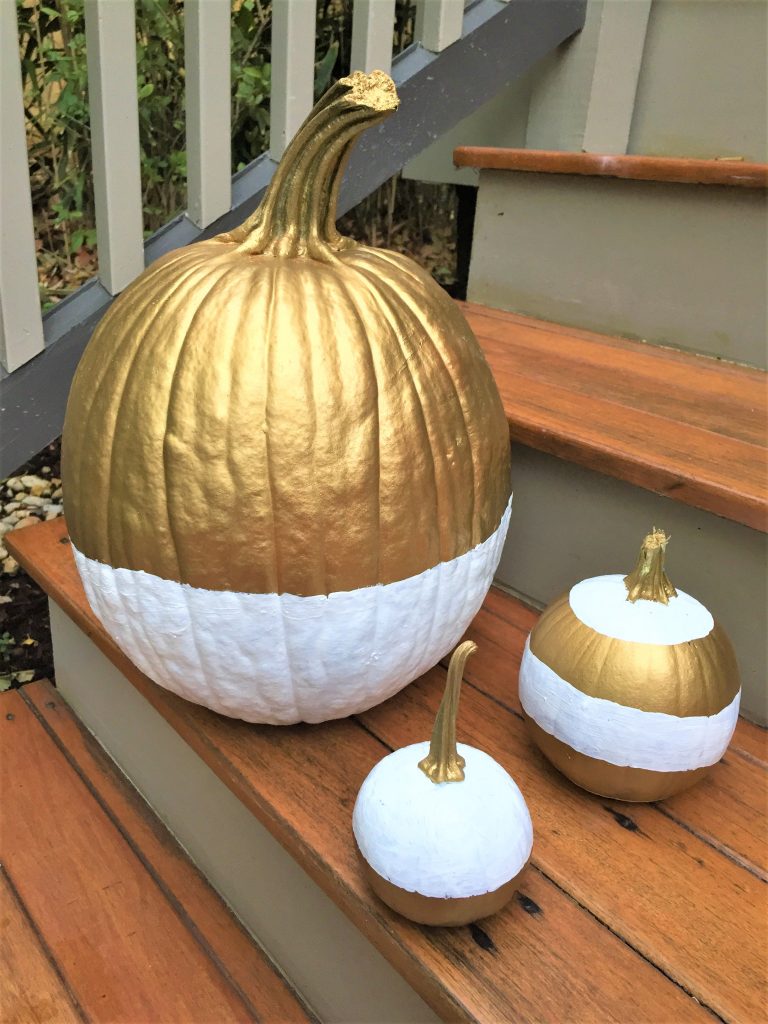
Idea 3: Go for the gold
Gold makes everything look so gorgeous!
- As with Idea 2, place your pumpkins outside on a drop cloth.
- Carefully add several layers of gold spray paint, allowing time to dry between coats. Ensure total coverage by placing the pumpkins on their sides and adding another layer.
- When dry, add white paint in big blocks.
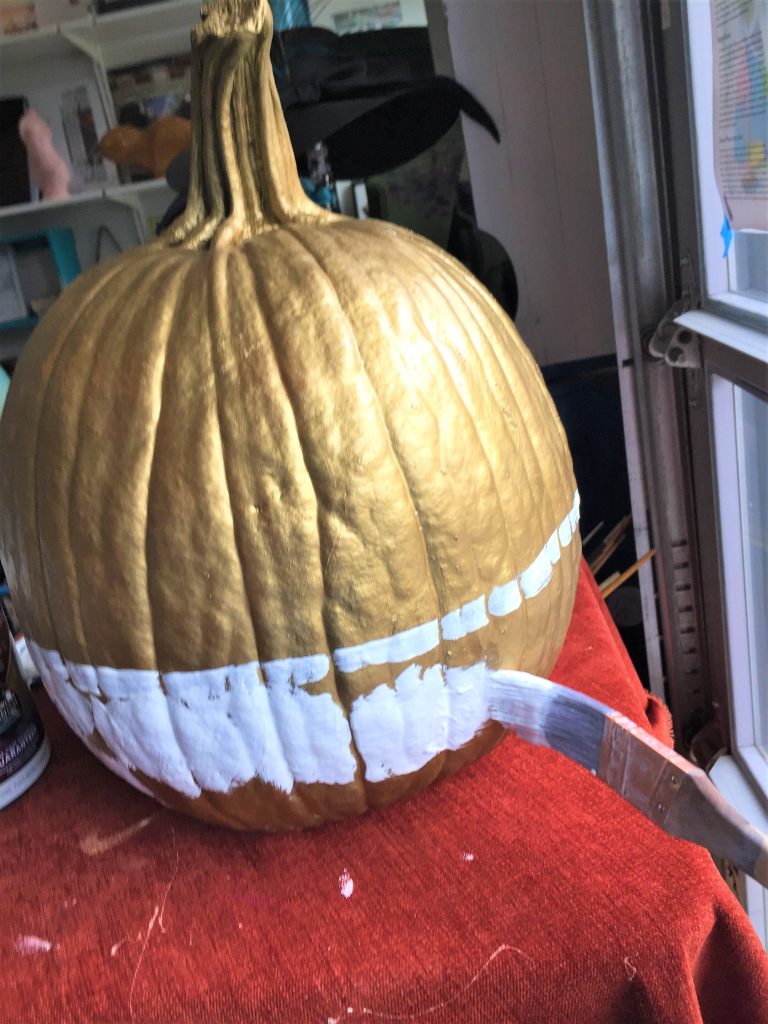
- For the big pumpkin, the bottom half was painted white.
- One of the smaller pumpkins was painted white on its top half.
- And the third was painted with bold white stripes. With a detail brush again, carefully paint around each stem so the gold paint on them stands out.
You may need to brush on a couple of layers of white paint to ensure solid coverage. Use your detail brush to ensure a crisp sharp line between the white and gold.
These is something very elegant about the gold and white together that makes each pumpkin feel special by itself.
However, a trio of pumpkins in gold and white is like going trick or treating and striking it rich with big chocolate candy bars—and no granola bars or other healthy choices!
Idea 4: Simply Tiffany blue
Sometimes less is more.
For this look, a bright Tiffany blue spray paint was selected because it looks so nice and is not a traditional Fall or Halloween color.
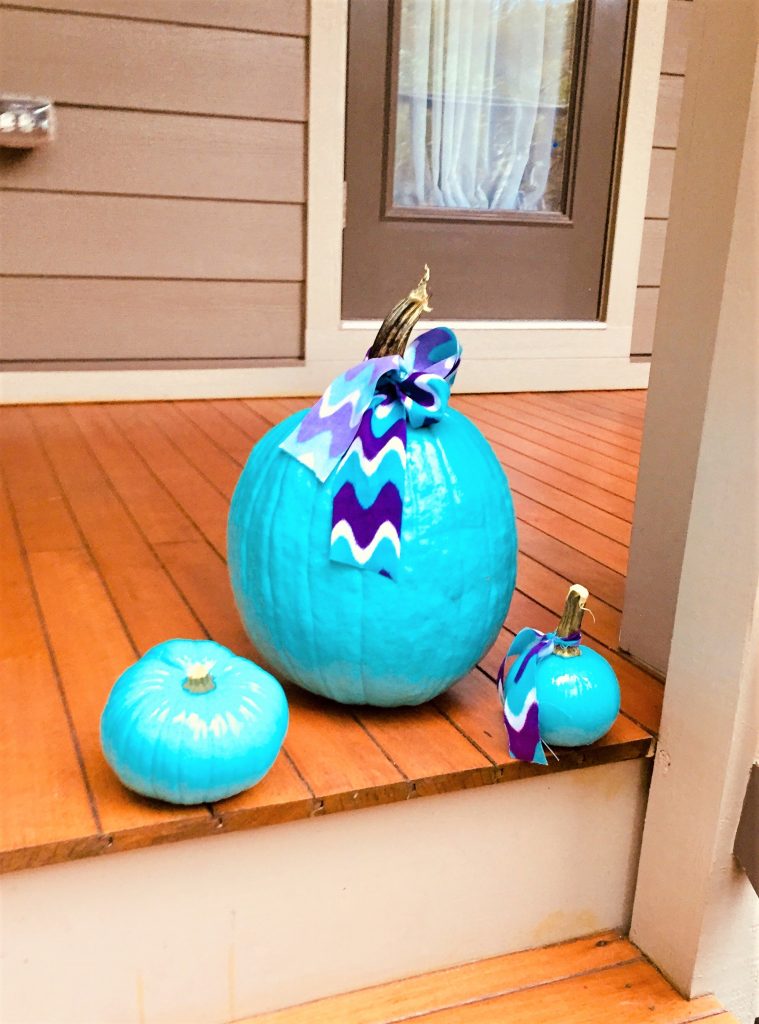
- Start by covering your pumpkin stem with painter’s tape to protect it from the paint.
- Place your pumpkin trio outside on a drop cloth or other protective material.
- Lightly spray several layers on, keeping them light to avoid drips and runs. As with any painted project, turn them on their sides to ensure all parts are covered well.
- Let dry before moving.
- Remove the painter’s tape then add tie a ribbon on top
- . While I consider ways to embellish this set of pumpkins, the bright color was all they needed. It is that easy and simple!

These four ideas will make your pumpkins certainly stand out from the orange crowd. They will look great on your front stoop or on your Halloween or Autumn-themed dining room or kitchen table. Please share your unique spin on this painted pumpkin project by sending us photos. We are always looking for inspiration for Halloween or any time of year!

