Turn on Your “Heartlight” by Upcycling a Lamp with Paper & Paint
In the classic movie, E.T. The Extra-Terrestrial, the adorable alien showed his love when his heart lit up so you could see it shine. When upcycling a generic lamp into one covered with hearts, the concept of “heartlight” came to mind. Your heart will shine, too, when you see how easy it is to create a totally one-of-a-kind fixture you will love to use and to share! Repurposed papers became stencils for this DIY project offering another way to reuse and rethink everyday items in new ways.
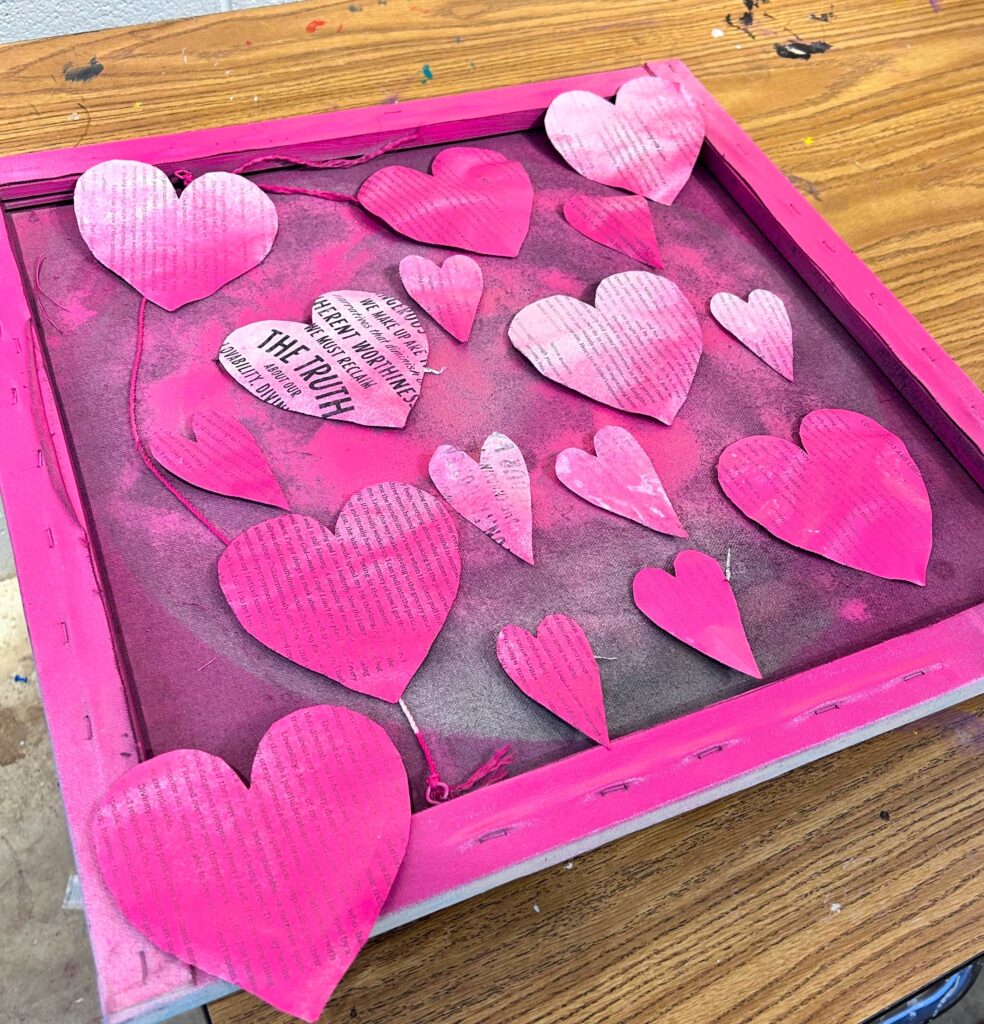
Speaking of repurposing, reusing and rethinking things, please mark your calendar for February 11 for our “Not Your Typical Typical Valentine’s Day” event. Join us to make flowers, jewelry and cards from repurposed and upcycled items. Tim Kime Art is delighted to join Finding Your Good and several other amazing organizations in co-hosting this fun, community-building event! This engaging event and the wonderful people who gather for it will certainly warm your heart and make it light up, too!
Step 1: See the light & find your good at Goodwill
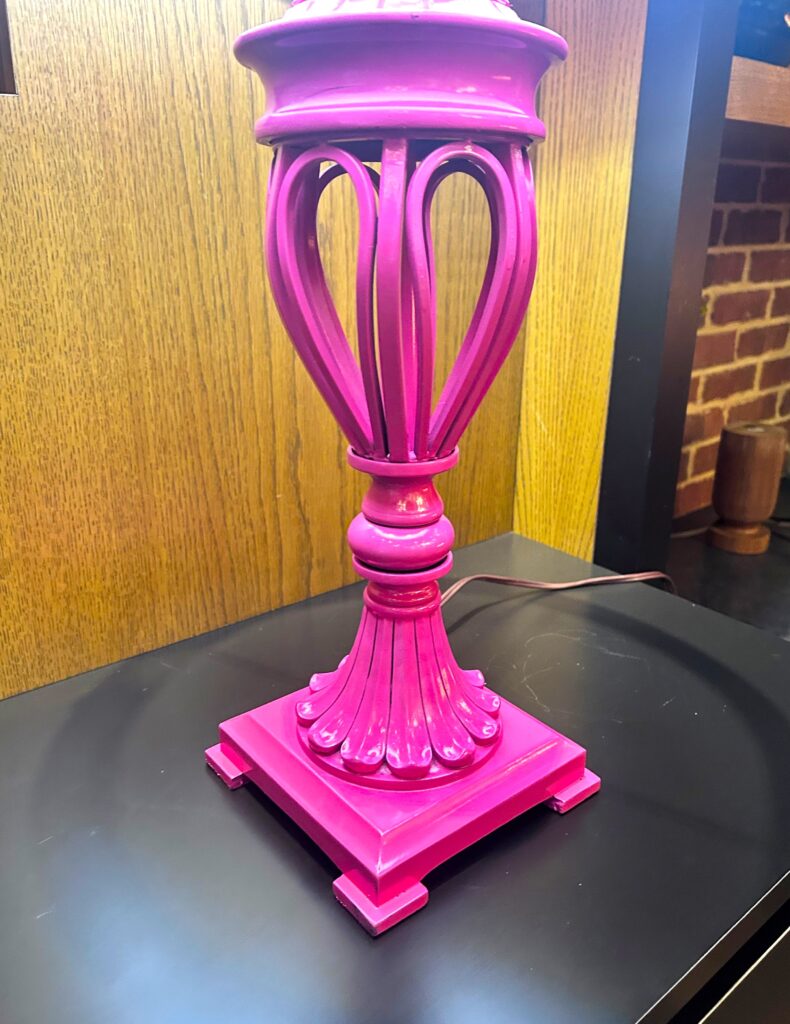
Shop ‘til you drop at your nearby nonprofit Goodwill retail store. Whatever you might need for your home, office or closet, Goodwill is likely to have it at lower than low prices. A staple at each store is a collection of interesting and often unusual lamps and lighting fixtures. As you are able to see by this blog project, if you find a lamp you like and it’s not the perfect color, take it home anyway. Painting a lamp is so easy and very inexpensive.
Ideally, you will be able to select a lamp which has all its parts together—the base, a harp (the part which holds the shade), a shade and even a light bulb! All electrical items available at Goodwill have all been tested and are ready for immediate use.
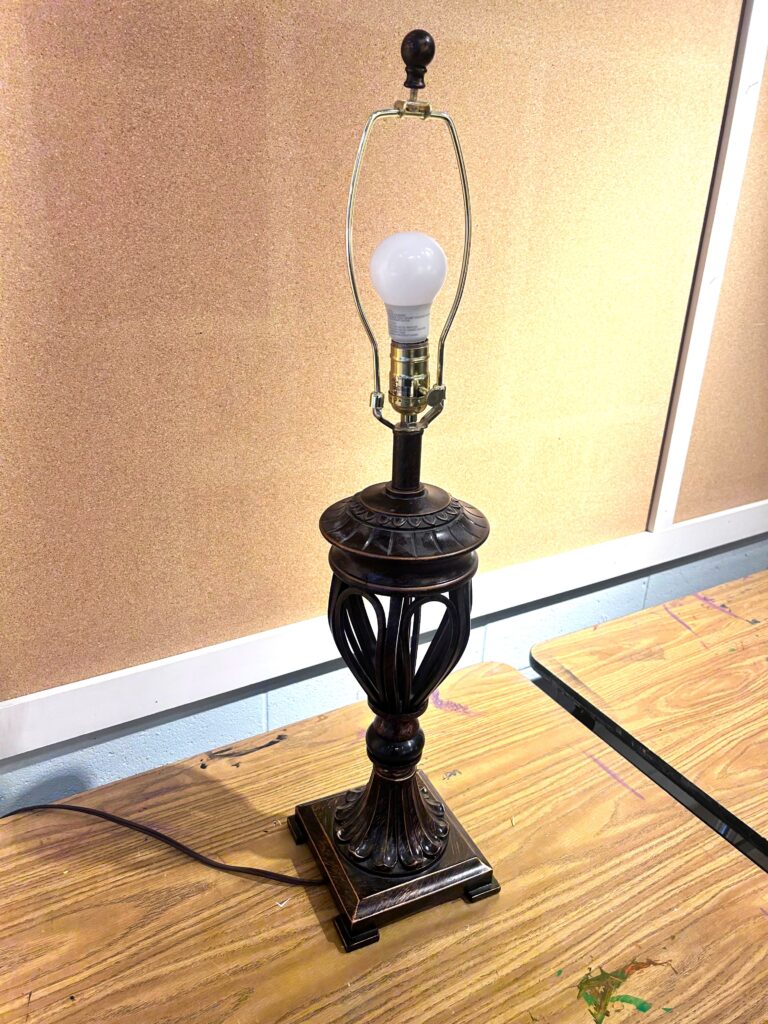
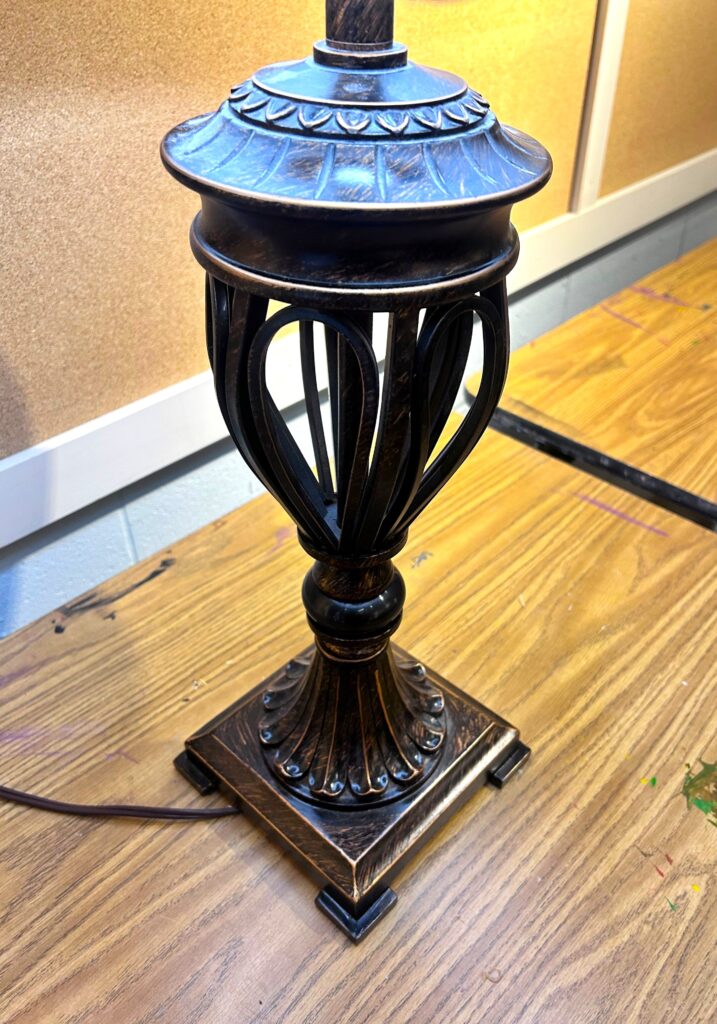
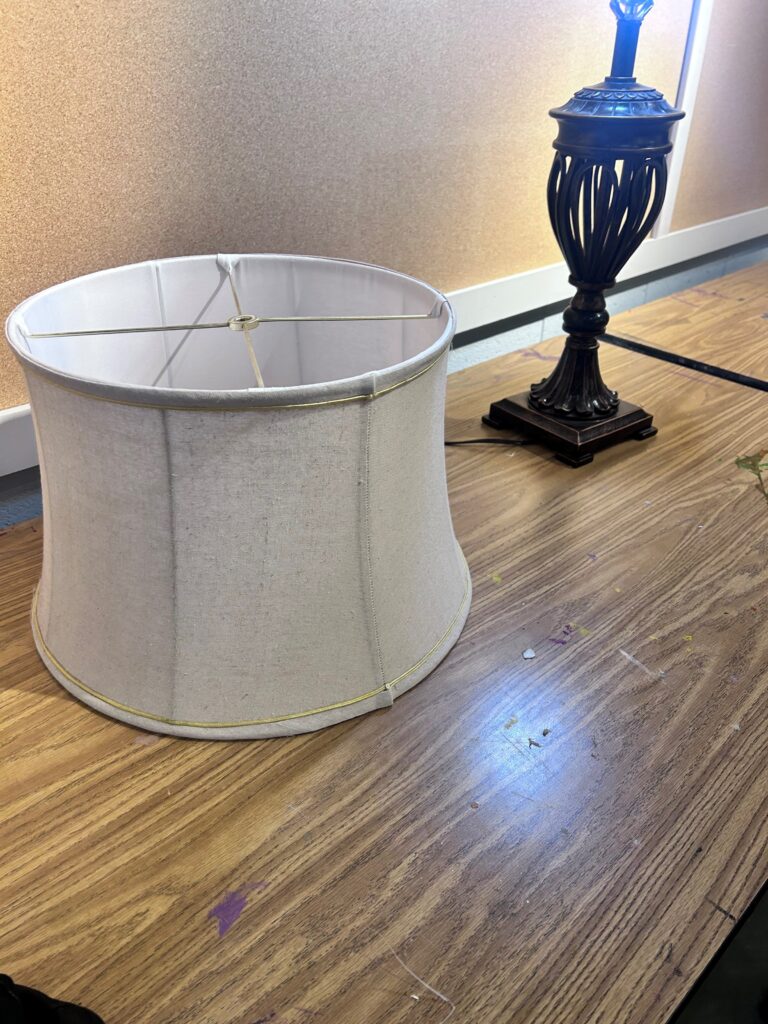
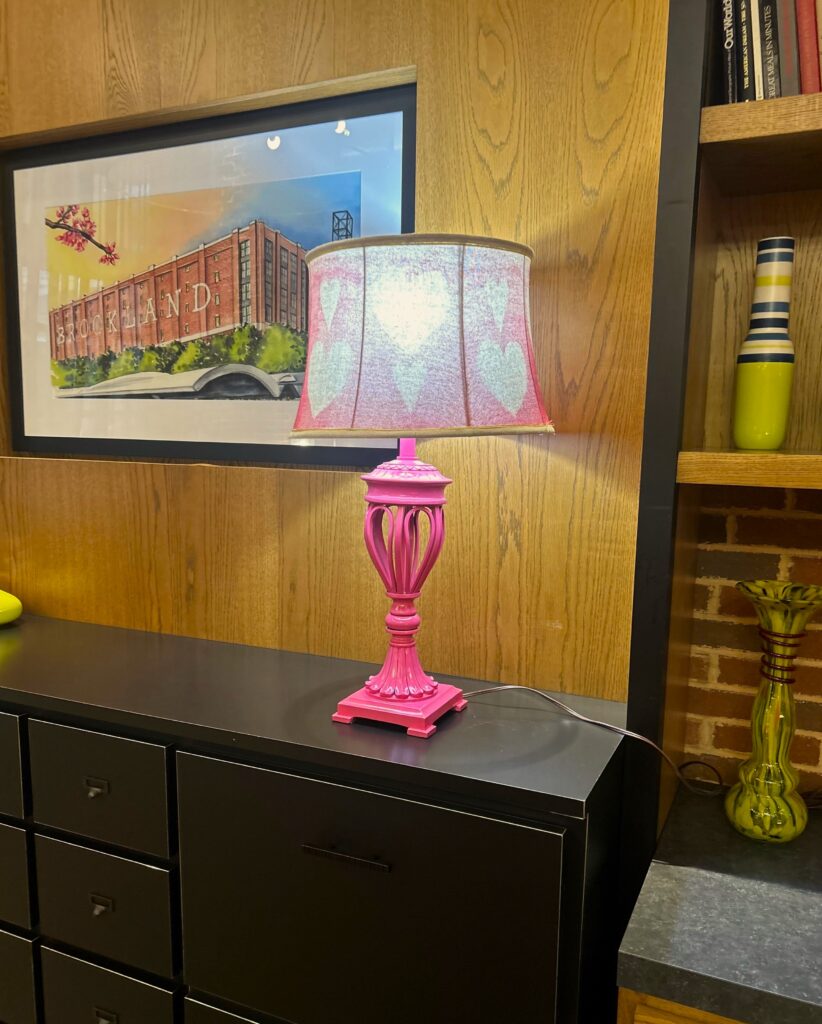
The lamp featured here had some good assets: a solid metal base and a basic shade in great shape. (And yes, it even came with a light bulb!)
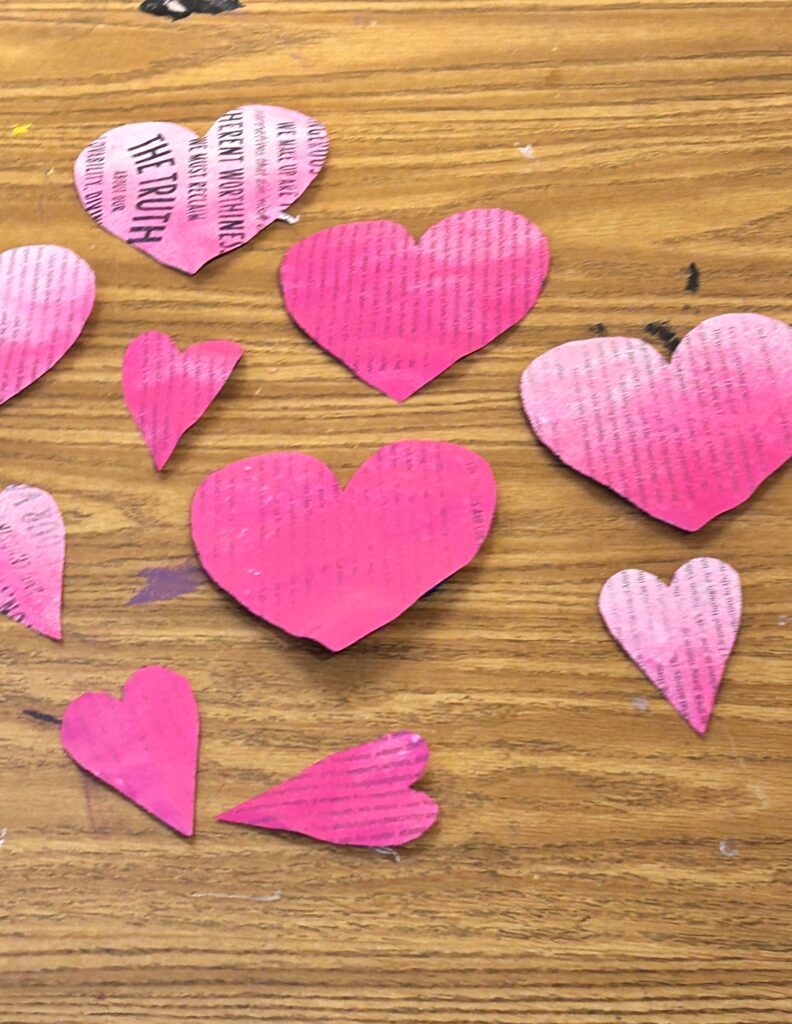
Step 2: Turn book pages into heart stencils
While any scrap paper will do, consider using book pages for this project. Leftover from previous upcycled projects, I had a book which had pages already torn out and reused. Carefully remove pages from a book also picked up at Goodwill for a buck or two. Fold over several pages and cut out hearts to use as stencils for the lamp shade update.
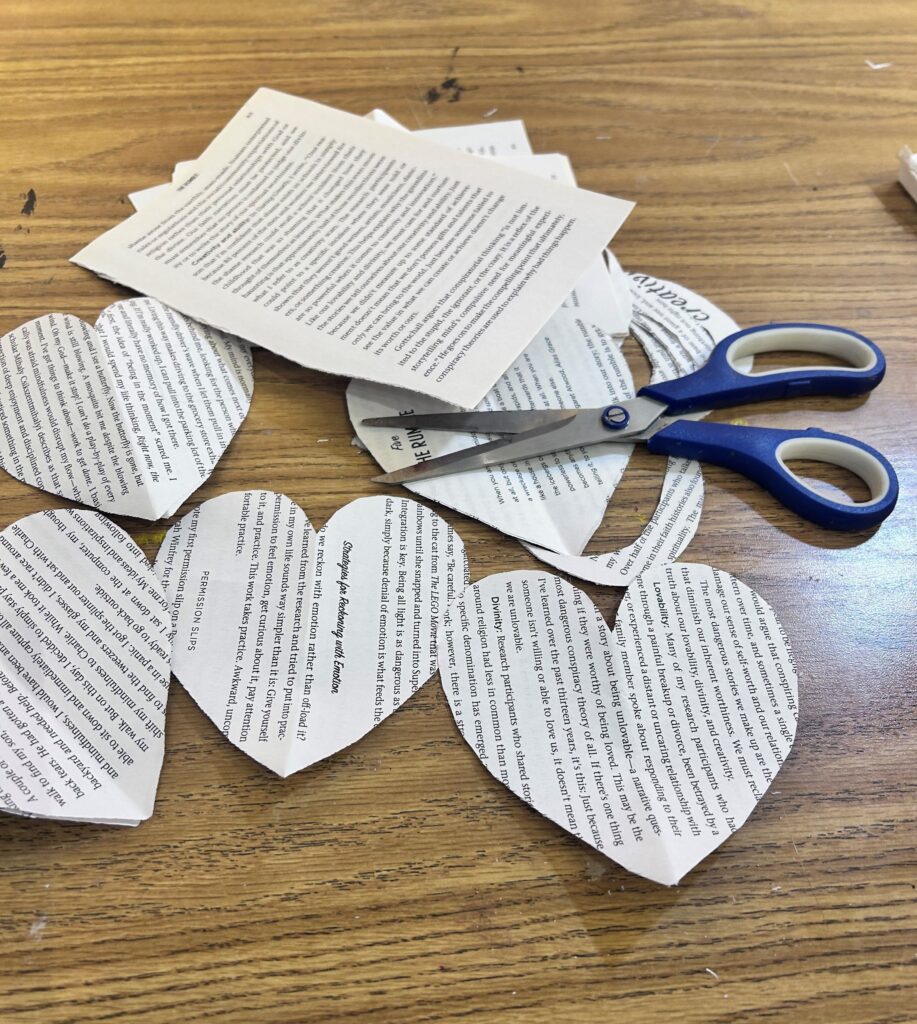
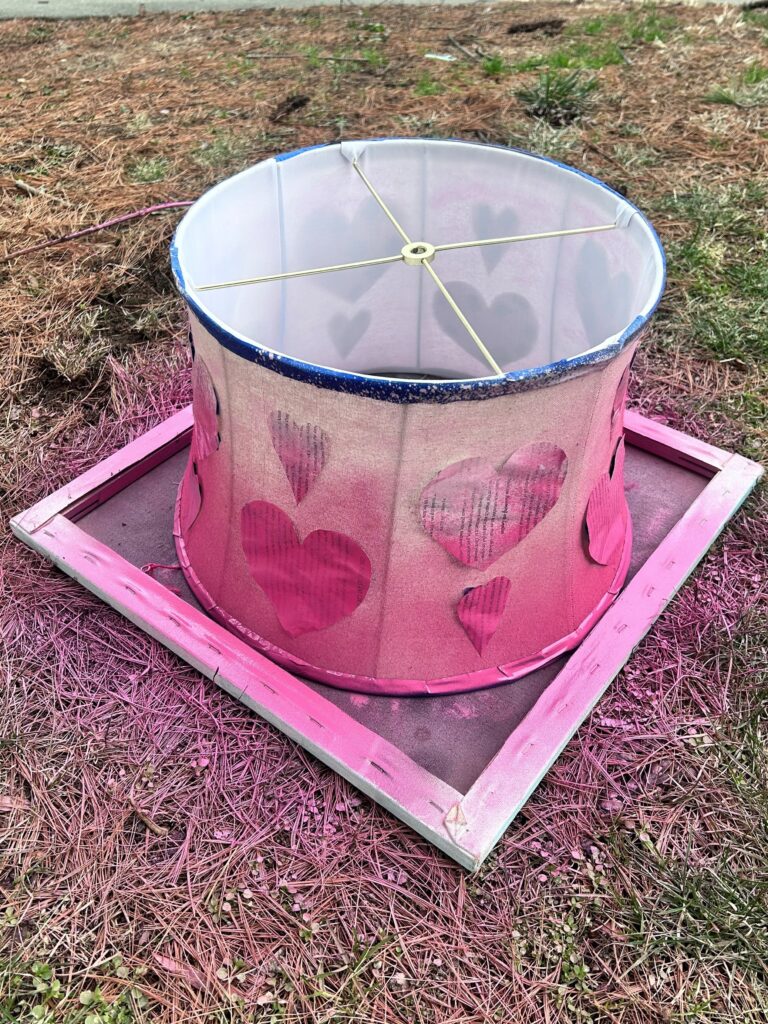
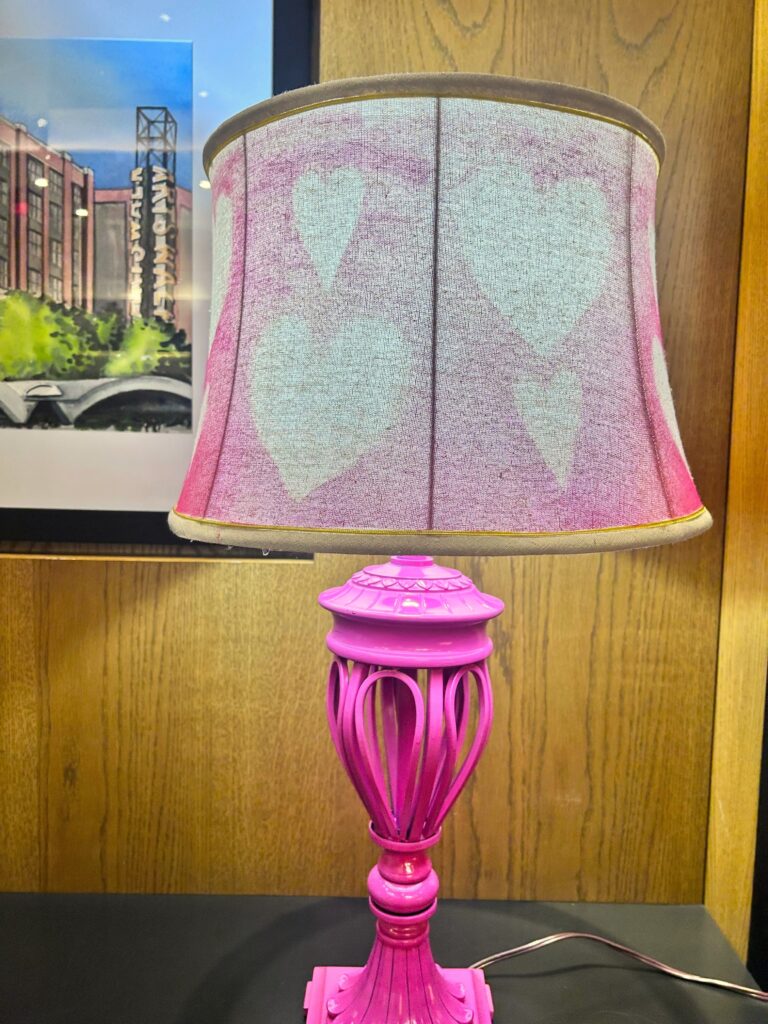
As you are able to see, the lamp shade had eight separate sections in its design, so sets of eight paper hearts were cut out. Does your shade have features or details on which to help you focus your design direction?
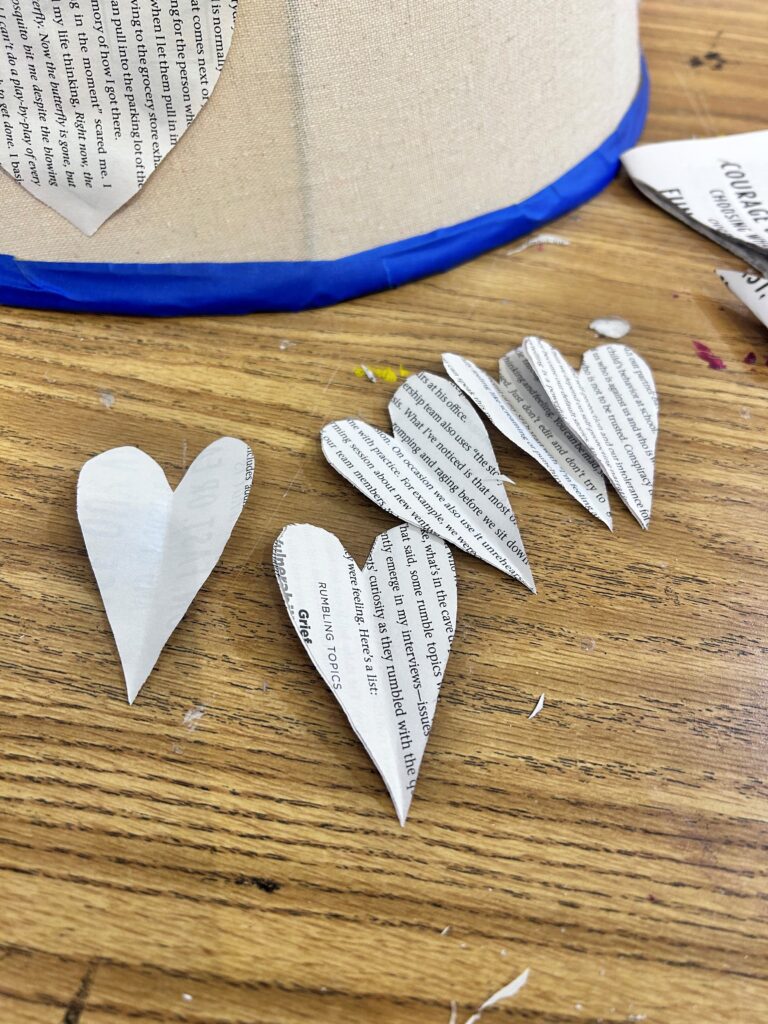
Step 3: Give your shade something special
Using painter’s tape, the larger book page hearts were secured around the shade in an alternating pattern for visual interest. Smaller, skinnier-shaped hearts were then taped in place, too.
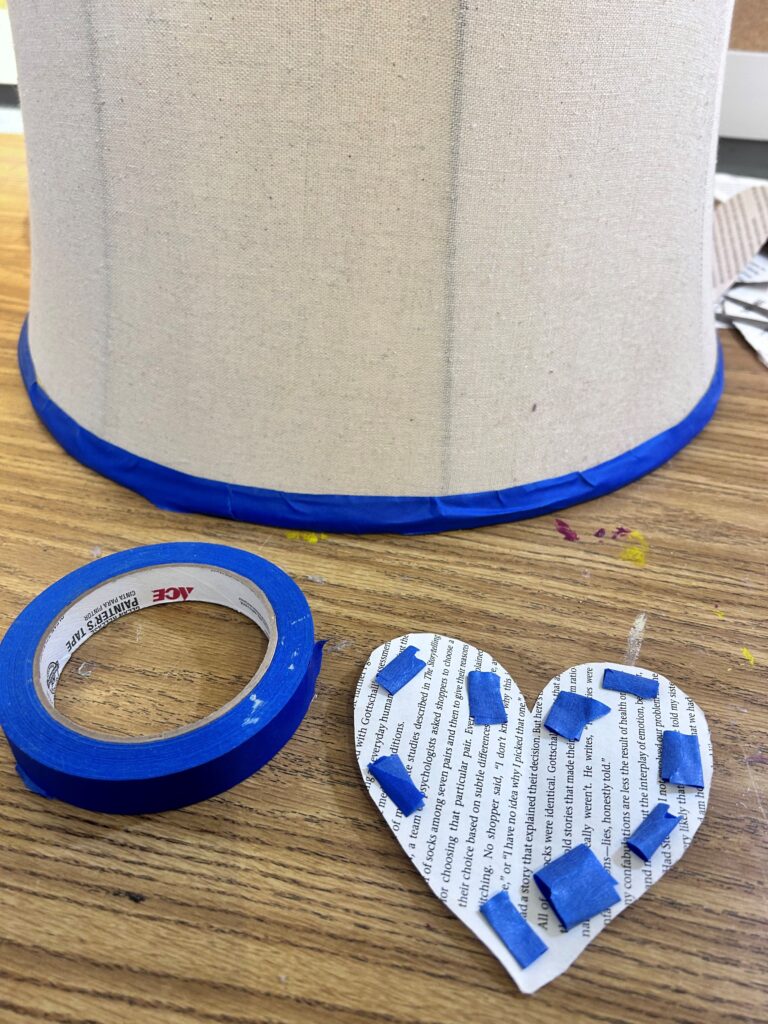

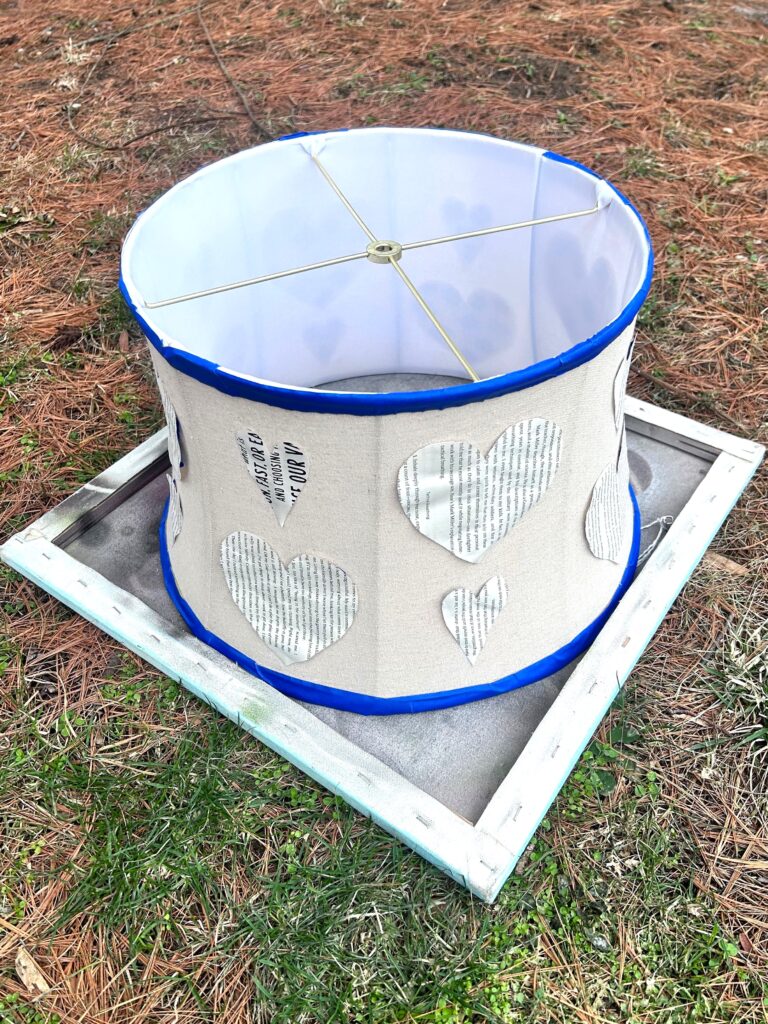
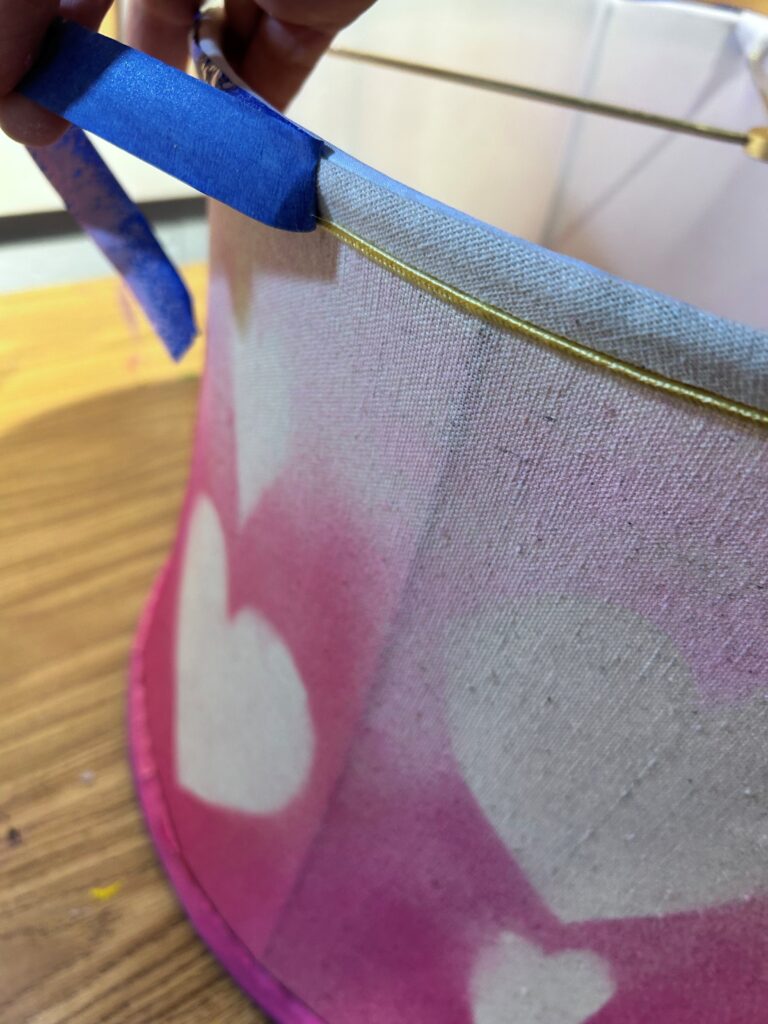
Does your shade have any parts you want to keep as they are? The top and bottom rims have nice gold band around them, so painter’s tape was put on top to keep paint off.
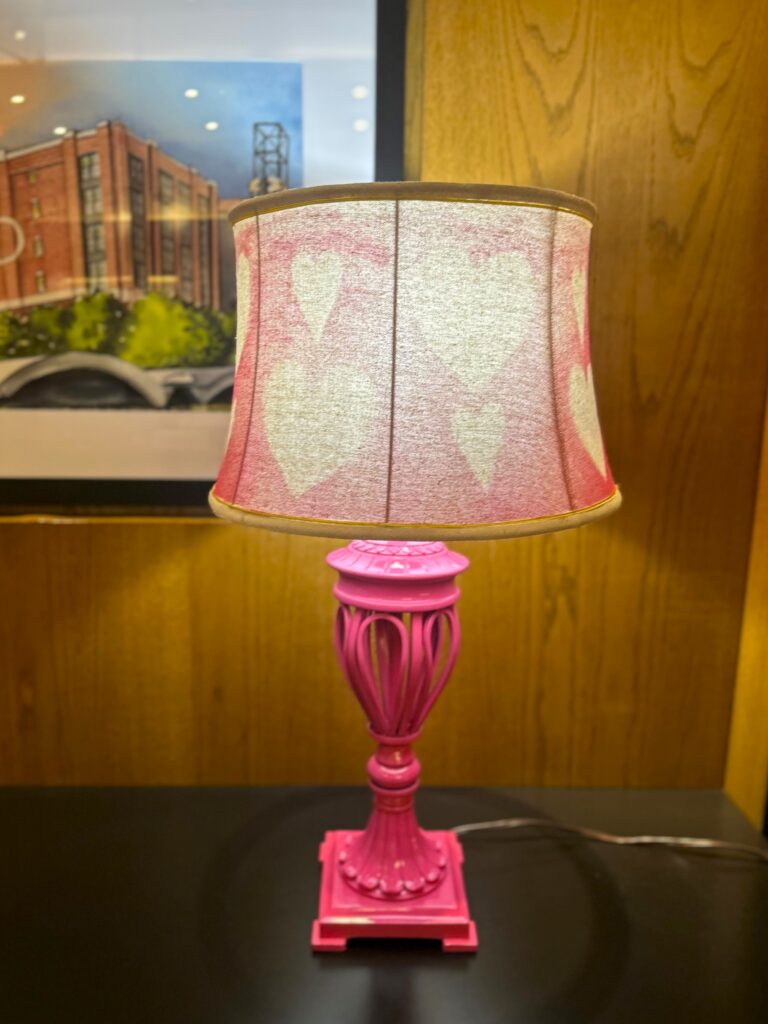
Step 4: Spray on some style
Shade
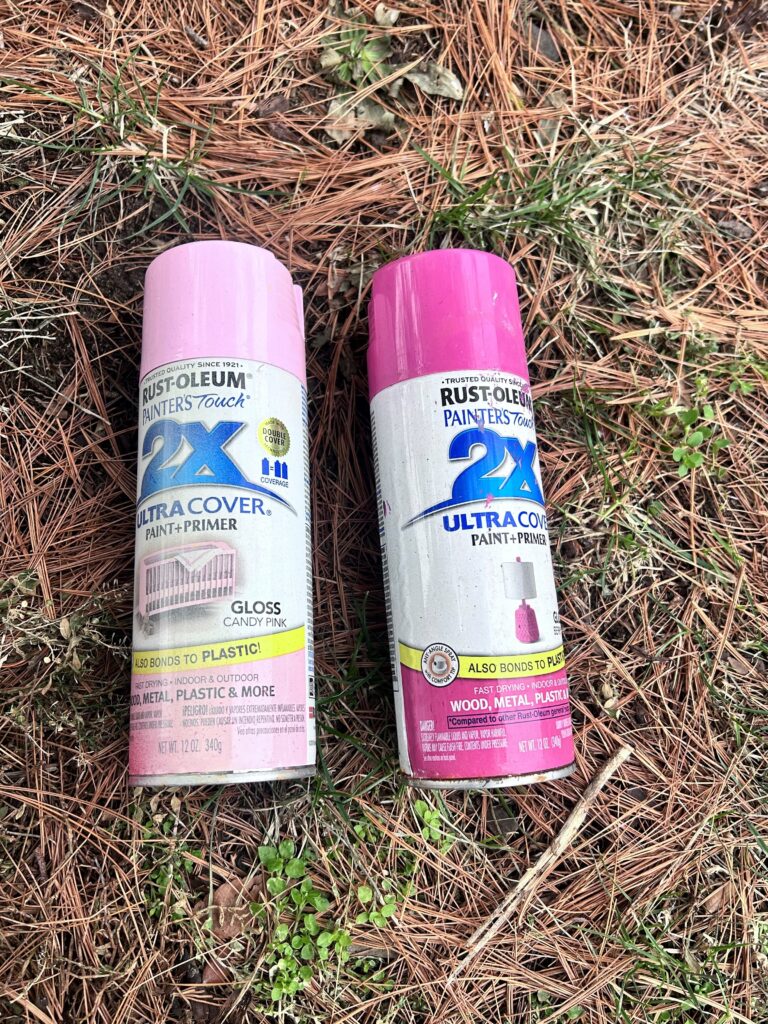
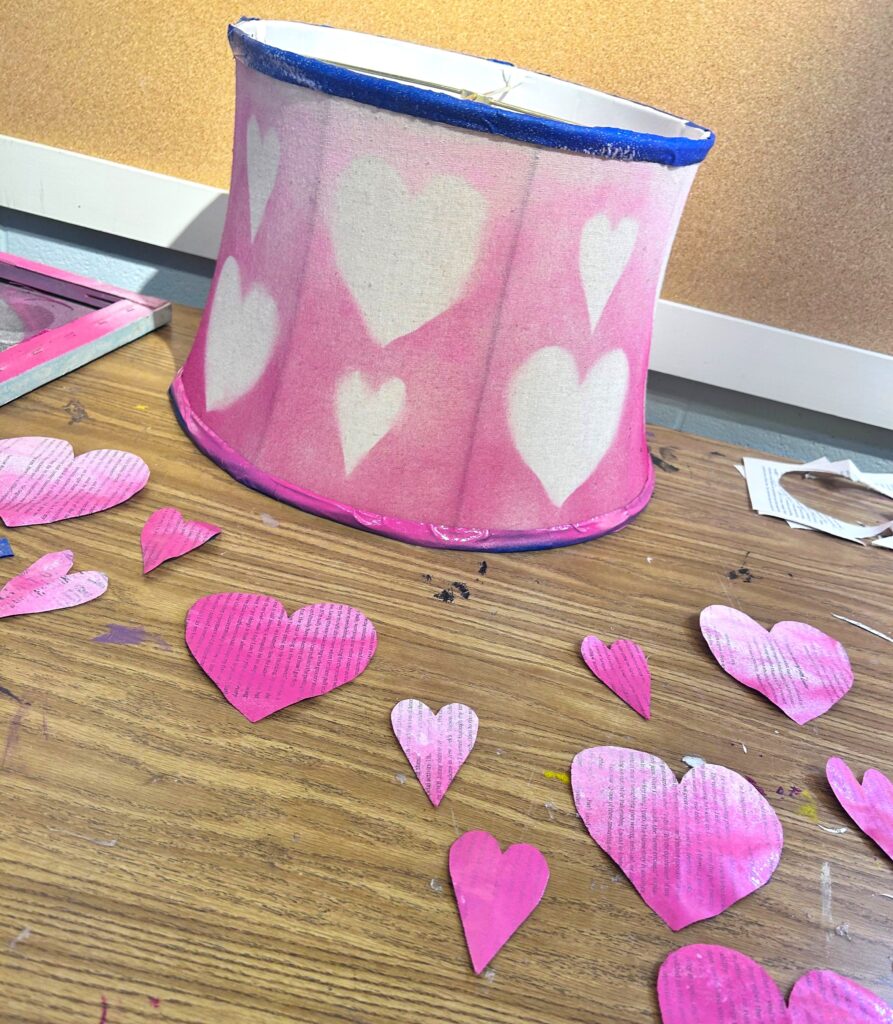
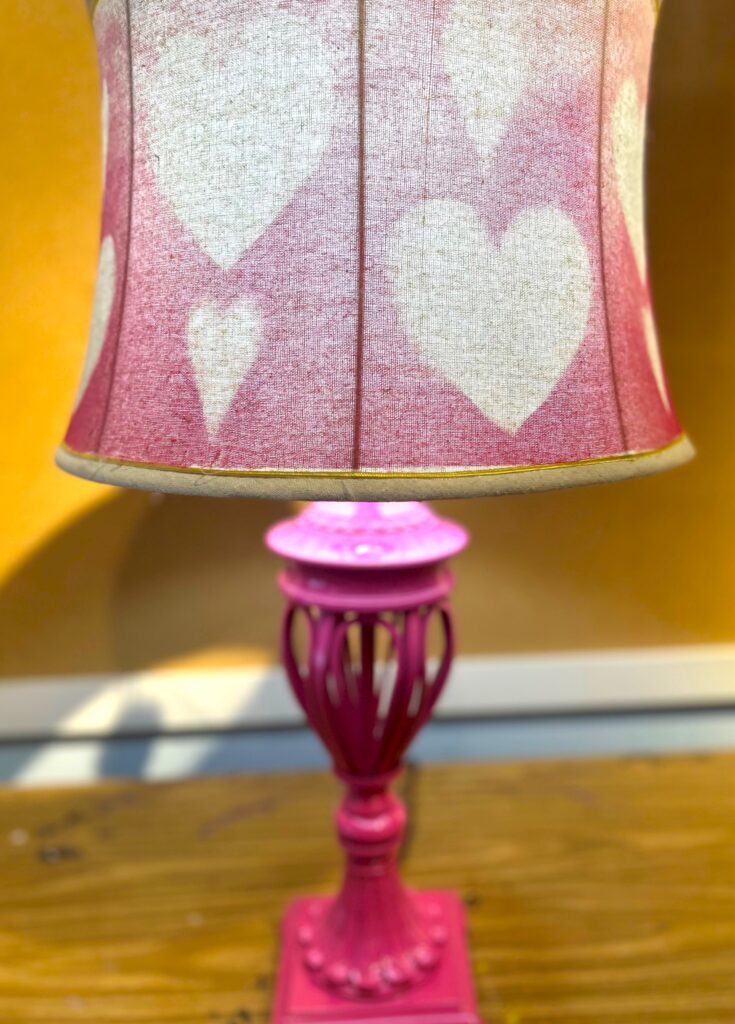
Place your lamp shade on a drop cloth and, if possible, place it outside. Wanting to tie into the heart theme, a light pink spray paint was added along the top part of the shade. Creating an ombre look, a bolder, brighter berry-toned paint was sprayed along the bottom half, overlapping the top pink tones, so they flowed together.
Base
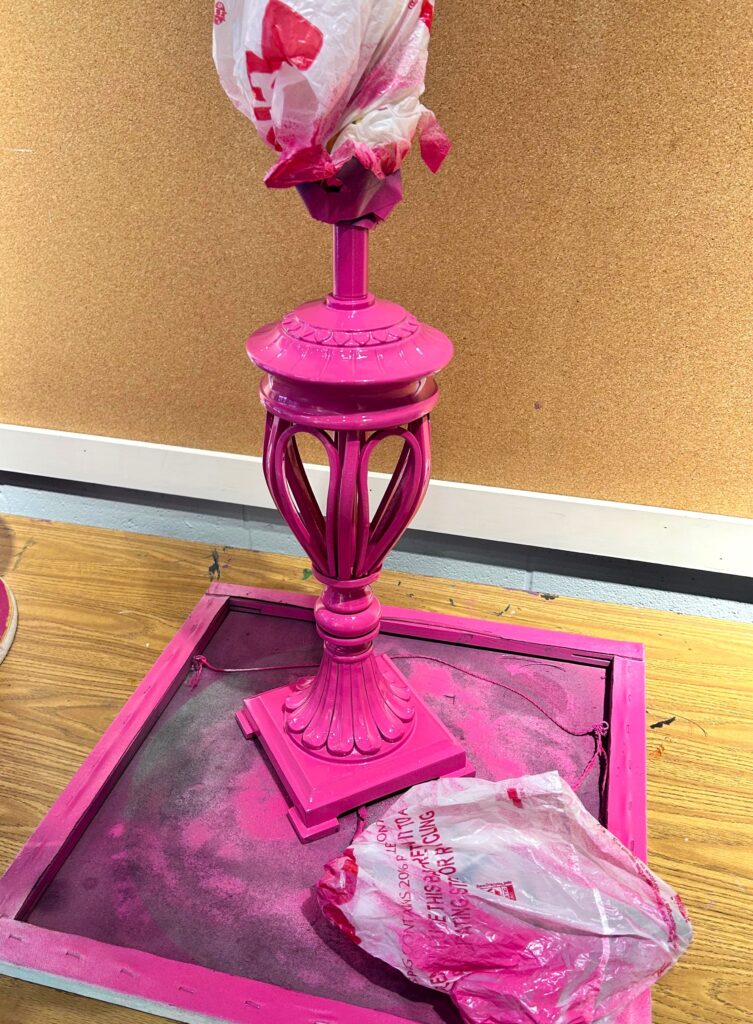
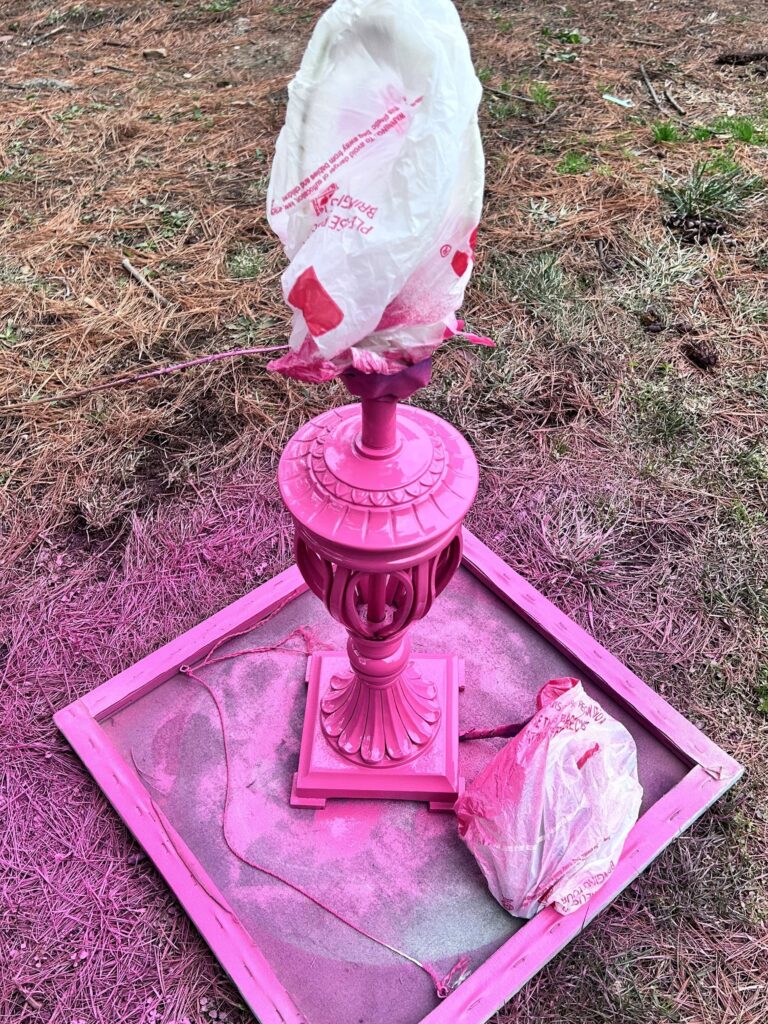
Use painter’s table and plastic shopping bags to cover and protect your lamp’s power cord as well as the top harp parts. Place your base outside, too, and apply a light layer of the bright berry paint. After it dries a bit, gently lean your lamp base over and apply another layer; moving the lamp and leaning it over from side to side, allowing all parts, pieces, edges and sections to get covered completely.
It is fine to move your painted shade and its base inside now to let them dry completely before moving forward. You want things to dry well to avoid smudges and/or fingerprints.
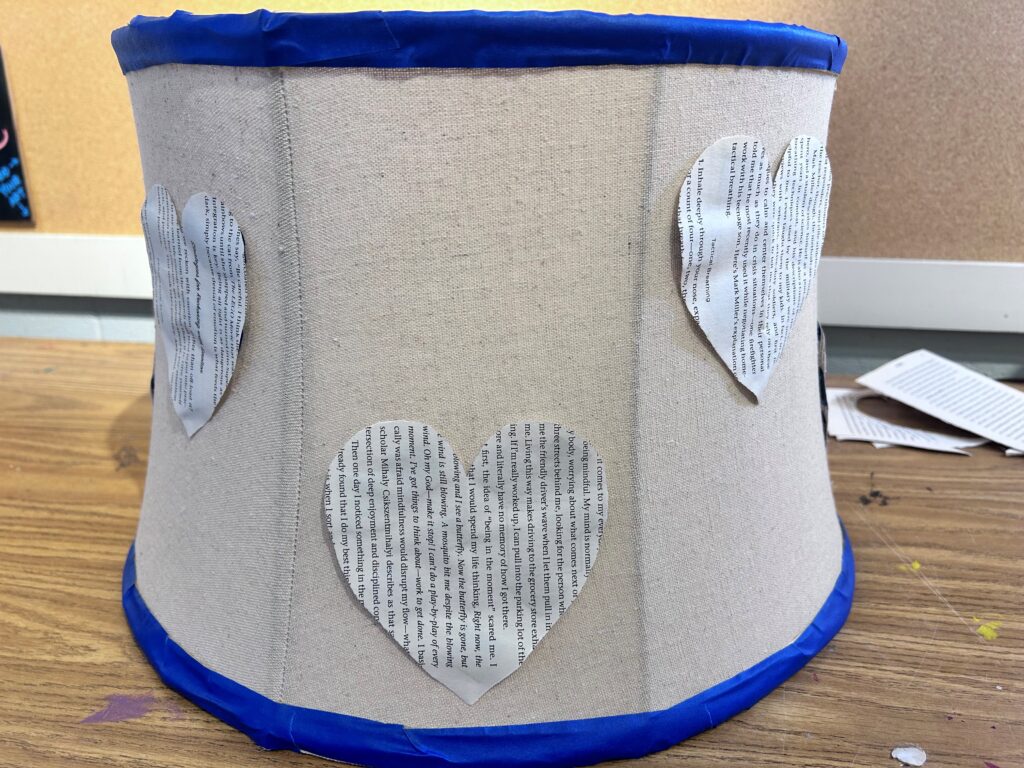
Step 5: Remove the hearts—and save them for future projects!
This part is so fun! Carefully remove the paper hearts/stencils from your lamp shade. Take off the painter’s tape from the back of the hearts (and save them for future DIY projects!), as well as from the shade’s rims and lamp base parts.
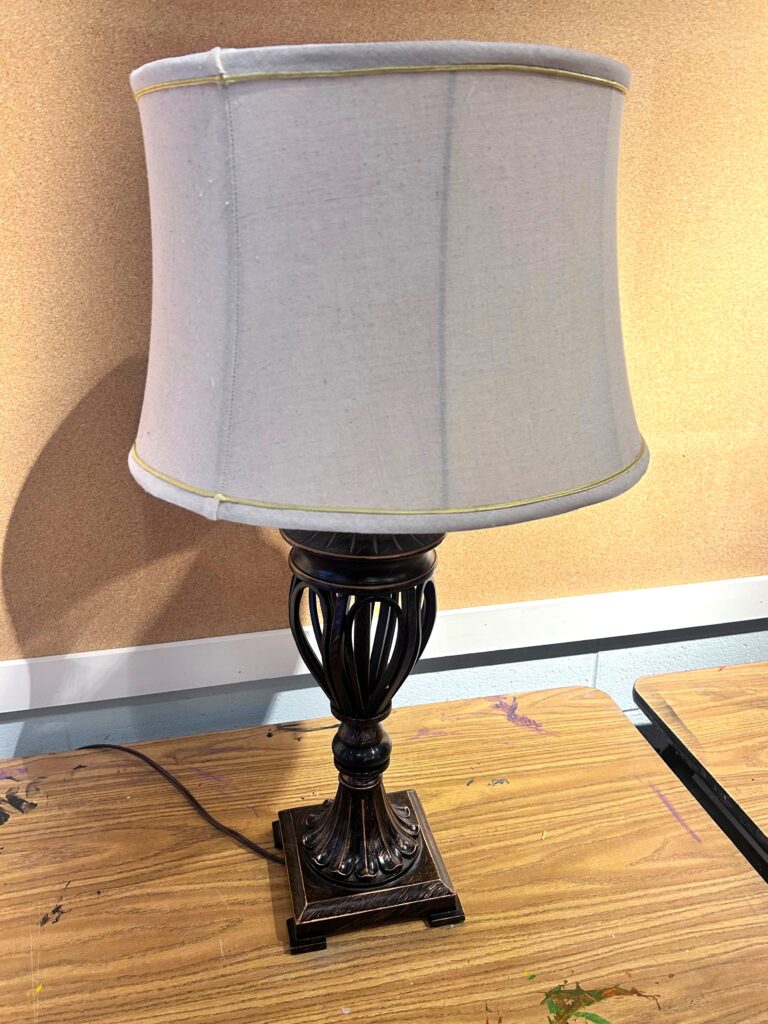
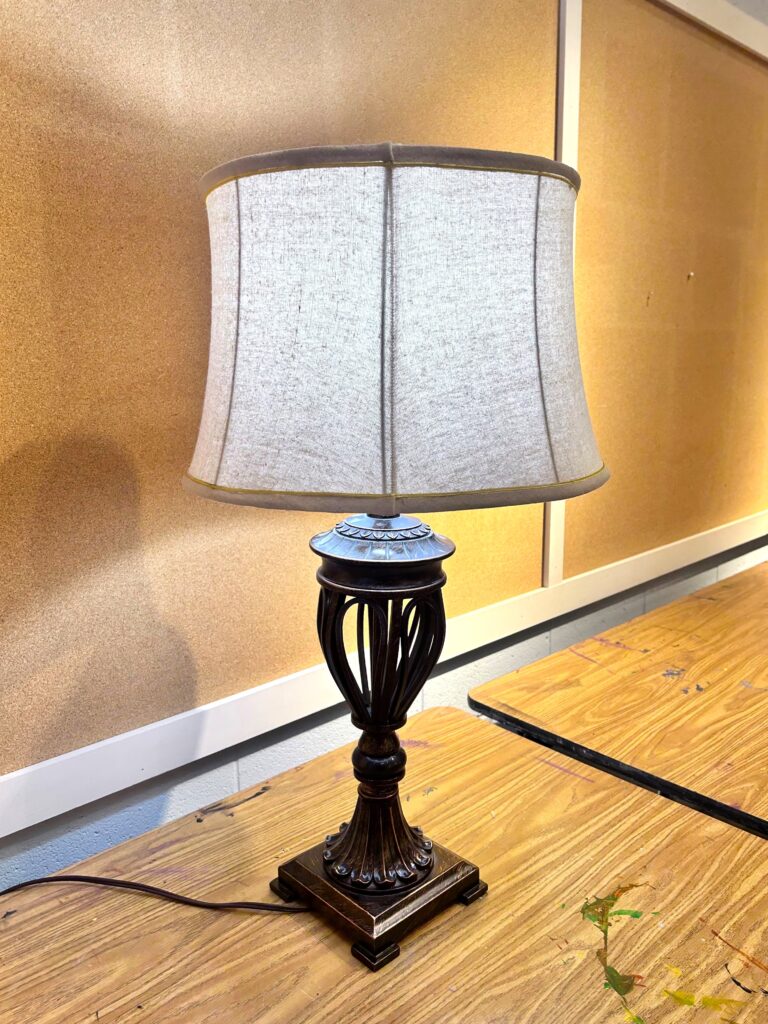
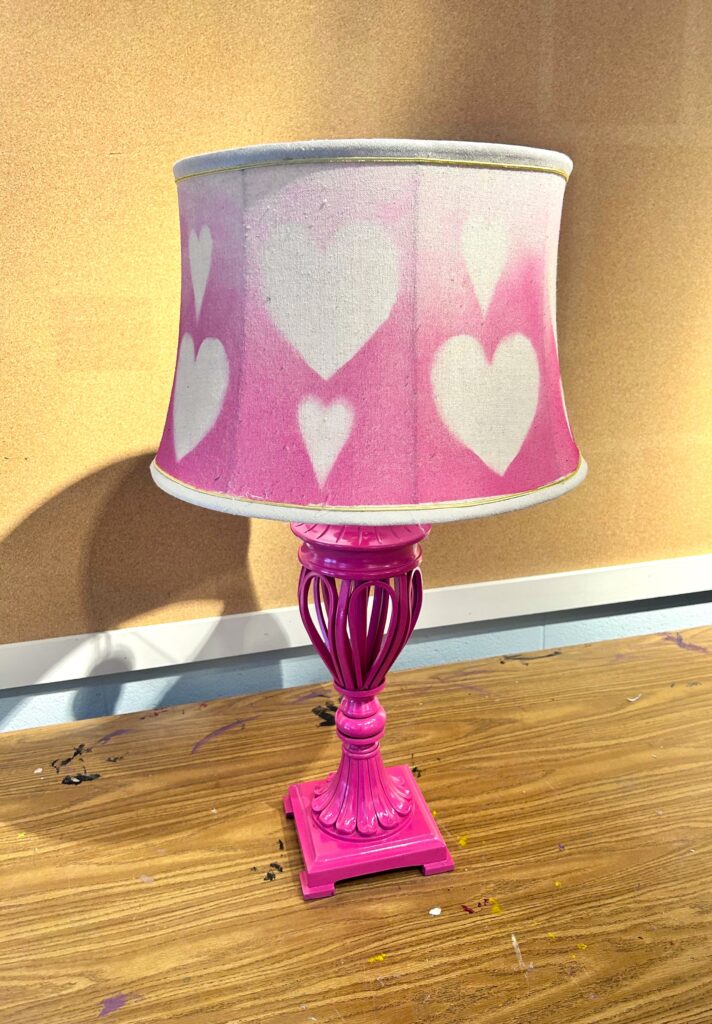
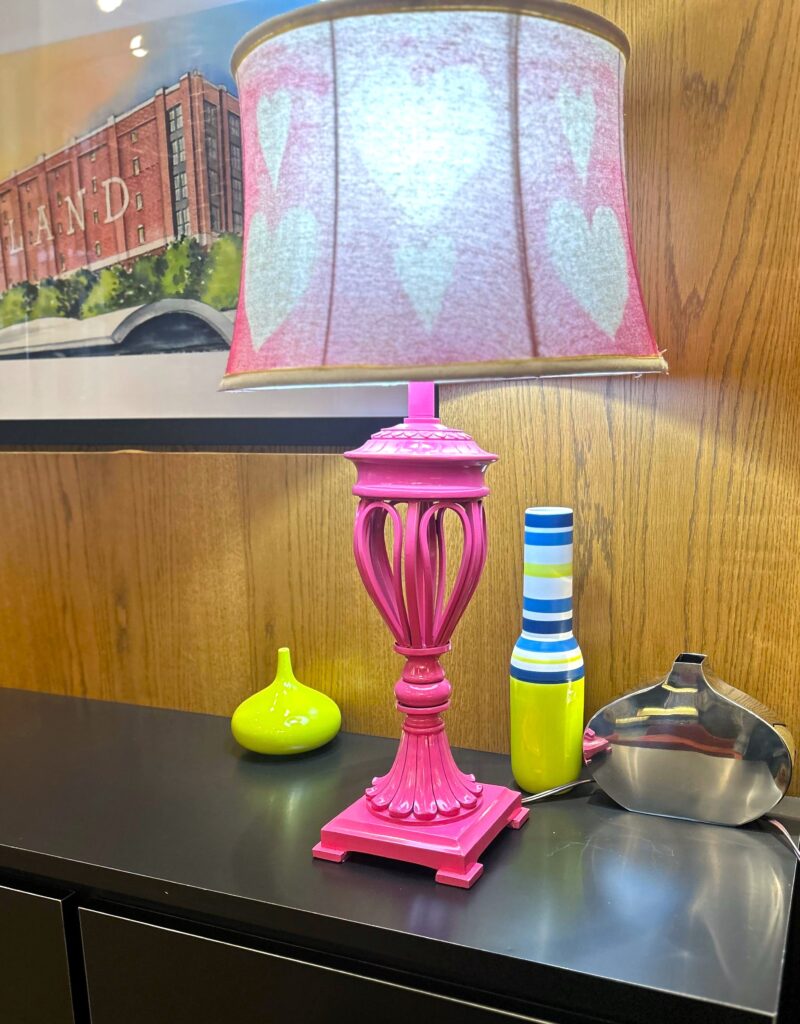
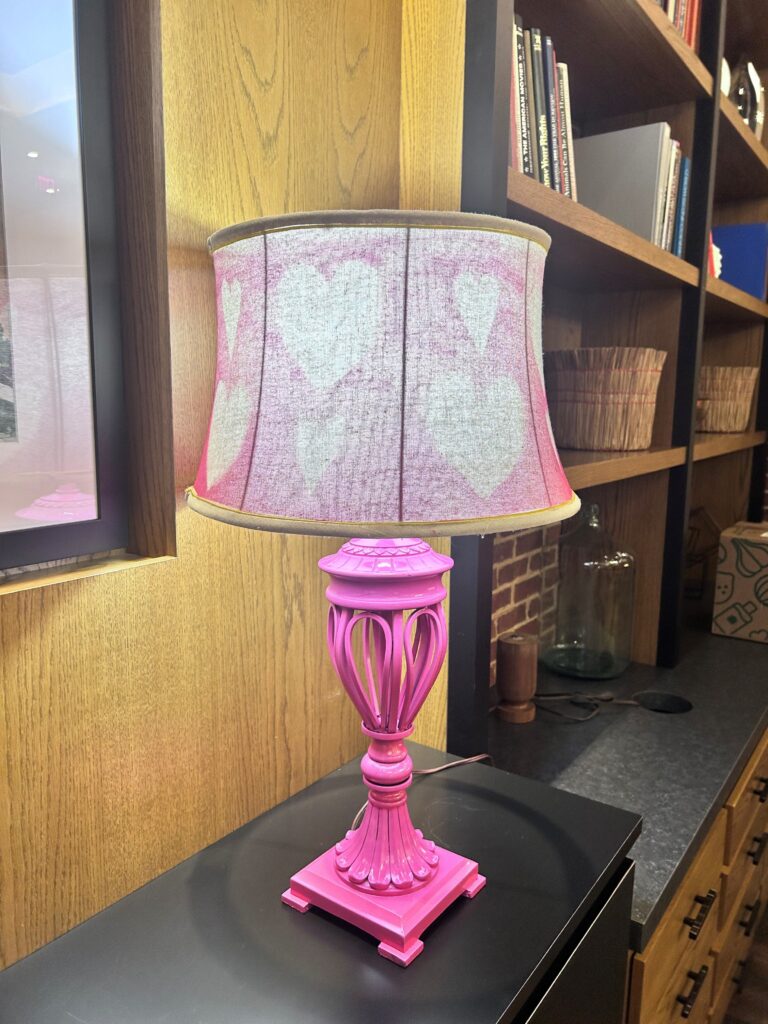
You should be able to see the heart shapes outlined by the paint. What I love about this project is that the lamp looks wonderful when turned on as well as when off during the day. Pretty, pretty, pretty!
6. Set the stage & let your heartlight shine!
This happy, colorful and heart-covered lamp will look at home anywhere you are feeling the love! It will make a statement when you set it in your living room with other cool collectables, favorite books and inviting artwork. Place it on your desk and position it with colorful frames for photos, a bright bowl for coins and an attractive mug for pens and pencils. If this finds a home on your nightstand, consider matching with furry and fun throw pillows in complimentary colors. After seeing the results of your DIY talents, like ET, your heartlight will shine for all to see!

Again, join us on February 11 from 6 p.m. to 8 p.m. at Brookland Arts Walk’s Artist’s Lounge, 716 Monroe Street NE. We are so excited to co-host this “Not Your Typical Typical Valentine’s Day” event with several amazing groups. You will create votives, flowers, jewelry, and cards using upcycled materials. Bring materials to use, share, and swap with others! Come solo, with a friend, or with your boo! See you there!
Similar Reads:
- Use Sunflowers to Inspire Your DIY Designs! – Finding Your Good
- Noodle on This DIY: Fun Flowers From Pool Accessories & Goodwill Finds – Finding Your Good
- DIY: Toilet Paper Roll Flowers & Butterflies

Tim Kime
Artist, Motivational Speaker, Life Coach
