
Oh Deer!
A DIY Address Post That Says, “Welcome Home”
A Whimsical, Repurposed Way to Make Your Mark at the Curb
This charming, one-of-a-kind address post will have your neighbors saying, “Oh deer, that’s amazing!” Using Goodwill finds and leftover/scrap materials, you’ll create a heartfelt and home-spun statement that blends curb appeal with eco-friendly flair.
Here’s How:
1. Hunt & gather like a deer at Goodwill
Forage through your favorite, nearby Goodwill nonprofit retail store for items to repurpose in this dear (deer!) and delightful way.
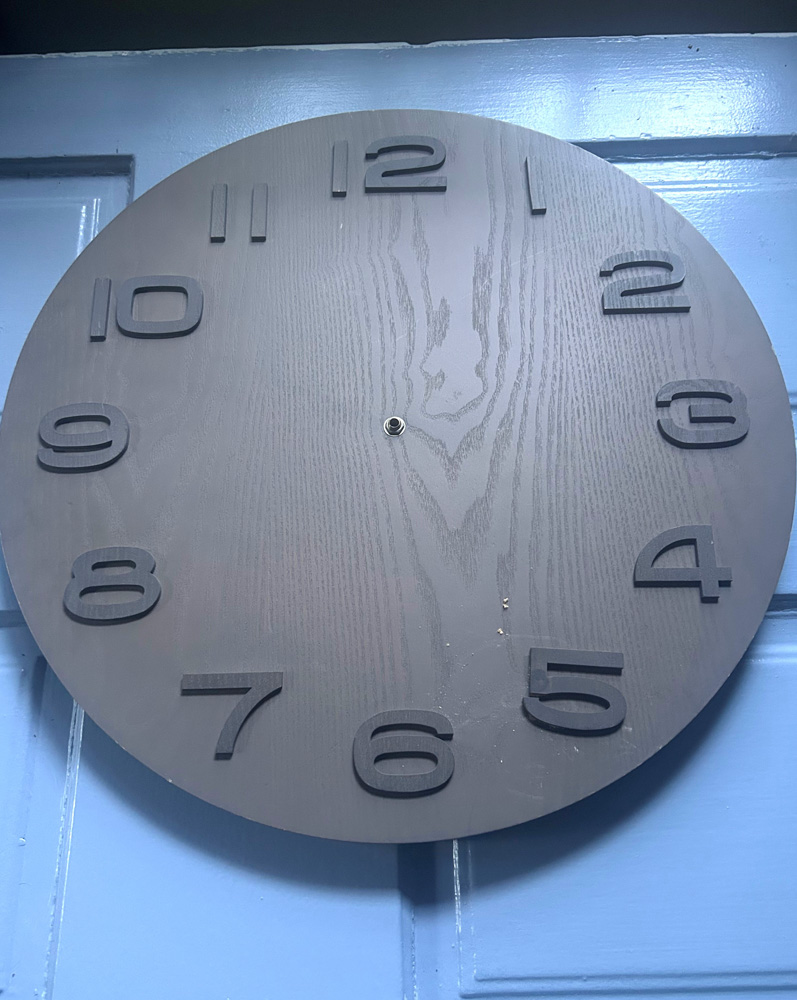
Choose a decorative element to add some visual interest and whimsy. I scored with a festive holiday deer and picked up a big clock to reuse its digits as house numbers.
Other ideas to add flair to your project include birdhouses, small animal figurines, a watering can or wooden picture frames. What have you seen at Goodwill that you might reuse in this inviting manner?


2. Build your home base
Lay out your wood pieces to form a post shape that stands tall and proud. Look through your collection of scrap and discarded wood from other projects to see what could create a base.
Consider taking a part of a wooden furniture item (also found at low prices at Goodwill) and reusing pieces of it for this project.
As you can see, I found a thick wood piece that was six inches wide and an inch and a half thick. I also had a carved piece of baseboard that was the same width as the other piece.


On your workspace, use wood glue to bond them together. Reinforce with nails or screws for lasting strength—this piece will stand the test of thyme (and time)! The baseboard piece was a little longer, which I thought would be perfect to help anchor in the garden, so no sawing or cutting was needed.


3. Add your deerly beloved topper
Remove any unwanted or unneeded embellishments from your thrifted deer (or other décor item). Some fake fur, string, and small bells were taken off, and the glue holding them was removed with a screwdriver.


Center the deer and its base at the top of your post. Secure it with glue and nails—it deserves a solid perch from which to greet passersby and stand proudly through various seasons and weather.
4. Paint with purpose
- Paint the entire post a clean, classic white to unify the look and match your home’s trim.
- Let it dry, then touch up as needed to make it shine like new.
- Always being cost-conscious and budget-friendly, look for what paint you already have on hand to see if you can use it for this project. The white made the whole project bright, too, to capture headlights for those coming by at night.


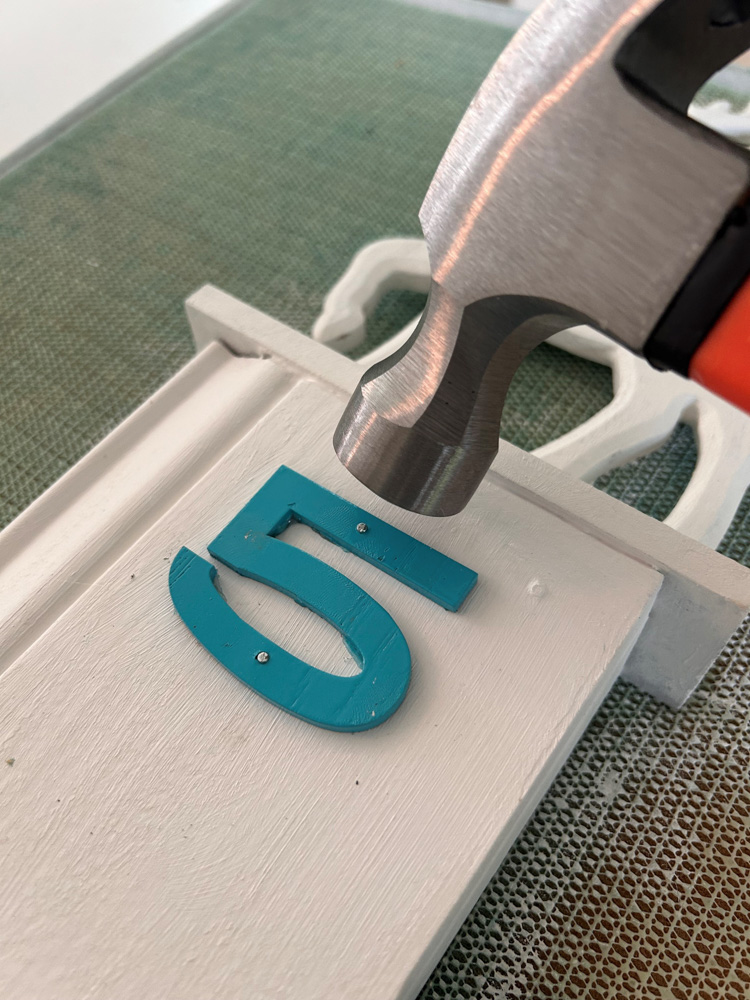
5. Give your numbers a pop of personality
- Paint your clock/house numbers in a bold, contrasting color to make them stand out and easily read. Again, consider using what you already have in your stash. In my collection, I had a bright teal spray paint with a glossy finish that was also exterior-friendly—perfect, as I love the color!
- Place your address numbers on a drop cloth or other item to protect things, then spray away.
- Let dry before handling.
- Glue and nail them down so they stay securely in place and ensure they’re easy to spot from the street.


6. Seal the deal
Considering adding a weatherproof sealant or outdoor-friendly polyurethane to help your DIY efforts last season after season.
7. Stake your claim
Dig a hole in your garden bed near the curb—go deep enough for a sturdy stance.
Place your post in the hole, backfill, and pat it firmly into place—your home’s “calling card” is now grounded!

8. Rock the base
Arrange garden stones, rocks, or pebbles around the base for a natural, polished finish. This will keep weeds out and style in.
The rocks and pebbles were found around the yard and gardens at my place, so no cost at all, yet a priceless, timeless look.


9. Shine a light on your DIY talents
Move or add a solar spotlight to illuminate your creation. It’s practical and gives your handiwork a nighttime glow that says “welcome home” around the clock. The one used here was relocated from one part of the yard to stand guard and shine the light on this new eye-catching addition.


You’ve crafted more than just an address post/signpost—you’ve made a statement of creativity, sustainability, and love for your home. So stand back, admire your talents, and say proudly, “This was a doe-it-yourself project I’ll always be fawn’d of!” (Okay, those puns might warrant a small groan AND a big smile!)
Similar Reads:
- DIY: How to Upcycle Mannequins into Pride Art Pieces – Finding Your Good
- DIY: How to Upcycle a Mirror to Reflect Your Pride – Finding Your Good

Tim Kime
Artist, Motivational Speaker, Life Coach


