You’ve Got the Whole World in Your Hands.
The world changes so quickly these days that globes seem to be out of date overnight as countries rename themselves.
Give your home a global appeal with these three creative transformations.
Level:Teens and adults
Items needed:
1. School-sized globe
2. Small lamp
3. Succulent plants (5 or 6)
4. Potting soil
5. Hanging lamp kit
6. Wide candle holder
7. Rope or twine
8. Ribbon
9. Exacto knife
10. Glue gun & glue sticks
11. Several cans of leftover spray paint
12. Drill
13. Jig saw
Time requirement: 60 minutes not including paint drying time
Cost: $15
- $4 globe
- $10 for succulent plants
- $2 for potting soil
- $1 for candle holder
- $7 for hanging lamp kit
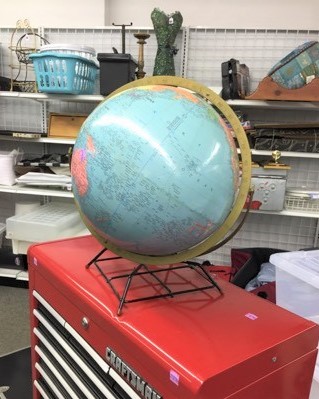
Step 1: Find the world—and a globe—at Goodwill
It might take you a trip to find a globe donated to Goodwill among the many great items available.
A word of advice-–anytime you see a globe for sale at one of Goodwill’s remarkable prices, take it (and the world!) home with you. Globes go great with any home décor and in any room in your home or office.
Here are three easy options for this internationally appealing DIY project.
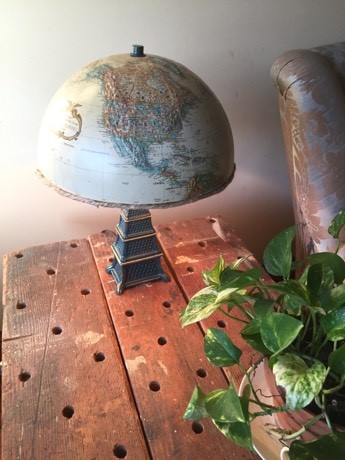
Option A: Going global lampshade
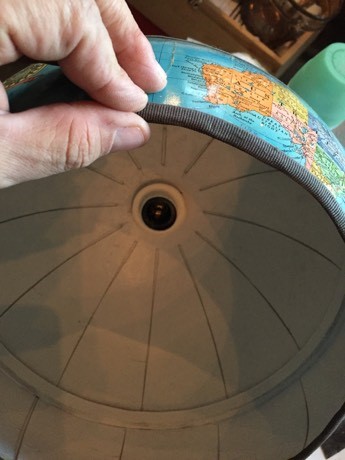
Step 1: Cut along the equator
After you remove the globe from its base or stand, use an exact-o knife to cut apart the top and bottom halves right along the equator.
This is where most globes are connected so you will be separating the two pieces through the glue holding them together.
Use the top half for your lamp shade so that when it is in place, the continents, countries and places are right side up.
Place the other half aside for the next project. You may want to lightly sand the cut edge to remove any of the glue used to hold the pieces together.

Step 2: Spray paint the globe’s inside
Like most you will find, the globes used for these projects were made out of thick cardboard – so the inside will be plain and dull in color and feel.
To provide a reflective, luminous quality and add visual interest, spray paint the inside with gold, white or a lighter color. Let dry.
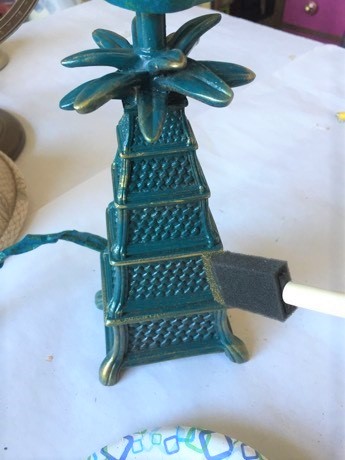
Step 3: Enhance the lamp base
While the recently painted globe’s inside is drying, now is the time to turn your attention to the lamp’s base.
While the lamp I had was a neutral brown tone and could have worked fine, I wanted it to stand out and compliment the globe’s colorful hues. Left over teal spray paint was used and a light coat was applied allowing some of the brown base to show through and give extra dimension. If you have left over cans around, consider using one of them on the base. You could brush on left over wall paint, too.
Given that most globes have a variety of colors, it is likely you will have a color on-hand to use for this DIY project.
Design Tip: Once the coat of spray paint has dried, consider lightly buffing the lamp base with sand paper to give it a distressed look. If there are interesting lines or designs on your lamp base, this will help to call attention to them. Also, you can use the paint color on the inside of the globe to pull out any interesting lines or edges, too. It will also help to connect the feel of the lamp base with its new shade.
Also paint the lamp’s finial so it matches, too.
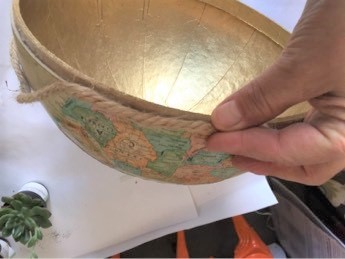
Step 4: Use rope or ribbon to cover the globe’s edge
Return your attention back to the globe. You will want to give a finished look to the outer edge that you sanded and where the two halves were previously joined. Consider what you already have around the house such as a piece of rope, twine or ribbon. With your glue gun, adhere this into place.
Step 5: Add the shade to the top, turn on and give a cheer
Place the globe half—now your lamp shade!–on to the lamp’s “harp” which is what holds it in place. The screw will come through the globe’s hold where the base used to attached. Add and tighten the finial in place.

Turn it on and admire the shine!
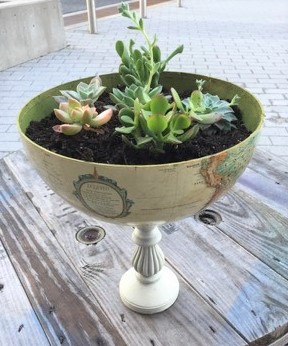
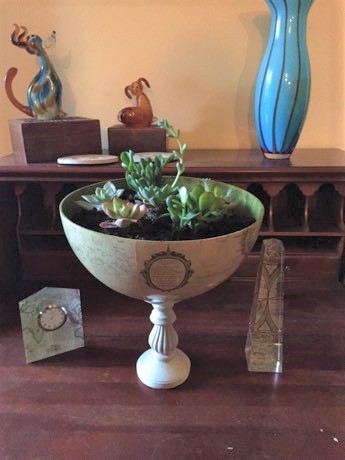
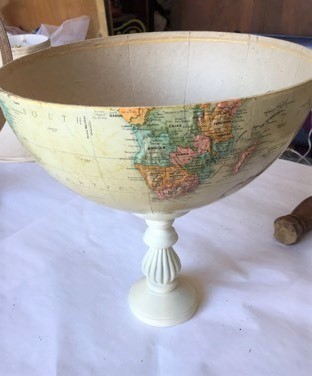
Option B: A world-class planter
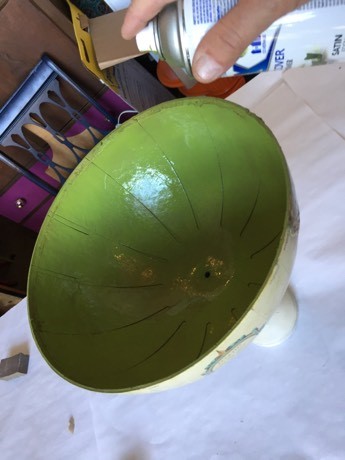
Step 1: Paint inside of the globe’s other half
Pick up the bottom half of the globe and lightly sand the edge where you separated it from the top.
To provide a punch of color and to project the globe’s cardboard inside from moisture, spray paint the inside. If possible, use a color of spray paint that you already have around your house. A hunter green color was used for this DIY project because it picked up tones on the globe as well as the plants to be used. Let dry.
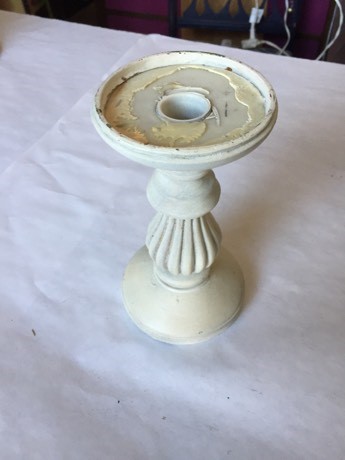
Step 2: Glue onto candle holder
With your glue gun, add glue to the top of the wide candle holder then place your globe on top. Based on the color of your candle holder, you might want to consider painting it too, again, picking a tone to match those of the globe.
Step 3: Add potting soil and plants
Once the globe’s inside coat of paint has thoroughly dried, add potting soil and plants. Voila! You now have a planter that will collect compliments in any language!
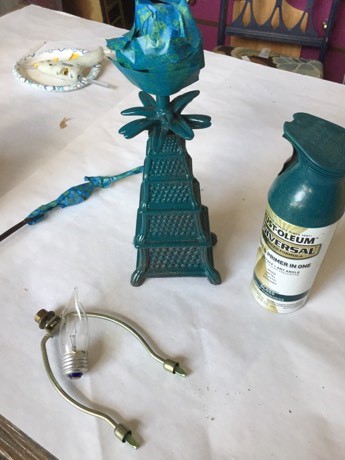
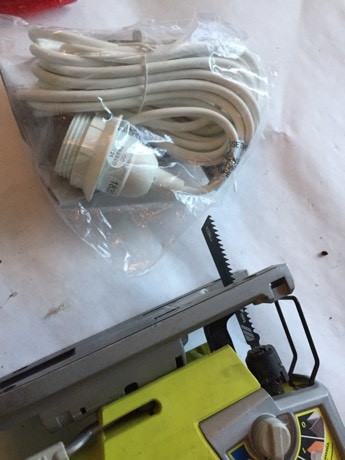
Option C: Make a light of the world chandelier
Step 1: Trim the bottom part
With another globe that has been removed from its base, too, use a drill to cut a hole near the bottom. Also, drill a larger hole in the top’s center. With a jig saw, carefully cut the lower third of the globe inserting the blade into the drilled hole then moving it around the globe to remove that portion. Once that piece is cut and removed, use sand paper to lightly buff the rough edge created by the sawing.
Step 2. Paint the inside
Like with the other options, spray paint the inside a light color to reflect light and add visual interest.
Step 3: Glue ribbon along the edge
To provide a clean line and appealing look, use your glue gun to adhere a matching ribbon along the edge cut by the jig saw. Be careful as the glue gets hot!
Step 4: Insert light fixture
From the inside out, thread the light fixture cord out through the hole drilled into the top. Screw together the fixture’s various pieces for a secure fit and add a light bulb.


Step 5: Hang it up and toast your talents
Drill a hook into your ceiling, then hang and admire your new worldly chandelier.

These are just three of the many ways to transform old globes into stylish new pieces for your home.
You truly can change the world, one globe and one DIY project at a time!
A special thanks to fellow Monroe Street Arts Walk Artist Marcelle Fozard of American Road Trip Pennant Pillows (www.marcellefozard.com) for letting me use her globe chandelier as a model for this blog!

