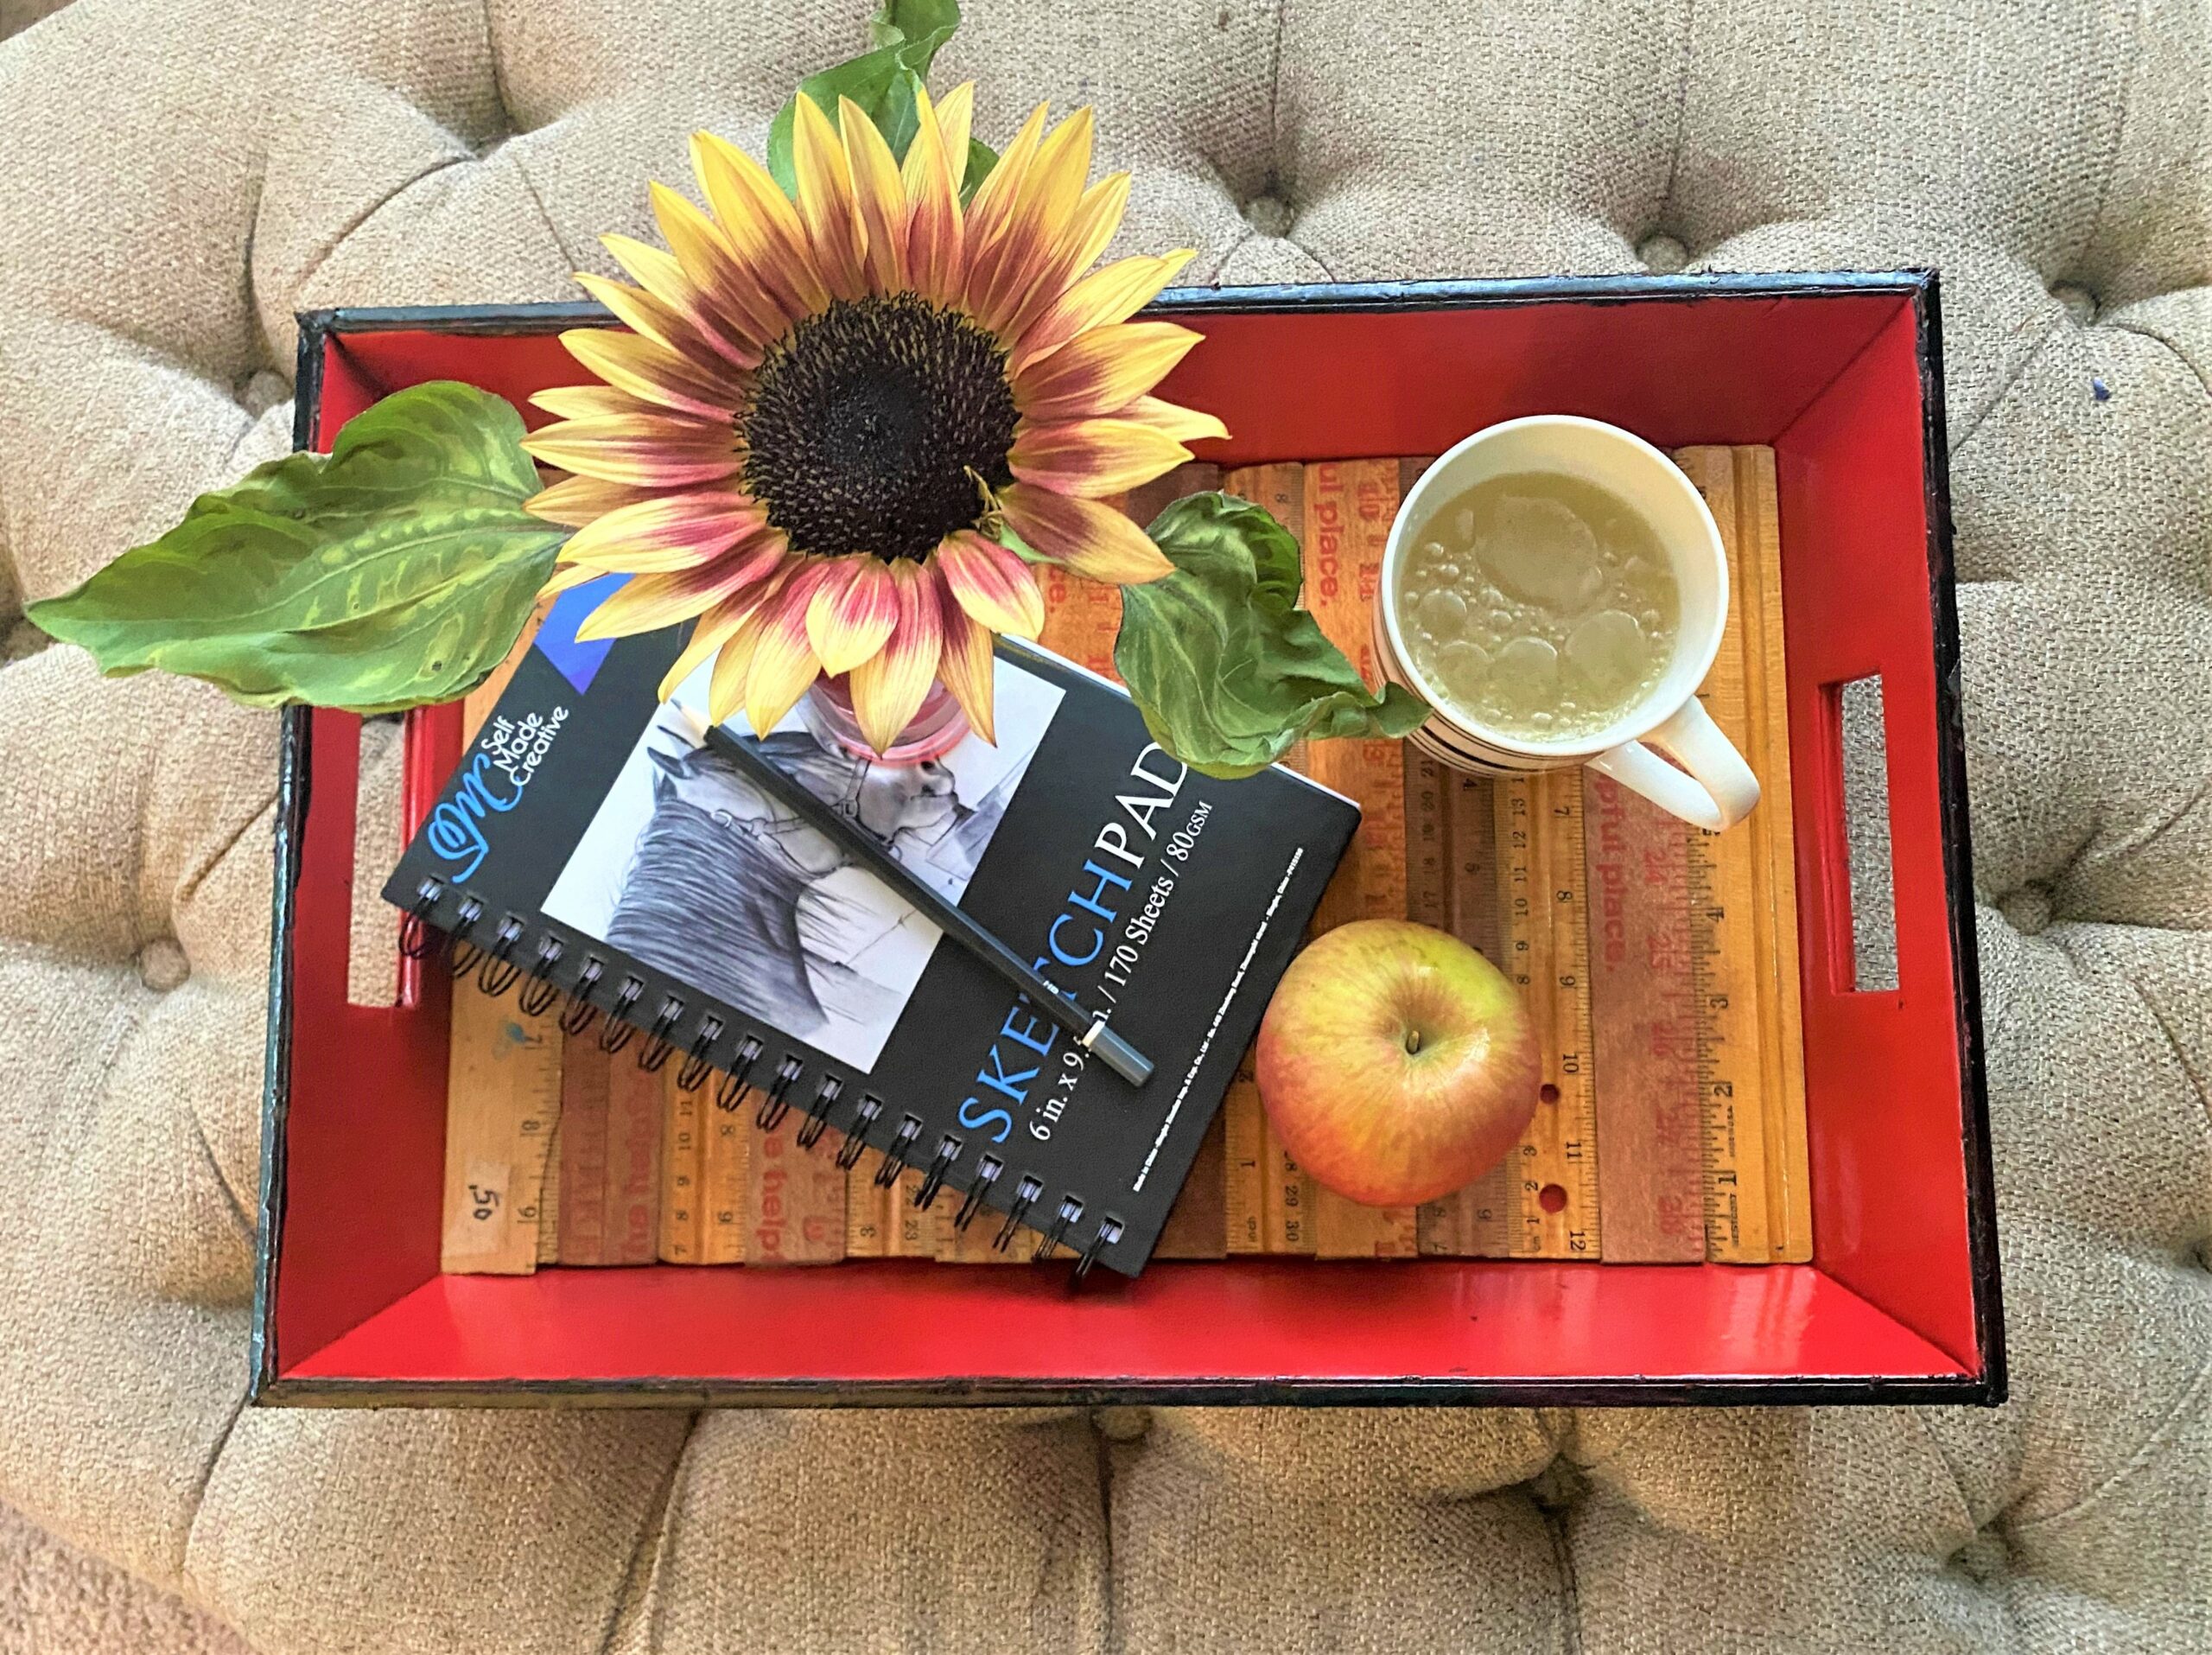
This easy DIY project will bring you loads of fun, inch by inch, for sure! Your creative efforts will measure up when you use rulers and yardsticks to make a unique serving tray.
As we head back to school, this is a great gift item for the teacher, educational volunteer, or student in your world! It’s also ideal for someone who loves very cool upcycled gifts!
Items needed:
· Wooden rulers & yardsticks
· Box cutter
· Fine-grade sandpaper
· Wood glue
· Wood stain
· Craft paint brushes
· Spray paint
· Craft paint
· Glossy polyurethane
1. Shopping at Goodwill RULES!
In addition to shopping at Goodwill for items to upcycle or repurpose, it’s a place to get some of your back-to-school items too.
For those on a budget or for those who love thrifting, stop by your nearby Goodwill store and check out the section where office and school items are available for purchase. Why spend big bucks at the big box office supply store when you can get great items at lower than low prices at Goodwill?
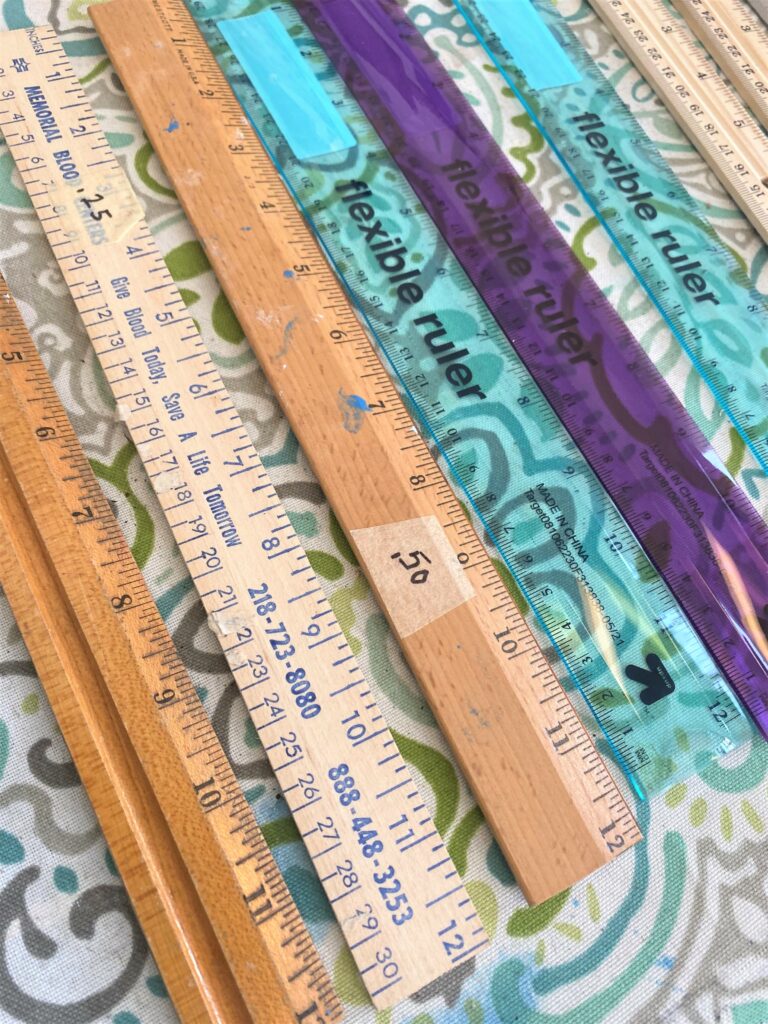

Rulers picked up and collected along the way were used for this project that every current and former student will love! Also, there is something heart-warming and simple about using wooden rulers and yardsticks for a project since many now are metal, plastic, or use today’s tech. There are a bunch of apps for measuring things!

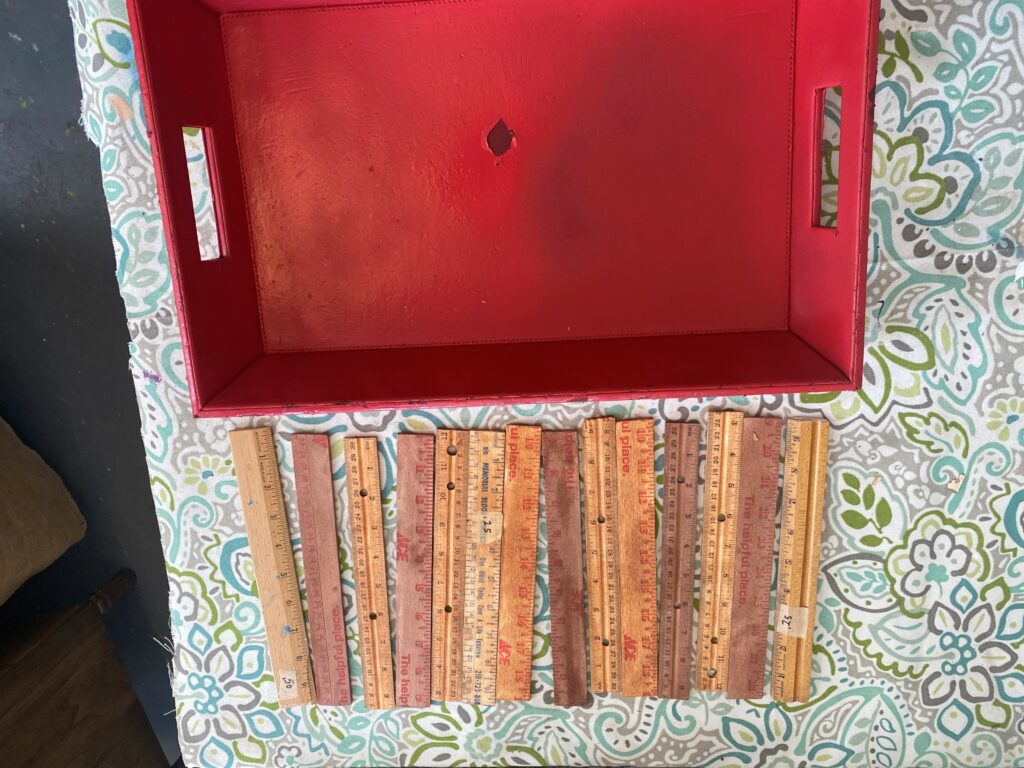
While at Goodwill, check out the aisle that houses all the wooden items available for purchase and look for a serving tray to transform. I found two I liked because they had a raised edge/border that I thought would frame the reused rulers nicely.
2. Measure twice, cut once
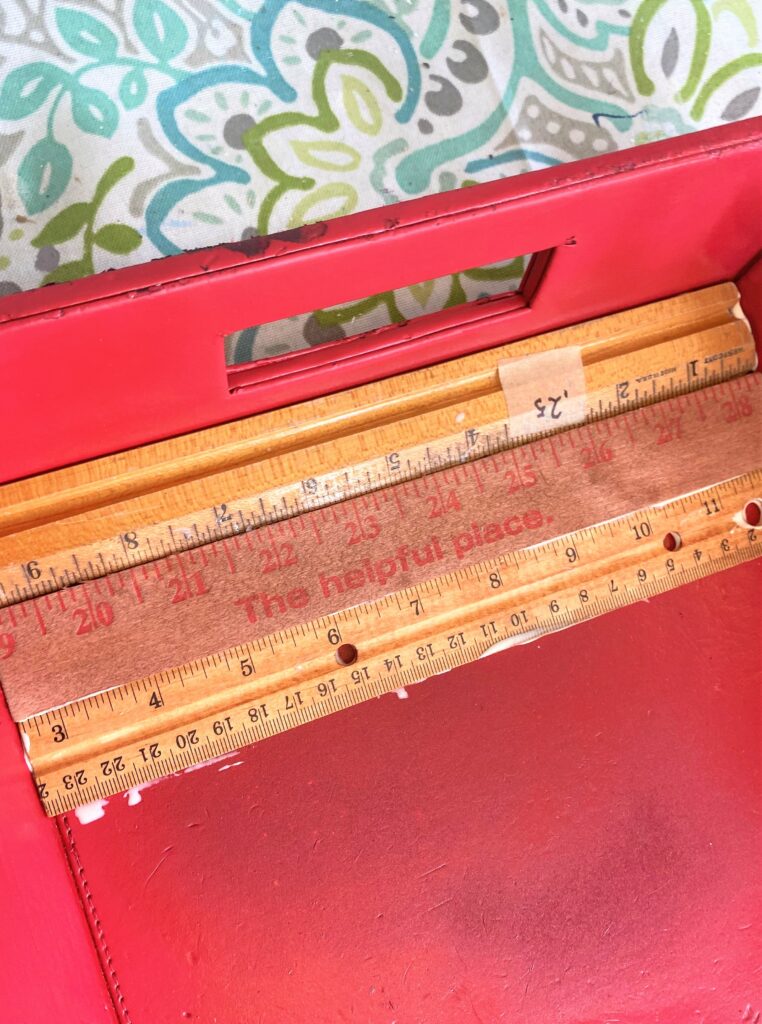
The serving tray used for this project was sturdy and had nice cut-out handles. Also, each ruler would fit across its width with a little cutting and trimming. After you measure how long you want each ruler to be, mark it with a pencil.
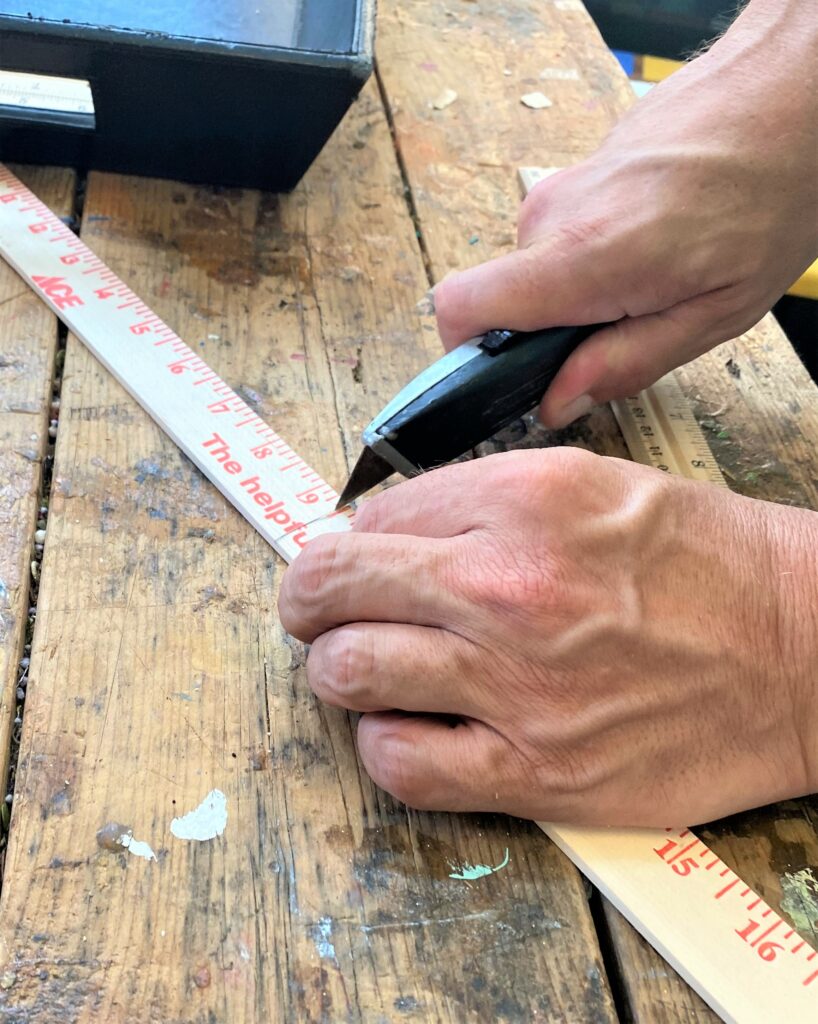
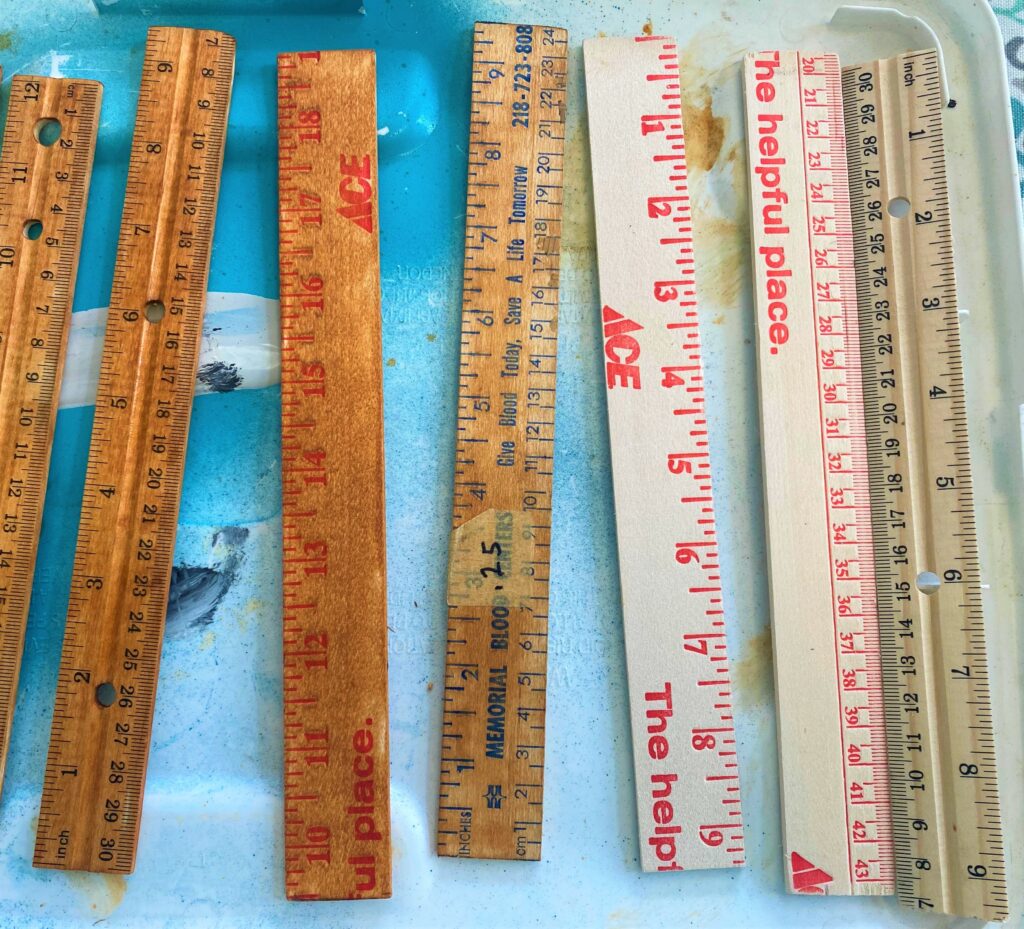
- Very, very carefully use your box cutter and start scoring it along your marked line.
- Carefully apply pressure and repeat this step until you are able to easily remove the unwanted ruler portion. (Be sure to save the cut-away pieces for future DIY projects!)
- Given the length of a yardstick, you will be able to get several pieces that can be used for this project.
- Use your sandpaper to smooth the cut edges for a clean looking finish.

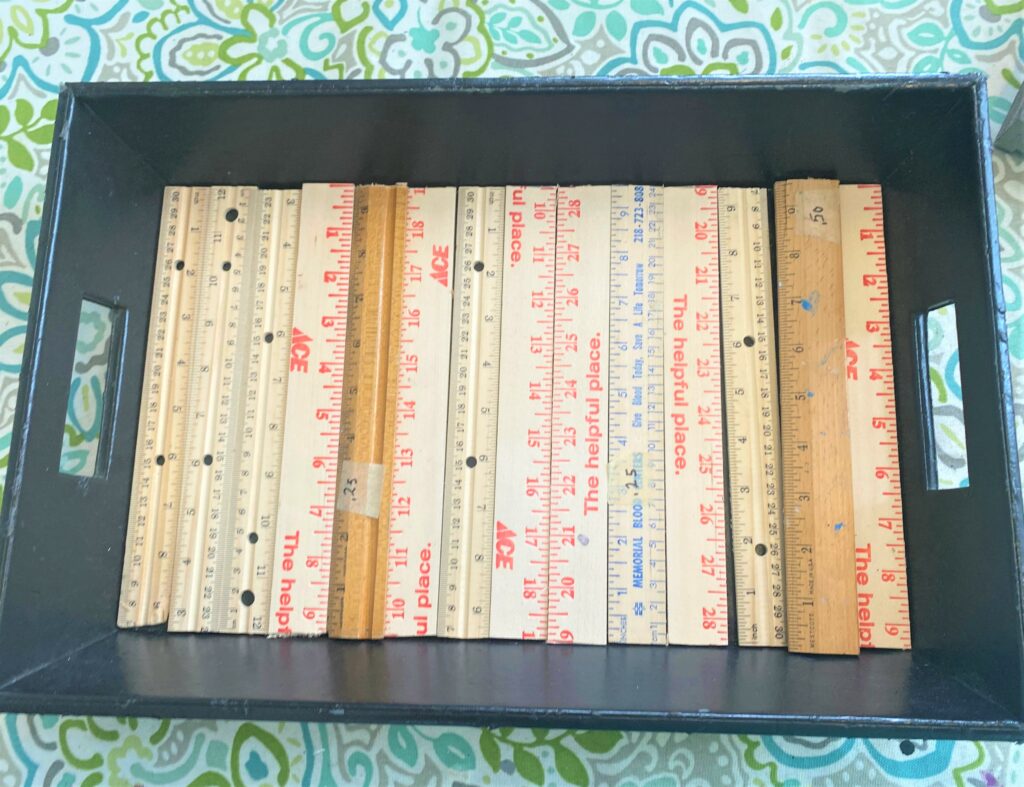
Design Tip: Rather than have all your rulers positioned in the same way, you might want to trim away several ends of one (where the last inches are) while trimming away the ends where the first inches are. The final pieces needed to be 9.5 inches long so for several I cut off the end from the 9.5-inch mark and higher. For some, I measured and removed the other end where the lower numbers are (1 inch to 2.5 inches).
3. Use a stain or paint color for a vintage-feel
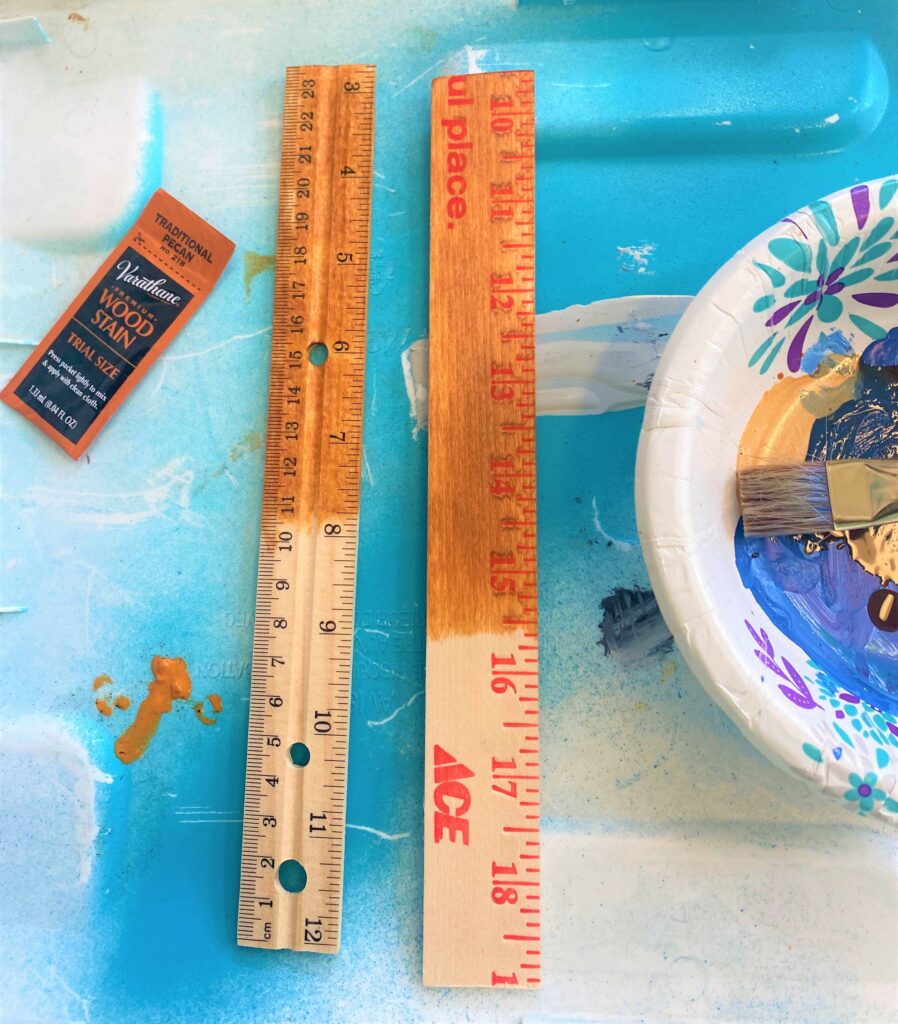
Some rulers were perfect just as they were, appearance-wise that is. Their warm golden tones were very homey and friendly. However, several of them were unfinished.
- To make all look lovingly aged, a wood stain was brushed on and immediately transformed how they looked.
- While I had wood stain on-hand that was used for some, I didn’t have enough for all. I poured brown craft paint in a bowl then added water and mixed it up. This was brushed on to allow the numbers and wording to show through it. It gave them a weathered and well-worn look which, if you follow this step, you will love, too!
- Allow your stained and paint-washed pieces to dry.
4. Give your tray some pop
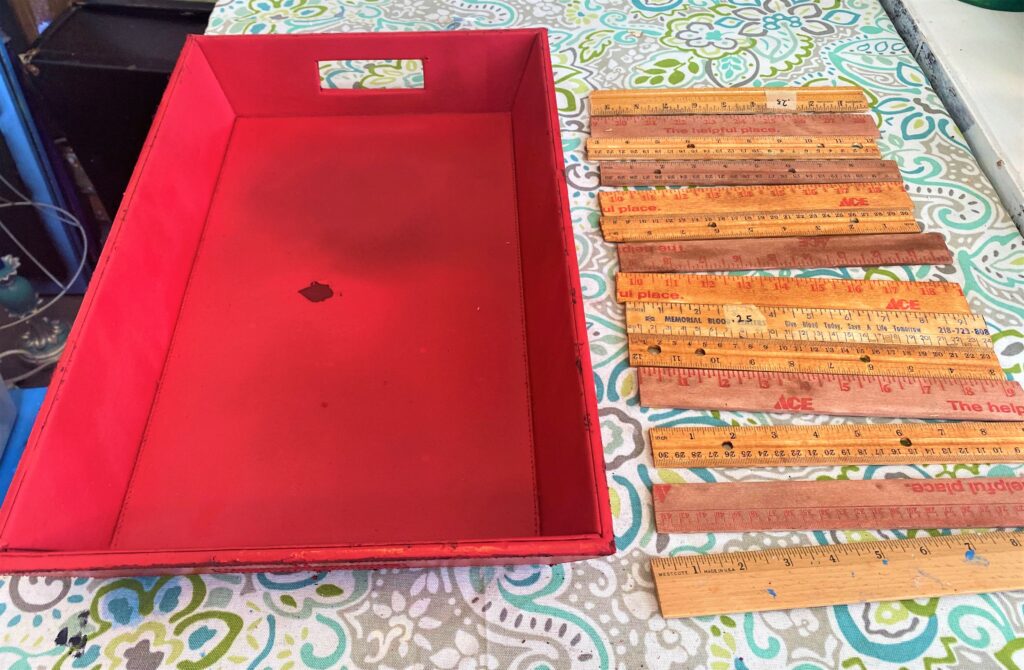
To match some of the lettering and numbering on the rulers, bright red spray paint was used on the tray. Also, given that schools often have bright red (since it is a primary color) in items and in decorations, this was a fun and appropriate choice.
- On your drop cloth placed outside, give your tray a light coat all over. You will come back to it for several more coats so don’t worry if the original hues show through after the first round.
- After the paint dries, you will want to flip it over so you can get the back side and edges.
- Again, let these paint coats dry completely before handling.
Expert Tip: Sometimes we—or should I say, “I”—have to learn the hard way! If you are doing a DIY project that involves spray painting and you do it outdoors, be sure to check the weather report before you get set up and start! Midway through painting, it started to sprinkle on the tray and on me. Thankfully, I was there to move things inside until the rain stopped. Upcycling crisis avoided!
5. Brush on glue
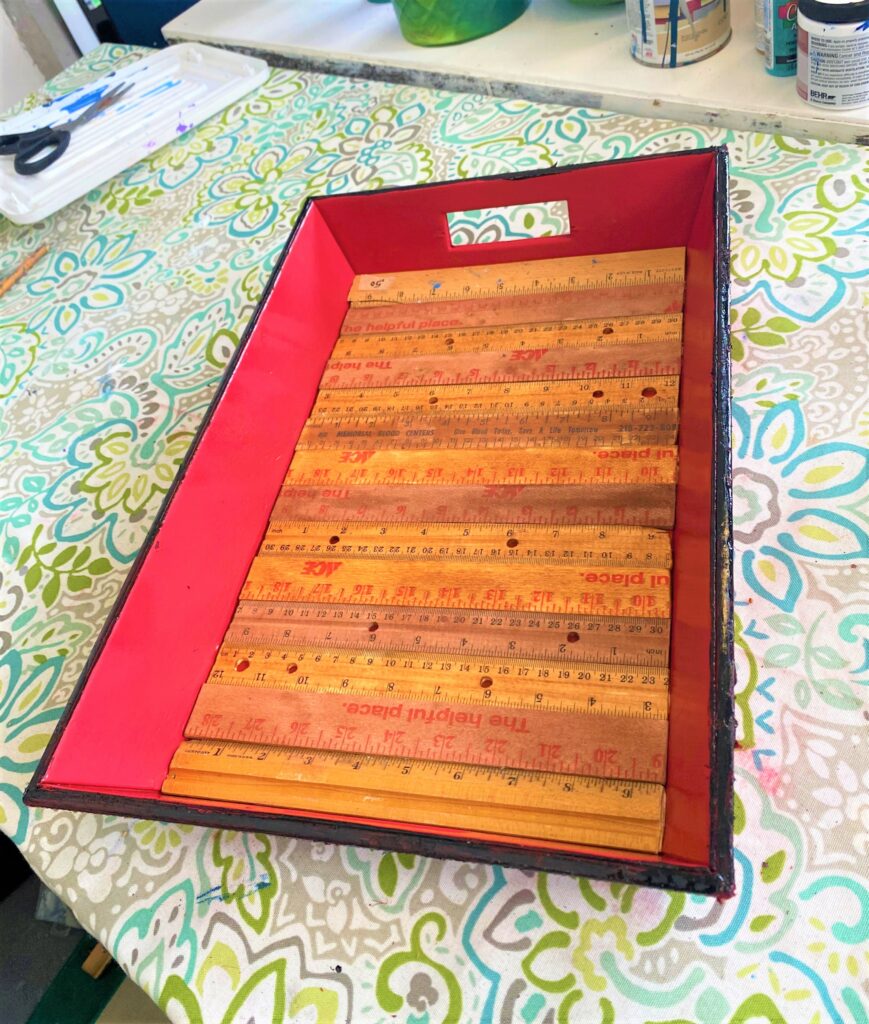
The next step is to secure your rulers in place. Before doing so, you might want to lay them out to see how they will look on your now-painted tray. Line them in a row and move them around so that some new and stained ones are next to the older ones. Also, you want some numbers on the rulers to face in various directions. Once you have them in places you like, then use a craft brush and add glue to the backside and edges and gently put in position. Repeat, repeat, repeat until all your rulers and yardstick pieces are on your tray.
Carefully wipe away any excess glue and let dry. (By the way, this step was so fun!)
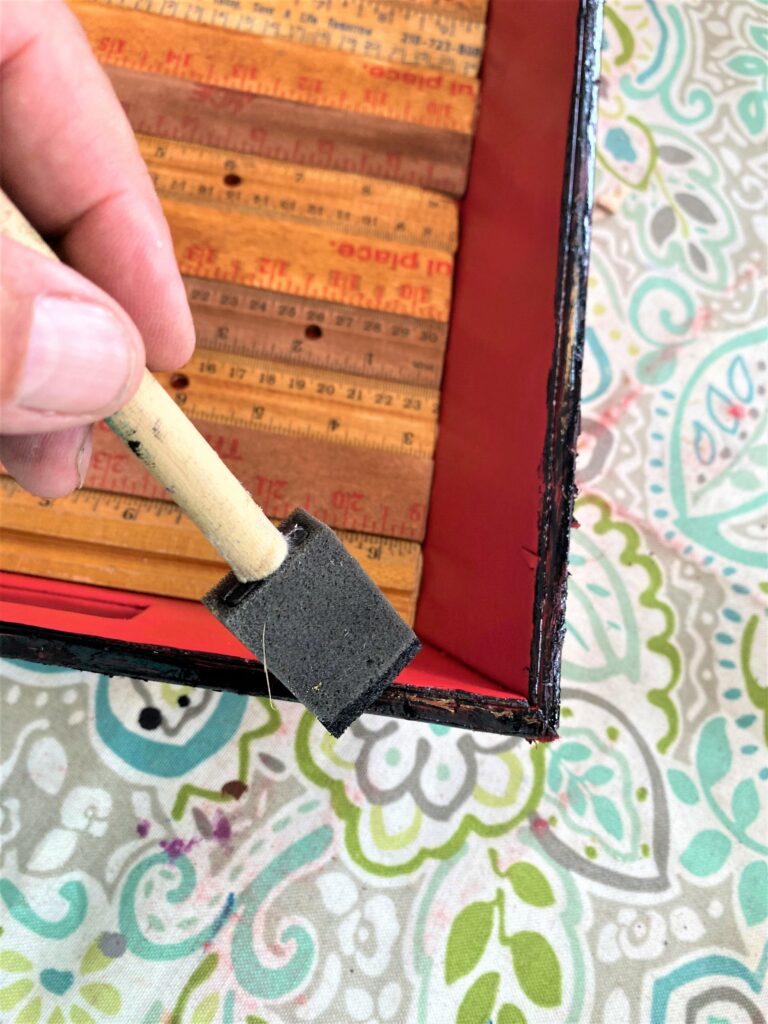
6. Highlight details with paint
Does your tray have any interesting parts you want to call attention to? If so, use black paint to do. Black was used given that some of the numbers/lettering are black. My tray had a slim edge around it, so I used a foam brush to put black paint on it making the overall look feel cohesive. Just that little touch of black helped to frame it. Love, love, love it!
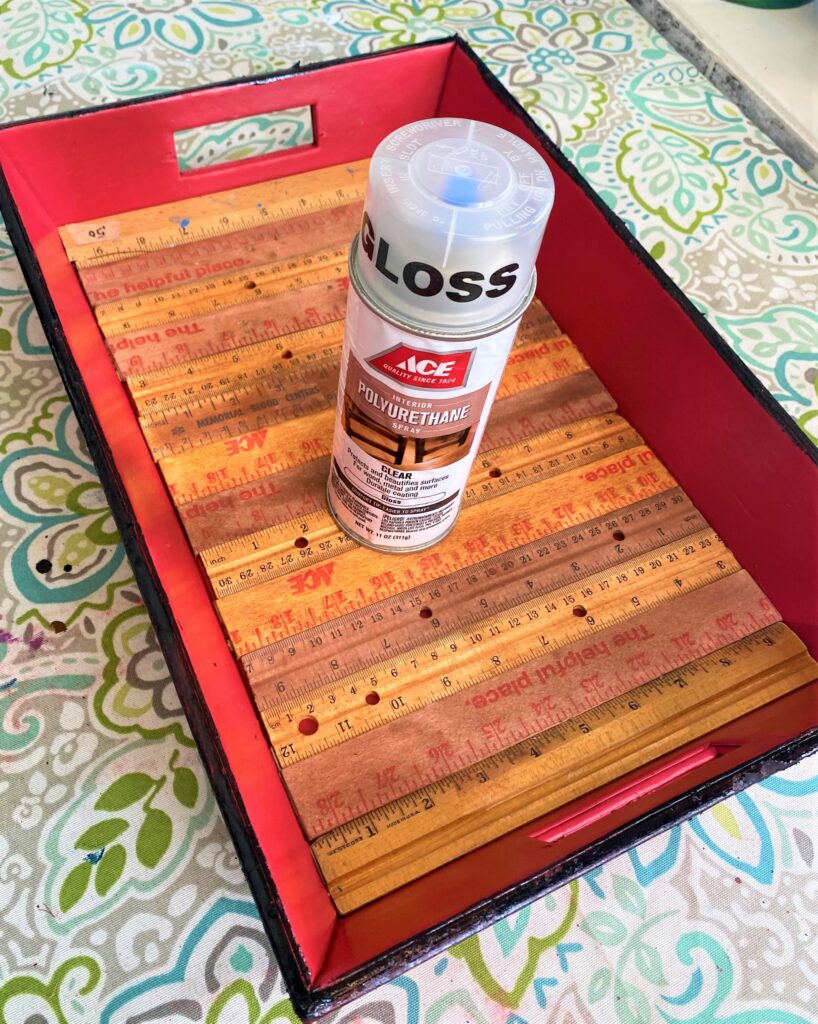
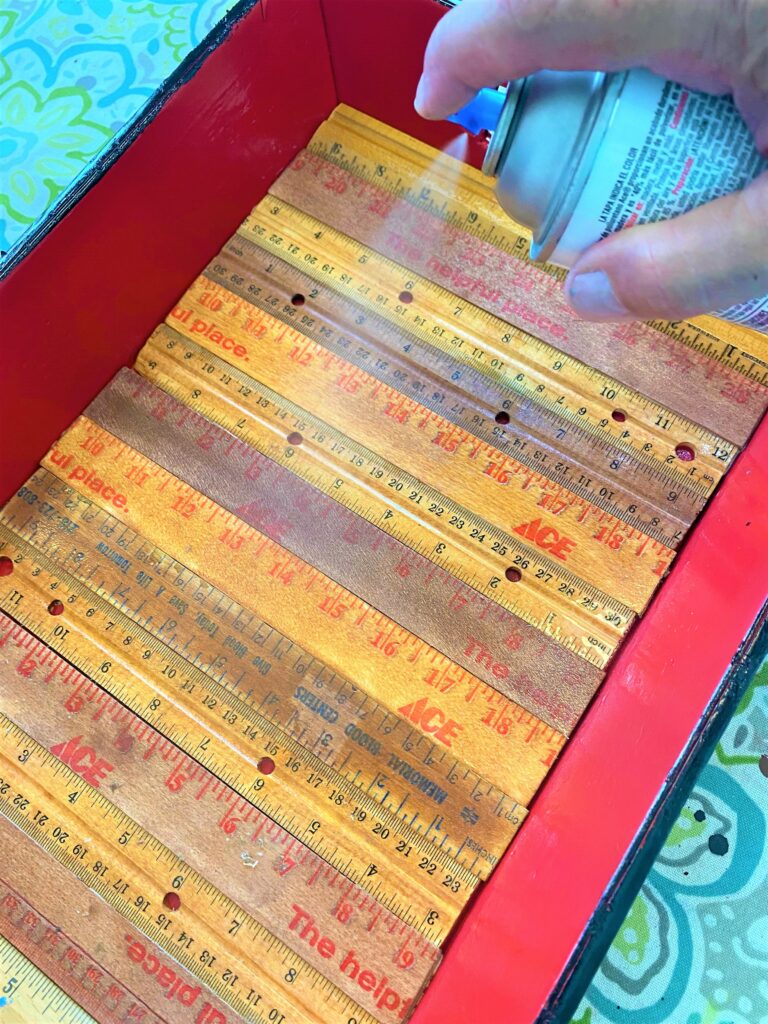
7. Protect with poly
The last step is important to make your tray usable and to protect your hard work.
- Spray or brush on a coat or two of polyurethane over every surface of your tray. This will allow for easy and safe clean-up of spills, fingerprints, dust, and dirt.
- Also, it will provide a lovely reflective finish to your piece that just looks nice!
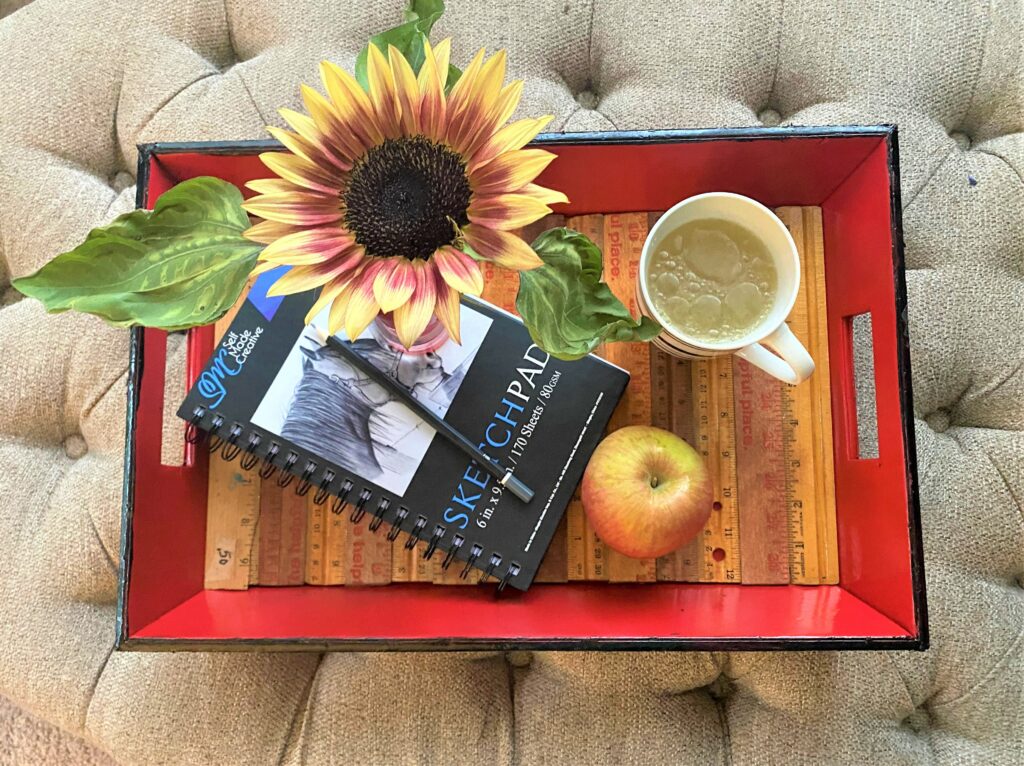
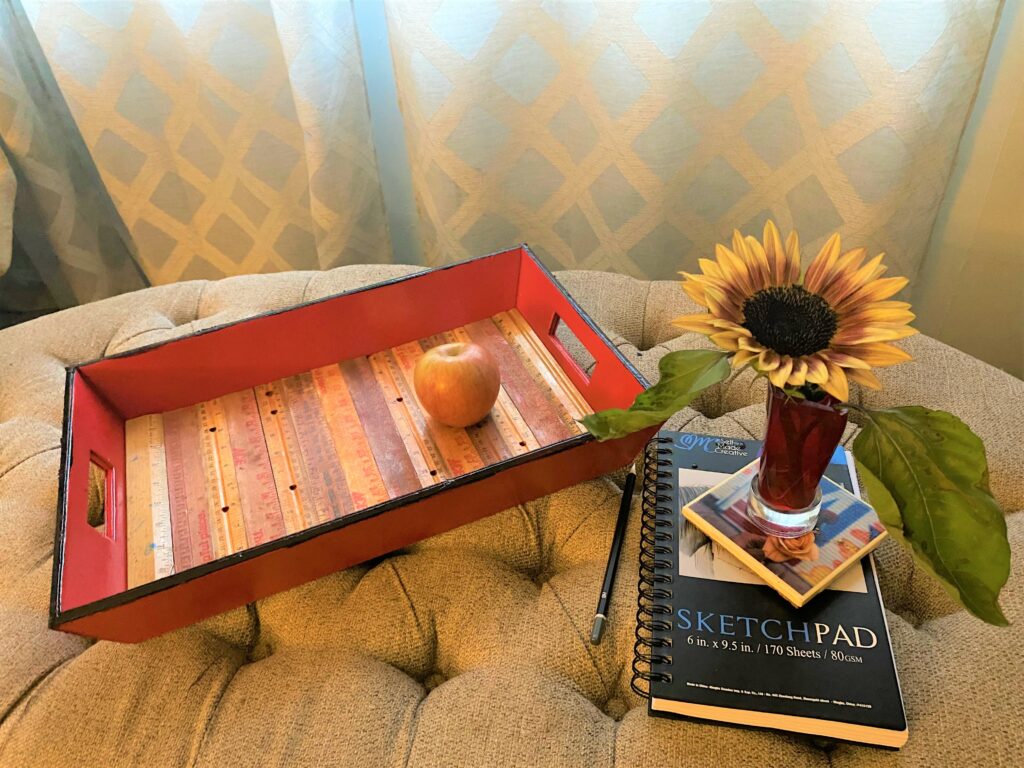
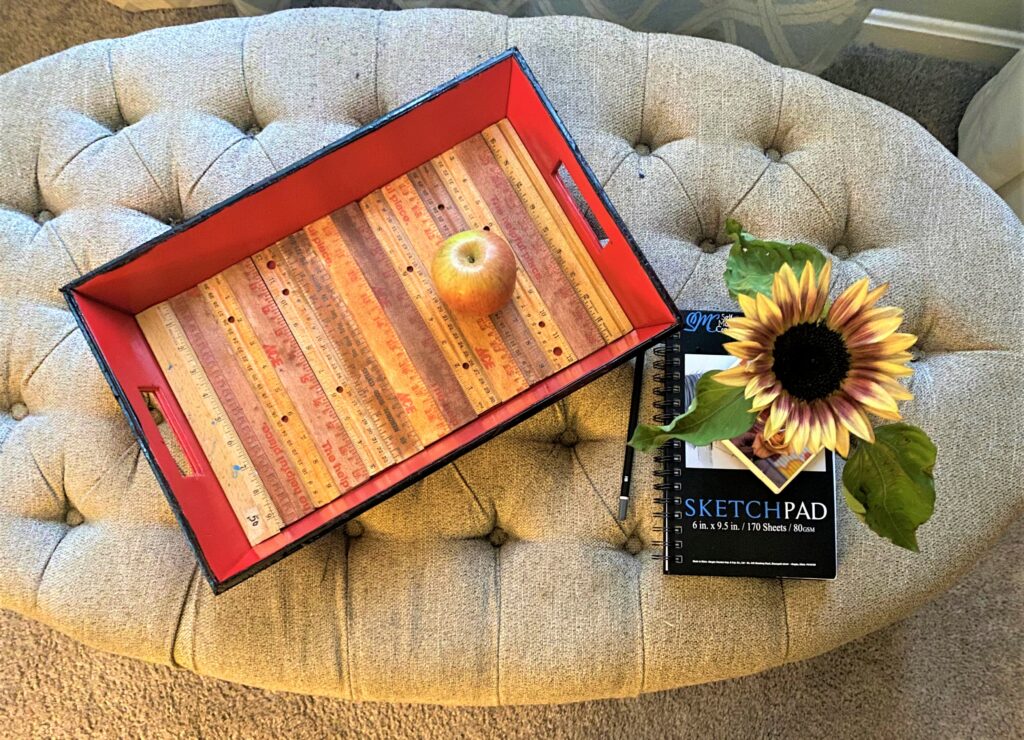
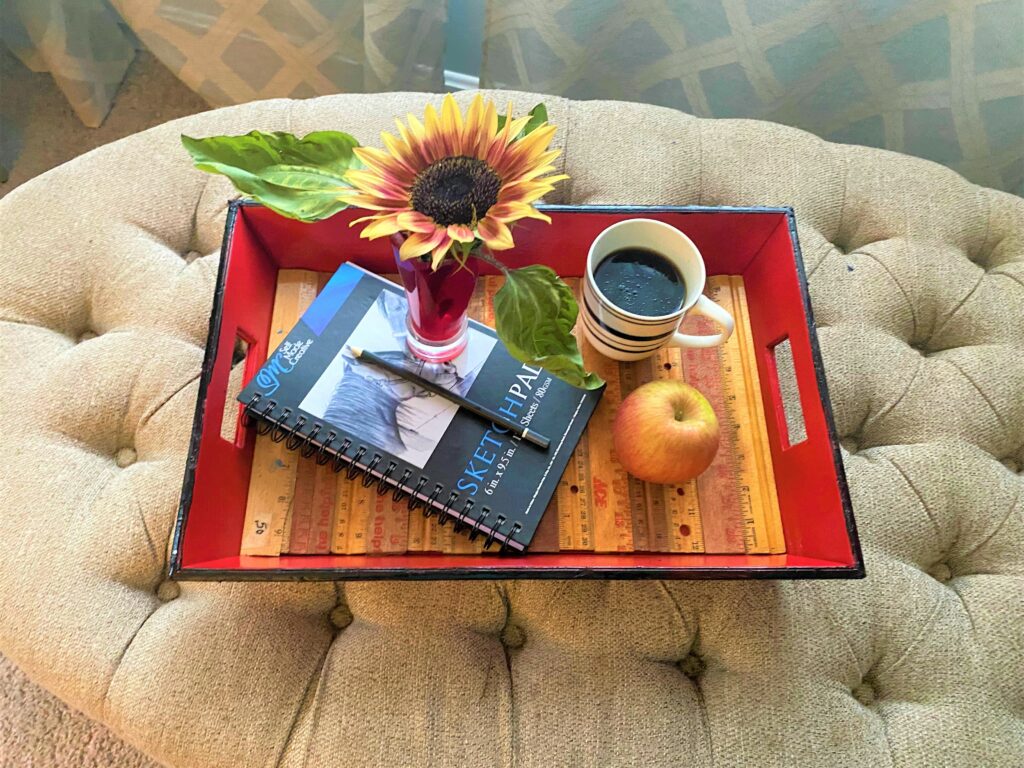
No matter how you measure it, this serving tray will get well-used whether it be the classroom, the office, or the home. I can’t wait to use or share this one!
Where will you use yours? Share your pics, please!

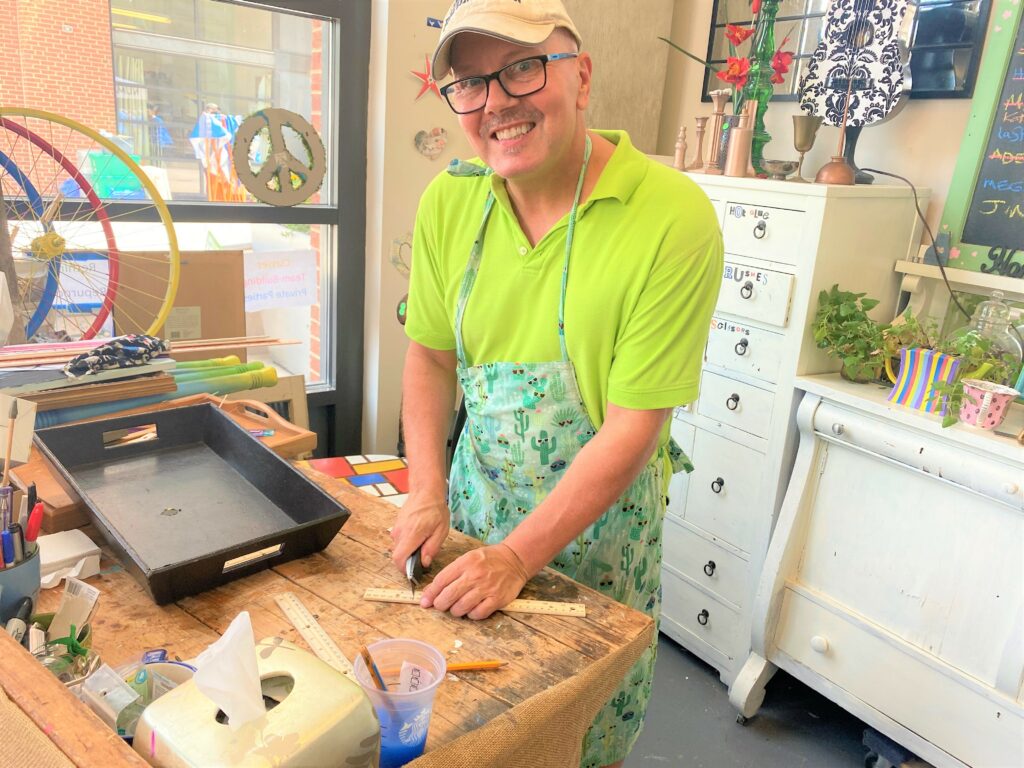
Tim Kime
Artist, Motivational Speaker, Life Coach
