Branch Out Your DIY by Decorating Small Trees with Repurposed Items
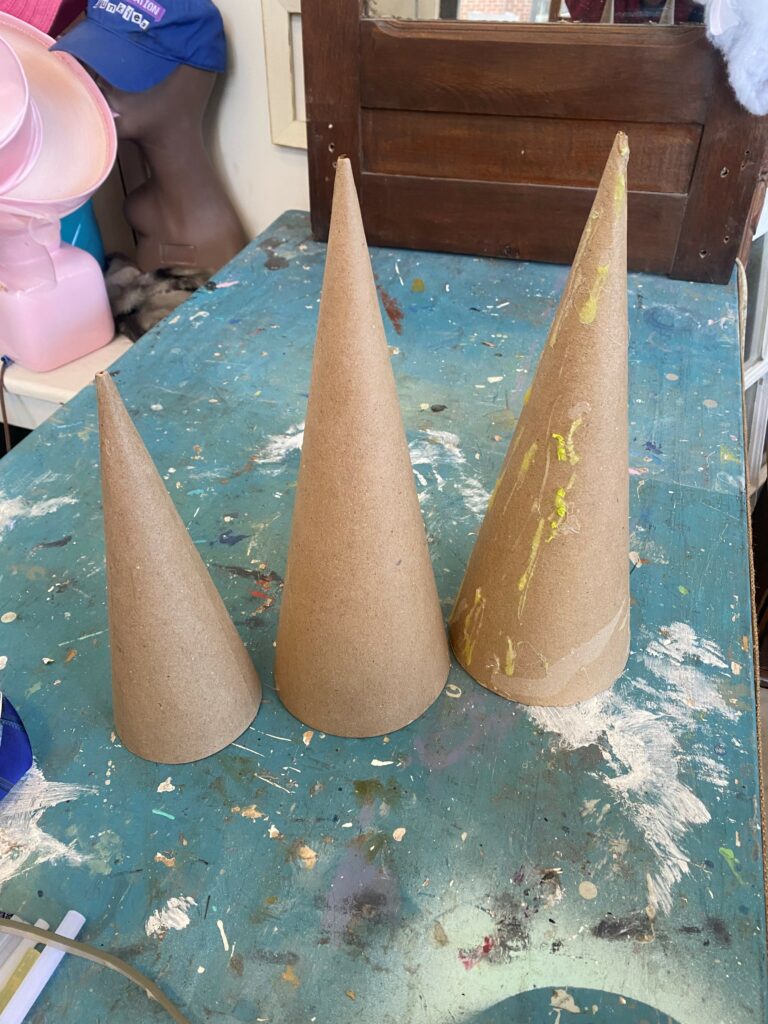
Transform cardboard cones into charming Christmas trees using repurposed thrift store finds. Here are four ideas/approaches to make those generic triangular forms into fun & festive holiday decorations everyone will love seeing—and making.
No “Ba hum bugs” here! Celebrate the spirit of the season by creating unique décor that is also good for Mother Earth because you are keeping items out of landfills.
Wishing Peace on Earth and Goodwill to All!
Items needed:
· Cardboard cones
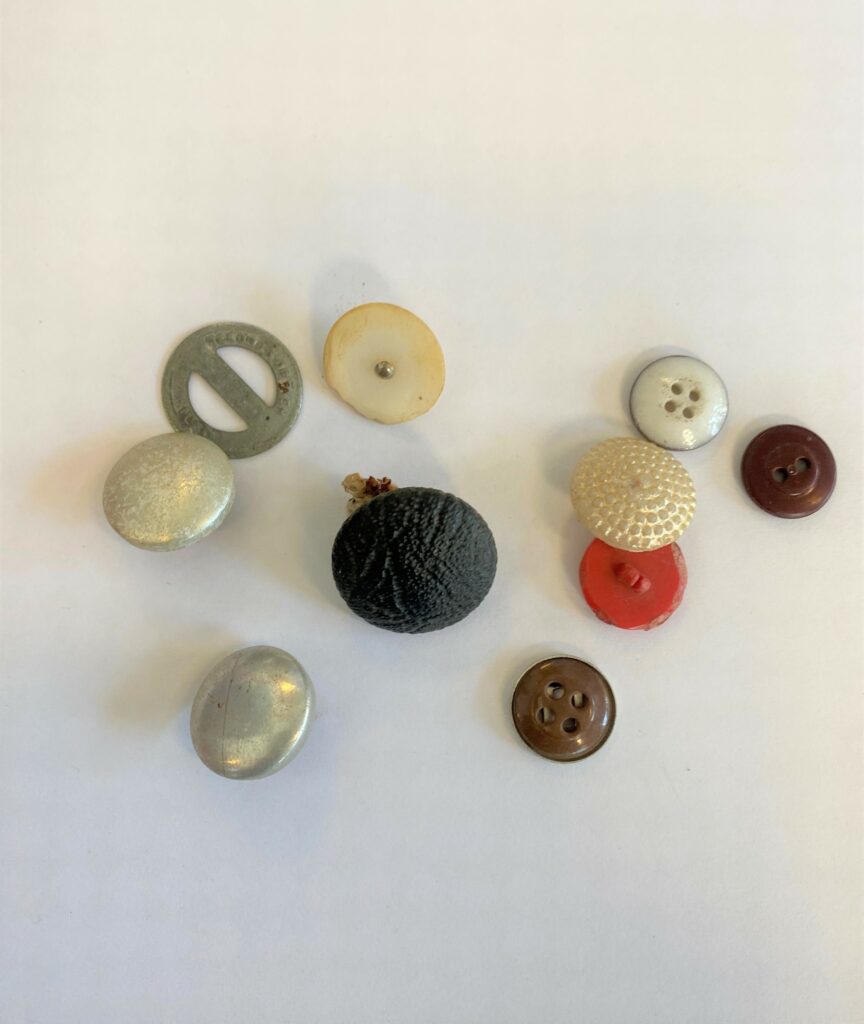
· Neck ties, buttons
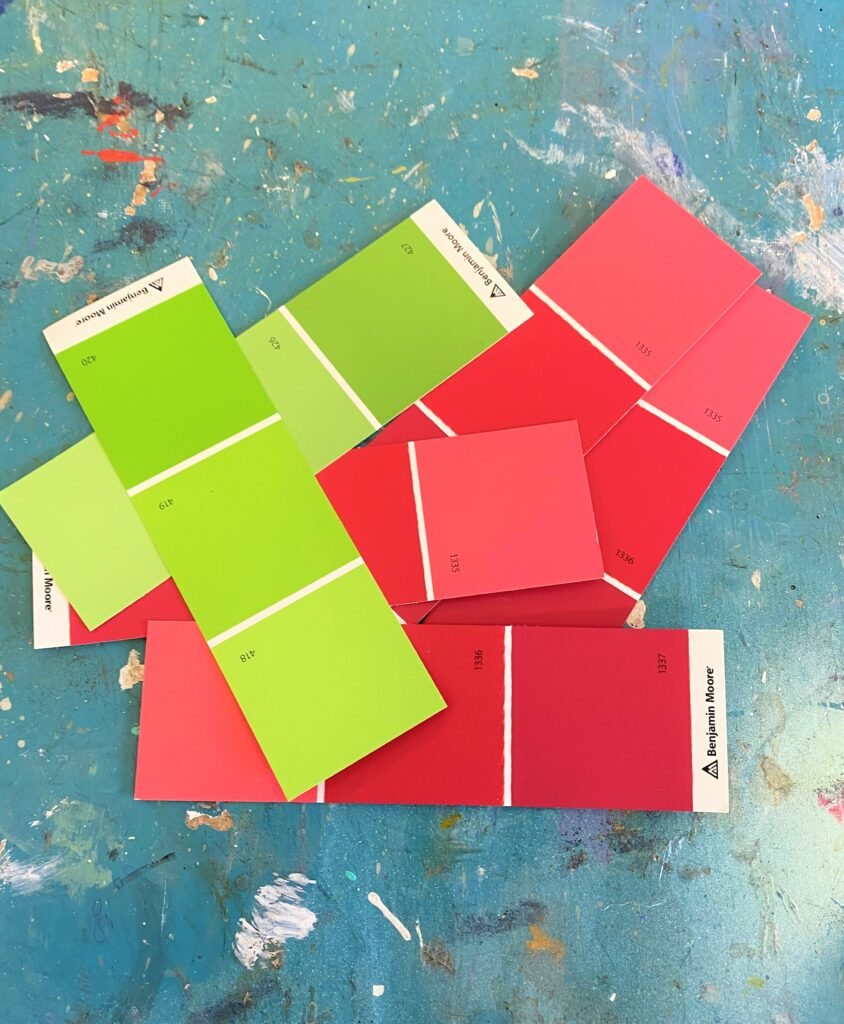
· Paint chip paper strips
· Scraps from a prom dress/evening gown
· Jewelry pieces
· Candle holder/base
· Silver spray paint
· Silver tinsel/garland
· Glue gun & glue sticks
· Scissors
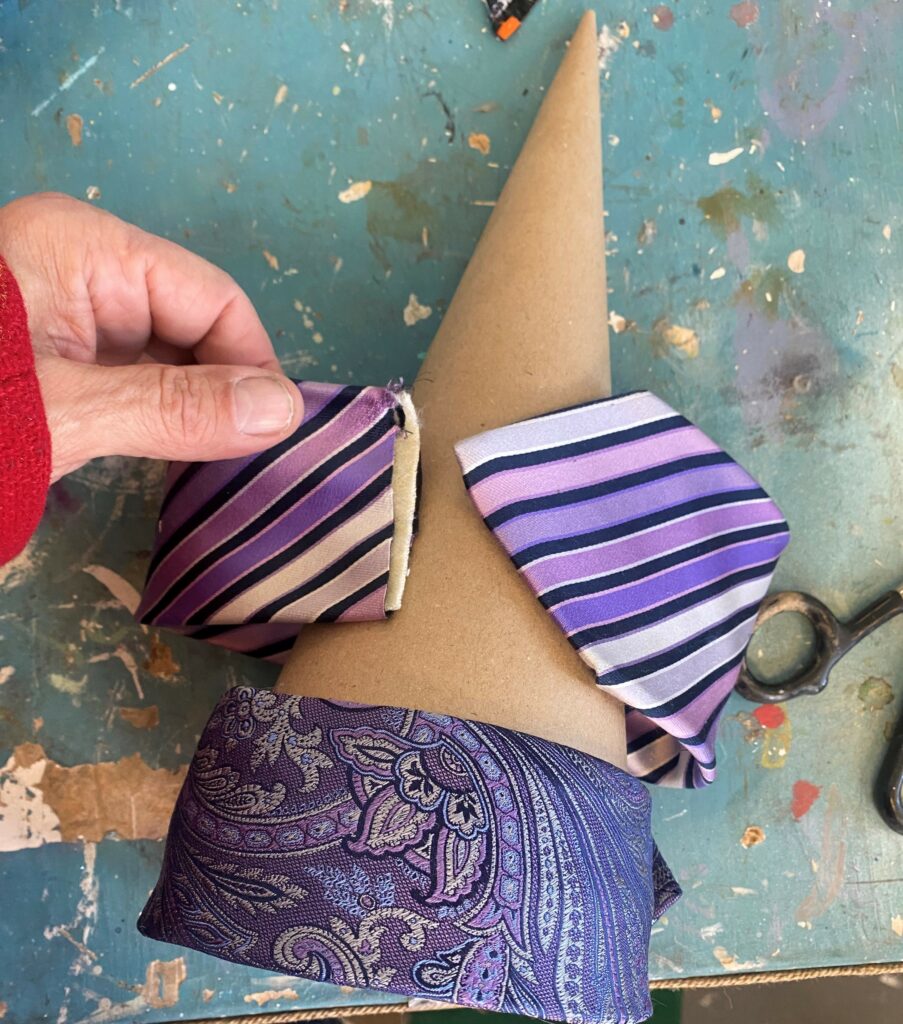
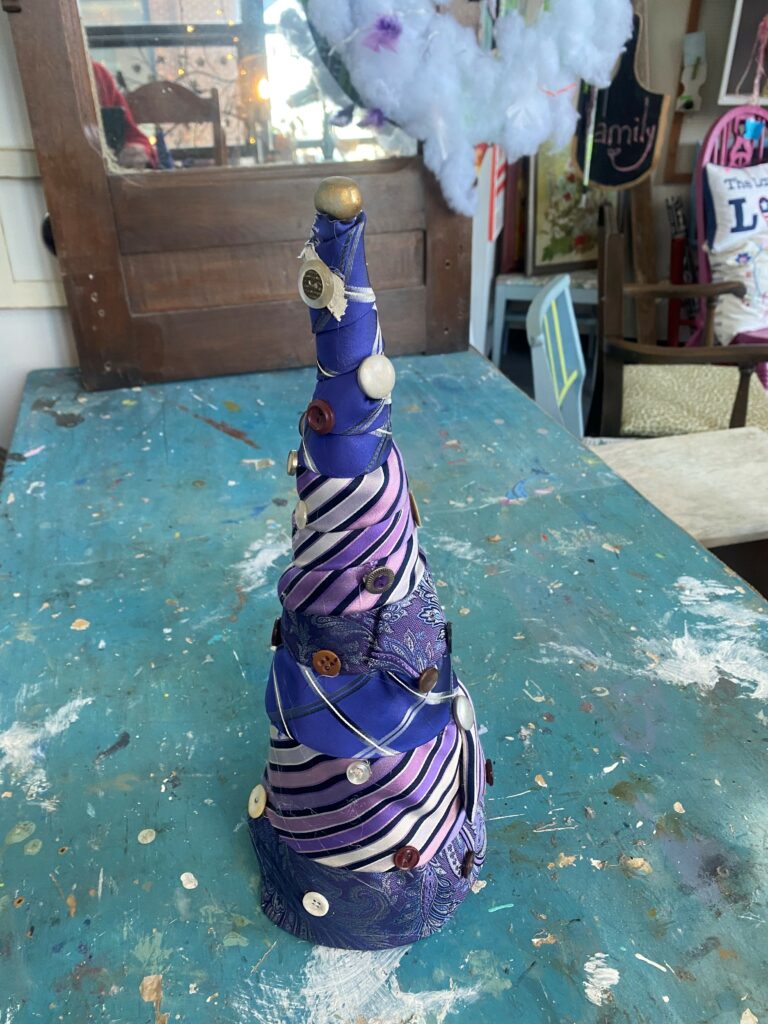
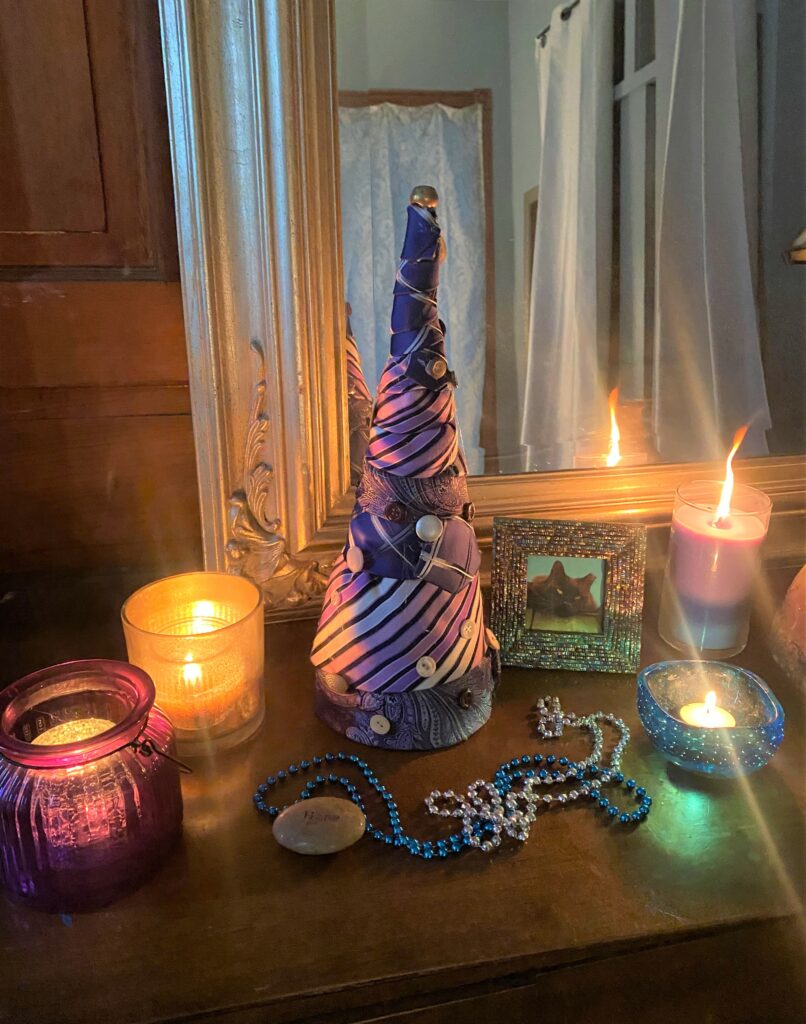
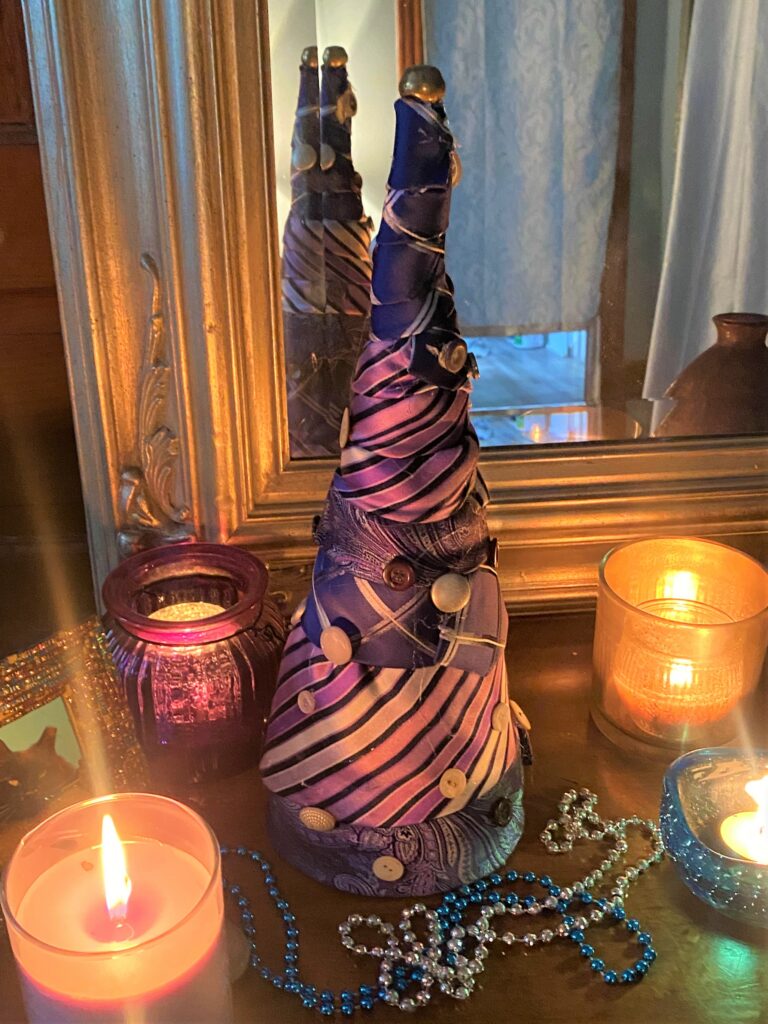
1. Dress to the Nines: Necktie & Button Tree
Here’s How:
· Pick up several neckties in matching colors from Goodwill for this super charming approach. While most people consider red and green Christmas colors, purple is always a great option to make your decorations stand out from the holiday crowd.
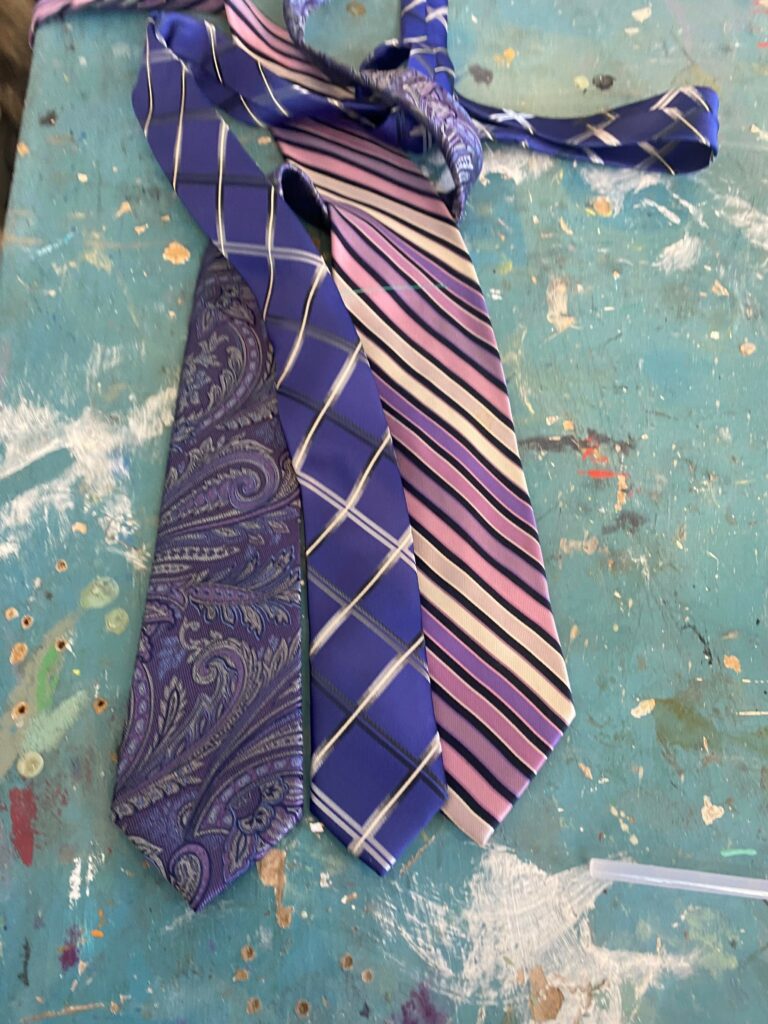
- Starting with the front end/larger side of your tie, wrap it around the base of the cone form allowing for space to overlap it. Cut it, then glue it in place.
- Take the next tie and do the same—cut the front end/larger side then overlap the previous tie. Repeat with your third tie.
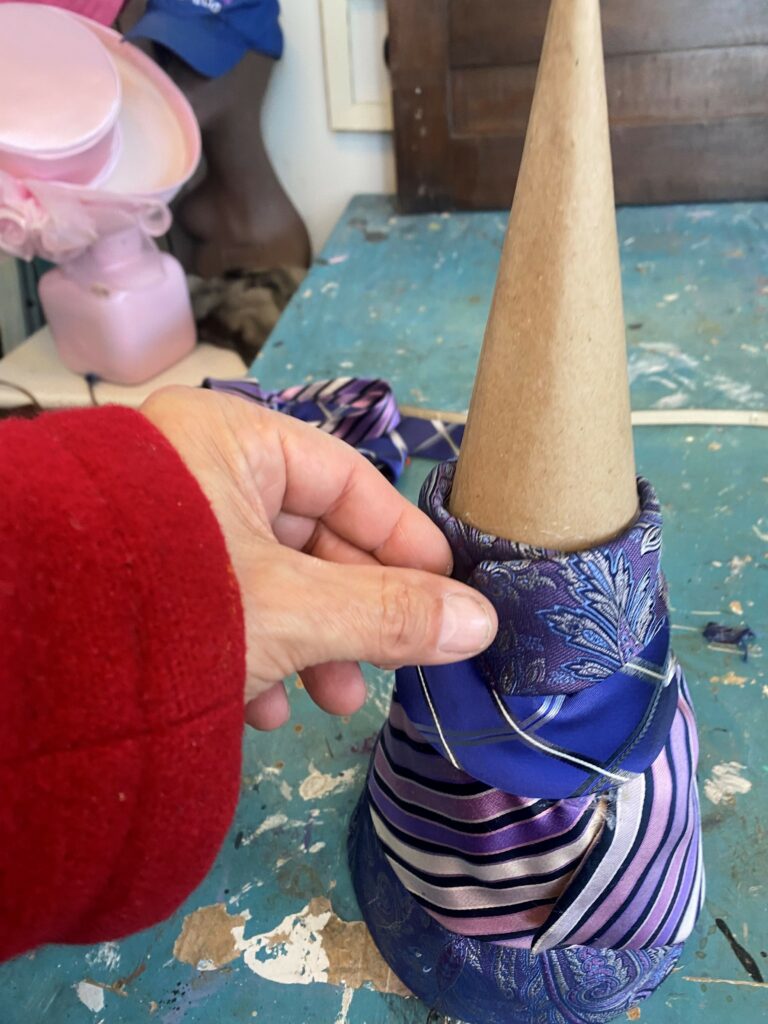
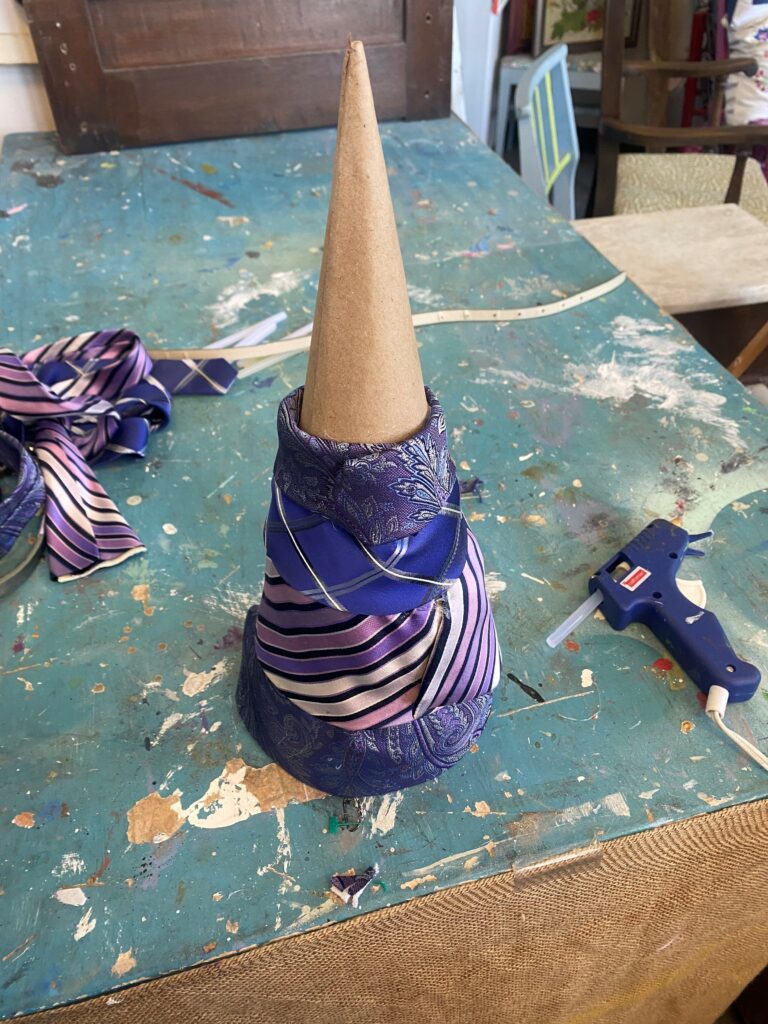
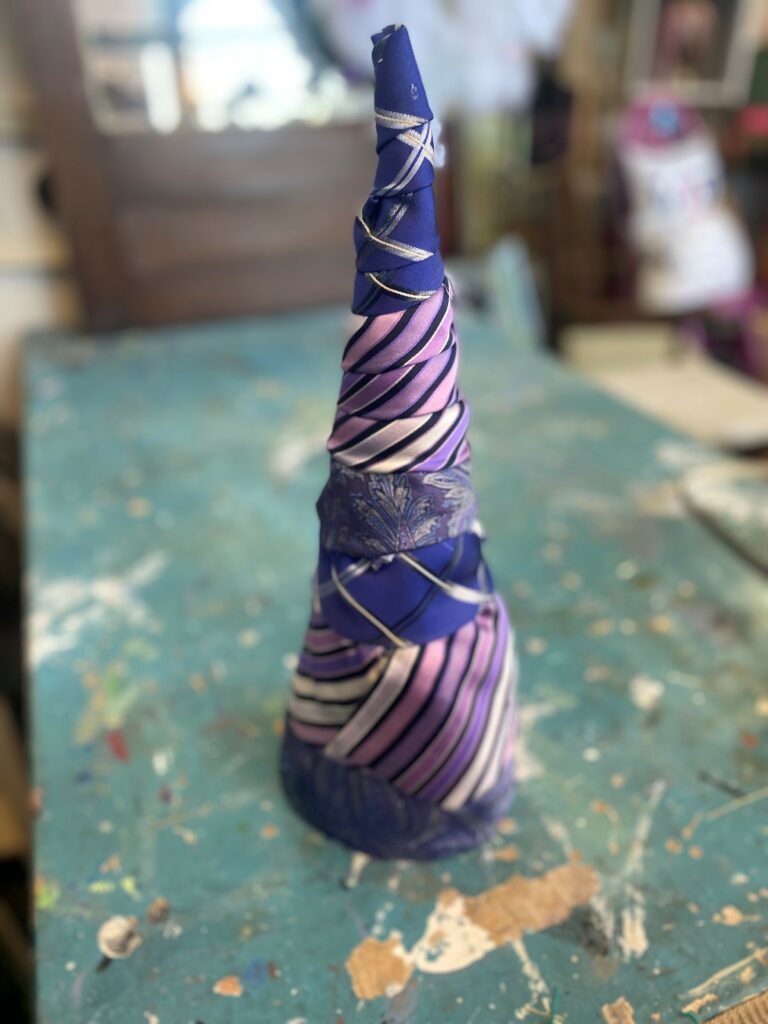
- For the top part, take the first tie and wrap it around, gluing securely in place with lots of hot glue, again, overlapping as you go. Take a second piece from the second tie and repeat; finish your tree with a second part of your third tie.
- Carefully twist your final necktie piece into a point, using more hot glue to hold it in place.
- To tie (ha, a necktie pun!) into the repurposed clothing theme of the tree, use old buttons as ornaments gluing them in various places on your necktie tree.
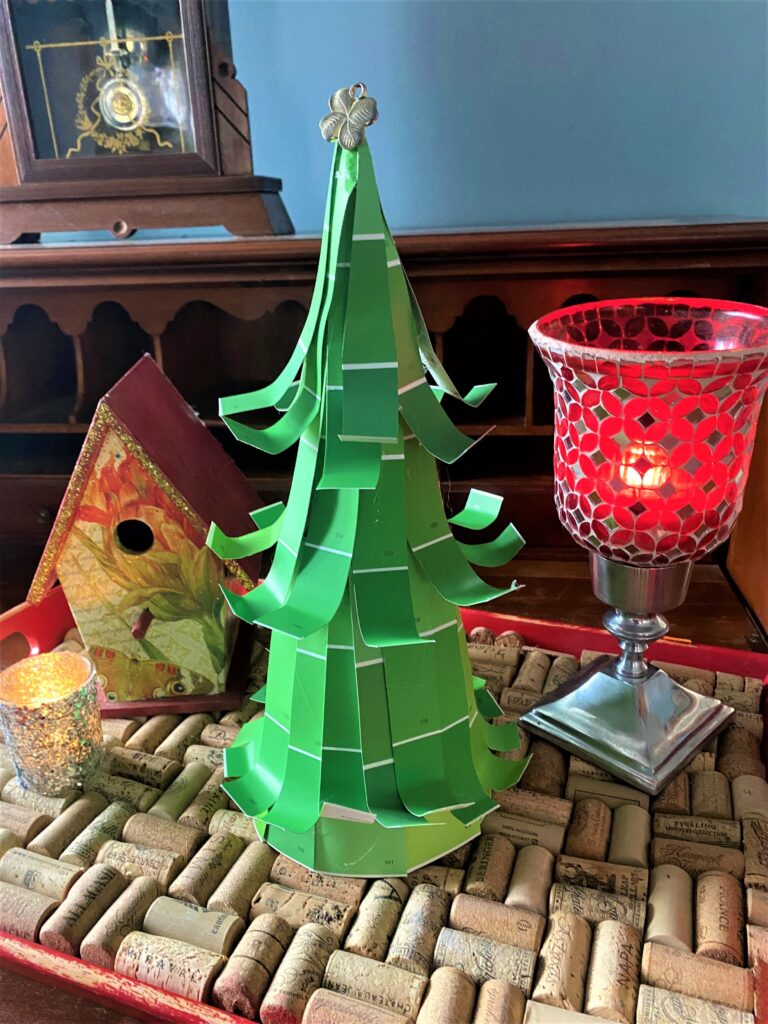
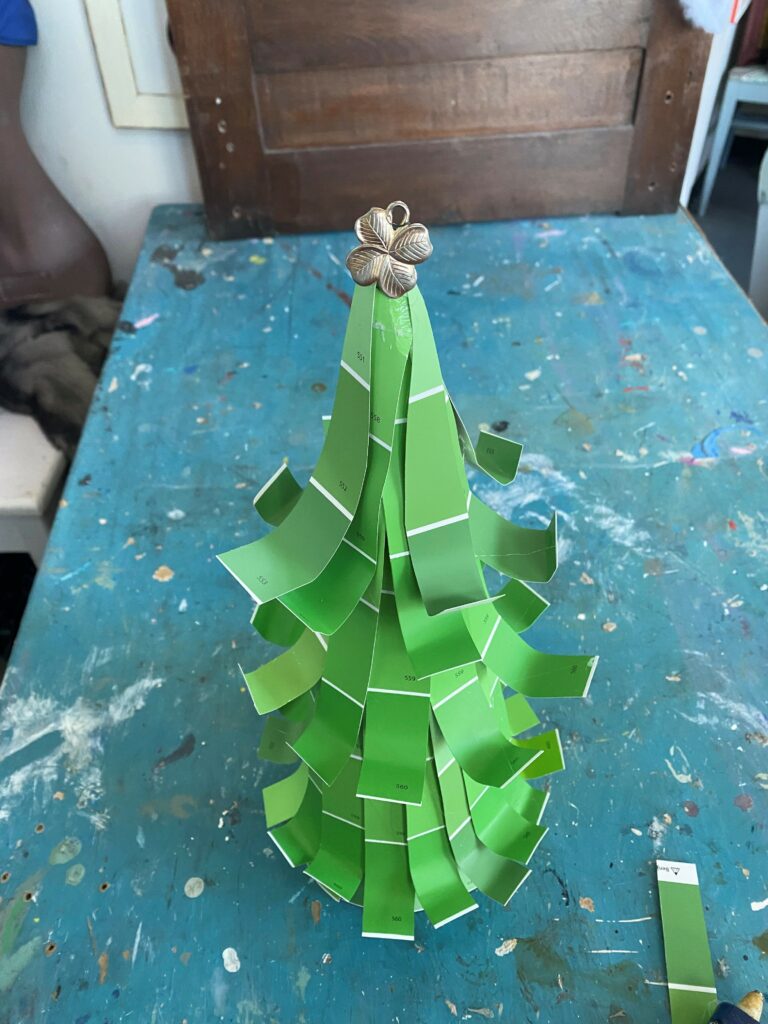
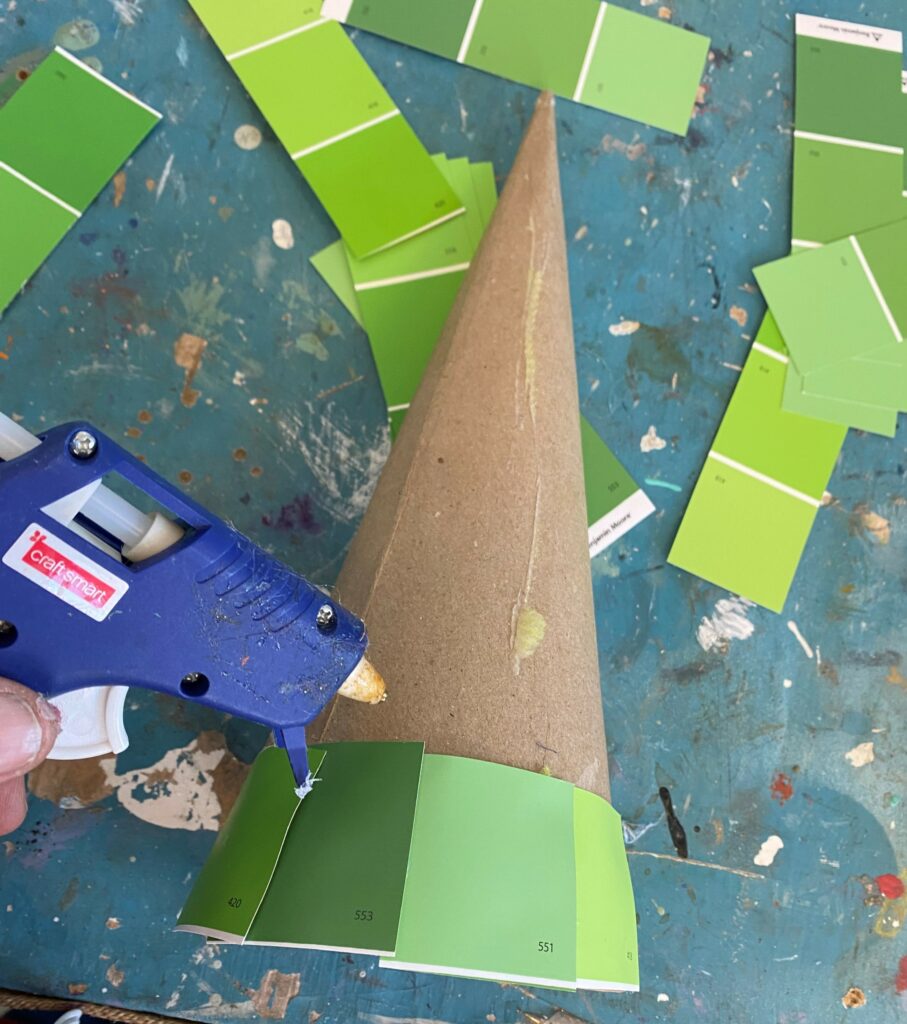
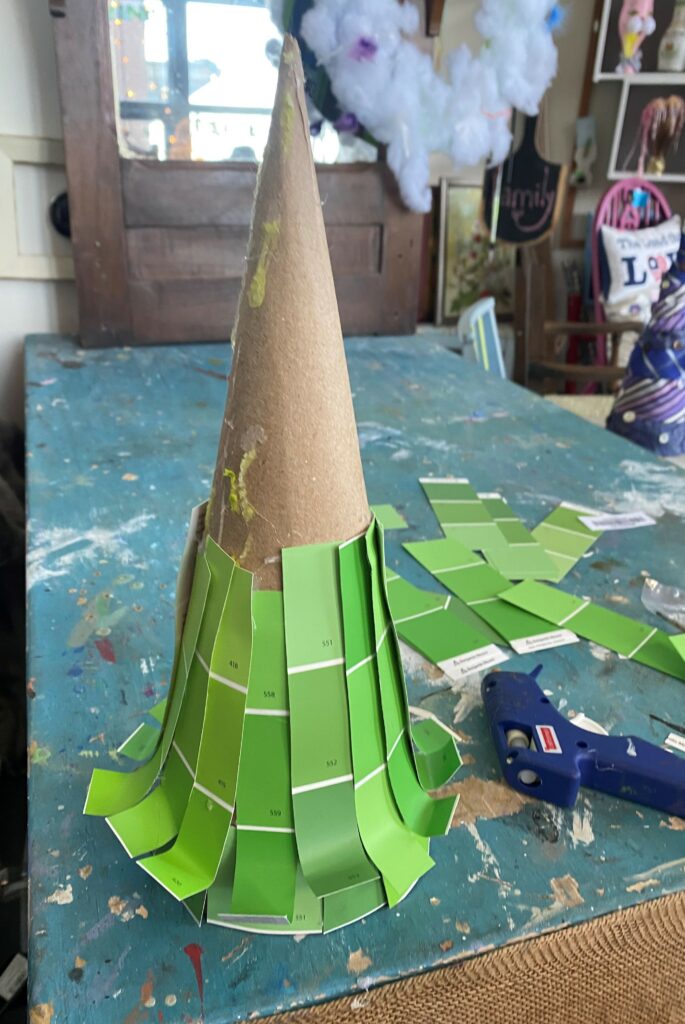
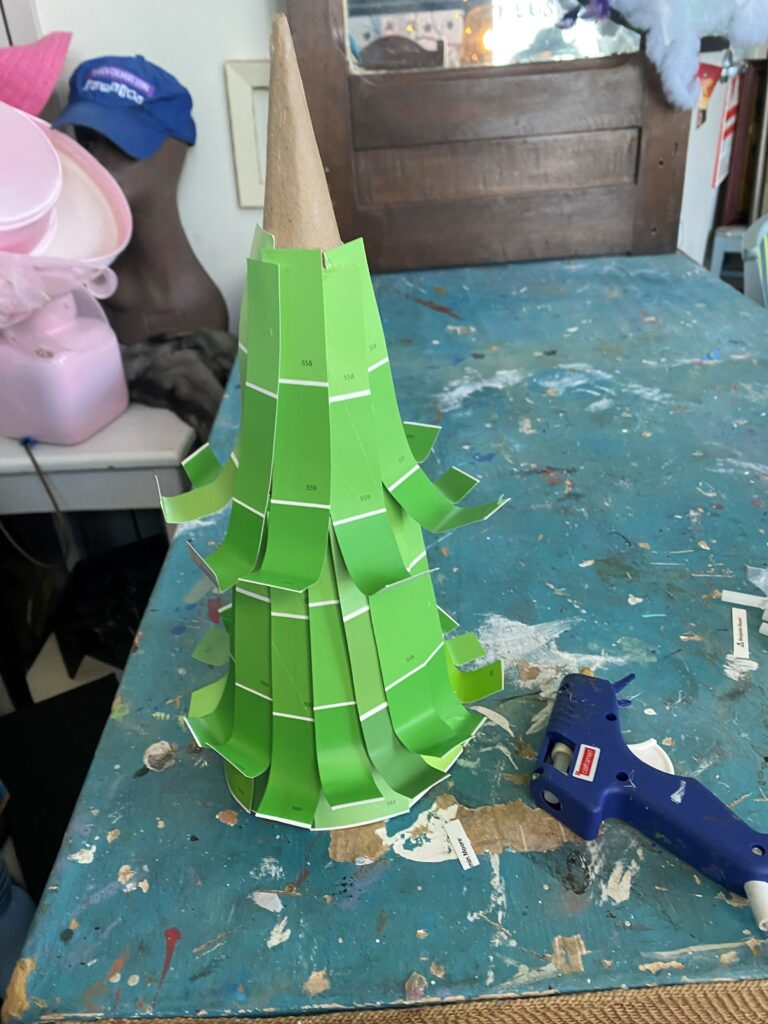
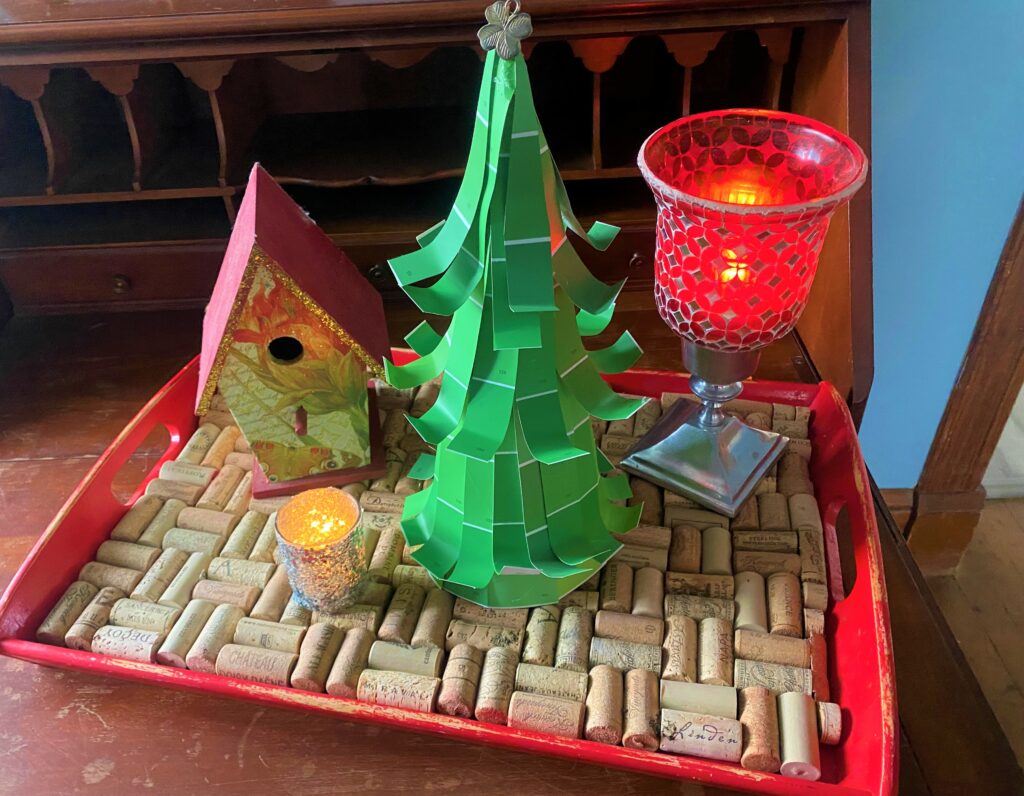
2. Chip Off the Old Block: Paint Chip Paper Tree
Here’s How:
- Collect green paint strip sample paper each time you visit your local hardware store.
- Cut one strip into parts and glue those with your hot glue gun, along the base of the cone to hide the cardboard. Add one row to the bottom, overlapping and cutting each piece as needed.
- For the next layers of “branches,” cut a paint strip paper in half, the long way to make two slimmer strips. Gently roll up one end to mimic a hanging branch then glue the other end to the cone. Ensure the curled part hangs low enough to cover the row below it. Glue in place, cutting and overlapping as you go. After the second layer/row is added, continue with the next one above it.
- For the top part of the tree, cut the top half of the paint strip paper into a point to allow overlapping to be easier and for a more finished look.
- Add a star on top using an old necklace pendant or, more fitting with tree’s theme, glue a washer, bolt or other piece of shiny, small hardware.
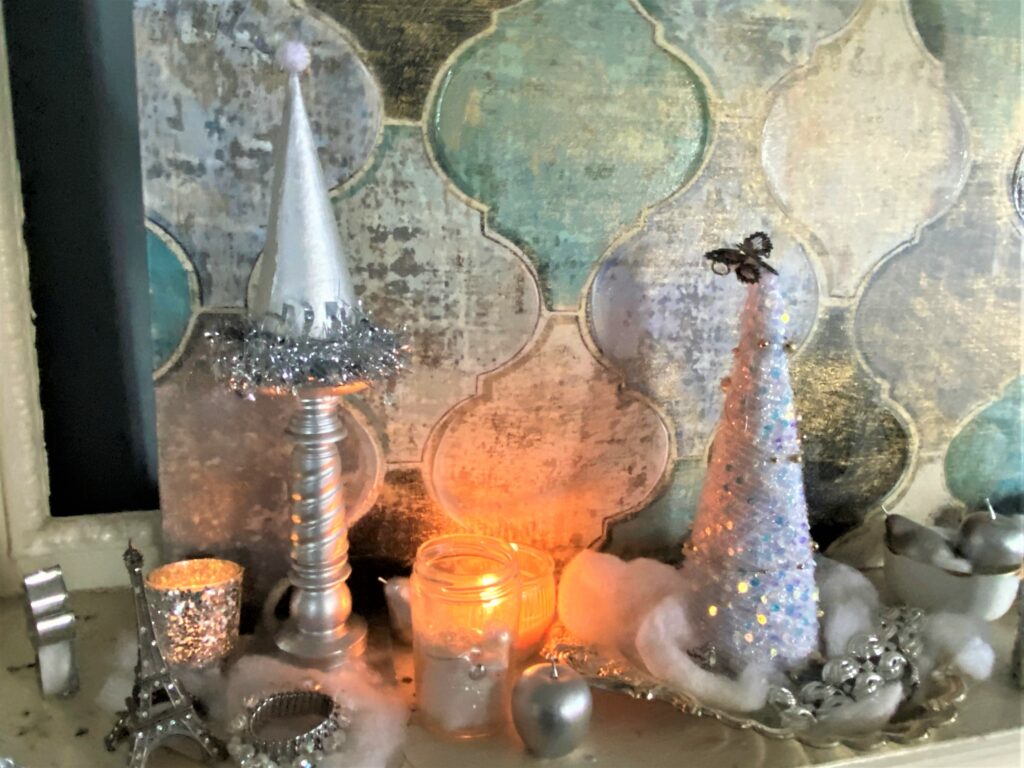
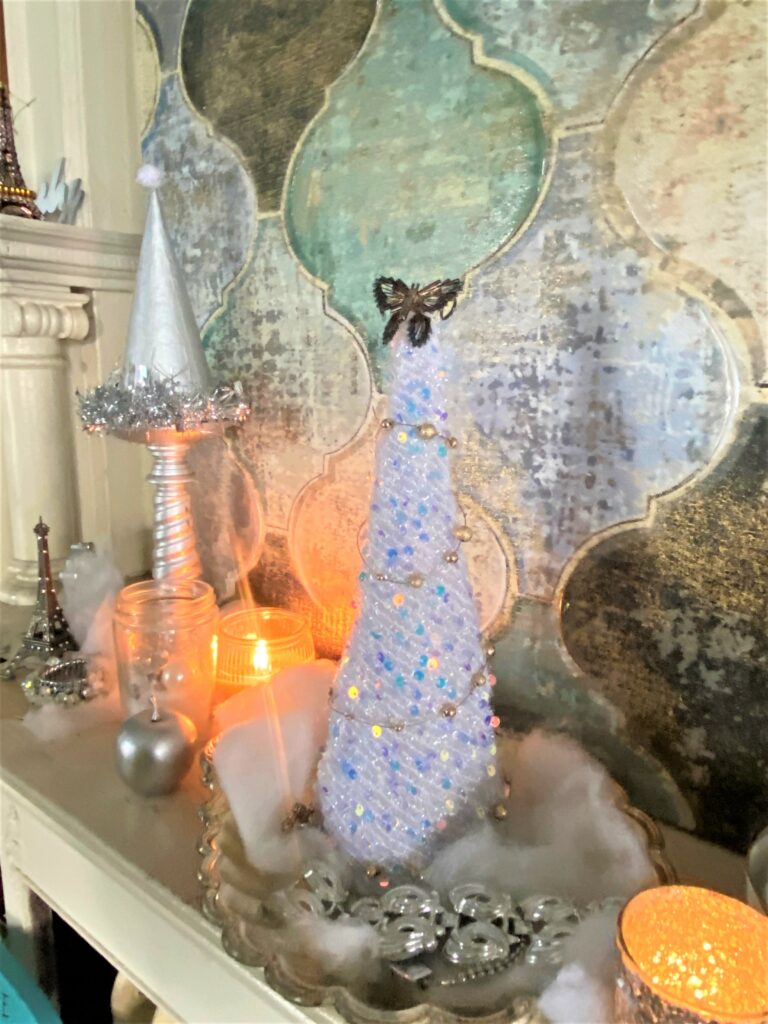
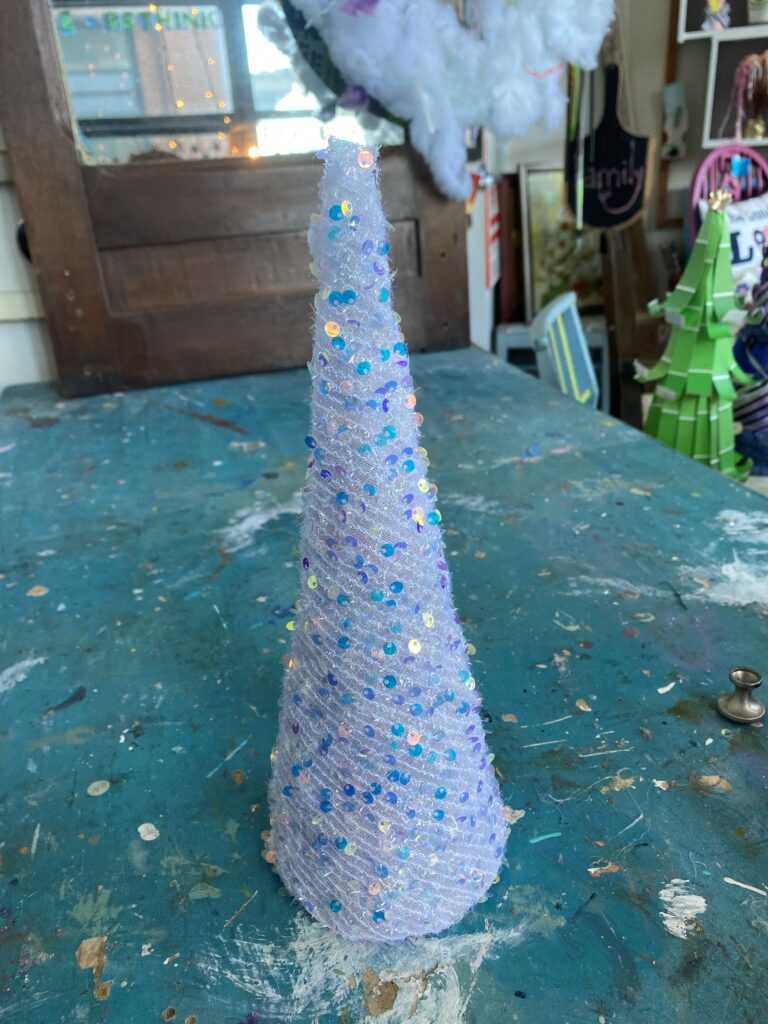
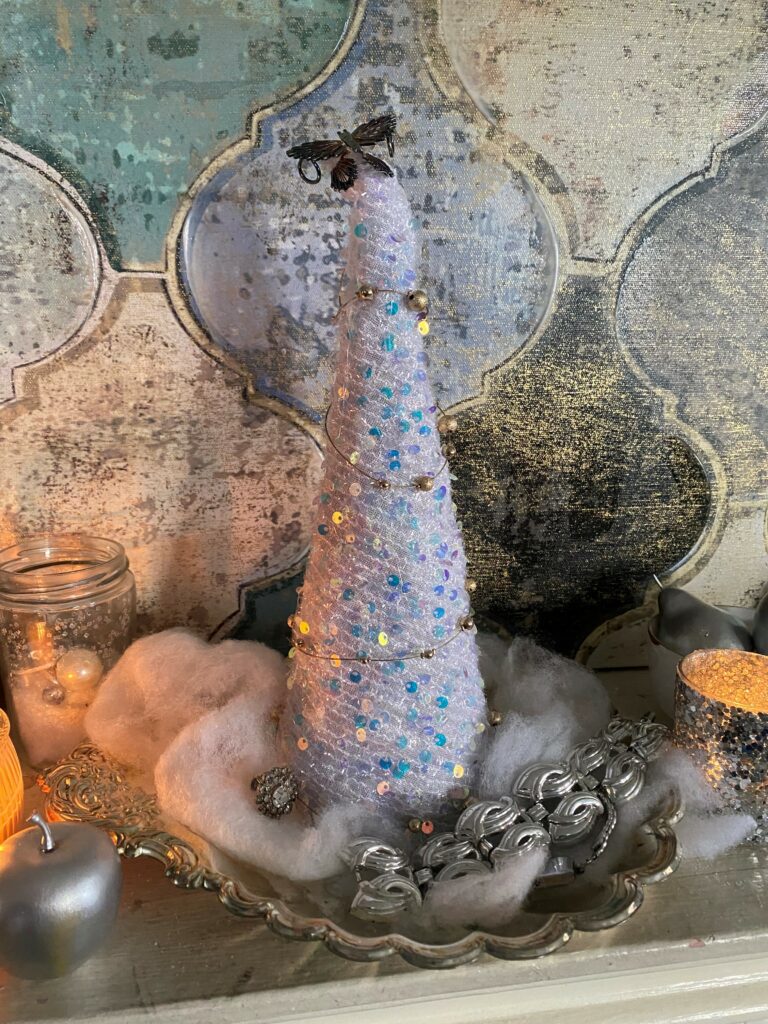
3. Sparkle & Shine: Sequin Fabric & Jewelry Tree
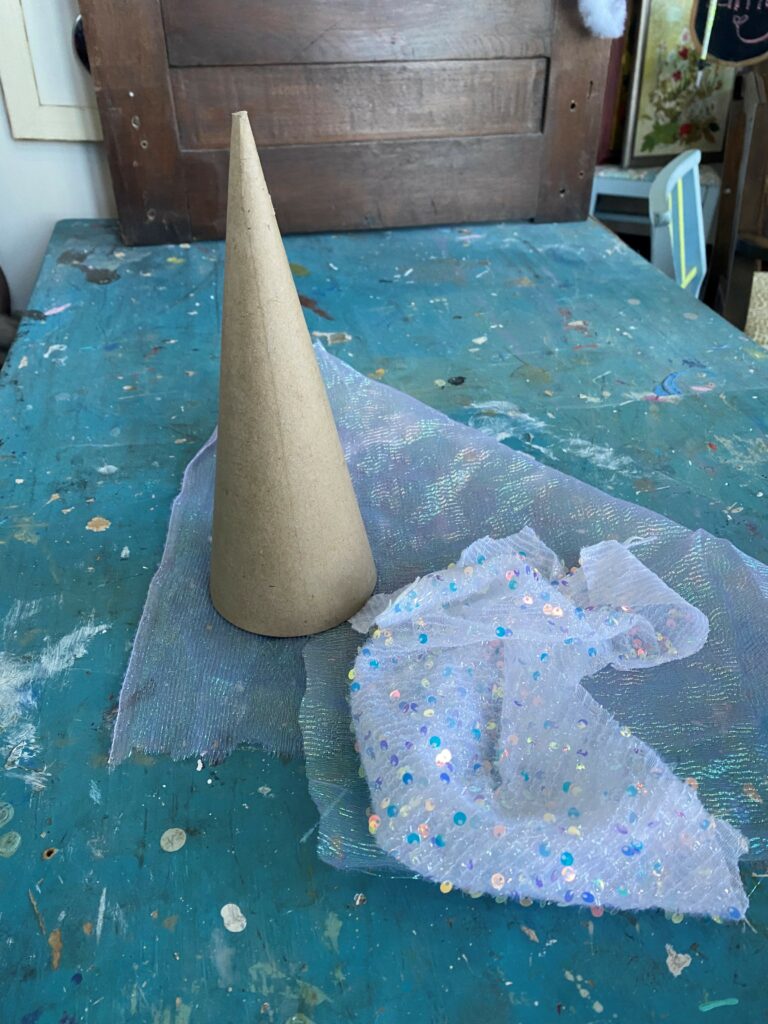
Here’s How:
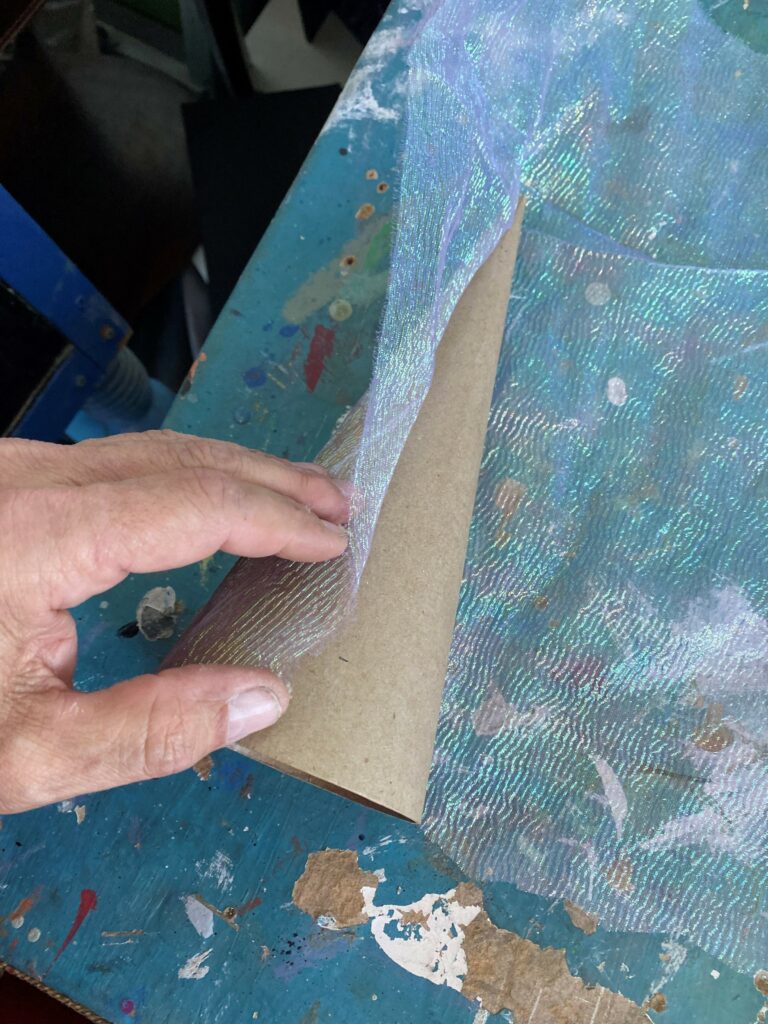
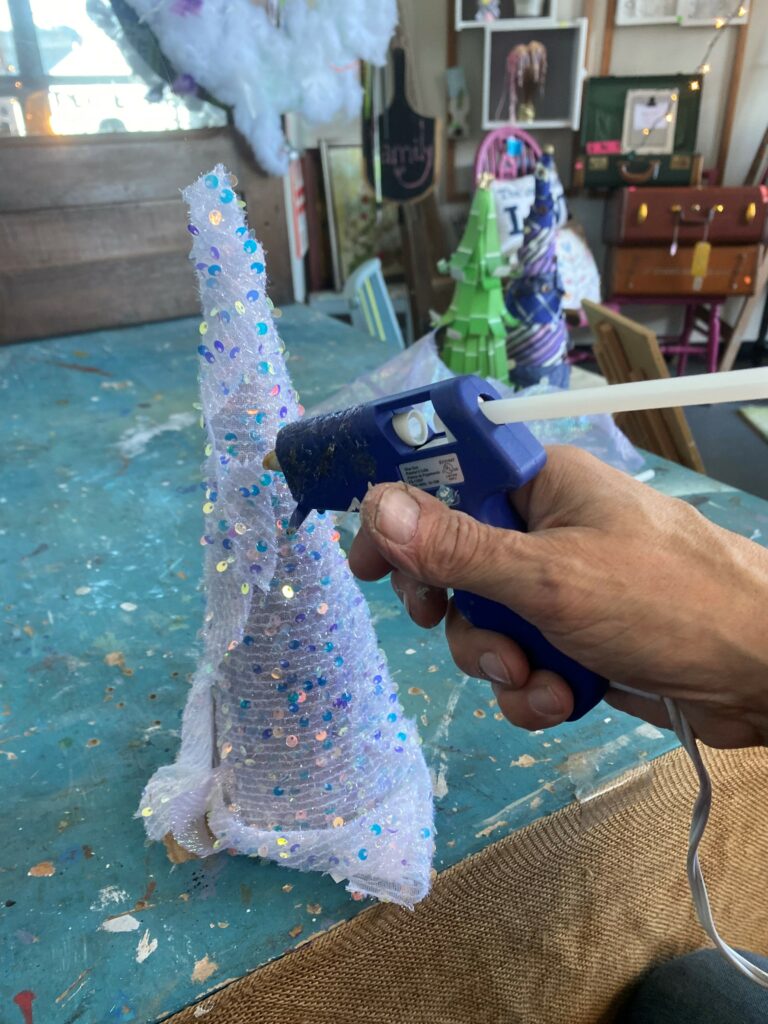
- A piece of sequined fabric from an evening gown or prom dress was wrapped around the form to make it shimmer and shine.
- Wrap your cone with the fabric then cut away the extra material. Use your glue gun to secure the fabric in place and tuck it inside, too, and add more glue to hold it. Two layers were added to this tree to ensure the brown cardboard was masked and hidden well given the thin and translucent fabric.
- A butterfly brooch, also picked up at Goodwill, was used as the tree’s star and secured on top with more hot glue.
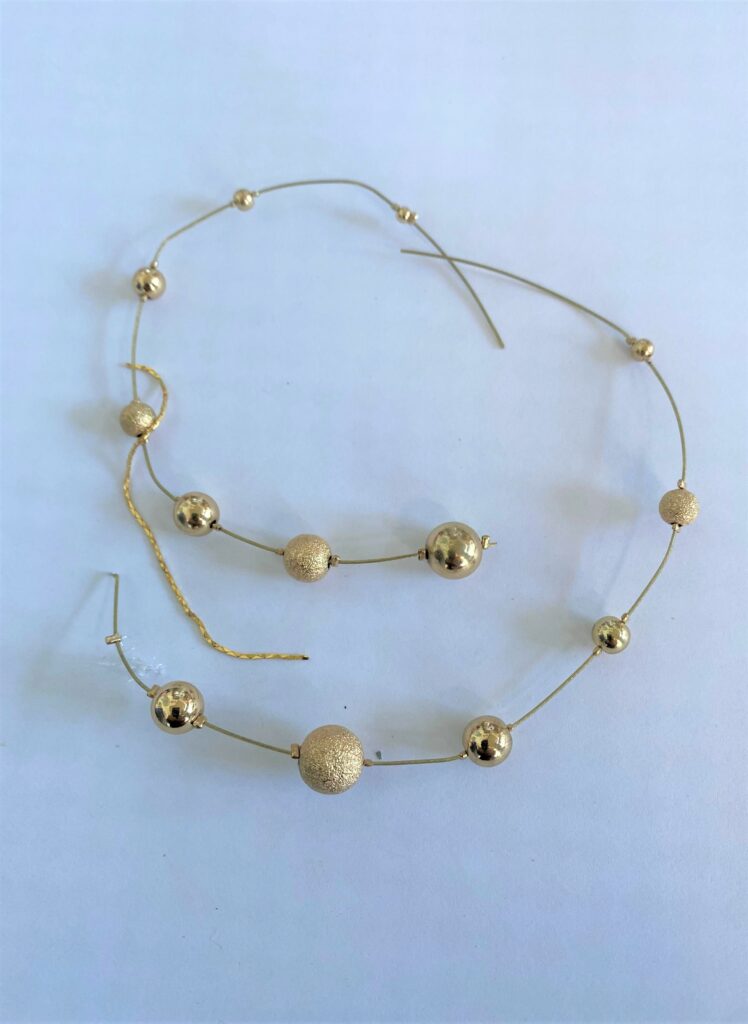
- Parts of a gold-beaded necklace were wrapped around the tree and glued in place to look like garland and to add more bling.
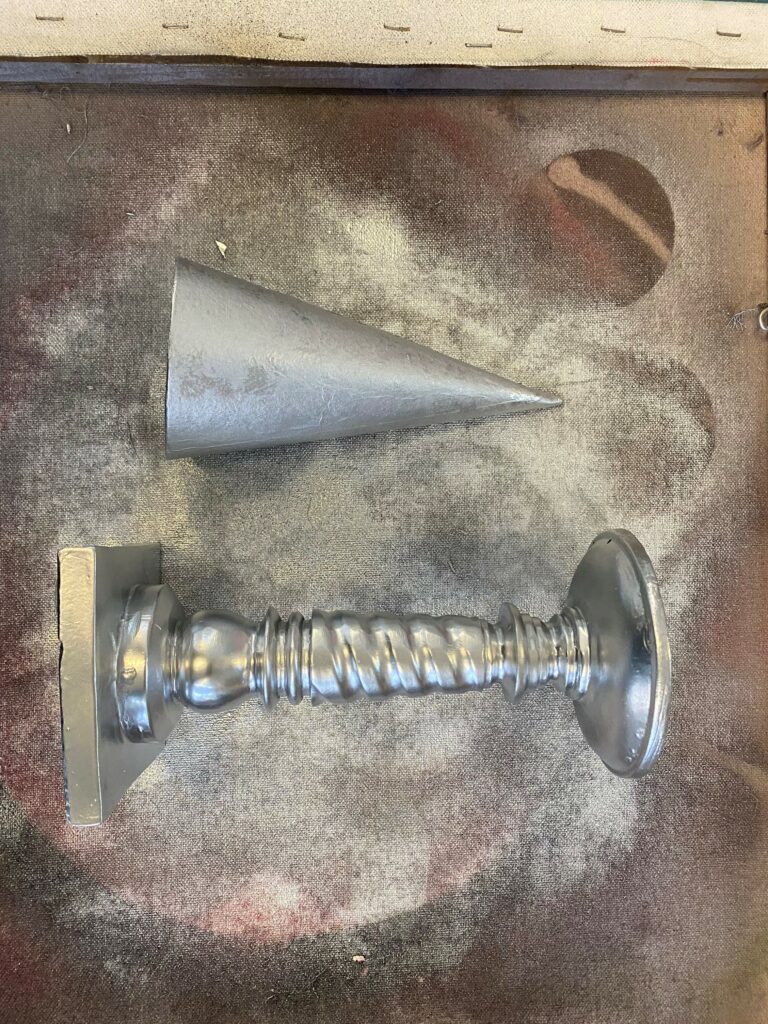
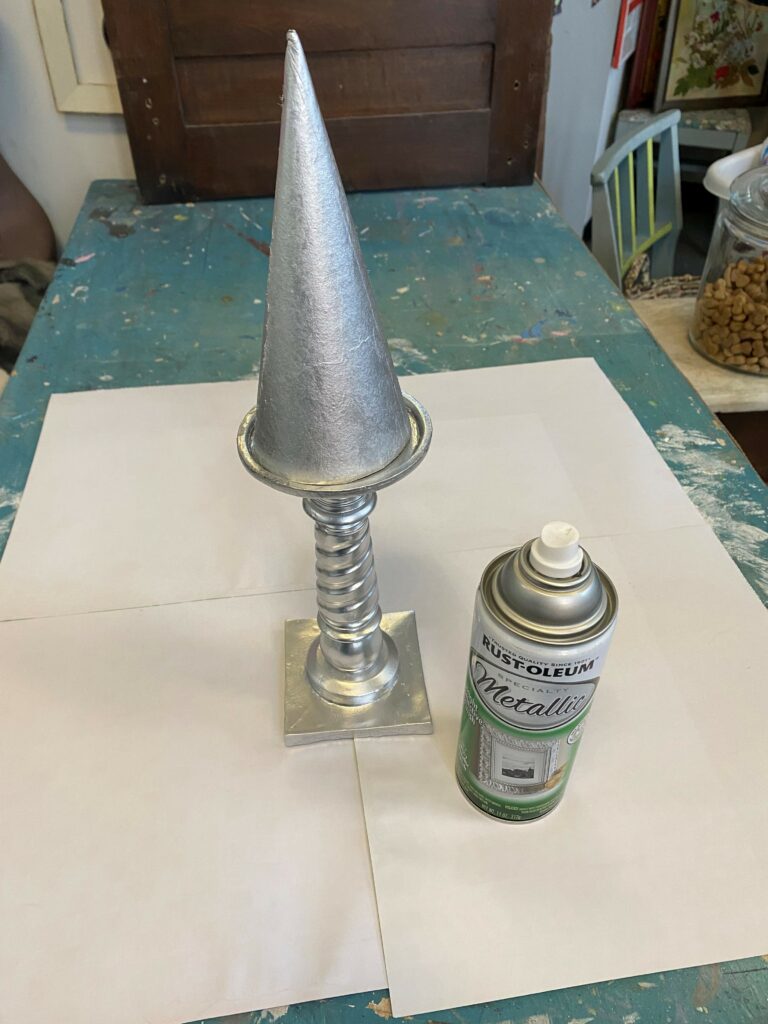
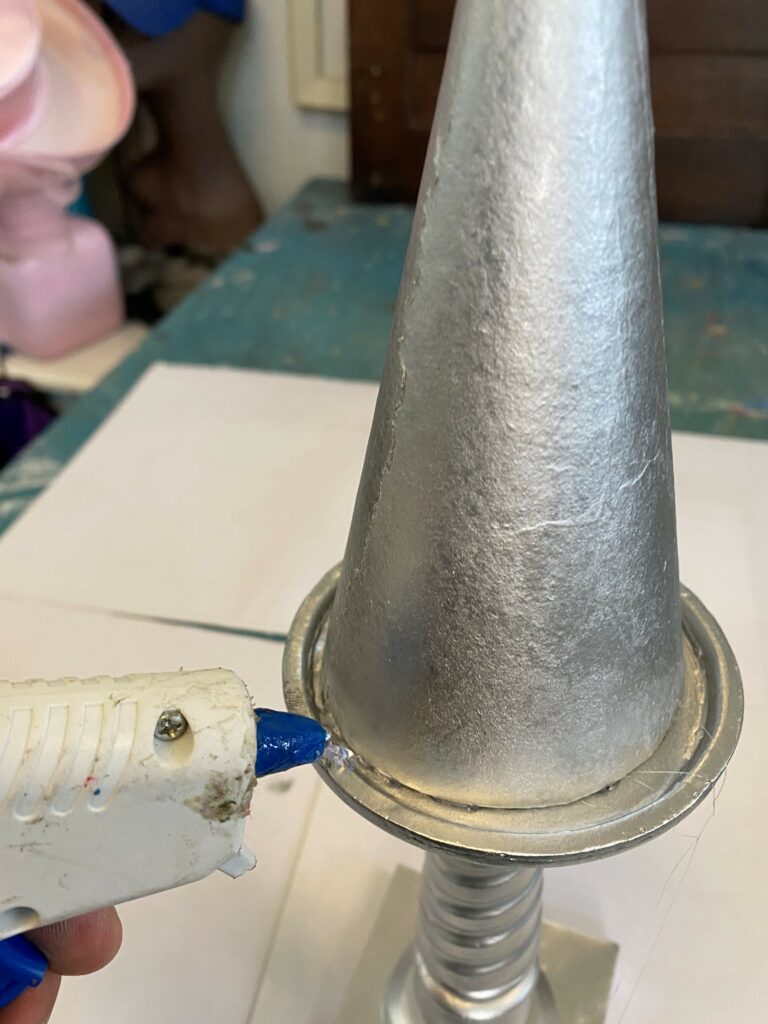
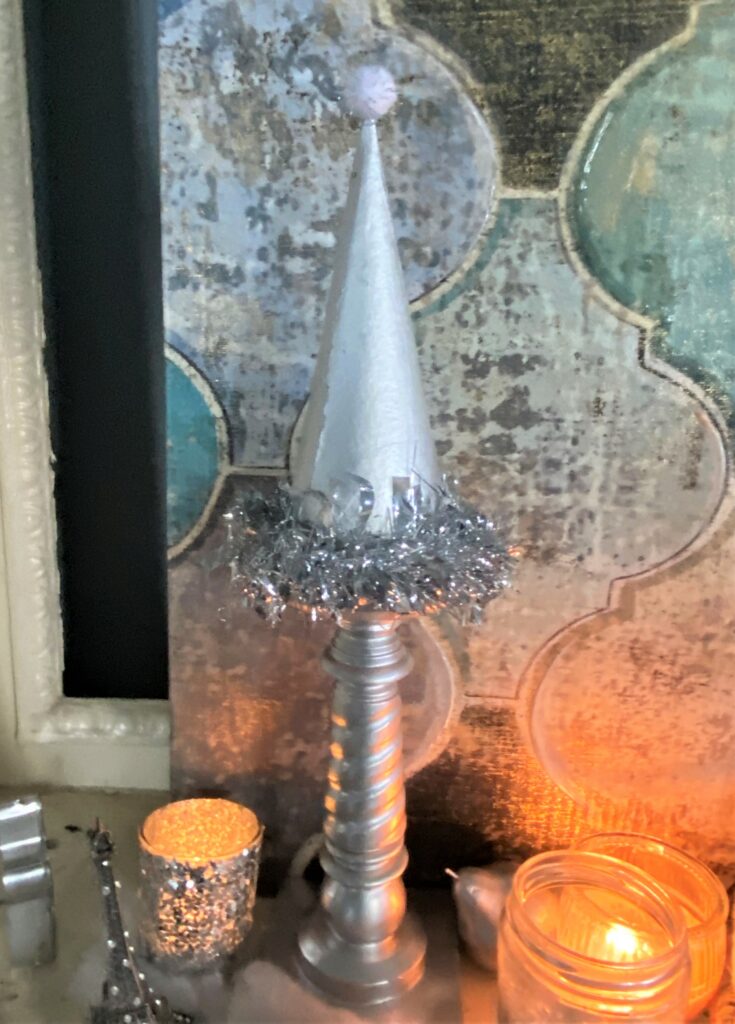
4. Silver Bells & Silver Trees: Candle Holder & Tinsel Tree
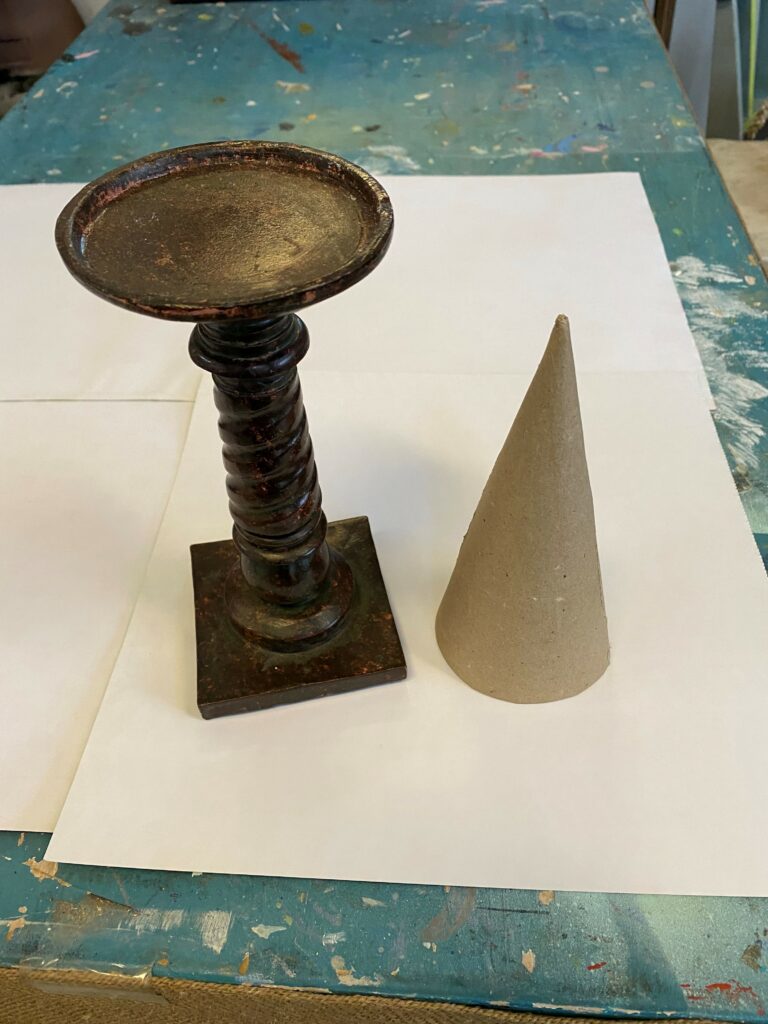

Here’s How:
- Silver spray paint was used to make the cardboard cone and a thrifted candle holder sparkle for the holiday season.
- Once the paint was dry, the cone was secured on top with hot glue.
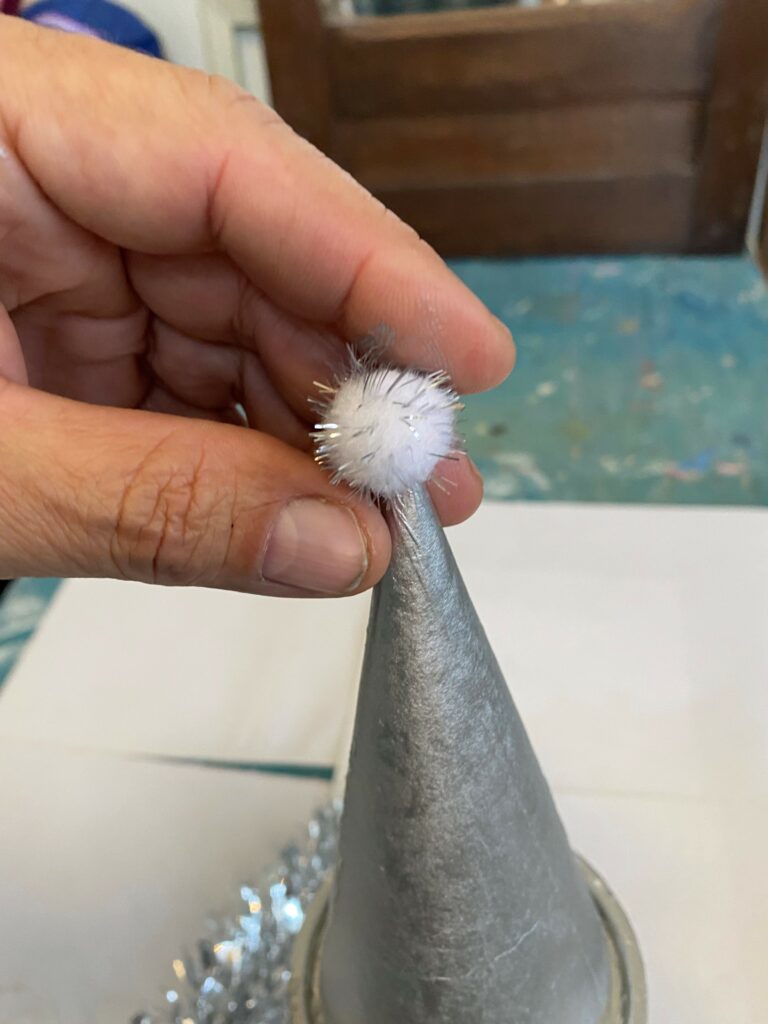
- A small white and silver tassel was added on top as the tree’s star.
- Silver tinsel garland, also picked up at Goodwill, was wrapped about the tree’s base and the top of the candle holder to add more shimmery visual interest. It resembles a stocking cap or Santa’s hat in a way, don’t you think?

Create inviting vignettes with other Goodwill treasures, repurposed items & craft pieces
These trees look charming and whimsical all on their own. However, position them with other Goodwill finds, other repurposed items and DIY projects to create lovely and festive vignettes.
The necktie tree was positioned with glass candle holders and items in similar hues. The paint chip one was matched with a birdhouse fit for the holidays along with a red and silver candle holder found for dollars at Goodwill; both were placed on a cork-covered serving tray.
The sequined fabric tree and silver sprayed tree were placed together with other silver pieces and jewelry items also picked up from Goodwill.
No matter what you place with your repurposed Christmas trees, they will certainly stand out and stand proud as they add love, light and laughter to your holiday gatherings.

Tim Kime
Artist, Motivational Speaker, Life Coach
