Repurpose Your DIY Project Leftovers: Turn Real Leaves into Art
“Leaf” no DIY parts behind! Painted leaves, recently used as paint stamps, get transformed themselves as framed art. It’s always fun to create something unexpected from items you might have previously discarded. Real leaves painted silver now shimmer as original art.

These leaves were left over from a recent dresser transformation (featured here in Finding Your Good) where they were used as stamps to apply paint. As one project—the dresser—was completed, another one was born when a Goodwill-found frame was transformed with the painted leaves. Talk about repurposing your repurposing!
Here’s some inspiration for turning Mother Nature’s handy work into wall art for your home or office.
Step 1: Find your good and a nice frame at Goodwill
A great way to make art for just a few pennies is to shop at Goodwill for frames and other decorative wall items. New frames can be super expensive, so honor your budget—and Mother Earth—by hitting Goodwill first. There’s usually a wide array of framed wall art there that is perfect as is or can easily be tweaked.
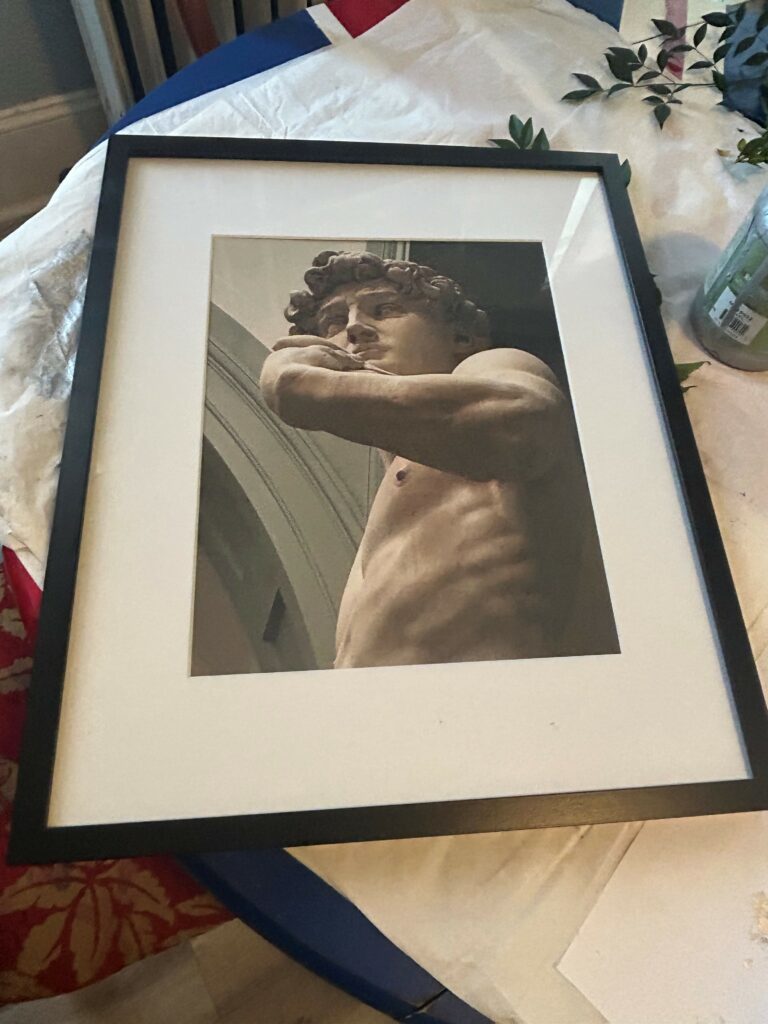
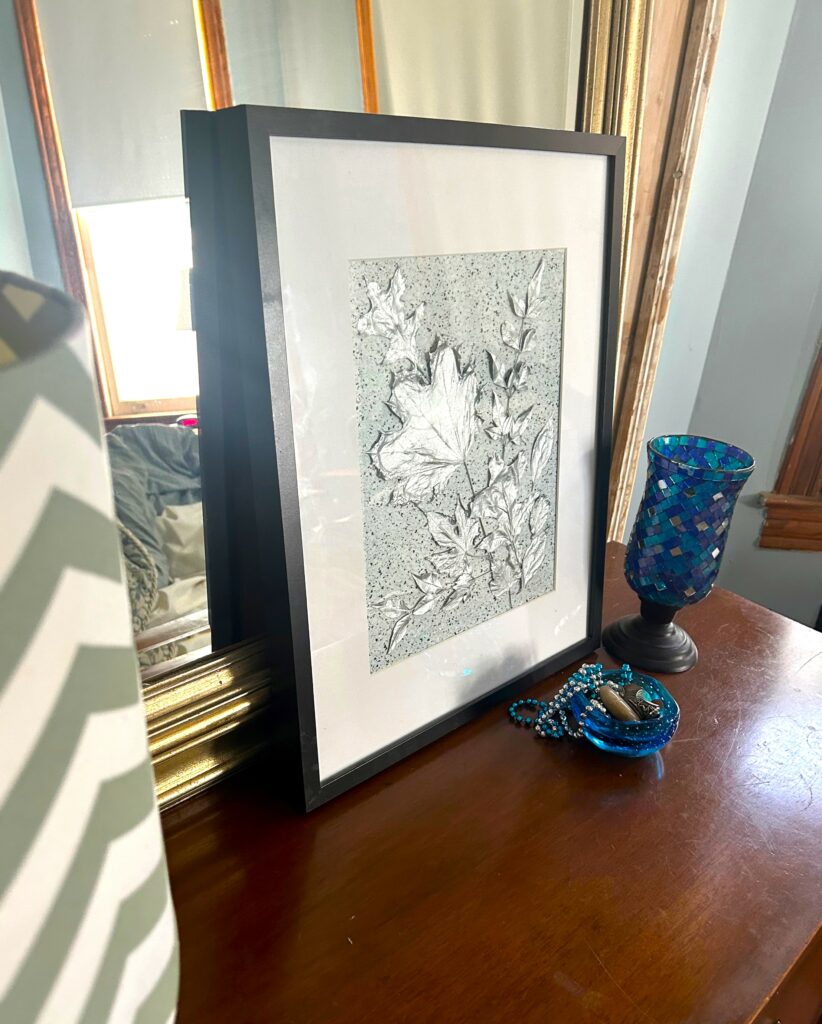
For this project, a sleek black frame with a crisp white mat was ideal just as it was found. It had held a photo print of Michaelangelo’s David sculpture, but it was the artwork’s outer parts which caught my attention. You can easily remove a frame’s existing artwork and, if need be, change the frame’s color with spray paint.
Step 2: Give real leaves some shimmering style
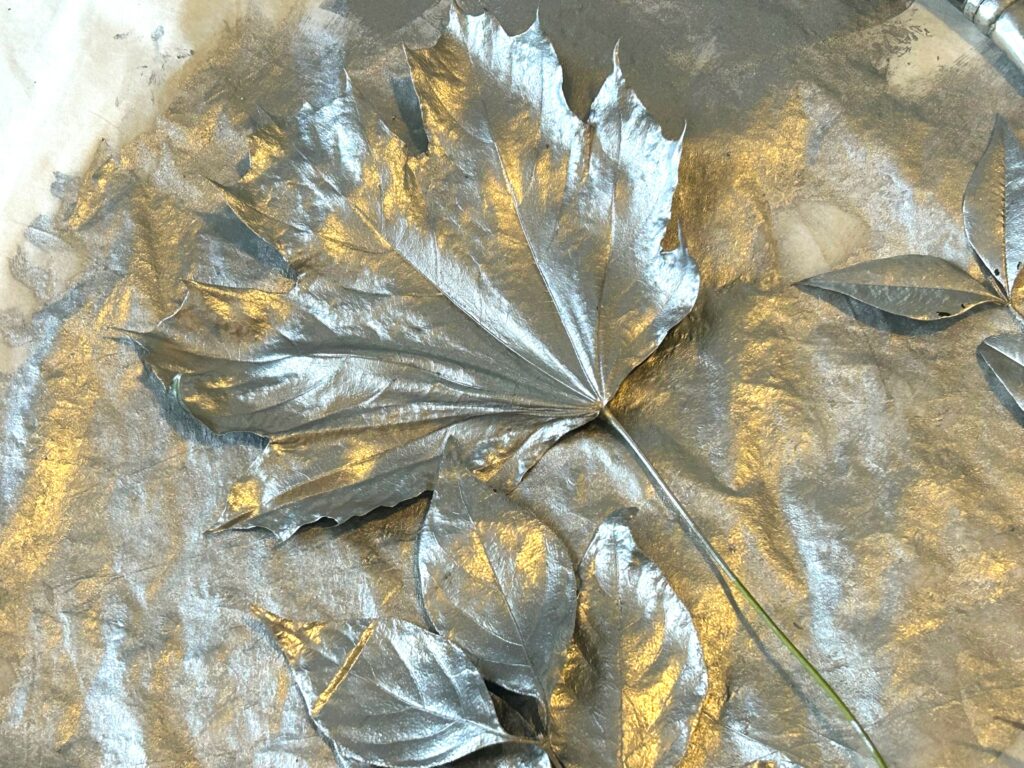
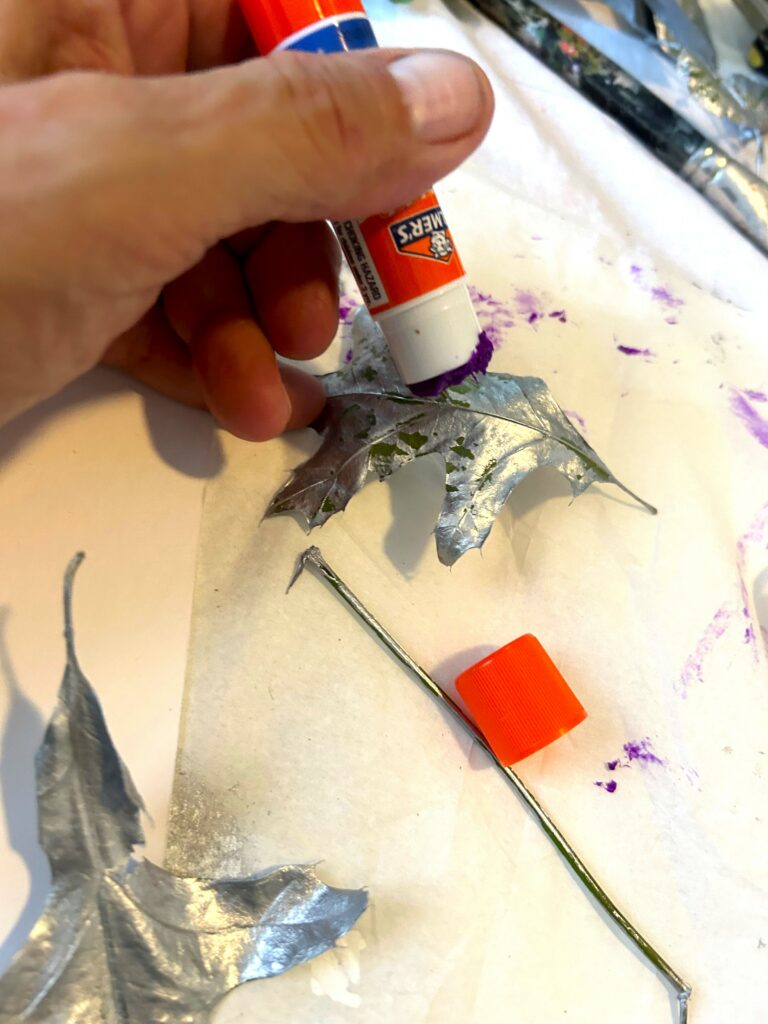
The leaves featured in this blog were painted silver then used as stamps to apply the paint on a white dresser. They were too beautiful to just toss out, so they became the inspiration for this art piece.
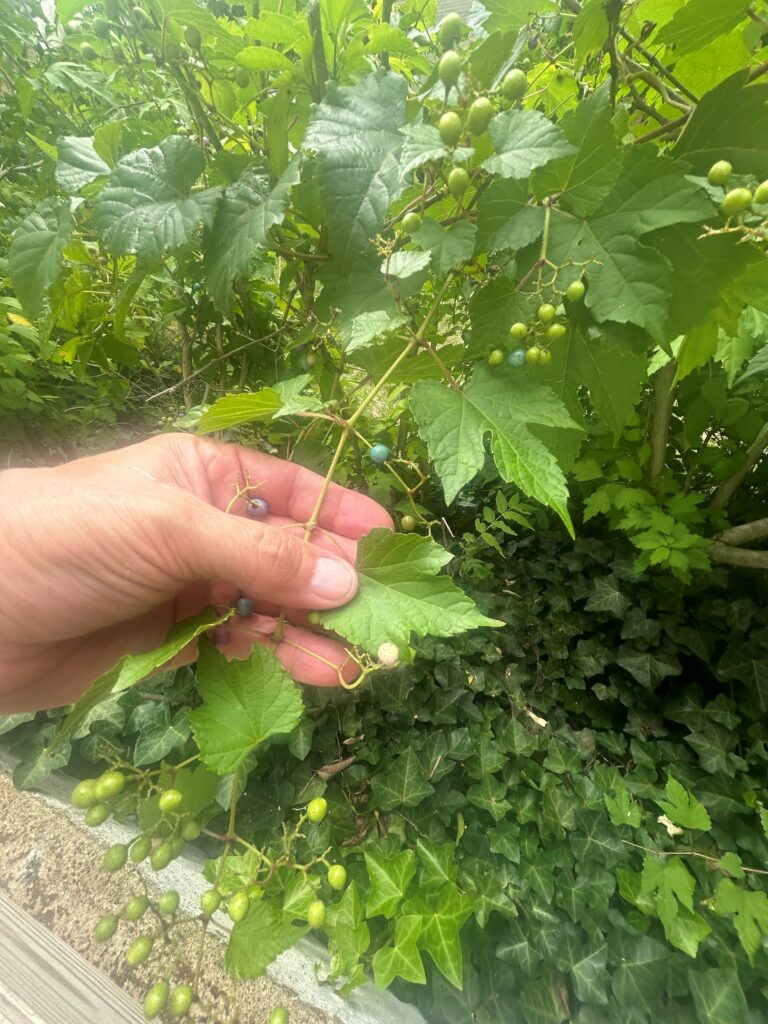
Since you are likely starting from scratch for this project, check out your yard, garden or outdoor community and hunt for leaves with pretty shapes. This is a wonderful time to enlist the little ones in your world to help select the leaves and to have them focus on Mother Nature’s creative talents.
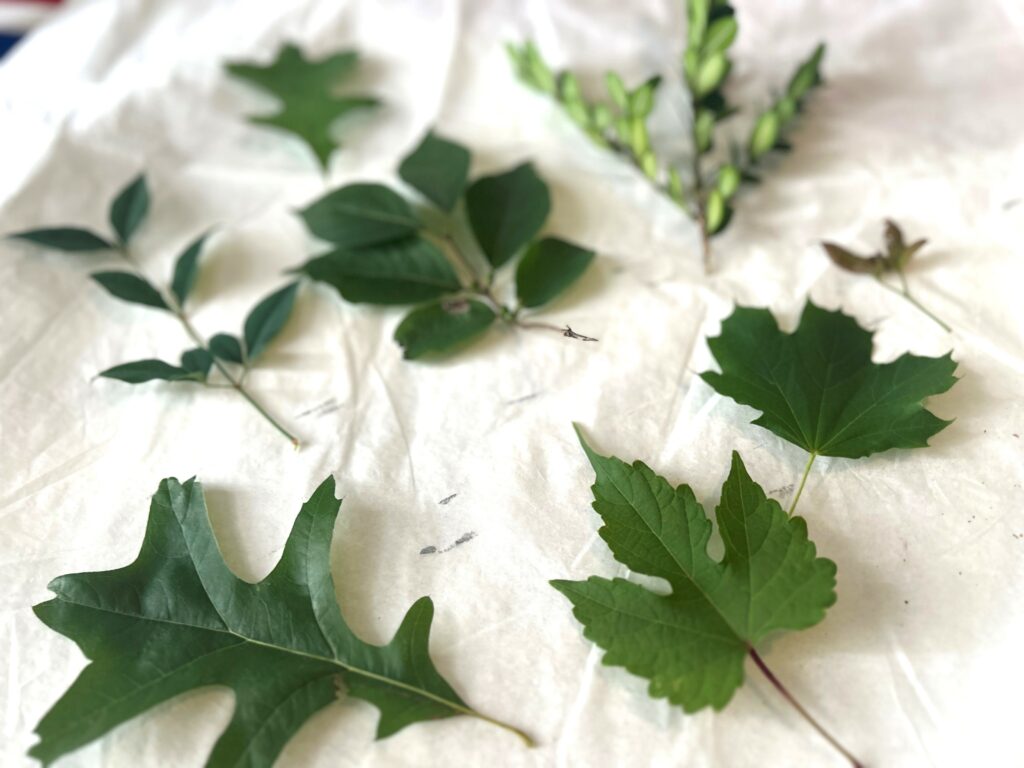
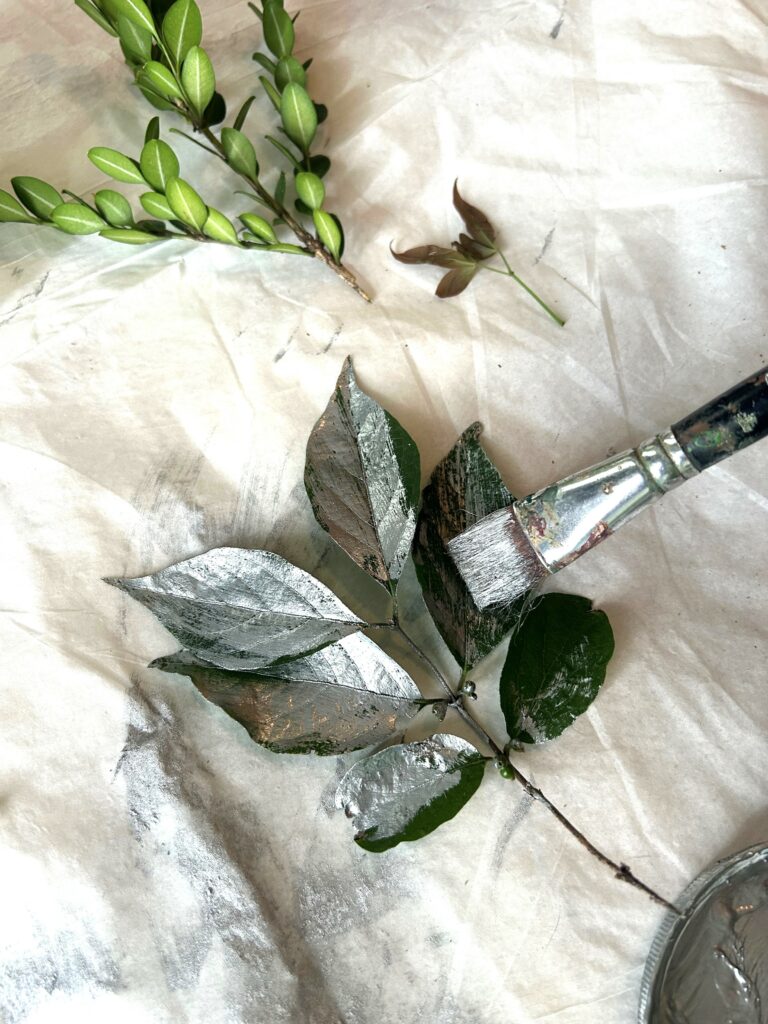
Once you have a good collection, place them on your workspace. Use silver craft paint and a small brush to apply paint on them and allow plenty of time to dry before handling. Brushing on the metallic paint will make the leaves look like pieces of jewelry. They look so elegant, so you are able to see why I couldn’t toss them away!

Expert Tip:
Silver spray paint also is a good option for this project. If you have a place outside to paint the leaves that way, you might consider it. Given this is a budget-friendly project, silver craft paint was painted on because it was already on hand. What do you have in your stash to use to keep down costs?
While your painted leaves are drying, move onto the next steps.
Step 3: Use care when deconstructing
Be sure to use care and caution when you take a part your frame to remove the current print/canvas/artwork. If there are screws involved, find a bowl or small container to hold them securely while you work on your project. If possible, use work gloves to project your hands as you remove the glass panel. Also, set it aside with care. If kids are helping with this project, please place the glass panel up and out of reach.
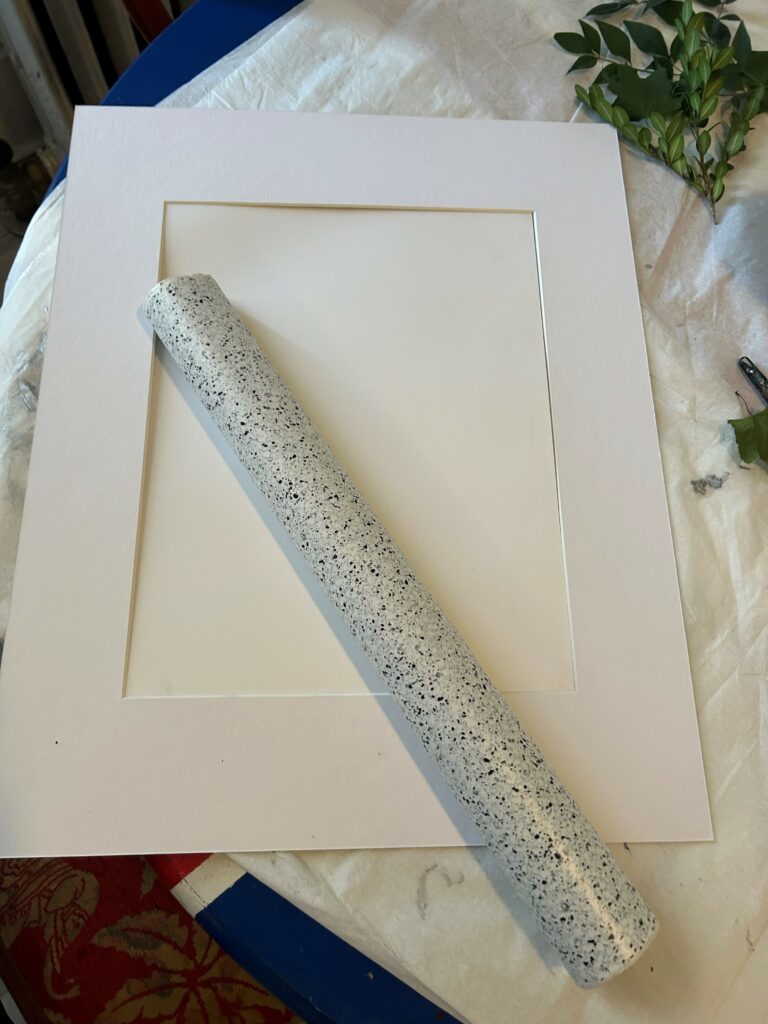
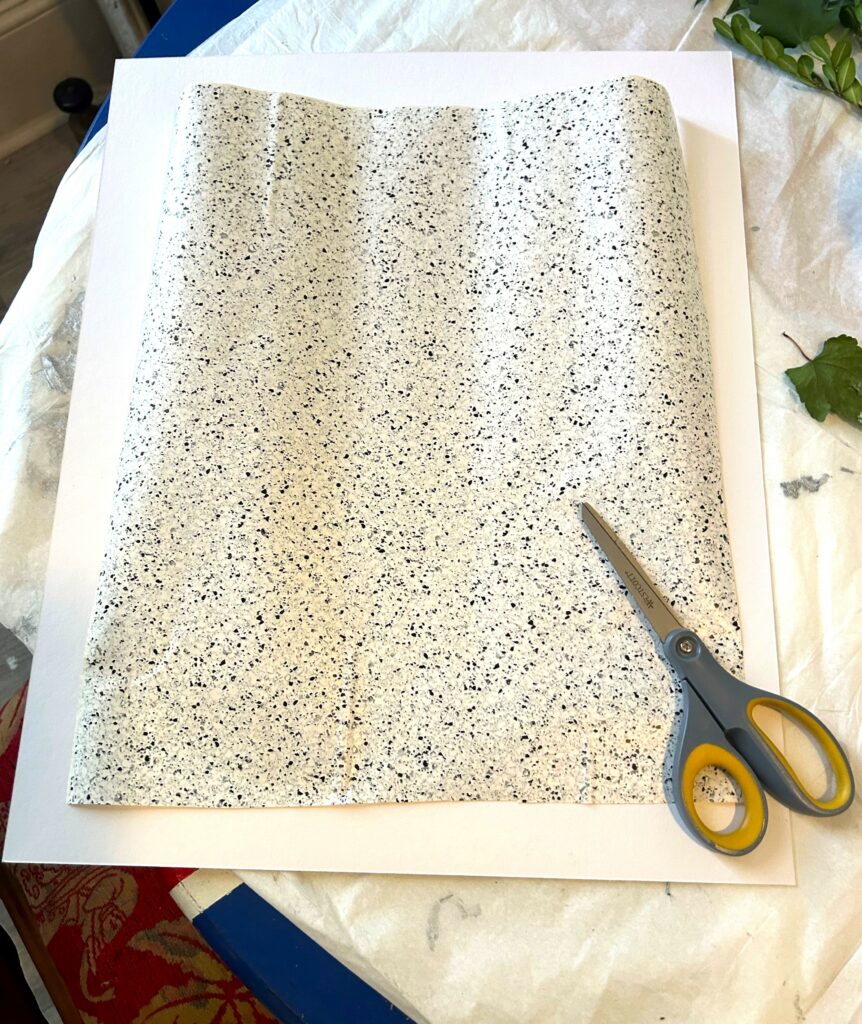
Step 4: Reuse the existing art as a foundation
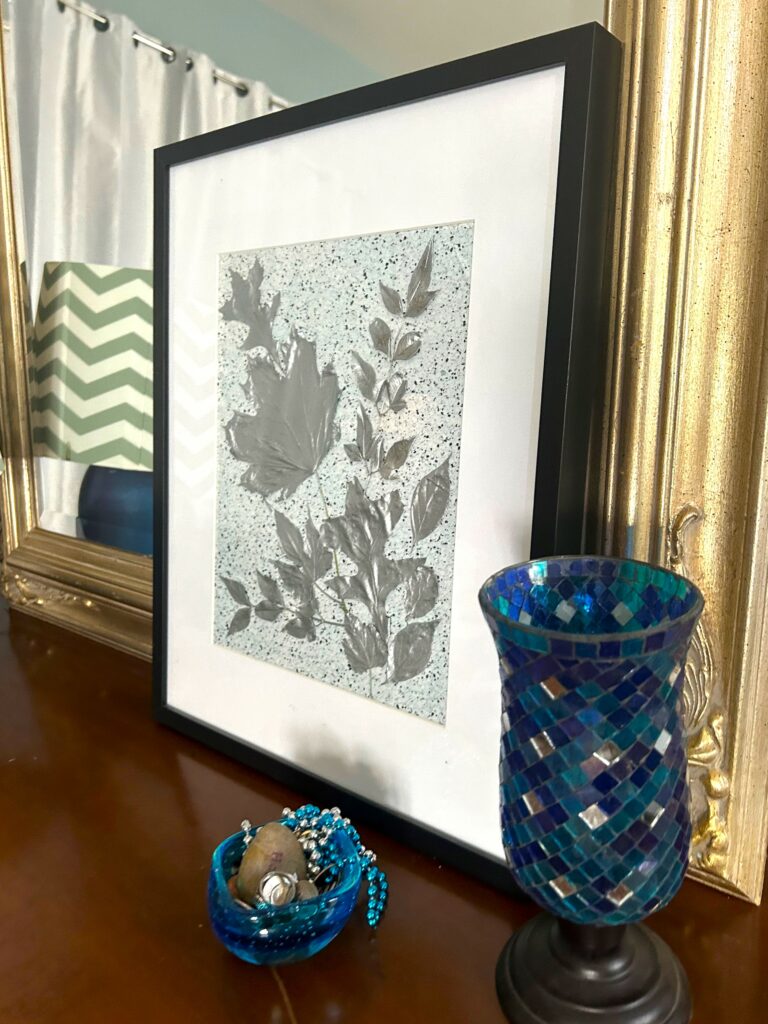
If possible, use the current art/print/artwork as the foundation for your new piece. It already will be the right size because you know it fits the frame. For this leaf-inspired art piece, the photograph of David was turned over and some speckled contact/shelf paper was measured, cut and applied on top. The gray, white and black tones complimented the frame, mat and painted leaves. While at Goodwill, look in the aisle where school, art and office supplies are available for sale. You are likely to find such paper to use as your art piece’s backdrop.

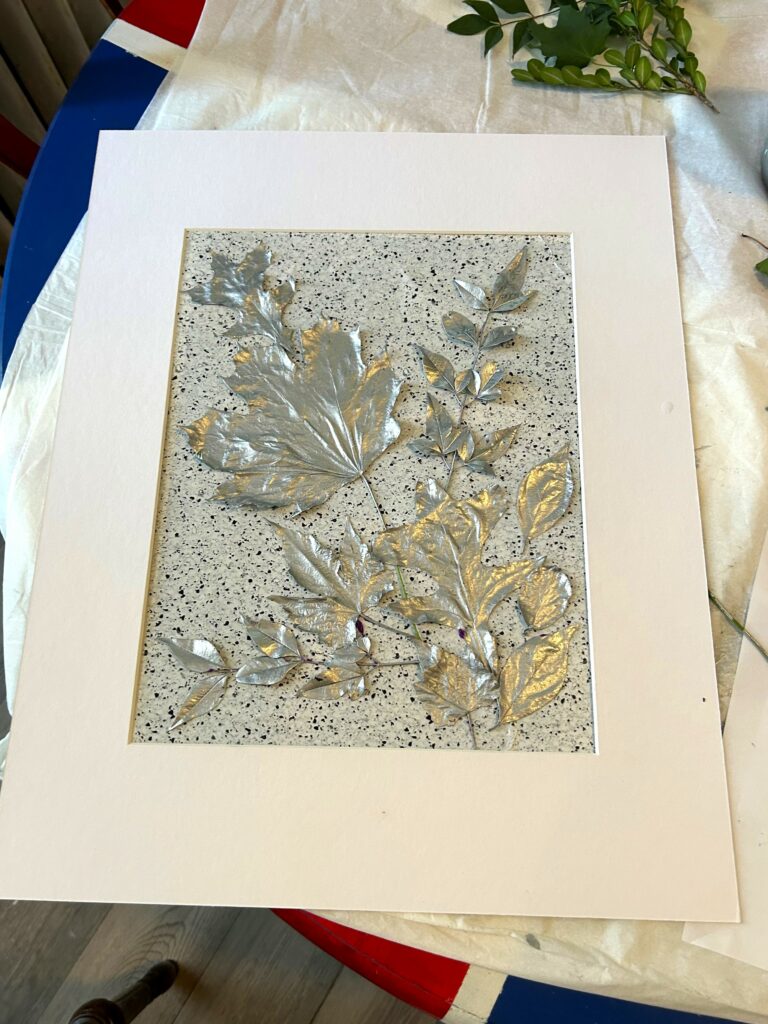
Step 4: Build on the background
Place your art piece’s new background/foundation on your workstation right side up and place the mat on top. Place your collection of silver painted leaves on top and move around until they feel balance and look right. Use glue to secure them in place, by removing one at a time, adding glue and putting it back. For this project, glue sticks were hand, so they were used.
Expert Tip:
School glue would have done the trick as well since it will dry clear and securely. Stay away from using your glue gun for this step because the hot glue will melt the leaves. Also, shy away from using wood glue because it often dries with a light brown finish which will impact the over aesthetic look of your art piece.
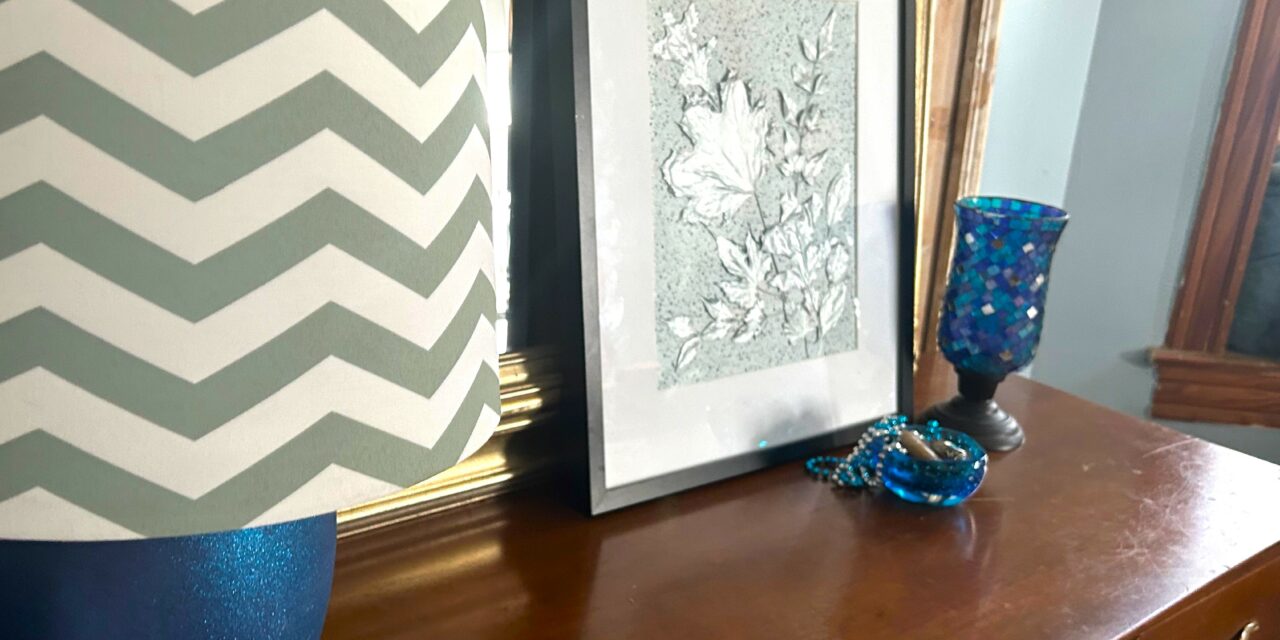
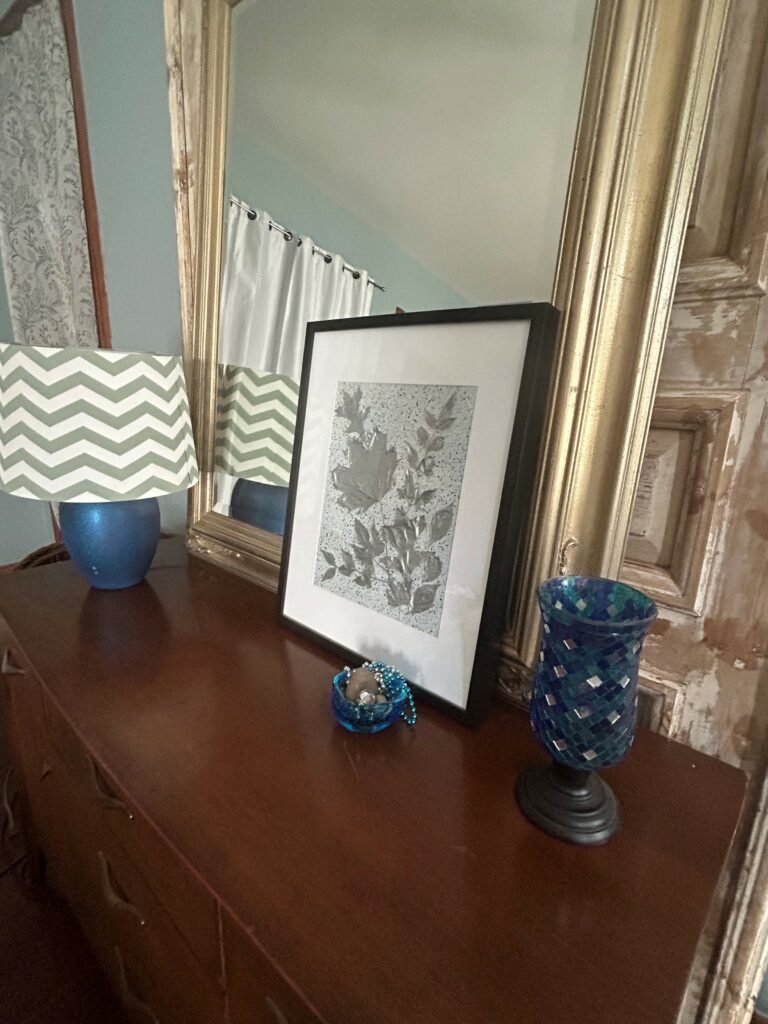
Step 5: Hang, display, pair with decorative items
One of the beautiful things about this shimmery leaf art piece is that it will look good all year-long and well past the change of seasons. The silver tone makes it a timeless, attractive addition to any space. The paint will also make the leaves reflect light, adding more visual delight wherever your art piece calls home.


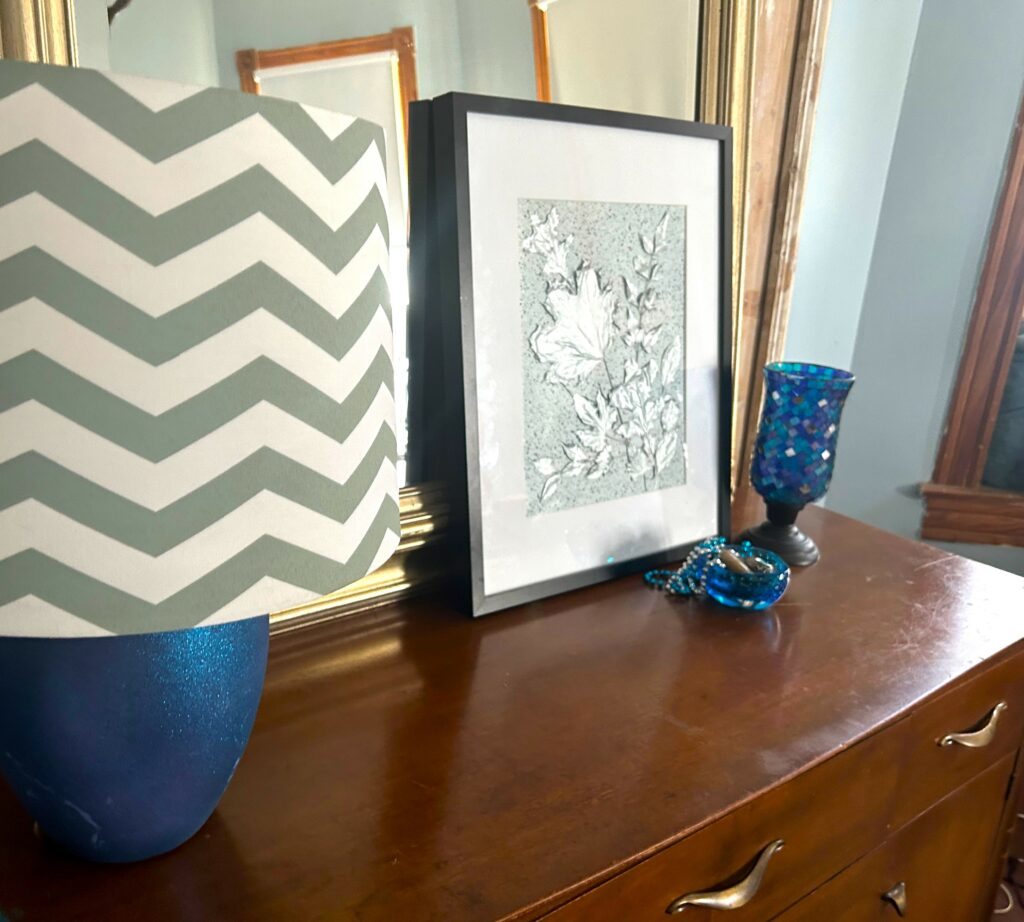
Position it with other decorative accessories like a colorful lamp, matching candle votive and a shiny glass bowl. This was placed in front of a big mirror with a silver frame which brings out the shimmery leaves.
Don’t you just love this DIY project? So lovely, so easy and so budget-friendly!
Similar Reads:
- DIY: How to Use Oak Leaves as Stencils
- “Leaf” a Lasting Impression by Using Goodwill Finds as Decorative Stamps

Tim Kime
Artist, Motivational Speaker, Life Coach

