Transform a pair of small, side lamps into an elegant, eye-catching twosome ready to take center stage by using silver and black spray paints. This easy, DIY project makes for a sharp-looking set that adds immediate style to any setting.
Items needed:
- Two small lamps, matching if possible
- Small paper lamp shades
- Silver metallic spray paint
- Black spray paint, satin finish
- Painter’s tape
- Recyclable grocery bags
1. Thrifting helps to save Mother Earth
Every time you shop at Goodwill and reuse or repurpose a secondhand item, you are helping to keep items out of landfills and are helping to preserve our treasured resources. And it sure is fun to hunt for items and look for your good at Goodwill!
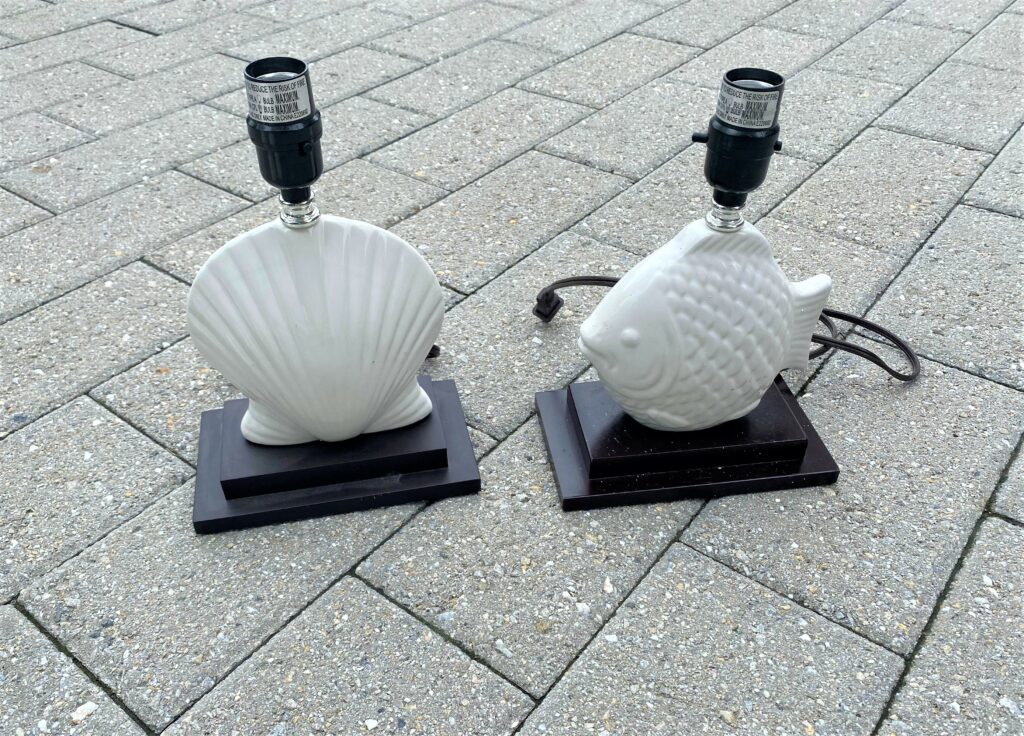
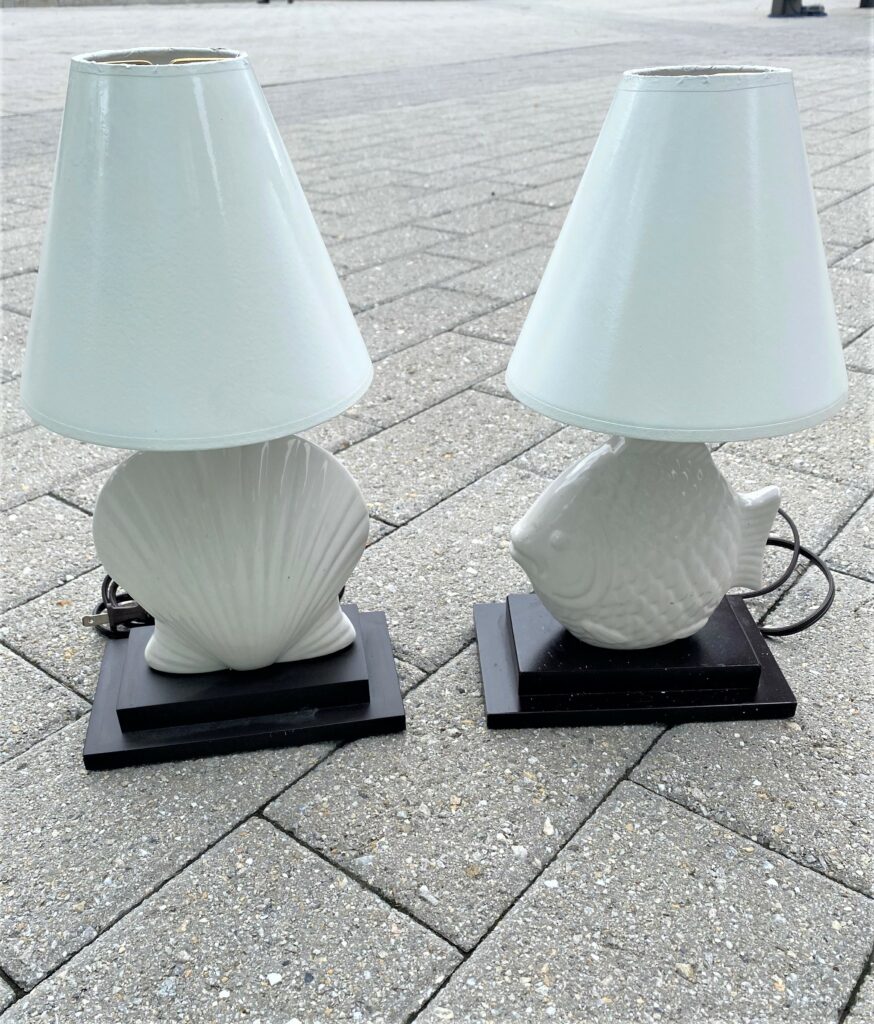
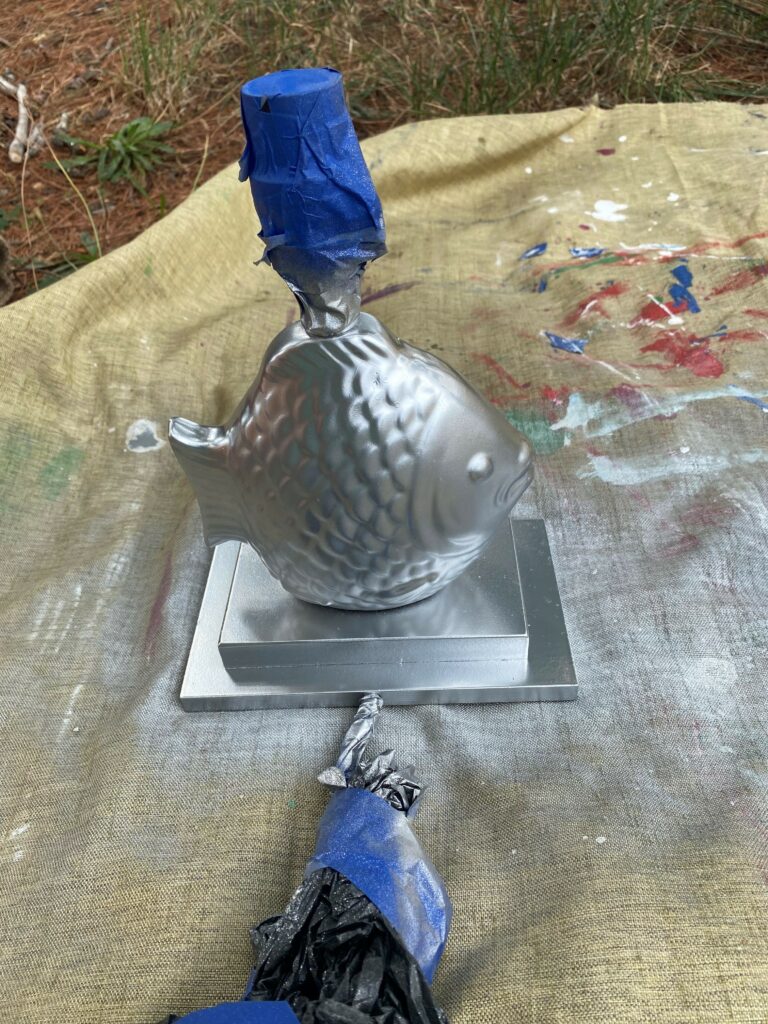
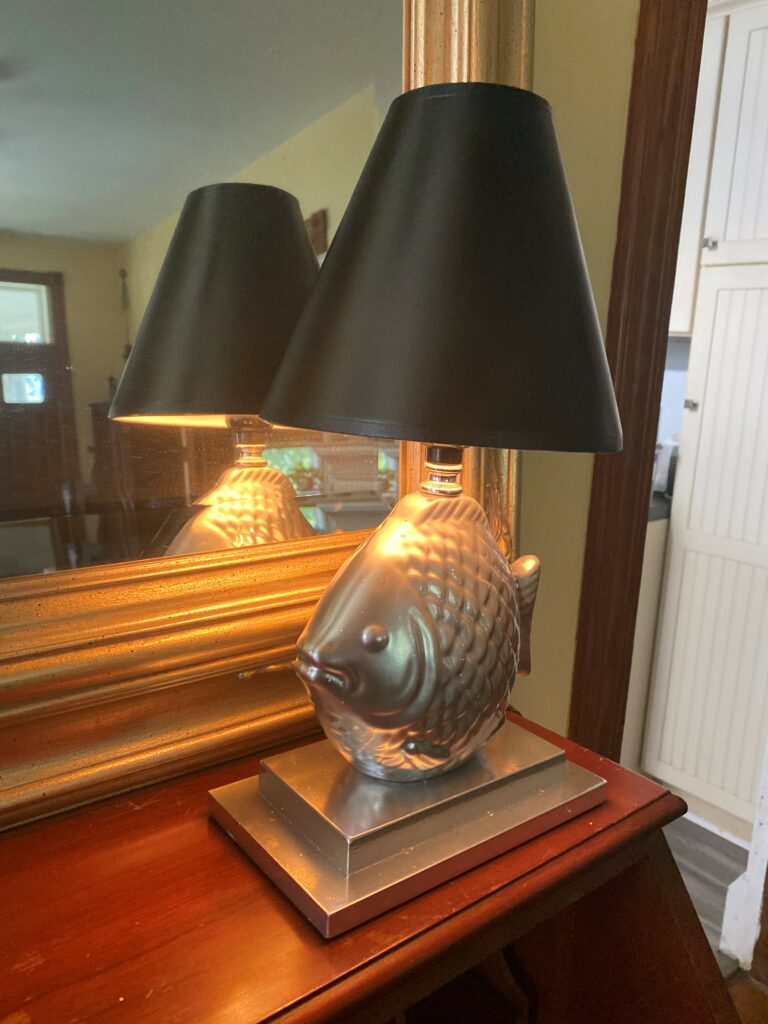
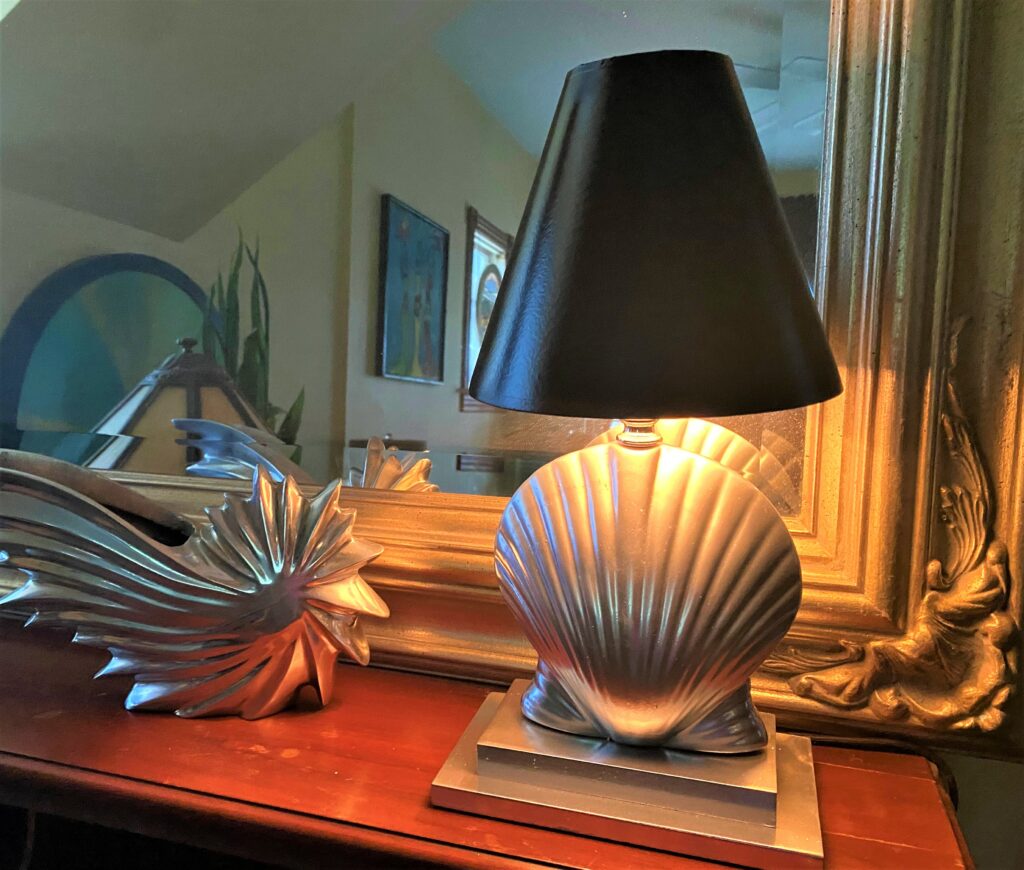
If you are a happy thrift shopper like me, you’re probably one who searches online or in your community for items being given away. While riding my bike home, I saw a collection of household items that were lined up for free. While I would have loved to take all the items home with me, I could only safely take the small fish lamp featured in this blog, because it fit in my bike basket. As fate would have it, I later found a matching shell lamp at Goodwill! Of course, I had to take it home with me.
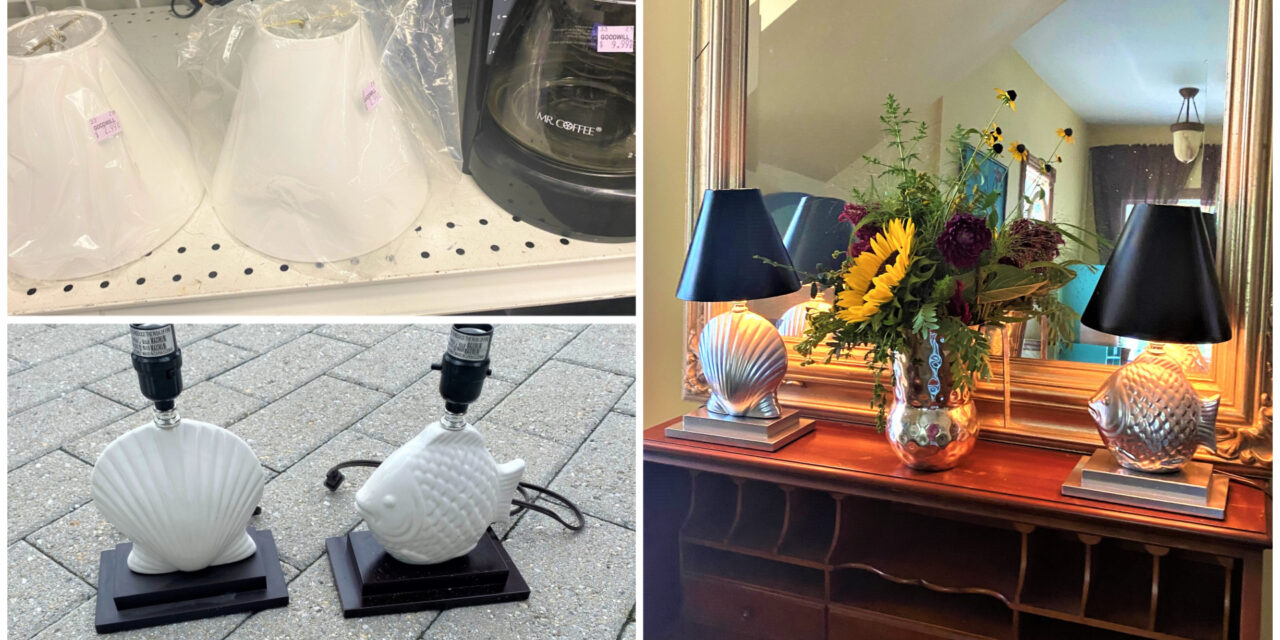
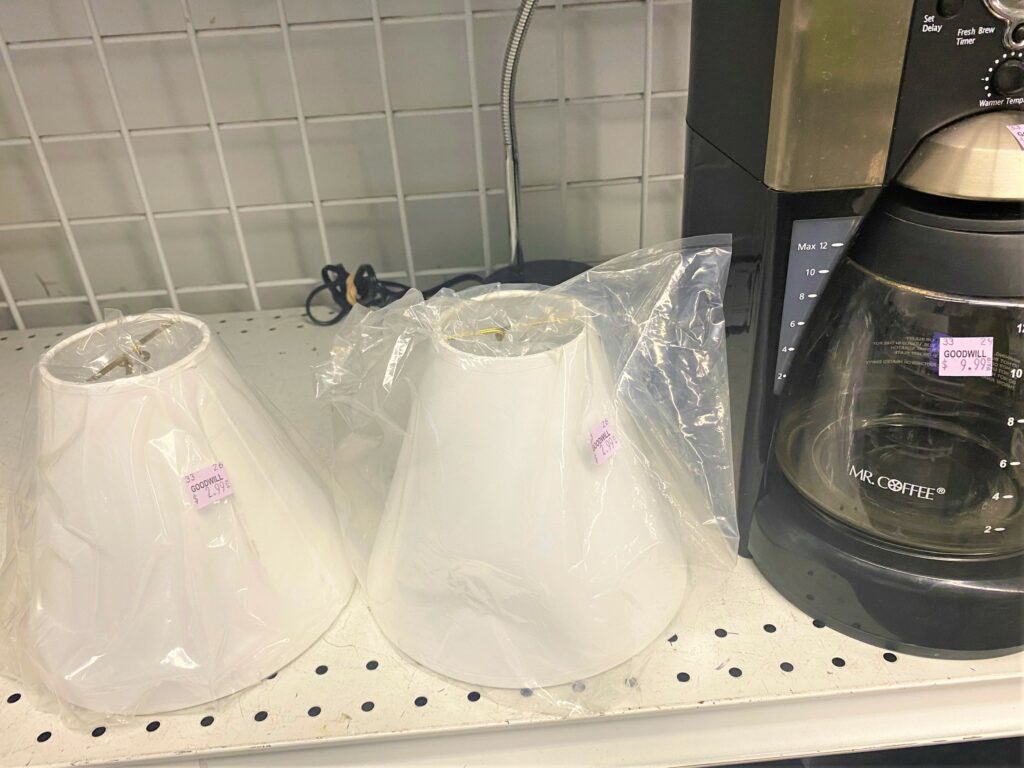
While there, I also picked up two matching paper lamp shades to complete the set. The lampshades were brand new and still in their original plastic packaging! In an instant, my single fish lamp base now had a partner and a shade!
2. Select the perfect pair of paints
Given the dog days of summer and with many people off on their last vacation before school starts, I thought this lamp pair was beachy-looking and relevant to the current season.
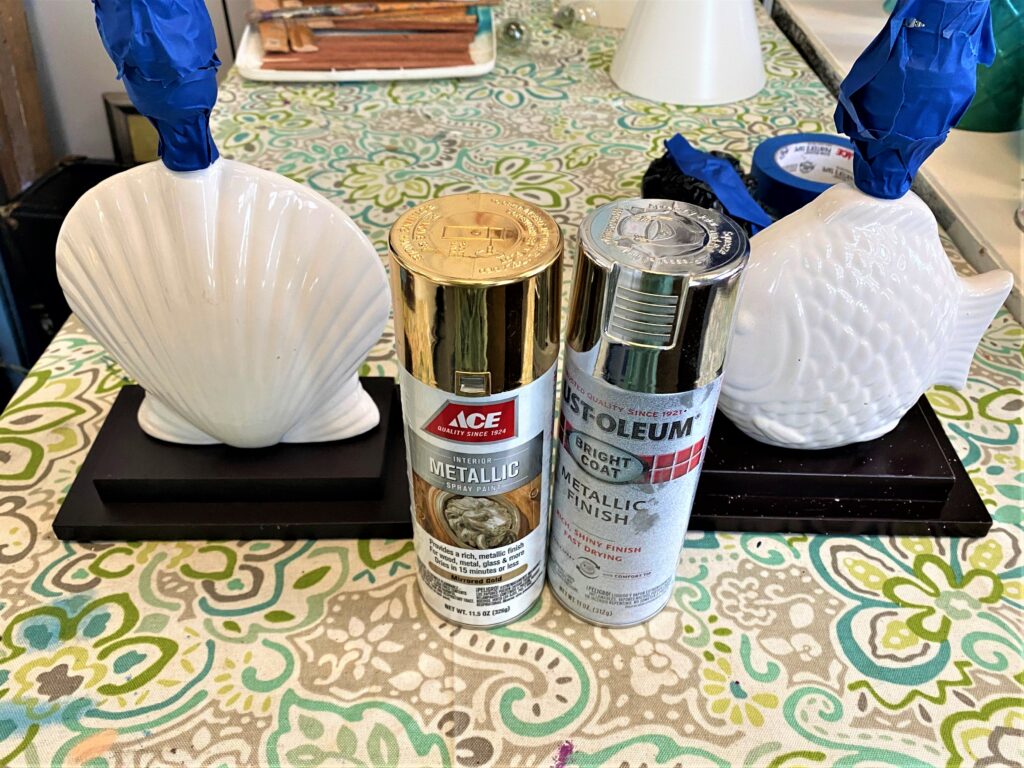
My first thought was blues to reflect the sky and ocean and something totally bright. However – and I say a big, HOWEVER – when I looked at my collection of spray paints, the metallic tones were the ones that called my name! I thought those tones would make these two ceramic pieces look like a million bucks!
Also, I thought a black shade would be the icing on the elegant cake and make a dramatic statement. To confirm this direction, I went to the Goddess of Pinterest and checked out lamps with black shades. Done!
Design Tip:
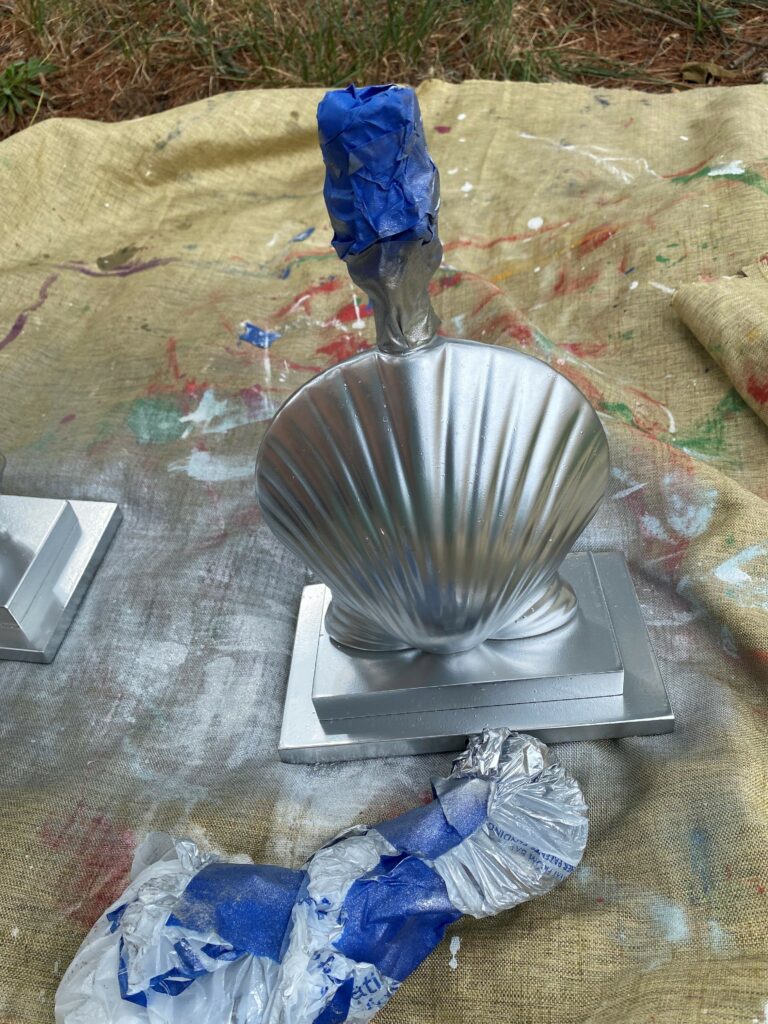
I had two cans of metallic paint, one gold, and one silver. I wasn’t sure which to use so initially sprayed one lamp base gold, and the other, silver. This easy step confirmed that silver was the more elegant, contemporary-looking option. If you are unsure, do the same! Try a tone; it is easy enough to repaint it with the color choice that makes you most happy.
3. Prep your pieces and parts
Lamp Bases
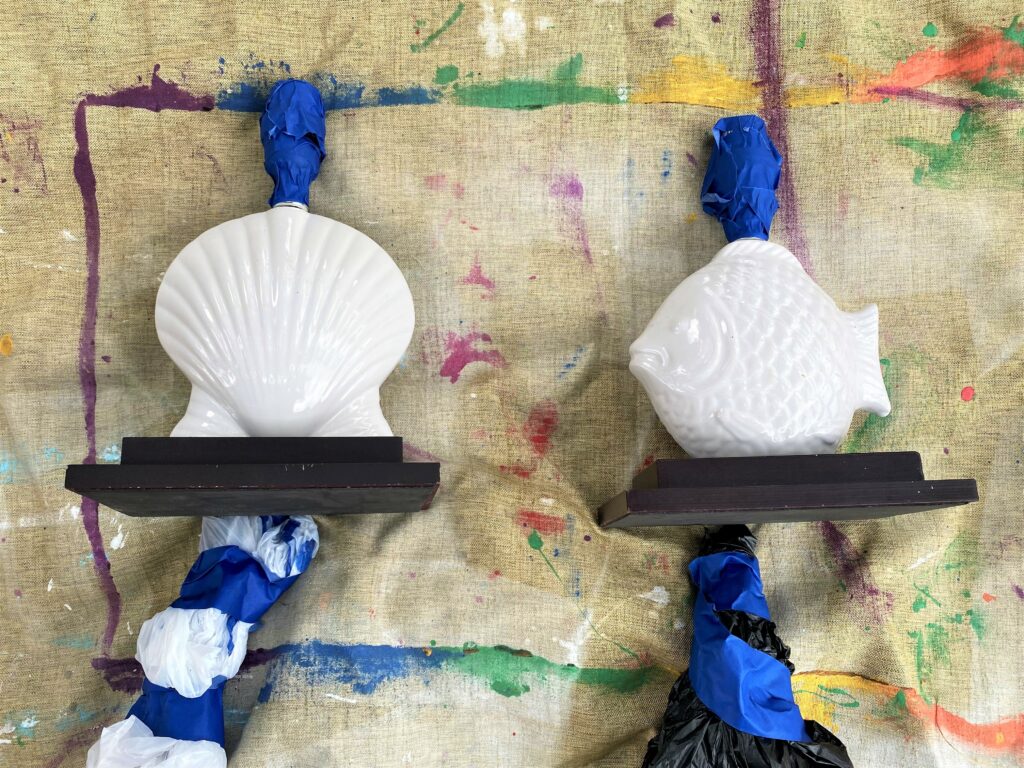
- Use your painter’s tape to cover any parts you want to protect.
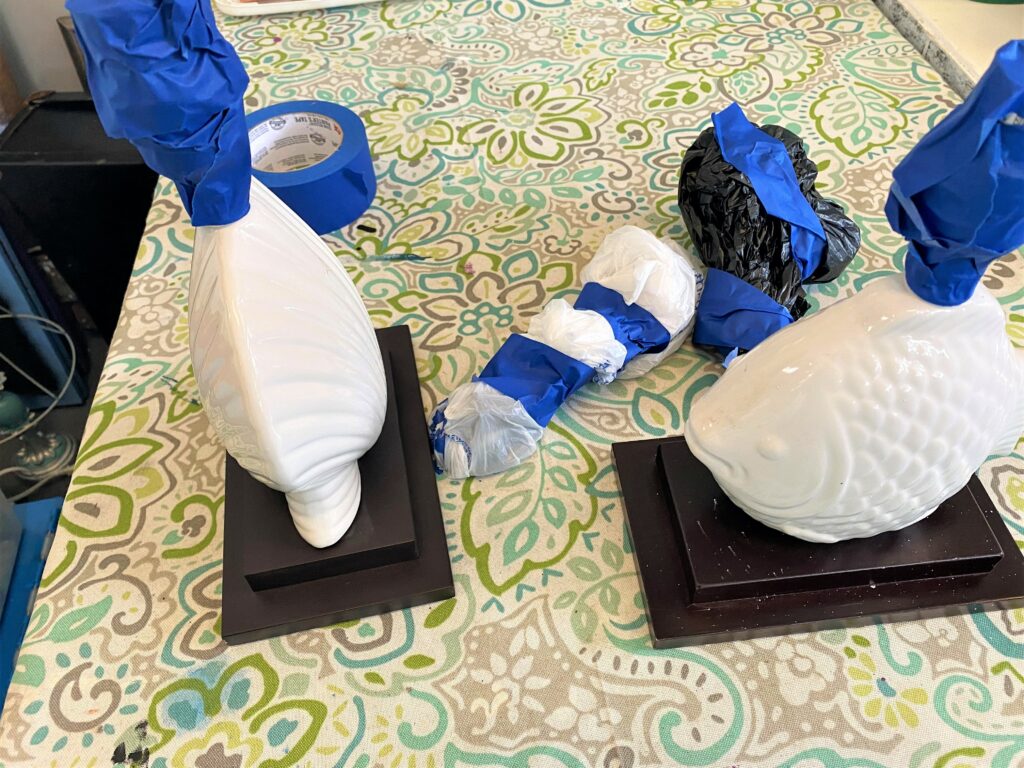
- Painter’s tape was used to cover the socket where the bulb goes in to keep paint out of it. Painter’s tape was also covered the power cords.
- Wrap your cords and place them in a plastic shopping bag, then secure with your painter’s tape.
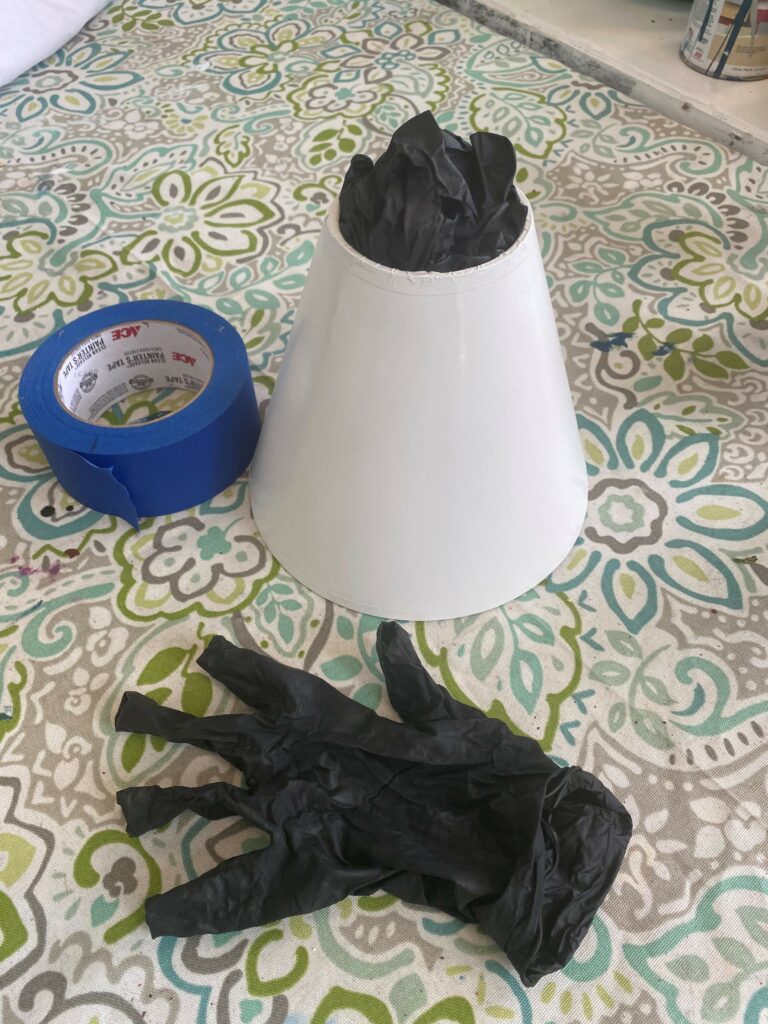
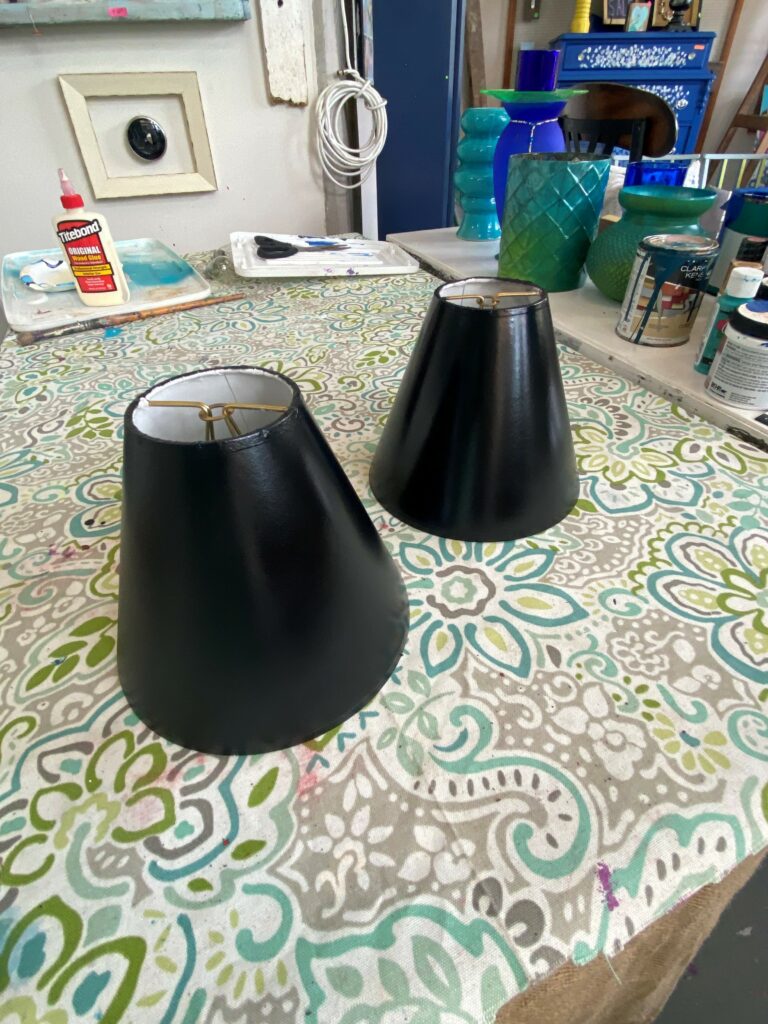
Shades
- To keep the inside of your shades looking good and to keep the paint out of them, stuff your shades with plastic shopping bags and secure them in place on the inside with painter’s tape.
- I had a bunch of used plastic gloves, so those were stuffed in as well at the very top.
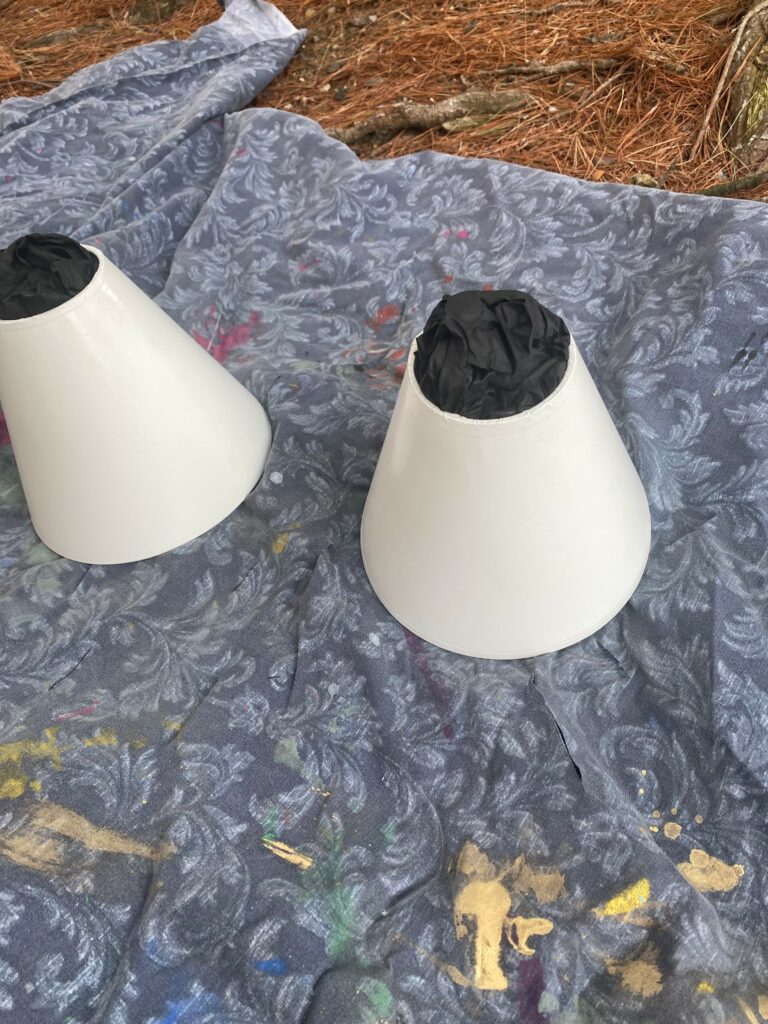
4. Spray on light layers
- Place your lamp bases outdoors and on a drop cloth.
- Add a very light layer, let dry, then turn them over and get the other side. You may need to add three or four light layers to prevent drips and runs while ensuring solid coverage.
- For your shades, place on a different drop cloth (so they don’t get silver on them), then add light layers too. No need to move or flip the shades as you don’t want paint on the insides.
- Carefully and lightly spray your black paint along the bottom part to create a nice edge and clear delineation of where the black starts on the outside and the white begins internally.
- Let your pieces dry well before handling; I got impatient and touched the lamp base before it was completely dry and left my fingerprints! It was easy enough to fix with a quick “spritz” of more silver.
.
5. Take away the tape, bags
- Very carefully cut and pull away all your painter’s tape from the sockets and power cords.
- Pull out the bags from the shades after gently removing the painter’s tape from inside.
6. Add bulbs and combine your parts
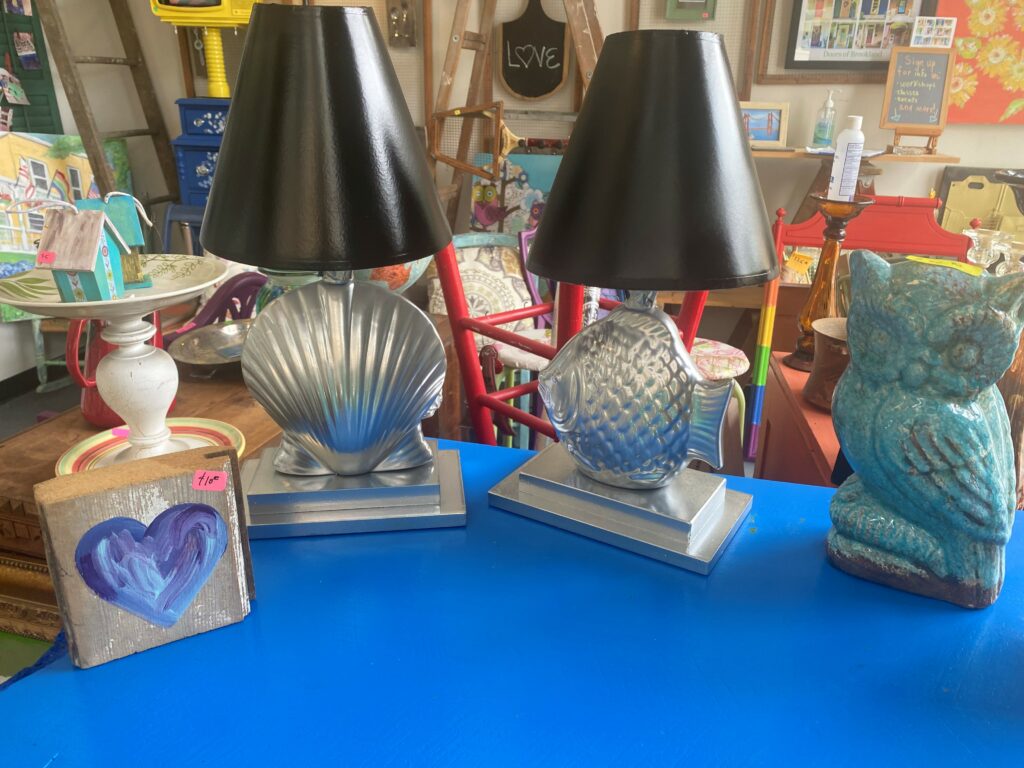
Small bulbs were added with a very soft light, an easy choice made given that these are accent lamps and not reading lamps, which would require very bright bulbs. Carefully add your shades on top of the bulbs or to your base, depending on how they go in place. They looked so good together as a proud and handsome pair!
7. Put in place and turn them on!
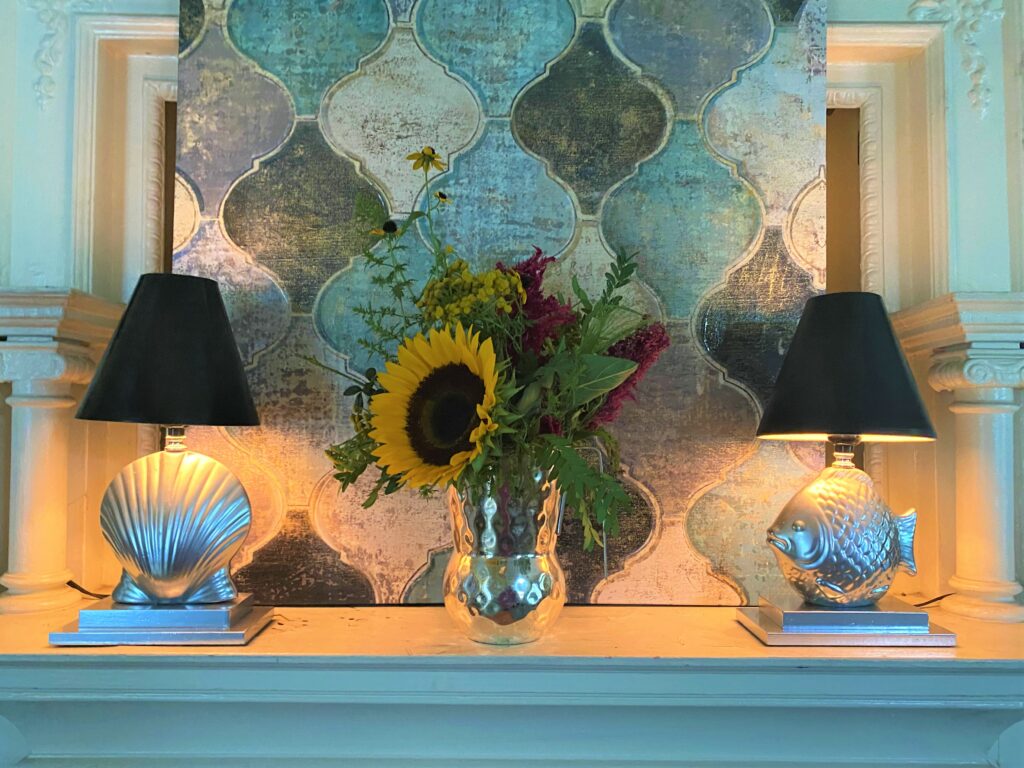
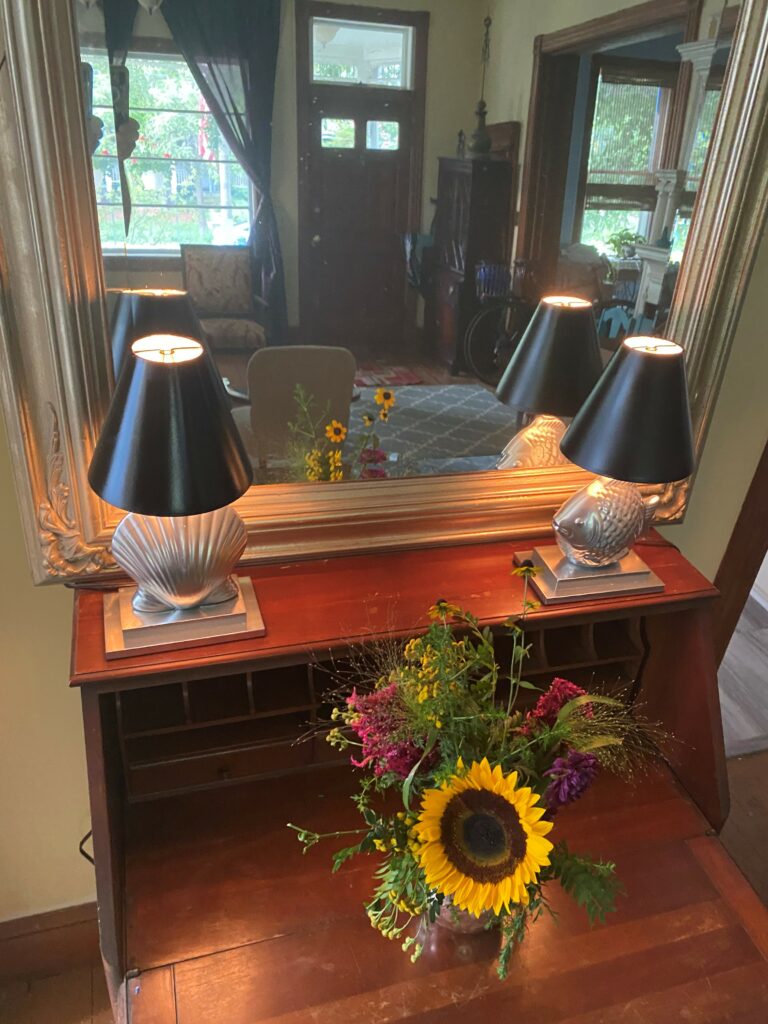
With their matching looks and small size, these lamps are best when paired together. As you are able to see by the photos, they were placed on top of a desk and in front of a mirror.
I love how beautiful they look with the light reflecting off of the silver and the mirror!

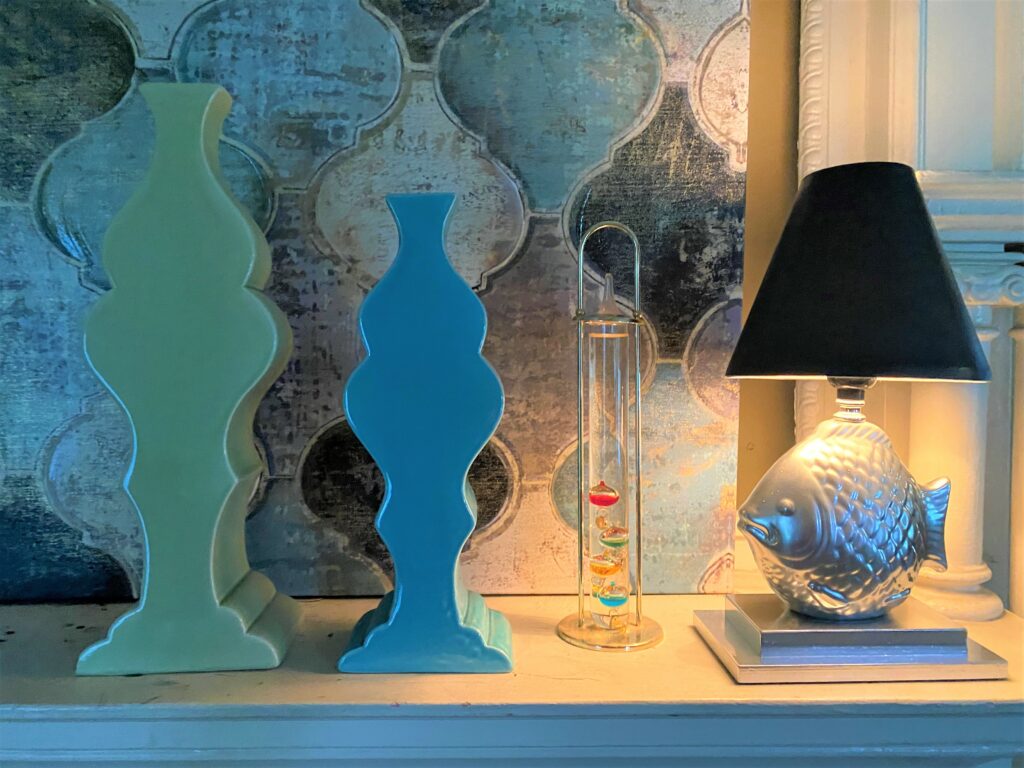
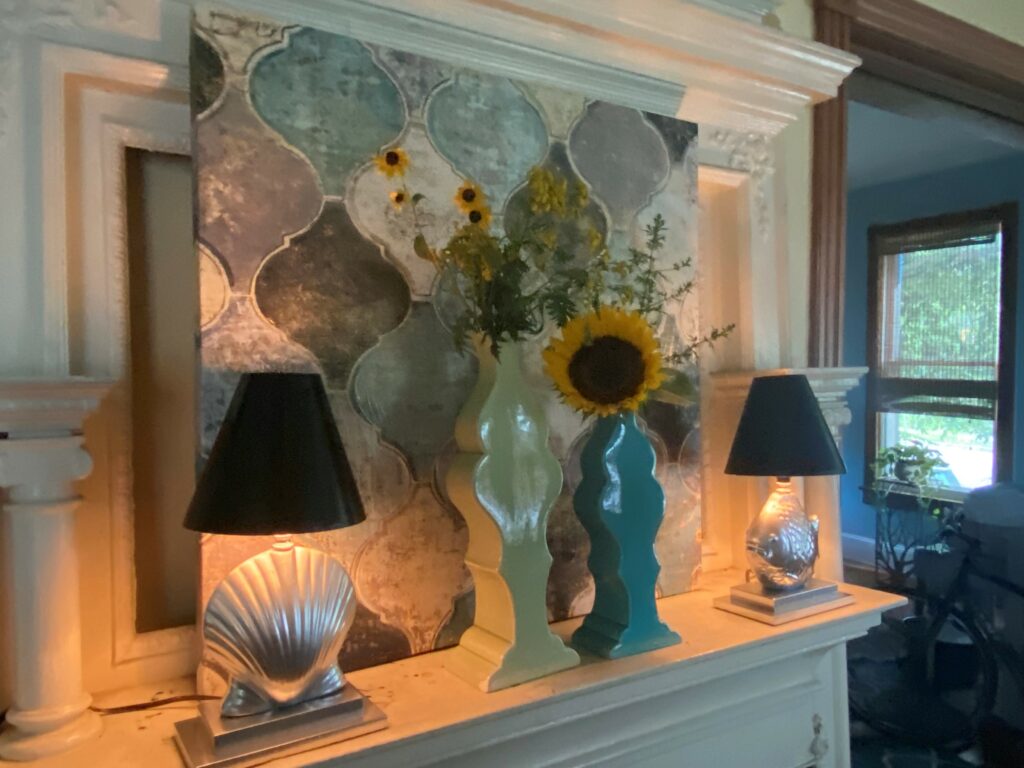
As another option, they were set together on a mantel which was also lit up when the little lamps were turned on.
What a warm and welcoming glow this pretty pair makes!
Add other accessories like vases, candles or art pieces (also available at Goodwill) to create a totally beautiful vignette!
You will glow, too, which happiness when you see how your upcycling efforts can look so sharp!

Tim Kime
Artist, Motivational Speaker, Life Coach


