
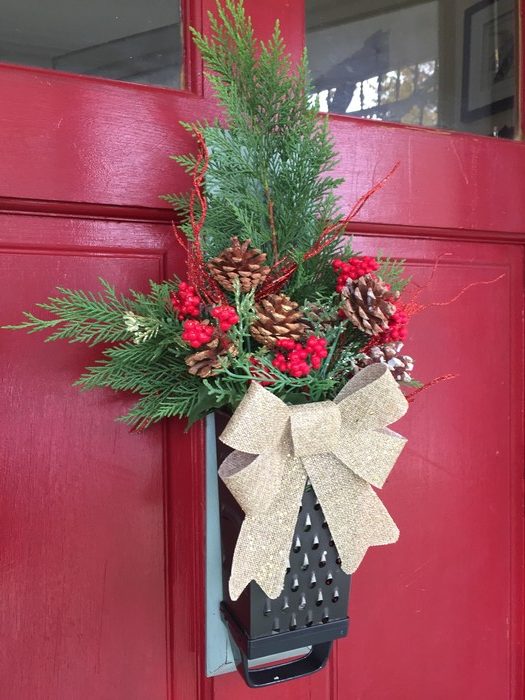
Upcycle a food grater into a whimsical holiday decoration, a storage container, a flower holder and more! An easy project that moves a kitchen tool from the back of the cabinet to the center of attention. There are so many fun uses for this transformation that you may want one for each room! Real life experience: As I was walking around the dollar store with my upcycled grater in hand and picking out holiday items to add to it, I was stopped by a couple who sang it’s praises and wanted me to create one for their front door!
Age Level: Older kids, teens, and adults
- Items needed:
- Four-sided food grater
- Scrap piece of wood (a small wooden cutting board or drawer front are great, too)
- Spray paint (optional)
- Leftover paint (optional)
- Wood screw
- Glue
- Small jar or vase
- Screwdriver
- Hammer
- D-hook
- Accessories
Time requirement: 30 minutes
Cost: Approximately $3
- $1 for food grater
- $1 for D-hook
- $1 for spray paint, leftover paint
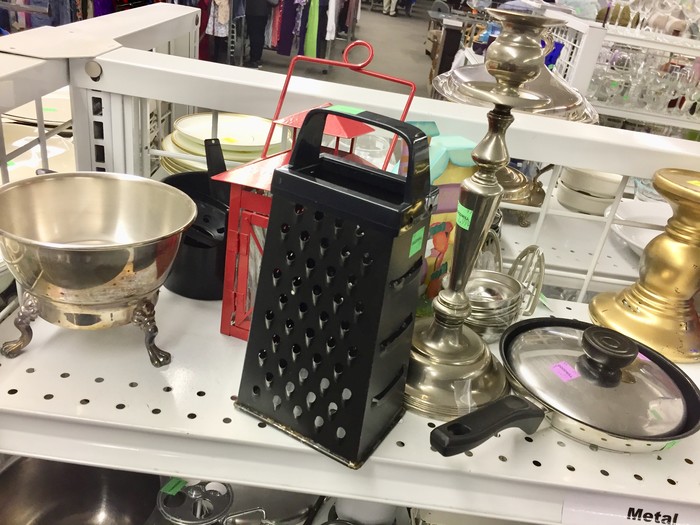
Step 1: Look, find, say “Cheese!”
It truly is amazing what you can find at Goodwill! During a recent excursion to my favorite Goodwill retail store (where the staff is always friendly and helpful!), I saw a charming looking food grater that was sitting on the shelf proudly…just waiting for me to come by to take it home and upcycle it. You will find lots of great kitchen tools at amazingly low prices in the Housewares aisle. There were a couple of other cool finds that I purchased, too…that’s for another time and another blog!
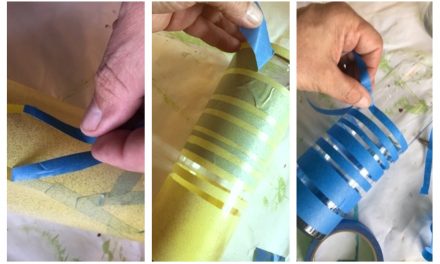
Step 2: Optional: Spray on color
The grater found for this upcycled project came in a weather brown color that was too perfect to tweak. Silver graters look sharp, too, and reflect lots of light. However, a fun bright color can make it make it stand out and be truly eye-catching. If spray painting, do so in a well-ventilated space, on a tarp or drop cloth and add several light layers. Let it dry for several hours or, if you have the time, overnight.
Step 3: Optional: Paint on color
To provide a foundation for your grater, you will need a scrap piece of wood on which to adhere it and to give it a backdrop. A small, wooden cutting board, the front of a drawer or a small cabinet door are wonderful options and will add personality to this project. Based on what you use, you may want to add some color to cover it. Consider using what paint choices you already have as the wooden backdrop for this project will only require a small amount. If planning to paint, place on a drop cloth, brush on the color and let dry, too. You would event paint on several light coats of different color paints to give it additional dimension. Let this dry thoroughly, too.
Expert tip: Apply a coat of the color of paint you already have. If you don’t like it, paint over it with another color. If you don’t have a leftover can of paint, consider stopping at your local hardware store and picking up one of their marked down cans; they often have returned paints or ones in the wrong tones at very low prices. You could also buy a sample size in a small container and have them create any color you prefer.

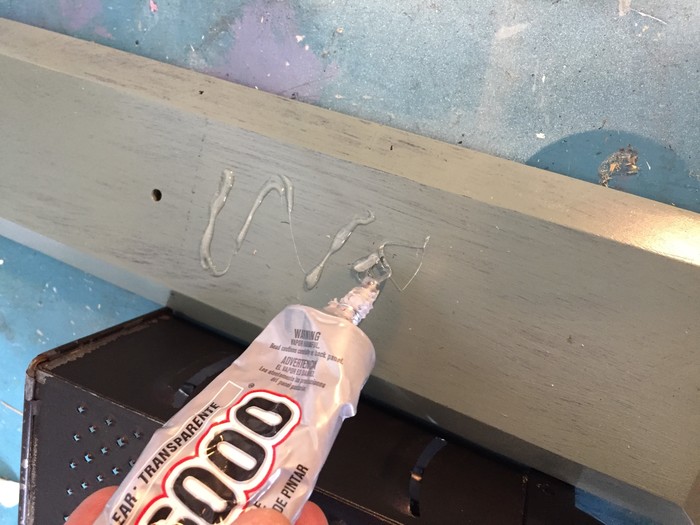
Step 3: Glue and screw
Place your grater in the position you would like it on the board/backdrop. Ideally, you want the grater to be the lower half of the wood so there is plenty above to provide a backdrop and support one you add utensils or decorative items to it. It also will add extra heft to it. Draw a light line with a pencil so you know where it goes, then remove it, turn it over and add glue. You can use your glue gun or special wood/glass glue. Turn it back over and position it on your board. Grab a wood screw and place it through one of the grater’s holes that is facing the wood backing. Tap with a hammer then screw it in for additional support. Let the glue dry, too.
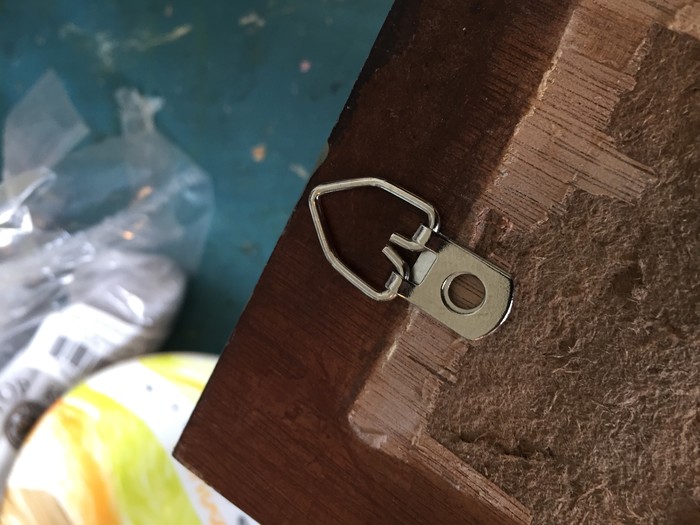
Step 4: Hook me up
Flip your grater, now attached to the piece of wood, over and at the top add a d-hook or small picture hook in the center. Again, tap with a hammer then screw in it to tighten it.
Step 5: Insert jar
To hold items, insert a small jar or vase that is small enough to go in the top opening and that will easily slip down inside to be hidden by the grater’s sides.
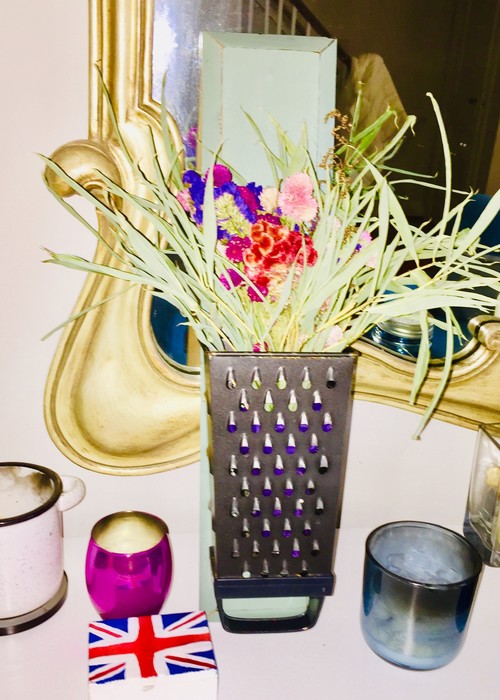
Step 5: Place in your space, add items, admire and get ready to say, “Grate!”…I mean, “Great!”
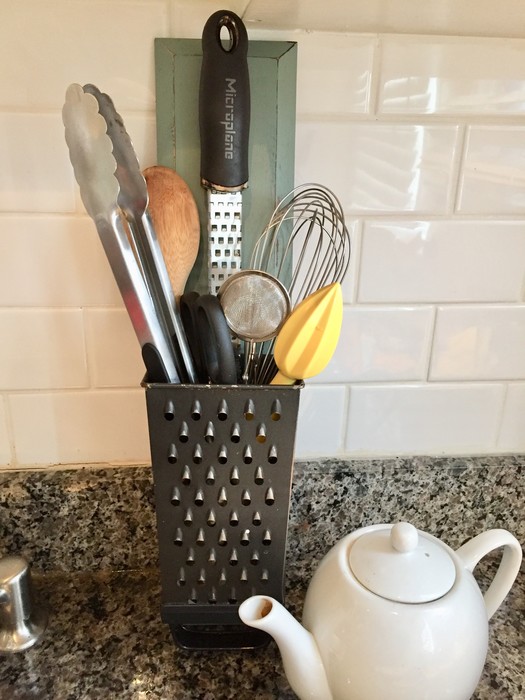
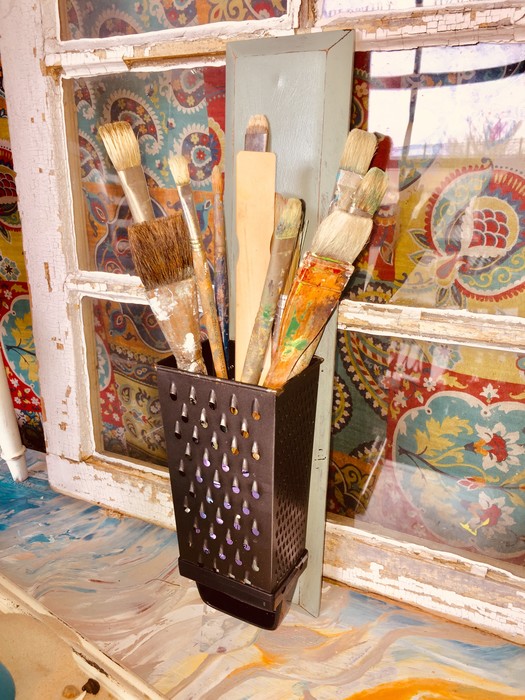
The last step is always to fun! There are lots of ways to use this upcycled grater project. Add small pine branches, pine cones, holiday decorations and a bow for a charming, welcoming front door decoration. Use in your kitchen to hold utensils. Place in your art room to collect brushes. Set on your mantel with flowers to greet guests. Add candles for a one-of-a-kind votive. So many options which is why you will want to make several to give…and to keep!
Lastly, hang up your wreath and get ready to receive smiles and compliments!

